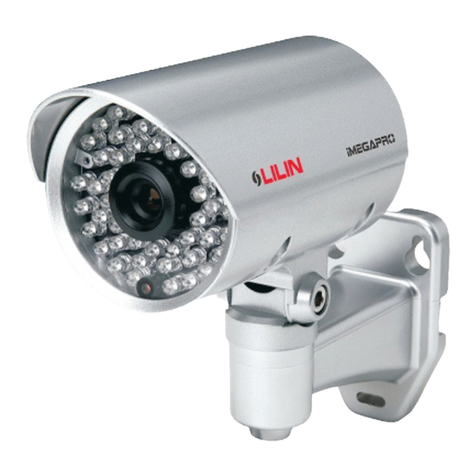
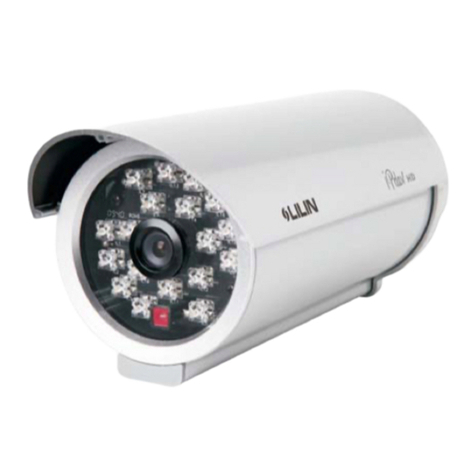
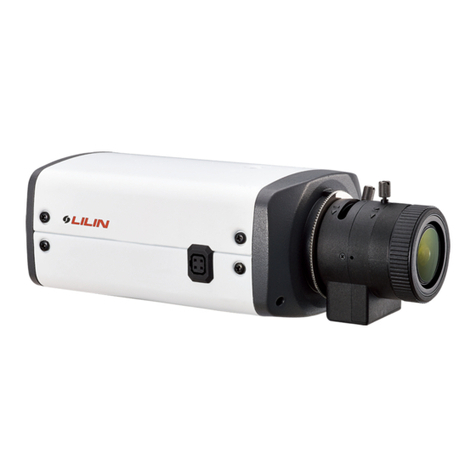
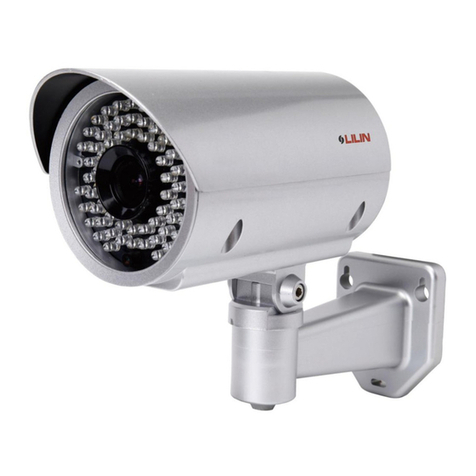
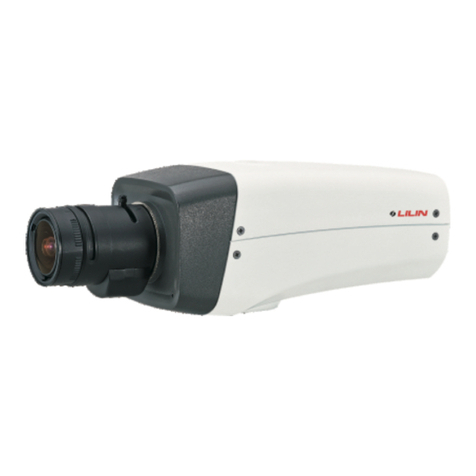
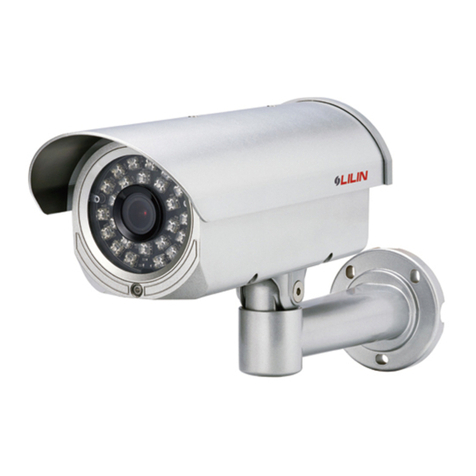
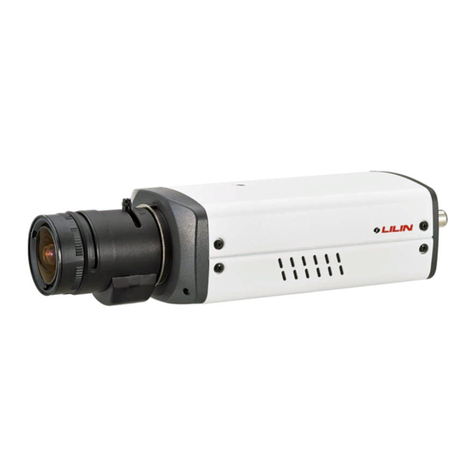
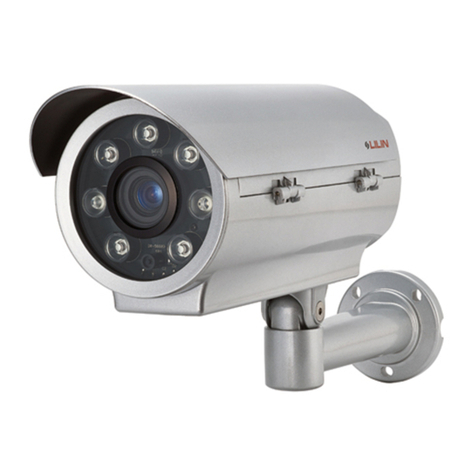
Lilin CMR7484X2.2N/P User manual

D/N ATR 700TVL VARI-FOCAL IR CAMERA
CMR7484X/7488X2.2 N/P &
CMR7484X/7488X2.5 N/P & CMR7484X/7488X3.6 N/P
CMR7484X/7488X2.4 N/P
MERIT LILIN ENT. CO., LTD
http://www.meritlilin.com 66-CMR748CSE
INSTRUCTION MANUAL

IMPORTANT SAFEGUARDS
1. Read Instructions
All the safety and operating instructions should be read before the unit is operated.
2. Retain Instructions
The safety and operating instructions should be retained for future reference.
3. Head Warnings
All warnings on the unit and in the operating instructions should be adhered to.
4. Follow Instructions
All operating and user instructions should be followed.
5. Electrical Connections
Only a qualified electrician should make electrical connections.
6. Attachments
Do not use attachments not recommended by the product manufacturer as they may cause hazards.
7. Cable Runs
All cable runs must be within permissible distance.
8. Mounting
This unit must be properly and securely mounted to a supporting structure capable of sustaining the weight
of the unit.
SAFETY PRECAUTIONS
CAUTION
RISK OF ELECTRIC SHOCK
CAUTION:
TO REDUCE THE RISK OF ELECTRIC SHOCK,
DO NOT OPEN COVER.
NO USER SERVICEABLE PARTS INSIDE.
REFER SERVICING TO QUALIFIED SERVICE PERSONNEL.
The lightning flash with arrowhead symbol, within an
equilateral triangle, is intended to alert the user to the
presence of uninsulated "dangerous voltage" within the
product's enclosure that may be of sufficient magnitude
The exclamation point within an equilateral triangle is
intended to alert the user to the presence of important
operating and maintenance (servicing) instructions in
to constitute a risk of electric shock to persons.
the literature accompanying the unit.
UNPACKING
Unpack carefully. Electronic components can be damaged if improperly handled or dropped. If an item appears
to have been damaged in shipment, replace it properly in its carton and notify the shipper.
Be sure to save:
1. The shipping carton and packaging material. They are the safest material in which to make future shipments
of the equipment.
2. This Installation and Operating Instruction.
SERVICE
If the unit ever needs repair service, the customer should contact our dealer or branch for authorization to
return and shipping instructions.
1
Part Description & Dimension
SUN SHIEL D
TOP C OVER
BOTTOM C HASSI S
BRACKET
PA N ADJUSTM ENT SC RE W
TILT ADJU STMENT S CREW
WINDO W
105
109
200
231
160
90
Unit : mm

INSTALLATION
1. Take out the bracket from the box first. Put the power cable and video cable through
the bracket and then fix it to the wall (FIG.1 & FIG.2).
FIG.1 F I G . 2
2
2. Secondly, take out the camera body and open the top cover with screw driver (FIG.3).
FIG.3
3. Put the power cable and video cable through the bracket rubble first and then go
through the bottom of camera body (FIG.4). Plug and fix the power cable to the
terminal and plug the video cable to video output of the camera (FIG.5).
F I G . 4
L N
Note :
When using two-cord
power cable, please
connect them to
"Live" and "Neutral".
Live
Earth
Neutral
F I G . 5

F I G . 6
4. Next, use the provided M5.0x10 screws (silver-2pcs) to fix the camera body on the
bracket with screw driver (FIG.6).
3
5. Loosen the pan and tilt adjustment screw on the bracket to turn the camera body to
the desired angle and then tighten the screw (FIG.7).
F I G . 7
6. First, adjust the lens on focus and zoom to form the optimal video image after that
tighten the screws (FIG.8). Then adjust the OSD menu.
Please refer to page5 ~page17.
RIGHTLEFT
DOWN
UP
SET
F O C U S o r Z O O M
Z O O M o r F O C U S
6-1. USER OSD SETTING
S
A. (UP)
B. (LEFT)
etting switches and Functions.
: Press to move the cursor upwards
or to select items.
: Press to move the cursor to the
left and to select or adjust the
parameters of the selected item.
The parameters changes each
time this button is pressed.
RIGHTLEFT
DOWN
UP
SET
F I G . 8

F I G . 9 F I G . 1 0
4
C. (RIGHT)
D. (DOWN)
E. SET : Executes selections and displays a submenu for an item with the
mark.
: Press to move the cursor to the right and to select or
adjust the parameters of the selected item.
The parameters changes each time this button is pressed.
: Press to move the cursor downwards or to select items.
7. Replace the top cover and tighten the screws (FIG.9 & FIG.10).

CONFIGURATION OF THE MENU
SETUP
MENU
LENS
SHUTTER/
AGC
WHITE BAL
ATR
PICT ADJUST
BACKLIGHT-BLC HLC OFF/ /
AUTO
AUTO
ATW
OFF
MIRROR-OFF/ ON
B-GAIN(000~255)
B-GAIN(000~255)
LUMINANCE-LOW MID HIGH/ /
SPEED(000~255)
MANUAL
MANUAL
PUSH
ON
BRIGHTNESS(000~255)
CONTRAST(000~255)
SHARPNESS(000~255)
HUE(000~255)
GAIN(000~255)
R-GAIN(000~255)
R-GAIN(000~255)
CONTRAST-LOW MIDLOW MID MIDHIGH HIGH/ / / /
DELAY CNT(000~255)
USER 1
USER 2
ANTI CR
MANUAL-LEVEL(000~255)
PUSH LOCK
ATW FRAME-x0.50 x1.00 x1.50 x2.00/ / /
ENVIRONMENT-INDOOR OUTDOOR/
HIGH LUMINANCE
LOW LUMINANCE
MODE-SHUT+AGC
SHUTTER-1/60(1/50) 1/100(1/120) 1/250~1/10000/ /
AGC-6.00 12.00 18.00 24.00 30.00 36.00 42.00 44.80/ / / / / / /
MODE
MODE-AGC OFF/
BRIGHTNESS(000~255)
BRIGHTNESS-x0.25 x0.50 x0.75 x1.00/ / /
AUTO IRIS/ SHUT+AUTO IRIS
SHUT (NOTES*2)
MODE-AUTO OPEN CLOSE/ /
SPEED(000~255)
TYPE-DC
5
(NOTES*1)

PRIVACY
NR
CAMERA ID
SYNC-INT
LANGUAGE-ENGLISH
ESPANOL/ 中文
/ 日本語/ DEUTSCH/ FRANCAIS/ PYCCK / PORTUGUES/
OFF
NR MODE-Y/C/OFF/ Y/ C
OFF
AREA SEL-1/8~8/8
ON
Y LEVEL(000~015)
ON
C LEVEL(000~015)
TOP [000~244(NTSC), 000~288(PAL)]
BOTTOM [000~244(NTSC), 000~288(PAL)]
LEFT [000~474(NTSC), 000~468(PAL)]
RIGHT [000~474(NTSC), 000~468(PAL)]
COLOR(1~8)
TRANSP-0.00 0.50 0.75 1.00/ / /
MOSAIC-OFF ON/
NN
^
~
^
CAMERA RESET
6
*1:The LENS option appear on the SETUP MENU menu, and then set the LENS mode to
AUTO on the SETUP MENU menu.
*2:The LENS option disappear on the SETUP MENU menu or set the LENS mode to
MANUAL on the SETUP MENU menu.
NOTES

TO Open and Exit the Menu screen
SETTING MENU AND FUNCTIONS
1. Press "SET" button.
The Menu screen appears on the monitor. Check the current settings on the menu.
2. Push or button to select the options then use or button to select a mode.
NEXT: To the next setup menu.
BACK: Return to the previous.
RETURN: Return to the previous.
SAVE ALL: Used to save the various setting of the internal OSD menu in the
EEPROM together.
EXIT: Exit the setup menu.
SETUP MENU
AUTO
AUTO
ATW
BLC
OFF
OFF
LENS
SHUTTER/AGC
WHITE BAL
BACKLIGHT
PICT ADJUST
ATR
PRIVACY
NEXT
EXIT SAVE ALL
SETUP MENU
OFF
INT
ENGLISH
NR
CAMERA ID
SYNC
LANGUAGE
CAMERA RESET
BACK
EXIT SAVE ALL
LENS
This function is used to set the mechanical iris of the lens.
1. Select [LENS] option.
2. Push or button to select a mode.
LENS mode changes as follows:
AUTO: Select the auto iris lens.
MANUAL: Select the manual iris lens.
3. Select an AUTO then press "SET" button.
The AUTO IRIS menu appears.
AUTO → MANUAL
AUTO IRIS
DC
AUTO
080
TYPE
MODE
SPEED
RETURN
7

AUTO (AUTO IRIS)
FUNCTION OPTION DESCRIPTION
TYPE
SPEED
MODE
DC
000~255
AUTO
OPEN
CLOSE
Sets the type of mechanical iris.
DC: Direct drive signal.
Sets the convergence speed of the
mechanical iris.
Sets the type of control to be exercised over
the mechanical iris.
AUTO: The mechanical iris is controlled
automatically.
OPEN: The mechanical iris is fixed to open.
CLOSE: The mechanical iris is fixed to close.
1. Without LENS option in the CMR7484X/7488X2.2N/P & CMR7484X/7488X2.5N/P.
2. Only DC mode on the TYPE option. Because a DC auto iris lens is used with the
CMR7484X/7488X2.4N/P & CMR7484X/7488X3.6N/P.
NOTES
SHUTTER/AGC
This function is used to set AE(Auto Exposure) or ME(Manual Exposure).
1. Select [SHUTTER/AGC] option.
2. Push or button to select an AUTO or MANUAL, then press "SET" button.
The AUTO SETUP or MANUAL SETUP menu appears.
SHUTTER/AGC mode changes as follows:
AUTO: Select the AE control.
MANUAL: Select the ME control.
AUTO → MANUAL
AUTO SETUP
SHUT+AUTO IRIS
024
AGC
x0.50
HIGH LUMINANCE
BRIGHTNESS
LOW LUMINANCE
MODE
BRIGHTNESS
RETURN
MODE
8
AUTO SETUP
SHUT
024
AGC
x0.50
HIGH LUMINANCE
BRIGHTNESS
LOW LUMINANCE
MODE
BRIGHTNESS
RETURN
MODE

9
AUTO (AE)
FUNCTION OPTION DESCRIPTION
HIGH
LUMINANCE
AUTO IRIS
SHUT+AUTO IRIS
1. The LENS option appear on the SETUP
MENU menu, and then set the LENS mode to
AUTO on the SETUP MENU menu.
2. Specifies AE control on the medium and high
brightness side.
AUTO IRIS: Fixed electronic shutter.
[1/60sec.(NTSC), 1/50sec.(PAL)]
SHUT+AUTO IRIS: Auto electronic shutter.
[1/60sec.(1/50sec.)~1/100,000sec.]
MODE
SHUT
000~255
1. The LENS option disappear on the SETUP
MENU menu or set the LENS mode to
MANUAL on the SETUP MENU menu.
2. Specifies AE control on the medium and high
brightness side.
SHUT: Auto electronic shutter.
[1/60sec.(1/50sec.)~1/100,000sec.]
Specifies the medium and high brightness side
reference.
BRIGHTNESS
LOW
LUMINANCE
AGC
OFF
Specifies AE control on the low brightness side.
AGC: AGC ON
OFF: AGC OFF
MODE
x0.25
x0.50
x0.75
x1.00
Specifies the low brightness side reference.
BRIGHTNESS
Setting of shutter speed of AUTO IRIS mode
Please set-up proper shutter speed for AUTO IRIS mode as below:
SHUTTER/AGC: AUTO[SETUP MENU] → SET MODE: AUTO IRIS[AUTO SETUP]
→ RETURN → SHUTTER/AGC: MANUAL[SETUP MENU] → SET → SHUTTER:
1/60(1/50) or 1/100(1/120) or 1/250.....[MANUAL SETUP] → RETURN → SHUTTER/
AGC: AUTO[SETUP MENU] → SAVE ALL → SET → EXIT
→

MANUAL (ME)
FUNCTION OPTION DESCRIPTION
MODE SHUT+AGC "SHUT+AGC" is the only option available for
the ME operation mode. There are no other
options.
MANUAL SETUP
SHUT+AGC
1/60
6.00
MODE
SHUTTER
AGC
RETURN
AGC
SHUTTER
6.00
12.00
18.00
24.00
30.00
36.00
42.00
44.80
1/60(NTSC), 1/50(PAL)
1/100(NTSC), 1/120(PAL)
1/250
1/500
1/1000
1/2000
1/4000
1/10000
Sets the AGC value(dB) for ME.
Sets the ME shutter speed(in fractions of a
second).
Please select AUTO mode on the SHUTTER/AGC option. If you select MANUAL mode, the
over exposure may occur.
NOTE
10

WHITE BAL (WHITE BALANCE)
This function is used to set the white balance operation mode.
1. Select [WHITE BAL] option.
2. Push or button to select a mode.
WHITE BAL mode changes as follows:
ATW → PUSH USER1 USER2 ANTI CR
PUSH LOCK ← MANUAL
→ → →
ATW
239
016
x1.00
INDOOR
SPEED
DELAY CNT
ATW FRAME
ENVIROMENT
RETURN
ATW (Auto Tracking White balance)
This function automatically tracks the changes in the color temperature, and
adjusts the white balance.
The color temperatures ranging from 1800K to 10500K.
FUNCTION OPTION DESCRIPTION
SPEED
DELAY CNT
000~255
000~255
Adjusts the pull-in speed of ATW.
Sets the time-based hysteresis of ATW.
11
ATW FRAME
ENVIROMENT
x0.50
x1.00
x1.50
x2.00
INDOOR
OUTDOOR
Sets the pull-in frame magnification.
Sets the pull-in frame(indoor/outdoor) of ATW.
INDOOR: Select the indoor pull-in frame.
OUTDOOR: Select the outdoor pull-in frame.
PUSH (Full pull-in)
This function adjusts the white balance regardless of the subject conditions.
USER2 WB
045
026
B-GAIN
R-GAIN
RETURN
USER1 WB
029
034
B-GAIN
R-GAIN
RETURN
USER1
The gain values for the outdoor fixed mode are used as the adjustment items
of USER1 on the internal OSD menu.

12
USER2
The gain values for the fluorescent light fixed mode are used as the adjustment
items of USER2 on the internal OSD menu.
FUNCTION OPTION DESCRIPTION
B-GAIN
R-GAIN
000~255
000~255
Used for the B gain operation in the WB fixed
gain mode.
Used for the R gain operation in the WB fixed
gain mode.
ANTI CR (Color Rolling suppression)
This function minimizes the color changes(color rolling) over long periods
caused by very small differences between the flicker frequency of non-inverter
fluorescent lights and the drive frequency of the image sensor devices.
MANUAL (Manual WB)
The B and R gain values for manual WB are set on this screen.
MANUAL WB
058LEVEL
RETURN
FUNCTION OPTION DESCRIPTION
LEVEL 000~255 Sets the B and R gain values for manual WB.
By incrementing or decrementing the B gain
value, the R gain value is also adjusted in
tandem.
PUSH LOCK (Hold)
The WB gain level established when operation has transferred to the PUSH
LOCK mode is held.
1. Push or button to select [PUSH LOCK] Mode then press "SET" button.

13
BACKLIGHT (BACKLIGHT Compensation)
This function is used to set the backlight compensation operation.
1. Select [BACKLIGHT] option.
2. Push or button to select a mode.
BACKLGIHT mode changes as follows:
BLC: Backlight compensation ON.
HLC: HLC(High Light Compensation) function ON
High Light Compensation(HLC) is a function
that improves the visual recognition of
license plates and other such objects by suppressing or masking strong
hight sources(such as the headlights of automobiles) in dark places.
OFF: Backlight Compensation OFF.
BLC → HLC OFF→
SETUP MENU
AUTO
AUTO
ATW
OFF
OFF
BLC
LENS
SHUTTER/AGC
WHITE BAL
PICT ADJUST
ATR
PRIVACY
NEXT
EXIT SAVE ALL
BACKLIGHT
PICT ADJUST (PICTURE ADJUST)
1. Select [PICT ADJUST] option and press "SET"
button. The PICT ADJUST menu appears.
2. Push or button to select a mode or set the
function level(000~255).
PICT ADJUST mode changes as follows:
MIRROR → BRIGHTNESS CONTRAST
GAIN ← HUE ← SHARPNESS
→
PICT ADJUST
OFF
000
128
128
128
128
MIRROR
BRIGHTNESS
CONTRAST
SHARPNESS
HUE
GAIN
RETURN
FUNCTION OPTION DESCRIPTION
BRIGHTNESS
CONTRAST
SHARPNESS
HUE
GAIN
MIRROR
000~255
000~255
000~255
000~255
000~255
OFF
ON
Sets the screen brightness.
Sets the screen contrast.
Sets the screen sharpness.
Adjusts the hue.
Adjusts the gain.
Sets the horizontal flip for the display output.
OFF: Normal output.
ON: Horizontal flipped output

ATR (Adaptive Tone Reproduction)
The ATR(Adaptive Tone Reproduction) function provides gradation compensation to
improve the contrast of subjects whose gradation has been lost in cases where, for
instance, both low-louminance areas and high-luminance areas exist in the same
picture.
1. Select [ATR] option.
2. Push or button to select a ON and press "SET"
button. The ATR menu appears.
3. Push or button to set the luminance level and
contrast level.
LUMINANCE level changes as follows:
CONTRAST level changes as follows:
LOW → MID HIGH→
ATR
LOW
LOW
LUMINANCE
CONTRAST
RETURN
LOW → MIDLOW MID MIDHIGH HIGH→ → →
14
FUNCTION OPTION DESCRIPTION
LUMINANCE
CONTRAST
LOW
MID
HIGH
LOW
MIDLOW
MID
MIDHIGH
HIGH
Sets the extent of the luminance compression.
Sets the extent of the contrast enhancement.
This function is used to set up to eight privacy masks.
1. Select [PRIVACY] option.
2. Push or button to select a ON and press
"SET" button. The PRIVACY menu appears.
3. Push or button to select a mode or set the
mask frame position.
PRIVACY
PRIVACY
1/8
020
070
020
090
8
1.00
OFF
AREA SEL
TOP
BOTTOM
LEFT
RIGHT
COLOR
TRANSP
MOSAIC
RETURN

15
FUNCTION OPTION DESCRIPTION
AREA SEL
TOP
BOTTOM
LEFT
RIGHT
1/8, 2/8, 3/8, 4/8,
5/8, 6/8, 7/8, 8/8,
000~244(NTSC)
000~288(PAL)SI
000~244(NTSC)
000~288(PAL)SI
000~474(NTSC)
000~468(PAL)SI
000~474(NTSC)
000~468(PAL)SI
Selects the mask frame to be adjusted.
Sets the top side of the mask frame selected
by the AREA SEL parameter.
Sets the bottom side of the mask frame
selected by the AREA SEL parameter.
Sets the left side of the mask frame selected
by the AREA SEL parameter.
Sets the right side of the mask frame selected
by the AREA SEL parameter.
COLOR 1~8 Sets the colors of the mask frames.
TRANSP
MOSAIC
0.00
0.50
0.75
1.00
OFF
ON
Sets the transparency ratio of the mask frames.
The same transparency ratio value is set for
all the mask frames.
Sets the mask frame mosaic function to ON or
OFF.
OFF: Mosaic function OFF.
ON: Mosaic function ON.
NR (Noise Reduction)
This function is used to set the noise reduction.
1. Select [NR] option and press "SET" button.
The NR menu appears.
2. Push or button to select one of four modes
for NR or set the different filter strength.
NR mode changes as follows:
NR
Y/C
004
004
NR MODE
Y LEVEL
C LEVEL
RETURN
Y/C → OFF Y C→ →
FUNCTION OPTION DESCRIPTION
NR MODE Y/C
OFF
Y
C
Sets the 2D NR filter mode.
Y/C: Y and C filters ON.
OFF: Through
Y: Y filter ON.
C: C filter ON.
Y LEVEL
C LEVEL
000~015
000~015
Sets the Y filter strength.
Sets the C filter strength.

16
CAMERA ID
This function is used to set the camera ID.
1. Select [CAMERA ID] option.
2. Use or button to select a ON and press "SET" button. The CAMERA ID menu
appears.
CAMERA ID
RETURN
A
(
W
B
)
X
C
_
Y
D
、
Z
E
,
0
F
¥
1
G
:
2
H
;
3
I
<
4
J
=
5
K
>
6
L
?
7
M
@
8
N
9
O
^
-
P
*
!
Q
.
"
R
x
#
S
+
$
T
/
%
U
&
V
'
¥
CHR1 CHR2
CLR POS
CAMERA ID
RETURN
大門廳走道倉庫口安全樓梯園電巷路區室地防火左
右鄰里弄號辦公攝影機前後側房廠車段村
CHR1 CHR2
CLR POS
1
3. Use , , or button to select a letter, numeral or symbol.
* (Blank): Inserts a space at the cursor position.
*CHR1: Letters A to Z, numerals 0 to 9, symbols.
*CHR2: 40 traditional Chinese.
* : Moves cursor to left, right, up or down.
*CLR: If you enter the wrong code, select CLR then press "SET" button.
*POS: Use , , or button to move position of CAMERA ID on the screen.
1
SYNC
This function is used to display the current synchronization mode. The SYNC mode
is fixed to the INT(Internal synchronization).
SETUP MENU
OFF
ENGLISH
INT
NR
CAMERA ID
LANGUAGE
CAMERA RESET
BACK
EXIT SAVE ALL
SYNC

17
CAMERA RESET
This function is initializes all the internal OSD menu setting together.
1. Select [CAMERA RESET] option.
2. Press "SET" button to reset the camera setting to initial setting.
3. Select [SAVE ALL] option on the [SETUP MENU] menu. Press "SET" button.
SETUP MENU
OFF
INT
ENGLISH
NR
CAMERA ID
SYNC
LANGUAGE
BACK
EXIT SAVE ALL
CAMERA RESET
LANGUAGE
This function is used to select the language in which to display the internal OSD
menu.
1. Select [LANGUAGE] option.
2. Push or button to select a language.
SETUP MENU
OFF
INT
ENGLISH
NR
CAMERA ID
SYNC
CAMERA RESET
BACK
EXIT SAVE ALL
LANGUAGE

Model No.
Lens
Power Input Voltage
System
Sync. Mode
Menu Control
Pick Up Element
Effective Pixels
Chip Size
Horizontal & Vertical
Sync. Frequency
Scanning System
Resolution
Minimum Illumination
Shutter
Adaptive Tone
Reproduction
S/N Ratio
Auto Gain Control
White Balance
Noise Reduction
Picture Adjust
Privacy Masking
Privacy Masking Zone
OSD Language
Power Consumption
Back Light Compensation
Video Output
Operating Temperature
Gamma Characteristic
IP Rating
Window
Infrared
LED Beam Spread
Peak Wavelength
Focal Length
Iris
Angle of view
H
Auto
Luminance
V
Manual
Contrast
D
CMR7484X2.2N/P
0.045Lux / F1.4, 0Lux (IR ON)
1/60(1/50)S ~ 1/100,000S
LOW / MID / HIGH
1/60(1/50)S, 1/100(1/120)S, 1/250S, 1/500S, 1/1,000S, 1/2,000S, 1/4,000S, 1/10,000S
LOW / MIDLOW / MID / MIDHIGH / HIGH
NTSC or PAL
AC24V ( 10%)±
Internal
OSD Control
1/3" Exview HAD CCD Sensor
976(H) x 494(V) [NTSC]
976(H) x 582(V) [PAL]
5.58mm(H) x 4.67mm(V)
15.734 KHz / 59.94Hz [NTSC]
15.625 KHz / 50Hz [PAL]
2:1 Interlace
700TV Lines
More Then 50dB (AGC-OFF)
AUTO / MANUAL
ATW / PUSH / USER1 / USER2 / ANTI CR / MANUAL / PUSH LOCK
Y / C / Y/C / OFF
MIRROR / BRIGHTNESS / CONTRAST / SHARPNESS / HUE / GAIN
ON / OFF
8 Zones
ENGLISH/JAPANESE/GERMANS/FRENCH/RUSSIAN/PORTUGUESE/SPANISH/SIMPLY CHINESE
9.5W
BLC / HLC(High Light Compensation) / OFF
IP66
ψ92 Heat Resistant Glass
850nm
30°
CVBS 1.0Vp-p, 75ohm
-10 ~ +50℃ ℃ (14℉ ~ 122℉)
γ=0.45
D/N ATR 700TVL VARI-FOCAL IR CAMERA
SPECIFICATIONS
AC100~240V
4 ~ 9mm
F1.4
69 ~ 30.7° °
51 ~ 23° °
86 ~ 38.5° °
Radiant Distance
Dimension
Weight
50M
Body:121.5mm(W) x 109mm(H) x 231mm(D), Bracket: 160mm(L)
1500g
Design and specifications are subject to change without notice.
18
CMR7484X2.5N/P CMR7488X2.2N/P CMR7488X2.5N/P
8 ~ 20mm 4 ~ 9mm 8 ~ 20mm
33 ~ 14.5° °
25 ~ 11° °
41.5 ~ 18.2° °
69 ~ 30.7° °
51 ~ 23° °
86 ~ 38.5° °
33 ~ 14.5° °
25 ~ 11° °
41.5 ~ 18.2° °
12W
This manual suits for next models
9
Table of contents
Other Lilin IP Camera manuals

Lilin
Lilin MR3022 User manual

Lilin
Lilin PIH-0364X WN IP User manual

Lilin
Lilin ipg1022esx User manual

Lilin
Lilin IPS622M User manual

Lilin
Lilin iMEGAPRO IPR722ES User manual

Lilin
Lilin IRS1204 User manual

Lilin
Lilin IPR414/418ESX3 User manual

Lilin
Lilin AHD7424AX4.2 User manual

Lilin
Lilin 6122 Manual

Lilin
Lilin IRS1308 User manual

Lilin
Lilin IPR614ES4.3 User manual

Lilin
Lilin PIH-0364X WN IP User manual

Lilin
Lilin IPG1022ESX3 User manual

Lilin
Lilin IPS2102E User manual

Lilin
Lilin IPR732ES User manual

Lilin
Lilin L Series Guide

Lilin
Lilin FD2452E User manual

Lilin
Lilin IPR454XW User manual

Lilin
Lilin IPG012ES User manual

Lilin
Lilin PIH - 7000 IP Series User manual