manuals.online logo
Brands
  1. Home
  2. •
  3. Brands
  4. •
  5. Lindy
  6. •
  7. Switch
  8. •
  9. Lindy 43144 User manual

Lindy 43144 User manual

USB 3.0 Switch
User Manual English
Benutzerhandbuch Deutsch
Manuel Utilisateur Français
Manuale Italiano
No. 43141_4
Hersteller / Manufacturer (EU): Manufacturer (UK):
LINDY-Elektronik GmbH LINDY Electronics Ltd.
Markircher Str. 20 Sadler Forster Way
68229 Mannheim Stockton-on-Tees, TS17 9JY
Germany England
Email: [email protected] [email protected]
T: +49 (0)621 470050 T: +44 (0) 1642 754000
lindy.com
© LINDY Group - THIRD EDITION (January 2021)
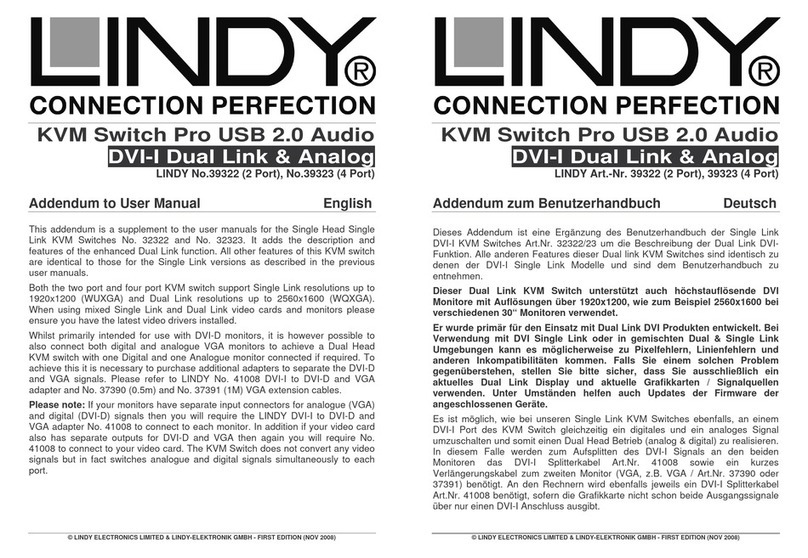
User Manual English
Benutzerhandbuch Deutsch
Introduction
Thank you for purchasing the Lindy USB 3.0 Switch. This product
has been designed to provide trouble free, reliable operation. It
benefits from both a Lindy 2 year warranty and free lifetime
technical support. To ensurecorrect use, please readthis manual
carefully and retain it for future reference.
This USB 3.0 2 or 4 Port Switch allows to quickly and easily
share a USB 3.0 device between two or four computers.
Features
•USB device sharing
•USB 3.2 / 3.1 Gen 1 / USB 3.0 interface (5Gbps),
backwards compatibility with USB 2.0/1.1
•Hot pluggable - Easily moved between computers
•LEDs indicate active port
•Bus Powered –Powered from your computers USB port
Installation
•Install the necessary drivers for the peripheral device on
each computer it will be shared between
•Turn off all the computers & devices you intend to connect
together via the switch before continuing with the
installation.
•Connect the USB Switch to your peripheral device and
computers with suitable USB 3.0 cables. (Sold separately)
•Power up your computers and the peripheral device
•The device will now be ready to switch between computers
If you want to share multiple USB peripheral devices between
computers connect a USB Hub to the USB Switch, connecting
the peripheral devices to the hub. (As with any peripheral
device connected to the Switch, install the necessary drivers on
the connected computers before use.)
Operation
•The LED on the USB Switch will indicate which computer is
currently accessing the peripheral device
•To switch peripheral devices between computers simply
press the corresponding computer button (1,2,3,4) you
wish to switch to on the USB Switch
Troubleshooting
•The maximum cable length between the Switch &
peripheral devices or the Switch and a computer is 2m. Do
not switch to a computer that is in the process of booting
•Computers must be “awake” before it is possible to switch
to them
•Before switching ensure that the attached USB device is
not in use –read/writing discs, printing etc.
Einführung
Wir freuen uns, dass Ihre Wahl auf ein Lindy-Produkt gefallen
ist und danken Ihnen für Ihr Vertrauen. Sie können sich
jederzeit auf unsere Produkte und einen guten Service
verlassen. Dieser USB 3.0 Switch unterliegt einer 2-Jahres
Lindy Herstellergarantie und lebenslangem kostenlosen,
technischen Support. Bitte lesen Sie diese Anleitung sorgfältig
und bewahren Sie sie auf.
Durch Einsatz dieses Switches können sich 2 bzw. 4
Computer ein USB Device teilen.
Eigenschaften
•2 bzw. 4 Computer teilen sich ein USB 3.0 Device
•USB 3.2 / 3.1 Gen 1 / USB 3.0 Schnittstelle (max. 5
Gbit/s), abwärts kompatibel mit USB 2.0/1.1
•Hot-Plug-fähig
•LEDs zeigen den aktiven Port an
•Bus powered –Stromversorgung über den USB Port
Installation
Vergewissern Sie sich vor der Installation, dass alle Computer
und Peripheriegeräte ausgeschaltet sind. Schließen Sie den
USB A Stecker eines USB 3.0 A/B Kabels (nicht im
Lieferumfang enthalten) am Computer an, den USB B Stecker
am Switch. Machen Sie dies genauso am zweiten (dritten und
vierten) Computer. Dann können Sie die Computer und das
Peripheriegerät einschalten. Achten Sie darauf, dass Sie die
erforderlichen Treiber für Ihr Device installiert haben.
Sie können auch noch einen USB Hub am Switch anschließen
und dann wiederum zusätzliche Devices am Hub.
Zum Umschalten zwischen den Computern drücken Sie
einfach auf die Taste oben am USB Switch. Die LED des
entsprechenden Computers leuchtet dann konstant.
Fehlerbehebung
Die Kabellänge zwischen Computer und Switch bzw. Switch
und Device/Hub sollte nicht mehr als 2m betragen.
Befindet sich ein Computer im Schlafmodus, dann können Sie
diesen nur umschalten, wenn Sie ihn zuerst aufwecken.
Achten Sie immer darauf, dass sich das angeschlossene USB
Device nicht gerade im Einsatz befindet, wenn Sie umschalten
wollen.
Versuchen Sie auch nie zwischen Computern umzuschalten,
wenn ein Computer gerade startet.
No. 43144
Radio Frequency Energy, Certifications
CE Certification
LINDY declares that this equipment complies with relevant European CE requirements.
CE Konformitätserklärung
LINDY erklärt, dass dieses Equipment den europäischen CE-Anforderungen entspricht
UKCA Certification
LINDY declares that this equipment complies with relevant UKCA requirements.
FCC Warning
This equipment has been tested and found to comply with the limits for a Class B digital
device, pursuant to part 15 of the FCC Rules. Operation is subject to the following two
conditions:
1. This device may not cause harmful interference, and
2. This device must accept any interference received, including interference that may
cause undesired
WEEE (Waste of Electrical and Electronic Equipment),
Recycling of Electronic Products
Europe, United Kingdom
In 2006 the European Union introduced regulations (WEEE) for the collection and
recycling of all waste electrical and electronic equipment. It is no longer allowable to simply
throw away electrical and electronic equipment. Instead, these products must enter the
recycling process.
Each individual EU member state, as well as the UK, has implemented the WEEE regulations
into national law in slightly different ways. Please follow your national law when you want to
dispose of any electrical or electronic products. More details can be obtained from your
national WEEE recycling agency.
Germany / Deutschland Rücknahme Elektroschrott und Batterie-Entsorgung
Die EU WEEE Direktive wurde im ElektroG in deutsches Recht umgesetzt. Das Entsorgen
von Elektro- und Elektronikgeräten über die Hausmülltonne ist verboten! Diese Geräte
müssen den Sammel- und Rückgabesystemen zugeführt werden! Dort werden sie kostenlos
entgegen genommen. Die Kosten für den weiteren Recyclingprozess übernehmen die
Gerätehersteller. LINDY bietet deutschen Endverbrauchern ein kostenloses
Rücknahmesystem an, beachten Sie bitte, dass Batterien und Akkus vor der Rückgabe an
das Rücknahmesystem entnommen werden müssen und über die Sammel- und
Rückgabesysteme für Batterien separat entsorgt werden müssen. Ausführliche
Informationen finden Sie stets aktuell auf der LINDY Webseite.
France
En 2006, l'union Européenne a introduit la nouvelle réglementation (DEEE) pour le
recyclage de tout équipement électrique et électronique.
Chaque Etat membre de l’ Union Européenne a mis en application la nouvelle réglementation
DEEE de manières légèrement différentes. Veuillez suivre le décret d’application
correspondant à l’élimination des déchets électriques ou électroniques de votre pays.
Italy
Nel 2006 l’unione europea ha introdotto regolamentazioni (WEEE) per la raccolta e il riciclo
di apparecchi elettrici ed elettronici. Non è più consentito semplicemente gettare queste
apparecchiature, devono essere riciclate. Ogni stato membro dell’ EU ha tramutato le
direttive WEEE in leggi statali in varie misure. Fare riferimento alle leggi del proprio Stato
quando si dispone di un apparecchio elettrico o elettronico.
Per ulteriori dettagli fare riferimento alla direttiva WEEE sul riciclaggio del proprio Stato.
LINDY Herstellergarantie –Hinweis für Kunden in Deutschland
LINDY gewährt für dieses Produkt über die gesetzliche Regelung in Deutschland hinaus
eine zweijährige Herstellergarantie ab Kaufdatum. Die detaillierten Bedingungen dieser
Garantie finden Sie auf der LINDY Website aufgelistet bei den AGBs.
© LINDY Group - THIRD EDITION (January 2021)
Manuel Utilisateur Français
Manuale Italiano
Introduction
Nous sommes heureux que votre choix se soit porté sur un
produit Lindy et vous remercions de votre confiance. Vous
pouvez compter à tout moment sur la qualité de nos produits et
de notre service. Ce Switch USB 3.0 est soumis à une durée de
garantie Lindy de 2 ans et d’une assistance technique gratuite
à vie. Merci de lire attentivement ces instructions et de les
conserver pour future référence.
Le switch USB 3.0 2/4 ports vous permet de partager simple-
ment un périphérique USB 3.0 entre 2 ou 4 ordinateurs.
Caractéristiques
•Partage de périphérique USB 3.0
•Interface USB 3.2 / 3.1 Gen 1 / USB 3.0 –taux de transfert
jusqu’à 5Gbit/s, rétrocompatible USB 2.0/1.1
•Connexions à chaud (Hot pluggable)
•LEDs indicatrices de port actif
•Alimenté par le Bus USB –nenécessite pas d’alimentation
Installation & Utilisation
•Installez les pilotes requis pour le périphérique sur
chacun des ordinateurs où il sera partagé
•Arrêtez tous les ordinateurs & périphérique qui seront
raccordés au commutateur avant de continuer
l’installation.
•Connectez le switch USB au périphérique et aux
ordinateurs avec des câbles USB 3.0 appropriés.
(vendus séparément)
•Démarrez vos ordinateurs et le périphérique
•Votre périphérique pourra à présent être partagé sur les
ordinateurs grâce au commutateur.
•La LED sur le switch USB indiquera quel ordinateur
accède actuellement au périphérique
•Pour commuter le périphérique entre les ordinateurs
appuyez sur le bouton sur le dessus du boîtier
Si vous souhaitez partager plusieurs périphériques USB entre
vos ordinateurs, connectez un Hub USB au Switch USB,
raccordez-y vos périphériques USB. (Comme avec n’importe
quel périphérique connecté au commutateur, installez les
pilotes requis sur les ordinateurs connectés avant utilisation)
Dépannage
•La longueur maximale des câbles mis en place entre le
switch et le périphérique ou le switch et les ordinateurs ne
doit pas dépasser 2 mètres. Ne pas commuter un
ordinateur qui est entrain de démarrer
•Les ordinateurs ne doivent pas être en veille pour qu’il soit
possible de les commuter
•Avant de commuter, assurez-vous que le périphérique
USB raccordé n’effectue pas une tâche –impression,
accès en lecture/écriture sur un disque, etc.
Introduzione
Vi ringraziamo per aver acquistato lo Switch USB 3.0 Lindy.
Questo prodotto è stato progettato per garantirvi la massima
affidabilità e semplicità di utilizzo ed è coperto da 2 anni di
garanzia Lindy oltre che da un servizio di supporto tecnico a
vita. Per assicurarvi di farne un uso corretto vi invitiamo a
leggere attentamente questo manuale e a conservarlo per
future consultazioni.
Gli Switch USB 3.0 da 2 o 4 porte vi consentiranno di condi-
videre una periferica USB 3.0 su due o quattro computer.
Caratteristiche
•Condivisione di periferiche USB 3.0
•Interfaccia USB 3.2 / 3.1 Gen 1 / USB 3.0 - velocità
massima di trasferimento dati di 5Gbps, retrocompatibile
con USB 2.0/1.1
•Hot pluggable - facilmente spostabile da un computer
•LED di indicazione dello stato
•Bus-powered, non necessita di un alimentatore esterno
Installazione & Operazioni
•Installare I driver necessari per le periferiche su ogni
computer
•Spegnere tutti i computer e le periferiche che avete
intenzione di collegare allo switch prima di continuare
con l’istallazione.
•Collegare lo Switch alle vostre periferiche USB e al
computer con un cavo USB 3.0 (in vendita
separatamente).
•Accendere il computer e le periferiche
•Ora le vostre periferiche saranno pronte per lavorare su
due computer
•Il LED sullo Switch indicherà quale computer è
correttamente collegato alle periferiche
•Per commutare le periferiche tra un computer e l’altro,
è sufficiente premere il tasto corrispondente al
computer (1,2,3,4) che si desidera
Se si desidera condividere più periferiche USB su i
computer, collegare un hub USB allo Switch. (Come per
qualsiasi periferica collegata allo switch, installare i driver
necessari sui computer collegati prima dell'uso.)
Risoluzione dei problemi
•La lunghezza massima del cavo tra lo switch e
dispositivi periferici e del computer è di 2m
•I computer devono essere attivi per poter commutare tra
loro
•Prima di passare da un computer all’altro, assicurarsi
che I dispositive USB collegati non siano in uso (lettura
dischi, stampanti ecc.)
Tested to comply with FCC
standards.
For home and office use.
This manual suits for next models

1

Other Lindy Switch manuals

Lindy 32924 User manual

Lindy

Lindy 32924 User manual

Lindy 39102 User manual

Lindy

Lindy 39102 User manual

Lindy 25044 User manual

Lindy

Lindy 25044 User manual

Lindy 25003 User manual

Lindy

Lindy 25003 User manual

Lindy 39405 User manual

Lindy

Lindy 39405 User manual

Lindy 70434-5 User manual

Lindy

Lindy 70434-5 User manual

Lindy 38150 User manual

Lindy

Lindy 38150 User manual

Lindy 32330 User manual

Lindy

Lindy 32330 User manual

Lindy 32416 User manual

Lindy

Lindy 32416 User manual

Lindy CAT-16 IP User manual

Lindy

Lindy CAT-16 IP User manual

Lindy 25040 Quick start guide

Lindy

Lindy 25040 Quick start guide

Lindy 32503 User manual

Lindy

Lindy 32503 User manual

Lindy 32343 User manual

Lindy

Lindy 32343 User manual

Lindy CPU Switch Duo User manual

Lindy

Lindy CPU Switch Duo User manual

Lindy 39639 User manual

Lindy

Lindy 39639 User manual

Lindy 25004 User manual

Lindy

Lindy 25004 User manual

Lindy 38249 User manual

Lindy

Lindy 38249 User manual

Lindy 38030 User manual

Lindy

Lindy 38030 User manual

Lindy 38268 User manual

Lindy

Lindy 38268 User manual

Lindy 2X8 User manual

Lindy

Lindy 2X8 User manual

Lindy 39414 User manual

Lindy

Lindy 39414 User manual

Lindy 38260 User manual

Lindy

Lindy 38260 User manual

Lindy 43228 User manual

Lindy

Lindy 43228 User manual

Lindy SC5-IP User manual

Lindy

Lindy SC5-IP User manual

Popular Switch manuals by other brands

Cisco Nexus 7000 Series Configuration guide

Cisco

Cisco Nexus 7000 Series Configuration guide

HDanywhere MHUB4K862 manual

HDanywhere

HDanywhere MHUB4K862 manual

Cabletron Systems MRXI 10BASE-T user guide

Cabletron Systems

Cabletron Systems MRXI 10BASE-T user guide

Sonoff BASICR4 user manual

Sonoff

Sonoff BASICR4 user manual

Versa Technology VX-IGP-1204F Quick installation guide

Versa Technology

Versa Technology VX-IGP-1204F Quick installation guide

Siemens SIMATIC NET RUGGEDCOM RS950G installation manual

Siemens

Siemens SIMATIC NET RUGGEDCOM RS950G installation manual

Hall Research Technologies UHBX-SW3-S quick start guide

Hall Research Technologies

Hall Research Technologies UHBX-SW3-S quick start guide

Cisco IE 3000 Hardware installation guide

Cisco

Cisco IE 3000 Hardware installation guide

IBM 8265 user guide

IBM

IBM 8265 user guide

Equitel N968 user manual

Equitel

Equitel N968 user manual

D-Link DES-1008F Quick installation guide

D-Link

D-Link DES-1008F Quick installation guide

Siemens SIRIUS 3RA2813 operating instructions

Siemens

Siemens SIRIUS 3RA2813 operating instructions

AMX RDM-3HSW Schematic diagram

AMX

AMX RDM-3HSW Schematic diagram

Eaton CTSA-0./04 Instruction leaflet

Eaton

Eaton CTSA-0./04 Instruction leaflet

Cabletron Systems MMAC-Plus 9E312-12 user guide

Cabletron Systems

Cabletron Systems MMAC-Plus 9E312-12 user guide

Interlogix NS4702-24P-4X Command guide

Interlogix

Interlogix NS4702-24P-4X Command guide

Sharp AD-207H Operation manual

Sharp

Sharp AD-207H Operation manual

Kobold TWR operating instructions

Kobold

Kobold TWR operating instructions

manuals.online logo
manuals.online logoBrands
  • About & Mission
  • Contact us
  • Privacy Policy
  • Terms and Conditions

Copyright 2025 Manuals.Online. All Rights Reserved.