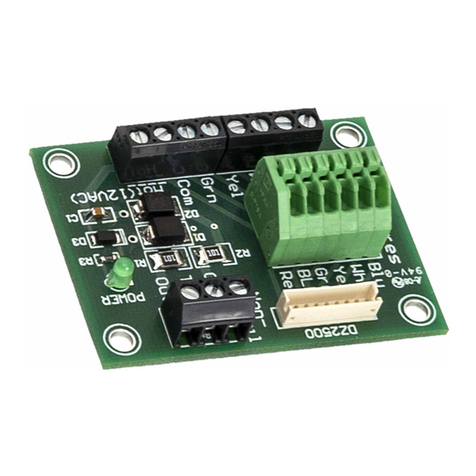
Lionel TMCC BPC User manual

TMCC
Block Power
Controller (BPC)
71-4184-250
11/02

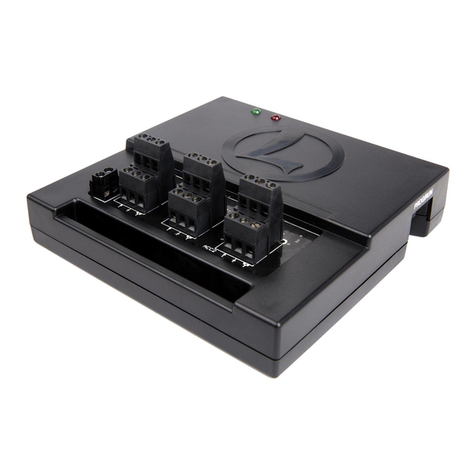
Congratulations on your purchase of the TMCC Block Power Controller (BPC)! Each BPC
unit is capable of switching control of up to four blocks of track between different Track
Power Controllers (TPC), allowing you and your friends to control your trains with more than
one CAB-1 Remote Controller. No need for a separate PowerMaster or TPC unit on each block
of track—the BPC routes the power from the TPC unit to the active section of track! Each
block of track can be operated in Command or conventional mode with a simple command
from your CAB-1 Remote Controller. Experience the superiority of the Lionel TrainMaster
Command Control system!
Congratulations
2
The following Lionel marks may be used throughout this instruction manual and are protected under
law. All rights reserved.
Lionel®, TrainMaster®, Odyssey®, RailSounds™, CrewTalk™, TowerCom™, DynaChuff™,
StationSounds™, Pullmor®, ElectroCoupler™, Magne-Traction®, CAB-1 Remote Controller®,
PowerMaster®, Lionel ZW®, ZW®, PowerHouse®, TMCC™, Lionelville™

3
Wiring Your Block Power Controller
Powering the Block Power Controller 4
Connecting the COMM wires 5
Connecting additional TMCC products in a “daisy chain” 6
Setting the BPC to control either four or two blocks of track 7
Assigning accessory ID#’s to the blocks of track 8
Using A Single BPC To Control Four Blocks With Two TPC’s
Wiring a single BPC to two TPC’s 9
Controlling four blocks of track with a single BPC 10
Using A Single BPC To Control Two Blocks With Four TPC’s
Wiring a single BPC to four TPC’s 11
Controlling two blocks of track with a single BPC 12
Using Two BPC’s To Control Eight Blocks With Two TPC’s
Wiring two BPC’s to two TPC’s 13
Controlling eight blocks of track with two BPC’s and two TPC’s 14
Specifications of Block Power Controller 15
Limited Warranty/Lionel Service 16
Table of Contents

B4
2 TPC
B2
4 TPC
J2
J2
J1
J1
B2
T2
T1
B1
B3
TMCC BPC
T1
T2
B2
B1
T3
T4
B1
6-14184
Patent Pending
BLOCK POWER CONTROLLER
4 TPC
2 TPC
U
A
U
POWER
A
AX
AX
COM
DAT
COMM
POWER
SUPPLY
UA
UA AU
COMMAND
BASE
Figure 1. Power and COMM connections
4
Wiring your Block Power Controller
Powering the Block Power Controller
Use a separate accessory power supply to power your BPC and be sure to set your
transformer to 12-18 volts (AC). Figure 1 illustrates the location of the POWER terminals.
Follow these steps and refer to Figure 1 as you connect your power supply to your BPC unit.
An isolated power supply (not connected to the track) will be needed if noise from
the TMCC signal interferes with communications. This is indicated be a steady green
COMM light on the BPC. Because the BPC uses very little power, you can wire the
BPC to a separate power supply with other TMCC products.
Color code the A and U power wires throughout your layout.
1. Attach one wire to the Common/Ground/U terminal of your transformer
and connect it to the POWER/U terminal on the BPC unit.
Do not connect this terminal to the outside rail
2. Attach another wire to the Power/A terminal of your transformer and
connect it to the POWER/A terminal on the BPC unit.
Power/A
Common/Ground/U
COMM (GreenWire)
DAT (RedWire)
Comm Connections Power Connections
Hint!
Note!
Note!

Wiring Your Block Power Controller
Connecting the COMM wires
To receive your commands, the BPC will need to communicate with the Command Base.
Messages from the Command Base are sent through the Command Base Cable (available
separately, 6-14191 for a 6’ cable or 6-14195 for a 20’ cable). Follow these steps and refer to
Figure 1 on page 4 to connect your BPC unit to the Command Base with the cable.
Your BPC is equipped with two additional COM terminals, AX + and AX-. At this
time, leave these terminals empty. These are intended for future capabilities. Do not
wire DAT and COMM wiring to the AX+ and AX- terminals.
1. Connect the DB9 Connector at the end of the Command Base Cable (the
end that looks like a computer cable) to the COMPUTER terminal on the
Command Base.
2. Connect the red wire at the other end of the Command Base Cable to the
DAT terminal on the BPC.
3. Connect the green wire to the COM terminal on the BPC.
5
Note!

Connecting additional TMCC products in a “daisy chain”
You may choose to power additional TMCC products using the same power supply and
Command Base by creating a “daisy chain,” or a series of TMCC units wired in succession.
Refer to Figure 2 and follow these steps as you connect the BPC to the next TMCC product.
When in a daisy chain, the L.E.D. on the BPC will flash for a tenth of a second to
indicate that the BPC is receiving commands for another TMCC product. The L.E.D.
will stay on for half of a second to indicate that the BPC has received a command with
an address it controls.
Power connections for additional units
1. Attach one wire to the additional Power U terminal on the BPC unit and
connect it to the Power U terminal on another product.
2. Attach another wire to the additional Power A terminal on the BPC unit
and connect it to the Power A unit on another product.
3. Add additional products in the same manner, connecting the Power U
terminals and the Power A terminals.
COMM connections for additional units
1. Attach the red wire to the DAT terminal of the BPC unit and connect it to
the DAT terminal of the next TMCC product. (Red wire)
2. Attach the green wire to the COM terminal of your BPC unit and connect it
to the COM terminal of the next product. (Green wire)
3. Add additional products in the same manner, connecting the DAT terminals
and the COM terminals.
Wiring Your Block Power Controller
6
LED
COMMAND
BASE
A/C
POWER
SUPPLY
AU
Figure 2. TMCC daisy chain connections
Power/A
Common/Ground/U
COMM (GreenWire)
DAT (RedWire)
Comm Connections Power Connections

7
Setting the BPC to control either four or two blocks of track
Each BPC is capable of controlling either two or four blocks of track. Before you assign the
individual ID#s to the blocks of track (the outputs of the BPC), you must tell each BPC
whether two or four blocks will be connected.
• To control two blocks of track per BPC, set the BPC to ID 99.
• To control four blocks of track per BPC, set the BPC to ID 98.
ID 98 is the factory default setting.
1. Remove the jumper from the side of the BPC unit. Refer to Figure 3 on
page 8 for the location of the jumper.
2. Press the ACC button on your CAB-1 Remote Controller.
3. Using the numeric keys on the CAB-1 Remote Controller, enter 98 to
control four blocks of track OR enter 99 to control two blocks of track.
4. Press the SET button on your CAB-1 Remote Controller.
The L.E.D. illuminates for one second.
5. Replace the jumper on the BPC unit.
At this point, the BPC unit is set to control the proper number of blocks through your TPC(s).
Wiring Your Block Power Controller
LED
Note!

Wiring Your Block Power Controller
Assigning the accessory ID#'s to the blocks of track
In the previous section, you set the BPC to control either two or four blocks of track.
To do so, you entered either 98 or 99. Those numbers are reserved for setting the
number of outputs, so do not attempt to assign accessory (ACC) ID#’s 98 or 99.
Choose a number from 1 to 97.
Each block of track that is controlled by the BPC has a unique accessory (ACC) ID# that you
may assign. Keep in mind that you only need to assign the first ID# to each BPC, and the
remaining blocks will automatically be assigned the next consecutive ID#'s.
If you are using multiple BPCs, be sure to assign ID#'s that are different from the numbers
assigned to the other BPC.
It is not necessary to have the outputs connected when assigning the accessory
(ACC) numbers.
1. Remove the RUN/PROGRAM jumper on the side of the BPC unit.
You should assign ID#'s to only one BPC at a time. Remove the jumper only from
the BPC that you are setting.
Pull the small black connector out from the terminal at the side of the BPC unit. Refer to
Figure 3 for the location of the jumper.
2. Press the ACC button on your CAB-1 Remote Controller.
3. Enter the ID# into the CAB-1 Remote Controller with the numeric keypad.
Keep in mind that you are assigning all of the ID#'s when you enter the
first. For example, if you enter ID# 5 and you have four blocks, the ID#'s
will be 5, 6, 7, and 8.
When assigning ID#'s to the BPC, you only need to assign the first ID#. The
remaining ID#'s are automatically assigned.
• When using two blocks of track (ID 99), ID#'s are automatically assigned in pairs. For
example, if you assign accessory ID# 3, the remaining ID# is 4.
• When using four block of track (ID 98) the three
remaining ID#'s are automatically assigned. For example,
if you assign ID# 5 to the first block, the remaining blocks
will be ID#'s 6, 7, and 8.
4. Press SET on your CAB-1 Remote Controller.
The L.E.D. illuminates for one second.
5. Replace the RUN/PROGRAM jumper at the
side of the BPC unit.
8
Figure 3. Jumper location
Note!
Note!
LED
Note!
Note!

9
Using A Single BPC To Control Four Blocks With
Two TPC’s
Wiring a single BPC to two TPC’s
Refer to Figure 4 to connect your BPC to two TPC’s. In this configuration, your BPC will
control four blocks of track. The L.E.D. illuminates for one half of a second to indicate
that the BPC has received a command.
U
A
U
A
B4
2 TPC
B2
4 TPC
J2
J2
J1
J1
B2
T2
T1
B1
B3
TMCC BPC
T1
T2
B2
B1
T3
T4
B1
6-14184
Patent Pending
BLOCK POWER CONTROLLER
4 TPC
2 TPC
U
A
U
POWER
A
AX
AX
COM
DAT
COMM
U
COMMAND
BASE
TPC
TPC
Figure 4. Wiring a single BPC to two TPC’s (four blocks)
POWER IN TRACK OUTCOMM
HOTUDAT
NEUTACOMAUX+AUX-

10
Using A Single BPC To Control Four Blocks With
Two TPC’s
Controlling four blocks of track with a single BPC
The BPC allows you to choose which TPC controls a particular block of track. With a single
BPC, you are able to alternate the control of four blocks of track between two TPC’s. Follow
these steps to control each block of track.
1. Press ACC on the CAB-1 Remote Controller.
2. Enter the ID# for the block of track you wish to control.
3. Press AUX1 to activate the numeric keypad.
4. Press 1 to power the block with the first TPC.
Press 2 to power the block with the second TPC.
5. Press 0 when you want to turn off power to that block of track.
In this configuration, four accessory (ACC) addresses are used for each BPC.
Note!

Using A Single BPC To Control Two Blocks With
Four TPC’s
Wiring a single BPC to four TPC’s
Refer to Figure 5 to connect your single BPC to four TPC’s. In this configuration, your BPC
will control two blocks of track.
U
A
U
U
A
U
A
U
A
B4
2 TPC
B2
4 TPC
J2
J2
J1
J1
B2
T2
T1
B1
B3
TMCC BPC
T1
T2
B2
B1
T3
T4
B1
6-14184
Patent Pending
BLOCK POWER CONTROLLER
4 TPC
2 TPC
U
A
U
POWER
A
AX
AX
COM
DAT
COMM
COMMAND
BASE
TPC
TPC
TPC
TPC
Figure 5. Wiring a single BPC to four TPC’s (two blocks)
POWER INTRACK OUTCOMM
HOTUDAT
NEUTACOMAUX+AUX-
11

Using A Single BPC To Control Two Blocks With
Four TPC’s
12
Controlling two blocks of track with a single BPC
The BPC allows you to choose which TPC controls a particular block of track. You are able
to switch control between four TPC’s. Follow these steps to control each block of track.
1. Press ACC on the CAB-1 Remote Controller.
2. Enter the ID# for the block of track you wish to control.
3. Press AUX1 to activate the numeric keypad.
4. Press 1 to power the block of track with the first TPC.
Press 2 to power the block of track with the second TPC.
Press 3 to power the block of track with the third TPC.
Press 4 to power the block of track with the fourth TPC.
5. Press 0 when you want to turn off power to that block of track.
In this configuration, two accessory (ACC) addresses are used for each BPC.
Note!

Using Two BPC’s To Control Eight Blocks With
Two TPC’s
Wiring two BPC’s to two TPC’s
Refer to Figure 6 to connect two BPC’s to two TPC’s. In this configuration, your BPC’s will
control eight blocks of track.
13
B4
2 TPC
B2
4 TPC
J2
J2
J1
J1
B2
T2
T1
B1
B3
TMCC BPC
T1
T2
B2
B1
T3
T4
B1
6-14184
Patent Pending
BLOCK POWER CONTROLLER
4 TPC
2 TPC
U
A
U
POWER
A
AX
AX
COM
DAT
COMM
B4
2 TPC
B2
4 TPC
J2
J2
J1
J1
B2
T2
T1
B1
B3
TMCC BPC
T1
T2
B2
B1
T3
T4
B1
6-14184
Patent Pending
BLOCK POWER CONTROLLER
4 TPC
2 TPC
U
A
U
POWER
A
AX
AX
COM
DAT
COMM
U
A
TPC
TPC
U
U
A
COMMAND
BASE
Figure 6. Wiring two BPC’s to two TPC’s (eight blocks)
POWER INTRACK OUTCOMM
HOTUDAT
NEUTACOMAUX+AUX-

14
Using Two BPC’s To Control Eight Blocks With
Two TPC’s
Controlling eight blocks of track with two BPC’s and two TPC’s
The BPC allows you to choose which TPC controls a particular block of track. With two
BPC’s, you are able to switch control of four blocks of track between two TPC’s. Follow
these steps to control each block of track.
1. Press ACC on the CAB-1 Remote Controller.
2. Enter the ID# for the block of track you wish to control.
3. Press AUX1 to activate the numeric keypad.
4. Press 1 to power the block of track with the first TPC.
Press 2 to power the block of track with the second TPC.
5. Press 0 when you want to turn off power to that block of track.
In this configuration, four accessory (ACC) addresses are used for each BPC.
Note!

15
Specifications of the Block Power Controller
Physical Ratings
• Size: 3.7” x 2.7” x 1.2”
• Mounting: Two #4 pan head sheet metal screws
Electrical Ratings
• Input voltage: 9 volts to 20 volts (AC)
• Input supply current: 50 mA
• COMM input signal: +/- 12 volts
• Maximum output voltage: 24 volts (AC or DC)
• Maximum output current: 20 amps
Template
Figure 7. Controller mount template
Clearance for
jumper removal
Your service and warranty information is on the other side. Be sure to photocopy
this page or the warranty.
Caution!

Limited Warranty/Lionel Service
This Lionel product, including all
mechanical and electrical components,
moving parts, motors and structural
components, except for light bulbs, is warranted to
the original consumer-purchaser, for one year
against original defects in materials or
workmanship when purchased through an
authorized Lionel merchant.
This warranty does NOT cover normal wear
and tear, light bulbs, defects appearing in the
course of commercial use, or damage resulting
from abuse or misuse of the product by the
purchaser. Transfer of this product by the original
consumer-purchaser to another person voids this
warranty. Modification of this product voids this
warranty.
Any warranted product which is defective in
original materials or workmanship and is delivered
by the original consumer-purchaser to Lionel
L.L.C. or an authorized Lionel L.L.C. Service
Center, together with proof of original purchase
will, at the option of Lionel L.L.C., be repaired or
replaced, without charge for parts or labor. In the
event the defective product cannot be repaired, and
a replacement is not available, a refund of the
original purchase price will be granted. Any
products on which warranty service is sought must
be sent freight or postage prepaid, as
transportation and shipping charges are not
covered by the warranty.
In no event shall Lionel L.L.C. be
liable for incidental or
consequential damages.
Some states do not allow the exclusion or
limitation of incidental or consequential damages,
so the above exclusion may not apply to you.
This limited warranty gives you specific legal
rights, and you may have other rights which vary
from state to state.
Instructions for Obtaining Service
If service for this Lionel L.L.C. product is
required, bring the item, along with your dated
sales receipt and completed warranty information
to the nearest Authorized Lionel Service Center.
Your nearest Lionel Service Center can be found by
calling 1-800-4-Lionel, or by accessing our
Website at www.lionel.com.
If you prefer to send your product back to
Lionel L.L.C. for repair in Michigan, you must first
call 586-949-4100 or FAX 586-949-5429, or write
to Customer Service, P.O. Box 748, New Baltimore,
MI 48047-0748, stating what the item is, when it
was purchased and what seems to be the problem.
You will be sent a return authorization letter and
label to ensure your merchandise will be properly
handled upon receipt.
Once you have received your return
authorization and label, make sure that the item
is packed to prevent damage during shipping and
handling. We suggest that you use the product’s
original packaging. This shipment must be
prepaid and we recommend that it be insured.
Please make sure you have followed all of the
above instructions carefully before returning any
merchandise for service. You may choose to have
your product repaired by one of our Authorized
Lionel Service Centers after its warranty has
expired. A reasonable service fee will be charged.
Warranty Information
Please complete the information below and
keep it, along with your dated sales receipt. You
must present this and your dated sales receipt
when requesting warranty service.
Name ____________________________
Address____________________________
Place of Purchase ____________________
Date of Purchase ____________________
Product Number______________________
Product Description____________________
©2003 LIONEL LLC, CHESTERFIELD, MI 48051-2493
UNITED STATES OF AMERICA
PRINTED IN CHINA
This manual suits for next models
1
Table of contents
Other Lionel Controllers manuals
Popular Controllers manuals by other brands

London Electronics
London Electronics INTUITIVE-I manual

Thunder Heart
Thunder Heart EA4250D owner's manual

Keating Of Chicago
Keating Of Chicago Meridian 10 manual

Victron energy
Victron energy BlueSolar MPPT 150/85-Tr manual

Omron
Omron CPM1 - PROGRAMING 02-2001 Programming manual

SDC
SDC ZR7500 Series installation instructions