manuals.online logo
Brands
  1. Home
  2. •
  3. Brands
  4. •
  5. Litepanels
  6. •
  7. Lighting Equipment
  8. •
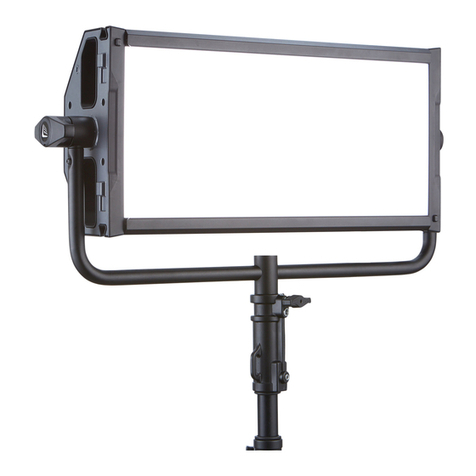
  9. Litepanels GEMINI 2X1 HARD Series User manual

Litepanels GEMINI 2X1 HARD Series User manual

SAFETY INFORMATION
To clean the GEMINI 2X1 HARD, wipe with a clean, dry, non-abrasive cloth only.
Weight (including Yoke, not including accessories): 12.3 kg [27.1 lb]
Dimensions (including Yoke, not including accessories): W = 74.8 cm [29.4 in], H = 52.9 cm [20.8 in], D = 17.6 cm [6.9 in]
Do not restrict air flow around the GEMINI 2X1 HARD. Keep the fixture’s air intakes and air exhaust space clear of obstruction.
Plug the GEMINI 2X1 HARD into a mains electrical outlet using only a provided AC powerCON power cable or one specified by Litepanels®. Protect the cable from
pinching, twisting, or crushing. Use a mains electrical outlet that is grounded and rated for 100-240VAC, 50/60Hz only.
Do not use, mount, transport, or store the GEMINI 2X1 HARD near radiators, space heaters, ovens, stoves, heat registers, open flame, or any heat source, or in an
environment with an ambient temperature greater than 65°C [149° F].
The GEMINI 2X1 HARD is suitable for operation only in an environment as follows: ambient air temperature between -20°C and 45°C [between -4°F and 113°F]; less
than 85% relative humidity (RH), no condensation. Use in a dry environment; do not place on a wet surface or submerge the GEMINI 2X1 HARD in liquid.
WARNING: Tampering with or disassembling the GEMINI 2X1 HARD may result in electric shock and will void the manufacturer’s warranty.
WARNING: To reduce the risk of electric shock or fire, do not expose the GEMINI 2X1 HARD to rain, moisture, or liquids.
Immediately consult with qualified Litepanels®service personnel if any of the following have occurred: The fixture has been dropped or impacted; the power cable
has been damaged; the fixture has been exposed to rain, moisture, or liquid; or the fixture does not operate normally.
This device complies with Part 15 of the FCC Rules. Operation is subject to the following two conditions: (1) this device may not cause
harmful interference, and (2) this device must accept any interference received, including interference that may cause undesired operation.
STUDIO FULL COLOR LENSED PANEL LED FIXTURE (940-2001) www.litepanels.com
DIFFUSER LATCH (2X)
DIFFUSER FLAP
YOKE
TILT LOCK SCREW
AIR INTAKE
ANTENNA
UNIVERSAL COMMS PORT
USB PORT
TILT LOCK KNOB
1/4-20 FEMALE THREAD (2X)
AIR EXHAUST
DOVETAIL CHANNEL (2X)
(A)
(B)
(C)
(D)
(E)
(F)
(G)
(H)
(I)
(J)
(K)
(L)
MAINS AC POWER INPUT
MAINS AC POWER THROUGH
3-PIN XLR DC POWER INPUT JACK
ACTIVE COMMS INDICATOR LIGHT
5-PIN XLR DMX / MASTER/REPLICA INPUT
5-PIN XLR DMX / MASTER/REPLICA OUTPUT
RJ45 DMX / MASTER/REPLICA INPUT
RJ45 DMX / MASTER/REPLICA OUTPUT
DISPLAY
CANCEL BUTTON
PRESET BUTTONS (6X)
PRESET TOGGLE BUTTON
(M)
(N)
(O)
(P)
(Q)
(R)
(S)
(T)
(U)
(V)
(W)
(X)
GREEN OFFSET / HUE / MENU KNOB
CCT / SATURATION KNOB
DIMMER / INTENSITY KNOB
POWER / STATUS INDICATOR LIGHT
ON / OFF SWITCH
STANDARD JUNIOR PIN
ACCESSORY LATCH
(Y)
(Z)
(AA)
(AB)
(AC)
(AD)
(AE)
SEE REVERSE
INCLUDED
GEMINI 2X1 HARD Light Fixture
GEMINI 2X1 HARD Yoke
Ultra Light Diffuser
Domed Diffuser
Hex L-Key, 6mm (not pictured)
D
CA B
A
M
N
O
Q T
R
U
V XW
P
S Z AB
YAA AC
GH
FIE E
E
LK
AD
AE
J
Register your product and download the
latest firmware at www.litepanels.com
EU Registration
Vitec Production Solutions GmbH
Parkring 29
85748 Garching, Germany
German VAT Registration: DE 174828733
Company Number: HRB111560
SETUP
Mount the GEMINI 2X1 HARD with its included Yoke
(see “C” above) and Standard Junior Pin (“AD”) to a
rigging or support system rated for the weight of the
fixture and its accessories (not included). Always
comply with applicable local regulations. Use
supplemental safety equipment (e.g. safety chain or
cable, not included) as required.
Lock the GEMINI 2X1 HARD in its tilt position with the
Tilt Lock Knob (“E”). Use the Tilt Lock Screw (“D”) for
additional adjustment.
To remove the diffuser, push the two Diffuser Latches
(“A”), right and left, away from the center of the light
fixture. When released, flip the Diffuser Flap (“B”)
open. Install a diffuser by setting it in place and
pushing the diffuser flap closed until both diffuser
latches spring completely back into place.
CAUTION: Keep the air intakes (“E”) and the air
exhaust space (“K”) clear of blockage. Allow more
than 30 cm [12 inches] of clear air space from the rear
of the GEMINI 2X1 HARD to the nearest obstruction.
Use only covers and accessories approved by
Litepanels®, and ensure that they do not obstruct the
air intakes or exhaust.
Connect a battery to the fixture via the 3-Pin XLR DC
Power Input Jack (“O”) (28-33VDC). Or plug into a
mains electrical outlet via a powerCON AC power
cable connected to the Mains AC Power Input (“M”).
Use only a provided AC power cable. Switch the
ON / OFF Power Switch (“AC”) to the “ON” position.
The GEMINI 2X1 HARD is ready for operation.
For information on customizing effects or controlling
the GEMINI 2X1 HARD via DMX, refer to the
Litepanels GEMINI Effects Details or DMX Map at
www.litepanels.com
Red flashes
Red flashes
Red solid on
Red flashes
No fault; fixture is operating normallyGreen solid on
TROUBLESHOOTING
COLOR MODES
There is no light output Adjust dimmer knob to change intensity
Check fan and vents for blockage or stoppage;
Turn dimmer down to 0% and allow light fixture to cool
Check fan and vents for blockage or stoppage;
Turn light fixture OFF and allow to cool
Change fan settings to enable full output, if desired
Change power source
Turn fixture OFF; change power source
Warning or Fault ConditionPower/Status IndicatorBehavior Recommended Action
Green flashesGreen flashes during power up Take no action; green flashing stops shortly after power upNo fault; fixture is operating normally
Red solid onLight turns off
Light turns off
“VIN LOW” (Input Under Voltage Fault) or
“VIN HIGH” (Input Over Voltage Fault)
“VIN LOW”
(Input Under Voltage Warning)
Light intensity is decreased by 50%
Light is on
Light is on
“LED TEMP”, “RGB TEMP”, “PCB TEMP”
(Over Temperature Fault)
“LED TEMP”, “RGB TEMP”, “PCB TEMP”
(Over Temperature Warning)
No fault; Fan is OFF (Local or DMX control)Green solid on
Check fans for blockage or stoppageLight intensity is decreased by 50% “C FAN ERR”, “R FAN ERR”, “L FAN ERR”
If the Power/Status Indicator Light (“AB”) turns red, flashes red, and/or the light fixture does not operate normally, navigate the menu to SETTINGS -> SYSTEM -> SYSTEM MONITOR to identify
active warning or fault conditions. If warning or fault conditions persist, contact litepanels.com/support
+/- GRN CCT DIM
HUE
MENU
(PUSH)
SAT INT
+- +-
+- +-
↑ ↓ T D
+-
Add /
subtract
green
offset
(+/- 1.00)
Raise /
lower
CCT
value (K)
Increase /
decrease
color hue
value
(0 – 359°)
Increase /
decrease
color
saturation
(0 – 100%)
Increase /
decrease
dimmer
(intensity)
(0 – 100%)
Choose
gel
Make
source
daylight /
tungsten
+-
Raise /
lower
CCT
value (K)
No
function
+-
CCT MODE
HSI MODE
GEL MODE
COLOR MODE
→ GEL MODE
COLOR MODE
→ HSI MODE
STATUS BAR
COMMS DATA
COLOR
MODE
COLOR
VALUES
↑ ↓
Scroll
menu
items
Go to
onscreen
menu
Go back /
cancel
Select
menu
item
Go to onscreen
menu
(Default)
Go to onscreen
menu
RGBW MODE
COLOR MODE
→ RGBW MODE
Go to onscreen
menu
Select DIM
Overall,
R, G, B, W
Document 725-0079/X4
This manual suits for next models

8

Other Litepanels Lighting Equipment manuals

Litepanels Studio LED X6 PLUS User manual

Litepanels

Litepanels Studio LED X6 PLUS User manual

Litepanels STORM ASTRA User manual

Litepanels

Litepanels STORM ASTRA User manual

Litepanels Gemini 1x1 Soft User manual

Litepanels

Litepanels Gemini 1x1 Soft User manual

Litepanels Studio LED X3 PLUS Bicolor User manual

Litepanels

Litepanels Studio LED X3 PLUS Bicolor User manual

Litepanels Gemini 2x1 Soft User manual

Litepanels

Litepanels Gemini 2x1 Soft User manual

Litepanels Hilio User manual

Litepanels

Litepanels Hilio User manual

Litepanels Gemini 1x1 Soft User manual

Litepanels

Litepanels Gemini 1x1 Soft User manual

Litepanels Ringlite Mini User manual

Litepanels

Litepanels Ringlite Mini User manual

Litepanels Gemini 1x1 Soft User manual

Litepanels

Litepanels Gemini 1x1 Soft User manual

Popular Lighting Equipment manuals by other brands

Stella PS00401 Seies installation instructions

Stella

Stella PS00401 Seies installation instructions

IN HOUSE LED Dali Push user manual

IN HOUSE LED

IN HOUSE LED Dali Push user manual

Lupine SL NANO CLASSIC quick start guide

Lupine

Lupine SL NANO CLASSIC quick start guide

Blooma NEGRIL RB170 instructions

Blooma

Blooma NEGRIL RB170 instructions

Schumacher Electric RED FUEL SL160 owner's manual

Schumacher Electric

Schumacher Electric RED FUEL SL160 owner's manual

Elation Patend Light 1200 HMI instruction manual

Elation

Elation Patend Light 1200 HMI instruction manual

Govee DreamView G1 Pro user manual

Govee

Govee DreamView G1 Pro user manual

Fusion 25643 quick start guide

Fusion

Fusion 25643 quick start guide

Klus NISA-NI Mounting instructions

Klus

Klus NISA-NI Mounting instructions

Eterna LDLEM3 installation instructions

Eterna

Eterna LDLEM3 installation instructions

Daniamant Dan WR3-2 Installation and maintenance instructions

Daniamant

Daniamant Dan WR3-2 Installation and maintenance instructions

Philip Payne TYKT404DA quick start guide

Philip Payne

Philip Payne TYKT404DA quick start guide

Gainsborough K338 manual

Gainsborough

Gainsborough K338 manual

Philips Selecon PL3 LED Luminaires Installation & user manual

Philips

Philips Selecon PL3 LED Luminaires Installation & user manual

Lutron Electronics GRAFIK OMX-CCO-8 installation instructions

Lutron Electronics

Lutron Electronics GRAFIK OMX-CCO-8 installation instructions

KUAREZ RD1000 user manual

KUAREZ

KUAREZ RD1000 user manual

CREE LIGHTING Noctura Series installation instructions

CREE LIGHTING

CREE LIGHTING Noctura Series installation instructions

Ikan RB10-2PT-KIT quick start guide

Ikan

Ikan RB10-2PT-KIT quick start guide

manuals.online logo
manuals.online logoBrands
  • About & Mission
  • Contact us
  • Privacy Policy
  • Terms and Conditions

Copyright 2025 Manuals.Online. All Rights Reserved.