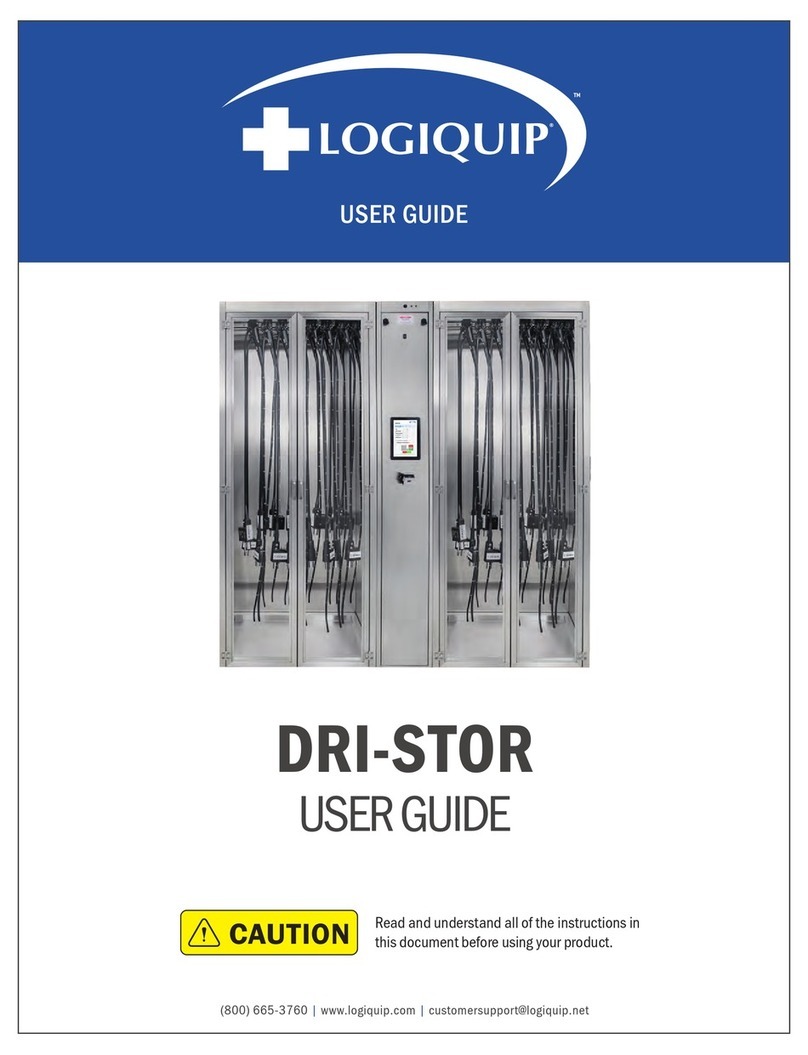
Logiquip DRI-STOR User manual

USE & CARE GUIDE
Dri-Stor
USE & CARE GUIDE
CAUTION Read and understand all of the instructions and safety
information in this document before operating this product.
SAVE THESE INSTRUCTIONS

(800) 665-3760
2|
TABLE OF CONTENTS
INTRODUCTION . . . . . . . . . . . . . . . . . . . . . . . . . . . . . . . . . . . . . . . 3
SAFETY PRECAUTIONS . . . . . . . . . . . . . . . . . . . . . . . . . . . . . . . . . . . 4-5
Symbol Definitions . . . . . . . . . . . . . . . . . . . . . . . . . . . . . . . . . . . . . . 4
Malfunction Instructions . . . . . . . . . . . . . . . . . . . . . . . . . . . . . . . . . . . . 4
Safety Precautions . . . . . . . . . . . . . . . . . . . . . . . . . . . . . . . . . . . . . 5
USE & CARE . . . . . . . . . . . . . . . . . . . . . . . . . . . . . . . . . . . . . . . 6-26
Initial Clean & Disinfection . . . . . . . . . . . . . . . . . . . . . . . . . . . . . . . . . . 6
Operating Instructions For HEPA & HEPA Channel Purge . . . . . . . . . . . . . . . . . . . . . . . . 7
EndoTrack Software Operation . . . . . . . . . . . . . . . . . . . . . . . . . . . . . . . . 8-12
User Interface . . . . . . . . . . . . . . . . . . . . . . . . . . . . . . . . . . . . . 8
Hanger Information. . . . . . . . . . . . . . . . . . . . . . . . . . . . . . . . . . . . 9
Scope Check-In . . . . . . . . . . . . . . . . . . . . . . . . . . . . . . . . . . . . 10
Scope Check-Out . . . . . . . . . . . . . . . . . . . . . . . . . . . . . . . . . . . 11
Re-Assign Scope . . . . . . . . . . . . . . . . . . . . . . . . . . . . . . . . . . . 12
Channel Purge Operation. . . . . . . . . . . . . . . . . . . . . . . . . . . . . . . . . . 13
Service & Maintenance . . . . . . . . . . . . . . . . . . . . . . . . . . . . . . . . . . 13
Cleaning Instructions . . . . . . . . . . . . . . . . . . . . . . . . . . . . . . . . . . 14-18
Preventative Maintenance . . . . . . . . . . . . . . . . . . . . . . . . . . . . . . . . . 19
EndoTrack Software Service & Maintenance . . . . . . . . . . . . . . . . . . . . . . . . . . 20-21
TROUBLESHOOTING . . . . . . . . . . . . . . . . . . . . . . . . . . . . . . . . . . . 22-26
WARRANTY . . . . . . . . . . . . . . . . . . . . . . . . . . . . . . . . . . . . . . . . 27

www.logiquip.com |3
INTRODUCTION
It is recommended that this document be read carefully by any individual who will be involved in installing, operating, or
maintaining LogiQuip Endoscope Storage and Drying Cabinets, or their components as outlined in this document.
Information, instructions, and safety precautions must be followed as indicated to ensure that product referred to in this
guide is used under the best conditions, is properly maintained, adheres to local guidelines and that safety can be prioritized.
There are many different guidelines and industry standards for Endoscope Storage and Drying Cabinets. It is recommended
to conduct a facility assessment to determine which guidelines and standards are best to follow and include in your
department’s policies and procedures.
Where used hereafter, Cabinet, Product, or Unit may be considered to refer to any specific Endoscope Storage and Drying
Cabinet, components, and/or applicable installed features described in the applicable portion of the document it is
used within.
INTENDED USE
LogiQuip Dri-Stor Cabinets are designed to ensure a clean storage location for disinfected Endoscopes and Probes while
protecting them from damage while in storage.
Configurations within the product family may also provide added functionality such as moisture control, scope tracking, and
other security features. Specific configurations include:
• Negative pressure providing HEPA-Filtered airflow
• Channel Purge mechanisms for removing moisture from internal channels
• Digital tracking and control of scope storage through the addition of EndoTrack with either Barcode Scanner
or RFID Reader
All reprocessing steps provided in the Endoscope’s instructions for use, including drying steps, need to be completed before
placing any device in the Cabinet.
Prior to first use, hospital-grade disinfectant must be used to perform cleaning of the Cabinet, and any tube set accessory
product flushed – following the manufacturer’s instruction for reprocessing before storing Endoscopes in the Cabinet.
ELECTRICAL SUPPLY
• North America 120 Vac, 60 Hz, 15 Amp Standard Deluxe Receptacle
• Typical Full Load Amperage ~1 Amps
• It is recommended to plug any Cabinet into a dedicated circuit
• Units with EndoTrack should be plugged into an outlet connected to the emergency backup circuit
• Disconnect power whenever servicing the Cabinet, by unplugging the power cord
ENVIRONMENT CONDITIONS
The Cabinets have been designed for use within medical facilities. They are designed to be safe within the following conditions:
• Indoor Use ONLY
• Temperature Range: 15-35°C
• Maximum Relative Humidity: 80% up to 25°C and decreasing linearly to 50% relative humidity at 35°C
INTRODUCTION

(800) 665-3760
4|
SAFETY PRECAUTIONS
SYMBOL DEFINITIONS
The following symbols appear within this manual or on the product to increase visibility of necessary safety precautions,
instructions and key information as described below.
Indicates key detail or reference for instruction, maintenance, compliance, or unique configuration of the product.
WARNING/CAUTION: Indicates risk of potential personal injury and/or potential damage to device.
WARNING/CAUTION: Indicates risk of electric shock or burn hazard causing potential personal injury and/or potential damage to device.
MALFUNCTION INSTRUCTIONS
The following symbols appear within this manual or on the product to increase visibility of necessary safety precautions,
instructions and key information as described below.
IN THE CASE OF HAZARDOUS MALFUNCTION:
1. Immediately stop using the device.
2. Use the troubleshooting information on pages 22-26 to determine what is causing the issue.
3. If it is not possible to identify or eliminate the cause using this document, switch the device off and call
LogiQuip Customer Support at (800) 665-3760.
WARNING: PERSONAL INJURY
Please follow all instructions alongside any/all applicable health & safety practices. Please follow all instructions alongside any/all safety
protocols and regulations applicable to the location, organization, and workplace environment.
SAFETY PRECAUTIONS

www.logiquip.com |5
SAFETY PRECAUTIONS (CONTINUED)
It is the duty of installers, operators, or maintenance persons to ensure that noted information, safety precaution, and
instruction is observed alongside applicable regulations when installing, operating, or performing maintenance tasks on any
LogiQuip Dri-Stor Drying Cabinets.
• WARNING indicates the potential for personal injury
• CAUTION indicates the potential for damage to equipment
For emphasis, certain Safety Precautions and informational notes are repeated throughout the manual. It is important to
review these before installing, operating, or servicing the unit.
WARNING: PERSONAL INJURY
Product may weigh in excess of 750 lbs. Ensure adequate personnel and equipment is available to perform uncrating
procedures. Uncrate on a level floor.
WARNING: PERSONAL INJURY
Do not modify this equipment without authorization from the manufacturer. If this equipment is modified, appropriate
inspection and testing must be conducted to ensure continued safe use of the equipment.
WARNING: PERSONAL INJURY
Avoid tipping hazard, ensure product is leveled, and secure when positioning.
WARNING: PERSONAL INJURY
Repairs and adjustments to this equipment should be made only by fully qualified service personnel or verified persons. Maintenance
performed by inexperienced, unqualified personnel or installation of unauthorized parts could cause personal injury, invalidate the warranty
or result in costly damage.
WARNING: PERSONAL INJURY
This product may only be used with the accessories delivered by or approved by LogiQuip.
The use of any other accessories is not verified for safety.
WARNING: PERSONAL INJURY
Please follow all instruction alongside any/all applicable health & safety practices. Please follow all instruction alongside any/all safety
protocols and regulations applicable to the location, organization and workplace environment.
WARNING: LACERATION
Always wear safety goggles, safety gloves, and safety shoes when loading, unloading, positioning, or
otherwise handling product to avoid injuries.
WARNING: TRIPPING HAZARD
Route the power cord to the receptacle in a position so that it will not be tripped over by personnel in the area.
WARNING: POSSIBLE EQUIPMENT, PROPERTY DAMAGE, OR HAZARD
A step stool must be kept within the immediate area which is sufficient to reach over the Cabinet to access the mains
power receptacle on the back at the top to disconnect the power at the source in an emergency situation.
CAUTION: DAMAGE TO EQUIPMENT
Use recommended cleaners only to clean stainless steel and product surfaces. Never use a wire brush, abrasives, or steel wool on
the equipment. Do not use chloride on stainless steel surfaces. Chloride based cleaners will deteriorate stainless steel.
WARNING: ELECTRIC SHOCK
Do not access serviceable or live current areas, nor clean near electrical connection points unless until all utilities have been
properly disconnected.
WARNING: ELECTRIC SHOCK
Do not replace or use Mains cords with inadequately rated supply. Use only cables labeled for applicable voltage or voltage range, frequency
or frequency range, and/or power or current RATING when stated on the label by LogiQuip, and install in the order of the instructions shown.
Only cables verified and provided by LogiQuip for a specific Cabinet may be used.
SAFETY PRECAUTIONS

(800) 665-3760
6|
INITIAL CLEAN AND DISINFECTION
All reprocessing steps provided in the Endoscope’s instructions for use, including drying steps, need to be completed prior
to placing any device in the Cabinet.
Once components have been verified to be running properly, an initial clean must be performed. See section ‘Cleaning
Methods & Process’ for details of approved protocol.
Prior to first use, hospital-grade disinfectant must be used to perform cleaning of the Cabinet, and any tube set accessory
product flushed – following the manufacturer’s instruction for reprocessing prior to storing Endoscopes in the Cabinet.
USE & CARE
WARNING:
Prior to Using Your Drying Cabinet you MUST CLEAN AND SANITIZE. Please refer to pages 14-18 for detailed cleaning instructions.

www.logiquip.com |7
OPERATING INSTRUCTIONS
All reprocessing steps provided in the Endoscope’s instructions for use, including drying steps, need to be completed prior
to placing any device in the Cabinet.
Once components have been verified to be running properly, an initial clean must be performed. See section ‘Cleaning
Methods & Process’ for details of approved protocol.
Prior to first use, hospital-grade disinfectant must be used to perform cleaning of the Cabinet, and any tube set accessory
product flushed – following the manufacturer’s instruction for reprocessing before storing Endoscopes in the Cabinet.
WARNING: POSSIBLE EQUIPMENT, PROPERTY DAMAGE, OR HAZARD
A step stool must be kept within the immediate area which is sufficient to reach over the Cabinet to access the main power
receptacle on the back at the top to disconnect the power at the source in an emergency situation.
HEPA & HEPA CHANNEL PURGE CABINET OPERATION
ACCESSING & STORING SCOPES
To access and store scopes in a HEPA Cabinet or a HEPA Channel Purge Cabinet, open the doors and safely store the scope
on one of the available scope hangers inside the Cabinet.
OPTIONAL KEYPAD & LOCKS
If your HEPA Cabinet or HEPA Channel Purge Cabinet is equipped with a keypad security lock, follow the steps below to add,
remove access scopes inside the Cabinet.
ADDING USERS - KEYPAD SECURITY LOCK
1. Enter: #9# 123456 on the keypad Enter program mode.
2. Enter 01# XXXX# XXXX# 1# Where ‘XXXX’ is the users 4-digit access code.
3. To enter ‘1234’ as a user, enter the following: 01# 1234# 1234# 1#.
4. Enter **# Exit program mode.
ACCESSING SCOPES
After adding the required 4-digit user codes, the Cabinet can now be accessed by keying in the user code.
SET UNLOCK DURATION - KEYPAD SECURITY LOCK
The keypad security system is programmed to remain unlocked for 5 seconds by default. In order to increase the duration the
Cabinet remains unlocked, follow the steps below.
1. Enter: #9# 123456 on the keypad Enter program mode.
2. Enter 01# 21# XX# 1# Where ‘XX is the time from 0 – 60 seconds.
3. To unlock the Cabinet for 10 seconds, enter the following: 01# 21# 10#.
4. Enter **# Exit program mode.
USE & CARE

(800) 665-3760
8|
ENDOTRACK SOFTWARE OPERATION
EndoTrack is the touchscreen software present on HEPA with EndoTrack, and HEPA with Channel Purge & EndoTrack Cabinets.
Scope and user operations within Cabinets configured for tracking with barcode or RFID tags are performed through use of
the touchscreen as configured by a supervisor or manager of the department.
USER INTERFACE (Fig. 67)
1. Access Supervisor/Service Page: Directs user to the Pin Page.
2. Manual User Check-In: Allows user to manually enter ID.
3. Toggle Cabinet Light: Allow user to turn Cabinet light ON/OFF.
4. Hanger Information: Shows user scope information (Check-in Time, Expiration time, etc.).
5. Channel Purge Timer: Allow user to see the remaining drying time for Channel Purge Pumps.
6. Error & Info Messages: Notifies users of operations related to the Cabinet such as Error messages,
and successful operations.
Fig. 67
USE & CARE

www.logiquip.com |9
7. Color Code for Checked-In Scopes:
Green: Checked-in Scope, Yellow: Expiry Warning, Red: Expired (Checked-in Scope is expired)
8. Exit Hanger Details Screen
9. Scope Expiry Duration
10. Scope Model
11. Expiration Date for Checked-in Scope
12. Checked-in Scope ID
13. Close Hanger Details Screen
14. Scope ID of Removed Scope
15. Orange: Scope Removed Scope List
16. Remove Scope ID from Hanger
Fig. 68
USE & CARE
ENDOTRACK SOFTWARE OPERATION (CONTINUED)
HANGER INFORMATION (Fig. 68)

(800) 665-3760
10 |
1. USER AUTHENTICATION: From the Main Menu, scan the Users Barcode/RFID Tag or press the Manual Entry Button to
enter the User ID manually, and then press the “Enter” button (Fig. 69-70).
2. SCOPE CHECK-IN: When prompted, scan the required Scopes’ Barcode/RFID Tag or press the ‘Manual Entry’ button to
enter the Scope ID manually (Fig. 71-72).
3. Press the Check-In button (Fig. 73), and then select an available hanger (Gray Icons) when prompted to Check in
the required Scope (Fig. 74).
4. Press the ‘Done’ button to complete the Checking-Out process (Fig. 75) and go to back to the Main Page.
Hanger numbers that were checked-out will now be gray (Fig. 76).
Once the scope has been reassigned, the same user can reassign multiple scopes by scanning the required scopes’
barcode/RFID Tag and repeating Steps 2 & 3 shown above.
The maximum amount of actions performed by a user should be limited to 5. This includes, checking in/out scopes and re-assigning scopes.
Fig. 69 Fig. 70 Fig. 71 Fig. 72
Fig. 73 Fig. 74 Fig. 75 Fig. 76
USE & CARE
ENDOTRACK SOFTWARE OPERATION (CONTINUED)
PERFORM SCOPE CHECK-IN
USER AUTHENTICATION & SCOPE CHECK-IN

www.logiquip.com |11
Fig. 76
Fig. 78
1. USER AUTHENTICATION: From the Main Menu, scan the Users Barcode/RFID Tag or press the Manual Entry Button to
enter the User ID manually, and then press the “Enter” button (Fig. 69-70).
2. When prompted, scan the required Scopes’ Barcode/RFID Tag or press the ‘Manual Entry’ button to enter the Scope ID
manually (Fig. 71-72).
3. SCOPE CHECK-OUT: Press the Check-Out button (Fig. 76).
4. CONFIRM SCOPE CHECK-OUT: Press the ‘Done’ button (Fig. 77) to complete the Checking-Out process and go to back
to the Main Page. Hanger numbers that were checked out will now be gray (Fig. 78).
Once the scope has been checked out, the same user can check out multiple scopes by scanning the required scopes’
barcode/RFID Tag and repeating Steps 2 & 3.
Fig. 77
USE & CARE
ENDOTRACK SOFTWARE OPERATION (CONTINUED)
PERFORM SCOPE CHECK-OUT
USER AUTHENTICATION & SCOPE CHECK-OUT

(800) 665-3760
12 |
1. USER AUTHENTICATION: From the Main Menu, scan the Users Barcode/RFID Tag or press the Manual Entry Button to
enter the User ID manually, and then press the “Enter” button (Fig. 69-70).
2. When prompted, scan the required Scopes’ Barcode/RFID Tag or press the ‘Manual Entry’ button to enter the Scope ID
manually (Fig. 71-72).
3. SCOPE RE-ASSIGN: Press the Reassign button (Fig. 79), and then select an available hanger (Gray Icons) when
prompted to re-assign the required Scope. (Fig. 80).
4. Once all scopes have been reassigned, press the ‘Done’ button (Fig. 81) to complete the process.
Scopes that were reassigned will be moved to their new hanger location (Fig. 82).
Once the scope has been reassigned, the same user can reassign multiple scopes by scanning the required scopes’ barcode/RFID Tag and
repeating Step 2 & 3.
Fig. 79 Fig. 80
Fig. 81
Fig. 82
USE & CARE
ENDOTRACK SOFTWARE OPERATION (CONTINUED)
RE-ASSIGNING SCOPES
It may be required to re-assign a Checked-In Scope to another hanger location without checking it out.
Follow the steps provided to re-assign a checked-in scope:
RE-ASSIGN A CHECKED-IN SCOPE

www.logiquip.com |13
CHANNEL PURGE OPERATION
CONNECTING & DISCONNECTING TUBE SETS
1. To connect, push the male quick-connect (Fig. 83) of the
reprocessed tube set into the quick disconnect (Fig. 84)
located on the ceiling of the Cabinet which corresponds to
the appropriate hanger for a matching Endoscope.
2. Connect the other end(s) to the matching Endoscope per
manufacturer’s instruction.
3. To disconnect a tube set, first disconnect the required tube set
from the Endoscope. Then press the metal tab on the quick
disconnect to remove the tube set from the Cabinet.
4. Please see LogiQuip's Dri-Stor Tubing Set Installation & User Guide for more information.
Fig. 83 Fig. 84
There is airflow while the Channel Purge Pumps are ON. If there is airflow through a quick disconnect that is not connected with a tube set,
press the metal tab to close the port.
SERVICE & MAINTENANCE
SERVICING & ALTERATION
WARNING: LACERATION
Always wear safety goggles, safety gloves, and safety shoes when loading, unloading, positioning, or otherwise handling product to
avoid injuries.
WARNING: PERSONAL INJURY
Repairs and adjustments to this equipment should be made only by fully qualified service personnel or verified persons.
Maintenance performed by inexperienced, unqualified personnel or installation of unauthorized parts could cause personal injury,
invalidate the warranty or result in costly damage.
WARNING: PERSONAL INJURY
Do not modify this equipment without authorization from the manufacturer. If this equipment is modified, appropriate inspection and testing
must be conducted to ensure continued safe use of the equipment.
WARNING: PERSONAL INJURY
This product may only be used with the accessories delivered by or approved by LogiQuip. The use of any other accessories is not verified
for safety.
CAUTION: DAMAGE TO EQUIPMENT
Use recommended cleaners only to clean stainless steel and product surfaces.
Never use a wire brush, abrasives, or steel wool on the equipment. Do not use chloride on stainless steel surfaces.
Chloride based cleaners will deteriorate stainless steel.
WARNING: ELECTRIC SHOCK
Do not service or clean equipment until all utilities have been properly disconnected.
LogiQuip accepts hospital-approved cleaning methods and surface disinfectants for Stainless Steel, so long as they do not use a
chloride-based disinfectant which will cause stainless steel to degrade. It is recommended to clean the unit a minimum of ONCE
per week unless extraneous circumstances warrant further cleaning. For further information on accepted and recommended
USE & CARE

(800) 665-3760
14 |
CLEANING INSTRUCTIONS
CLEANING THE CABINET
Glass cleaner can be used on the glass part of the doors.
The stainless steel is easily cleaned by many different methods. While some contaminants may be easily removed,
others may require specific cleaners for effective removal. It may be necessary to identify the contaminant or
experiment with various cleaners.
Frequently, warm water with or without a gentle detergent can be used. Mild household cleaners with non-scratching
abrasive powders can be used with warm water, soft bristle brushes, sponges, or clean cloths. Ordinary carbon steel
brushes or steel wool should be avoided as they may leave particles embedded in the surface, which can lead to
rusting. For more aggressive cleaning, a small amount of vinegar can be added to the cleaning powder. Handle the
stainless steel with clean gloves or cloths to guard against stains and fingerprints.
Follow the facility’s schedule for the frequency of cleaning the Cabinet. The drip pan can be cleaned as needed
with this schedule.
NOTES
• Avoid the use of oily rags or greasy cloths when wiping the surface of the Cabinet
• After cleaning rinse the Cabinet thoroughly, where possible, with water
• When in doubt about the compatibility of a product with stainless, contact the manufacturer of the cleaner to
confirm that the product is safe for stainless steel.
• Cleaning with chloride-containing detergents MUST BE AVOIDED
FINGERPRINTS AND STAINS
Fingerprints and mild stains can be removed with a glass cleaner. Cleaning should always be followed by rinsing with
a soft cloth and clean warm water. When water contains mineral solids, which leave water spots, it is advisable to
wipe the surface completely with dry towels.
CLEAN WATER AND WIPES
Soft cloths and clean warm water should always be the first choice for mild stains, loose dirt, and soil. Rinsing with
clean water and a dry wipe(s) will eliminate the possibility of water stains.
DISINFECTANTS
If a disinfectant is used, it should be a non-chloride or non-abrasive type, such as alcohol, ammonia, or
hydrogen peroxide.
USE & CARE

www.logiquip.com |15
CLEANING INSTRUCTIONS (CONTINUED)
SOLVENT CLEANING
Organic solvents can be used to remove materials that have not had time to oxidize or decompose. Solvents should
not contain chloride, such as acetone, methyl alcohol, or mineral spirits. There are many blended organic cleaners
that are commercially available. Users are advised to contact suppliers of solvents for information regarding the
application on stainless steel.
HOUSEHOLD CLEANERS
Household cleaners fall into two categories; detergent (non-abrasive) and abrasive cleaners. Both are effective for
mild dirt, stain, and soil deposits, as well as light oils, such as fingerprints. The abrasive cleaners are more effective
but introduce the possibility of scratching the surface. The degree of abrasiveness will vary greatly with the product.
Some brands will produce noticeable scratching on only the most highly-polished surfaces. All of these cleaners
vary widely with respect to acidity and the amount of chlorine contained. A neutral cleaner that is low in chloride is
preferred unless the user is assured that the surface can be thoroughly rinsed after cleaning with warm water and
wiped dry with a soft cloth. It is not a guarantee that the product is non-abrasive, non-acidic, or low in chloride even
if it states that it is for use on stainless steel. The cleaning method generally employed with these cleaners is to
apply to the stainless surface and follow directions closely.
Even the finest cleaning powders can scratch or burnish a finish. On polished finishes, rubbing or wiping should be
done in the direction, NOT across, of the polish line or grain of the surface.
GRAIN DIRECTION
FOR BEST PRACTICES WIPE SIDE TO SIDE
USE & CARE

(800) 665-3760
16 |
CLEANING INSTRUCTIONS (CONTINUED)
GLASS CABINETS RECOMMENDED CLEANING PROTOCOL
LogiQuip recommends disinfectants use on the inside of the Endoscope Cabinet on a weekly basis, or as required by hospital
and/or local standards.
1. Ensure the Cabinet has been turned off.
2. Remove all Endoscopes and equipment stored inside the Cabinet.
3. Spray the glass cleaner on the glass doors of the Cabinet and wipe down with a clean, dry cloth.
4. Spray the stainless-steel cleaner on the outside surface of the Cabinets. Wipe down with a clean, dry cloth.
5. Apply or spray the hospital-grade surface disinfectant on the inside surfaces of the Cabinet.
NOTE: Follow the manufacturer's instruction for use. Do NOT use a chloride-based disinfectant.
CLEANING OF CHANNEL PURGE TUBING SETS
At the hospital’s discretion, the channel purge Tubing set and connectors can be cleaned by Steam Sterilization, hospital
approved Enzymatic detergents or High-Level Disinfection.
• STEAM STERILIZATION: Tubing sets are compatible with steam sterilization at the following parameters:
270°F ( 32°C), four-minute cycle. Minimum drying time for Tubing sets is 30 minutes before connecting
to an Endoscope.
• The Tubing sets should be washed using a hospital-approved Enzymatic cleaner prior to the first use. This is done by
flushing, soaking, and rinsing, following the Enzymatic manufacturer’s IFU. After the Tubing sets have been properly
rinsed, they can be connected to the quick connect manifold in the Cabinet to allow the interior of the Tubing to be air
purged dry for 30 minutes prior to connecting to an Endoscope.
• Approved High-Level Disinfectants include Paracetic Acid, Hydrogen Peroxide, Glutaraldehyde , and OPA based
disinfectants. Follow the respective HLD manufacturer’s IFU for proper use. After the Tubing sets have been properly
rinsed, they can be connected to the quick connect manifold in the Cabinet to allow the interior of the Tubing to be air
purged dry for 30 minutes prior to connecting to an Endoscope.
• Tubing sets and connectors should be checked regularly for cracks and loss of Tubing flexibility. If any such flaws are
found, they should be replaced immediately.
Prior to their first use, all Tubing sets must be washed using a hospital approved enzymatic cleaner. This is done by flushing, soaking, rinsing
and following the enzymatic manufacturer’s IFU.
Tubing sets and connectors should be checked regularly for cracks, discoloration, and loss of Tubing flexibility. If any such flaws are found,
they should be replaced immediately.
USE & CARE

www.logiquip.com |17
USE & CARE
CLEANING INSTRUCTIONS (CONTINUED)
While it is recommended that the Main Cabinet HEPA Filter be replaced every two years, periodic cleaning can be
done as needed.
CLEANING THE CABINET FILTER
1. Shut off the Cabinet Power Supply.
2. If equipped with a side component Cabinet, use the provided 8mm Allen wrench to remove the mechanical compartment
front panel. For Cabinets with components mounted in the top, remove the access or top panel (depending on model).
3. Turn off the switch for HEPA Fan and unplug the power cord.
4. Slide the HEPA housing completely out of the Cabinet and remove the lid by undoing two latches and one screw.
5. Twist the Filter Assembly counterclockwise to unlock the old HEPA Filter.
6. If replacing the HEPA Filter along with its Pre- and Post-Filters, go to STEP 7.
a. Remove the Pre-Filter Sleeve by sliding it off the HEPA Filter and replace with the new one.
b. Remove the Post-Filter from the opening at the bottom of the HEPA Filter. To insert the new Filter, roll it up,
and slide it back into the HEPA Filter.
c. Replace the O-Ring on the HEPA Filter.
d. Place the old Filters (to be discarded) in a bag and remove to a non-biohazard area.
7. Insert the new HEPA Assembly into the housing, and with downward pressure, twist the Filter Assembly clockwise to
relock the Seal and Filter into place.
8. Replace the lid to the HEPA Housing and slide it into the Cabinet.
9. Plug in Fan and turn on the Power Switch to ON.
10. If using EndoTrack, go to the Service Screen to reset the HEPA replacement timer. Refer to the EndoTrack User Guide.
11. Replace the mechanical compartment front panel, top panel, or shroud. Store the Allen wrench in the hold on the top
side of the Cabinet.
12. Turn on Cabinet Power Supply.
Cabin HEPA Filter Box With Top Removed
Twist Cap (To Left) To Access HEPA Filter
VOC Carbon FilterCabin HEPA Filter

(800) 665-3760
18 |
USE & CARE
CLEANING INSTRUCTIONS (CONTINUED)
REPLACING THE CHANNEL PURGE FILTER
1. Turn off the Power Supply to the Cabinet.
2. Using the provided 8mm Allen wrench, remove the mechanical compartment front panel, if the unit has a side component
Cabinet. For Cabinets with components mounted in the top, remove the access panel or top (depending on model).
3. Take the tube off the barb of the Filter and unscrew the base from the Tubing.
4. Replace Filter, by screwing it onto the Tubing and putting the Tubing on the top barb of the filter. CAUTION: Make sure the
Filter and threaded fitting are exactly aligned. DO NOT OVERTIGHTEN.
5. Press the RESET button on the Filter Cabinet Control Box. If using EndoTrack, go to the Service screen to reset the HEPA
Replacement Timer. Refer to the EndoTrack User Guide.
6. Replace the mechanical compartment front panel, if the side component Cabinet or cover plate Filters are mounted in
the top.
External Filter
(Side Mount Cabinet)
Side Cabinet RemovalFilter Reset Button - Resets Timer For
Channel Purge Filter Replacement
Channel Purge
HEPA Filter
Channel Purge Air Pump
(Green or Blue)
Power Button
Cabinet Filter
Alert LED
Channel Purge Filter
Alert LED

www.logiquip.com |19
PREVENTATIVE MAINTENANCE SCHEDULE
Any work performed by inexperienced or unqualified persons or the installation of unauthorized parts could cause personal
injury, invalidate the warranty or result in costly damage.
Preventive Maintenance is essential in keeping this equipment in optimal working condition. LogiQuip recommends
establishing an annual maintenance agreement with LogiQuip service. Please contact your LogiQuip Sales Representative
for additional information.
WARNING: PERSONAL INJURY
Repairs and adjustments to this equipment should be made only by fully qualified service personnel or verified persons.
Maintenance performed by inexperienced, unqualified personnel or installation of unauthorized parts could cause personal injury,
invalidate the warranty or result in costly damage.
USE & CARE
STANDARD
WARRANTY
LogiQuip Dri-Stor Cabinets are covered
by a 5-Year Limited Warranty from date
of receipt against defect in materials
or workmanship under normal use and
service, excluding electronic compo-
nents. During this period, LogiQuip will,
in its sole discretion, repair defects in
materials or workmanship that existed
when the product was received
or replace the product. If the product
is replaced, the new product will be
warranted for the remaining term of
the original product warranty period.
1-Year Warranty on electronic
components and sub-assemblies.
2-YEAR
MAINTENANCE +
STANDARD WARRANTY
5-YEAR LIMITED WARRANTY +
24 MONTHS OF MAINTENANCE
•Maintenance Visits Every 6 Months
•Replacement and Consumable Parts
(1) Main Cabinet Filter (40000MFF)
•Inspect Tubing
•Check Operation of Fans and Pumps
•Check Doors and Locks
•Check Levelness of Cabinets
4-YEAR
MAINTENANCE +
STANDARD WARRANTY
5-YEAR LIMITED WARRANTY +
48 MONTHS OF MAINTENANCE
•Maintenance Visits Every 6 Months
•Replacement and Consumable Parts
(2) Main Cabinet Filter (40000MFF)
•Inspect Tubing
•Check Operation of Fans and Pumps
•Check Doors and Locks
•Check Levelness of Cabinets

(800) 665-3760
20 |
ENDOTRACK SOFTWARE SERVICE & MAINTENANCE
EndoTrack is the touchscreen software present on HEPA with EndoTrack, and HEPA with EndoTrack-Channel Purge Cabinets.
ACCESSING & EXPORTING LOGS (Fig. 85)
WARNING: PERSONAL INJURY
Repairs and adjustments to this equipment should be made only by fully qualified service personnel or verified persons.
Maintenance performed by inexperienced, unqualified personnel or installation of unauthorized parts could cause personal injury,
invalidate the warranty or result in costly damage.
# BUTTON DESCRIPTION
1Time
Time logged for the activity/message
in the following format: [YYYY-MM-DD
HH:MM: SS AM/PM]
2Type
INFO: Message displayed when Cabinet
operation has changed
ERROR: Message displayed if Cabinet is
not operating as intended
3Message Description of the INFO/ERROR Type.
4Export New/
All Activity
EXPORT NEW ACTIVITY: Export all logs
starting from previous export using
a FAT32 formatted USB
EXPORT ALL ACTIVITY: Export all logs from
Cabinets initial start up using a FAT32
formatted USB
5Previous/
Next See the Next/Previous set of logs
Fig. 85
USE & CARE
Other manuals for DRI-STOR
2
Table of contents
Other Logiquip Medical Equipment manuals