manuals.online logo
Brands
  1. Home
  2. •
  3. Brands
  4. •
  5. logos biosystems
  6. •
  7. Laboratory Equipment
  8. •
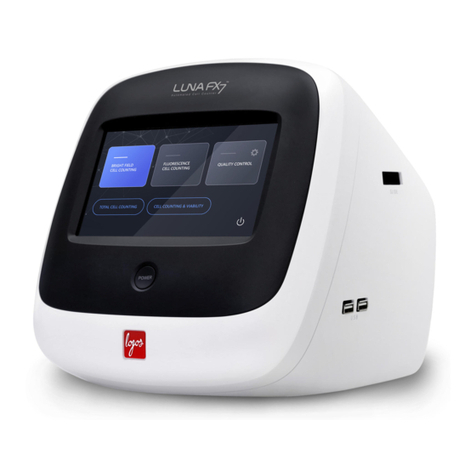
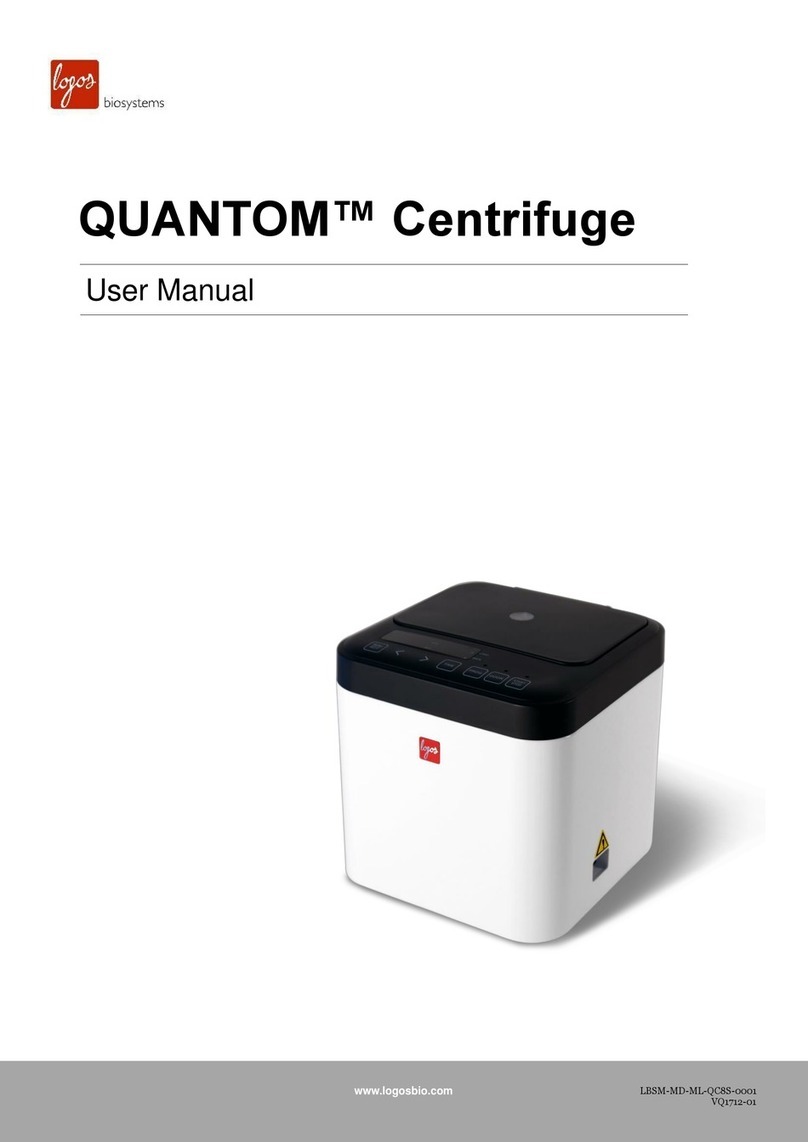
  9. logos biosystems LUNA-FX7 Basic Installation guide

logos biosystems LUNA-FX7 Basic Installation guide

© 2020 Logos Biosystems, Inc. All Rights Reserved. Logos Biosystems |www.logosbio.com
Front view Right side view Rear view
Touch screen Power button USB ports Slide port Power inlet Ethernet port
Quick Manual for LUNA-FX7TM
Setting LUNA-FX7
1. Select “Bright Field Cell Counting”
2. Choose “TOTAL CELL COUNTING”
or “CELL COUNTING & VIABILITY”
1) Total Cell Counting : Without staining dye
2) Viability : Using staining dye
3. Select “ SETTING“ at the top right of the screen,
and select “CELL COUNTING” on the right menu.
4. Set the options for slide and chamber area
5.Set the options for Staining.
·For “viability” cell counting, mix cell suspension with 0.4%
trypan blue solution in 1:1 ratio (Dilution Factor : 2).
· For total cell counting, there is no options for staining.
6. Set the options for Autofocus
2. Insert Slide
Press EJECT and put slide into the slide port on
the right side of the device.
Insert slide by pressing INSERT.
4. Counting result display ①
By pressing the “Tag” button, live cells are
displayed in green, dead cells are displayed in
red, and you can check whether or not the cells
are being counted visually.
1.Load sample
Load appropriate volume of sample into the
counting slide chamber.
You can easily load it by touching the tip as
shown above and tilting it at 45 to 65 degrees.
3. Focus & Light Intensity adjustment and count
Make sure that the cells are in focus, press the light
bulb icon to adjust the intensity of the light asneeded.
After adjusting the focus, press “Count” button on
the upper right of the screen to count cells.
5. Counting result display ②
Press “Histogram & Gating” button to display
histogram of cellsize and cell number. Gating by cell
size is possible.
Alternatively, dilution rate can be calculated by
pressing the “Dilution” button.
6.Data storage
Insert a USB memory and press the "Save & Print"
button to save PDF format report and TIFFimages
orprint data.
The data also canbe saved indesignated PCvia WiFi
orEthernet.
Bright Field Cell Counting Procedure with/without Trypan Blue
© 2020 Logos Biosystems, Inc. All Rights Reserved. Logos Biosystems |www.logosbio.com
Cell Counting Procedure
●Adherent cells
1. Prepare cell suspension.
(Recommended cell concentration range : 5x10⁴~2x10⁷cells/mL)
(Cell size range : 1-90 μm, Optimal : 3-60 μm)
2. Aspirate the medium and rinse the flask with DPBS.
3. Aspirate DPBS, add trypsin-EDTA and place cells in 1-3 minutes
at room temperature. Tap the flask to detach cells.
4. Add medium containing serum to neutralize trypsin-EDTA.
5. Centrifuge cells at 900~1200 rpm for 2 minutes at room temperature.
6. Aspirate the media and resuspend cell pellet using DPBS.
7. Mix 0.4% trypan blue solution and cells in 1:1 ratio.
※No need to mix the staining dye for Total Cell Counting
Cell Preparation (Example)
●Suspension cells
1. Prepare cell suspension.
(Recommended cell concentration range : 5x10⁴~2x10⁷cells/mL)
(Cell size range : 1-90 μm)
2. Centrifuge cells at 900~1200 rpm for 2 minutes at room temperature.
3. Aspirate the media and resuspend cell pellet using DPBS.
4. Mix 0.4% trypan blue solution and cells in 1:1 ratio.
※No need to mix the staining dye for Total Cell Counting
Loading Volume : 10ul Loading Volume : 10ul
Loading Volume : 10ul Loading Volume : 50ul
●Adherent cells
1. Prepare cell suspension.
(Recommended cell concentration range : 5x10⁴~2x10⁷cells/mL)
(Cell size range : 1-90 μm, Optimal : 3-60 μm)
2. Aspirate the medium and rinse the flask with DPBS.
3. Aspirate DPBS, add trypsin-EDTA and place cells in 1-3 minutes at
room temperature. Tap the flask to detach cells.
4. Add medium containing serum to neutralize trypsin-EDTA.
5. Centrifuge cells at 900~1200 rpm for 2 minutes at room temperature.
6. Aspirate the media and resuspend cell pellet using DPBS.
7. Mix AO/PI fluorescence dye and cells in 1:9 ratio.
1. Select “Fluorescence Cell Counting” and press
“CELL LINES & PRIMARY CELLS”
4. Counting result display ①
By pressing BF/GF/RF button, able to check each
images and overlay image. By pressing the “Tag”
button, live cells are displayed in green and dead
cells are displayed in red, and you can check
whether or not the cells are being counted
visually.
3. Focus &Light intensity adjustment and count
Press the "BF" button on the lower left of the screen to
switch to "Green “and "Red".
Adjust the light intensity by pressing -/+ buttons.
※The light intensity levels in theCOUNT screen willonly be applied tothe
live view mode.The exposure level in protocol needs tobe adjusted to
apply counting result
6.Data storage
Insert a USB memory and press the "Save & Print"
button to save PDF format report and TIFFimages
orprint data.
The data also canbe saved in designated PC via WiFi or
Ethernet.
Cell Counting Procedure
© 2020 Logos Biosystems, Inc. All Rights Reserved. Logos Biosystems |www.logosbio.com
Fluorescence Cell Counting Procedure with AO/PI
Setting LUNA-FX7
2. Select “ SETTING“ at the top right of the screen,
and select “CELL COUNTING” on the right menu.
3. Set the options for slide and chamber area
4. Set the options for Autofocus
2. Insert Slide
Press EJECT and put slide into the slide port on
the right side of the device.
Insert slide by pressing INSERT.
Cell Preparation (Example)
●Suspension cells
1. Prepare cell suspension.
(Recommended cell concentration range : 5x10⁴~2x10⁷cells/mL)
(Cell size range : 1-90 μm)
2. Centrifuge cells at 900~1200 rpm for 2 minutes at room temperature.
3. Aspirate the media and resuspend cell pellet using DPBS.
4. Mix AO/PI fluorescence dye and cells in 1:9 ratio.
1.Load sample
Load appropriate volume of sample into the
counting slide chamber.
You can easily load it by touching the tip as
shown above and tilting it at 45 to 65 degrees.
Loading Volume : 10ul Loading Volume : 10ul
Loading Volume : 10ul Loading Volume : 50ul
5. Counting result display ②
Press “Histogram & Gating” button to display histogram
of cell size andcell number. Gating bycell size is possible.
Alternatively, dilution rate can be calculated by pressing
the “Dilution” button.
Setting & Counting
1. Choose the counting mode you desire. 2. Create the new protocol and LOAD.
※Use the same protocol to monitor the cell growth
of same cell line.
3.Set the options for Slide, Staining and Autofocus.
※Always choose “Current” chamber area.
Bioprocess Monitoring
© 2020 Logos Biosystems, Inc. All Rights Reserved. Logos Biosystems |www.logosbio.com
●Cell sampling from Bioreactor or other type of cell culture vessels
1. Mix cells and staining dye in desired ratio, and set the Dilution Factor in Protocol accordingly.
※Recommendation :
2. Load appropriate volume of sample into the counting slide chamber.
Cell Preparation (Example)
Counting Mode Brightfield (Total) Brightfield (Viability) Fluorescence
Sample Cells Cells Trypan blue
(0.4%) Cells AO/PI
Ratio of mixture No need to mix with dye 1:1 Ratio 1:9 Ratio
Dilution Factor 1 2 1.11
5. Make sure to select “Bioprocess” when saving the
the result.
6. Go to “REVIEW” and select “REVIEW BIOPROCESS”
button on the right menu.
Review Bioprocess
1. Select “RESULTS” tab to review the summary of
cell proliferation data.
2. Select “GRAPH” tab to review the summary of
cell proliferation data in graphs.
·Press the Y-axis title box to alternate between
“Total cell concentration”, “Live cell concentration”,
and “Viability”.
·Press “Day”, “Month” or “Year” to alter X-axis scale.
3. Insert a USB memory and press the “EXPORT TO
USB“ button to export the results in CSV format and
graphs in PNG format.
4.Focus &Light Intensity adjustment and count.
Make sure that the cells are in focus, press the light
bulb icon to adjust the intensity ofthe light as needed.
After adjusting the focus, press “Count” button on
the upper right of the screen to count cells.
© 2020 Logos Biosystems, Inc. All Rights Reserved. Logos Biosystems |www.logosbio.com
Setting : BrightField – Total Cell Counting
Parameter Range DEFAULT Description
Min.search size 1-89 7 Set the minimum cell size to be counted.
The setting increment is 1μm.
Max.search size 2-90 24 Set the maximum cell size to be counted.
The setting increment is 1μm.
Cell detection
sensitivity 1-10 5
Refers to the sensitivity of object separation from
the background. A higher Cell detection sensitivity
value will increase detection of signals from
weakly stained cells or smaller objects, but can
also increase false positive calls.
Noise reduction 0-9 5
Higher value setting will not detect faint signals
and weakly stained objects. Lower value setting
will increase sensitivity of objects and detect faint
signals.
Dilution factor 1-100 1 The default value for the dilution factor is 1.
Options Description
Slide setting Select slide type, 1 or 2 or 3 or 8 channels
Counting
chamber area
Current : Counts the chamber that is being viewed in live view of the count screen
All : Counts all chambers
Chamber designation : Counts selected chamber, one or more chambers
Autofocused
counting
ON : Finds focus for every field of view during image capture
※Recommended to keep “ON”
Autofocus upon
slide insertion ON : Finds focus automatically when the slide is inserted
Parameter Range DEFAULT Description
Min.search size 1-89 7 Set the minimum cell size to be counted.
The setting increment is 1μm.
Max.search size 2-90 24 Set the maximum cell size to be counted.
The setting increment is 1μm.
Cell detection
sensitivity 1-10 5
Refers to the sensitivity of object separation from
the background. A higher Cell detection sensitivity
value will increase detection of signals from
weakly stained cells or smaller objects, but can
also increase false positive calls.
Live cell
sensitivity 1-10 5
A higher Live cell sensitivity will decrease the
intensity cutoff value and increase the number of
live cells detected.
Noise reduction 0-9 5
Higher value setting will not detect faint signals
and weakly stained objects. Lower value setting
will increase sensitivity of objects and detect faint
signals.
Dilution factor 1-100 2 The default value for the dilution factor is 2.
Setting : BrightField – Viability Cell Counting
Options Description
Slide setting Select slide type, 1 or 2 or 3 or 8 channels
Counting
chamber area
Current : Counts the chamber that is being viewed in live view of the count screen
All : Counts all chambers
Chamber designation : Counts selected chamber, one or more chambers
Staining options
with Trypan blue : This option is for using 0.4% Trypan blue or Erythrosin B
provided by LogosBiosystems.
with Custom staining : This option is for using staining dyes, provided by other
manufacturers. The background calibration must be performed.
Autofocused
counting
ON : Finds focus for every field of view during image capture
※Recommended to keep “ON”
Autofocus upon
slide insertion ON : Finds focus automatically when the slide is inserted
Parameter Range DEFAULT Description
GF exposure
level 0.1-10 5 Adjust exposure level of GF and RF.
Increase exposure if the preview image is dim and
only a few cells are visible. Lower exposure if the
preview image is too bright and background noise
is high. Determine optimal exposure values
empirically.
RF exposure
level 0.1-10 5
Min.cell size 1-89 3 Set the minimum cell size to be counted.
The setting increment is 1μm.
Max.cell size 2-90 70 Set the maximum cell size to be counted.
The setting increment is 1μm.
GF threshold
level 1-10 5 Green and red Fluorescence Threshold will
determine the level of threshold during the image
processing.
Increased threshold will detect less cells by
subtracting the background more stringently.
Decreased threshold can detect more cells, but
will increase the noise signal.
RF threshold
level 1-10 5
Dilution factor 1-10 1.11 The default value for the dilution factor is 1.11.
Setting : Fluorescence Counting
Options Description
Slide setting Select slide type, 1 or 2 or 3 or 8 channels
Counting
chamber area
Current : Counts the chamber that is being viewed in live view of the count screen
All : Counts all chambers
Chamber designation : Counts selected chamber, one or more chambers
when Combine results of selected chamber is ON (3 channel slide only)
: Counting chamber area is automatically set to [all]
: The data in triplication will be generated in PDF and CSV file format and the
data from each 3 chambers will also be created separately
Autofocused
counting
ON : Finds focus for every field of view during image capture
※Recommended to keep “ON”
Autofocus upon
slide insertion ON : Finds focus automatically when the slide is inserted
Logos Biosystems, Inc.
FL 3, 28 Simindaero 327 beon-gil, Dongan-gu, Anyang-si,
Gyeonggi-do, 14055 South Korea
T.+8231-360-4273 I F.+8231-360-4277 I [email protected]
LUNATM
1-Channel Slide LUNATM
8-Channel Slide LUNATM
3-Channel Slide LUNATM Cell Counting Slide
PhotonSlidesTM
Compatible Slides
Sample throughput 1 Sample Up to 8 Samples Up to 3 Samples Up to 2 Samples
Sample Loading Vol. 50 µl 10 µl / chamber 10 µl / chamber 10 µl / chamber
Max. analysis vol. 5.1 µl 0.5 µl / chamber 1.3 µl / chamber 1.3 µl / chamber
Max. fields per ch. 47 fields 5 fields 12 fields 12 fields
Expected CV 1.5 % 5 % 3 % 3 %
Selection of Counting Slide

Other logos biosystems Laboratory Equipment manuals

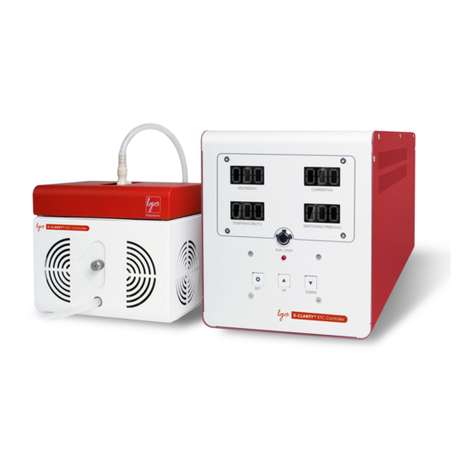
logos biosystems CELENA X User manual

logos biosystems

logos biosystems CELENA X User manual

logos biosystems QUANTOM User manual

logos biosystems

logos biosystems QUANTOM User manual

logos biosystems LUNA-II User manual

logos biosystems

logos biosystems LUNA-II User manual

logos biosystems Luna II User manual

logos biosystems

logos biosystems Luna II User manual

logos biosystems LUNA FX7 Series User manual

logos biosystems

logos biosystems LUNA FX7 Series User manual

logos biosystems X-CLARITY TISSUE CLEARING SYSTEM User manual

logos biosystems

logos biosystems X-CLARITY TISSUE CLEARING SYSTEM User manual

logos biosystems Luna-II yf User manual

logos biosystems

logos biosystems Luna-II yf User manual

Popular Laboratory Equipment manuals by other brands

Struers Accutom-100 instruction manual

Struers

Struers Accutom-100 instruction manual

Analytik Jena InnuPure C96 user manual

Analytik Jena

Analytik Jena InnuPure C96 user manual

Qsonica Q55 Operation manual

Qsonica

Qsonica Q55 Operation manual

Laarmann LM2000 user manual

Laarmann

Laarmann LM2000 user manual

Hanson Petit Terraillon manual

Hanson

Hanson Petit Terraillon manual

QUANTIFOIL Instruments BioShake iQ quick start guide

QUANTIFOIL Instruments

QUANTIFOIL Instruments BioShake iQ quick start guide

Eurofins RapidScan ST5-W quick guide

Eurofins

Eurofins RapidScan ST5-W quick guide

M&C CSS Series instruction manual

M&C

M&C CSS Series instruction manual

Xylem TitroLine 7800 operating manual

Xylem

Xylem TitroLine 7800 operating manual

OHAUS Frontier FC5714 instruction manual

OHAUS

OHAUS Frontier FC5714 instruction manual

IKA RET control-visc operating instructions

IKA

IKA RET control-visc operating instructions

Connections 1500 Series manual

Connections

Connections 1500 Series manual

NEW BRUNSWICK SCIENTIFIC innova 4900 Guide to operations

NEW BRUNSWICK SCIENTIFIC

NEW BRUNSWICK SCIENTIFIC innova 4900 Guide to operations

Sutter Instrument MPC-78 Assembly guide

Sutter Instrument

Sutter Instrument MPC-78 Assembly guide

TORREY PINES SCIENTIFIC EchoTherm IC20 operating manual

TORREY PINES SCIENTIFIC

TORREY PINES SCIENTIFIC EchoTherm IC20 operating manual

Teledyne Everywhereyoulook IsoPlane 320A manual

Teledyne

Teledyne Everywhereyoulook IsoPlane 320A manual

Hitachi S-3400N quick start guide

Hitachi

Hitachi S-3400N quick start guide

Agilent Technologies G1367A Reference manual

Agilent Technologies

Agilent Technologies G1367A Reference manual

manuals.online logo
manuals.online logoBrands
  • About & Mission
  • Contact us
  • Privacy Policy
  • Terms and Conditions

Copyright 2025 Manuals.Online. All Rights Reserved.