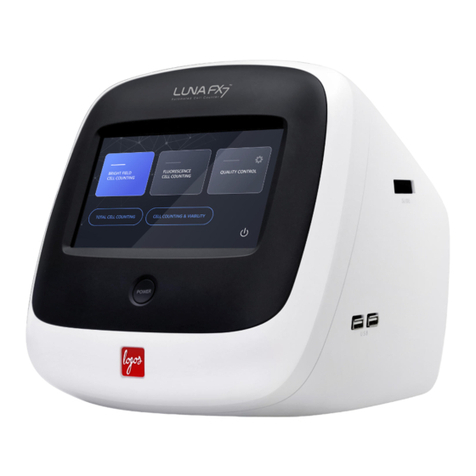
logos biosystems LUNA FX7 Series User manual

1
DISCLAIMER
The contents of this document are subject to change without notice.
The LUNA-FX7™ Automated Cell Counter is an electrical laboratory instrument for scientific research use only.
It is not a medical, therapeutic, or in vitro diagnostics device.
Do not disassemble the device on any occasion as this will invalidate your warranty.
TRADEMARKS
The trademarks used in this document are the property of Logos Biosystems, Inc.
© 2020 Logos Biosystems, Inc. All rights reserved.

2
Table of Contents
SAFETY PRECAUTIONS·········································································································· 5
Instrument Safety··················································································································5
Operating conditions ···········································································································5
Instrument disposal & disassembly·························································································5
Personal Safety ····················································································································5
Waste disposal ··················································································································5
1. PRODUCT INTRODUCTION································································································ 6
Product Contents ··················································································································6
Product Description ···············································································································7
LUNA-FX7™ Automated Cell Counter·····················································································7
LUNA-FX7™ Cell Counting Slides ·························································································8
2. GETTING STARTED·············································································································· 8
Installation ···························································································································8
LUNA-FX7™ startup ···········································································································9
Screen Saver ····················································································································9
3. COUNTING CELLS·············································································································· 10
Sample Preparation ············································································································· 10
Sample staining ···············································································································10
Counting with the LUNA-FX7™ ······························································································ 10
Slide insertion/removal ······································································································10
Viewing images················································································································ 11
Cell counting ··················································································································· 12
Results ····························································································································· 12
Histograms ·····················································································································13
Dilution calculator·············································································································14
Save······························································································································14
Print ······························································································································15
Quick save······················································································································15
4. REVIEW·································································································································15

3
Reviewing Data··················································································································· 15
Review images ················································································································15
Reanalyze ······················································································································16
Previous counts ···············································································································16
5. PROTOCOLS ······················································································································· 17
Protocol Selection ··············································································································· 17
Protocol Parameters ············································································································ 18
Brightfield cell counting parameters······················································································18
Fluorescence cell counting parameters ·················································································20
6. BIOPROCESS FEATURE··································································································· 21
Bioprocess Feature·············································································································· 21
Creating a bioprocess protocol····························································································21
Record bioprocess data·····································································································21
Review/Export bioprocess data ···························································································22
Graph ····························································································································22
7. QUALITY CONTROL··········································································································· 23
Quality control mode ············································································································ 23
Validation slide registration ·································································································23
Performing Quality Control ·································································································26
Review···························································································································28
8. SETTINGS····························································································································· 29
LUNA-FX7™ Settings ·········································································································· 29
Screen settings················································································································29
Cell counting ··················································································································· 29
Save & Review ················································································································30
Network ·························································································································31
Server setting··················································································································32
Date / Time ·····················································································································32
Calibration ······················································································································33
Software·························································································································34
4
9. DATA TRANSFER VIA NETWORK···················································································· 35
FTP freeware ····················································································································· 35
FileZilla FTP Client ··········································································································· 35
10. MAINTENANCE AND TROUBLESHOOTING································································ 36
Maintenance ······················································································································ 36
Powering on/off················································································································36
Cleaning·························································································································36
Troubleshooting ·················································································································· 36
Inaccurate cell count ·········································································································36
Data transfer and saving···································································································· 37
Software update errors ······································································································ 37
11. PRODUCT SPECIFICATIONS·························································································· 37
LUNA-FX7™ Automated Cell Counter······················································································ 37
LUNA™ Slides···················································································································· 38
12. ORDERING INFORMATION····························································································· 38
13. PURCHASER NOTIFICATION························································································· 40
Limited Use Label License····································································································· 40
Instrument Warranty············································································································· 40

5
Safety Precautions
Instrument Safety
General safety
Operate the instrument in the conditions described in the Operating Conditions.
Install the instrument on a level and sturdy surface. Avoid vibrations from other
devices.
Do not touch components with wet hands.
Use components provided or authorized by Logos Biosystems. If the proper
combination of components is not used, product safety cannot be guaranteed.
Use only the power cord and AC adapter provided by Logos Biosystems. If the
proper power cord and AC adapter are not used, electrical safety of the product
cannot be guaranteed.
Ensure that the input voltage is compatible with the power supply voltage of the
product.
Connect the grounding terminal of the instrument and electrical outlet properly. If
the instrument is not grounded, electrical safety of the product cannot be
guaranteed.
Turn on the instrument only after connecting the power cord and AC adapter to both
the power source and the instrument. Turn off the instrument before disconnecting
the power cord and/or moving the instrument.
Disconnect the power cord in the case of abnormalities.
Do not hold the slide slot while it is in motion.
Protect USB drives from being infected with viruses and malware.
Operating conditions
Operating Power
100 - 240 VAC, 1.5 A
Frequency
50/60 Hz
Electrical Input
12 VDC, 5 A
Installation Site
Indoor use only
Operating Temperature
10 - 35°C
Maximum Relative Humidity
10 - 80%
Altitude
≤ 2,000 m
Instrument disposal
Follow the rules and regulations of your local government.
Instrument disassembly
Do not disassemble the instrument in any event as this will invalidate your warranty.
If the instrument is damaged or malfunctioning, contact your local distributor or
Logos Biosystems.
Personal Safety
Safety guidelines
Read all user manuals thoroughly before using the instrument.
Keep all user manuals in a safe and accessible place for future reference.
Read all safety data sheets before storing, handling, or working with any reagents.
Wear appropriatepersonal protectiveequipment (PPE) when handling reagents and
cell samples to avoid exposure.
When using toxic agents, radioactive materials, or pathogenic microorganisms
belonging to WHO Risk Groups 2-4, follow national laws and regulations for
biosafety level requirements.

6
Waste disposal
Do not reuse disposable slides. Used slides must be disposed as biohazardous
waste according to the rules and regulations of your local government.
1. Product Introduction
Product Contents
Product contents
The LUNA-FX7™Automated Cell Counter is shipped with the following
components.
Component
Quantity
LUNA-FX7™ Automated Cell counter
1
Power Cord with AC Adapter
1
Cell Counting Slides Sample
2 ea/4 slide types
Trypan Blue Stain, 0.4 %
2 x 1 mL
Acridine Orange/Propidium Iodide Stain
2 x 0.5 mL
LUNA-FX™ Calibration Beads Kit
1
WiFi Dongle
1
USB Drive
1
Quick Start Guide
1
Inspect the product package upon delivery to ensure that all components have been
included. Contact your local distributor or Logos Biosystems if anything is missing.
Damage that may occur during shipping and handling is not covered by warranty
and must be filed with the carrier.

7
Product Description
LUNA-FX7™Automated Cell
Counter
The LUNA-FX7™ is an automated, image-based cell counting device that features
an accurate counting algorithm and increased counting volume and represents a
fully automated solution for cell counting and viability analysis. The LUNA-FX7™
also provides flexible counting slide options from a single chamber slide to a higher
throughput, 8-chamber slide.
Front view Right side Back
Touchscreen
The LUNA-FX7™ has a 7-inch capacitive touchscreen for navigating the user
interface.
Slide port
The automated slide port enables one-time slide insertion.
Power button
The power button is used for the main power control.
USB ports
USB ports allow the user to transfer or print cell count data. Data may be transferred
via USB drive or the provided WiFi dongle. Counting data may be printed using the
LUNA-FX7™Printer (P17001).
Ethernet port
The Ethernet port allows the instrument to be connected to a computer network.
The CountWire™software package enables automated data synchronization and
the ability to remotely operate the LUNA-FX7™.
Power inlet
Connect the power inlet of the instrument to an electrical outlet with the suppliedAC
adapter and power cord.
Touchscreen
Slide port
USB ports
Power inlet
Ethernet port
Power Button

8
LUNA-FX7™ Cell Counting
Slides
The LUNA-FX7™ gives you the flexibility to use various counting slide formats. The
LUNA-FX7™ is compatible with the LUNA™ 1-, 3- , and 8-Channel Slide formats in
addition to the standard LUNA™ Cell Counting Slides and PhotonSlides™. With
single-time slide insertion, the LUNA-FX7™is able to count all slide chambers at
one time without needing to remove and reinsert a slide. The increased counting
volume yields more accurate and consistent results.
NEW
NEW
NEW
Compatible
Slides
LUNA™
1-Channel
Slides
LUNA™ Cell
Counting Slides
/ PhotonSlide™
LUNA™
3-Channel
Slides
LUNA™
8-Channel
Slides
Sample
Throughput
1 sample
Up to
2 samples
Up to
3 samples
Up to
8 samples
Sample Loading
Volume
50 μL
10 μL/chamber
10 μL/chamber
10 μL/chamber
Analysis
Volume
5.1 μL
1.3 μL/chamber
1.3 μL/chamber
0.5 μL/chamber
2. Getting Started
Installation
Installation
Place the LUNA-FX7™ on a clean, level and sturdy surface.
oAvoid vibrations from other devices.
oDo not install the instrument in a location that will expose the device to
intense ultraviolet light.
oAllow at least 5 cm (2 inches) free space at the back of the instrument to
prevent overheating of the instrument.
oAllow at least 10 cm (4 inches) free space at the right of the instrument to
insert/eject a cell counting slide easily.
Connect the instrument to electrical outlets using the supplied power cord and AC
adapter.
oMake sure the power cords are appropriate for your region.
oAlways use power cord and AC adapter provided or approved by Logos
Biosystems. If appropriate cord is not used, the electrical safety of the
instrument cannot be guaranteed.
Connect the supplied WiFi dongle to a USB port.
(Optional) Connect a LUNA-FX™ Thermal Printer (P17001) to a USB port.

9
Setup
LUNA-FX7™ startup
Push the power button located below the touchscreen to turn on the instrument.
After a short beep, the company logo will appear, followed by the home screen.
The home screen has three menus:
Brightfield Cell Counting
- Select Total cell counting mode or Cell counting & viability mode.
- Total cell counting mode is used to enumerate total cell numbers without staining
cells.
- Cell counting & viability mode is used to count cells and calculate the viability of
cells stained with the Trypan Blue Stain, 0.4% (T13001) or Erythrosin B Stain
(L13002).
Fluorescence Cell Counting
- Select Cell lines & primary cells mode.
- Cell lines & Primary cells mode is used to count cells and calculate the viability of
cells stained with fluorescence dyes, Acridine Orange/Propidium Iodide (AO/PI)
(F23001).
Cell lines & Primary cell mode may also be used to count cells expressing GFP
and/or RFP.
Quality Control
- Quality Control mode is only functional upon registration of Logos Biosystems
brightfield or fluorescent validation slides.
- The Quality Control menu is used to monitor the accuracy and variability of the
instrument.
- The validation slides contain pre-spotted patterns or pre-fixed beads with a known
concentration and viability.
- Utilizing the Quality Control feature can provide daily, weekly, or monthly validation
results that may be graphically displayed, and/or downloaded.
Screen Saver
The screen backlight will automatically turn off after 10 minutes of inactivity.
Touching the screen will reactivate the instrument.

10
3. Counting Cells
Sample Preparation
Sample staining
Brightfield cell counting
For Total and viability cell counting, prepare a cell suspension according to standard
procedures. Mix the sample, 1:1, with Trypan Blue Stain, 0.4% (T13001) or
Erythrosin B (L13002). Mix gently, but thoroughly to ensure a homogenous
suspension.
For total cell counting, load the sample directly onto the slide without staining the
sample.
Fluorescent cell counting
Prepare a cell suspension according to standard procedures. Mix the sample, 9:1
(cells: stain), with Acridine Orange/Propidium Iodide Cell Viability Kit (F23001). Mix
gently, but thoroughly to ensure a homogenous suspension.
Sample Loading
Load the appropriate volume for each slide chamber according to the table below:
LUNA™
1-Channel Slides
LUNA™ Cell
Counting Slides &
PhotonSlide™
LUNA™
3-Channel Slides
LUNA™
8-Channel Slides**
50 µL
10 µL
10 µL
10 µL
** The LUNA™ 8-Channel Slides are multi-channel pipette compatible.
For easy and accurate loading, hold the slides by their edges and pipette at a 45-
60°angle to the slide. Take care not to overload or under-load the chamber.
Counting with the LUNA-FX7™
Slide insertion/removal
Select appropriate counting mode and navigate to appropriate counting screen.
Press EJECT.
When inserting a slide into the instrument, ensure that the slide is facing up so that
the arrow is showing on the right side and/or so that the lowest chamber designation
is to the left.
Press INSERT. The slide holder will automatically move into position.
Insert from this side.

11
To remove the slide, press EJECT. The slide holder will automatically extend out of
the instrument and the slide may be removed.
Viewing images
By default, upon slide insertion, the viewing light will automatically turn on and the
LUNA-FX7™will perform an initial autofocus. Whether or not autofocus is
performed upon slide insertion may be changed within SETTINGS (Section 8).
Light
By pressing the lamp icon in the bottom left corner of the screen, a light control
panel will appear. The intensity can be adjusted as needed. When in the
fluorescence counting screen, the filters also may be switched between the BF,
Green, and Red channels. Photobleaching will occur with procolonged exposure,
so work appropriately.
Important ! Adjusting light intensity levels in the COUNT screen will only
be applied to the live view mode. Exposure levels for imaging may only be
adjusted within a protocol (Section 5).
Focusing
To bring cells into focus, press Autofocus. Focus may also be adjusted manually
using the up & down arrows in the focus control bar.
Zoom
Zoom in or out by spreading or pinching two fingers. The outer box in the upper, left
hand corner of the viewing window represents the current field of view. The inner
box represents the view on the screen. Zooming in or out will cause the inner box
size to decrease or increase.
Current FOV
Filter Switch and Light
Intensity
Slide Chamber
Selection
Field of View
Toggle
Manual focus
Slide Port Control
Autofocus

12
Navigation
To view different slide chambers within a slide, select the chamber to be viewed by
pressing a chamber on the slide image just under the COUNT button. To see
different fields of view within a chamber, use the arrows located above the manual
focus adjustment.
Cell counting
Prior to counting, confirm that the image is in focus for the first field of view. When
the first field is in focus, press the COUNT button.
The LUNA-FX7™will count all slide chambers as designated in SETTINGS.
Counting time will vary depending on slide type, counting mode and the protocol
used.
Results
After counting is complete, the data and images will appear in the RESULTS
window.
The counting results will be shown to the left of the screen.
Press the left or right arrows under Chamber to view the results and images for
each counted chamber.

13
Press TAG to identify live (green circles) or dead (red circles) cells.
After fluorescence cell counting, BF, GF, and RF images can be viewed separately
or in overlay.
Histograms
Press HISTOGRAM & GATING to open the histogram window.
Cell concentration or number can be graphed according to cell size. Cell size gating
parameters may be changed by pressing the slider rectangles. An active slider will
be highlighted in blue. Move the sliders by dragging or pressing the arrows.
Press Apply to set cell size gating parameters. Counting results will adjust
accordingly.
To toggle between cell concentration, cell cluster, and cell number press the Y-Axis
title (e.g. Cell Number).

14
Dilution calculator
Press DILUTION to open the Dilution Calculator.
Enter the values for the desired concentration and final volume. Press CALCULATE
and dilution instruction will appear in the grey message box.
Save
Press SAVE & PRINT to open the save window.
Select the desired saving options:
Save Options
File Type
Description
Analyzed image
TIF
Tagged images of cells
Raw image
TIF
Untagged images of cells
Report
PDF
Report with data, images, and histograms
Bioprocess
Onboard
graph, .CSV
Growth curve displayed onboard
Growth rate, doubling time
Press Path to select where files are to be stored.
Using the onscreen keyboard, provide the name and append the date and time by
pressing the +Date/Time button.
Press Save. A folder name will be created with the name provided. The folder will
contain subfolders matching each of the counted chambers, e.g. ‘Chamber A’, or
‘Chamber 1’.

15
Print
To print a text summary of the counting results, connect a LUNA-FX7™ Thermal
Printer (P17001) to the instrument and press Print.
Quick save
Press QUICK SAVE to save results with a default name and suffix designation. The
appended suffix may be a sequential number or the date/time. Default Quick save
preferences may be pre-set in SETTINGS: SAVE & REVIEW.
4. Review
Reviewing Data
Review images
Press REVIEW.
Navigate and open a folder from the internal or a USB drive.Select a subfolder, e.g.,
Ch A, Ch B. Cell counting results will appear.
Press Images > to see images. Zoom in or out by pinching in or out with two fingers.

16
Scroll through the captured images using the arrows.
Press the PROTOCOL tab to check the protocol used.
To transfer files to a USB drive or delete files from the internal drive, press < Results
to return to the main Results window. Use the command buttons at the bottom of
the screen: COPY, PASTE, or DELETE.
Reanalyze
Raw images may be reanalyzed using a different protocol.
Load or create the desired protocol.
Important ! During reanalysis, changing exposure levels in the protocol
will have no effect on the results of the reanalyzed counting data.
Press REVIEW and select a folder from the internal or USB drive.
Select the subfolder/chamber to be reanalyzed.
Press REANALYZE.
Previous counts
Press PREVIOUS COUNT to see a list of previous counts.
A summarized version of each count that includes Total cell concentration, viability,
average size, and protocol is automatically saved to the internal drive.
Insert a USB drive and press EXPORT TO USB to save as a .CSV file.

17
Press ERASE ALL to delete all stored counts. This will not delete reports or images
of the corresponding count, if they were saved to the internal drive.
5. Protocols
Protocol Selection
Default Protocol
Customized protocols for specific cell types may be created.
Each counting mode comes with a pre-set Default counting protocol. These
protocols cannot be edited. The default protocols, by design, will provide optimal
results for most cell types, but protocols for specific cell types or applications may
need to be optimized.
Creating protocols
To create a new protocol, select the DEFAULT protocol and press SAVE AS.
Rename the protocol and press Save. The newly created protocol will appear in the
list of protocols.
Editing Protocols
Select a protocol that is not the Default protocol.
Press EDIT. This will activate the arrows for each parameter, turning them black.
Press the arrows to adjust the values of each parameter. Press SAVE AS to change
the protocol name. Press Load to save the edited protocol under the selected name.

18
Load protocol
Select the desired protocol and press LOAD. The current active protocol name can
be seen in the upper right hand corner of the screen.
Protocol Parameters
Brightfield cell counting
parameters
Parameters for [Brightfield cell counting-Total cell counting]
Parameter
Range
DEFAULT*
Min. search size (μm)
1-89
7
Max. search size (μm)
2- 90
24
Cell detection sensitivity
1-10
5
Noise reduction
0-9
5
Dilution factor
1-100
1
Parameters for [Brightfield cell counting-Cell counting & Viability]

19
Parameter
Range
DEFAULT*
Min. search size (μm)
1-89
7
Max. search size (μm)
2- 90
24
Cell detection sensitivity
1-10
5
Live cell sensitivity
1-10
5
Noise reduction
0-9
5
Dilution factor
1-100
2
Min./ Max. search Size
Search size refers to the approximate cell size that the algorithm recognizes as
potential cell objects. By adjusting Min. and Max. search Size, objects sized within
the setting value will be listed as a potential cell candidate.
Clustered objects larger than the Max. search size will not be excluded from the
search. Rather, the algorithm will utilize morphological information to identify
individual objects within the cluster that are within the search size parameters. For
the most accurate results, it is recommended to set the Min/Max search size window
as narrow as possible to encompass the expected cell size range.
Cell detection sensitivity
Cell detection sensitivity refers to the sensitivity of object separation from the
background. A higher Cell detection sensitivity value will increase detection of
signals from weakly stained cells or smaller objects, but can also increase false
positive calls.
Live cell sensitivity
Live cells with intact cell membranes exclude trypan blue and erythrosin B. The dyes
stain the cytoplasm of dead cells with compromised membranes.As a result, object
intensity of unstained live cells is brighter than the stained dead cells. A higher Live
cell sensitivity will decrease the intensity cutoff value and increase the number of
live cells detected.
Live Cell Sensitivity is not available in the protocol of the Total cell counting mode.
Noise reduction
This option allows for the adjustment of background noise during counting. With
more noise reduction, the instrument will not detect weakly stained objects. With
lower noise reduction, the instrument can detect objects with fainter signals.
Dilution factor
The dilution factor is used to calculate cell concentrations accurately. The default
dilution factor is preset as 1 for Total cell counting and as 2 for Total cell & viability
counting (assuming a 1:1 ratio of stain to cell suspension).
This value can be modified according to the dilution of the original sample in
increments of 1 between 1-10; and, increments of 10 between 10 -100. For users
handling highly dense cell cultures. For highly dense cultures, serial dilutions and
several counts with appropriately adjusted dilution factors may be necessary.
Other manuals for LUNA FX7 Series
1
This manual suits for next models
4
Table of contents
Other logos biosystems Laboratory Equipment manuals

logos biosystems
logos biosystems Luna II User manual

logos biosystems
logos biosystems LUNA-II User manual

logos biosystems
logos biosystems Luna-II yf User manual

logos biosystems
logos biosystems X-CLARITY TISSUE CLEARING SYSTEM User manual

logos biosystems
logos biosystems CELENA X User manual

logos biosystems
logos biosystems LUNA-FX7 Basic Installation guide

logos biosystems
logos biosystems QUANTOM User manual