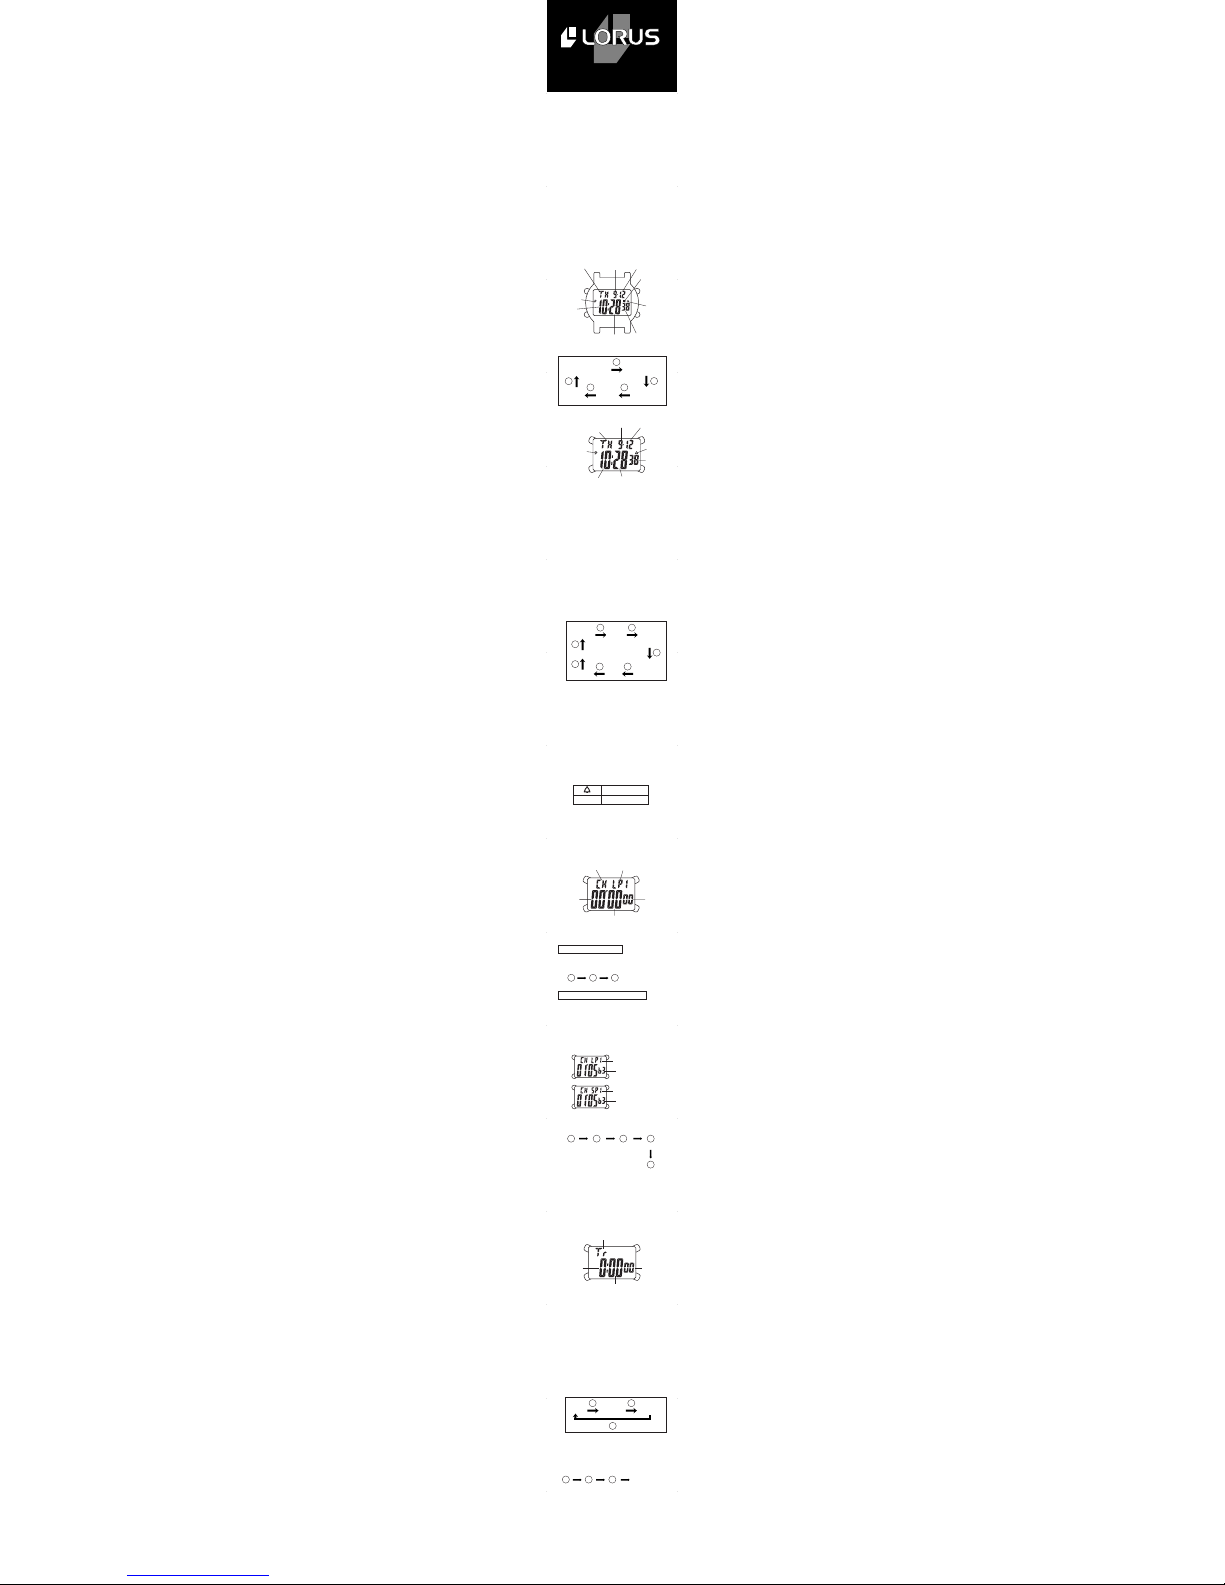
1. Press button B to go to the Dual Time Mode.
Mode indicator “T2” appears.
2. Press button A for 3 to 4 seconds to change the
display to the Dual Time Setting Mode. The
second digits start flashing.
3. Press button C simultaneously with a time signal
to adjust the second digits. The second digits
are reset to “00” and start immediately.
When button C is pressed while the second
digits are between “30” to “59”, one minute is
added at the same time the second digits are
reset to “00”.
4. Press button B to confirm the second setting and
move on to the hour setting.
5. Adjust the hour digits and other items. Press
button C to adjust an item, and press button B to
confirm it’s setting and move on to the next item.
Each press of button C advances the digit by one.
To advance the digits quickly, keep button C pressed.
•The item to be adjusted changes over in the
following order.
A
B
C
Day of
the week
PM mark
(for 12-hour
display only)
Hour
Month
Minute
Date
Dual Time
Mode
indicator
Second
Chime
6. After all the adjustments are completed, press
button A to go back to the Dual Time Mode.
7. Press button B to go back to the Time/Calendar
display.
Choice of 12-Hour/24-Hour indication
Press button C to select the time display format in
either 12-hour indication or in 24-hour indication.
Under the 12-hour indication format, “P” mark
appears in the afternoon. Under the 24-hour
indication format, no mark appears on the display.
Chime setting
The chime can be set to sound on the hour.
Press button D to set the chime. The chime mark
appears on the display.
■HOW TO SET THE ALARM
•Two daily alarm (AL1/AL2) work independently.
Each alarm can be set to the time of Time/
Calendar mode (T1) or Dual Time mode (T2).
1. Press button B to go to the Alarm Mode. Mode
indicator “AL” appears.
2. Press button C to select AL1 or AL2.
3. Press button A for 3 to 4 seconds to change the
display to the Alarm Setting Mode. The hour
digits start flashing.
4. Press button C to adjust the hour digits.
Each press of button C advances the digit by one.
To advance the digits quickly, keep button C pressed.
5. Press button B to confirm the hour digits and
move on to the minute setting.
6. Press button C to adjust the minute digits, and
press button B to confirm the minute setting.
7. Press button C to select T1 or T2, and press
button B to confirm it. The alarm is set to the
time of Time/Calendar mode (T1) or Dual Time
mode (T2) that is selected.
•The item to be adjusted is shown in the following
order with each press of button B.
A
B
C
Time mode
(T1 or T2)
Hour
Alarm Mode
Indicator
(AL1 or AL2)
Alarm
Mark
Minutes
8. After all the adjustments are completed, press
button A to go back to the Alarm Mode.
9. Press button B to go back to the Time/Calendar
Display.
Alarm engagement/disengagement
The alarm is automatically engaged when the
display is changed to the Alarm Setting mode. When
the alarm is engaged, the alarm mark appears on
the Alarm time display and also on the Time/
Calendar (T1) or the Dual Time (T2) display that
the alarm is set. In order to engage or disengage
the alarm, press button D in the Alarm Mode. The
alarm is engaged or disengaged alternatively.
Alarm engaged
Alarm disengaged
How to stop the alarm while sounding
The alarm sounds for 20 seconds at the designated
time. Press any button to stop it manually.
*When the 24-hour Indication format is selected in
Time/Calendar (T1) or the Dual Time (T2) mode,
no “P” mark appears on the Alarm time display.
■HOW TO RESET THE WATCH
Press all buttons simultaneously for 1 second to reset
the watch. After reset, all indicators and digits appear
on the display and then the display will be as follows.
■LUMIBRITE WATCH
(dial, hands, buttons, case, bezel,
strap, etc.)
✼If your watch is a LORUS LUMIBRITE watch, it
has following features.
LORUS LUMIBRITE watches absorb and store light
energy from natural and artificial light sources and
emit light in the dark. They are made of
environmentally friendly material, and therefore, are
harmless to human beings and the environment.
•With a full charge, LORUS LUMIBRITE watches
glow in the dark hours longer than conventional
luminous watches of this type. If exposed to a
light of more than 500 lux (i.e., the brightness
of a typical office) for approximately 10 minutes,
or direct sunlight for 2 minutes, they will glow
for hours.
•Since LORUS LUMIBRITE watches emit the
light they store, the brightness will decrease
gradually over time. The length of time they will
glow may also differ slightly depending on such
factors as the brightness of and distance from
the light source used to charge the watch.
■BATTERY CHANGE
The miniature lithium battery SONY, Maxell or
Panasonic CR2016, which powers your watch,
should last approximately 2 years. However,
because it is inserted at the factory, the actual life
of the battery once in your possession may be less
than 2 years. Be sure to replace the battery to
prevent any possible malfunction as soon as it runs
down. To replace the battery, we recommend taking
the watch to a local watch repair shop.
■ CARE OF YOUR LORUS WATCH
This watch contains precise electronic components.
Never attempt to open the case or remove the back cover.
•BATTERY
CAUTION
Do not expose the old battery to fire
or recharge it. Keep it at a place
beyond the reach of children. If a
child swallows it, consult a doctor
immediately.
•WATER RESISTANT
*If your watch is 200 M/20 BAR, 100 M/10 BAR
or 50 M/5 BAR water resistant, it is so indicated
on the dial/case back.
NO NO NO
YES
YES
YES NO NO
YES YES NO
Condition
of use
Accidental
contact
with water,
such as
splashes
and rain
Swimming
andtaking
a shower
Skin
diving Scuba
diving
Indication
on the dial/
case back
No
Indication
NO NO NO
YES
WATER
RESISTANT
WATER
RESISTANT
(50M/5 BAR)
WATER
RESISTANT
100M/10 BAR
or above
(
(
NO
•Do not operate the buttons when the watch is wet.
•If the watch is exposed to salt water, rinse it in
fresh water and then wipe it thoroughly dry.
•Should you find any water or condensation inside
the watch, immediately have it checked. Water
can corrode electric parts inside the case.
Caution:
Leather straps are not water resistant except so
indicated, even if the watch head is water resistant.
•ALLERGIC REACTION
Because the case and band touch the skin directly,
it is important to clean them regularly. If not, shirt
sleeves may be stained and those with delicate skin
may develop a rash. Please wear the watch with
some play to avoid any possible allergic reaction. If
you develop a rash on your wrist, stop wearing and
consult a physician.
•MAGNETISM/STATIC ELECTRICITY
Your watch will not be affected by magnetism
generated by household electric appliances but keep
your watch away from a place where the watch is
subject to strong electric field and static electricity.
•SHOCKS AND VIBRATIONS
Your watch may be worn for normal sports activities,
However, be careful not to drop it or hit it on hard
surfaces and avoid any severe impacts.
•TEMPERATURE
Your watch works with stable accuracy within a
temperature range between 0˚C and 50 ˚C. Do not
expose the watch to a place exceeding this
temperature range.
•CLEANING
Use only a soft cloth and clean water for cleaning
your watch. Never use chemicals, especially soap.
■SERVICE
When your LORUS watch requires repair or sevicing,
please see the enclosed WARRANTY/GUARANTEE.
Printed in China
■ILLUMINATING LIGHT
To turn the backlight on, press button A in any mode.
The electroluminescent backlight illuminates the
display for 3 seconds and turns off automatically.
•Once the timer time is set, it is retained and can
be used repeatedly unless it is readjusted.
■HOW TO SET THE DUAL TIME
•Time in a different time zone can be displayed.
YearMonth
Second Hour
Day of the
week
Minute
Date
B B
B
BB
B
B
Hour Minute T1/T2
B B
B


 User manual")