Lovato GEX69 C Series User manual

I451 I GB D F E 10 16 4257Z010
G
B
LOVATO ELECTRIC S.P.A.
24020 GORLE (BERGAMO) ITALIA
VIA DON E. MAZZA, 12
TEL. 035 4282111
FAX (Nazionale): 035 4282200
FAX (International): +39 035 4282400
E-mail info@
L
ovato
E
lectric.com
Web www.
L
ovato
E
lectric.com
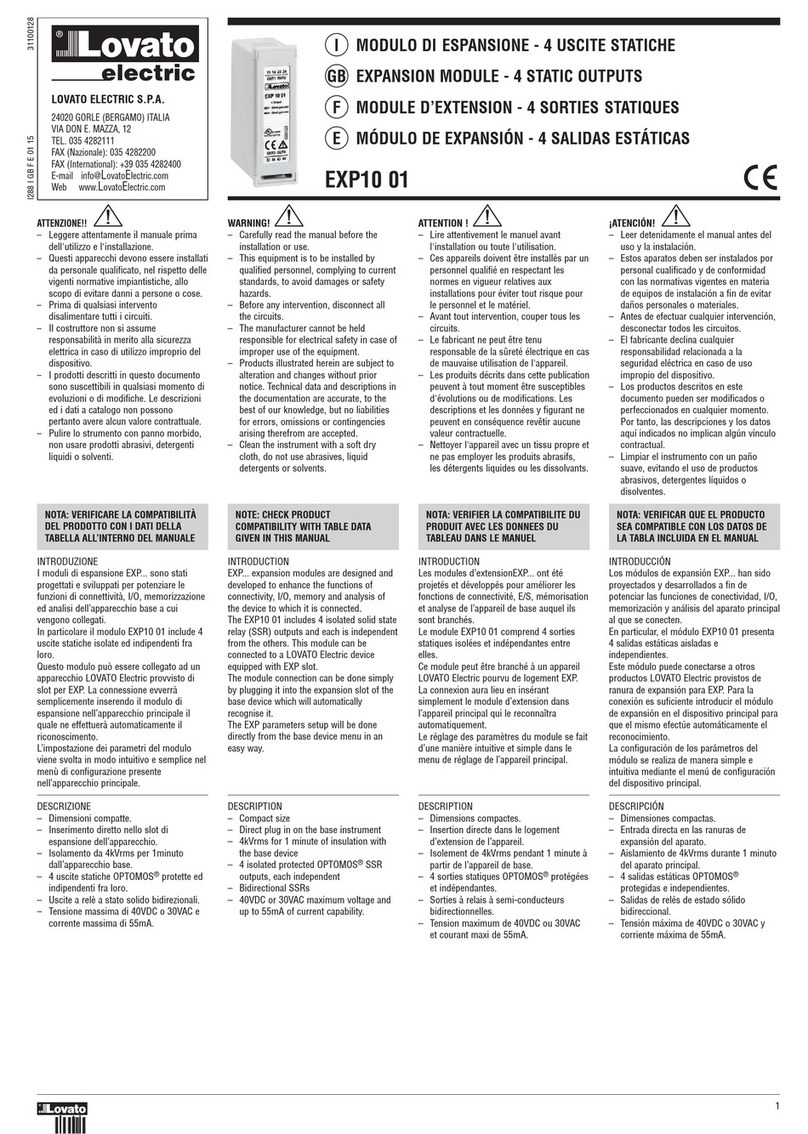
GEX69...C
GB MOTORISED CONTROL UNIT
Safety warnings
In the installation and during the operation of the motorised unit it is necessary to observe the following recommendations:
– Make sure the voltage of the motorised unit coincides with the foreseen working voltage and the motorised unit is suitable for the changeover it is going to drive (See page 9).
– Before installation ensure that both the changeover switch and the motorised unit are in 0 (OFF) position.
– Carefully follow the installation instructions and wiring diagrams.
– The motorised unit must be installed on the changeover switch before being operated. Do not switch the power supply on until the whole wiring process has been completed.
– Do not dismantle, repair or modify this unit, as it may cause malfunction or electrical discharges.
– Do not switch on or connect the motorised control unit if any of the parts are damaged.
– Take into account possible voltage drops in the wiring.
– Lovato Electric is not responsible for inappropriate use of the motorised unit or the misinterpretation of the information contained in this publication.
– The installation of this device in a domestic environment can cause radio-frequency interference.
– If the secondary line of the changeover switch is a generating set, make sure the generating set switches off after changing over the lines (t >1 min).
– Surge protection devices (SPD) type 2/class II, per
IEC/EN 61643-11 standards, must be installed upstream in installations with power supply line instability or disturbances due to on-off switching processes.
VERIFICATION OF THE PARTS CONTAINED IN THE KIT
Before unit assembly check that the following parts are included in the carton box:
–
Motorised unit MU.
–
Plastic bag containing screws for fixing the motorise. unit to the changeover, and electrical connectors.
–
Coupling shaft.
–
Auxiliary manual handle for direct operation.
–
Interface.
PRODUCT GUIDE
CHANGEOVER SWITCH
I - 0 - II
A- MU power supply
B- Input signals
C- Output signals
D- Position leds:
Changeover switch 0 - I - II
E- Padlock slider
F- Error led
WARNING!
– This equipment is to be installed by qualified personnel, complying to current standards, to avoid
damages or safety hazards.
– The manufacturer cannot be held responsible for electrical safety in case of improper use of the equipment.
– Products illustrated herein are subject to alteration and changes without prior notice. Technical data and descriptions
in the documentation are accurate, to the best of our knowledge, but no liabilities for errors, omissions or
contingencies arising there from are accepted.
ATTENZIONE!
– Questi apparecchi devono essere installati da personale qualificato, nel rispetto delle vigenti normative
impiantistiche, allo scopo di evitare danni a persone o cose.
– Il costruttore non si assume responsabilità in merito alla sicurezza elettrica in caso di utilizzo improprio del
dispositivo.
– I prodotti descritti in questo documento sono suscettibili in qualsiasi momento di evoluzioni o di modifiche. Le
descrizioni ed i dati a catalogo non possono pertanto avere alcun valore contrattuale.
ATTENTION !
– Ces appareils doivent être installés par un personnel qualifié, conformément aux normes en vigueur en
matière d'installations, afin d'éviter de causer des dommages à des personnes ou choses.
– Le constructeur n'assume aucune responsabilité quant à la sécurité électrique en cas d'utilisation impropre du
dispositif.
– Les produits décrits dans ce document sont susceptibles d'évoluer ou de subir des modifications à n'importe quel
moment. Les descriptions et caractéristiques techniques du catalogue ne peuvent donc avoir aucune valeur
contractuelle.
UWAGA!
– W celu uniknięcia obrażeń osób lub uszkodzenia mienia tego typu urządzenia muszą być instalowane przez
wykwalifikowany personel, zgodnie z obowiązującymi przepisami.
– Producent nie przyjmuje na siebie odpowiedzialności za bezpieczeństwo elektryczne w przypadku niewłaściwego użytkowania
urządzenia.
– Produkty opisane w niniejszym dokumencie mogą być w każdej chwili udoskonalone lub zmodyfikowane. Opisy oraz dane
katalogowe nie mogą mieć w związku z tym żadnej wartości umownej.
ACHTUNG!
– Zur Vermeidung von Personen- und Sachschäden dürfen diese Geräte nur von qualifiziertem
Fachpersonal und unter Befolgung der einschlägigen Vorschriften installiert werden.
– Bei zweckwidrigem Gebrauch der Vorrichtung übernimmt der Hersteller keine Haftung für die elektrische Sicherheit.
– Die in dieser Broschüre beschriebenen Produkte können jederzeit weiterentwickelt und geändert werden. Die im
Katalog enthaltenen Beschreibungen und Daten sind daher unverbindlich und ohne Gewähr.
ADVERTENCIA
– Este dispositivo debe ser instalado por personal cualificado conforme a la normativa de instalación
vigente a fin de evitar daños personales o materiales.
– El fabricante no se responsabilizará de la seguridad eléctrica en caso de que el dispositivo no se utilice de forma
adecuada.
– Los productos descritos en este documento se pueden actualizar o modificar en cualquier momento.
Por consiguiente, las descripciones y los datos técnicos aquí contenidos no tienen valor contractual.
ПРЕДУПРЕЖДЕНИЕ!
– Во избежание травм или материального ущерба монтаж должен существляться только квалифицированным
персоналом в соответствии с действующими нормативами.
– Производитель не несет ответственность за обеспечение электробезопасности в случае ненадлежащего
использования устройства.
– Изделия, описанные в настоящем документе, в любой момент могут подвергнуться изменениям или
усовершенствованиям. Поэтому каталожные данные и описания не могут рассматриваться как действительные с точки
зрения контрактов
UPOZORNĚNÍ
– Tato zařízení smí instalovat kvalifikovaní pracovníci v souladu s platnými předpisy a normami pro předcházení
úrazů osob či poškození věcí.
– Výrobce nenese odpovědnost za elektrickou bezpečnost v případě nevhodného používání regulátoru.
– Výrobky popsané v tomto dokumentu mohou kdykoli projít úpravami či dalším vývojem. Popisy a údaje uvedené v katalogu
nemají proto žádnou smluvní hodnotu.
DİKKAT!
– Bu aparatlar kişilere veya nesnelere zarar verme ihtimaline karşı yürürlükte olan sistem kurma normlarına göre
kalifiye personel tarafından monte edilmelidirler
– Üretici aparatın hatalı kullanımından kaynaklanan elektriksel güvenliğe ait sorumluluk kabul etmez.
– Bu dokümanda tarif edilen ürünler her an evrimlere veya değişimlere açıktır. Bu sebeple katalogdaki tarif ve değerler herhangi
bir bağlayıcı değeri haiz değildir.
AVERTIZARE!
– Acest echipament va fi instalat de personal calificat, în conformitate cu standardele actuale, pentru a evita
deteriorări sau pericolele.
– Producătorul nu poate fi considerat responsabil pentru siguranţa electrică în caz de utilizare incorectă a echipamentului.
– Produsele ilustrate în prezentul sunt supuse modificărilor şi schimbărilor fără notificare anterioară. Datele tehnice şi descrierile
din documentaţie sunt precise, în măsura cunoştinţelor noastre, dar nu se acceptă nicio răspundere pentru erorile, omiterile
sau evenimentele neprevăzute care apar ca urmare a acestora.
NOTE: Contents of this publication can be modified without prior notice.
1

I451 I GB D F E 10 16 4257Z010
G
B
2
CHANGEOVER SWITCH GE0160E/T4 - GE0200E/T4
CHANGEOVER SWITCH GE0201E/T4 - GE0400E/T4
ADVERTENCIAS:
- Lea atentamente el manual de
instrucciones antes de poner en
servicio la unidad
- Preste atención al estado del
led de error antes de manipular
la unidad
- En caso de fallo de la unidad
lea con atención el apartado
autodiagnóstico del manual de
instrucciones
AVV ERT EN ZE :
- Leggere attentamente il manuale
d'uso prima di attivare l'unità.
- Controllare lo stato del LED
di segnalazione errori prima di
azionare l'unità
- In caso di guasto dell'unità,
leggere attentamente il paragrafo
relativo all'autodiagnosi del
manuale d'uso
M ≤ 20 Nm
230 Vac - 50/60Hz
230 Vdc
MADE IN SPAIN
IEC-60947-3 EN-61000-6-4EN-61000-6-2
F
DBAC
E
AUTO
GND
COM
TO
II
9654 23187
TOI TO
0POWER
SUPPLY
OFF
ADVERTENCIAS:
- Lea atentamente el manual de
instrucciones antes de poner en
servicio la unidad
- Preste atención al estado del
led de error antes de manipular
la unidad
- En caso de fallo de la unidad
lea con atención el apartado
autodiagnóstico del manual de
instrucciones
AVVERTENZE:
- Leggere attentamente il manuale
d'uso prima di attivare l'unità.
- Controllare lo stato del LED
di segnalazione errori prima di
azionare l'unità
- In caso di guasto dell'unità,
leggere attentamente il paragrafo
relativo all'autodiagnosi del
manuale d'uso
M ≤ 20 Nm
230 Vac - 50/60Hz
230 Vdc
MADE IN SPAIN
IEC-60947-3 EN-61000-6-4EN-61000-6-2
E
BADC
F
AUTO
GND
COM
TO
II
9654231 87
TO
I
TO
0
POWER
SUPPLY
0III
OFF
AUXILIARY MANUAL HANDLE
For maintenance or emergency operating.
INSTALLATION / MOUNTING
Ensure that the voltage of the motorised unit coincides with the working voltage to be used and the motorised unit is suitable for the changeover it is going to drive. (See page 7).
Before installation, make sure that both the changeover switch and the motorised control unit are in position 0 (OFF).
The motorised unit must be installed on the changeover switch before being operated per the following steps.
FOR CHANGEOVER SWITCH GE0160E/T4 - GE0200E/T4
1 - Set the changeover switch in its place fix the busbars and unite the common output.

I451 I GB D F E 10 16 4257Z010
G
B
3
2 - Insert the coupling shaft and fix it with an allen key 2,5 DIN 90011. Without removing the front cover, remove the four screws indicated.
3 - Place the interface and screw it on top of the changeover switch M3.5x30 DIN7985 (x4) screws and A.E.T. 4,3 (x4) washers are included.
4 - Screw the motorized unit (with changeover switch and MU in 0 (OFF) position). M5 x 75 DIN 7985 (x 4) screws, A.E.T. 5,3 (x 4) washers, M5 DIN 933 (x4) nuts are included.
5 - Locate the connectors (CN1, CN2, CN3) and make the connections according to the electrical diagram (see annex 3, page 8).
CN1, CN2, CN3

I451 I GB D F E 10 16 4257Z010
G
B
4
FOR CHANGEOVER SWITCH GE0201E/T4...GE0400E/T4
1 - Set the changeover switch in its place and fix the busbars.
2 - Insert the coupling shaft and fix it with an allen key 2,5 DIN 90011.
3 - Place the interface and screw it on top of the changeover switch. M5x15 DIN7985 (x6) screws and A.E.T. 5,3 (x6) washers are included.
4 - Screw the motorized unit (with changeover switch and MU in 0 (OFF) position). M5 x 75 DIN 7985 (x 4) screws, A.E.T. 5,3 (x 4) washers, M5 DIN 933 (x4) nuts are included.

I451 I GB D F E 10 16 4257Z010
G
B
5
5 - Locate the connectors (CN1, CN2, CN3) and make the connections according to the electrical diagram (see annex 3, page 8).
SUPPLY VOLTAGE
The motorised unit requires a supply voltage for its operation (terminals 1-2). For the motorised unit to have an uninterrupted power supply (mains-secondary sources), the client needs to prepare
a circuit similar to the example at page 8.
Surge protection devices (SPD) type 2/class II, per IEC/EN 61643-11 standards, must be installed upstream in installations with power supply line instability or disturbances due to on-off switching
processes.
Terminals
1-2
Maximum wiring capacity 4 mm2(w/o comp. lugs)
2.5 mm2(w. comp. lugs)
Minimum wiring capacity 1.5 mm2
CN1, CN2, CN3
0,22-0,25 Nm
0,22-0,25 Nm
7 mm
7 mm
INPUT SIGNALS
The state of the electrical inputs indicates the position where the motorised control unit is to move to. The inputs can be controlled by a dry contact.
To activate the motorised control unit with a dry (no-volt) contact, close the circuit of terminal +5VDC (terminal 7). If the direct application of a voltage is your choice, the voltage generator should
have identical potential as the input parts, so it will be necessary to connect the “ground“ signal of the generator with GND1 terminal (pin 3).
Changeover state Terminal 5VDC GND 1
Position 0 4 7 3
Position I 5 7 3
Position II 6 7 3
Maximum wiring capacity 4 mm2(w/o comp. lugs)
2.5 mm2(w. comp. lugs)
Minimum wiring capacity 1.5 mm2
OUTPUT SIGNALS
Indicate the operational mode (Automatic or locked) of the changeover switch. Performed through a contact based on a solid state. Outputs can be powered through the MU internal auxiliary
voltage of +5VDC (pin 7) acting as common for the outputs with the corresponding terminal Connecting GND1 and GND2.
The outputs can also be controlled through an external voltage source located between the position outputs and the GND terminal (Vmax=315Vac/dc, Imax=120mA).
Motorized unit state Terminal +5 VDC GND 2
LOCKED mode 9 7 8
AUTOMATIC mode 10 7 8
Maximum wiring capacit 4 mm2(w/o comp. lugs)
2.5 mm2(w. comp. lugs)
Maximum wiring capacity 1.5 mm2
Imax = 120mA x Terminal. External power supply + GND
OPERATIONAL MODES
Automatic
This is the standard status of the unit and it is activated when auxiliary manual handle or padlock are not installed. The unit only obey input signals.
Manual
This mode is activated when inserting and locking the auxiliary manual handle on its housing (handle ring). The unit can only be moved with auxiliary manual handle. Electrical operations are not
allowed.
Locked
This mode is activated when extracting the padlock slider. Manual or electrical operations are not allowed.
AUTOMATIC OPERATION
In this mode the unit only acts according to digital inputs. MU moves according to the first order received either with continuous signal or pulses.

I451 I GB D F E 10 16 4257Z010
G
B
6
PULSE CONTROL
The switching order is made by pulse between common
terminal and terminals 4 (position 0), 5 (position I) and 6
(position II).
Minimum pulse duration: 100ms.
Example of pulse control:
tmin = 100ms.
IN (0)
IN (1)
IN (2)
MAINTAINED CONTACT CONTROL
The switching order is made by maintained contact
between common terminal and terminals 4 (position 0),
5 (position I) and 6 (position II).
Outputs
The outputs indicate the positions of the changeover
switch; see page 5.
Example of maintained contact control:
MANUAL OPERATION
Manual operation is activated automatically when
inserting the auxiliary manual handle on its housing.
Handle insertion must be performed until it reaches its
locked position.
IN (2)
IN (1)
IN (0)
click!
Once handle is locked the unit changes to manual
operation and movements can only be performed with the
auxiliary
manual handle.
Inputs
No automatic operation is allowed in this mode. The unit
will not obey any electrical input signal.
Return to automatic operation
Once manual operation is done the unit returns to
AUTOMATIC mode by releasing and extracting the
auxiliary manual handle.
Handle extraction is performed by pressing the grey push
button located in the handle ring. Once pressed the handle
is released from the ring.
press

I451 I GB D F E 10 16 4257Z010
G
B
LOCKED MODE
In this mode neither manual nor automatic operation can
be performed. This mode can be activated by two ways:
– Extracting the padlock slider
– Inserting the auxiliary manual handle, changing to 0
(OFF) position and activating the handle padlockable
lever.
UNIT LOCKING VIA PADLOCKABLE LEVER ACTIVATION
This padlock can be in any position according to
changeover switch I - 0 - II or switch - disconnector 0 - I.
remove
to lock
UNIT LOCKING BY AUXILIARY MANUAL HANDLE
This padlock is only allowed at 0 (OFF) position, once
locked, the handle cannot be removed from the MU.
The output signal in between terminals 8 and 9 is only activated when the unit is locked via padlockable lever activation.
ERROR LED
MU has an integrated led for failure indication. It can be activated in any of the below situations:
− Failure due to movement under locked position: The unit shaft has moved with the unit in Locked mode.
− Failure due to final position not reached: The ongoing movement has not been finalized.
− Failure due to broken clutch: A shaft movement has been performed with auxiliary manual handle while the state was AUTO. (see annex 6).
NOTE: Once error led is activated, the MU remains locked.
MU unlocking is only possible by switching OFF and ON power supply.
remove
to lock
ANNEXES
Annex 1: changeover switch references
MU range is available for changeover switches in the 160 to 400 Amp range. Power supply
is 230VAC/DC.
Changeover switches I - 0 - II
3 P 3 P + N
A Code Code
160 GE0160E GE0160ET4
200 GE0200E GE0200ET4
200 GE0201E GE0201ET4
250 GE0250E GE0250ET4
315 GE0315E GE0315ET4
400 GE0400E GE0400ET4
Annex 2:
DIMENSIONS (mm)
Motorized unit MU
230VAC/DC
A Code
160-200 GEX690C
250-400 GEX691C
250
76
90
14543
8
103 307
5
68
12,5
15
7

I451 I GB D F E 10 16 4257Z010
G
B
8
Changeover switch
GE0160E/T4 - GE0200E/T4 + GEX690C
247 30
145
250
83
60
94
GE0201E/T4 - GE0400E/T4 + GEX691C
260 30
216
223
121
310
Annex 3:
Wiring diagrams
CHANGEOVER SWITCH I - 0 - II
12 3 75910486
AUT
IN (0) IN (1) IN (2)
230 VAC/DC
+5VDC
GND 1GND2
OUT OUT
AUT
Go
to 0
Go
to 1
Go
to 2
POWER
SUPPLY
12 3 75910486
AUT
IN (0) IN (1) IN (2)
230 VAC/DC
+5VDC
GND 1GND2
OUT OUT
AUT
Go
to 0
Go
to 1
Go
to 2
Imax = 120 mA
Vmax = 315VAC/DC
Imax = 500 mA
Vmax = 40VAC/DC
POWER
SUPPLY
Wiring proposed for external uninterrupted supply K1, K2 = 230VAC = Coil 230VAC
K1, K2 relays electric and mechanically interlocked
A1
A2
A1
A2
K1 K2
21
21
11 21 31 31 21 11
12 24 34 34 24 12
CONNECTOR
mains secondary
sources

I451 I GB D F E 10 16 4257Z010
G
B
9
L1
L2
N1
N2
Mains
Generator
LN
LN
DUAL POWER SUPPLY
SOLUTION 2
L1
L2
N1
N2
Mains
Generator
NL
DUAL POWER SUPPLY
SOLUTION 1
Voltage protection (e.g. LOVATO ELECTRIC PMV...)
DUAL POWER SUPPLY
7654
2 (N)
1 (L)
Common +
Closing pos. II
Closing pos. I
Open all pos. 0
Optional
protection
MOTORISED CONTROL UNIT
GEX69...C
23 2 3
1
Pos. I
1
Pos. II
POSITION FEEDBACK
(External GEX10.... on GE...E)
KG KM
KM
KG
Mains and generator
contactors KG and KM
Generator
Mains
Generator
contact
feedback
Mains
contact
feedback
Battery -
terminal
KG: Generator contactor auxiliary contact
KM: Mains contactor auxiliary contact
L2/N L2/L
OUT/L
L1/L L1/N
OUT/N
Line 1 Line 2
Control with generating set as secondary line
NL
Np Lp
PE
N
PE
14
11
12
RC
LN
L
N
LN
L
R
e
l
a
y
O
u
t
p
u
t
SOLUTION 1
(e.g. LOVATO ELECTRIC SA2 1N A320 / A320R)
SOLUTION 2
(e.g. LOVATO ELECTRIC PMV...)
WIRING DIAGRAM
EXAMPLE OF GEX69...C USED WITH LOVATO ELECTRIC RGK...
SA2 1N A320 SA2 1N A320R

I451 I GB D F E 10 16 4257Z010
G
B
10
Annex 4: electrical features table
Changeover siwtch
I - 0 - II
COperational torque Nm 20
Rated operational voltage V 230VAC/DC
Operating voltage range ΔV da 0.85V a 1.15V
Operating voltage range acc. IEC 60947-6 ΔV da 0.95V a 1.10V
Cable section of voltage supply mm21.5 - 2.5
Cable section area Input Signals
mm20.5 - 1.5
Cable section area Auto-Lock mode Outputs
mm20.5 - 1.5
Inrush Current A 1.1
Use current mA 45
Protective FuseA 1
Operating angle - 70º / 0º / +70º (I - 0 - II)
MU number of operations Cycles 10000
Operation rate (0 - I - II - 0) Cycles/hour 120
Operating temperature -25ºC +55ºC
Transportation and storage temperature -40ºC +70ºC
Weight kg 1.8
Based in our own tests
Fuse reference F0,5AL250 V (Littelfuse)
Pos. Direction Pos. Operating time
0 →I 750 ms
I →0 750 ms
0 →II 750 ms
II →0 750 ms
I →II 1.5 s
II →I 1.5 s
Annex 5: EMC table (electromagnetic compatibility)
Inmunity
Test Standard
According to standard According to standard
Results achieved Values achieved
UNE/EN 61000 IEC 60947-6 in tests
Electrostatic discharges EN 61000-4-2 Special, B Special, A Special, A ±8KV air discharge
±4KV equipment discharge
Electromagnetic H.F. field EN 61000-4-3 Level 3, A Level 3, A Level 3, A 10V/m. from 80MHz to 1 GHz
Fast transients (Burst) EN 61000-4-4 Level 3, B Level 3, A Level 4, A ±4KV power supply,
freq. Rep. 2.5kHz
±2KV signal supply,
freq. Rep 5kHz
Fast transient (surge discharge) EN 61000-4-5 Level 3, B Level 3, A Special, A ±4KV power supply L1-L2
Generator impedance 2Ω
(wave 1.2/50 ms)
Conducted disturbances EN 61000-4-6 Level 3, A Level 3, A Level 3, A 10V supply and signal
Electromagnetic field, industrial frequency EN 61000-4-8 Level 4, A –– Level 4, A Field intensity 30A/m
Voltage dips, interruptions and voltage variations EN 61000-4-11 Criterion B –– Criterion A 30% Un - 1000 ms
Criterion C –– Criterion A 60% Un - 1000 ms
Criterion C –– Criterion B 95% Un - 5000 ms
Emission
Test Standard
According to standard According to standard
Results achieved Values achieved
UNE/EN 61000 IEC 60947-6 in tests
Emission of harmonic current EN 61000-3-2 Level 3 Level 3 Level 3 0.02A total current
(manual mode)
Level 3 Level 3 Level 3 0.04A total current
(automatic mode)
Unwanted voltage EN 55011 Level 3 Level 3 Level 3 Qualified
Radiated emission N 55011 Level 3 Level 3 Level 3 Qualified
NOTE: The installation of this device in a domestic environment can cause radiofrequency interference
EN 61000 is equivalent to IEC 61000 - EN 55011 is equivalent to CISPR11
CRITERION A: Normal service behaviour in determined limits
CRITERION B: Transient alteration of the service. The appliance gets back to the normal performing without the intervention of the operator
CRITERION C: A loss of function is allowed, provided the function is self-recoverable, or can be restored by the operation of the controls or cycling of the power to the EUT by the user in
accordance with the manufacturer’s instructions.
Test level 3: Typical industrial environment, without special installation measures
Test level 4: Severe industrial environment
Special level: Level of higher electromagnetic severe environment

I451 I GB D F E 10 16 4257Z010
G
B
11
Annex 6: diagnostic table
Symptom Possible causa Recommended action
Once MU is installed, in the first automatic operation, MU has not been installed Disassemble the unit. Change the switch or changeover switch to “0” position.
the unit does not change its position and error led turns ON with switch or changeover Reassemble the unit and repeat the manoeuvre
switch in “0” position
The MU does not operate at all and error led remains OFF Supply voltage out of Check with a multimeter the voltage between terminals 1 and 2 of the MU.
specification The voltage must fulfil the range indicated (see annex 5, page 14)
Wiring to input signals is Check wiring continuity from remote control to the MU
damaged
The MU does not operate according to input signals and neither Power fuse blown Check fuse with a multimeter. If fuse is blown replace it with a new one equal to
padlock slider nor auxiliary manual handle have been used. the specified (see annex 5, page 14)
Error led is ON
After inserting and releasing the auxiliary manual handle the MU Auxiliary manual handle Insert the auxiliary manual handle again and check that that during extraction
does not operate according to input signals. clutch has not returned to it is rejected automatically by the clutch. Check with a multimeter that output between
Error led remains OFF top position terminal 7 and 9 is closed (AUTO mode active)
Using auxiliary manual handle the switch or changeover Auxiliary manual handle Insert the auxiliary manual handle again and check that during extraction
switch position has been changed and after releasing clutch has not returned to it is rejected automatically by the clutch. Check with a multimeter that output between
the handle the MU does not operate according to input signals. top position terminal 7 and 9 is closed (AUTO mode active)
Error LED remains OFF
Using auxiliary manual handle the switch or changeover No coherence in between Insert the auxiliary manual handle again and return the switch or changeover switch
switch position has been changed and after releasing MU position and switch or to prior to failure position. After releasing the handle check that AUTO operation has
the handle the MU does not operate according to input signals. changeover switch position been restablished
Error LED is ON that can not be solved by
MU logical control
NOTE: Once error led is activated, the MU remains locked. MU unlocking is only possible by switching OFF and ON power supply
STANDARDS
– IEC/EN 60947-1 and 3. Low voltage devices. General part and switch - disconnectors.
– IEC/EN/UNE 61000-6, Parts 2 and 4. Electromagnetic compatibility in industrial environments, immunity and emission.
– According to European Standard 2006/95/CE for low voltage.
– According to European standard 2004/108/CE of EMC.
This product in under marking
NOTE: The content of this document can be modified without previous warning.

I451 I GB D F E 10 16 4257Z010
I
LOVATO ELECTRIC S.P.A.
24020 GORLE (BERGAMO) ITALIA
VIA DON E. MAZZA, 12
TEL. 035 4282111
FAX (Nazionale): 035 4282200
FAX (International): +39 035 4282400
E-mail info@
L
ovato
E
lectric.com
Web www.
L
ovato
E
lectric.com
12
GEX69...C
I COMANDO MOTORIZZATO
Avvisi di sicurezza
Durante l’installazione e il funzionamento del comando motorizzato è necessario attenersi alle indicazioni di seguito.
– Assicurarsi che la tensione del comando motorizzato corrisponda alla tensione di esercizio prevista e che il comando motorizzato sia idoneo al dispositivo di commutazione che si intende comandare
(vedere pag. 9).
– Prima dell’installazione assicurarsi che sia il commutatore sia il comando motorizzato siano in posizione 0 (OFF).
– Seguire attentamente le istruzioni per l’installazione e fare riferimento agli schemi di connessione.
– Il comando motorizzato deve essere installato sul commutatore prima di essere azionato. Non alimentare prima di aver completato tutte le operazioni di cablaggio.
– Non smontare, riparare o modificare questo modulo poiché potrebbero verificarsi danneggiamenti o scariche elettriche.
– Non alimentare in tensione o collegare il comando motorizzato se un componente qualsiasi risulta danneggiato.
– Tenere conto delle possibili cadute di tensione linea di alimentazione.
– Lovato Electric non è in alcun modo responsabile dell’utilizzo scorretto del comando motorizzato o dell’errata interpretazione delle informazioni riportate nel presente documento.
– L’installazione di questo dispositivo in un ambiente domestico può generare interferenze in radiofrequenza.
– Se la linea secondaria del commutatore è un gruppo elettrogeno assicurarsi che il gruppo elettrogeno venga
disinserito (Off) dopo la commutazione delle linee (t >1 min).
– In impianti con reti elettriche instabile o con disturbi dovuti a processi di interruzione, un dispositivo di protezione contro le sovratensioni (SPD) di tipo 2/classe II deve essere installato secondo le
norme IEC/EN 61643-11.
VERIFICA DEI COMPONENTI INCLUSI NEL KIT
Prima di montare l'unità, assicurarsi che i seguenti componenti siano inclusi nella scatola di cartone:
– Unità motorizzata MU.
– Sacchetto di plastica contenente le viti di fissaggio dell'unità motorizzata al commutatore e connettori elettrici.
– Albero di collegamento.
– Maniglia ausiliaria di azionamento manuale diretto.
– Interfaccia (solo commutazione).
GUIDA DEL PRODOTTO
COMMUTATORE I - 0 - II
A- Alimentazione MU
B- Segnali di ingresso
C- Segnali di uscita
D- LED di posizione: Commutatore 0 - I - II
E- Cursore per lucchetto
F- LED di errore
WARNING!
– This equipment is to be installed by qualified personnel, complying to current standards, to avoid
damages or safety hazards.
– The manufacturer cannot be held responsible for electrical safety in case of improper use of the equipment.
– Products illustrated herein are subject to alteration and changes without prior notice. Technical data and descriptions
in the documentation are accurate, to the best of our knowledge, but no liabilities for errors, omissions or
contingencies arising there from are accepted.
ATTENZIONE!
– Questi apparecchi devono essere installati da personale qualificato, nel rispetto delle vigenti normative
impiantistiche, allo scopo di evitare danni a persone o cose.
– Il costruttore non si assume responsabilità in merito alla sicurezza elettrica in caso di utilizzo improprio del
dispositivo.
– I prodotti descritti in questo documento sono suscettibili in qualsiasi momento di evoluzioni o di modifiche. Le
descrizioni ed i dati a catalogo non possono pertanto avere alcun valore contrattuale.
ATTENTION !
– Ces appareils doivent être installés par un personnel qualifié, conformément aux normes en vigueur en
matière d'installations, afin d'éviter de causer des dommages à des personnes ou choses.
– Le constructeur n'assume aucune responsabilité quant à la sécurité électrique en cas d'utilisation impropre du
dispositif.
– Les produits décrits dans ce document sont susceptibles d'évoluer ou de subir des modifications à n'importe quel
moment. Les descriptions et caractéristiques techniques du catalogue ne peuvent donc avoir aucune valeur
contractuelle.
UWAGA!
– W celu uniknięcia obrażeń osób lub uszkodzenia mienia tego typu urządzenia muszą być instalowane przez
wykwalifikowany personel, zgodnie z obowiązującymi przepisami.
– Producent nie przyjmuje na siebie odpowiedzialności za bezpieczeństwo elektryczne w przypadku niewłaściwego użytkowania
urządzenia.
– Produkty opisane w niniejszym dokumencie mogą być w każdej chwili udoskonalone lub zmodyfikowane. Opisy oraz dane
katalogowe nie mogą mieć w związku z tym żadnej wartości umownej.
ACHTUNG!
– Zur Vermeidung von Personen- und Sachschäden dürfen diese Geräte nur von qualifiziertem
Fachpersonal und unter Befolgung der einschlägigen Vorschriften installiert werden.
– Bei zweckwidrigem Gebrauch der Vorrichtung übernimmt der Hersteller keine Haftung für die elektrische Sicherheit.
– Die in dieser Broschüre beschriebenen Produkte können jederzeit weiterentwickelt und geändert werden. Die im
Katalog enthaltenen Beschreibungen und Daten sind daher unverbindlich und ohne Gewähr.
ADVERTENCIA
– Este dispositivo debe ser instalado por personal cualificado conforme a la normativa de instalación
vigente a fin de evitar daños personales o materiales.
– El fabricante no se responsabilizará de la seguridad eléctrica en caso de que el dispositivo no se utilice de forma
adecuada.
– Los productos descritos en este documento se pueden actualizar o modificar en cualquier momento.
Por consiguiente, las descripciones y los datos técnicos aquí contenidos no tienen valor contractual.
ПРЕДУПРЕЖДЕНИЕ!
– Во избежание травм или материального ущерба монтаж должен существляться только квалифицированным
персоналом в соответствии с действующими нормативами.
– Производитель не несет ответственность за обеспечение электробезопасности в случае ненадлежащего
использования устройства.
– Изделия, описанные в настоящем документе, в любой момент могут подвергнуться изменениям или
усовершенствованиям. Поэтому каталожные данные и описания не могут рассматриваться как действительные с точки
зрения контрактов
UPOZORNĚNÍ
– Tato zařízení smí instalovat kvalifikovaní pracovníci v souladu s platnými předpisy a normami pro předcházení
úrazů osob či poškození věcí.
– Výrobce nenese odpovědnost za elektrickou bezpečnost v případě nevhodného používání regulátoru.
– Výrobky popsané v tomto dokumentu mohou kdykoli projít úpravami či dalším vývojem. Popisy a údaje uvedené v katalogu
nemají proto žádnou smluvní hodnotu.
DİKKAT!
– Bu aparatlar kişilere veya nesnelere zarar verme ihtimaline karşı yürürlükte olan sistem kurma normlarına göre
kalifiye personel tarafından monte edilmelidirler
– Üretici aparatın hatalı kullanımından kaynaklanan elektriksel güvenliğe ait sorumluluk kabul etmez.
– Bu dokümanda tarif edilen ürünler her an evrimlere veya değişimlere açıktır. Bu sebeple katalogdaki tarif ve değerler herhangi
bir bağlayıcı değeri haiz değildir.
AVERTIZARE!
– Acest echipament va fi instalat de personal calificat, în conformitate cu standardele actuale, pentru a evita
deteriorări sau pericolele.
– Producătorul nu poate fi considerat responsabil pentru siguranţa electrică în caz de utilizare incorectă a echipamentului.
– Produsele ilustrate în prezentul sunt supuse modificărilor şi schimbărilor fără notificare anterioară. Datele tehnice şi descrierile
din documentaţie sunt precise, în măsura cunoştinţelor noastre, dar nu se acceptă nicio răspundere pentru erorile, omiterile
sau evenimentele neprevăzute care apar ca urmare a acestora.
NOTA: le informazioni riportate nel presente documento sono soggette a modifiche
senza preavviso.

I451 I GB D F E 10 16 4257Z010
I
13
COMMUTATORE GE0160E/T4 - GE0200E/T4
COMMUTATORE GE0201E/T4 - GE0400E/T4
ADVERTENCIAS:
- Lea atentamente el manual de
instrucciones antes de poner en
servicio la unidad
- Preste atención al estado del
led de error antes de manipular
la unidad
- En caso de fallo de la unidad
lea con atención el apartado
autodiagnóstico del manual de
instrucciones
AVV ERT EN ZE :
- Leggere attentamente il manuale
d'uso prima di attivare l'unità.
- Controllare lo stato del LED
di segnalazione errori prima di
azionare l'unità
- In caso di guasto dell'unità,
leggere attentamente il paragrafo
relativo all'autodiagnosi del
manuale d'uso
M ≤ 20 Nm
230 Vac - 50/60Hz
230 Vdc
MADE IN SPAIN
IEC-60947-3 EN-61000-6-4EN-61000-6-2
F
DBAC
E
AUTO
GND
COM
TO
II
9654 23187
TOI TO
0POWER
SUPPLY
OFF
ADVERTENCIAS:
- Lea atentamente el manual de
instrucciones antes de poner en
servicio la unidad
- Preste atención al estado del
led de error antes de manipular
la unidad
- En caso de fallo de la unidad
lea con atención el apartado
autodiagnóstico del manual de
instrucciones
AVVERTENZE:
- Leggere attentamente il manuale
d'uso prima di attivare l'unità.
- Controllare lo stato del LED
di segnalazione errori prima di
azionare l'unità
- In caso di guasto dell'unità,
leggere attentamente il paragrafo
relativo all'autodiagnosi del
manuale d'uso
M ≤ 20 Nm
230 Vac - 50/60Hz
230 Vdc
MADE IN SPAIN
IEC-60947-3 EN-61000-6-4EN-61000-6-2
E
BADC
F
AUTO
GND
COM
TO
II
9654231 87
TO
I
TO
0
POWER
SUPPLY
0III
OFF
MANIGLIA AUSILIARIA DI AZIONAMENTO MANUALE
Per operazioni di manutenzione o azionamento di emergenza.
INSTALLAZIONE / MONTAGGIO
Assicurarsi che la tensione del comando motorizzato corrisponda alla tensione di esercizio prevista e che il comando motorizzato sia idoneo al dispositivo di commutazione che si intende
comandare (vedere pag. 18).
Prima dell’installazione assicurarsi che sia il commutatore sia il comando motorizzato siano in posizione 0 (OFF).
Il comando motorizzato deve essere installato sul commutatore prima di essere messo in servizio rispettando le indicazioni riportate di seguito.
PER COMMUTATORE GE0160E/T4 - GE0200E/T4
1 - Posizionare il commutatore, fissare le sbarre e unire l'uscita comune.

I451 I GB D F E 10 16 4257Z010
I
14
2 - Inserire l'albero di collegamento e fissarlo con una chiave a brugola da 2,5 DIN 90011. Senza togliere il coperchio anteriore, togliere le quattro viti indicate.
3 - Posizionare l'interfaccia ed avvitarla sul commutatore usando viti M3.5x30 DIN7985 (q.tà 4) e rondelle AET 4,3 (q.tà 4) già incluse nel kit.
4 - Avvitare l'unità motorizzata [con commutatore e unità motore in posizione 0 (OFF)]. Le viti M5 x 75 DIN 7985 (q.tà 4), le rondelle AET 5,3 (q.tà 4) e i dadi M5 DIN 933 (q.tà 4) sono compresi nel
kit.
5 - Montare i connettori (CN1, CN2, CN3) ed effettuare i collegamenti sulla base dello schema elettrico (vedere allegato 3, pagina 19).
CN1, CN2, CN3

I451 I GB D F E 10 16 4257Z010
I
15
PER COMMUTATORE GE0201E/T4...GE0400E/T4
1 - Posizionare il commutatore e fissare le sbarre.
2 - Inserire l'albero di collegamento e fissarlo con una chiave a brugola da 2,5 DIN 90011.
3 - Posizionare l'interfaccia ed avvitarla sul commutatore usando viti M5x15 DIN7985 (q.tà 6) e rondelle AET 5,3 (q.tà 6) già incluse nel kit.
4 - Avvitare l'unità motorizzata [con commutatore e unità motore in posizione 0 (OFF)]. Le viti M5 x 75 DIN 7985 (q.tà 4), le rondelle AET 5,3 (q.tà 4) e i dadi M5 DIN 933 (q.tà 4) sono compresi nel
kit.

I451 I GB D F E 10 16 4257Z010
I
16
5 - Montare i connettori (CN1, CN2, CN3) ed effettuare i collegamenti sulla base dello schema elettrico (vedere allegato 3, pagina 19).
TENSIONE DI ALIMENTAZIONE
Per funzionare il comando motorizzato richiede una tensione di alimentazione (morsetti 1-2). Per far funzionare il comando motorizzato con un gruppo statico di continuità (alimentazione ausiliaria)
è
responsabilità del cliente preparare un circuito analogo a quello dell’esempio a pag. 19.
In impianti con reti elettriche instabile o con disturbi dovuti a processi di interruzione, un dispositivo di protezione contro le sovratensioni (SPD) di tipo 2/classe II deve essere installato secondo le
norme IEC/EN 61643-11.
Morsetti
1-2
Sezione massima conduttori 4 mm2(senza capicorda)
2,5 mm2(con capicorda)
Sezione minima conduttori 1,5 mm2
CN1, CN2, CN3
0,22-0,25 Nm
0,22-0,25 Nm
7 mm
7 mm
SEGNALI DI INGRESSO
Gli ingressi elettrici indicano al comando motorizzato dove posizionarsi. Gli ingressi possono essere comandati con un contatto senza tensione.
Per azionare il comando motorizzato con un contatto senza tensione si deve chiudere il circuito tra il terminale +5VDC (terminale 7). Se viene applicato un contatto tensionato, il livello di tensione
deve essere identico a quello del commutatore, quindi sarà necessario connettere il segnale di massa del comando con il terminale GND1 (pin 3).
Stato di commutazione Morsetto 5VDC GND 1
Posizione 0 4 7 3
Posizione I 5 7 3
Posizione II 6 7 3
Sezione massima conduttori 4 mm2(senza capicorda)
2,5 mm2(con capicorda)
Sezione minima conduttori 1,5 mm2
SEGNALI DI USCITA
Indicano la modalità di funzionamento (automatica o bloccata) del commutatore. Effettuato tramite un contatto a stato solido. Le uscite possono essere alimentate dalla tensione ausiliaria interna di
+5VDC (pin 7) se viene effettuata la connessione tra GND1 e GND2.
Le uscite possono anche essere controllate tramite una fonte di tensione esterna posizionata tra le uscite di posizione e il morsetto di terra (Vmax=315 Vca/cc, Imax=120 mA).
Stato unità motorizzata Morsetto +5 VDC TERRA GND 2
Modalità BLOCCATA 9 7 8
Modalità AUTOMATICA 10 7 8
Capacità massima del cablaggio 4 mm2(senza alette comp.)
2,5 mm2(con alette comp.)
Capacità massima del cablaggio 1,5 mm2
Imax = 120 mA x morsetto. Alimentazione esterna + terra (GND)
MODALITÀ DI FUNZIONAMENTO
Automatica
Questo è lo stato normale dell'unità e viene attivato quando la maniglia ausiliaria di azionamento manuale o il lucchetto non sono presenti. L'unità risponde solamente a segnali di entrata.
Manuale
Questa modalità viene attivata quando si inserisce e si blocca la maniglia ausiliaria di azionamento manuale nel relativo alloggiamento (anello per maniglia). L'unità può essere azionata unicamente
utilizzando la maniglia ausiliaria di azionamento manuale. Gli azionamenti elettrici non sono ammessi.
Bloccata
Questa modalità è attivata quando si estrae il cursore per lucchetto. Gli azionamenti manuali o elettrici non sono ammessi.
FUNZIONAMENTO AUTOMATICO
In questa modalità l'unità funziona solo sulla base di entrate digitali. MU si attiva secondo il primo ordine ricevuto con segnale continuo o a impulsi.

I451 I GB D F E 10 16 4257Z010
I
17
COMANDO MEDIANTE IMPULSO
La sequenza di commutazione si ottiene mediante
impulso tra il morsetto comune e i morsetti 4
(posizione 0), 5 (posizione I) e 6 (posizione II).
Durata minima dell’impulso 100ms.
Esempio di comando mediante impulso:
tmin = 100ms.
IN (0)
IN (1)
IN (2)
COMANDO MEDIANTE CONTATTO STABILE
La sequenza di commutazione si ottiene mediante
contatto stabile tra il morsetto comune e i morsetti 4
(posizione 0), 5 (posizione I) e 6 (posizione II).
Uscite
Le uscite (vedi pag. 16) indicano le posizioni del
sezionatore commuatore.
Esempio di comando mediante contatto stabile:
FUNZIONAMENTO MANUALE
Il funzionamento manuale è attivato automaticamente
quando si inserisce la maniglia ausiliaria di azionamento
manuale all'interno dell'alloggiamento.
La maniglia deve essere inserita fino a quando non
raggiunge la posizione di bloccaggio.
IN (2)
IN (1)
IN (0)
click!
Una volta bloccata la maniglia l'unità passa al
funzionamento manuale ed i movimenti possono essere
effettuati unicamente con la maniglia ausiliaria di
azionamento manuale.
Entrate
In questa modalità non è ammesso il funzionamento
automatico. L'unità non risponderà ad alcun segnale
elettrico di entrata.
Ritorno al funzionamento automatico
Dopo l'azionamento manuale l'unità torna in modalità
AUTOMATICA quando si rilascia e si estrae la maniglia
ausiliaria di azionamento manuale.
La maniglia si estrae premendo il pulsante grigio
sull'anello della maniglia. Una volta premuta, la maniglia
si stacca dall'anello.
press

I451 I GB D F E 10 16 4257Z010
I
18
MODALITÀ BLOCCATA
In questa modalità non sono ammessi né il
funzionamento
manuale né quello automatico. Questa modalità può
essere attivata in due modi:
– Estraendo il cursore con lucchetto
– Inserendo la maniglia ausiliaria per attivazione
manuale, passando alla posizione 0 (OFF) e attivando
la leva della maniglia lucchettabile.
BLOCCAGGIO DELL'UNITÀ TRAMITE ATTIVAZIONE
DELLA LEVA LUCCHETTABILE
Questo lucchetto si può trovare in qualsiasi posizione a
seconda del punto in cui è stato collocato il commutatore
I - 0 - II. rimuovere per
bloccare
BLOCCAGGIO DELL'UNITÀ TRAMITE LA MANIGLIA
AUSILIARIA DI AZIONAMENTO MANUALE
Questo lucchetto può unicamente essere in posizione 0
(OFF), e, una volta bloccata, la maniglia non può essere
tolta dalla MU.
Il segnale di uscita tra i morsetti 8 e 9 viene attivato solo quando il comando motorizzato è bloccato tramite l'utilizzo della leva lucchettabile.
LED DI ERRORE
La MU contiene un LED al suo interno per indicare le eventuali anomalie. Può essere attivato in una qualsiasi delle situazioni seguenti:
− Anomalia dovuta a movimento in posizione bloccata:
L'albero dell'unità si è mosso mentre l'unità si trovava il modalità bloccata.
− Anomalia provocata dal mancato raggiungimento della posizione finale: Il movimento continuo non è stato completato.
− Anomalia dovuta a rottura della frizione: È stato effettuato un movimento dell'albero tramite la maniglia ausiliaria di azionamento manuale mentre lo stato della era AUTO. (vedere allegato 6).
NOTA: Una volta attivato il LED di errore, la MU resta bloccata. Lo sblocco della MU è possibile unicamente togliendo e riattivando l'alimentazione.
rimuovere per
bloccare
ALLEGATI
Allegato 1: riferimenti commutatore
L'intervallo della MU disponibile per i commutatori è compreso tra 160 e 400A.
L'alimentazione è 230VAC/DC.
Commutatori I - 0 - II
3 poli 3 poli + neutro
A Codice Codice
160 GE0160E GE0160ET4
200 GE0200E GE0200ET4
200 GE0201E GE0201ET4
250 GE0250E GE0250ET4
315 GE0315E GE0315ET4
400 GE0400E GE0400ET4
Allegato 2:
DIMENSIONI (mm)
Unità motorizzata MU
230VAC/DC
A Codice
160-200 GEX690C
250-400 GEX691C
250
76
90
14543
8
103 307
5
68
12,5
15

I451 I GB D F E 10 16 4257Z010
I
19
Commutatore
GE0160E/T4 - GE0200E/T4 + GEX690C
247 30
145
250
83
60
94
GE0201E/T4 - GE0400E/T4 + GEX691C
260 30
216
223
121
310
Allegato 3:
SCHEMI ELETTRICI
COMMUTATORE I - 0 - II
12 3 75910486
AUT
IN (0) IN (1) IN (2)
230 VAC/DC
+5VDC
GND 1GND2
OUT OUT
AUT
Go
to 0
Go
to 1
Go
to 2
POWER
SUPPLY
12 3 75910486
AUT
IN (0) IN (1) IN (2)
230 VAC/DC
+5VDC
GND 1GND2
OUT OUT
AUT
Go
to 0
Go
to 1
Go
to 2
Imax = 120 mA
Vmax = 315VAC/DC
Imax = 500 mA
Vmax = 40VAC/DC
POWER
SUPPLY
Cablaggio proposto per alimentazione continua esterna K1, K2 = 230VAC = Bobina 230VAC
Relè K1, K2 interbloccati elettricamente e meccanicamente
A1
A2
A1
A2
K1 K2
21
21
11 21 31 31 21 11
12 24 34 34 24 12
CONNECTOR
mains secondary
sources

I451 I GB D F E 10 16 4257Z010
I
20
L1
L2
N1
N2
Mains
Generator
LN
LN
DUAL POWER SUPPLY
SOLUZIONE 2
L1
L2
N1
N2
Mains
Generator
NL
DUAL POWER SUPPLY
SOLUZIONE 1
Voltage protection (e.g. LOVATO ELECTRIC PMV...)
DUAL POWER SUPPLY
7654
2 (N)
1 (L)
Common +
Closing pos. II
Closing pos. I
Open all pos. 0
Optional
protection
MOTORISED CONTROL UNIT
GEX69...C
23 2 3
1
Pos. I
1
Pos. II
POSITION FEEDBACK
(External GEX10.... on GE...E)
KG KM
KM
KG
Mains and generator
contactors KG and KM
Generator
Mains
Generator
contact
feedback
Mains
contact
feedback
Battery -
terminal
KG: Generator contactor auxiliary contact
KM: Mains contactor auxiliary contact
L2/N L2/L
OUT/L
L1/L L1/N
OUT/N
Line 1 Line 2
Comando con gruppo elettrogeno come linea secondaria
NL
Np Lp
PE
N
PE
14
11
12
RC
LN
L
N
LN
L
R
e
l
a
y
O
u
t
p
u
t
SOLUZIONE 1
(e.g. LOVATO ELECTRIC SA2 1N A320 / A320R)
SOLUZIONE 2
(e.g. LOVATO ELECTRIC PMV...)
SCHEMA DI COLLEGAMENTO
ESEMPIO UTILIZZO GEX69...C CON RGK... LOVATO ELECTRIC
SA2 1N A320 SA2 1N A320R
This manual suits for next models
2
Table of contents
Languages:
Other Lovato Control Unit manuals