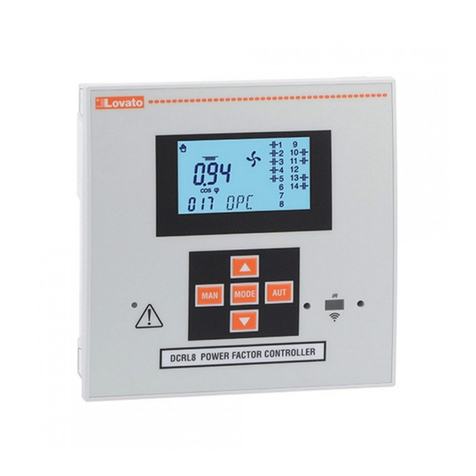
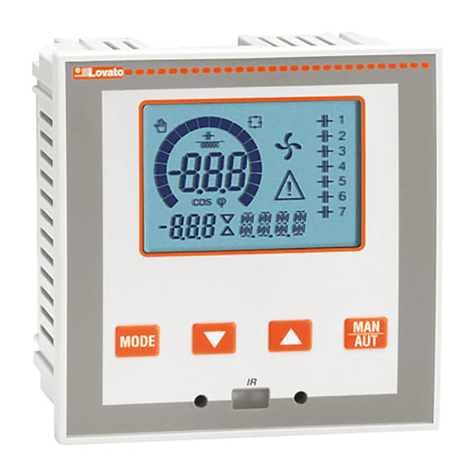
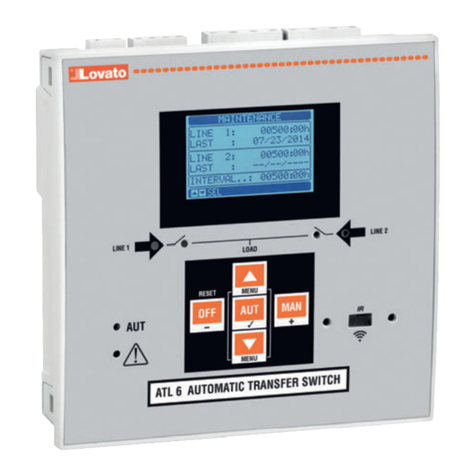
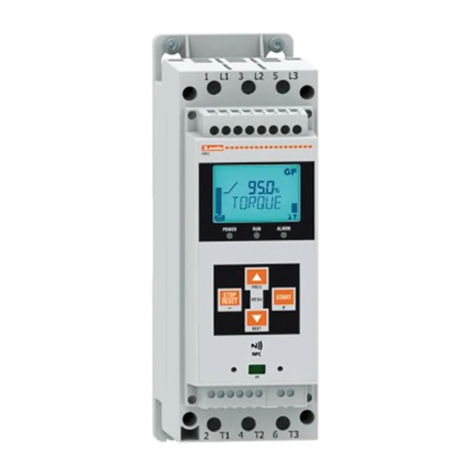
Lovato DCRL3 User manual

Doc: I377ROGB03_14.doc 04/03/2014 p. 1 / 19
DCRL3 –DCRL5 DCRL3 –DCRL5
Controler automat al Automatic Power Factor
factorului de putere Controller
MANUAL DE UTILIZARE INSTRUCTIONS MANUAL
● Înainte de efectuarea oricărei operaţiuni de întreţinere asupra dispozitivului, îndepărtaţi toate
tensiunile de la intrările de măsurare şi de alimentare şi scurtcircuitaţi bornele de intrare CT.
● Produsele ilustrate în prezentul sunt supuse modificărilor şi schimbărilor fără notificare
anterioară.
● Datele tehnice şi descrierile din documentaţie sunt precise, în măsura cunoştinţelor noastre,
dar nu se acceptă nicio răspundere pentru erorile, omiterile sau evenimentele neprevăzute care
apar ca urmare a acestora.
● Trebuie inclus un disjunctor în instalaţia electrică a clădirii. Acesta trebuie instalat aproape de
echipament şi într-o zonă uşor accesibilă operatorului. Trebuie marcat ca fiind dispozitivul de
deconectare al echipamentului: IEC/EN 61010-1 § 6.11.2.1.
● Curăţaţi instrumentul cu un material textil moale şi uscat; nu utilizaţi substanţe abrazive,
detergenţi lichizi sau solvenţi.
● Before any maintenance operation on the device, remove all the voltages from measuring
and supply inputs and short-circuit the CT input terminals.
● Products illustrated herein are subject to alteration and changes without prior notice.
● Technical data and descriptions in the documentation are accurate, to the best of our
knowledge, but no liabilities for errors, omissions or contingencies arising there from are
accepted.
● A circuit breaker must be included in the electrical installation of the building. It must be
installed close by the equipment and within easy reach of the operator. It must be marked as
the disconnecting device of the equipment: IEC /EN 61010-1 § 6.11.2.1.
● Clean the instrument with a soft dry cloth; do not use abrasives, liquid detergents or
solvents.
Index
Pagina
Introducere
1
Descriere
2
Funcţiile tastaturii
2
Indicaţii afişaj
2
Moduri de operare
3
Măsuri
4
Blocare tastatură
5
Extensibilitate
5
Portul de programare IR
6
Setarea parametrilor prin PC
6
Setarea parametrilor prin tablete sau smartphone-uri
6
Setarea parametrilor (configurare) din panoul frontal
6
Configurare CT rapidă
7
Tabelul parametrilor
8
Alarme
12
Descriere alarme
12
Proprietăţi implicite alarme
13
Meniul comenzilor
14
Utilizarea modulului dongle CX02
14
Instalare
15
Scheme electrice
15
Dispunere borne
17
Dimensiunile mecanice şi decuparea în panoul frontal
17
Caracteristici tehnice
17
Istoric de revizii ale manualului
18
Index
Page
Introduction
1
Description
2
Keyboard functions
2
Display indications
2
Operating modes
3
Measures
4
Keypad lock
5
Expandability
5
IR programming port
6
Parameter setting through PC
6
Parameter setting through tablets or Smarphones
6
Setting of parameters (setup) from front panel
6
Rapid CT setup
7
Parameter table
8
Alarms
12
Alarm description
12
Default alarm properties
13
Command menu
14
CX02 dongle usage
14
Installation
15
Wiring diagrams
15
Terminal arrangement
17
Mechanical dimensions and Panel cutout
17
Technical carachteristics
17
Manual revision history
18
Introducere
Unitatea de control automat al factorului de putere DCRL a fost concepută
pentru a oferi funcţii de ultimă generaţie pentru aplicaţiile de compensare a
factorului de putere. Construită cu componente dedicate şi fiind extrem de
compactă, DCRL combină designul modern al panoului frontal cu
instalarea practică şi cu posibilitatea de extindere din spate, unde un modul
din seria EXP poate fi introdus în slot. Ecranul LCD oferă o interfaţă de
utilizator clară şi intuitivă.
Introduction
The DCRL automatic power factor control unit has been designed to offer
state-of-the-art functions for power factor compensation applications.
Built with dedicated components and extremely compact, the DCRL
combines the modern design of the front panel with practical installation
and the possibility of expansion from the rear, where one EXP series
module can be slotted. The LCD screen provides a clear and intuitive
user interface.
I377 RO GB 0314
AVERTIZARE!
Citiţi cu atenţie manualul înainte de instalare sau utilizare.
Acest echipament va fi instalat de personal calificat, în conformitate cu
standardele actuale, pentru a evita deteriorări sau pericolele.
WARNING!
Carefully read the manual before the installation or use.
This equipment is to be installed by qualified personnel, complying to
current standards, to avoid damages or safety hazards.
GB
RO

Doc: I377ROGB03_14.doc 04/03/2014 p. 2 / 19
Descriere
Controler automat al factorului de putere.
Carcasă încastrată standard de 96 x 96 mm.
Ecran LCD cu luminare de fundal.
Versiuni:
oDCRL3 cu 3 relee, extensibil până la 5 max.
oDCRL5 cu 5 relee, extensibil până la 7 max.
4 taste de navigare pentru funcţie şi setări.
Mesaje de alarmă în 6 limbi.
Magistrală de extindere cu 1 slot pentru modulele de extindere din
seria EXP:
oInterfeţe de comunicaţii RS232, RS485, USB.
oIeşiri pentru relee suplimentare.
Măsurători TRMS de înaltă precizie.
Selecţie largă de măsuri electrice, inclusiv THD de tensiune şi curent cu
analiză armonică de până la a 15-a comandă.
Intrare de tensiune separată de sursa de alimentare, adecvată pentru
conexiunea VT în aplicaţii de tensiune medie.
Alimentare cu electricitate de gamă largă (100 - 440 V c.a.).
Interfaţă de programare optică frontală: izolată prin galvanizare, viteză
ridicată, etanşă, compatibilă cu USB şi module dongle WiFi.
Programare din panoul frontal, de la PC sau de la tabletă/smartphone.
Protecţie cu parolă de 2 niveluri pentru setări.
Copie de rezervă a setărilor originale de punere în funcţiune.
Senzor de temperatură integrat.
Montare pe panou fără unelte.
Description
Automatic power factor controller.
Flush-mount, standard 96x96mm housing.
Backlit LCD screen.
Versions:
oDCRL3 with 3 relays, expandable to 5 max.
oDCRL5 with 5 relays, expandable to 7 max.
4 navigation keys for function and settings.
Alarm messages in 6 languages.
Expansion bus with 1 slot for EXP series expansion modules:
oRS232, RS485, USB communications interface.
oAdditional relay outputs.
High accuracy TRMS measurements.
Wide selection of electrical measures, including voltage and current
THD with harmonic analysis up to 15th order.
Voltage input separated from power supply, suitable for VT
connection in medium voltage applications.
Wide-range power supply (100-440VAC).
Front optical programming interface: galvanically isolated, high
speed, waterproof, USB and WiFi dongle compatible.
Programming from front panel, from PC or from tablet/smartphone.
2-level password protection for settings.
Backup copy of original commissioning settings.
Built-in temperature sensor.
Tool-less panel mount.
Tastatură frontală
Tasta MODE - Utilizată pentru a selecta din măsurătorile disponibile.
Utilizată şi pentru a accesa meniurile de programare.
Tastele ▲ şi ▼ - Utilizate pentru a seta valori şi pentru a selecta paşi.
Tasta MAN-AUT - Utilizată pentru a selecta modul de operare dintre
manual şi automat.
Front keyboard
MODE Key - Used to select among available measurements. Used also
to access programming menus.
▲ and ▼ keys - Used to set values and to select steps.
MAN-AUT key - Used to select operating mode between manual and
automatic.
Indicaţii afişaj
Display indications
Output status
Cooling fan
status
Secondary
display
Active alarm
Automatic
mode
Manual
mode
Main display
Inductive /
capacitive
Bar graph
Alphanumeric
display
Step status
Starea ieşirii
Starea
ventilatorului
de răcire
Afişaj
secundar
Alarmă
activă
Mod automat
Mod manual
Afişaj
principal
Inductiv/
capacitiv
Grafic de
bare
Afişaj
alfanumeric
Starea
pasului

Doc: I377ROGB03_14.doc 04/03/2014 p. 3 / 19
Moduri de operare
Există trei moduri de operare posibile, listate mai jos:
Modul TEST
Dacă unitatea este nouă şi nu a fost niciodată programată, aceasta
intră automat în modul TEST, care permite instalatorului să activeze
manual ieşirile individuale ale releelor, astfel încât să puteţi verifica
dacă panoul are cablajul corect.
Modul TEST este indicat de trei cratime --- indicate pe afişajul principal.
Activarea şi dezactivarea ieşirilor se face direct apăsând butoanele ▲
şi ▼, dar fără a lua în considerare timpul de reconectare.
Modul TEST este închis automat după ce se realizează programarea
parametrilor (consultaţi capitolul Setarea parametrilor).
Operating modes
There are three possible operating modes, listed below:
TEST Mode
When the unit is brand new and has never been programmed, it
automatically enters in TEST mode that allows the installer to
manually activate the individual relay outputs, so you can verify the
correct wiring of the panel.
The TEST mode is indicated by three dashes --- shown on the main
display.
The activation and deactivation of the outputs is done directly by
pushing ▲and ▼buttons, but without considering the reconnection
time.
The TEST mode is automatically left after the parameter
programming is done (see Parameter setting chapter).
Moduri MAN şi AUT
Pictogramele AUT şi MAN indică modul de operare automat sau
manual.
Pentru a schimba modul, apăsaţi butonul MAN/AUT timp de 1 secundă
consecutiv.
Modul de operare rămâne stocat chiar şi după deconectarea şi
reaplicarea tensiunii de alimentare.
Modul MAN
Când unitatea este în modul manual, puteţi selecta unul dintre aceşti
paşi şi să o conectaţi sau să o deconectaţi manual.
Pe lângă pictograma specifică, afişajul alfanumeric indică MAN pentru a
evidenţia modul manual. Apăsaţi MODE pentru a vizualiza celelalte
măsurători ca de obicei.
În timp ce afişajul arată MAN, puteţi selecta pasul care va fi pornit sau
oprit. Pentru a selecta un pas, utilizaţi butoanele ▲ sau ▼. Pasul
selectat se va aprinde intermitent cu frecvenţă ridicată.
Apăsaţi MODE pentru a activa sau dezactiva pasul selectat.
Dacă pasul selectat încă nu a epuizat timpul de reconectare,
pictograma MAN se va aprinde intermitent pentru a indica faptul că
tranzacţia a fost acceptată şi că va fi realizată cât mai repede posibil.
Configurarea manuală a paşilor este menţinută chiar şi când tensiunea
de alimentare este eliminată. Când revine alimentarea, starea originală
a pasului este restaurată.
Selectare pas Modificare stare pas
MAN and AUT Modes
The icons AUT and MAN indicate the operating mode automatic or
manual.
To change the mode, press the MAN / AUT button for 1 sec in a row.
The operating mode remains stored even after removing and
reapplying the power supply voltage.
MAN Mode
When the unit is in manual mode, you can select one of the steps and
manually connected or disconnect it.
In addition to the specific icon, the alphanumeric display shows MAN
in order to highlight the manual mode condition. Press MODE to view
the other measurements as usual.
While the display shows MAN, it is possible to select the step to be
switched on or off. To select a step, use the ▲ or ▼buttons. The
selected step will flash quickly.
Press MODE to activate or deactivate the selected step.
If the selected step has not yet exhausted the reconnection time, the
MAN icon will flash to indicate that the transaction has been accepted
and will be conducted as soon as possible.
Manual configuration of the steps is maintained even when the power
supply voltage is removed. When the power returns, the original state
of the steps is restored.
Select step Change step status
Mod AUT
În modul automat, controlerul calculează configurarea optimă a paşilor
condensatorului, pentru a atinge cos setat.
Criteriile de selecţie iau în considerare multe variabile, precum: puterea
fiecărui pas, numărul de operaţiuni, timpul total de utilizare, timpul de
reconectare etc.
Controlerul afişează conectarea iminentă sau deconectarea paşilor prin
aprinderea intermitentă a numărului de identificare al acestora (stânga).
Iluminatul intermitent poate dura în cazurile în care introducerea unui
pas nu este posibilă din cauza timpului de reconectare (timpul de
descărcare a condensatorului).
Dispozitivul iniţiază corecţii automate atunci când există o cerere de
putere reactivă medie (delta-kvar) mai mare de 50% din cel mai mic
pas, iar cosphi măsurat este diferit de valoarea de referinţă.
AUT Mode
In automatic mode, the controller calculates the optimum
configuration of capacitor steps in order to reach the set cos .
The selection criteria takes into account many variables such as: the
power of each step, the number of operations, the total time of use,
the reconnection time, etc.
The controller displays the imminent connection or disconnection of
the steps with the flashing of their identification number (left). The
flashing can last in cases in which the insertion of a step is not
possible due to the reconnection time (discharge time of the
capacitor).
The device initiates automatic corrections when there is an average
reactive power request (delta-kvar) higher than 50% of the smallest
step, and the measured cosphi is different from the setpoint.
Indication of
TEST mode
Total number
of steps
Firmware
revision
Model
variant
Indicarea
modului
TEST
Numărul total
de paşi
Revizie
firmware
Versiune
model
MAN mode
icon
Connected
steps
Tot kvar
inserited in
MAN
Manual step
selection
enabled
▼
MODE
▲
▼
MODE
▲
Pictogramă
mod MAN
Paşi
conectaţi
Kvar tot.
introdus în
MAN
Selectarea
manuală a
paşilor
activată

Doc: I377ROGB03_14.doc 04/03/2014 p. 4 / 19
Măsuri
DCRL oferă o gamă de măsurători prezentate pe afişajul alfanumeric,
împreună cu valoarea cosphi actuală, care este întotdeauna indicată
pe afişajul principal.
Apăsaţi tasta MODE pentru a derula măsurile prin rotaţie.
După 30 secunde în care nu s-a apăsat niciun buton, afişajul se
întoarce automat la măsurătoarea implicită definită de P.47.
Dacă P.47 este setat la ROT, atunci măsurile se rotesc automat la
fiecare 5 secunde.
Valoarea de referinţă pentru cosphi poate fi setată în partea de jos a
listei de măsuri, acţionând pe baza aceleiaşi valori setate cu P.19.
Mai jos se prezintă un tabel cu măsurătorile afişate.
Măsură
Pictogramă
Descriere
Delta-kvar
Δkvar
Kvar necesar pentru a atinge valoarea
de referinţă cosphi. Dacă delta-kvar este
pozitivă, condensatorul trebuie conectat,
iar dacă este negativă, acesta trebuie
deconectat.
kvar
Kvar total în staţie.
ΔSTEP
Numărul de paşi echivalenţi.
Tensiune
V
Tensiunea RMS a curentului staţiei.
V HI
Valoarea maximă a măsurii.
Curent
A
Curentul RMS al tensiunii staţiei.
A HI
Valoarea maximă a măsurii.
PF săptămânal
WPF
Factor de putere săptămânal mediu.
PF
Factor de putere instantaneu total.
Curent cond.
%C.CU
Curentul calculat al condensatorului,
în % din cel nominal.
%C.HI
Valoarea maximă a măsurii.
Temperatură
°C °F
Temperatura senzorului intern.
°CHI °FHI
Valoarea maximă a măsurii.
THD tensiune
THDV
Distorsiune armonică totală % (THD) a
tensiunii staţiei.
VH02…
…VH15
Conţinut armonic tensiune % de la
comanda a 2-a până la comanda a 15-a.
THD curent
THDI
Distorsiune armonică totală % (THD) a
curentului staţiei.
IH02…
…IH15
Conţinut armonic curent % de la
comanda a 2-a până la comanda a 15-a.
Valoare de
referinţă cosphi
IND CAP
Setarea valorii de referinţă cosphi dorită
(asemănător cu P.19).
Putere pas
%
Putere reziduală a pasului, ca
procentaj din puterea nominală setată.
Contor paşi
OPC
Contorul de funcţionare a pasului.
Ore pas
H
Contorul orelor pentru introducerea
paşilor.
Aceste măsuri sunt indicate numai dacă funcţia Reglare putere pas este activată
(P.25 = ON) şi parola avansată este activată şi introdusă.
Measures
The DCRL provides a set of measurements displayed on the
alphanumeric display, in conjunction with the current cosphi that is
always displayed on the main display.
Press the MODE key to scroll through the measures in rotation.
After 30 seconds without pressing any buttons, the display
automatically returns to the default measurement defined by P.47.
If P.47 is set on the ROT, then the measures rotate automatically
every 5 seconds.
At the bottom of the list of measures it is possible to set the setpoint of
the cosphi, acting on the same value set with P.19.
Below is a table with the measurements displayed.
Measure
Icon
Description
Delta-kvar
Δkvar
Kvars needed to reach the cosphi setpoint.
If delta-kvar is positive cpacitors need to be
inserted, if negative to be disconnected.
kvar
Total kvar of the plant.
ΔSTEP
Number of equivalent steps.
Voltage
V
RMS voltage of the plant current.
V HI
Maximum peak of measure.
Current
A
RMS current of the plant voltage.
A HI
Maximum peak of measure.
Weekly PF
WPF
Weekly average power factor.
PF
Instantaneous total power factor.
Cap. current
%C.CU
Calculated capacitor current, in % of their
nominal.
%C.HI
Maximum peak of measure.
Temperature
°C °F
Temperature of internal sensor.
°CHI °FHI
Maximum peak of measure.
Voltage THD
THDV
Total harmonic distortion % (THD) of plant
voltage.
VH02…
...VH15
% voltage harmonic content from 2.nd up to
15.th order
Current THD
THDI
Total harmonic distortion % (THD) of plant
current.
IH02…
…IH15
% Current harmonic content from 2.nd up
to 15.th order
Cosphi setpoint
IND CAP
Setting of desired cosphi setpoint (same as
P.19).
Step power
%
Step residual power, as a percentage of
the set rated power.
Step counter
OPC
Operation counter of the step.
Step hours
H
Hour meter of the step insertion.
These measures are shown only if the Step trimming function is enabled
(P.25=ON) and the advanced password is enabled and entered.
MODE
▼
▲
▼
▲
▼
▼
▼
▼
▼
▼
▲
▼
▲
▼
▲
MODE
▼
▲
MODE
▼
▲
MODE
▼
▲
MODE
MODE
MODE
MODE
MODE
MODE
MODE
MODE
MODE
MODE
MODE
MODE
MODE
MODE
MODE
▼
▲
MODE
▼
▲
MODE
▼
▲
MODE
▼
▲
▼
▼
▼
▼
▼
▼
▲
▼
▲

Doc: I377ROGB03_14.doc 04/03/2014 p. 5 / 19
Blocare tastatură
Poate fi activată o funcţie pentru a exclude toate modificările
parametrilor de operare; vizualizarea măsurătorii încă este furnizată, în
orice caz.
Pentru a bloca şi debloca tastatura, apăsaţi şi menţineţi apăsată tasta
MODE. Apoi apăsaţi tasta ▲ de trei ori şi tasta ▼ de două ori iar apoi
eliberaţi MODE.
Afişajul va indica LOC când tastatura este blocată şi UNL când este
deblocată.
Când este activată blocarea, nu este posibilă efectuarea următoarelor
operaţiuni:
oOperare automată între modul automat şi modul manual
oAcces la meniurile de configurare
oModificarea valorii de referinţă cosphi
La încercarea de a efectua operaţiunile de mai sus, afişajul va vizualiza
LOC pentru a indica starea tastaturii blocate.
Keypad lock
A function to exclude all modification to operating parameters can be
enabled; measurement viewing is still provided in any case.
To lock and unlock the keypad, press and keep MODE key pressed.
Then press the ▲ key three times and the ▼key twice and after that
release MODE.
The display will show LOC when the keypad is locked and UNL when it
is unlocked.
When the lock is enabled, it is not possible to make the following
operations:
oOperation between automatic and manual mode
oAccess to set-up menus
oChange of cosphi set-point
By attempting to conduct the above operations, the display will view
LOC to indicate the locked keypad state.
Extensibilitate
Mulţumită magistralei de extindere, DCRL poate fi extins cu un modul
din seria EXP ... .
Modulele EXP acceptate pot fi grupate în următoarele categorii:
opaşi suplimentari
omodule de comunicaţii
omodule I/O digitale
Pentru a insera un modul de extindere:
oeliminaţi sursa de alimentare la DCRL.
oîndepărtaţi capacul de protecţie a slotului de extindere.
ointroduceţi cârligul superior al modulului în orificiul de fixare de la
partea de sus a slotului de extindere.
orotiţi corpul modulului în jos, introducând conectorul pe magistrală.
oîmpingeţi până când clema de jos se fixează pe carcasa acesteia.
Expandability
Thanks to expansion bus, the DCRL can be expanded with one EXP…
series module.
The supported EXP modules can be grouped in the following
categories:
oadditional steps
ocommunication modules
odigital I/O modules
To insert an expansion module:
oremove the power supply to DCRL.
oremove the protecting cover of the expansion slot.
oinsert the upper hook of the module into the fixing hole on the top
of the expansion slot.
orotate down the module body, inserting the connector on the bus.
opush until the bottom clip snaps into its housing.
După ce DCRL este pornit, acesta recunoaşte în mod automat modulul
EXP care a fost montat.
Modulele de extindere oferă resurse suplimentare care pot fi utilizate
prin meniurile de configurare dedicate.
Meniurile de configurare asociate extinderilor sunt întotdeauna
accesibile, chiar dacă modulele de extindere nu sunt dotate fizic.
Următorul tabel indică modelele de module de extindere care sunt
acceptate:
TIP MODUL
COD
FUNCŢIE
PAŞI SUPLIMENTARI
EXP 10 06
RELEE CU 2 PAŞI
I/O DIGITALĂ
EXP 10 03
2 C/O RELEU
COMUNICAŢIE
EXP 10 10
USB
EXP 10 11
RS-232
EXP 10 12
RS-485
When the DCRL is powered on, it automatically recognises the EXP
module that have been mounted.
The expansion modules provide additional resources that can be used
through the dedicated setup menus.
The setup menus related to the expansions are always accessible,
even if the expansion modules are not physically fitted.
The following table indicates which models of expansion modules are
supported:
MODULE TYPE
CODE
FUNCTION
ADDITIONAL STEPS
EXP 10 06
2 STEP RELAYS
DIGITAL I/O
EXP 10 03
2 RELAY C/O
COMMUNICATION
EXP 10 10
USB
EXP 10 11
RS-232
EXP 10 12
RS-485

Doc: I377ROGB03_14.doc 04/03/2014 p. 6 / 19
Portul de programare IR
Parametrii DCRL pot fi configuraţi prin portul optic frontal, utilizând
modulul dongle de programare CX01 cu cod IR-USB sau modulul
dongle CX02 cu cod IR-WiFi.
Acest port de programare are următoarele avantaje:
oPuteţi configura şi repara multimetrul DCRL fără acces la partea
posterioară a dispozitivului sau fără a fi nevoie să deschideţi
panoul electric.
oAcesta este izolat prin galvanizare de la circuitele interne ale
DCRL, astfel garantând cel mai mare grad de siguranţă pentru
operator.
oTransfer de date la viteză ridicată.
oProtecţie pentru panoul frontal IP54.
oLimitează posibilitatea de acces neautorizat cu configurarea
dispozitivului, din moment ce este necesar să aveţi module dongle
CX01 şi CX02.
Doar ţineţi modulul dongle CX.. lângă panoul frontal, conectând fişele
la conectoarele relevante iar dispozitivul va fi recunoscut, după cum se
indică de către aprinderea intermitentă a ledului LINK verde de pe
modulul dongle de programare.
IR programming port
The parameters of the DCRL can be configured through the front
optical port, using the IR-USB code CX01 programming dongle, or with
the IR-WiFi code CX02 dongle.
This programming port has the following advantages:
oYou can configure and service the DCRL without access to the
rear of the device or having to open the electrical panel.
oIt is galvanically isolated from the internal circuits of the DCRL,
guaranteeing the greatest safety for the operator.
oHigh speed data transfer.
oIP54 front panel protection.
oLimits the possibility of unauthorized access with device config,
since it is necessary to have the CX01 or CX02 dongles.
Simply hold the CX.. dongle up to the front panel, connecting the plugs
to the relevant connectors, and the device will be acknowledged as
shown by the LINK LED on the programming dongle flashing green.
Modul dongle de programare USB cod CX01
USB programming dongle code CX01
Modul dongle de programare WiFi cod CX02
WiFi programming dongle code CX02
Setarea parametrilor cu PC
Puteţi utiliza software-ul pentru control de la distanţă DCRG în scopul
de a transfera parametrii de configurare (programaţi anterior) de la
DCRL pe unitatea hard a PC-ului şi invers.
Parametrul poate fi transferat parţial de pe PC la DCRL, transferând
numai parametrii meniurilor specifice.
Parameter setting with PC
You can use the DCRG Remote control software to transfer (previously
programmed) set-up parameters from the DCRL to the hard drive of
the PC and vice versa.
The parameter may be partially transferred from the PC to the DCRL,
transferring only the parameters of the specified menus.
Setarea parametrilor (configurare) din panoul frontal
Pentru a accesa meniul de programare (configurare):
Pentru a accesa programarea parametrilor, unitatea trebuie să fie în
modul TEST (prima programare) sau în modul MAN.
De pe afişajul măsurătorilor normale, apăsaţi MODE timp de 3 secunde
pentru a reapela meniul principal. Apare SET pe afişajul principal.
Dacă aţi setat parola (P.21 = ON), în loc de SET afişajul arată PAS
(cerere de introducere parolă). Setaţi parola numerică utilizând ▲ ▼
şi apoi apăsaţi MAN-AUT pentru a trece la următoarea cifră.
Dacă parola este corectă, unitatea va arăta OK U sau OK A în funcţie de
nivelul parolei introduse - de utilizator sau avansat. Parola poate fi
definită cu parametrii P.22 şi P.23. Valoarea implicită din fabrică este
001 şi 002, respectiv.
Dacă parola introdusă este incorectă, unitatea va afişa ERR.
După introducerea parolei, accesul este activat până când unitatea
este re-iniţializată sau pentru 2 minute fără a apăsa nicio tastă.
După introducerea parolei, repetaţi procedura pentru a accesa setările
parametrilor.
Apăsaţi ▲ ▼ pentru a selecta sub-meniul dorit (BASADV ALA ...)
care este prezentat pe afişajul alfanumeric.
Parameter setting (setup) from front panel
To access the programming menu (setup) :
To enter parameter programming the unit must be in TEST mode (first
programming) or in MAN mode.
From the normal measurement display, press MODE for 3 seconds to
recall the main menu. SET is displayed on the main display.
If you have set the password (P.21 = ON) instead of SET the display
shows PAS (password entry request). Set the numeric password using
▲ ▼ and then press MAN-AUT to move to next digit.
If the password is correct the unit will show OK U or OK A depending on
the entered password is user or the advanced level. The password can
be defined with parameters P.22 and P.23. Factory default is 001 and
002 respectively.
If the entered password is wrong the unit will show ERR.
After having entered the password, tha access is enabled until the unit
is re-initialized or for 2 minutes without pressing any key.
After having entered the password, repeat the procedure to access the
parameter setting.
Press ▲ ▼ to select the desired submenu (BASADVALA ... ) that
is shown on the alphanumeric display.

Doc: I377ROGB03_14.doc 04/03/2014 p. 7 / 19
Următorul tabel prezintă sub-meniurile disponibile:
Cod
Descriere
BAS
Acces la Meniul de bază
ADV
Acces la Meniul avansat
ALA
Acces la Meniul alarmelor
CMD
Acces la Meniul comenzilor
CUS
Acces la Meniul de personalizare
SAVE
Ieşire cu salvarea modificărilor.
EXIT
Ieşire fără salvare (anulare)
Apăsaţi MAN - AUT pentru a accesa sub-meniul.
Atunci când sunteţi într-un sub-meniu, afişajul meniului arată codul
parametrului selectat (de ex., P.01 ), în timp ce afişajele
numerice/alfanumerice de la partea inferioară a ecranului prezintă
valoarea parametrului şi/sau descrierea.
Apăsaţi MAN - AUT pentru a avansa în selecţia elementelor (cum ar fi
derularea prin parametrii P.01 P02 P03… ), sau apăsaţi MODE
pentru a vă întoarce la parametrul anterior.
În timp ce parametrul este selectat, cu ▲ ▼ puteţi creşte/scădea
valoarea.
Înapoi Creştere/scădere Înainte
The following table lists the available submenus:
Cod
Description
BAS
Access to Base menu
ADV
Accesso to Advanced menu
ALA
Accesso to Alarm menu
CMD
Access to Command menu
CUS
Access to Custom menu
SAVE
Exits saving modifications.
EXIT
Exits without saving (cancel)
Press MAN - AUT to access the submenu.
When you are in a submenu, the main display shows the code of the
selected parameter (eg P.01 ), while the numeric/alphanumeric
displays at the bottom of the screen showsthe parameter value and / or
description.
Press MAN - AUT to advance in the selection of items (such as scroll
through parameters P.01 P02 P03… ), or press MODE to go
back to the previous parameter.
While a parameter is selected, with ▲ ▼ you can increase/decrease
its value.
Backward Increment/decrement Forward
După ce ajungeţi la ultimul parametru din meniu, apăsând MAN - AUT
încă o dată, vă veţi întoarce la selectarea sub-meniurilor.
Utilizând ▲▼, selectaţi SAVE pentru a salva modificările sau EXIT
pentru a anula.
În mod alternativ, din cadrul programării, dacă ţineţi apăsat MAN - AUT
timp de trei secunde, veţi salva modificările şi veţi ieşi imediat.
Dacă utilizatorul nu apasă nicio tastă timp de mai mult de 2 minute,
sistemul părăseşte configurarea în mod automat şi revine la
vizualizarea normală, fără a salva modificările efectuate asupra
parametrilor (asemănător cu EXIT).
N.B.: se poate salva o copie de siguranţă a datelor de configurare
(setări care pot fi modificate utilizând tastatura) în memoria eeprom a
dispozitivului DCRL. Aceste date pot fi restaurate oricând este necesar
în memoria de lucru. „Copia” de rezervă a datelor şi comenzile de
„restaurare” pot fi găsite în Meniul comenzilor.
Once you reach the last parameter of the menu, by pressing MAN -
AUT once more will return you to the submenu selection.
Using ▲▼select SAVE to save the changes or EXIT to cancel.
Alternatively, from within the programming, holding MAN - AUT for
three seconds will save the changes and exit directly.
If the user does not press any key for more than 2 minutes, the system
leaves the setup automatically and goes back to normal viewing
without saving the changes done on parameters (like EXIT).
N.B.: a backup copy of the setup data (settings that can be modified
using the keyboard) can be saved in the eeprom memory of the DCRL.
This data can be restored when necessary in the work memory. The
data backup 'copy' and 'restore' commands can be found in the
Commands menu.
MODE
▼
▲
MAN
AUT
▲
MAN
AUT
MODE
▼
▲
MAN
AUT
MODE
▼

Doc: I377ROGB03_14.doc 04/03/2014 p. 8 / 19
Configurare CT rapidă
Când valoarea CT nu este cunoscută şi este utilizată numai la
momentul instalării, parametrul P.01 pentru CT primar poate rămâne
setat la OFF, în timp ce celelalte pot fi programate.
În acest caz, în timpul instalării sistemului şi odată ce controlerul este
pornit, afişajul va prezenta un CT (Transformator de curent) luminat
intermitent. Apăsând ▲▼, CT primar poate fi setat direct.
După ce s-a realizat programarea, apăsaţi MAN/AUT pentru a
confirma. Unitatea va stoca setarea în P.01 şi va reporni direct în
modul automat.
Rapid CT set-up
When the CT value is not known and only used at the moment of the
installation, the P.01 parameter for CT primary can remain set at OFF
while all the others can be programmed.
In this case, during the system installation and once the controller is
powered up, the display will show a flashing CT (Current Transformer).
By pressing ▲▼the CT primary can be set directly.
Once programmed, press MAN/AUT to confirm. The unit will store the
setting into P.01, and directly restart in automatic mode.
Tabelul parametrilor
Mai jos sunt prezentaţi toţi parametrii de programare sub formă de tabel.
Pentru fiecare parametru indicat este posibilă setarea intervalului şi a
valorilor implicite din fabrică, precum şi o explicaţie scurtă a funcţiei
parametrului. Descrierea parametrului indicat pe afişaj poate fi, în unele
cazuri, diferită de ceea ce se raportează în tabel, din cauza numărului
redus de caractere disponibile. Totuşi, codul parametrului poate fi utilizat
ca referinţă.
Notă: parametrii prezentaţi în tabel cu fundal întunecat sunt esenţiali
pentru operarea sistemului, astfel aceştia reprezintă programarea minimă
necesară pentru operare.
Parameter table
Below are listed all the programming parameters in tabular form. For each
parameter are indicated the possible setting range and factory default, as
well as a brief explanation of the function of the parameter. The description
of the parameter shown on the display can in some cases be different from
what is reported in the table because of the reduced number of characters
available. The parameter code can be used however as a reference.
Note: the parameters shown in the table with a shaded background are
essential to the operation of the system, thus they represent the minimum
programming required for operation.
MENIU DE BAZĂ
COD
DESCRIERE
ACC
UdM
DEF
GAMĂ
P.01
CT primar
Usr
A
OFF
OFF / 1...10.000
P.02
CT secundar
Usr
A
5
1 / 5
P.03
Fază citire CT
Usr
L3
L1
L2
L3
P.04
Polaritate cablaj CT
Usr
Aut
Aut
Dir
Inv
P.05
Fază citire tensiune
Usr
L1-L2
L1-L2
L2-L3
L3-L1
L1-N
L2-N
L3-N
P.06
Puterea minimă a pasului
Usr
Kvar
1.00
0.10 ... 10000
P.07
Tensiune nominală
condensator
Usr
V
400V
50 ... 50000
P.08
Frecvenţă nominală
Usr
Hz
Aut
Aut
50Hz
60Hz
Var
P.09
Timp reconectare
Adv
sec
60
1 … 30000
P.10
Sensibilitate
Usr
sec
60
1 … 1000
P.11
Funcţionare pas 1
Usr
OFF
OFF
1…32
ON
NOA
NCA
FAN
MAN
AUT
A01…A13
P.12
Funcţionare pas 2
Usr
OFF
=
P.13
Funcţionare pas 3
Usr
OFF
=
P.14
Funcţionare pas 4
Usr
OFF
=
P.15
Funcţionare pas 5
Usr
OFF
=
P.16
Funcţionare pas 6
Usr
OFF
=
P.17
Funcţionare pas 7
Usr
OFF
=
P.19
Valoare de referinţă
cos-phi
Usr
0.95
IND
0.50 Ind –0.50 Cap
BASE MENU
COD
DESCRIPTION
ACC
UoM
DEF
RANGE
P.01
CT primary
Usr
A
OFF
OFF / 1...10.000
P.02
CT secondary
Usr
A
5
1 / 5
P.03
CT read phase
Usr
L3
L1
L2
L3
P.04
CT wiring polarity
Usr
Aut
Aut
Dir
Inv
P.05
Voltage read phase
Usr
L1-L2
L1-L2
L2-L3
L3-L1
L1-N
L2-N
L3-N
P.06
Smallest step power
Usr
Kvar
1.00
0.10 ... 10000
P.07
Rated capacitor voltage
Usr
V
400V
50 ... 50000
P.08
Nominal frequency
Usr
Hz
Aut
Aut
50Hz
60Hz
Var
P.09
Reconnection time
Adv
sec
60
1 … 30000
P.10
Sensitivity
Usr
sec
60
1 … 1000
P.11
Step 1 function
Usr
OFF
OFF
1…32
ON
NOA
NCA
FAN
MAN
AUT
A01…A13
P.12
Step 2 function
Usr
OFF
=
P.13
Step 3 function
Usr
OFF
=
P.14
Step 4 function
Usr
OFF
=
P.15
Step 5 function
Usr
OFF
=
P.16
Step 6 function
Usr
OFF
=
P.17
Step 7 function
Usr
OFF
=
P.19
Cos-phi setpoint
Usr
0.95
IND
0.50 Ind –0.50 Cap

Doc: I377ROGB03_14.doc 04/03/2014 p. 9 / 19
P.20
Limba mesajelor de
alarmă
Usr
ENG
ENG
ITA
FRA
SPA
POR
DEU
P.01 - Valoarea transformatorului de curent primar. Exemplu: cu CT 800/5 setare
800. Dacă este setat la OFF, după pornire, dispozitivul vă va solicita să setaţi CT şi
să permiteţi accesul direct la acest parametru.
P.02 - Valoarea transformatorului de curent secundar. Exemplu: cu CT 800/5
setare 5.
P.03 –Defineşte la care fază dispozitivul citeşte semnalul de curent. Cablajul
intrărilor de curent trebuie să se potrivească cu valoarea setată pentru acest
parametru. Acceptă toate combinaţiile posibile ale parametrului P.05.
P.04 - Citirea polarităţii conexiunilor la CT.
AUT = Polaritatea este detectată automat la pornire. Poate fi utilizat numai când
funcţionează cu un CT şi când sistemul nu are niciun dispozitiv generator.
Dir = Detectarea automată dezactivată. Conectare directă.
Inv = Detectarea automată dezactivată. Cablaj inversat (încrucişat).
P.05 - Defineşte pe care şi pe câte faze dispozitivul citeşte semnalul tensiunii.
Cablajul intrărilor de tensiune trebuie să se potrivească cu setarea acestui
parametru. Acceptă toate combinaţiile posibile ale parametrului P.03.
P.06 - Valoarea în kvar a celui mai mic pas instalat (echivalent cu pasul 1). Puterea
nominală a plăcii condensatorului furnizată la tensiunea nominală specificată în
P.07 şi raportată la totalul celor trei condensatoare pentru aplicaţii trifazice.
P.07 - Tensiunea nominală a plăcii condensatorului, care este livrată la putere
specifică P.06. În cazul în care condensatoarele sunt utilizate la o tensiune diferită
(mai mică) decât cea nominală, puterea care rezultă este recalculată automat de
către dispozitiv.
P.08 - Frecvenţa de lucru a sistemului:
Aut = selecţie automată între 50 şi 60 Hz la pornire.
50Hz = fixată la 50 Hz.
60Hz = fixată la 60 Hz.
Var = variabilă, măsurată continuu şi reglată.
P.09 - Timpul minim care trebuie să treacă între deconectarea unui pas şi
reconectarea ulterioară, atât în modul MAN, cât şi în modul AUT. În acest timp,
numărul pasului de pe pagina principală se aprinde intermitent.
P.10 - Sensibilitate conexiune. Acest parametru setează viteza de reacţie a
controlerului. Cu valori mici ale P.10, reglarea se face rapid (mai precisă în jurul
valorii de referinţă, dar cu mai multe comutări de paşi). La valori ridicate vor exista,
în schimb, reacţii mai lente ale reglării, cu mai puţine comutări ale paşilor. Timpul
de întârziere a reacţiei este invers proporţional cu cererea de paşi pentru a atinge
valoarea de referinţă: timp de aşteptare = (sensibilitate/numărul de paşi necesar).
Exemplu: setarea sensibilităţii la 60 s, dacă se solicită introducerea unui pas de
greutate 1, se estimează 60 s (60/1 = 60). Dacă, în schimb, se vor deservi 4 paşi,
se estimează 15 s (60/4 = 15).
P11 ... P18 - Funcţia releelor de ieşire 1 ... 8:
OFF = Neutilizat.
1 .. 32 = Greutatea pasului. Acest releu acţionează un banc de
condensatoare al cărui putere este n (n = 1...32) înmulţit cu cea mai mică
putere definită cu parametrul P.06.
ON = Tot timpul pornit.
NOA = Alarma în mod obişnuit nealimentată. Acest releu este alimentat
când se emite orice alarmă cu proprietatea Alarmă globală.
NCA = Alarmă alimentată în mod normal. Acest releu este scos de sub
tensiune când se emite orice alarmă cu proprietatea Alarmă globală.
FAN = Releul controlează ventilatorul de răcire.
MAN = Releul este alimentat când dispozitivul este în modul MAN.
AUT= Releul este alimentat când dispozitivul este în modul AUT.
A01 ... A13 = Releul este alimentat când alarma specificată este activă.
P.19 - Valoarea de referinţă (valoarea ţintă) pentru cosphi. Utilizată pentru aplicaţii
standard.
P.20 - Limba mesajelor de alarmă defilante.
P.20
Alarm messages language
Usr
ENG
ENG
ITA
FRA
SPA
POR
DEU
P.01 - The value of the primary current transformer. Example: with CT 800/5 set
800. If set to OFF, after the power-up the device will prompt you to set the CT and
allow direct access to this parameter.
P.02 - Value of the secondary of the current transformers. Example: with CT 800/5
set 5.
P.03 –It defines on which phase the device reads the current signal. The wiring of
current inputs must match the value set for this parameter. Supports all possible
combinations of parameter P.05.
P.04 - Reading the connection polarity of the CT.
AUT = Polarity is automatically detected at power up. Can only be used when
working with only one CT and when the system has no generator device.
Dir = Automatic detection disabled. Direct connection.
Inv = Automatic detection disabled. Reverse wiring (crossover).
P.05 - Defines on which and on how many phases the device reads the voltage
signal. The wiring of voltage inputs must match the setting for this parameter.
Supports all possible combinations of parameter P.03.
P.06 - Value in kvar of the smallest step installed (equivalent to the step weight 1).
Rated power of the capacitor bank provided at the rated voltage specified in P.07
and referred to the total of the three capacitors for three-phase applications.
P.07 - Rated plate capacitor, which is delivered in specified power P.06. If the
capacitors are used to a voltage different (lower) than nominal, the resulting power
is automatically recalculated by the device.
P.08 - Working frequency of the system:
Aut = automatic selection between 50 and 60 Hz at power on.
50Hz = fixed to 50 Hz.
60Hz = fixed to 60 Hz.
Var = variable, measured continuously and adjusted.
P.09 - Minimum time that must elapse between the disconnection of one step and
the subsequent reconnection both in MAN or AUT mode. During this time the
number of the step on the main page is blinking.
P.10 - Connection sensitivity. This parameter sets the speed of reaction of the
controller. With small values of P.10 the regulation is fast (more accurate around
the setpoint but with more step swithchings). With high values instead we’ll have
slower reactions of the regulation, with fewer switchings of the steps. The delay
time of the reaction is inversely proportional to the request of steps to reach the
setpoint: waiting time = (sensitivity / number of steps required).
Example: setting the sensitivity to 60s, if you request the insertion of one step of
weight 1 are expected 60s (60/1 = 60). If instead serve a total of 4 steps will be
expected 15s (60/4 = 15).
P11 ... P18 - Function of output relays 1 ... 8:
OFF = Not used .
1 .. 32 = Weight of the step. This relay drives a bank of cpacitors which
power is n times (n = 1…32) the smallest power defined with parameter
P.06.
ON = Always on.
NOA = Alarm normally de-energized. The relay is energized when any
alarm with the Global alarm property arises.
NCA = Alarm normally energized. The relay is de-energized when any
alarm with the Global alarm property arises.
FAN = The relay controls the cooling fan.
MAN = Relay is energized when device is in MAN mode.
AUT = Relay is energized when device is in AUT mode.
A01 ... A13 = The relay is energized when the alarm specified is active.
P.19 - Setpoint (target value) of the cosphi. Used for standard applications.
P.20 - Language of scrolling alarm messages.
MENIU AVANSAT
COD
DESCRIERE
ACC
UdM
DEF
GAMĂ
P.21
Activare cu parolă
Adv
OFF
OFF
ON
P.22
Parolă de utilizator
Usr
001
0-999
P.23
Parolă avansată
Adv
002
0-999
P.24
Tip cablaj
Usr
3PH
3PH trifazic
1PH monofazic
P.25
Reglare putere pas
Usr
OFF
ON Activat
OFF Dezactivat
P.26
Toleranţă + valoare de
referinţă
Usr
0.00
0 –0.10
P.27
Toleranţă - valoare de
referinţă
Usr
0.00
0 –0.10
P.28
Mod introducere pas
Usr
STD
STD Standard
Lin Liniar
ADVANCED MENU
COD
DESCRIPTION
ACC
UoM
DEF
RANGE
P.21
Password enable
Adv
OFF
OFF
ON
P.22
User password
Usr
001
0-999
P.23
Advanced password
Adv
002
0-999
P.24
Wiring type
Usr
3PH
3PH three-phase
1PH single-phase
P.25
Step trimming
Usr
OFF
ON Enabled
OFF Disabled
P.26
Setpoint clearance +
Usr
0.00
0 –0.10
P.27
Setpoint clearance -
Usr
0.00
0 –0.10
P.28
Step insertion mode
Usr
STD
STD Standard
Lin Linear

Doc: I377ROGB03_14.doc 04/03/2014 p. 10 / 19
P.29
Valoare de referință cos
cogenerare
Usr
OFF
OFF /
0.50 IND –0.50
CAP
P.30
Sensibilitate deconectare
Usr
sec
OFF
OFF / 1 –600
P.31
Deconectarea pasului trece
în MAN
Usr
OFF
OFF Dezactivat
ON Activat
P.32
Prag alarmă suprasarcină
curent condensator
Adv
%
125
OFF / 100...150
P.33
Prag deconectare imediată
suprasarcină condensator
Adv
%
150
OFF / 100.. 200
P.34
VT primar
Usr
V
OFF
OFF / 50-50000
P.35
VT secundar
Usr
V
100
50-500
P.36
UoM temperatură
Usr
°C
°C °Celsius
°F °Fahrenheit
P.37
Temperatură pornire
ventilator
Adv
°
55
0…212
P.38
Temperatură oprire
ventilator
Adv
°
50
0…212
P.39
Prag alarmă temperatură
Adv
°
60
0…212
P.40
Prag alarmă eroare pas
Adv
%
OFF
OFF / 25…100
P.41
Prag alarmă tensiune
maximă
Adv
%
120
OFF / 90...150
P.42
Prag alarmă tensiune
minimă
Adv
%
OFF
OFF / 60..110
P.43
Prag alarmă THD V
Adv
%
OFF
OFF / 1..250
P.44
Prag alarmă THD I
Adv
%
OFF
OFF / 1..250
P.45
Interval întreţinere
Adv
h
9000
1 - 30000
P.46
Funcţie grafic de bare
Usr
Kvar
ins/tot
Kvar ins/tot
Corr att/nom
Delta kvar att/tot
P.47
Măsură auxiliară implicită
Usr
Delta
kvar
Deltakvar
V
A
TPF săptămânal
Curent cond.
Temp.
THDV
THDI
ROT
P.48
Iluminare de fundal
intermitentă la alarmă
Usr
OFF
OFF
ON
P.49
Adresă nod serial
Usr
01
01-255
P.50
Viteză serială
Usr
bps
9.6k
1.2k
2.4k
4.8k
9.6k
19.2k
38.4k
P.51
Format dată
Usr
8 bit –n
8 biţi, fără paritate
8 biţi, impar
8 biţi, par
7 biţi, impar
7 biţi, par
P.52
Biţi de stop
Usr
1
1-2
P.53
Protocol
Usr
Modbus
RTU
Modbus RTU
Modbus ASCII
P.21 –Dacă este setat la OFF, este dezactivată gestionarea parolelor iar oricine
poate avea acces la setări şi meniul comenzilor.
P.22 –Cu P.21 activat, aceasta este valoarea care va fi specificată pentru
activarea accesului la nivel de utilizator. Consultaţi capitolul Accesul cu parolă.
P.23 –În ceea ce priveşte P.22, cu referire la Accesul de nivel avansat
P.24 –Numărul fazelor panoului de corectare a puterii.
P.25 - Activează măsurarea puterii efective a pasului, efectuată de fiecare dată
când acestea sunt conectate. Măsura este calculată, în timp ce măsurătoarea
curentului se raportează la sarcina totală a staţiei. Puterea măsurată a paşilor este
ajustată (reglată) după fiecare comutare şi se afişează pe pagina statisticilor de
funcţionare a paşilor. Când este activată această funcţie, se introduce o pauză de
15 s între comutarea unui pas şi a următorului, necesară pentru a măsura variaţia
puterii reactive.
P.26 –P.27 - Toleranţa aproximativă a valorii de referinţă. Când cosphi este în
cadrul gamei delimitate de aceşti parametri, în modul AUT, dispozitivul nu
conectează/deconectează paşii, chiar dacă delta-kvar este mai mare decât cel mai
mic pas.
Notă: + înseamnă „spre inductiv”, în timp ce - înseamnă „spre capacitiv”.
P.29
Cogeneration cos
setpoint
Usr
OFF
OFF /
0.50 IND –0.50
CAP
P.30
Disconnection sensitivity
Usr
sec
OFF
OFF / 1 –600
P.31
Step disconnection passing
in MAN
Usr
OFF
OFF Disabled
ON Enabled
P.32
Capacitor current overload
alarm threshold
Adv
%
125
OFF / 100...150
P.33
Capacitor overload
immediate disconnection
threshold
Adv
%
150
OFF / 100.. 200
P.34
VT primary
Usr
V
OFF
OFF / 50-50000
P.35
VT secondary
Usr
V
100
50-500
P.36
Temperature UoM
Usr
°C
°C °Celsius
°F °Fahrenheit
P.37
Fan start temperature
Adv
°
55
0…212
P.38
Fan stop temperature
Adv
°
50
0…212
P.39
Temperature alarm
threshold
Adv
°
60
0…212
P.40
Step failure alarm
threshold
Adv
%
OFF
OFF / 25…100
P.41
Maximum voltage alarm
threshold
Adv
%
120
OFF / 90...150
P.42
Minimum voltage alarm
threshold
Adv
%
OFF
OFF / 60..110
P.43
THD V alarm threshold
Adv
%
OFF
OFF / 1..250
P.44
THD I alarm threshold
Adv
%
OFF
OFF / 1..250
P.45
Maintenance interval
Adv
h
9000
1 - 30000
P.46
Bar-graph function
Usr
Kvar
ins/tot
Kvar ins/tot
Corr att/nom
Delta kvar att/tot
P.47
Default auxiliary measure
Usr
Delta
kvar
Deltakvar
V
A
Week TPF
Cap. Current
Temp
THDV
THDI
ROT
P.48
Backlight flashing on alarm
Usr
OFF
OFF
ON
P.49
Serial node address
Usr
01
01-255
P.50
Serial speed
Usr
bps
9.6k
1.2k
2.4k
4.8k
9.6k
19.2k
38.4k
P.51
Data format
Usr
8 bit –n
8 bit, no parity
8 bit, odd
8bit, even
7 bit, odd
7 bit, even
P.52
Stop bits
Usr
1
1-2
P.53
Protocol
Usr
Modbus
RTU
Modbus RTU
Modbus ASCII
P.21 –If set to OFF, password management is disabled and anyone has access to
the settings and commands menu.
P.22 –With P.21 enabled, this is the value to specify for activating user level
access. See Password access chapter.
P.23 –As for P.22, with reference to Advanced level access
P.24 –Number of phases of the power correction panel.
P.25 - Enables the measurement of the actual power of the step, performed each
time they are switched in. The measure is calculated, as the current measurement
is referred to the whole load of the plant. The measured power of the steps is
adjusted (trimmed) after each switching and is displayed on the step life statistic
page. When this function is enabled, a 15 sec pause is inserted between the
switching of one step and the following, necessary to measure the reactive power
variation.
P.26 –P.27 - Tolerance around the setpoint. When the cosphi is within the range
delimited by these parameters, in AUT mode the device does not connect /
disconnect steps even if the delta-kvar is greater than the smallest step.
Note: + means ‘towards inductive’, while – means ‘towards capacitive’.

Doc: I377ROGB03_14.doc 04/03/2014 p. 11 / 19
P.28 - Selectarea modului de introducere a paşilor.
Mod standard - Operare normală cu selectarea liberă a paşilor
Mod liniar - paşii sunt conectaţi progresiv de la stânga spre dreapta,
urmând numai numărul paşilor şi în conformitate cu logica LIFO (Last In,
First Out - Ultima intrare, prima ieşire). Controlerul nu va conecta un pas
când paşii sistemului au tensiuni nominale diferite şi, prin conectarea
următorului pas, valoarea de referinţă ar fi depăşită.
P.29 - Valoare de referinţă utilizată când sistemul generează putere activă la
furnizor (cu putere activă/factor de putere negativă).
P.30 - Sensibilitate la deconectare. Asemănător cu parametrul anterior, dar raportat
la deconectare. Dacă este setat la OFF, deconectarea are acelaşi timp de reacţie
pentru conectare ca cel setat cu parametrul anterior.
P.31 - Dacă este setat pe ON, la comutarea din modul AUT în modul MAN, paşii
sunt deconectaţi în secvenţă.
P.32 –Pragul de declanşare pentru protecţia la suprasarcină a condensatoarelor
(alarma A08), care va fi emisă după un timp de întârziere integral, invers
proporţional cu valoarea suprasarcinii.
Notă: Puteţi utiliza această protecţie numai în cazul în care condensatoarele nu
sunt dotate cu dispozitive de filtrare, precum inductoare sau altele asemănătoare.
P.33 - Pragul peste care întârzierea integrală pentru declanşarea alarmei de
suprasarcină este eliminată, cauzând intervenţia imediată a alarmei A08.
P.34 –P.35 –Datele VT eventual utilizate în schemele electrice.
P.36 –Unitatea de măsură pentru temperatură.
P.37 –P.38 - Temperatura de pornire şi oprire pentru ventilatorul de răcire al
panoului, exprimată în unitatea setată de P.36. Ventilatorul de răcire este pornit
când temperatura este >= cu P.37 şi se opreşte când este < decât P.38.
P.39 - Pragul pentru generarea alarmeiA08 Temperatura panoului este prea mare .
P.40 - Pragul de procentaj al puterii reziduale a paşilor, în comparaţie cu puterea
originală programată în meniul general. Sub acest prag este generată alarma A10
eroare pas.
P.41 - Pragul de alarmă al tensiunii maxime, raportat la tensiunea nominală setată
cu P.07, peste care se generează alarma A06 Tensiune prea mare.
P.42 - Pragul de alarmă al tensiunii minime, raportat la tensiunea nominală setată
cu P.07, sub care se generează alarma A05 tensiune prea mică.
P.43 - Pragul de alarmă al THD maxim pentru tensiunea staţiei, peste care se
generează alarma A10 THDV prea mare.
P.44 - Pragul de alarmă al THD maxim pentru curentul staţiei, peste care se
generează alarma A05 tensiune prea mică.
P.45 –Interval de întreţinere în ore. După ce a expirat, se va genera alarma A12
interval de întreţinere. Contorul de ore rămâne activ cât timp dispozitivul este
alimentat.
P.46 –Funcţionarea graficului de bare semi-circular.
Kvar ins/tot: Graficul de bare reprezintă valoarea kvar efectiv introdusă,
raportată la puterea reactivă totală instalată în panou.
Curent act/nom: Procentajul curentului actual al staţiei, raportat la
curentul maxim al CT.
Delta kvar: grafic de bare cu zero în centru. Acesta reprezintă delta-
kvar pozitiv/negativ necesar pentru a atinge valoarea de referinţă, în
comparaţie cu kvar total instalat.
P.47 –Măsură implicită indicată pe afişajul secundar. Setând parametrul la ROT,
vor fi indicate diferite măsuri printr-o rotaţie secvenţială.
P.48 –Dacă este setat la ON, iluminarea de fundal a afişajului se aprinde
intermitent în prezenţa uneia sau a mai multor alarme active.
P.49 –Adresa serială (nod) a protocolului de comunicaţii.
P.50 –Viteza de transmisie a portului de comunicaţii.
P.51 –Format date. Pot fi utilizate setări pe 7 biţi numai pentru protocolul ASCII.
P.52 –Număr bit de stop.
P.53 –Selectarea protocolului de comunicaţii.
P.28 - Selecting mode of steps insertion.
Standard mode - Normal operation with free selection of the steps
Linear mode - the steps are connected in progression from left towards
right only following the step number and according to the LIFO (Last In
First Out) logic. The controller will not connect a step when the system
steps are of different ratings and by connecting the next step, the set-point
value would be exceeded.
P.29 - Setpoint used when the system is generating active power to the supplier
(with negative active power / power factor ).
P.30 - Disconnection sensitivity. Same as the previous parameter but related to
disconnection. If set to OFF the disconnection has the same reaction time of
connection set with the previous parameter.
P.31 - If set to ON, when switching from AUT mode to MAN mode, steps are
disconnected in sequence.
P.32 –Trip threshold for the capacitors overload protection (alarm A08), that will
arise after a integral delay time, inversely proportional to the value of the overload.
Note: You can use this protection only if the capacitors are not equipped with
filtering devices such as inductors or similar.
P.33 - Threshold beyond which the integral delay for tripping of the overload alarm
is zeroed, causing the immediate intervention of the A08 alarm.
P.34 –P.35 –Data of VTs eventually used in the wiring diagrams.
P.36 –Unit of measure for temperature.
P.37 –P.38 - Start and stop temperature for the cooling fan of the panel, expressed
in the unit set by P.36. The cooling fan is started when the temperature is >= to
P.37 and it is stopped when it is < than P.38.
P.39 - Threshold for generation of alarm A08 Panel temperature too high .
P.40 - Percentage threshold of the residual power of the steps, compared with the
original power programmed in general menu. Below this threshold the alarm A10
step failure is generated.
P.41 - Maximum voltage alarm threshold, referred to the rated voltage set with
P.07, beyond which the alarm A06 Voltage too high is generated.
P.42 - Undervoltage alarm threshold, referred to the rated voltage set with P.07,
below which the alarm A05 voltage too low is generated.
P.43 - Maximum plant voltage THD alarm threshold, beyond which the alarm A10
THDV too high is generated.
P.44 –Maximum plant current THD alarm threshold beyond which the alarm A05
voltage too low is generated.
P.45 –Maintenace interval in hours. When it is elapsed, the alarm A12
maintenance interval will be generated. The hour count increments as long as the
device is powered.
P.46 –Function of the semi-circular bar-graph.
Kvar ins/tot: The bar graph represents the amount of kvar actually
inserted, with reference to the total reactive power installed in the panel.
Curr act/nom: Percentage of actual plant current with reference to the
maximum current of the CT.
Delta kvar: bar graph with central zero. It represts the positive/negative
delta-kvar needed to reach the setpoint, compared to the total kvar
installed.
P.47 –Default measure shown on the secondary display. Setting the parameter to
ROT, the different measures will be shown with a sequential rotation.
P.48 –If set to ON, the display backlight flashes in presence of one or more active
alarms.
P.49 –Serial (node) address of the communication protocol.
P.50 –Communication port transmission speed.
P.51 –Data format. 7 bit settings can only be used for ASCII protocol.
P.52 –Stop bit number.
P.53 –Select communication protocol.
MENIU ALARMĂ
COD
DESCRIERE
ACC
UdM
DEF
GAMĂ
P.61
A01 Activare alarmă
Adv
ALA
OFF
ON
ALA
DISC
A+D
P.62
A01 întârziere alarmă
Adv
15
0-240
P.63
A01 uom întârziere
Adv
min.
Min
Sec
…
….
…
…
…
…
P.97
A13 Activare alarmă
Adv
ALA
OFF
ON
ALA
DISC
A+D
P.98
A13 întârziere alarmă
Adv
15
0-240
P.99
A13 uom întârziere
Adv
min.
Min
Sec
ALARM MENU
COD
DESCRIPTION
ACC
UoM
DEF
RANGE
P.61
A01 Alarm enable
Adv
ALA
OFF
ON
ALA
DISC
A+D
P.62
A01 alarm delay
Adv
15
0-240
P.63
A01 delay uom
Adv
min
Min
Sec
…
….
…
…
…
…
P.97
A13 Alarm enable
Adv
ALA
OFF
ON
ALA
DISC
A+D
P.98
A13 alarm delay
Adv
120
0-240
P.99
A13 delay uom
Adv
sec
Min
Sec

Doc: I377ROGB03_14.doc 04/03/2014 p. 12 / 19
P.61 - Activează alarma A01 şi defineşte comportamentul controlerului când
alarma este activă:
OFF - Alarmă dezactivată
ON - Alarmă activată, numai vizual
ALA - Alarmă activată, releu alarmă globală alimentat (dacă este setat)
DISC - Alarmă activată, pas deconectare
A + D = Releu alarmă alimentat şi deconectarea paşilor.
Notă: Când accesaţi parametrii P61, P.64, P67 etc., afişajul auxiliar arată
codul alarmei relative.
P.62 - Alarmă întârziere A01.
P.63 - Unitatea alarmei de întârziere A01.
P.64 –Asemănător cu P.61 pentru alarma A02.
P.65 –Asemănător cu P.62 pentru alarma A02.
P.66 –Asemănător cu P.63 pentru alarma A02.
…
P.97 –Asemănător cu P.61 pentru alarma A13.
P.98 –Asemănător cu P.62 pentru alarma A13.
P.99 –Asemănător cu P.63 pentru alarma A13.
P.61 - Enable alarm A01 and defines the behavior of the controller when the alarm
is active: OFF - Alarm disabled
ON - Alarm enabled, only visual
ALA - Alarm enabled, global alarm relay energized (if set)
DISC - Alarm enabled, logoff step
A + D = Alarm relay energized and disconnection of the steps.
Note: When you access the parameters P61, P.64, P67, etc., the auxiliary
display shows the relative alarm code.
P.62 - Delay alarm A01.
P.63 - Unit of delay alarm A01.
P.64 –Like P.61 for alarm A02.
P.65 –Like P.62 for alarm A02.
P.66 –Like P.63 for alarm A02.
…
P.97 –Like P.61 for alarm A13.
P.98 –Like P.62 for alarm A13.
P.99 –Like P.63 for alarm A13.
Alarme
Când este generată o alarmă, afişajul va arăta o pictogramă de alarmă,
codul şi descrierea alarmei în limba selectată.
Dacă tastele de navigare din pagini sunt apăsate, mesajul defilant care
arată indicațiile alarmei va dispărea pentru moment, pentru a reapărea
din nou după 30 de secunde.
Alarmele sunt resetate automat, imediat ce condiţiile alarmei care le-au
generat dispar.
În cazul uneia sau al mai multor alarme, comportamentul DCRL depinde
de setările proprietăţilor alarmelor active.
Alarms
When an alarm is generated, the display will show an alarm icon, the code
and the description of the alarm in the language selected.
If the navigation keys in the pages are pressed, the scrolling message
showing the alarm indications will disappear momentarily, to reappear
again after 30 seconds.
Alarms are automatically resetted as soon as the alarm conditions that
have generated them disappear.
In the case of one or more alarms, the behaviour of the DCRL depends on
the properties settings of the active alarms.
Descriere alarme
COD
ALARMĂ
DESCRIERE
A01
Sub-compensare
În modul automat, toţi paşii
disponibili sunt conectaţi, dar cosphi
încă este mai inductiv decât valoarea
de referinţă.
A02
Supra-compensare
În modul automat, toţi paşii sunt
deconectaţi, dar cosphi încă este mai
capacitiv decât valoarea de referinţă.
A03
Curent prea mic
Curentul care curge între intrările de
curent este mai mic decât gama de
măsurare minimă.
Această condiţie poate apărea în
mod normal, dacă staţia nu are nicio
sarcină.
A04
Curent prea mare
Curentul care curge între intrările de
curent este mai mic decât gama de
măsurare minimă.
A05
Tensiune prea mică
Tensiunea măsurată este mai mică
decât pragul setat cu P.42.
A06
Tensiune prea mare
Tensiunea măsurată este mai mare
decât pragul setat cu P.41.
A07
Suprasarcină curent
condensator
Suprasarcina curentului
condensatorului calculată este mai
mare decât pragul setat cu P.32 şi
P.33. După ce condiţiile de alarmă
au dispărut, mesajul alarmei rămâne
afişat timp de 5 minute sau până
când utilizatorul apasă o tastă de pe
partea frontală.
A08
Temperatură prea mare
Temperatura panoului este mai mare
decât pragul setat cu P.39.
A09
Micro-întrerupere
A avut loc o micro-întrerupere la
intrările de tensiune ale liniei, care a
durat mai mult de 8 ms.
A10
THD tensiune prea mare
THD-ul tensiunii staţiei este mai
mare decât pragul setat cu P.43.
A11
THD curent prea mare
THD-ul curentului staţiei este mai
mare decât pragul setat cu P.44.
A12
Întreţinere necesară
Intervalul de întreţinere setat cu P.45
a expirat. Pentru a reseta alarma,
utilizaţi comanda C.01 (consultaţi
Meniul comenzilor).
A13
Eroare pas
Puterea reziduală a unuia sau a mai
multor paşi este mai mică decât
pragul minim setat cu P.40.
Alarm description
COD
ALARM
DESCRIPTION
A01
Undercompensation
In automatic mode, all the available steps
are connected but the cosphi is still more
inductive than the setpoint.
A02
Overcompensation
In automatic mode, all the steps are
disconnected but the cosphi is still more
capacitive than the setpoint.
A03
Current too low
The current flowing in the current inputs
is lower than minimum measuring range.
This condition can occour normally if the
plant has no load.
A04
Current too high
The current flowing in the current inputs
is lower than minimum measuring range.
A05
Voltage too low
The measured voltage is lower than the
threshold set with P.42.
A06
Voltage too high
The measured voltage is higher than the
threshold set with P.41.
A07
Capacitor current
overload
The calculated capacitor current overload
is higher than threshold set with P.32 and
P.33. After the alarm conditions have
disappeared, the alarm message
remains shown for the following 5 min or
until the user presses a key on the front.
A08
Temperature too high
The panel temperature is higher than
threshold set with P.39.
A09
No-Voltage release
A no-voltage release has occoured on
the line voltage inputs, lasting more than
8ms.
A10
Voltage THD too high
The THD of the plant voltage is higher
than the threshold set with P.43.
A11
Current THD too high
The THD of the plant current is higher
than the threshold set with P.44.
A12
Maintenance requested
The maintenance interval set with P.45
has elapsed. To reset the alarm use the
command C.01 (see Command menu).
A13
Step failure
The residual power of one or more steps
is lower than minimum threshold set with
P.40.

Doc: I377ROGB03_14.doc 04/03/2014 p. 13 / 19
Proprietăţi implicite alarme
Cod
Descriere
Activare
Releu alarmă
Deconectare
Întârziere
A01
Sub-compensare
●
●
15 min
A02
Supra-compensare
●
120 s
A03
Curent prea mic
●
●
5 s
A04
Curent prea mare
●
120 s
A05
Tensiune prea mică
●
●
5 s
A06
Tensiune prea mare
●
●
15 min
A07
Suprasarcină curent condensator
●
●
●
180 s
A08
Temperatură prea mare
●
●
●
30 s
A09
Micro-întrerupere
●
●
0 s
A10
THD tensiune prea mare
●
●
●
120 s
A11
THD curent prea mare
●
●
●
120 s
A12
Întreţinere necesară
●
0s
A13
Eroare pas
●
●
0s
Default alarm properties
Cod.
Description
Enable
Alarm relay
Disconnection
Delay
A01
Undercompensation
●
●
15 min
A02
Overcompensation
●
120 s
A03
Current too low
●
●
5 s
A04
Current too high
●
120 s
A05
Voltage too low
●
●
5 s
A06
Voltage too high
●
●
15 min
A07
Capacitor current overload
●
●
●
180 s
A08
Temperature too high
●
●
●
30 s
A09
No-Voltage release
●
●
0 s
A10
Voltage THD too high
●
●
●
120 s
A11
Current THD too high
●
●
●
120 s
A12
Maintenance requested
●
0s
A13
Step failure
●
●
0s

Doc: I377ROGB03_14.doc 04/03/2014 p. 14 / 19
Meniul comenzilor
Meniul comenzilor permite executarea unor operaţiuni ocazionale cum ar
fi resetarea vârfurilor de citire, golirea contoarelor, resetarea alarmelor
etc.
În cazul în care a fost introdusă parola de nivel avansat, atunci meniul
comenzilor permite executarea operaţiunilor automate utile pentru
configuraţia dispozitivului.
Următorul tabel listează funcţiile disponibile în meniul comenzilor, divizate
de nivelul de acces necesar.
Cu controlerul în mod MAN, apăsaţi butonul MODE timp de 5 secunde.
Apăsaţi ▲ pentru a selecta CMD.
Apăsaţi MAN-AUT pentru a accesa Meniul comenzilor.
Selectaţi comanda dorită cu MODE sau MAN-AUT.
Apăsaţi şi menţineţi timp de trei secunde ▲dacă doriţi să executaţi
comanda selectată. DCRL arată OK?cu o numărătoare inversă.
Dacă apăsaţi şi menţineţi ▲ până la finalul numărătorii inverse, comanda
este executată, dar dacă eliberaţi tasta înainte de final, comanda este
anulată.
COD.
COMANDĂ
NIVEL DE
ACCES
DESCRIERE
C01
RESETARE ÎNTREŢINERE
Avansat
Resetare interval de service
pentru întreţinere.
C02
RESETARE NUMĂRARE
PAŞI
Avansat
Resetarea contoarelor de
funcţionare a paşilor.
C03
RESETARE REGLARE
PUTERE PAŞI
Avansat
Reîncărcarea puterii programate
iniţial în reglarea puterii paşilor.
C04
RESETARE ORE PAŞI
Avansat
Resetarea contoarelor de ore de
funcţionare pentru paşi.
C05
Resetare VALORI max.
Avansat
Resetarea valorilor maxime.
C06
RESETARE TPF
SĂPTĂMÂNAL
Avansat
Resetarea istoricului săptămânal
al factorului de putere total.
C07
CONFIGURARE LA
IMPLICIT
Avansat
Resetarea programării de
configurare la valorile implicite din
fabrică.
C08
CONFIGURARE COPIE DE
REZERVĂ
Avansat
Realizează o copie de rezervă a
setărilor parametrilor configuraţiei
realizate de utilizator.
C09
CONFIGURARE
RESTAURARE
Avansat
Reîncarcă parametrii de setare
cu copia de rezervă a setărilor
utilizatorului.
Commands menu
The commands menu allows executing some occasional operations like reading
peaks resetting, counters clearing, alarms reset, etc.
If the Advanced level password has been entered, then the commands menu
allows executing the automatic operations useful for the device configuration.
The following table lists the functions available in the commands menu, divided
by the access level required.
Withcontrollerin MAN mode, press the MODE buttonfor 5 seconds.
Press ▲toselect CMD.
PressMAN-AUT to access the Commands menu.
Select the desired command with MODE or MAN-AUT.
Pressand holdfor three seconds ▲ifyou want to executethe selected command.
DCRLshows OK? With a countdown.
If you press and hold ▲ until the end of the countdown the command is
executed, while if you release the key before the end, the command is canceled.
COD
COMMAND
PWD. ACCESS
LEVEL
DESCRIPTION
C01
RESET MAINTENANCE
Advanced
Reset maintenance service interval.
C02
RESET STEP COUNT
Advanced
Reset step operation counters.
C03
RESET STEP TRIMMING
Advanced
Reload originally programmed
power into step trimming.
C04
RESET STEP HOURS
Advanced
Reset step operation hour meters.
C05
Reset max VALUES
Advanced
Reset maximum peak values.
C06
RESET WEEKLY TPF
Advanced
Resets weekly total power factor
history.
C07
SETUP TO DEFAULT
Advanced
Resets setup programming to
factory default.
C08
SETUP BACKUP
Advanced
Makes a backup copy of user setup
parameters settings.
C09
SETUP RESTORE
Advanced
Reloads setup parameters with the
backup of user settings.

Doc: I377ROGB03_14.doc 04/03/2014 p. 15 / 19
Utilizarea modulului dongle CX02
Modulul dongle CX02 oferă capabilitate de punct de acces WiFi pentru
conexiune la PC, tabletă sau smartphone-uri. În plus, acesta oferă şi
posibilitatea de stocare şi de transferare a unui bloc de date de la/către
DCRL.
Introduceţi interfaţa CX02 în portul IR al DCRL pe placa frontală.
Activaţi CX02, apăsând butonul timp de 2 sec.
Aşteptaţi până când ledul LINK se aprinde intermitent în culoarea
portocalie.
Apăsaţi de 3 ori consecutiv şi rapid pe butonul modulului dongle.
În acest moment, afişajul DCRL prezintă primele 6 comenzi posibile
(D1…D6).
Apăsaţi ▲▼pentru a selecta comanda dorită.
Apăsaţi MAN-AUT pentru a executa comanda dorită. Unitatea va solicita
o confirmare (OK?). Apăsaţi din nou pe MAN-AUT pentru a confirma sau
pe MODE pentru a anula.
Următorul tabel prezintă comenzile posibile:
COD
COMANDĂ
DESCRIERE
D1
CONFIGURARE DISPOZITIV
CX02
Copie setările de configurare de la
DCRL la CX02.
D2
CONFIGURARE CX02
DISPOZITIV
Copie setările de configurare de la
CX02 la DCRL.
D3
CLONARE DISPOZITIV CX02
Copie setările de configurare şi
datele de lucru de la DCRL la CX02.
D4
CLONARE CX02 DISPOZITIV
Copie setările de configurare şi
datele de lucru de la CX02 la DCRL.
D5
INFO DATE CX02
Arată informaţiile despre datele
stocate în CX02.
D6
IEŞIRE
Iese din meniul dongle.
Pentru detalii suplimentare, consultaţi manualul de utilizare CX02.
CX02 Dongle usage
The CX02 dongle offers WiFi Access point capability for connection to PC, Tablet
or smartphones. In addition to this function it also offer the possibility to store and
transfer a block of data from/to the DCRL.
Insert the interface CX02 into the IR port of DCRL on the front plate.
Switch CX02 on by pressing the button for 2 sec.
Wait until the LINK LED becomes orange flashing.
Press 3 times consecutively and fast the dongle button.
At this point the display of the DCRL shows the first of the 6 possible commands
(D1…D6).
Press ▲▼to select the desired command.
Press MAN-AUT to execute the selected command. The unit will prompt for a
confirmation (OK?). Press once again MAN-AUT to confirm or MODE to cancel.
The following table lists the possible commands:
COD
COMMAND
DESCRIPTION
D1
SETUP DEVICE CX02
Copies Setup settings from DCRL to
CX02.
D2
SETUP CX02 DEVICE
Copies Setup settings from CX02 to
DCRL.
D3
CLONE DEVICE CX02
Copies Setup settings and working
data from DCRL to CX02.
D4
CLONE CX02 DEVICE
Copies Setup settings and working
data from CX02 to DCRL.
D5
INFO DATA CX02
Shows information about data stored
into CX02.
D6
EXIT
Exits from dongle menu.
For additional details see CX02 Operating manual.

Doc: I377ROGB03_14.doc 04/03/2014 p. 16 / 19
Instalare
DCRL este conceput pentru instalare încastrată. Cu montarea corectă,
acesta garantează protecţie frontală de gradul IP54.
Din interiorul panoului, pentru fiecare patru cleme de fixare, poziţionaţi
clema într-unul dintre cele două ghidaje de glisare, apoi apăsaţi pe colţul
clemei până când se fixează cel de-al doilea ghidaj.
Apăsaţi clema în faţă, apăsând pe laturile acesteia şi glisând-o pe ghidaje
până când se apasă complet pe suprafaţa interioară a panoului.
Installation
DCRL is designed for flush-mount installation. With proper mounting, it
guarantees IP54 front protection.
From inside the panel, for each four of the fixing clips, position the clip in one of
the two sliding guide, then press on the clip corner until the second guide snaps
in.
Push the clip forward pressing on its side and making it slide on the guides until it
presses completely on the internal surface of the panel.
Pentru conexiunea electrică, consultaţi schemele electrice din capitolul
dedicat şi cerinţele incluse în tabelul caracteristicilor tehnice.
For the electrical connection see the wiring diagrams in the dedicated chapter
and the requirements reported in the technical characteristics table.
Scheme electrice
Wiring diagrams
AVERTIZARE!
WARNING!
Deconectaţi tensiunea şi alimentarea când lucraţi asupra
bornelor.
Disconnect the line and the supply when operating on terminals.
Cablaj trifazic standard
Standard Three-phase wiring
CONEXINE STANDARD TRIFAZATĂ (implicit)
Configurare implicită a cablajului pentru aplicaţii standard
THREE-PHASE STANDARD CONNECTION (default)
Default wiring configuration for standard applications.
Măsură tensiune
1 citire de tensiune fază-la-fază L1-L2
Voltage measure
1 ph-to-ph voltage reading L1-L2
Măsură curent
Fază L3
Current measure
L3 phase
Deviere unghi fază
Între V (L1-L2 ) şi I (L3) 90°
Phase angle offset
Between V (L1-L2 ) and I (L3) 90°
Măsura curentului de suprasarcină a
condensatorului
1 citire calculată pe L1-L2
Capacitor overload current measure
1 reading calculated on L1-L2
Setare parametri
P.03 = L3
P.05 = L1-L2
P.24 = 3PH
Parameter setting
P.03 = L3
P.05 = L1-L2
P.24 = 3PH
NOTE
NOTES
Pentru conexiunea trifazică, intrarea tensiunii trebuie conectată fază
la fază; transformatorul de curent trebuie conectat la faza rămasă.
Polaritatea intrării curentului/tensiunii nu are nicio influenţă.
For three-phase connection, the voltage input must be connected phase to phase;
the current transformer must be connected on the remaining phase.
The polarity of the current/voltage input is indifferent.

Doc: I377ROGB03_14.doc 04/03/2014 p. 17 / 19
Cablaj monofazic
Single-phase wiring
CONEXIUNE MONOFAZICĂ
Configuraţie cablaj pentru aplicaţii monofazate
SINGLE-PHASE CONNECTION
Wiring configuration for single-phase applications
Măsură tensiune
1 citire de tensiune fază L1-N
Voltage measure
1 phase voltage reading L1-N
Măsură curent
Fază L1
Current measure
L1 phase
Deviere unghi fază
Între V (L1-N) şi I (L1) 0°
Phase angle offset
Between V (L1-N ) and I (L1) 0°
Măsura curentului de suprasarcină a
condensatorului
1 citire calculată pe L1-N
Capacitor overload current measure
1 reading calculated on L1-N
Setare parametri
P.03 = L1
P.05 = L1-N
P.24 = 1PH
Parameter setting
P.03 = L1
P.05 = L1-N
P.24 = 1PH
NOTE
NOTES
IMPORTANT!
Polaritatea intrării de curent/tensiune nu are nicio influenţă.
IMPORTANT!
The polarity of the current/voltage input is indifferent.
Configurarea cu măsurare şi corectare TM
Configuration with MV measurement and correction
Măsură tensiune
3 citiri de tensiune fază-la-fază L1-L2, L2-L3,
L3-L1 pe partea TM
Voltage measure
3 ph-to-ph voltage reading L1-L2, L2-L3, L3-L1
on MV side
Măsură curent
Fază L1-L2-L3
Current measure
L1-L2-L3 phase
Deviere unghi fază
90°
Phase angle offset
90°
Măsura curentului de suprasarcină a
condensatorului
dezactivată
Capacitor overload current measure
disabilitato
Setare parametri
P.03 = L3
P.05 = L1-L2
P.24 = 3PH
P.34 = VT primar
P35 = VT secundar
Parameter setting
P.03 = L3
P.05 = L1-L2
P.24 = 3PH
P.34 = VT primary
P35 = VT secondary
Cablaj TM
MV wiring

Doc: I377ROGB03_14.doc 04/03/2014 p. 18 / 19
Poziţia bornelor
Terminals position
DCRL3
DCRL5
Dimensiunile mecanice şi decuparea în panoul frontal (mm)
Mechanical dimensions and front panel cutout (mm)
Caracteristici tehnice
Technical characteristics
Alimentare
Supply
Tensiune nominală Us
100 - 440 V~
110 - 250 V=
Rated voltage Us
100 - 440V~
110 - 250V=
Interval tensiune de operare
90 - 484 V~
93,5 - 300 V=
Operating voltage range
90 - 484V~
93,5 - 300V=
Frecvenţă
45 - 66 Hz
Frequency
45 - 66Hz
Consum/disipare putere
3,5 W –9,5 VA
Power consumption/dissipation
3.5W –9.5VA
Micro-întrerupere
>= 8 ms
No-voltage release
>= 8ms
Timp imunitate pentru micro-întreruperi
<= 25 ms
Immunity time for microbreakings
<= 25ms
Siguranţe electrice recomandate
F1A (rapid)
Recommended fuses
F1A (fast)
Intrări tensiune
Voltage inputs
Tensiune nominală maximă Ue
600 V c.a. L-L (346 V c.a. L-N)
Maximum rated voltage Ue
600VAC L-L (346VAC L-N)
Interval de măsurare
50…720 V L-L (415 V c.a. L-N)
Measuring range
50…720V L-L (415VAC L-N)
Interval frecvenţă
45…65 Hz
Frequency range
45…65Hz
Metodă de măsurare
RMS real
Measuring method
True RMS
Impedanţă intrare măsurare
> 0,55 ML-N
> 1,10 ML-L
Measuring input impedance
> 0.55ML-N
> 1,10ML-L
Mod cablaj
Sistem monofazic, bifazic, trifazic cu sau fără
neutru sau sistem trifazic echilibrat.
Wiring mode
Single-phase, two-phase, three-phase with or
without neutral or balanced three-phase system.
Acurateţea măsurătorii
1% ± 0,5 unitate
Accuracy of measurement
1% ±0,5 digit
Siguranţe electrice recomandate
F1A (rapid)
Recommended fuses
F1A (fast)
14
13
12
11
10
9
8
6
7
5
S1
S2
1
2
3
4
Aux supply
100-440V~
V Input
100-600V~
50/60Hz
50/60Hz
B300 / 250V~ 5A AC1 / 1,5A 440V~ AC15 (NO CONTACT)
COM
1
2
3
3,5 W
9,5 VA
Current 0,025-5A~
MAX
10A
14
13
12
11
10
9
8
6
7
5
S1
S2
1
2
3
4
Aux supply
100-440V~
V Input
100-600V~
50/60Hz
50/60Hz
COM
1
2
3
4
5
3,5 W
9,5 VA
Current 0,025-5A~
MAX
10A
B300 / 250V~ 5A AC1 / 1,5A 440V~ AC15 (NO CONTACT)

Doc: I377ROGB03_14.doc 04/03/2014 p. 19 / 19
Intrări curent
Current inputs
Curent nominal Ie
1 A~ sau 5 A~
Rated current Ie
1A~ or 5A~
Interval de măsurare
Pentru scara 5 A: 0,025 - 6 A~
Pentru scara 1A: 0,025 –1,2 A~
Measuring range
For 5A scale: 0.025 - 6A~
For 1A scale: 0.025 –1.2A~
Tip de intrare
Şuntare asigurată de un transformator de
curent extern (tensiune redusă). Max. 5 A
Type of input
Shunt supplied by an external current
transformer (low voltage). Max. 5A
Metodă de măsurare
RMS real
Measuring method
True RMS
Capacitate suprasarcină
+20% Ie
Overload capacity
+20% Ie
Valoare maximă suprasarcină
50 A pentru 1 secundă
Overload peak
50A for 1 second
Acurateţea măsurătorii
± 1% (0,1…1,2 In) ± 0,5 unitate
Accuracy of measurement
± 1% (0,1…1,2In) ±0,5 digit
Consum putere
0,6 VA
Power consumption
0.6VA
Precizie de măsurare
Measuring accuracy
Tensiune linie
0,5% f.s. 1 unitate
Line voltage
0.5% f.s. 1digit
Ieşire releu: DCRL3 OUT 1 - 2/DCRL5 OUT 1 - 4
Relay output: DCRL3 OUT 1 - 2 / DCRL5 OUT 1 - 4
Tip contact DCRL3
DCRL5
2 x 1 NO + contact comun
4 x 1 NO + contact comun
Contact type DCRL3
DCRL5
2 x 1 NO + contact common
4 x 1 NO + contact common
Clasificare UL
B300
30 V= 1 A putere de închidere
UL Rating
B300
30V= 1A Pilot Duty
Tensiune nominală max.
440 V~
Max rated voltage
440V~
Curent nominal
AC1-5A 250 V~ AC15-1,5 A 440 V~
Rated current
AC1-5A 250V~ AC15-1,5A 440V~
Curent maxim la contactul comun
10 A
Maximum current at contact common
10A
Anduranţă mecanică/electrică
1x10⁷/1x105 operaţiuni
Mechanical / electrical endurance
1x10⁷/ 1x10⁵ ops
Ieşire releu: DCRL3 OUT 3/DCRL5 OUT 5
Relay output: DCRL3 OUT 3 / DCRL5 OUT 5
Tip contact
1 comutare
Contact type
1 changeover
Clasificare UL
B300/30 V= 1 A putere de închidere
UL Rating
B300 / 30V= 1A pilot duty
Tensiune nominală max.
415V~
Max rated voltage
415V~
Curent nominal
AC1-5A 250 V~ AC15-1,5 A 440 V~
(numai NO)
Rated current
AC1-5A 250V~ AC15-1,5A 440V~ (NO only)
Anduranţă mecanică/electrică
1x10⁷/1x105 operaţiuni
Mechanical / electrical endurance
1x10⁷/ 1x10⁵ ops
Tensiune izolaţie
Insulation voltage
Tensiune nominală izolaţie Ui
600V~
Rated insulation voltage Ui
600V~
Tensiune nominală de rezistenţă la impuls Uimp
9,5kV
Rated impulse withstand voltage Uimp
9.5kV
Tensiune de rezistenţă la frecvenţă putere
5,2kV
Power frequency withstand voltage
5,2kV
Condiţii ambientale de operare
Ambient operating conditions
Temperatura de operare
-20 - +60°C
Operating temperature
-20 - +60°C
Temperatura de stocare
-30 - +80°C
Storage temperature
-30 - +80°C
Umiditate relativă
80% (IEC/EN 60068-2-78)
Relative humidity
80% (IEC/EN 60068-2-78)
Grad de poluare maxim
2
Maximum pollution degree
2
Categorie suprasarcină
3
Overvoltage category
3
Categorie măsurare
III
Measurement category
III
Secvenţă climatică
Z/ABDM (IEC/EN 60068-2-61)
Climatic sequence
Z/ABDM (IEC/EN 60068-2-61)
Rezistență la şoc
15g (IEC/EN 60068-2-27)
Shock resistance
15g (IEC/EN 60068-2-27)
Rezistenţă la vibraţii
0.7g (IEC/EN 60068-2-6)
Vibration resistance
0.7g (IEC/EN 60068-2-6)
Conexiuni
Connections
Tip bornă
Cu conectare/detaşabilă
Terminal type
Plug-in / removable
Secţiune transversală cablu (min. ... max.)
0,2…2,5 mm² (24…12 AWG)
Cable cross section (min… max)
0.2…2.5 mm² (24…12 AWG)
Clasificare UL
Secţiune transversală cablu (min. ... max.)
0,75…2,5 mm² (18…12 AWG)
UL Rating
Cable cross section (min… max)
0,75…2.5 mm² (18…12 AWG)
Cuplu de strângere
0,56 Nm (5 LBin)
Tightening torque
0.56 Nm (5 LBin)
Carcasă
Housing
Versiune
Montare încastrată
Version
Flush mount
Material
Policarbonat
Material
Polycarbonate
Grad de protecţie
IP54 la partea frontală - IP20 borne
Degree of protection
IP54 on front - IP20 terminals
Greutate
320 g
Weight
320g
Certificări şi conformitate
Certifications and compliance
cULus
În aşteptare
cULus
Pending
Standarde de referinţă
IEC/EN 61010-1, IEC/EN 61000-6-2
IEC/ EN 61000-6-4
UL508 şi CSA C22.2-N°14
Reference standards
IEC/EN 61010-1, IEC/EN 61000-6-2
IEC/ EN 61000-6-4
UL508 and CSA C22.2-N°14
Marcaj UL
Utilizaţi numai conductor din cupru 60°C/75°C
Interval AWG: 18 - 12 AWG torsadat sau solid
Cuplu de strângere borne cablaj câmp:
4,5 lb.in
Montare panou plat pe o carcasă de tipul 1
UL Marking
Use 60°C/75°C copper (CU) conductor only
AWG Range: 18 - 12 AWG stranded or solid
Field Wiring Terminals Tightening Torque:
4.5lb.in
Flat panel mounting on a Type 1 enclosure
Alimentare auxiliară conectată la o linie cu tensiune fază-neutru ≤300 V
Auxiliary supply connected to a line with a phase-neutral voltage ≤300V
Istoric de revizii ale manualului
Manual revision history
Rev.
Data
Notă
Rev
Date
Notes
00
04/03/2014
Prima ediţie
00
04/03/2014
First release
Other manuals for DCRL3
1
This manual suits for next models
1
Table of contents
Other Lovato Controllers manuals

Lovato
Lovato ATL10 Mounting instructions

Lovato
Lovato RGK700 User manual

Lovato
Lovato ADX Series User manual

Lovato
Lovato ADXL Series User manual

Lovato
Lovato DCRL3 User manual

Lovato
Lovato DCRL8 User manual

Lovato
Lovato ATL600 User manual

Lovato
Lovato RGK750 User manual

Lovato
Lovato ADXC 012 400 User manual

Lovato
Lovato RGK900SA User manual
Popular Controllers manuals by other brands

Novus
Novus XL6 quick start guide

JLCooper Electronics
JLCooper Electronics ES-4/100 user manual

PROEL
PROEL PLLEDCNTRHP user manual

Siemens
Siemens SIMATIC S7-1200 manual

ComAp
ComAp InteliLite 4 AMF 20 Global Guide

elsner elektronik
elsner elektronik 70711 Technical specifications and installation instructions