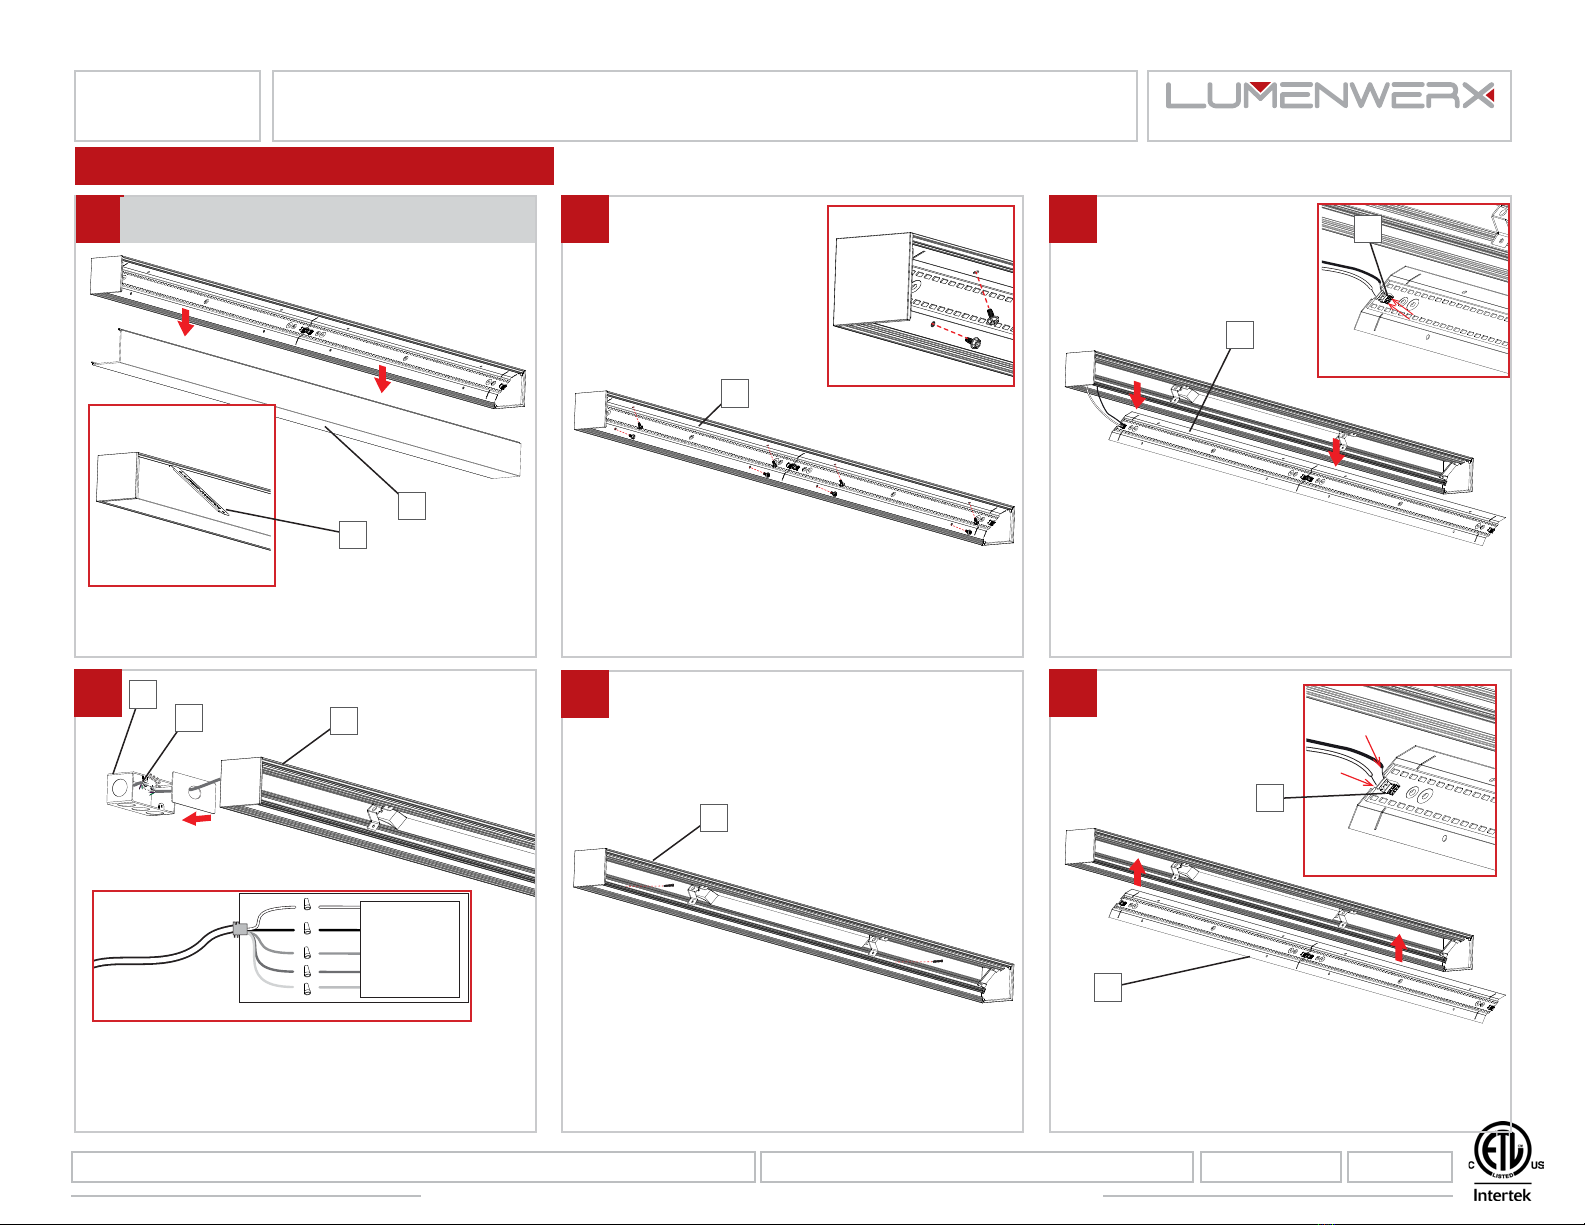
Make the electrical connections on the J-Box (E)
between the fixture (F) and the main power (G)
(connect the wires with the same colors together).
Number of wires may vary.
Fix the fixture (F) to the wall by screwing it directly to
the wall. Align the screws (by other) with the studs
inside the wall.
Put back the reflector (C) in place and reconnect
the wires to the LED molex connectors (D).
WHT WHT
BLKBLK
GRN
GRN
PPLPPL
GRYGRY
DRIVER
FIXTURE
MAIN POWER
Remove the lens (A) using the included lens tool
(B).
Unscrew the cartridge (C) and keep the screws in
a safe place.
Disconnect LED molex connector (D) by taking a
pointed object and pressing on the two tabs on the
top. Remove the cartridge (C) and keep it in a safe
place.
B
A
F
F
G
E
C
D
C
C
D
WWW.LUMENWERX.COM
www.lumenwerx.com (T) 514-225-4304 (F) 514-931-4862 © All rights are reserved to LumenWerx ULC. FILE NAME:CUBITO-LED-SURFACE-WALL-MOUNT-INST November 12, 2019 Page: 1 / 3
LumenWerx ULC. reserves the right to change or modify product specifications without notification
WALL/SURFACE - INSTALLATION INSTRUCTIONS
CUBITO
NOTE: Wire dimming conductors as Class 1
4
21
5
3
6
SINGLE FIXTURE


