Luvele deluxe User manual

Luvele deluxe Vacuum Sealer
LDVS175S
Instructions

Congratulations
on the purchase of your new Luvele deluxe Vacuum Sealer

Sa fet y Inst ruct i ons
Safety Instructions
P/3
• Remove all packaging material before using your Vacuum Sealer for the
first time.
• Do not place your Vacuum Sealer near the edge of a bench or table
during operation. Ensure the surface is level, free of liquids or other
substances.
• Do not place your Vacuum Sealer on or near a hot stove or oven.
• Do not touch the hot sealing element located on the edge of the top
cover of the Vacuum Sealer, as it may be very hot.
• Use only recommended bags and or attachments with your Luvele
Vacuum Sealer, and do not use this appliance for any other purpose
except for its intended use.
• Do not place any parts of the Vacuum Sealer in a dishwasher or
microwave oven.
• Do not immerse the Vacuum Sealer in water or other liquids.
• Never operate damaged appliance (incl. Mains cable).
• Operate appliance only through a professionally installed socket
supplying the correct voltage and do not use extension cables.
• Never remove main cable with wet hands, or lay cable on hot surface,
or let cable come into contact with oil.
• Unplug the appliance after each use, when the appliance is not in use
and before changing accessories or cleaning appliance.
• Do not try and perform any maintenance, other than cleaning. For any
• Do not operate outdoors.
• This appliance is not intended for use by young children or infirm persons
without supervision.
• Use a fire blanket only to extinguish fires on appliance.
• The appliance is not designed for commercial or industrial use, it is for
household use only. Commercial warranty claims are not valid.
Please be sure to read all instructions before using the Luvele deluxe
Vacuum Sealer. Keep these instructions for future reference.

VACUUM:
When pressed in the standby mode it starts
the Vacuum Sealer and commences
automatic operation of vacuuming the
bag and then automatically seals the
bag when vacuum is complete.
PULSE:
The PULSE button is used when full control of the vacuuming process is required.
For example, when vacuum sealing delicate, moist and liquid items less vacuuming time
is required before the bag is sealed.
Alternatively, a longer vacuuming time may be required when vacuum sealing firm and
hard items. The PLUSE button gives full control over how long you vacuum an item before
pressing the seal button. The PULSE button is a unique feature from Luvele.
Press and hold the PULSE button and the vacuum pump turns on, release the button
and it shuts off. When the desired pressure is reached, press the seal button to seal the bag.
CANCEL:
Immediately halts the current function.
SEAL:
This button provides two functions:
First: Press to create a seal when making
bags from a bag roll.
Second: Press to immediately stop the
vacuum process and begin sealing the bag,
preventing delicate foods from being crushed.
VACUUM CANCEL PULSE SEAL
Know your Luvele deluxe Vacuum Sealer
P/4

Release buttons:
On left & right side
of machine. Press
both sides to open
the cover, and
release the vacuum
pressure inside the
machine.
Sealing element:
Teflon-coated heating
element for sealing the bag.
DO NOT REMOVE
Hook:
To lock the cover
to the base.
Sealing strip:
Place the bag to be
sealed under this strip.
Lower gasket:
When cover is locked in place
the lower & upper gasket join
to create an airtight vacuum
chamber.
Air intake:
Air intake valve.
Pumps air from
chamber to create
vacuum seal.
Upper gasket:
Connects with
lower chamber.
Vacuum chamber:
Position the open end
of the bag inside the
chamber, air is drawn
out of the bag and any
liquid overflow from
the bag is caught here.
Canister switch:
To start vacuuming
for canisters, jar
lids, wine stoppers
or other accessories
through a hose.
Bag rest:
Place bags to be
Vacuum sealed
against the two
bag rests for best
sealing results
Know your Luvele deluxe Vacuum Sealer
P/5

Making a bag with a bag roll
1. Plug the unit into a power source.
2. Use scissors to cut a bag from the bag roll to your desired length.
3. Put one end of the bag underneath the sealing strip.
4. Close the upper lid and press tightly till you hear it click in place on both the left and
righ side.
5. Press SEAL button to seal one end of the bag.
6. Press the two release buttons to open the cover and take the bag out of the machine.
The bag is now ready for vacuum sealing.
Operating your Luvele deluxe Vacuum Sealer
P/6
Using your Luvele deluxe Vacuum Sealer

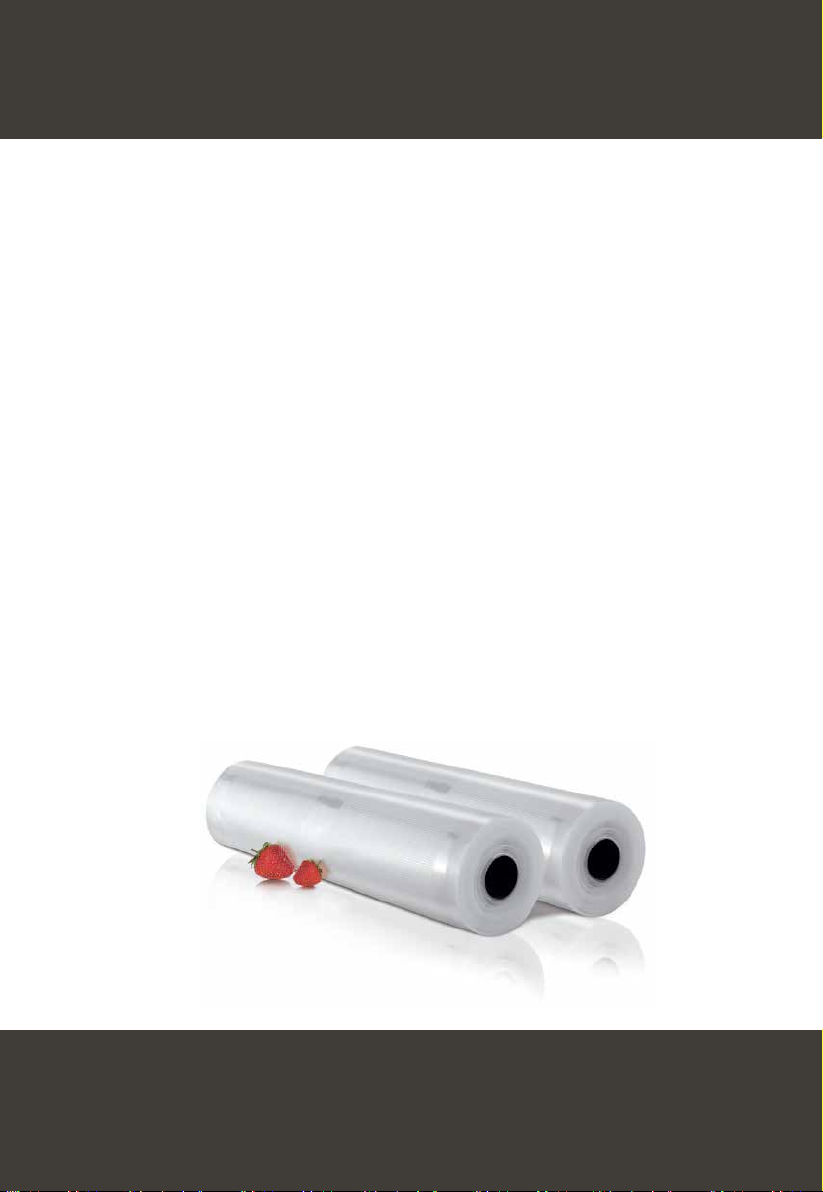
1. Put the item you wish to vacuum seal inside the bag. Use only the specially designed
Luvele vacuum bags/rolls supplied. Luvele high quality bags are designed with
channel on both sides for more consistent vacuum sealing results.
2. Leave at least 5 - 8cm between the top of the item being sealed and the seal line to allow for
bag contraction. Please note, for moist items we recommend 15cm to be left to prevent
moisture from reaching the seal area. Read Page12 for more tips on vacuum sealing liquids.
3. Straighten the open end of the bag, making sure there is no dust, liquid, wrinkles or ripples
in the bag.
4. Place the open end of the bag within the vacuum chamber area. Make sure the end of the
bag is pressed up against the two bag rests within the vacuum chamber.
5. Press the cover down on both sides using both hands until you hear two click sounds
on both the left and right side. The cover will now be secured in place. The lid may be
firm to colse the first few times of use. If needed use the plams fo your hands to press down
on the side to clip lid into place. After a few using the lid/foam gaskets will loosen up.
6. To begin the vacuum process, press the ’’VACUUM’’ button. The unit will continue to vacuum
and then automatically seal once the air has been removed from the bag. Once the LED light
has turned off, press the release buttons on both sides of the machine to release the bag.
Pulse vacuum packaging with a bag
1. The PULSE button is used when full control of the vacuuming process is required.
For example, when vacuum sealing delicate, moist and liquid items less vacuuming time is
required before the bag is sealed.
2. Alternatively, a longer vacuuming time may be required when vacuum sealing firm and hard
items. The PLUSE button gives full control over how long you vacuum an item before
pressing the seal button. The PULSE button is a unique feature from Luvele.
3. Press and hold the PULSE button and the vacuum pump turns on, release the button and it
shuts off. When the desired pressure is reached press the seal button to seal the bag.
NOTE: For the best sealing outcome, it is best to let the appliance cool down for
1 minute before using it again. Wipe out any excess liquid or food residue in the
vacuum chamber after each vacuum seal.
Do not seal one bag after another continuously to avoid overheating of the sealing element.
The machine will reject if “SEAL” button is pressed within 20 seconds of the last activation.
Your sealer can work only on the specific bags provided by Luvele. Do not attempt to use
other bags not intended for vacuum packaging. Cut the bags straight across with scissors to
open a sealed bag.
General vacuum packaging with a bag
P/7

Storage time will vary depending on the freshness of foods that are being vacuumed packaged.
The fresher the foods the longer the storage time will be.
The main element that causes food to lose its nutritional value, texture, flavor, and overall
quality is oxygen. Vacuum packaging helps to extend the life of foods by removing most of
the oxygen in a sealed bag or container. Removing oxygen from stored foods helps to inhibit
the growth of micro-organisms. There are three main types of micro-organisms that effect
stored foods. They are mould, yeast and bacteria.
•Mould: Easy to identify due to its characteristics fuzz. Moulds cannot grow in vacuum
packaging because of the low oxygen environment. Therefore, vacuum packaging
eliminates mould.
• Yeast: Yeast is the fermentation of foods. It can be identified by smell or taste. Yeast
requires sugar and a moderate temperature to grow and it can grow with or without air.
Refrigeration will slow the growth of yeast and freezing stops it completely.
• Bacteria: Bacteria can grow with or without air. Bacteria results in discoloration, soft
or slimy texture and an unpleasant smell. The best way to combat bacteria is to both
vacuum pack and freeze foods.
Storing foods at low temperatures is critical for preserving foods safely. Growth of
micro-organisms is reduced at temperatures below 4° C. Storing foods at -17°C will
not kill micro-organisms but it will stop them from growing. For the best results freeze
perishable foods that have been vacuumed sealed.
Food Storage Information
Thawing and heating vacuumed packages foods
Always thaw frozen foods in the refrigerator or microwave. Do not leave foods to thaw at room
temperature. When microwaving a vacuumed packaged food cut a corner of the bag and place
on a microwave safe tray.
You can reheat foods in a vacuum sealed bag by placing in water at a low simmer
P/8
Food Storage Information

Vacuum Packaging Meat & Fish
For the best results when vacuum packaging meats and fish, pre-freeze for 1-2 hours before
vacuum packaging in bag. This helps meats to retain their shape and prevents any liquids form
overflowing into vacuum sealer.
Vacuum Packaging Cheese
To keep cheese fresh you can vacuum pack after each use. Make the bag extra long when
sealing for the first time. Cut sealed edge when you’re ready to use cheese. To re-package
simply place the cheese back in to the bag and re vacuum seal.
Vacuum Packaging Vegetables
Vegetables need to be blanched before vacuum packaging. This stops enzymes from effecting
the flavor, colour and texture of the vegetable. To blanch vegetables, place in boiling water for
approximately 1 minute. After blanching place the vegetable in to iced cold water to stop the
cooking process. Then dry vegetables on paper towel before vacuum packaging.
Note: Cruciferous vegetables such as broccoli, Brussels sprouts, cabbage and cauliflowers
naturally emit gases during storage. Therefore, after blanching and vacuum packaging they
must be stored in freezer only. Mushrooms and garlic should not be vacuumed packed.
Vacuum Packaging Fruits
Fruits can be vacuumed sealed whole or sliced. For longer lasting storage place fruits in freezer.
Vacuum Packaging Coffee or Powdery Foods
To prevent food particles from being drawn into vacuum pump place a coffee fliter or piece of
paper towel at the top of bag before vacuum packaging. You can also place the food in its
original bag inside a vacuum sealer bag.
Vacuum Packaging Liquids
Before vacuum packaging liquids such as stock, pre-freeze in a ice cube tray until frozen. Place
frozen cubes into vacuum sealer bag. When ready to use place frozen cube straight in to dish
being prepared.
Vacuum Packaging for Marinating
Vacuum sealing opens the pores in foods such as meats, poultry and seafood absorbing
marinades much aster that traditional methods. When vacuum sealing marinades do not overfill
bag. This will ensure that liquid does not enter the vacuum chamber.
Re-sealing Chip Packets
You can utilise the seal strip to re-seal packaging that has already undergone a commercial
quality seal.This allows half consumed packets of chips, crackers and cereals to be resealed
by placing on sealing strip. When resealing, ensure that the bag does not reach into the vacuum
chamber, as it will crush delicate items. Use this method to reseal suitable packets only.
Tips for Vacuum Packaging Food Items
P/9

The Luvele deluxe Vacuum Sealer can also be used to protect non-food items from
corrosion, oxidation and moisture. The same process can be used to vacuum seal
non-food items as food items.
Vacuum Packaging Silver Ware & Cutlery
When vacuum packaging silver ware and cutlery make sure any sharp edges are covered
with a soft cushioning material such as paper towel to avoid puncturing bag.
Vacuum Packaging First Aid Kits
Vacuum packaging first aids kits to store in your home, boat or car is a great way to keep
items dry and free from dirt and mould. Also consider vacuum sealing flares, batteries,
flashlight, candles and matches.
Vacuum Packaging for Outdoor Activities
When campling vacuum packing your clothes can save space in your bag and keep dry at the
same time. Also, vacuum seal your maps, matches and snacks.
Vacuum Packaging paint brushes
When painting around the home you can vacuum package your wet paint brushes between
coats rather that washing. This is particularly useful for oil based paints that require mineral
turpentine to clean.
Vacuum Packaging Ice
You can vacuum package ice to use as an icepack for picnics and other outdoor activities.
When the ice melts you then have fresh drinking water or refreeze to use again as an icepack
Vacuum Packaging Non-Food Items
P/10

Nothing happens when I try to vacuum seal a bag
• Check power cord to see if it is firmly plugged into electrical outlet.
• Examine power cord for any damage.
• See if electrical outlet is functioning by plugging in another appliance.
• If your appliance has a mode switch, make sure it is set to the correct mode. Refer to the
above operating instructions
• Make sure the bag is placed correctly inside the Vacuum chamber and pressed against
the bag rests.
• Make sure both sides of the cover have been clipped into place. A firm pressing down on
the left and right hand side of the cover is required to achieve the sides to click securely.
The vacuum sealer will not begin operation otherwise.
Air is not removed from the bag completely
• To seal properly, the open end of the bag should be resting entirely inside the vacuum
chamber area.
• It is important that the bag does not wrinkle at the seal like when vacuum sealing. To
prevent this from happening make sure the is at least 5 cm of bag roll between the top of
the item being sealed and the seal like. The bag must be completely flat on the seal line.
• Check the sealing strip and the foam gasket are free of debris and in their correct position.
Make sure there is no damage to the foam gaskets, both the upper and lower gaskets. Also,
make sure the foam gaskets are flat in their respective groves. If needed, wipe clean and
smooth them back into place gently with your fingers.
• Vacuum bag may have a leak. To test, seal the bag with some air in it, submerge in
water, and apply pressure. Bubbles indicate a leak. Reseal or use another bag.
• Use only the specified ‘double sided’ vacuum bags with vacuum channels provided
by Luvele.
• Leaks along the seal can be caused by wrinkles, debris crumbs, grease or liquids.
Reopen bag, wipe the top inside of the bag and smooth it out along the sealing strip
before resealing.
Air has re-entered into the bag after being sealed
• Leaks along the seal line can be caused by wrinkles, crumbs, grease or liquids. Reopen
bag, wipe inside of the bag and smooth it out along the sealing strip before resealing.
• The release of natural gases or fermentation from foods such as fresh fruits and
vegetables may occur. Most vegetables require blanching prior to vacuum packaging.
See page 9 for further instructions.
• Open bag if you think food has begun to spoil, and discard food. Lack of refrigerator or
fluctuating temperatures in the refrigerator can cause food to spoil. If food is not spoiled
then consume food immediately.
• Check the bag for a puncture or hole which may have released the vacuum. Do not
vacuum seal hard items with sharp points like bones or shell. Cushion sharp edges in
the contents of the bag with paper towels.
Troubleshooting
P/11

Vacuum Sealing moist or liquid items
Many troubles faced when vacuum sealing are from trying to seal moist or liquid items.
Moist items are more difficult to vacuum seal because the moisture in the items naturally
wants to get sucked towards the seal area where the vacuuming is taking place. If the
moisture reaches the seal area the vacuum sealer will automatically start to seal the item.
This can happen while there is still air in the bag and can give the appearance that the
vacuum sealer is not working correctly.
Following are some tips to overcome this:
• If attempting to seal moist meats like fish and chicken, it is recommended that you cut
you vacuum bag with extra length, so there is room for the moisture to move during the
vacuuming process and so the moisture does not reach the seal area. 10cm should be
enough length from the end of the meat item to the seal area.
• Another solution to sealing high moisture items is to wrap them in plastic wrap then
place them in the vacuum bag to be vacuum sealed. This should prevent most of the
liquid being sucked towards the seal area.
• If placing large moist items in a bag like a whole fish, it is very important you do not
leave any moisture near the seal area. Once you have placed this type of item in the
bag, use some dry paper towel to wipe down the seal area for a successful outcome.
• Liquid items like soups, stocks, gravy etc should all be frozen before attempting to
seal with a bag.
The bag melts
• If the heating element overheats and melts the bag, it may be necessary to lift
the lid and allow the heating element to cool for a few minutes.
Troubleshooting
P/12

Cleaning your Vacuum Sealer
1. Always unplug the unit before cleaning.
2. Do not immerse in water or any other liquid.
3. Avoid using abrasive products or material to clean the unit, as they will scratch the
surface.
4. Use a mild dishwashing soap and a warm, damp cloth to wipe away food residue on
or around components.
5. Dry thoroughly before using again.
Note: The foam gaskets around the vacuum chamber should be cleaned & dried thoroughly
before storing. Do not store the Vacuum Sealer with the lid clipped shut as it will compress and
damage the foam gaskets.
Cleaning vacuum bags
1. Wash bags in warm water with a mild dishwashing soap
2. When washing bags in dishwasher, turn bags inside out and spread them over top rack of
dishwasher, so entire surface is exposed to the washing water.
3. Dry thoroughly before reusing.
IMPORTANT: To avoid possible illness, do not reuse bags after storing raw meats,
raw fish or greasy foods. Do not reuse bags that have been microwaved or boiled.
Storing Your Vacuum Sealer:
1. Keep the unit in a flat and safe place, out of the reach of children.
2. Remember to make sure the lid of the appliance is unlocked when not in use and
in storage. Locking the cover will distort the foam gaskets causing leaking.
Storage and Cleaning
P/13

Foods
Meat
Beef, Pork, Lamb Freezer
Ground Meat Freezer
Poultry Freezer
Fish Freezer
Hard Cheeses
Cheddar, Swiss
Refrigerator
Parmesan Refrigerator
Vegetables (Most vegetables need to be blanched before vacuum sealing)
Asparagus Freezer
Broccoli, Cauliflower Freezer
Cabbage, Brussels
Sprouts
Freezer
Corn (cob or kernel) Freezer
Green Beans Freezer
Lettuce, Spinach Refrigerator
Snow Peas, Snap Peas Freezer
Fruits
Apricots, Plums Freezer
Peaches, Nectarines Freezer
Softer Berries
Raspberries,
Blackberries
Refrigerator
Strawberries Refrigerator
Harder Berries
Blueberries Refrigerator
Cranberries Refrigerator
Where to
store
2-3 years 6 months
1 year 4 months
2-3 years 6 months
2 years 6 months
4-8 months1-2 weeks
4-8 months1-2 weeks
2-3 years 8 months
2-3 years 8 months
2-3 years 8 months
2-3 years 8 months
2-3 years 8 months
2 weeks 3-6 days
2-3 years 8 months
1-3 years 6-12 months
1 week1-3 days
1 week1-3 days
2 weeks 3-6 days
2 weeks 3-6 days
Storage life when
vacuumed sealed
Normal storage
life
P/14
Storage Life Guide Continued

Foods
Baked Goods
Bagels, Bread, Pastries Freezer
Nuts
Almonds, Peanuts Pantry
Sunflower Seeds Pantry
Coffee
Coffee Beans Freezer
Coffee BeansPantry
Ground Coffee Freezer
Ground Coffee Pantry
Prepared Liquids
Sauces, Soups, Stews Freezer
Dry Foods
Beans, GrainsPantry
Pasta, RicePantry
Powdery Foods
Dry Milk Pantry
Dried Coconut Pantry
FlourPantry
Sugar, Brown Sugar Pantry
Snack Foods
Chips Pantry
Cookies, CrackersPantry
Where to
store
1-3 years 6-12 months
2 years 6 months
2 years 6 months
2-3 years 6 months
1 year 3 months
2 years 6 months
5-6 months
1-2 years 3-6 months
1-2 years 6 months
1-2 years 6 months
1-2 years 6 months
1-2 years 6 months
1-2 years 6 months
1-2 years 6 months
3-6 weeks 1-2 weeks
3-6 weeks 1-2 weeks
Storage life when
Vacuumed sealed
Normal storage
life
P/15
Storage Life Guide Continued

The complete Luvele range of products is backed by our 1 Year Total Cover
Warranty. Our warranty will covers any manufacturing fault with the product and
will also cover damage caused during transit.
Your warranty starts from the purchase date of your Luvele product.
You do not need to register your warranty as your details are automatically
processed at the time of purchase.
Warranty Process
We want to make any warranty claim as simple as possible for you. All you need to
problem you are having with your item. Firstly, we will suggest some
troubleshooting ideas to establish whether or not the issue can be fixed without a
return. Photos of the fault may be requested if and where appropriate, and if it
will ensure a faster resolution.
Generally, if you have an issue with your item within 30 days of receiving it, we will
email you a prepaid return label that can be printed out and used to send the item
back with. We will then generally send you a brand new item. The new item will be
shipped within 48 hours of receiving the faulty item back. A confirmation email will
be send when your faulty item is received back.
If you have an issue after the 30 day period we will consider repairing your item if
suitable. If it cannot be repaired it will be replaced with a brand new item. Refunds
will only be offered within the 30 day money back guarantee, if you choose this
option over a new replacement. Outside of this 30 day period, your item will be
repaired or replaced.
We are here to help, so please email us and the best solution to meet your needs
will be offered.
1 Year Warranty
P/16

www.luvele.com
This manual suits for next models
1
Table of contents
Other Luvele Kitchen Appliance manuals

Luvele
Luvele Razor LRMS180W User manual

Luvele
Luvele LEFD400 User manual

Luvele
Luvele Breeze Food Dehydrator User manual

Luvele
Luvele LFVC4SETEU User manual

Luvele
Luvele LBFD500EU User manual

Luvele
Luvele supreme User manual

Luvele
Luvele LCPUMPAUS User manual

Luvele
Luvele LBTM400W User manual

Luvele
Luvele LPPYM300WUS User manual

Luvele
Luvele SUPREME PLUS User manual