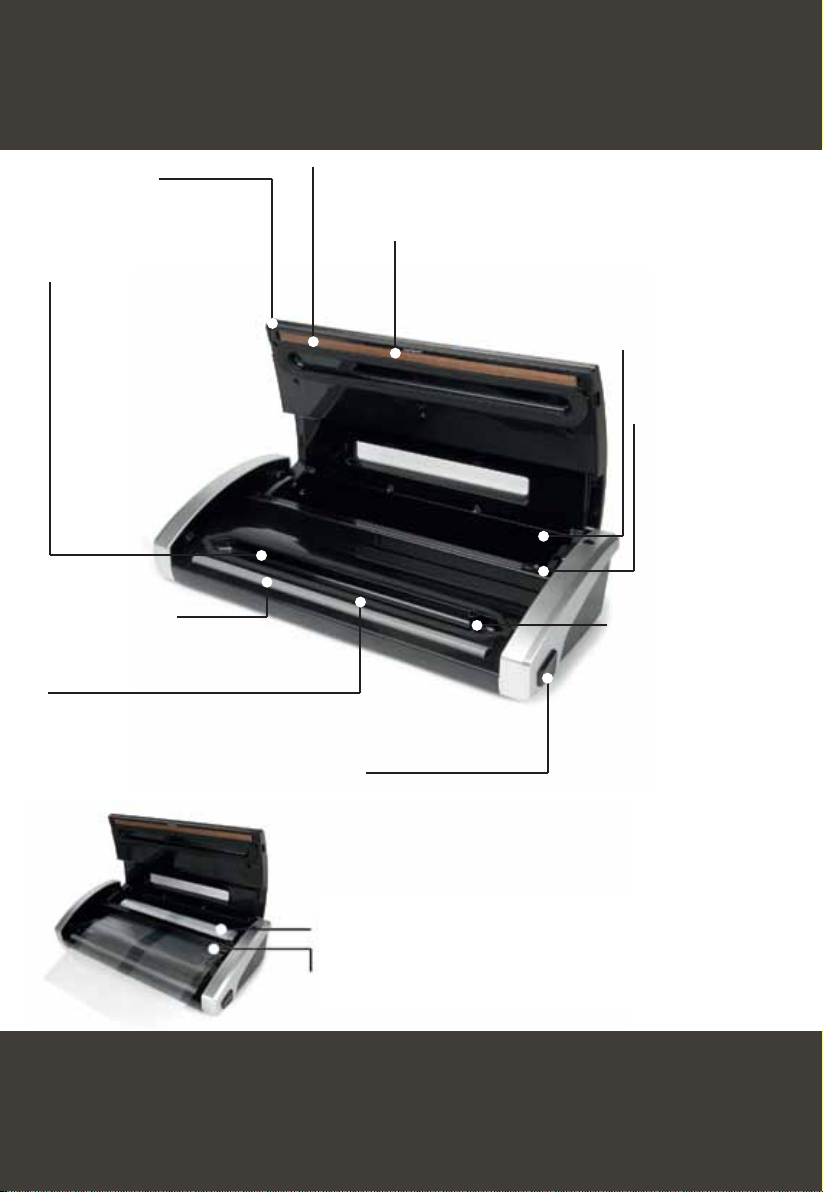
Know your Luvele supreme Vacuum Sealer
P/4
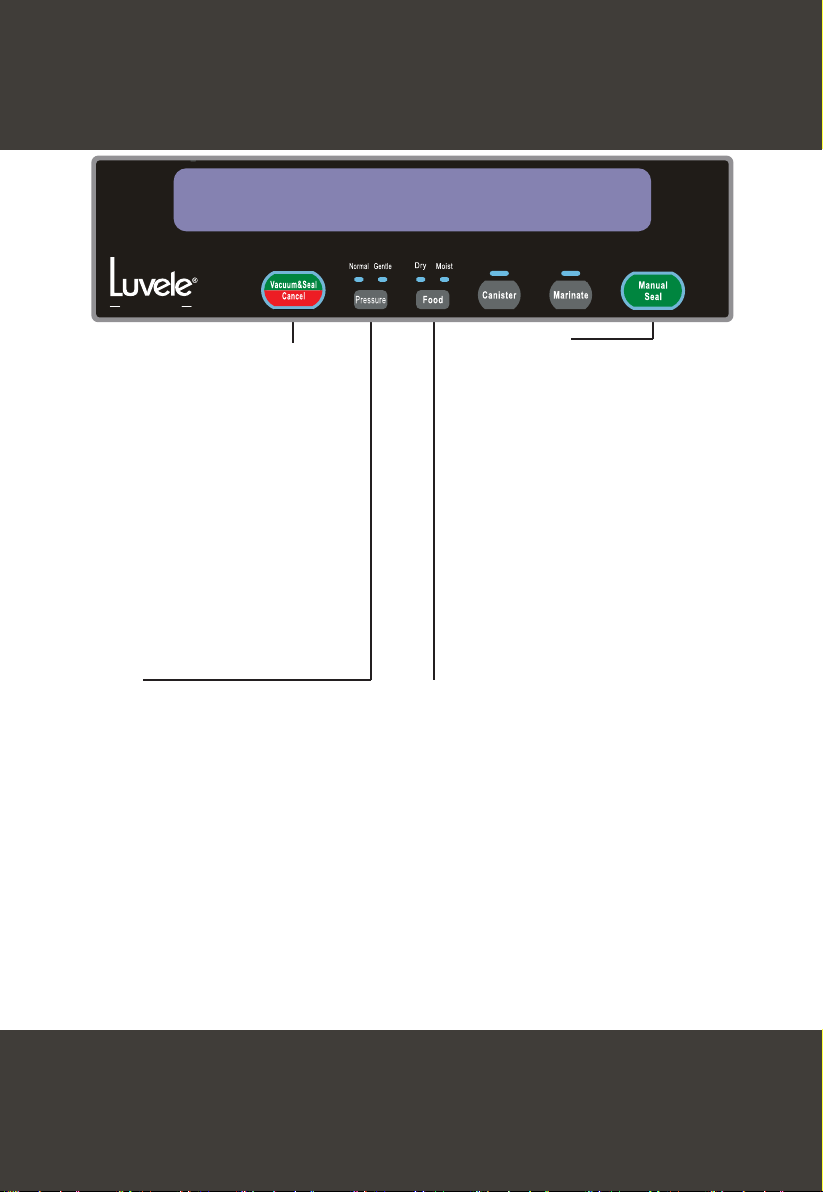
Vacuum & Seal / Cancel:
This button has two functions
depending on the machine’s status:
Vacuum & Seal: When pressed in
the standby mode it starts the
Vacuum Sealer and commences
automatic operation of vacuuming
the bag and then automatically
seals the bag when vacuum is
complete.
Cancel: If pressed when Vacuum
Sealer is in operation, it will stop
the machine.
Food:
This button is used for choosing the
best bag seal time:
Dry setting: for dry bags and items
without moisture, with a shorter heat
sealing time.
Moist setting: for wet bags or foods
with moisture, with an extended heat
sealing time.
Default setting is for dry bags and
normal sealing time.
Pressure:
This button offers the choice of two
different vacuum pressure:
Normal Setting: for regular items
storage in normal vacuum pressure.
Gentle Setting: for soft & crushable
items where less vacuum pressure is
required. Default setting is normal
vacuum pressure.
Manual Seal:
This button provides two functions:
First: To manually seal the open end
of a bag without vacuuming, used to
make a bag from a bag roll.
Second: When the automatic
“Vacuum & seal” function is in
operation, this button can be
pressed to stop the motor pump and
immediately starts to seal the bag so
that less vacuum pressure inside the
bag can be controlled by the operator
to avoid crushing for delicate items.
Canister: To start vacuuming for canisters,
jar lids, wine stoppers or other accessories
through a hose.
PLEASE NOTE: Not all canister accessories are
currently available through Luvele.
Marinate: Press to marinate food in
a marinator bowl.
LSVS130G