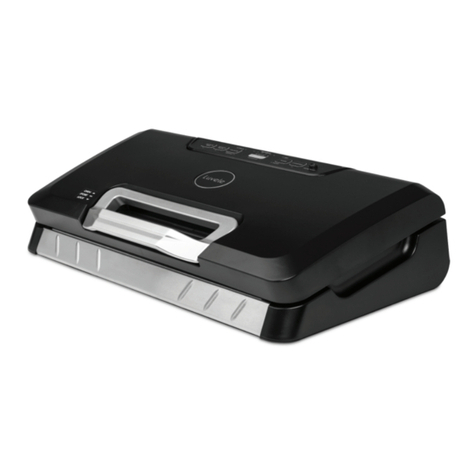
Luvele SUPREME PLUS User manual

LUVELE SUPREME PLUS VACUUM SEALER Instruction
Booklet
LSPVS120EU
eu

Congratulations
on the purchase of your new Luvele Supreme PLUS Vacuum Sealer
INSTRUCTION | P3
Notes

This appliance is intended to be used in household and similar applications
such as:
• Sta kitchen areas in shops, oces and other working environments;
• Farm houses;
• By clients in hotels, motels and other residential type environments;
• Bed and breakfast type environments
This appliance is not intended for use by persons (including children) with
reduced physical, sensory or mental capabilities, or lack of experience and
knowledge, unless they have been given supervision or instruction concerning
use of the appliance by a person responsible for their safety.
Children 8 years and above can use this appliance, however, they should be
supervised to ensure that they do not play with the appliance. Children
should now play with the appliance.
Cleaning and user maintenance shall not be made by children unless they are
older than 8 years old and supervised.
Keep the appliance and its cord out of reach of children less than 8 years.
Check the power supply cord for damage from time to time. If the power supply
cord is damaged, it must be replaced by the manufacturer or its service agent or
a similarly qualified person in order to avoid a hazard.
Use only designated accessories enclosed. This appliance is not intended to be
operated by means of external timer or separated remote-control system.
INSTRUCTION | P4
Safety
• Remove all packaging material before using your Vacuum Sealer for the first time.
• Do not place your Vacuum Sealer near the edge of a bench or table during
operation. Ensure the surface is level, free of liquids or other substances.
• Do not place your Vacuum Sealer on or near a hot stove or oven.
• Do not touch the hot sealing element located on the edge of the boom of the
Vacuum Sealer, as it may be very hot.
• Use only recommended bags and or aachments with your Luvele Vacuum
Sealer, and do not use this appliance for any other purpose except for its
intended use.
• Do not place any parts of the Vacuum Sealer in a dishwasher or microwave oven.
• Do not immerse the Vacuum Sealer in water or other liquids.
• Never operate damaged appliance (incl. Mains cable).
• Operate appliance only through a professionally installed socket supplying the
correct voltage and do not use extension cables.
• Never remove main cable with wet hands, or lay cable on hot surface, or let cable
come into contact with oil.
• Unplug the appliance after each use, when the appliance is not in use and before
changing accessories or cleaning appliance.
• Do not try and perform any maintenance, other than cleaning. For any
maintenance issues please contact Luvele at support@luvele.com
• Do not operate outdoors.
• This appliance is not intended for use by young children or infirm persons without
supervision.
• Use a fire blanket only to extinguish fires on appliance.
• The appliance is not designed for commercial or industrial use, it is for household
use only.
INSTRUCTION | P5
Please be sure to read all instructions before using the Luvele
Supreme PLUS Vacuum Sealer. Keep these instructions for future reference.
Safety
INSTRUCTION | P6
Features
INSTRUCTION | P7
Features
Upper gasket:
Connects with
lower chamber.
SEAL
To manually seal the open end of a bag without vacuuming, used to make a bag from
a bag roll.
PULSE
The PULSE buon is used when full control of the vacuuming process is required. For
example, when vacuum sealing delicate, moist & liquid items, less vacuum pressure
may be required before the bag is sealed.
Alternatively, a longer vacuuming time may be required when vacuum sealing firm &
hard items. The PULSE buon gives full control over how long you vacuum an item
before pressing the SEAL buon.
Press and hold the PULSE buon and the vacuum pump turns on, release the buon
and it shuts o. When the desired pressure is reached, press the SEAL buon to seal
the bag.
VACUUM
This buon oers the choice of two dierent vacuum pressures:
NORMAL Seing: for regular items.
GENTLE Seing: for soft & crushable items where less vacuum pressure is required.
Default seing is normal vacuum pressure.
Upper Vacuum
Chamber
Bag Cuer Rack
Press and slide in
one direction or
another to cut bags
to desired size
Lower Vacuum
Chamber:
Position the open end
of the bag inside the
chamber, air is drawn
out of the bag and
any moisture overflow
from the bag is caught
here.
Dual Seal Strip:
Teflon-coated
dual heating
element for
sealing the bag.
Lower gasket:
When cover is
locked in place
the lower & upper
gasket join to
create an airtight
vacuum chamber.
Bag Roll Storage
Chamber:
Store your 28cm or
22cm bag rolls here.
Pull out required
length of bag roll,
then cut it to size
with the ‘Bag Cuer’.
Air intake:
Air intake valve
pumps air from
chamber to create
vacuum seal.
Hook:
To lock the cover
to the base.
Seal Bar:
Secures the bag to be sealed
over the dual seal strip.

INSTRUCTION | P8
Features
INSTRUCTION | P9
FOOD
This buon is used for choosing the best bag seal time:
DRY seing: This is used for dry food & will shorten the time the dual seal strip
is on.
MOIST seing: Used for wet bags or foods with moisture, & will increase
the time the dual seal strip is on.
Default seing is for dry bags and normal sealing time.
VACUUM & SEAL / CANCEL
This buon has two functions depending on the machine’s status:
VACUUM & SEAL: When pressed in the standby mode it starts the vacuum sealer
and commences automatic operation of vacuuming the bag and then automatically
seals the bag when vacuum is complete.
CANCEL: If pressed when vacuum sealer is in operation, it will stop the machine.
CANISTER
To start vacuuming for canisters through a hose accessory. Canisters are available at
luvele.eu.
Features
Easy Lock Handle:
The ‘Easy Lock Handle’ has been designed so no pressure is required to close the lid
and lock a bag into position ready for vacuum sealing. With a gentle push the easy lock
handle clips the lid closed and vacuuming can begin. The easy lock handle also has a
‘store’ position, which it used to store the vacuum sealer and prevent the foam gaskets
from becoming damaged or compressed.
Open - In the open position the lid can be opened, ready for use.
Store - When storing the vacuum sealer, place the handle in the ‘Store’ position to
prevent the foam gaskets from becoming damaged or compressed.
Lock - Place the handle in the ‘Lock’ position once a vacuum bag is in position, to
begin vacuum sealing.

SPARE SET OF FOAM GASKETS INCLUDED:
We include a spare set of foam gaskets with our Supreme PLUS model.
If looked after the foam gaskets should last for years.
The foam gaskets are a replaceable part and need to be looked after for your vacuum
sealer to work at its optimal level. Please follow these steps when using your vacuum
sealer.
1. After each use be sure the upper and lower foam gaskets are free of all food and
moisture residue. Wipe down with a damp clean cloth if required.
2. After each use, check that both the upper and lower foam gaskets are siing flat
in their grooves for storage.
3. If you are vacuum sealing multiple bags in one session, regularly check that the
foam gaskets are siing flat in their grooves.
INSTRUCTION | P10
!PLEASE NOTE:
This hose aachment is only compatible with the Luvele Glass
Canister Set and will not fit other brands of vacuum canisters.
INSTRUCTION | P11
Features Features
If your Supreme PLUS does stop vacuum sealing at any time, then it is
most likely an issue with the foam gaskets.
We suggest to first try cleaning them if they are dirty, by wiping them
down with a damp clean cloth. You can also try to flip them over and
place them back in their grooves.
Or, you can replace your foam gaskets with the new set provided.
CANISTER HOSE ATTACHMENT
The canister hose aachment is included to use with your Luvele Glass Canister Set.
These can be purchased at luvele.eu.

Close the lid and place the ‘Easy Lock Handle’ in the ‘Lock’ position.
Press the ‘Seal’ buon to seal one end of the bag.
Lift the ‘Easy Lock Handle’ to the ‘Open’ position to open the cover and take
the bag out of the machine. The bag is now ready for vacuum sealing.
INSTRUCTION | P12
Operation
MAKING A BAG WITH A BAG ROLL:
Plug the unit into a power source and then open the top cover.
Place a bag roll into the bag roll storage chamber.
Lift up the bag cuer rack.
Pull the required length of the bag roll out and place it under the bag cuer
rack.
Place the bag cuer rack down, making sure the bag cuer knob is fully to
the left or to the right. Then slide the cuer knob from one end to the other
end to cut the bag.
Put one end of the bag on top of the dual seal strip, but make sure the end
does not enter the vacuum chamber.
STEP
2
STEP
4
STEP
5
STEP
6
STEP
7
STEP
8
STEP
9
STEP
1
STEP
3
INSTRUCTION | P13
Operation

SMART SEAL TECHNOLOGY | DUAL SEAL STRIP:
Luvele’s ‘Smart Seal Technology’ allows for up to 100 bag seals in a row without
overheating the Dual Seal Strip. The smart seal system manages the heat distribution
of the Dual Seal Strip to maintain an even and constant temperature throughout use.
!
IMPORTANT:
If you are going to seal multiple bags in a row, it is important to take
your time and not rush it. Be sure the bags are packed well and not
overfilled. Be sure the food stays in the bag and does not spill on
to the vacuum sealer. Be sure to check the foam gaskets regularly
to make sure they are siing flat in their grooves and free of food
residue.
!IMPORTANT:
The Dual Seal Strip must be kept free of all food and moisture
residue at all times. If any food or mositure accidentally comes into
contact with the Dual Seal Strip it must be cleaned o with dry
paper towel or a dry cloth immediately.
PLEASE NOTE:
The Smart Seal feature will take approximately 3-4 bag seals to
warm-up. The first few bag seals may be a lile slower, while the dual
seal strip warms up. Please keep this in mind when using the Luvele
Supreme PLUS vacuum sealer.
!
INSTRUCTION | P14
Operation
INSTRUCTION | P15
Operation

INSTRUCTION | P16
Operation
VACUUM SEALING WITH A BAG:
Put the items you wish to vacuum seal inside the bag. Use only the specially
designed vacuum bags/rolls supplied by Luvele.
Straighten the open end of the bag and make sure there are no folds
in the bag.
Place the open end of the bag within the vacuum chamber area. Make sure
the air intake is not covered by the bag.
Close the lid and place the ‘Easy Lock Handle’ in the ‘Lock’ position.
!IMPORTANT:
The bag on the Dual Seal Strip must be completely flat. Make sure
there is approximately 5cm of bag roll between the top of the item
being sealed in the bag and the Dual Seal Strip. Sealing the bag
too close to the food in the bag can cause wrinkles and prevent the
vacuum sealer from sealing the bag.
STEP
2
STEP
4
STEP
1
STEP
3
INSTRUCTION | P17
Operation
Check the LED status of the VACUUM buon and the FOOD buon.
If the item you are sealing is dry then select DRY on the FOOD buon. If
the item is moist then select MOIST on the FOOD buon. Then select the
desired vacuum pressure with the VACUUM buon. Select NORMAL for
general items. If you need to seal delicate items then select the GENTLE
buon.
When you have set the FOOD buon and VACUUM buon to desired
seings, then press the VACUUM & SEAL buon. The unit will then vacuum
the bag and when complete will automatically seal the bag.
The vacuum packaging is now done. Lift the ‘Easy Lock Handle’ to the open
position and take out the vacuum packed bag.
STEP
5
STEP
6
!IMPORTANT:
Wipe out any excess food residue in the vacuum chamber after each
vacuum seal. After 100 vacuum seals in a row, allow the vacuum
sealer to cool down for 40 minutes.

Replacement bag roll packs can be ordered at luvele.eu.
Scan the QR code to access bag rolls:
INSTRUCTION | P18
Operation
INSTRUCTION | P19
Operation
!IMPORTANT:
The Luvele Supreme PLUS should only be used with specifically
designed vacuum sealer bags provided by Luvele. Do not aempt
to use other bags not intended for vacuum sealing. Cut the bags
straight across with scissors to open a sealed bag.
VACUUM SEALING MOIST ITEMS:
Many troubles faced when vacuum sealing are from trying to seal moist or liquid
items. Moist items are more dicult to vacuum seal because the moisture in the bag
naturally wants to get sucked towards the seal area where the vacuuming is taking
place. If the moisture reaches the seal line the vacuum sealer will automatically start
to seal the item. This can happen while there is still air in the bag and can give the
appearance that the vacuum sealer is not working correctly.
Following are some tips to overcome this:
>If aempting to seal moist meats like fish and chicken, it is recommended that you
cut the vacuum bag with extra length, so there is room for the moisture to move
during the vacuuming process and so the moisture does not reach the seal line. Ten to
fifteen centimetres [10-15cm] should be enough length from the end of the meat item
in the bag to the seal line.
>Another solution to sealing high moisture items is to wrap them in plastic wrap then
place them in the vacuum bag to be vacuum sealed. This should prevent most of the
liquid being sucked towards the seal area.
>If placing large moist items in a bag like a whole fish, it is very important you do not
leave any moisture near the seal area. Once you have placed this type of item in the
bag use some dry paper towel to wipe down the seal area for a successful outcome.
>Liquid items like soups, stocks, gravy etc... should all be frozen before aempting to
vacuum seal.

INSTRUCTION | P20
Operation
!IMPORTANT:
Vacuum sealing liquids like soups, oils, wet marinades etc... in a bag
without freezing them should be avoided.
The best solution to vacuum seal liquid with your Supreme PLUS Vacuum Sealer is
with our glass canister set. Please visit luvele.eu for more information on our glass
container set.
INSTRUCTION | P21
Storage
Yeast: Yeast is the fermentation of foods. It can be identified by smell or taste. Yeast
requires sugar and a moderate temperature to grow and it can grow with or without
air. Refrigeration will slow the growth of yeast and freezing stops it completely.
Bacteria: Bacteria can grow with or without air. Bacteria results in discoloration, soft
or slimy texture and an unpleasant smell. The best way to combat bacteria is to both
vacuum pack and freeze foods.
Storing foods at low temperatures is critical for preserving foods safely. Growth of
micro-organisms is reduced at temperatures below 4° C. Storing foods at -17°C
will not kill micro-organisms but it will stop them from growing. For the best results
freeze perishable foods that have been vacuum sealed.
THAWING AND HEATING VACUUM PACKAGED FOODS
Always thaw frozen foods in the refrigerator or microwave. Do not leave foods to thaw
at room temperature. When microwaving a vacuum packed food cut a corner of the
bag and place on a microwave safe tray.
You can reheat foods in a vacuum sealed bag by placing in water at a low simmer.
Storage
Storage time will vary depending on the freshness of foods that are being vacuum
packaged. The fresher the foods the longer the storage time will be.
The main element that causes food to lose its nutritional value, texture, flavour and
overall quality is oxygen. Vacuum packaging helps to extend the life of foods by
removing most of the oxygen in a sealed bag or container. Removing oxygen from
stored foods helps to inhibit the growth of micro-organisms. There are three main
types of micro-organisms that aect stored foods. They are mould, yeast and bacteria.
Mould: Easy to identify due to its characteristic fuzz. Moulds cannot grow in vacuum
packaging because of the low oxygen environment. Therefore, vacuum packaging
eliminates mould.

INSTRUCTION | P22
Hints & Tips
Vacuum Packaging Meat & Fish
For the best results when vacuum packaging meats and fish, pre-freeze for 1-2 hours
before vacuum packaging in bag. This helps meats to retain their shape and prevents
any liquids from overflowing into vacuum sealer.
Vacuum Packaging Cheese
To keep cheese fresh you can vacuum pack after each use. Make the bag extra long
when sealing for the first time. Cut sealed edge when you’re ready to use cheese. To
re-package simply place the cheese back in to the bag and re-vacuum seal.
Vacuum Packaging Vegetables
Vegetables need to be blanched before vacuum packaging. This stops enzymes
from aecting the flavour, colour and texture of the vegetable. To blanch vegetables,
place in boiling water for approximately 1 minute, then place the vegetable into iced
cold water to stop the cooking process. Then dry thoroughly on paper towel before
vacuum packaging. There should be no excess water in the bag.
Vacuum Packaging Fruits
Fruits can be vacuum sealed whole or sliced. For longer lasting storage place fruits in
freezer.
!NOTE:
Cruciferous vegetables such as broccoli, brussels sprouts, cabbage
and cauliflower naturally emit gases during storage. Therefore, after
blanching and vacuum packaging they must be stored in freezer
only. Mushrooms and garlic should not be vacuum packed.
INSTRUCTION | P23
Vacuum Packaging Coee or Powdery Foods
To prevent food particles from being drawn into vacuum pump place a coee filter or
piece of paper towel at the top of bag before vacuum packaging. You can also place
the food in its original bag inside a vacuum sealer bag.
Vacuum Packaging Liquids
Before vacuum packaging liquids such as stock, pre-freeze in a ice cube tray until
frozen. Place frozen cubes into vacuum sealer bag. When ready to use place frozen
cube straight in to dish being prepared.
Re-sealing Chip Packets
You can utilise the seal strip to re-seal packaging that has already undergone a
commercial quality seal. This allows half consumed packets of chips, crackers and
cereals to be resealed by placing on sealing strip. When resealing, ensure that the
bag does not reach into the vacuum chamber, as it will crush delicate items. Use
this method to reseal suitable packets only.
TIPS FOR VACUUM PACKAGING NON-FOOD ITEMS
The Luvele Supreme PLUS Vacuum Sealer can also be used to protect non-food items
from corrosion, oxidation and moisture. The same process can be used to vacuum seal
non-food items as food items.
Vacuum Packaging Silverware & Cutlery
When vacuum packaging silverware and cutlery make sure all sharp edges are covered
with a cushioning material such as paper towel to avoid puncturing bag.
Hints & Tips

INSTRUCTION | P24
Hints & Tips
Vacuum Packaging First Aid Kits
Vacuum packaging first aids kits to store in your home, boat or car is a great way to
keep items dry and free from dirt and mould. Also consider vacuum sealing flares,
baeries, flashlight, candles and matches.
Vacuum Packaging for Outdoor Activities
When camping vacuum packing your clothes can save space in your bag and keep dry
at the same time. Also, vacuum seal your maps, matches and snacks.
Vacuum Packaging Paint Brushes
When painting around the home you can vacuum package your wet paint
brushes between coats rather that washing. This is particularly useful
for oil based paints that require mineral turpentine to clean.
Vacuum Packaging Ice
You can vacuum package ice to use as an icepack for picnics and other outdoor
activities. When the ice melts you then have fresh drinking water or refreeze to use
again as an icepack.
Scan the QR code to find more hints and tips to get the
most out of vacuum sealing:
INSTRUCTION | P25
Troubleshoot
Nothing happens when I try to vacuum seal a bag
• Check power cord to see if it is firmly plugged into electrical outlet.
• Examine power cord for any damage.
• See if electrical outlet is functioning by plugging in another appliance.
• Make sure the bag is placed correctly inside vacuum chamber and beneath the air
intake.
• Make sure there is 5cm of flat bag between the top of the item in the vacuum bag
and the dual seal strip. The bag needs to be completely flat on the dual seal strip.
Air is not removed from the bag completely
• To seal correctly, the open end of the bag should be resting entirely inside the
vacuum chamber area.
• Check the dual seal strip and the foam gaskets are free of any food residue.
• Make sure both the upper and lower foam gaskets are flat in their grooves and
not compressed or damaged in anyway. You can try flipping the foam gaskets
over if needed. Wipe clean and smooth them back into place if needed.
• Vacuum bag may have a leak. To test, seal the bag with some air in it, submerge in
water, and apply pressure. Bubbles indicate a leak. Reseal or use another bag.
• Use only the specified vacuum bag with vacuum channels provided by Luvele.
• Leaks along the seal can be caused by wrinkles, debris crumbs, grease or liquids.
Reopen bag, wipe the top inside of the bag and smooth it out along the sealing
strip before resealing.
• There is a vacuum pressure sensor built in this machine. The machine will not turn
to seal automatically if the vacuum pressure inside the bag is not able to reach the
predetermined vacuum pressure. Check dual seal strip and the foam gaskets for
debris and correct position. Wipe clean and smooth them back into place, and try
again.

INSTRUCTION | P26
Troubleshoot
The bag melts
• Should the dual seal strip overheat and melt the bag, it may be necessary to lift
the lid and allow seal strip to cool for a few minutes.
Air has re-entered into the bag after being sealed
• Leaks along the seal can be caused by wrinkles, debris, crumbs, grease or liquids.
Reopen bag, wipe the top inside of the bag and smooth it out along the sealing
strip before resealing.
• The release of natural gases or fermentation from foods such as fresh fruits
and vegetables may occur. Most vegetables require blanching prior to vacuum
packaging.
• Open bag if you think food has begun to spoil, and discard food. Lack of
refrigerator or fluctuating temperatures in the refrigerator can cause food to spoil.
If food is not spoiled then consume food immediately.
• Check the bag for a puncture or hole which may have released the vacuum. This
can occur when vacuum sealing sharper/harder items. Do not vacuum package
hard items with sharp points like bones or shell. Cushion sharp edges in the
contents of the bag with paper towels.
Cleaning your Vacuum Sealer:
> Always unplug the unit before cleaning.
> Do not immerse in water or any other liquid.
> Avoid using abrasive products or material to clean the unit, for they will scratch the
surface.
> Use a mild dish washing soap and a warm, damp cloth to wipe away food residue or
around components.
> Dry thoroughly before using again.
Cleaning vacuum bags:
> Wash bags in warm water with a mild dish washing soap
> When washing bags in dishwasher, turn bags inside out and spread them over top
rack of dishwasher, so entire surface is exposed to the wash.
> Dry thoroughly before reusing.
INSTRUCTION | P27
Cleaning
!NOTE:
The foam gaskets around the vacuum chamber should be dried
thoroughly before storing. If removal and re-assembling of foam
gaskets is required, then be careful to position them correctly to
ensure no vacuum leakage.
!IMPORTANT:
Do not store your vacuum sealer with any food residue remaining on
it, especially on the dual seal strip and foam gaskets. If food residue
is left on these parts, it can aect the vacuum sealing function.

INSTRUCTION | P28
Cleaning
INSTRUCTION | P29
Storage
Storing Your Vacuum Sealer:
> Keep the unit in a flat and safe place, out of the reach of children.
> Remember to make sure the ‘Easy Lock Handle’ is in the ‘Store’ position when
storing, to protect the foam gaskets.
!IMPORTANT:
To avoid possible illness, do not reuse bags after storing raw
meats, raw fish or greasy foods. Do not reuse bags that have been
microwaved or boiled.
FOODS WHERE TO
STORE STORAGE LIFE
WHEN VACUUM
SEALED
NORMAL
STORAGE LIFE
Meat
Beef, Pork, Lamb Freezer 2-3 years 6 months
Ground Meat Freezer 1 year 4 months
Poultry Freezer 2-3 years 6 months
Fish Freezer 2 years 6 months
Hard Cheeses
Cheddar, Swiss Refrigerator 4-8 months 1-2 weeks
Parmesan Refrigerator 4-8 months 1-2 weeks
Vegetables (Most vegetables need to be blanched before vacuum sealing)
Asparagus Freezer 2-3 years 8 months
Broccoli, Cauliflower Freezer 2-3 years 8 months
Cabbage, Brussels Sprouts Freezer 2-3 years 8 months
Corn (cob or kernel) Freezer 2-3 years 8 months
Green Beans Freezer 2-3 years 8 months
Leuce, Spinach Refrigerator 2 weeks 3-6 days
Snow Peas, Snap Peas Freezer 2-3 years 8 months
Fruits
Apricots, Plums Freezer 1-3 years 6-12 months
Peaches, Nectarines Freezer 1-3 years 6-12 months

INSTRUCTION | P30
Storage
INSTRUCTION | P31
Storage
FOODS WHERE TO
STORE STORAGE LIFE
WHEN VACUUM
SEALED
NORMAL
STORAGE LIFE
Softer Berries
Raspberries, Blackberries Refrigerator 1 week 1-3 days
Strawberries Refrigerator 1 week 1-3 days
Harder Berries
Blueberries Refrigerator 2 weeks 3-6 days
Cranberries Refrigerator 2 weeks 3-6 days
Baked Goods
Bagels, Bread, Pastries Freezer 1-3 years 6-12 months
Nuts
Almonds, Peanuts Pantry 2 years 6 months
Sunflower Seeds Pantry 2 years 6 months
Coee
Coee Beans Freezer 2-3 years 6 months
Coee Beans Pantry 1 year 3 months
Ground Coee Freezer 2 years 6 months
Ground Coee Pantry 5-6 months
Prepared Liquids
Sauces, Soups, Stews Freezer 1-2 years 3-6 months
FOODS WHERE TO
STORE STORAGE LIFE
WHEN VACUUM
SEALED
NORMAL
STORAGE LIFE
Dry Foods
Beans, Grains Pantry 1-2 years 6 months
Pasta, Rice Pantry 1-2 years 6 months
Powdery Foods
Dry Milk Pantry 1-2 years 6 months
Dried Coconut Pantry 1-2 years 6 months
Flour Pantry 1-2 years 6 months
Sugar, Brown Sugar Pantry 1-2 years 6 months
Snack Foods
Chips Pantry 3-6 weeks 1-2 weeks
Cookies, Crackers Pantry 3-6 weeks 1-2 weeks

LUVELE SUPREME PLUS VAKUUMIERGERÄT Bedienungsanleitung
LSPVS120EU
de
INSTRUCTION | P32
The Luvele Supreme PLUS is backed by our 1 Year Total Cover Warranty. Our warranty
will cover any manufacturing fault with the product and will also cover damage caused
during transit. Your warranty starts from the purchase date of your Luvele product.
Please visit www.luvele.eu to register your warranty. Further instructions can be found
on your warranty card.
Warranty Process
We want to make any warranty claim as simple as possible for you. All you need to do
is contact us at support@luvele.eu and provide us information about the problem
you are having with your item. Firstly, we will suggest some troubleshooting ideas to
establish whether or not the issue can be fixed without a return. Photos of the fault may
be requested if and where appropriate, and if it will ensure a faster resolution.
Generally, if you have an issue with your item within 30 days of receiving it, we will
email you a prepaid return label that can be printed out and used to send the item back
with. We will then generally send you a brand new item. The new item will be shipped
within 48 hours of receiving the faulty item back. A confirmation email will be sent
when your faulty item is received back.
If you have an issue after the 30 day period we will consider repairing your item if
suitable. If it cannot be repaired it will be replaced with a brand new item. Refunds will
only be oered within the 30 day money back guarantee, if you choose this option
over a new replacement. Outside of this 30 day period, your item will be repaired or
replaced.
We are here to help, so please email us and the best solution to meet your needs
will be oered. support@luvele.eu | www.luvele.eu
LUVELE SUPREME PLUS VACUUM SEALER
Instruction booklet LSPVS120EU
Warranty

Herzlichen Glückwunsch
zum Kauf Ihres neuen Luvele Supreme PLUS Vakuumiergeräts
BEDIENUNGSANLEITUNG | S3
Notizen

Dieses Gerät ist für den Gebrauch im Haushalt und ähnliche Anwendungen
vorgesehen. Dazu gehören:
• Personalküchen in Geschäften, Büros und anderen Arbeitsumgebungen;
• Bauernhäuser;
• Kunden in Hotels, Motels und anderen Wohnumgebungen;
• Frühstückpensionen und B&Bs.
Dieses Gerät ist nicht für den Gebrauch durch Personen (einschließlich Kindern)
mit eingeschränkten physischen, sensorischen oder geistigen Fähigkeiten oder
mangelnden Erfahrungen und Kenntnissen bestimmt, sofern sie nicht von einer für
ihre Sicherheit verantwortlichen Person überwacht oder instruiert werden.
Kinder ab 8 Jahren können dieses Gerät verwenden, sollten allerdings beaufsichtigt
werden, um sicherzustellen, dass sie nicht mit dem Gerät spielen. Dieses Gerät ist
kein Spielzeug.
Reinigung und Wartung sollten nicht von Kindern durchgeführt werden, sofern sie
nicht über 8 Jahre alt sind und beaufsichtigt werden.
Bewahren Sie das Gerät und sein Kabel außer Reichweite von Kindern unter 8
Jahren auf.
Prüfen Sie von Zeit zu Zeit, ob das Netzkabel beschädigt ist. Wenn das Netzkabel
beschädigt ist, muss es vom Hersteller, dessen Kundendienst oder ähnlich
qualifizierten Personen ersetzt werden, um eine Gefahrensituation zu vermeiden.
Verwenden Sie nur das mitgelieferte Zubehör. Dieses Gerät darf nicht mit einem
externen Timer oder einem Fernsteuerungssystem betrieben werden.
BEDIENUNGSANLEITUNG | S4
Sicherheit
• Entfernen Sie alle Verpackungsteile, bevor Sie Ihr Vakuumiergerät zum ersten
Mal benutzen.
• Stellen Sie das Vakuumiergerät während des Betriebs nicht in die Nähe der
Kante einer Arbeitsfläche oder eines Tisches. Stellen Sie sicher, dass die
Oberfläche eben und frei von Flüssigkeiten oder anderen Substanzen ist.
• Stellen Sie Ihr Vakuumiergerät nicht auf oder in die Nähe eines heißen Herds
oder Backofens.
• Berühren Sie das heiße Versiegelungselement an der Unterseite des
Vakuumiergeräts nicht, da es sehr heiß werden kann.
• Verwenden Sie nur die empfohlenen Beutel oder Zubehörteile und benutzen
Sie Ihr Luvele Vakuumiergerät nur für den vorgesehenen Zweck.
• Stellen Sie keine Teile des Vakuumiergeräts in eine Spülmaschine oder
Mikrowelle.
• Tauchen Sie das Vakuumiergerät nicht in Wasser oder andere Flüssigkeiten ein.
• Verwenden Sie niemals beschädigte Geräte (inkl. Netzkabel).
• Betreiben Sie das Gerät nur über eine fachgerecht installierte Steckdose mit
der richtigen Spannung und verwenden Sie keine Verlängerungskabel.
• Entfernen Sie das Stromkabel nie mit nassen Händen, legen Sie es nie auf
heiße Oberflächen und stellen Sie sicher, dass das Kabel nie mit Öl in Kontakt
kommt.
• Ziehen Sie den Netzstecker nach jedem Gebrauch, wenn das Gerät nicht
benutzt wird und bevor Sie das Zubehör wechseln oder das Gerät reinigen.
• Führen Sie keine anderen Wartungsarbeiten durch als die Reinigung. Bei
Fragen zur Wartung kontaktieren Sie Luvele bie unter support@luvele.com.
• Betreiben Sie das Gerät nicht im Freien.
• Dieses Gerät ist nicht für die Verwendung durch Kleinkinder oder gebrechliche
Personen ohne Aufsicht vorgesehen.
• Verwenden Sie nur eine Löschdecke, um Brände des Geräts zu löschen.
• Das Gerät ist nicht für den gewerblichen oder industriellen Gebrauch
bestimmt, sondern nur für den privaten Gebrauch vorgesehen.
BEDIENUNGSANLEITUNG | S5
Bie lesen Sie sich alle Anweisungen durch, bevor Sie das Luvele
Supreme PLUS Vakuumiergerät verwenden. Bewahren Sie diese
Bedienungsanleitung zur späteren Einsichtnahme auf.
Sicherheit

BEDIENUNGSANLEITUNG | S6
Funktionen
BEDIENUNGSANLEITUNG | S7
Funktionen
Obere Dichtung:
Verbindet sich
mit der unteren
Kammer.
SEAL
Zum manuellen Verschließen des oenen Endes eines Beutels ohne Vakuumieren, zur
Herstellung eines Beutels aus einer Beutelrolle.
PULSE
Die PULSE-Taste wird verwendet, um den gesamten Vakuumiervorgang zu steuern.
Zum Beispiel kann beim Vakuumieren von empfindlichen, feuchten und flüssigen
Lebensmieln ein geringerer Vakuumdruck erforderlich sein, bevor der Beutel
versiegelt wird.
Es könnte auch eine längere Vakuumierzeit erforderlich sein, wenn feste, harte
Gegenstände vakuumiert werden. Mit der PULSE-Taste haben Sie die volle Kontrolle
darüber, wie lange Sie den Inhalt vakuumieren, bevor Sie die SEAL-Taste drücken.
Halten Sie die PULSE-Taste gedrückt, um die Vakuumpumpe einzuschalten. Lassen
Sie die Taste wieder los, um den Vorgang zu beenden. Wenn der gewünschte Druck
erreicht ist, drücken Sie die SEAL-Taste, um den Beutel zu verschließen.
VAKUUM
Mit dieser Taste wählen Sie zwischen zwei verschiedenen Vakuumdruckeinstellungen:
NORMAL: Für normale Lebensmiel.
GENTLE: Für weiche und zerbrechliche Lebensmiel, für die ein geringerer
Vakuumdruck erforderlich ist.
Die Standardeinstellung ist der normale Vakuumdruck.
Obere
Vakuumkammer
Beutelschneider
Drücken und
schieben Sie den
Beutelschneider in
eine beliebige Rich-
tung, um Ihre Beutel
auf die gewünschte
Größe zuzuschnei-
den.
Untere
Vakuumkammer:
Legen Sie das
oene Ende des
Beutels in die
Kammer. Hier wird
die Luft aus dem
Beutel gesaugt
und überlaufende
Flüssigkeit
aufgefangen.
Doppelter
Versiegelungsstreifen:
Teflon-beschichtetes,
doppeltes Heizelement
zur Versiegelung des
Beutels.
Untere Dichtung:
Wenn der Deckel
eingerastet ist,
verbinden sich die
untere und obere
Dichtung und
bilden eine luft-
dichte Vakuum-
kammer.
Beutelrollenkam-
mer:
Bietet Platz für 28 cm
oder 22 cm breite
Beutelrollen. Ziehen
Sie die gewünschte
Länge heraus und
schneiden Sie den
Beutel dann mit dem
Beutelschneider zu.
Lufteinlass:
Das Luftein-
lassventil pumpt
Luft aus der
Kammer, um eine
Vakuumversiege-
lung zu erzeugen.
Haken:
Um Deckel
und Basis zu
verschließen.
Versiegelungsleiste:
Fixiert den Beutel, der mit dem
doppelten Versiegelungsstreifen
vakuumiert wird.
This manual suits for next models
1
Table of contents
Languages:
Other Luvele Kitchen Appliance manuals

Luvele
Luvele LPPYM300WUS User manual

Luvele
Luvele deluxe User manual

Luvele
Luvele LFVC4SETEU User manual

Luvele
Luvele LCPUMPAUS User manual

Luvele
Luvele LBFD500EU User manual

Luvele
Luvele Flow User manual

Luvele
Luvele Breeze Food Dehydrator User manual

Luvele
Luvele Razor LRMS180W User manual

Luvele
Luvele LBTM400W User manual

Luvele
Luvele LEFD400 User manual