Luvele Razor LRMS180W User manual


Congratulations
on the purchase of your new Luvele Razor Meat Slicer

Safety Instructions
P/3
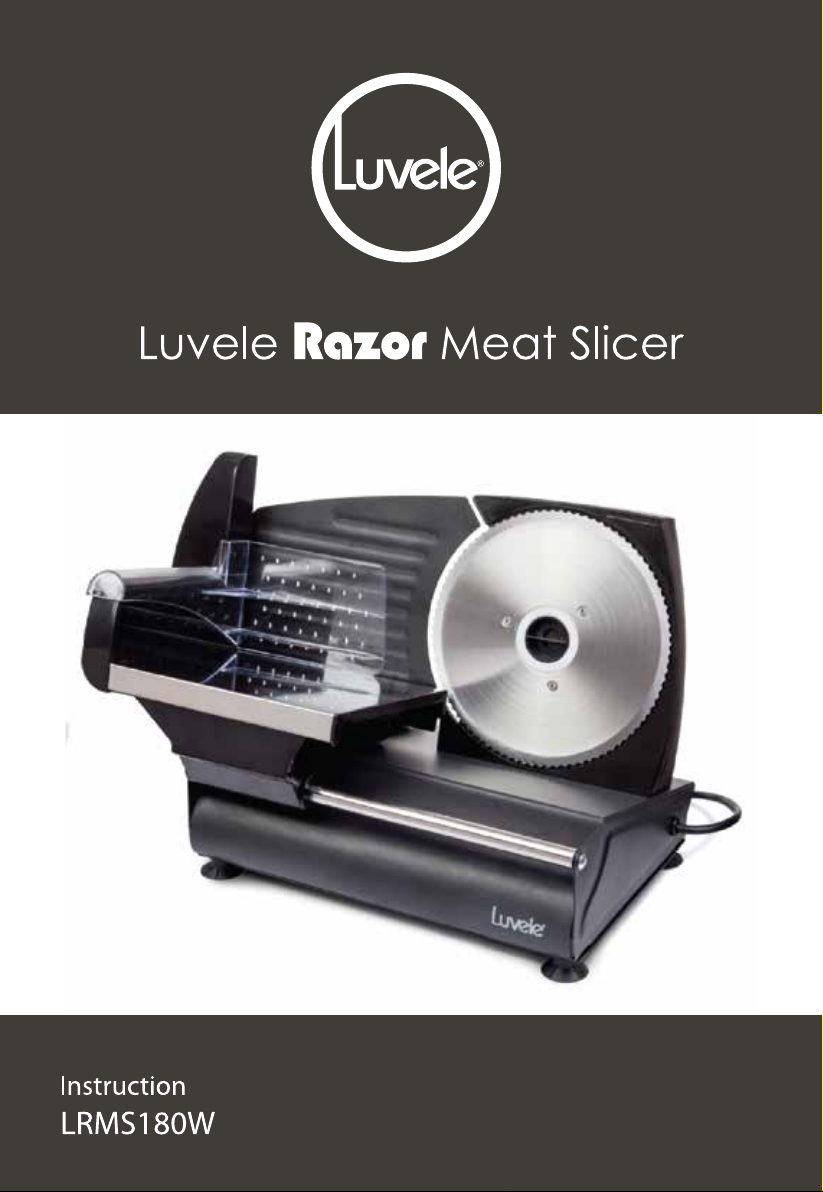
Please be sure to read all instructions before using the Luvele Razor
Meat Slicer. Keep these instructions for future reference.
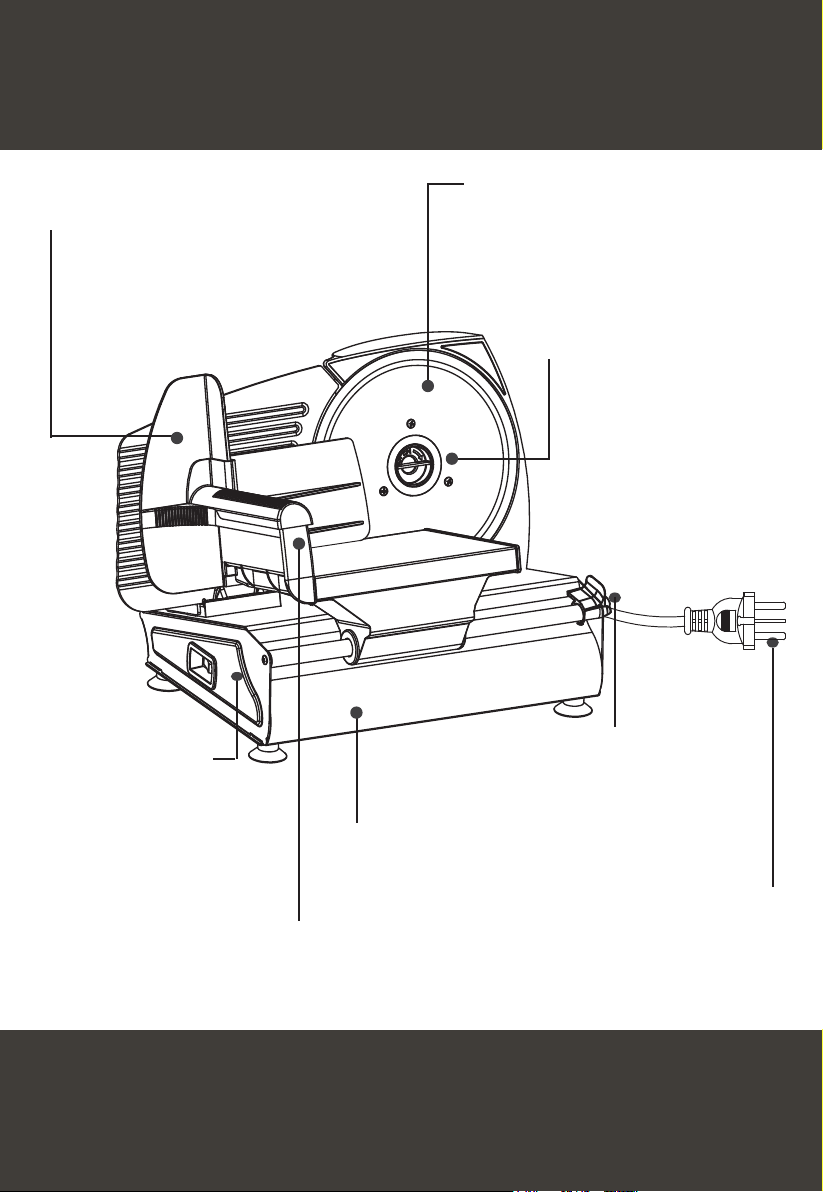
• Remove all packaging before using your Meat Slicer for the first time.
• Do not place Meat Slicer near the edge of a bench or table during operation.
• Ensure the surface is level, free of liquids or other substances.
• Do not place your Meat Slicer on or near a hot stove or oven.
• Always use extreme care when handling the blade and cutting area.
• Unplug from power outlet when not in use, before putting on or taking off
attachments, and before cleaning.
• The Meat Slicer should always be used with the sliding feed table and
Food Holder in position, unless this is not possible due to the size or
shape of the food item.
•Do not put hot meat into the meat Slicer.
• Do not use Meat Slicer to slice through bones or deep-frozen foods.
• Only use the accessories provided and recommended by Luvele.
• If the Meat Slicer is damaged due to improper or incorrect use then the
warranty will be void
• Do not place any parts of the Meat Slicer in a dishwasher or microwave oven.
• Do not immerse the body of the Meat Slicer in water or other liquids.
• Never operate damaged appliance (incl. Mains cable).
• Operate appliance only through a professionally installed socket
supplying the correct voltage and do not use extension cables.
• Never remove main cable with wet hands, or lay cable on hot surface, or let
cable come into contact with oil.
• Unplug the appliance after each use, when the appliance is not in use and
before changing accessories or cleaning appliance.
• Do not try and perform any maintenance, other than cleaning. For any
• Do not operate outdoors.
• This appliance is not intended for use by young children or infirm persons
without supervision.
• Use a fire blanket only to extinguish fires on appliance.
• The appliance is not designed for commercial or industrial use; it is for
household use only.

P/4
This appliance is intended to be used in household and similar applications such as:
- Staff kitchen areas in shops, offices and other working environments;
- Farm houses;
- By clients in hotels, motels and other residential type environments;
- Bed and breakfast type environments
This appliance is not intended for use by persons (including
children) with reduced physical, sensory or mental capabilities,
or lack of experience and knowledge, unless they have been
given supervision or instruction concerning use of the appliance
by a person responsible for their safety.
Children 8 years and above can use this appliance, however,
they should be supervised to ensure that they do not play with
the appliance. Children should not play with the appliance.
Cleaning and user maintenance shall not be made by children
unless they are older than 8 years old and supervised.
Keep the appliance and its cord out of reach of children less
than 8 years.
Check the power supply cord for damage from time to time.
If the power supply cord is damaged, it must be replaced by
the manufacturer or its service agent or a similarly qualified
person in order to avoid a hazard.
Use only designated accessories enclosed. This appliance is not
intended to be operated by means of external timer or separated
remote-control system.
Safety Instructions

Know your Luvele Razor Meat Slicer
P/5
Sliding Food Guide:
Supports the food and
slides back and forth for
effortless slicing.
Safety Food Holder:
Holds food pieces in place while slicing and
ensures fingers are kept well away from the
blade for added safety.
Stainless Steel Cutting Blade:
The high quality cutting
blade is specially designed for
precise slicing of meats, cheese,
fruit, vegetables and breads.
Meat Slicer
Housing:
ON/OFF Switch:
Power Plug:
Australian SAA, CE (EU) &
British approved plug.
Blade Locking Piece:
Rotate the Blade
Locking Piece
clockwise from the
blade centre to
pull out the blade.
Quick Release
‘Sliding Food Guide’ Bar:
Allows for removal of Sliding
Food Guide for easy cleaning

P/6
Know your Luvele Razor Meat Slicer
Variable Thickness Dial:
Allows you to slice foods to
a variety of thicknesses,
from 1mm to 15mm.
180 Watt Motor:
To handle the toughest slicing tasks.
Suction Cup Feet:
Ensures the food slicer
remains secure to the
benchtop during slicing.
Food Support Plate

Using your Luvele Razor Meat Slicer
P/7
Before using the Meat Slicer for the first time, please make sure to read carefully
and thoroughly through these operating instructions, and the safety advice to
familiarize yourself completely with the functions of the device.
Remove all packaging material before using your Luvele Razor Meat Slicer for the
first time. Clean the Meat Slicer before it comes into contact with any foods.
Follow cleaning instructions on page 10.
This device is intended exclusively for slicing normal household foods.
The food must be thawed, unpackaged, and boneless before it can be sliced
using the Meat Slicer.
WARNING: Do not use to slice or cut any non-food items.
Before Using Your Luvele Razor Meat Slicer:
Setting up the Meat Slicer:
Never set the Meat Slicer up on a hot surface or near an open flame.
Make sure that the power chord does not pass over any hot or sharp edged
objects/surfaces.
Do not allow the chord to become kinked/trapped and do not wind it around
the Meat Slicer. Set up the Meat Slicer on a flat, non-slip surface close to an
electrical socket.
Unwind the required length of chord; Insert the plug into the electricity socket.
Put the Safety Food Holder on to the Sliding Food Guide.
Apply downward pressure onto the Meat Slicer, ensuring it is pressed firmly to the
bench to activate the suction cup feet.

P/8
Using your Luvele Razor Meat Slicer
Setting the Slice thickness:
The Variable Thickness Dial can be set to between 0 and 15mm. Set the required
slice thickness using the knob. The settings on the scale are approximate settings
only.
Operating the Meat Slicer:
Pull the Sliding Food Guide to the left as far as it will slide. Place the food to be
sliced on to the Sliding Food Guide and lightly press the food to be sliced with the
Safety Food Holder against the Food Support Plate.
Do not rest food against the blade.
Switch the device ON and, then while lightly pressing the food to be sliced forward,
guide it along the Cutting Blade. After using the Meat Slicer, always set the
Variable Thickness Dial to the “0” setting, so that the sharp blade is covered.
The Cutting Blade is ideally suitable for cutting wafer-thin slices of cold cut meats.
To safeguard your fingers always use the Safety Food Holder when possible.
(This might not be possible when slicing large or awkward shaped foods).
Never use Meat Slicer without the Sliding Food Guide
Pushing the switch to “ON”, will cause cutting blade to run. To stop operation move
the switch into the “OFF” position and wait until the cutting blade comes to a
complete stop.

P/9
Using your Luvele Razor Meat Slicer
Slicing Tips:
- Never touch the blade while the slicer is operating because it can cause injury.
- Always use the Safety Food Holder when possible. Press the piece of food to be
sliced forward using the Safety Food Holder.
- Use the slicer only for slicing normal household foods only. Do not use the slicer
for slicing deep-frozen foods, bones, foods with large seeds, or for slicing
packaged foods.
- Never use the slicer for more than 10 minutes continuously.
- The Cutting Blade continues to rotate after the slicer has been switched off.
- Always return the Variable Thickness Dial back to “0” setting after each use.

P/10
The Blades
Important: Handle the blade with care, it is extremely sharp.
Removing the blade
Take hold of the blade lock in the centre of the blade. Unlock the blade by
turning the central screw in a clockwise direction. Turn 90 Degrees then
carefully lift the blade out from the housing.
The difference - Serrated and Straight Edge
The obvious difference is that a straight edge slicer blade has a smooth
edge while a serrated slicer blade resembles a table saw. Both types of
blades are multi-purpose, However, the ‘straight edge blade’ is best suited
for ultra-thin slicing of specialty meats such as proscuitto. While the
‘serrated blade’ tend to perform better when cutting into hard crusted breads
or fibrous foods.
Slicing Bread
When slicing bread, always use the serrated blade. For the best results
when slicing fresh, homemade bread, allow it to cool over night. Attempting
to slice hot or warm bread straight from the oven or bread maker can
cause the bread to crumble and produce irregular slices.

Cleaning
P/11
Cleaning:
It is necessary to clean the Meat Slicer at regular intervals as perishable food
scraps could accumulate on the Meat Slicer and Cutting Blade.
Before cleaning the Meat Slicer, make sure it is off. Pull the plug out of the
electrical socket and set the Variable Thickness Dial to the “0” setting.
Do not immerse the Meat Slicer in water.
Remove the Safety Food Holder and clean it in warm soapy water, then rince.
Do not clean using a dishwasher.
Wipe the Housing and Sliding Food Guide using a slightly damp soapy cloth.
Do not use any scouring pads or hard brushes.
Removing the Cutting Blade:
Rotate the Blade Locking Piece clockwise from the blade centre and then pull out
the blade. When taking out the blade make sure that you handle it by the centre.
Wash it by hand in warm soapy water. Do not clean using a dishwasher.
Clean the housing behind the blade with a dry cloth or a soft brush.
Danger of injury: The Cutting Blade is very sharp!
Figure 1.
If necessary remove the ‘Quick Release’
Sliding Food GuideBar for a more
thorough clean. Push the button as
shown in Figure 1, and remove
the Sliding Food Guide Bar. Before
operating the Meat Slicer again make
sure the Sliding Food Guide Bar has
been reinstalled correctly and the
Sliding Food Guide is sliding smoothly.

The complete Luvele range of products are backed by our 1 Year Total Cover
Warranty. Our warranty will covers any manufacturing fault with the product and
will also cover damage caused during transit.
The Luvele ‘Total Cover Warranty’ is ‘null and void’ if the appliance has
been used for commercial purposes.
Your warranty starts from the purchase date of your Luvele product.
You do not need to register your warranty as your details are automatically
processed at the time of purchase.
Warranty Process
We want to make any warranty claim as simple as possible for you. All you need to
problem you are having with your item. Firstly, we will suggest some
troubleshooting ideas to establish whether or not the issue can be fixed without a
return. Photos of the fault may be requested if and where appropriate, and if it
will ensure a faster resolution.
Generally, if you have an issue with your item within 30 days of receiving it, we will
email you a prepaid return label that can be printed out and used to send the item
back with. We will then generally send you a brand new item. The new item will be
shipped within 48 hours of receiving the faulty item back. A confirmation email will
be send when your faulty item is received back.
If you have an issue after the 30 day period we will consider repairing your item if
suitable. If it cannot be repaired it will be replaced with a brand new item. Refunds
will only be offered within the 30 day money back guarantee, if you choose this
option over a new replacement. Outside of this 30 day period, your item will be
repaired or replaced.
We are here to help, so please email us and the best solution to meet your needs
will be offered.
1 Year Warranty
P/12
Please Note, all warranty claims and after sales service will be
provided in English only

Table of contents
Other Luvele Kitchen Appliance manuals

Luvele
Luvele Breeze Food Dehydrator User manual

Luvele
Luvele Deluxe PRO User manual

Luvele
Luvele SUPREME PLUS User manual

Luvele
Luvele supreme User manual

Luvele
Luvele deluxe User manual

Luvele
Luvele Flow User manual

Luvele
Luvele LBTM400W User manual

Luvele
Luvele LPPYM300WUS User manual

Luvele
Luvele LEFD400 User manual

Luvele
Luvele LFVC4SETEU User manual
Popular Kitchen Appliance manuals by other brands

Structural Concepts
Structural Concepts Impulse CSC3223 Installation & operating manual

Candy
Candy DUO Instructions for use and installation

NUTRICHEF
NUTRICHEF PKBRTP50 Operation instructions

Schulte-Ufer
Schulte-Ufer GP 705 Using and cleaning instructions

MIU France
MIU France 90777 manual

Blaupunkt
Blaupunkt 5WK820FF0R instruction manual