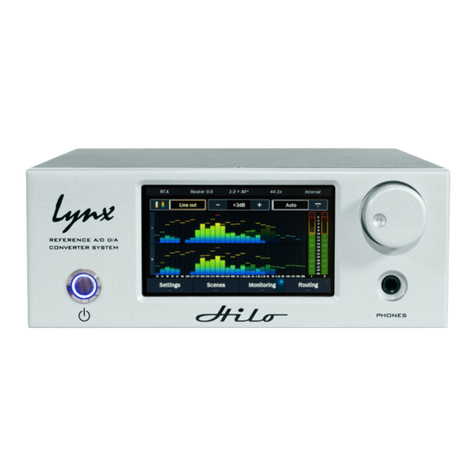
Lynx hilo User manual

Mastering Analog to Digital / Digital to Analog Converter
User Manual
Including February 2017 Version 8
Firmware and Feature Update
Lynx Studio Technology, Inc.
www.lynxstudio.com
Updated: July 17, 2018

Purchase Date: _____________________________________________________
Dealer Name: _____________________________________________________
Dealer Telephone: _____________________________________________________
Hilo Serial Number: _____________________________________________________
LSlot Serial Number: _____________________________________________________
Lynx Hilo User Manual
Copyright © 2011-2018, Lynx Studio Technology Inc.

User Manual
Table of Contents
1Introduction ................................................................................................................................ 1
1.1Overview ......................................................................................................................... 1
1.2Features ........................................................................................................................... 1
1.3In the Box ........................................................................................................................ 1
1.4Power and Safety Information......................................................................................... 1
1.5Rack-Mounting................................................................................................................ 1
1.6Operation Requirements.................................................................................................. 2
1.6.1Audio Equipment Requirements ..................................................................................................................2
1.6.2Computer requirements................................................................................................................................2
1.7Using this manual............................................................................................................ 3
1.8Registration ..................................................................................................................... 3
2Getting Started Hilo-USB .......................................................................................................... 3
2.1Unpacking ....................................................................................................................... 3
2.2Set up............................................................................................................................... 3
2.3Cable Connections........................................................................................................... 4
2.4Initial Setup ..................................................................................................................... 5
2.5Computer Set Up............................................................................................................. 5
2.5.1Driver Installation for Windows 7/8/10 .......................................................................................................5
2.5.2Hilo Driver Devices – Windows Operating Systems ...................................................................................5
2.5.3Installation for Macintosh OS X ..................................................................................................................7
2.5.4Installation for iPad......................................................................................................................................8
3Getting Started Hilo-TB............................................................................................................. 9
3.1Unpacking ....................................................................................................................... 9
3.2Set up............................................................................................................................... 9
3.3Cable Connections......................................................................................................... 10
3.4Initial Setup ................................................................................................................... 11
3.5Computer Set Up........................................................................................................... 11
3.5.1Driver Installation for Windows 7/8/10 .....................................................................................................11
3.5.2Hilo Driver Devices – Windows Operating Systems .................................................................................13
3.5.3Installation for Macintosh OS X ................................................................................................................15
4Getting Started Hilo-Dante...................................................................................................... 18
4.1Unpacking ..................................................................................................................... 18
4.2Set up............................................................................................................................. 18
4.3Cable Connections......................................................................................................... 19
4.4Initial Setup ................................................................................................................... 20
4.5Dante Connections ........................................................................................................ 20
4.5.1Dante computer Set Up ..............................................................................................................................20
5Using Hilo.................................................................................................................................. 22
5.1On Power Up................................................................................................................. 22
5.1.1Headphone and Monitor Out Volume Control ...........................................................................................22
5.1.1Menu Screen conventions: .........................................................................................................................22
5.2Changing the Meter Page .............................................................................................. 23
5.2.1Meter screens in detail ...............................................................................................................................23
5.3Navigation ..................................................................................................................... 25
5.3.1Settings.......................................................................................................................................................25
5.3.2Scenes ........................................................................................................................................................35
5.3.3Monitoring .................................................................................................................................................37
5.3.4Routing.......................................................................................................................................................38
5.3.5Status Bar...................................................................................................................................................43
5.3.6DSD Support..............................................................................................................................................43
6Firmware Updates.................................................................................................................... 44
6.1Updating the LT-USB ................................................................................................... 44
6.2Updating the LT-TB (Thunderbolt)............................................................................... 45
6.3Updating the LT-DANTE.............................................................................................. 45
7Hilo Remote Control Application............................................................................................ 46
7.1Hilo Remote for USB .................................................................................................... 46
7.2Hilo Remote for Thunderbolt ........................................................................................ 46
7.3Hilo Remote for Dante .................................................................................................. 46
7.4Hilo Remote for iPad..................................................................................................... 46
7.5Using Hilo Remote ........................................................................................................ 47
7.5.1Navigation Bar .......................................................................................................................................... 47
7.5.2Monitor Page............................................................................................................................................. 50
7.5.3Adapter Section......................................................................................................................................... 54
7.6Using Hilo Remote from a WiFi or WLAN connected computer................................. 56
7.6.1Requirements ............................................................................................................................................ 56
7.6.2Initial Setup ............................................................................................................................................... 56
7.6.3Frequently Asked Questions ..................................................................................................................... 57
8Support ...................................................................................................................................... 59
8.1Lynx Website Support Resources.................................................................................. 59
8.2Telephone Support......................................................................................................... 59
8.3Registering your Hilo .................................................................................................... 59
8.4Return Policy ................................................................................................................. 59
9Appendices ................................................................................................................................ 60
9.1Methods of Connection ................................................................................................. 60
9.1.1USB 2.0..................................................................................................................................................... 60
9.1.2Thunderbolt............................................................................................................................................... 60
9.1.3Dante......................................................................................................................................................... 60
9.1.4ProTools Digilink...................................................................................................................................... 60
9.1.5Standalone................................................................................................................................................. 60
9.2Battery Information ....................................................................................................... 60
9.3XLR Connector Wiring and Adapters ........................................................................... 61
9.3.1Balanced Connections ............................................................................................................................... 61
9.3.2Unbalanced Connections with Twisted Pair Cable.................................................................................... 61
9.3.3Unbalanced Connections with Single Conductor Cable............................................................................ 62
9.4Setting Trim Pots ........................................................................................................... 63
9.5Setting the Monitor out Level Mode ............................................................................. 63
10Troubleshooting & User Tips .......................................................................................... 64
11Specifications..................................................................................................................... 65
12Certifications..................................................................................................................... 66
12.1FCC DECLARATION OF CONFORMITY................................................................. 66
12.2CE EMC DECLARATION OF CONFORMITY.......................................................... 67
12.3CE SAFETY DECLARATION OF CONFORMITY ................................................... 67
13Warranty Information ..................................................................................................... 68

Page 1
1Introduction
Thank you for choosing Lynx Hilo for your audio needs. The device you have received has been precision engineered to provide the
very best audio quality possible, coupled with an innovative, intuitive user interface, and a unique and powerful feature set. Hilo is one
of the first pro audio devices on the market that utilizes a full-color LCD touchscreen for control, metering and configuration. Far
from an unnecessary bit of “eye candy”, the touch display allows quick routing and setup, as well as a variety of accurate metering and
measurement tools. New features will be available in the form of downloadable firmware updates, keeping Hilo responsive to your
needs for many years to come.
1.1 Overview
Hilo represents the zenith of Analog conversion, improving on Lynx’s famous Aurora converters with state-of-the-art components and
design techniques. The innovative design of the analog stage and converter topology allow ultra-low noise and distortion
specifications, producing an unprecedented level of clarity and depth-of-image. Much more than a “me too” stereo converter, Hilo
actually features three unique sets of analog outputs, each with their own Digital-to-Analog converters, and independent routing. Main
Outs, Monitor Outs and Headphone Outs all can feature a unique combination of sources with independent level controls.
1.2 Features
Hilo also has an extremely generous set of Digital I/O options. Apart from AD/DA conversion tasks, Hilo is one of the most powerful
digital format converters/routers on the market. Digital formats include stereo AES/EBU, Stereo S/PDIF Coaxial, Stereo Optical
S/PDIF which is switchable to 8-channel ADAT light pipe, and 16 channels of communication to a host computer, via USB 2,
Thunderbolt or Dante connections. Any digital input can be routed to any analog or digital output, and all digital outputs can have
unique combinations of source inputs.
The unique 480 x 272 pixel LCD touch screen display makes Hilo stand out from other pro audio converters. Never before has
establishing parameters and routing channels been so quick and intuitive in a high-end converter. Not only are clear and accurate
meters provided, but the user can select from several meter styles. The Hilo display and features can be updated via simple computer
firmware update tools, easily accessible from the Lynx website. Hilo’s feature set and display options will evolve in response to user
feedback and the imagination of Lynx engineers.
Hilo is also a game changer in terms of flexibility. It is well suited for recording studio use, the home recordist, mastering, audio
analysis, home theater/audiophiles, as well as field recording. With AC or battery-powered DC operation, Hilo can be used “for here”
or “to go”. With its lightweight, portable design, no longer does the discriminating user have to choose between top rung sound quality
and convenience.
1.3 In the Box
Before proceeding with the Hilo setup, let’s make sure that you received everything that was included with the purchase. In the Hilo
box, you should find:
Hilo AD/DA converter
AC Power Cord
Hilo User’s Manual
Hilo-USB only: One 6’ long Type-A to Type-B shielded USB 2.0 cable
1.4 Power and Safety Information
To prevent fire or shock hazard, do not expose this equipment to rain or moisture. Do not block any of the ventilation openings. Do
not defeat the safety purpose of the grounding-type plug. A grounding type plug has two blades and a third grounding prong. The third
prong is provided for your safety. If the provided plug does not fit into your outlet, consult an electrician for replacement of the
obsolete outlet. Protect the power cord from being walked on or pinched, particularly at the plugs, convenience receptacles, and the
point where they connect to the Hilo. Unplug this device during lightning storms or when unused for long periods of time.
Hilo utilizes a state-of-the-art universal power supply. The power supply will auto-detect the voltage from 100V to 240V and conform
appropriately. No manual voltage adjustment is necessary.
1.5 Rack-Mounting
Hilo can be mounted in standard studio equipment racks using an optional two-space rack shelf available from Lynx.

Page 2
1.6 Operation Requirements
To operate Hilo successfully with your existing equipment, first let’s verify that you have compatible elements for best results.
1.6.1 Audio Equipment Requirements
Hilo features a wide variety of audio I/O formats. Compatibility with these formats are, of course, only important for I/O ports that
you intend to use.
Headphones: The Hilo headphone jack (PHONES) is suitable for driving stereo headphones through a ¼” TRS connection.
Any standard set of headphones should work with Hilo.
Line Inputs and Outputs: Hilo can operate with balanced or unbalanced, line-level analog audio equipment (power amps,
powered speakers, headphone amps, microphone pre-amps, mixing boards, etc.) operating at trim levels of +18 dBu; +20
dBu; +22 dBu; +24 dBu; +0 dBV; +2 dBV; +4 dBV and +6 dBV . The LINE INs and LINE OUTs use XLR connections.
Monitor Outputs: The Hilo MONITOR outputs can operate with balanced or unbalanced, line-level analog audio
equipment and use ¼” TRS jacks.
AES/EBU Inputs and Outputs: The Hilo AES IN and OUT ports should work with any AES/EBU compatible device at
standard sample rates between 44.1 kHz and 192 kHz. The AES ports utilize XLR connections.
SPDIF Inputs and Outputs: Hilo supports coaxial (electrical) SPDIF connections on RCA jacks, or SPDIF Optical signals
on TOSLINK connections.
ADAT Lightpipe: Hilo’s TOSLINK Optical connector (S/PDIF/ADAT OPT.) can be software switched between 2-channel
SPDIF operation and 8-channel ADAT Lightpipe operation. When ADAT is selected, each input and output port supports
up to eight channels at sample rates of 44.1 kHz and 48 kHz, four channels at sample rates of 88.2 kHz and 96 kHz, or two
channels at sample rates of 176.4 kHz and 192 kHz.
1.6.2 Computer requirements
Hilo is configured to operate with Mac or PC computer systems via USB, Thunderbolt or Dante (Ethernet). Hilo USB can also be used
with iOS on an Apple iPad. Check the system requirements below to insure compatibility with your platform and format.
It also is important to note that most professional audio applications place significant demands on your computer’s resources, and it is
therefore recommended that you meet or exceed the recommended system requirements for your Digital Audio Workstation or audio
playback software, which will likely be greater than those listed for Hilo. Please refer to your audio software’s documentation for
more information.
Desktop computer or laptop with at least Intel Core 2 @ 1.6 GHz, or AMD equivalent
At least 1GB RAM
Hilo-USB
One functional USB 2.0 port
Hilo-TB (Thunderbolt)
One functional Thunderbolt port (Note: With Thunderbolt 3, a TBT3 to TBT2 adapter is required)
Hilo-DNT (Dante)
Standard wired Ethernet network interface (100Mbps or Gigabit).
Gigabit (1000Mbps) interface is required for channel counts above 32x32 @48kHz (16x16 @ 96 kHz; 8x8 @ 192 kHz).
Wireless LAN (Wi-Fi) Ethernet interfaces are not supported
Windows
Windows 7, Windows 8, Windows 8.1 or Windows 10
macOS
Mac OS X 10.8.5 or higher. Hilo-DNT (Dante) requires Mac OS X 10.9.5, 10.10.5 or 10.11.
iOS
Hilo-USB only
iOS 7
Apple iPad 2 or newer
iPad camera kit for USB connection

Page 3
1.7 Using this manual
To insure smooth sailing with your new product, we recommend reading through the entire manual before using Hilo. Thereafter, use
the manual as a reference as needed when questions arise.
The following typographic conventions are used in this manual:
ALL UPPER CASE TEXT refers to a specific parameter selection control (i.e. SYNC SOURCE) or a cable connection.
Text in quotation marks indicates a parameter selection value or menu option (i.e. “EXT”).
Phrases, such as: Start > Programs > Lynx Studio Technology use the greater than symbol (“>”) to indicate multiple menu
options or mouse selections within a software control context.
1.8 Registration
Lynx is committed to providing you with the best service possible. To help us serve you better, please be sure to register your Hilo.
Register on the web at: http://www.lynxstudio.com/register
Once you are registered you will automatically receive notifications of new products and upgrades.
2Getting Started Hilo-USB
Hilo was designed to be a product that is so easy to use that this section of the manual would scarcely be necessary. However, it is
quicker to learn how the device works in one go, then to spend precious minutes figuring things out by randomly pressing buttons. We
recommend reading this section thoroughly, before putting Hilo to serious use, if you can manage it.
2.1 Unpacking
Before setting up Hilo for use, remove it from the box and verify that the box contents described in section 1.3 are all present.
If all items are present, connect the Hilo AC power cord to a grounded AC Outlet, or power
distribution unit. Switch on the power switch on the back of Hilo (note: the “|” position on the
power button is “On” and the “O” is “Off”.)
Hilo may power up automatically when AC is applied (this varies by firmware version). If not,
press the front panel standby switch and verify that Hilo powers up.
If it does not, verify that the selected AC power source is operational. If it is and the unit still will
not power up, please contact Lynx technical support.
If Hilo DOES power up, move on to Set up…
2.2 Set up
Hilo was designed to be adaptable to a variety of operational environments: on a desktop for Audiophile enthusiasts, in an equipment
rack for recording studios, over a mixing console for a mastering engineer, etc. If Hilo is to be used on a desktop or other flat surface,
it is best to leave the pre-installed rubber feet in place. These are designed to prevent scratching of Hilo or the surface that it is set
upon.
In a recording studio context, where space is at a premium, one may choose to rack mount Hilo. A rack kit for the Hilo is available
from Lynx dealers, or from www.lynxstudio.com.

Page 4
2.3 Cable Connections
Hilo features a treasury of I/O types, suitable to accommodate whatever audio devices you wish to integrate.
USB Port
Cable connections may vary by system. Use the included USB cable or equivalent to connect Hilo to a USB 2.0 equipped computer. If
using a third party cable, make sure that it is USB 2.0 compliant. 5 meters (16 feet) maximum.
LINE IN
Use standard XLR cables (i.e. mic cables) to connect to a line level, balanced signal source. This input is not suitable for use with
microphones, unless a microphone pre-amp is used to get mic-level signals up to line-level. Cable Concerns: If your signal source is
unbalanced, consult Appendix 9.3 to determine if your cables are wired correctly for use with Hilo. For unbalanced cables, 4.5 meters
(15 feet) is the maximum recommended length.
LINE OUT
Use standard XLR cables (i.e. mic cables) to connect to a line level, balanced signal destination. Cable Concerns If your signal source
is unbalanced, consult Appendix 9.3 to determine if your cables are wired correctly for use with Hilo. For unbalanced cables, 4.5
meters (15 feet) is the maximum recommended length.
MONITOR OUT
Use standard ¼” cables. TRS if balanced, standard ¼” TS if unbalanced.
Cable Concerns: For unbalanced cables 4.5 meters (15 feet) is the maximum recommended length.
AES IN/OUT
Use AES XLR cables (110 Ω). Insure that the connected device supports AES3 or AES/EBU. Cable lengths of up to 100 meters (328
feet) are acceptable.
S/PDIF/ ADAT Optical
Use standard TOSLINK optical cables, of lengths up to 9 meters (30 feet).
SPDIF Coaxial In Out
Use 75 ΩS/PDIF cable with RCA connections. Recommended maximum length is 6 meters (20 feet)
Wordclock In/Out
Use standard 75 Ωwordclock cable with BNC connectors. Recommended maximum length is 9 meters (30 feet).
Battery In
DC 4-pin XLR battery pack connector. Supports 9-18 volts DC. See Appendix 5.1 for more information.
IEC Power connector
Use the included AC power cord
In Addition to the rear panel jack pack, there is one remaining cable connection on the Hilo front panel. The PHONES jack is a
standard ¼” TRS connector, and is capable of driving the full range of stereo headphones available.

Page 5
2.4 Initial Setup
It is important to set up Hilo in the proper order to avoid any speaker damage calamities. Follow these steps for the best results:
Connect the AC power cord to Hilo and to a quality, surge-protected AC power source. Check the Power and Safety section
of this manual for additional information.
Connect cables from Hilo to whatever audio devices Hilo will be connected to. These could include powered speakers,
mixing consoles, power amps, microphone pre-amps, effects processors, etc.
Make sure volumes are turned down on connected equipment to avoid excessive level being sent to the equipment during
setup.
If the context of use is as a standalone AD/DA converter that will not be connected to a computer, skip ahead to section 5,
and, in particular, section 5.3.4: Routing.
If using Hilo with a Mac or PC computer, follow the installation procedure below.
2.5 Computer Set Up
All driver files and utilities mentioned in the subsequent installation steps are available on our website at:
http://www.lynxstudio.com > Support > Downloads
If a previous driver version is present, it will automatically be removed as part of the driver installation process.
Note: No driver installation is required for OS X or iOS, only for Windows.
2.5.1 Driver Installation for Windows 7/8/10
1. Power on Hilo with the USB cable disconnected. The Hilo driver should be installed prior to connecting the cable.
2. Download the most recent driver from the www.lynxstudio.com website and save the file to a convenient location.
3. Double-click the downloaded Hilo_DriverSetup_vX.XX.X.exe file (where X.XX.X is the version number).
4. When the User Account Control
window pops up, press “Yes” to continue. 5. Press Next to continue. 6. Press Install to continue.
7. Press Next to complete the installation
8. If this is a driver upgrade, you will be
promoted to disconnect the Hilo and
reconnected it.
2.5.2 Hilo Driver Devices – Windows Operating Systems
Hilo was designed to provide maximum compatibility with the most popular audio and multimedia applications that use the Windows
WDM (which includes both DirectSound and MME) and ASIO driver standards. It is crucial that the applications are set up correctly
for optimal operation.
WDM was developed by Microsoft and is used most typically by media playback applications, such as Windows Media Player,
iTunes, Quicktime Player, as well as the default format for media players like J River Media Center, FooBar, Media Monkey, etc.
ASIO was developed by Steinberg, and was designed to address the low-latency and high channel count needs of Pro Audio and
Music Production. ASIO is an option for Audio Production applications such as Pro Tools, Cubase/Nuendo, Sonar,

Page 6
Samplitude/Sequoia, Audition, etc. These applications may also support MME or DirectSound, but when the option exists, we
recommend using ASIO for the best performance.
2.5.2.1 WDM/Multimedia Applications
Hilo can be used as a playback device for most popular multimedia, home theater and consumer audio applications. Some such
applications allow selection of specific playback devices. In these cases, one or two Hilo 8-channel play devices will be available to
choose from, depending on whether Hilo is in 8 or 16 channel mode (see section 5.3.1.2.8: USB mode). These devices are labeled as
“Lynx Hilo Speakers” and “USB Play 9-16”. These are 8-channel devices capable of playing back multi-channel streams, like
surround sound, but can also be easily used for stereo playback. When “Lynx Hilo Speakers” is selected as the play device, stereo
audio will stream to Play 1+2 and with “USB Play 9-16” stereo audio will stream to Play 9+10. It is generally advisable to choose
“Lynx Hilo Speakers” with any WDM program, as this will insure that audio streams to every analog and digital output on Hilo, if the
Hilo is in its default state. If you wish to route a stream to a particular output, you can choose “USB Play 9-16” and route that to the
desired physical output from the Routing Page, as described in section 5.3.4: Routing.
When output device selection is not an option, it can be assumed that the application uses the Windows default audio device. In this
case, “Lynx Hilo Speakers” or “USB Play 9-16”should be established as the system playback default from:
Windows Vista/Windows 7 /Windows 8 and Windows 10:
Right-click Start > Control Panel > Hardware and Sound > Sound > Playback. Right-Click “Speakers Lynx Hilo” or “USB Play 9-16”
and choose “Set as default device”.
2.5.2.2 ASIO Application
When using an application that supports the ASIO driver standard, one must specify the Hilo ASIO driver as the appropriate audio
device. Once that is established, multiple stereo input and output devices will be available for use within the application. Please note:
the USB Mode from the Hilo “Settings: System” page will determine whether 8-channels or 16-channels of I/O are presented.
When using an ASIO compatible program, the appropriate ASIO device must be selected from a settings or options menu in the
application. The correct choice would be “ASIO Lynx Hilo USB”.
Many ASIO applications provide access to an ASIO Control Panel for the device being used. For Hilo, this button will launch the Hilo
Control Panel, as detailed below.
2.5.2.3 Hilo USB Control Panel
The Hilo Control Panel provides access to operational parameters for the Hilo, including setting buffer sizes to control latency.
Latency in an audio interface can be defined as the time required to process a sample from an application to the interface’s audio
output. A number of factors determine the achievable latency performance of a Hilo system: processor speed, operating system,
sample rate, number of utilized record or play channels, system efficiency, etc.
Latency can be manipulated by changing the size of the buffers used to transfer data to and from the LT-USB card installed into Hilo.
The Hilo USB Control Panel provides access to buffer settings, both a Streaming Mode for WDM and ASIO, and also an ASIO Buffer
Size control. This control panel can be launched from either the ASIO control settings within most audio applications or from “Start>
All Programs> Lynx Studio Technology > “Hilo USB Control Panel”.
There are three tabs in the Hilo Control Panel
The STATUS page simply reveals the “USB Audio Device” (Lynx Hilo in this
case), and the current “Sample Rate”. The sample rate cannot be changed here, it is
information display only.

Page 7
In the BUFFER SETTINGS page, the USB Streaming and ASIO buffer parameters
control the size of the audio packets that are used to transfer audio to the LT-USB
hardware. Smaller buffer sizes will give you lower latency.
However, if a buffer size is too small for the system or context, audio anomalies
such as clicks and pops may occur. It is recommended to become familiar with
altering the LT-USB buffer size to best suit the context of use.
When using ASIO based applications, both the Streaming and ASIO buffer sizes
contribute to the overall latency of the system and interact in a cumulative fashion.
It is not possible to set the stream buffer to a value smaller than that required for
the ASIO buffer size.
When using WDM based applications, only the Streaming buffer size parameter contributes to the overall latency of the system. The
ASIO buffer size is ignored. Most WDM applications also add a large amount of additional latency to ensure clean playback. For this
reason, ASIO is the preferred driver model for pro-audio and low-latency situations.
To modify the latency, the “Streaming” buffer size must first be set. Choose the desired size and click “Apply”. We recommend
setting this value to “Low Latency” in order to have the greatest flexibility in ASIO buffer size selection. If clean audio is not possible
in this state, increase the stream buffer size to “Standard”. Once the Streaming size is set, you will have various options for the
“ASIO” buffer size. Choose the appropriate size and click “Apply”. The default state for this value is “Auto”. Auto chooses a safe
buffer size based on the stream buffer size selected and the sample rate being used. Once you have determined the smallest supported
Stream Buffer size, you typically will not have to change this again. The ASIO buffer size, however, may need to be increased or
lowered from time to time depending on the context of use.
Once you determine the lowest achievable buffer size, you will typically have to double the size each time you double the sample rate,
but the effective latency will remain constant. For example, if a system is capable of operating at a buffer size of 128 samples at 48
kHz, then for a 96 kHz project, the buffer size will likely need to be increased to 256 samples.
The third tab in the Hilo Control Panel opens the INFO page.
This page simply reveals the connected product (again Hilo), the
Revision of the LT-USB (its firmware version), serial number
and driver build.
2.5.3 Installation for Macintosh OS X
Hilo will operate as a Core Audio device under OS X automatically without any driver installation required. Core Audio is the
dominant audio driver model for OS X, and is used for media playback applications as well as Pro Audio applications.
Simply connect the USB cable from Hilo to your Mac OS X computer and Hilo will be immediately available for use. Please note that
Hilo does require OS X version 10.6.4 or above.
2.5.3.1 OSX Audio Applications
Hilo can be used as a playback device for most popular multimedia, home theater and pro audio applications. Some such applications
allow selection of specific playback devices. In these cases, a Lynx Hilo output device can be selected from the appropriate device
selection menu.

Page 8
In cases where the playback software does not provide access to output
selections, the default output devices for the operating system will be
used. In OS X, the audio out default device can be established from
Applications > Utilities > Audio MIDI Setup.
When the Lynx Hilo is selected as the output sound device, channels
1&2 are active by default. In this state, audio will be sent to ALL Hilo
outputs simultaneously. If you wish to mute a stream to a particular
output, you can do that from the Hilo Routing Page, as describe in
section 5.3.4: Routing.
2.5.3.2 Controlling Latency by Changing the Buffer Size
Latency in an audio interface can be defined as the time required to process a sample from an application to the interface’s audio
output. A number of factors determine the achievable latency performance of a Hilo USB system: processor speed; operating system;
sample rate; number of utilized record or play channels; system efficiency; etc.
Latency can be manipulated by changing the size of the buffers used to transfer data to and from Hilo. Core Audio buffer size
controls are offered within most pro audio recording applications. With Hilo, buffer sizes typically range between 32 and 2048
samples.
Smaller buffer sizes will give you lower latency. However, if a buffer size is too small for the system or context, audio anomalies such
as clicks and pops may occur. It is recommended to become familiar with altering the Hilo buffer size to best suit the context of use.
Once you determine the lowest achievable buffer size, you will typically have to double the size each time you double the sample rate,
but the effective latency will remain constant. For example, if a system is capable of operating at a buffer size of 128 samples at 48
kHz, then for a 96 kHz project, the buffer size will likely need to be increased to 256 samples.
2.5.4 Installation for iPad
Hilo can connect to an Apple iPad with the camera kit. Hilo will operate as an audio device under iOS automatically without any
driver installation required.
Simply connect the USB cable from Hilo to your iPad, and Hilo will be immediately available for use. There is no capability in iPad
applications to select audio devices. Any audio that plays from the iPad will automatically be routed to the Hilo through the camera
connection kit/USB cable.

Page 9
3Getting Started Hilo-TB
Hilo was designed to be a product that is so easy to use that this section of the manual would scarcely be necessary. However, it is
quicker to learn how the device works in one go, then to spend precious minutes figuring things out by randomly pressing buttons. We
recommend reading this section thoroughly, before putting Hilo to serious use, if you can manage it.
3.1 Unpacking
Before setting up Hilo for use, remove it from the box and verify that the box contents described in section 1.3 In the Box are all
present.
If all items are present, connect the Hilo AC power cord to a grounded AC Outlet, or power
distribution unit. Switch on the power switch on the back of Hilo (note: the “|” position on the
power button is “On” and the “O” is “Off”.)
Hilo may power up automatically when AC is applied (this varies by firmware version). If not,
press the front panel standby switch and verify that Hilo powers up.
If it does not, verify that the selected AC power source is operational. If it is and the unit still will
not power up, please contact Lynx technical support.
If Hilo DOES power up, move on to Set up…
3.2 Set up
Hilo was designed to be adaptable to a variety of operational environments: on a desktop for Audiophile enthusiasts, in an equipment
rack for recording studios, over a mixing console for a mastering engineer, etc. If Hilo is to be used on a desktop or other flat surface,
it is best to leave the pre-installed rubber feet in place. These are designed to prevent scratching of Hilo or the surface that it is set
upon.
In a recording studio context, where space is at a premium, one may choose to rack mount Hilo. A rack kit for the Hilo is available
from Lynx dealers, or from www.lynxstudio.com.

Page 10
3.3 Cable Connections
Hilo features a treasury of I/O types, suitable to accommodate whatever audio devices you wish to integrate.
Thunderbolt ports
Thunderbolt: Hilo-TB has been tested with standard optical and copper Thunderbolt cables. For Copper cable, one can use lengths up
to 3 meters (9.8 feet). Optical cables, while somewhat more difficult to acquire, do promise operation with much longer cable lengths,
up to 100 meters. Either port may be used to connect to the computer. The other port may be used to daisy-chain to other
Thunderbolt devices (up to 6 total on the Thunderbolt chain).
Note: Using a Thunderbolt 3 computer will require a 3rd party adapter like the Apple MMEL2AM/A Thunderbolt 3 to Thunderbolt 2
Adapter.
12V DC port
For connecting an external AC power supply in cases where bus-powered Thunderbolt devices will be connected to the Hilo-TB
LINE IN
Use standard XLR cables (i.e. mic cables) to connect to a line level, balanced signal source. This input is not suitable for use with
microphones, unless a microphone pre-amp is used to get mic-level signals up to line-level. Cable Concerns: If your signal source is
unbalanced, consult Appendix 9.3 to determine if your cables are wired correctly for use with Hilo. For unbalanced cables, 4.5 meters
(15 feet) is the maximum recommended length.
LINE OUT
Use standard XLR cables (i.e. mic cables) to connect to a line level, balanced signal destination. Cable Concerns If your signal source
is unbalanced, consult Appendix 9.3 to determine if your cables are wired correctly for use with Hilo. For unbalanced cables, 4.5
meters (15 feet) is the maximum recommended length.
MONITOR OUT
Use standard ¼” cables. TRS if balanced, standard ¼” TS if unbalanced.
Cable Concerns: For unbalanced cables 4.5 meters (15 feet) is the maximum recommended length.
AES IN/OUT
Use AES XLR cables (110 Ω). Insure that the connected device supports AES3 or AES/EBU. Cable lengths of up to 100 meters (328
feet) are acceptable.
S/PDIF/ ADAT Optical
Use standard TOSLINK optical cables, of lengths up to 9 meters (30 feet).
SPDIF Coaxial In Out
Use 75 ΩS/PDIF cable with RCA connections. Recommended maximum length is 6 meters (20 feet)
Word clock In/Out
Use standard 75 Ωword clock cable with BNC connectors. Recommended maximum length is 9 meters (30 feet).

Page 11
Battery In
DC 4-pin XLR battery pack connector. Supports 9-18 volts DC. See Appendix 5.1 for more information.
IEC Power connector
Use the included AC power cord
In Addition to the rear panel jack pack, there is one remaining cable connection on the Hilo front panel. The PHONES jack is a
standard ¼” TRS connector, and is capable of driving the full range of stereo headphones available.
3.4 Initial Setup
It is important to set up Hilo in the proper order to avoid any speaker damage calamities. Follow these steps for the best results:
Connect the AC power cord to Hilo and to a quality, surge-protected AC power source. Check the Power and Safety section
of this manual for additional information.
Connect cables from Hilo to whatever audio devices Hilo will be connected to. These could include powered speakers,
mixing consoles, power amps, microphone pre-amps, effects processors, etc.
Make sure volumes are turned down on connected equipment to avoid excessive level being sent to the equipment during
setup.
If the context of use is as a standalone AD/DA converter that will not be connected to a computer, skip ahead to section 5,
and, in particular, section 5.3.4: Routing.
If using Hilo with a Mac or PC computer, follow the installation procedure below.
3.5 Computer Set Up
Lynx Drivers and firmware updaters are updated regularly. The most current versions can be easily downloaded from the Lynx
Website: www.lynxstudio.com > Support> Downloads. Make sure that you choose LT-TB or Hilo Thunderbolt as the “Product”.
If you are updating an existing driver, it is recommended to remove it before installing the new driver. In Windows, this is done from
Start > Programs > Lynx Studio Technology > Uninstall Lynx Driver. From OS X, this is done by running the uninstaller that comes
in the folder with the downloaded driver installer. Reboot when prompted after the Uninstall is complete. When installing drivers,
make sure that all software programs, especially audio applications, are closed.
3.5.1 Driver Installation for Windows 7/8/10
1. Power up the Hilo and connect it to the computer with a Thunderbolt cable.
2. On first connection, you may receive a prompt that New Thunderbolt Devices have been attached. Click this window to
have the system connect to the Hilo as a Thunderbolt Device
3. When the Select Device to Connect Window comes up, Choose “Always Connect”. If there are multiple Thunderbolt
devices connected at install time, you will need to do this for each unit. (If this is a reinstall, you will not see this dialog box.
Just continue on with the subsequent steps).
4. Locate the LT-TB driver from your downloaded files. The file name will be V2Setup###.exe (where ### is the version
number of the driver)
5. Double-click the installation file to start the driver installation.
6. Accept the License Agreement by clicking “Accept”

Page 12
7. The installer will extract the necessary files to the C:\Lynx directory. Click “Extract” from this window
8. If you are prompted to let the program make changes to the computer, select “Yes”
9. You will next see the driver Install dialog. Click “Install”
10. You may get a Windows Security Dialog Bog. If so, select “Install”
11. Driver installation will proceed
12. Finally you will receive a confirmation that the install completed successfully

Page 13
13. The Hilo TB is ready to use, no reboot necessary.
NOTE: The driver installation process installs both the Windows driver and the Hilo Remote Control application. The Hilo
Remote Control application is installed into the Lynx Studio Technology program group.
3.5.2 Hilo Driver Devices – Windows Operating Systems
Hilo was designed to provide maximum compatibility with the most popular audio and multimedia applications that use the Windows
WDM (which includes both DirectSound and MME) and ASIO driver standards. It is crucial that the applications are set up correctly
for optimal operation.
WDM was developed by Microsoft and is used most typically by media playback applications, such as Windows Media Player,
iTunes, Quicktime Player, as well as the default format for media players like J River Media Center, FooBar, Media Monkey, etc.
ASIO was developed by Steinberg, and was designed to address the low-latency and high channel count needs of Pro Audio and
Music Production. ASIO is an option for Audio Production applications such as Pro Tools, Cubase/Nuendo, Sonar,
Samplitude/Sequoia, Audition, etc. These applications may also support MME or DirectSound, but when the option exists, we
recommend using ASIO for the best performance.
3.5.2.1 WDM/Multimedia Applications
The Hilo-TB can be used as a playback device for most popular multimedia, home theater and consumer audio applications. Some
such applications allow selection of specific playback devices. In these cases, a Hilo output device can be selected from the
appropriate device selection menu. When output device selection is not an option, it can be assumed that the application uses the
Windows default audio device. To use the desired Hilo output as the system default:
With Windows 7/Windows 8 navigate to: Start > Control Panel > Hardware and Sound > Sound > Playback. With Windows 10, right
click the Start button and choose Control Panel > Hardware and Sound > Sound > Playback. Right-Click the desired Hilo-TB output
device and choose “Set as default device”. The first pair of outputs will appear as (Speakers) Hilo.
The Hilo-TB will present 8 stereo Play and Record devices to the operating system. Play devices are labeled as Hilo Speakers (this is
equivalent to Play 1+2), Hilo Play 3+4, Hilo Record 1+2, Hilo Record 3+4, etc. These are pre-configured to connect to appropriate
hardware I/O on the Hilo by default, although this can be user altered in Hilo Routing page or from the Hilo Remote software. There
are also factory scenes pre-installed in the Hilo that provide easy access to the most popular configurations. See section 5.3.8 Scenes.
3.5.2.2 ASIO Application
When using an application that supports the ASIO driver standard, one must specify the Lynx ASIO driver as the active audio device
from within the audio software. Once that is established, eight stereo input and output devices will be available for use within the
application.
When using an ASIO compatible program, the appropriate ASIO device must be selected from a settings or options menu in the
application. The correct choice would be “Lynx ASIO”.

Page 14
3.5.2.3 ASIO Control Panel
Many ASIO applications provide access to the driver’s ASIO Control Panel. For a Hilo-TB, this button will launch the Lynx ASIO
Control Panel.
From the Lynx ASIO Control Panel, the ASIO buffer size and system latency can be established conveniently within the audio
software application. The following parameters can be altered from the Lynx ASIO Control Panel:
Buffer Size: Allows the size of the ASIO buffer, in samples, to be set. The buffer size is the primary factor in the amount of latency
that a user will experience when using the Hilo TB. See section 3.5.2.4 Controlling Latency by Changing the Buffer Size below
for details.
Latency: Displays the amount of latency in milliseconds that is the result of the selected buffer size at the active sample rate.
Ignore Direct Monitor Requests: When checked, the ASIO driver will disregard Direct Monitor commands from an ASIO software
application. Since Direct Monitor calls can assign and mute monitor sources in the Routing page and the Hilo Remote, checking
this box can prevent unintended changes to the monitoring scheme when an ASIO application is launched.
DM Uses Active Devices: This switch sets the Direct Monitoring scheme for the application. When unchecked, all devices (active or
not) may be used for Direct Monitoring. When checked, only active devices, or devices assigned to software busses, are used for
Direct Monitoring. This gets around a problem where Cubase & Nuendo might select the wrong Direct Monitoring input or
output if non-contiguous devices are active.
Maximum Channels: This switch determines how many ASIO device channels will be available to the application. This is an
application specific parameter. If different ASIO applications are used at different times, it is possible to have them set
differently.
The primary purpose for this switch is to increase CPU efficiency and to facilitate multi-client operation. The default state is
“unlimited”, which means that all 16-channels are available to the ASIO application.
Most audio software allows the user to specify how many ASIO devices are used, generally in a settings or options menu. There
are some applications however that grab control over ALL of the ASIO devices in the system. For example, ProTools will open
all available channels regardless of the number of tracks being used in a project. This can be problematic because it uses more
CPU power than is necessary, and also because there are no driver devices available to be used by another application (multi-
client operation).
In these cases, setting the Maximum Channels control to the desired number of channels may free up some CPU overhead and
allows another application to access the channels that the ASIO application is not using. As an example, if you are only using two
pairs of outputs from your ASIO application, it would be appropriate top set this parameter to “4 channels”.
3.5.2.4 Controlling Latency by Changing the Buffer Size
Latency in an audio interface can be defined as the time required to process a sample from an application to the interface’s audio
output. A number of factors determine the achievable latency performance of a Hilo-TB system: processor speed, operating system,
sample rate, number of utilized record or play channels, system efficiency, etc.
Latency can be manipulated by changing the size of the buffers used to transfer data to and from the LT-TB. The higher the buffer
size, the less work the computer has to do to stream audio to the hardware. However, a higher buffer results in more latency. Also, the
higher the sample rate, the higher the buffer size needs to be. For instance, a buffer size of 128 samples at a sample rate of 44.1kHz
results in 2.9 milliseconds of latency. However, at 96kHz, a buffer size of 128 = 1.33 milliseconds. Therefore the buffer size needs to
be increased as the sample rate increases to maintain the same level of performance. If the buffer size is too low, you can experience

Page 15
clicks, pops or distortion in the audio. This is the result of buffer under-runs, when the audio buffer is momentarily depleted because
the computer cannot deliver samples quickly enough to keep it filled.
Why is latency important? It isn’t in every case. Here are the main conditions where low latency is important:
Software input monitoring. This is where you are monitoring through your audio software the input signals to be recorded. The
software is re-directing the input signal back out to a play device. If the buffer is too high here the performer will hear a
noticeable delay between the notes they are playing and hearing the sound back through the computer. Note that with the LT-TB,
zero latency hardware monitoring is available as an alternative to software monitoring. See section 5.3.4: Routing.
Virtual Instruments. Generally this would involve using a software synthesizer or other virtual sound source as an alternative to
dedicated hardware like a keyboard or tone module. Frequently one would play these instruments with some sort of MIDI
controller. The delay between a key being struck and hearing the resulting note from the virtual instrument is a function of
latency.
Mix Automation. Virtually all DAW applications feature some sort of Mix Automation, and most allow an external Mix surface or
MIDI controller to facilitate mixing within the software environment. Whether using onscreen faders or a MIDI surface of some
sort, latency will determine the delay between manipulating a fader or knob, and that move being reflected in the project.
3.5.3 Installation for Macintosh OS X
1. Power up the Hilo and connect it to the computer with a Thunderbolt cable.
2. Locate the LT-TB driver from your downloaded files. The file name will be Lynx_OSX_##.zip (where ## is the version
number of the driver). Double-click to expand the installer package.
3. Double-click “Lynx_OSX.pkg” that was expanded from the step above. This will start the driver installation.
4. Click “Continue” at the “Install Lynx CoreAudio Driver Installer” dialog box.
5. Click “Continue” for the Software License Agreement after reading it.
6. Click “Agree” from the next Window
7. Click “Install” in the Standard Install Window
8. Type in Password and click “Install”
9. Click “Continue Installation” for prompt about restarting computer after the installation

Page 16
10. The installation will continue
11. When complete, you will be prompted to restart the computer
12. After restart the driver will be installed and ready for use
NOTE: The OS X installation process installs both the Core Audio driver and the Hilo Remote application. The Hilo Remote
application is installed in the “Applications” folder.
3.5.3.1 OSX Audio Applications
Hilo can be used as a playback device for most popular multimedia, home theater and pro audio applications. Some such applications
allow selection of specific playback devices. In these cases, a Lynx Hilo output device can be selected from the appropriate device
selection menu.
In cases where the playback software does not provide access to output
selections, the default output devices for the operating system will be
used. In OS X, the audio out default device can be established from
Applications > Utilities > Audio MIDI Setup.
When the Lynx Hilo is selected as the output sound device, channels
1&2 are active by default. In this state, audio will be sent to ALL Hilo
outputs simultaneously. If you wish to mute a stream to a particular
output, you can do that from the Routing Page, as describe in section
5.3.4: Routing
Other manuals for hilo
1
Table of contents
Other Lynx Media Converter manuals

Lynx
Lynx greenMachine HDR Static User manual

Lynx
Lynx C AD 5320 D User manual

Lynx
Lynx MiniModules 3000 Series User manual

Lynx
Lynx C DA 5005 User manual

Lynx
Lynx C AD 3321 D User manual

Lynx
Lynx C AD 5110 User manual

Lynx
Lynx C DX 5624 User manual

Lynx
Lynx C DA 5010 User manual

Lynx
Lynx Hilo Preliminary User manual

Lynx
Lynx P AR 5610 User manual

Lynx
Lynx D AD 3260 BS User manual

Lynx
Lynx Aurora User manual

Lynx
Lynx C AD 3100 User manual

Lynx
Lynx C AD 5111 User manual

Lynx
Lynx C DX 5024 C User manual

Lynx
Lynx P VD 5660 D User manual

Lynx
Lynx CardModule C AD 5131 User manual

Lynx
Lynx C AD 3110-2 User manual

Lynx
Lynx hilo User manual

Lynx
Lynx C DA 3002 User manual