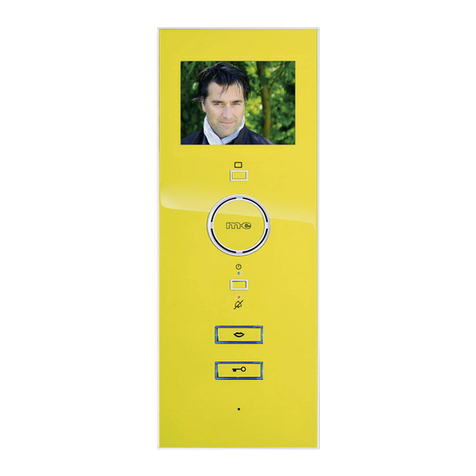
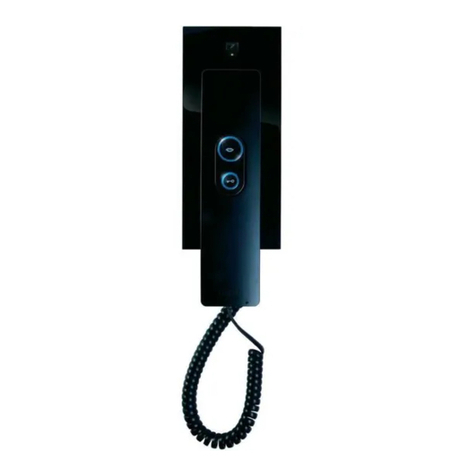
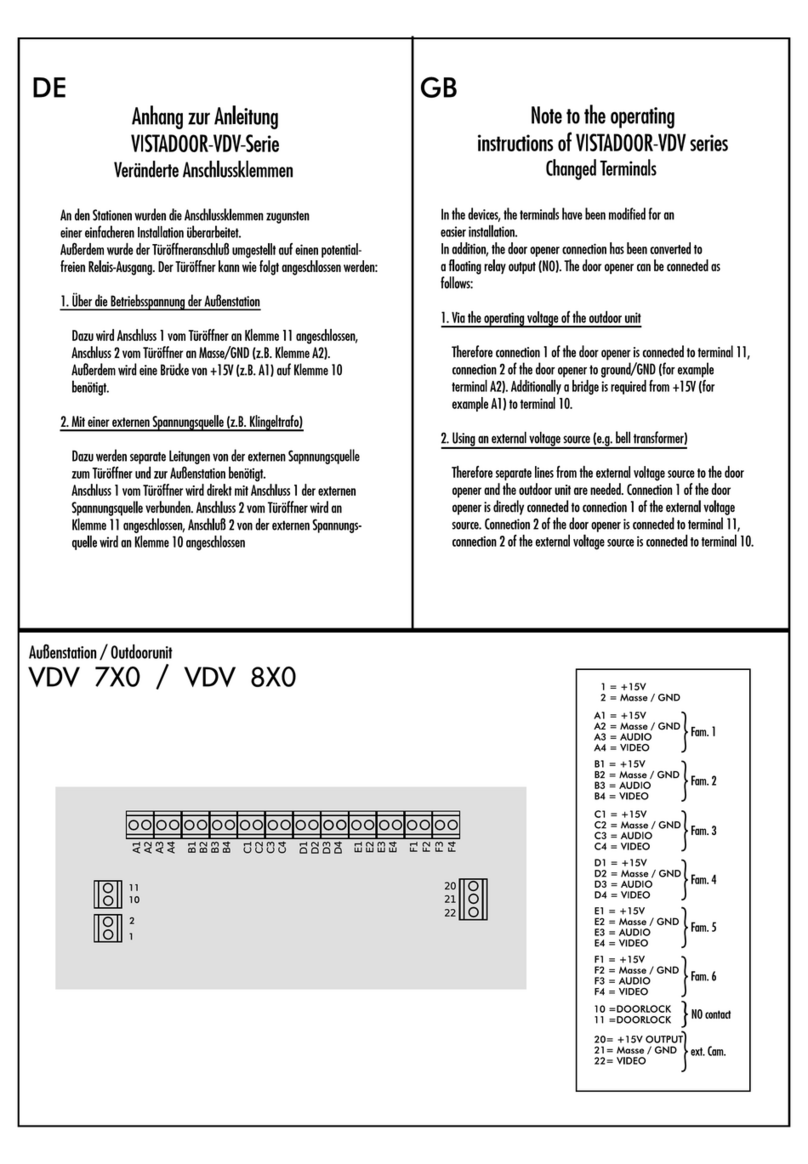
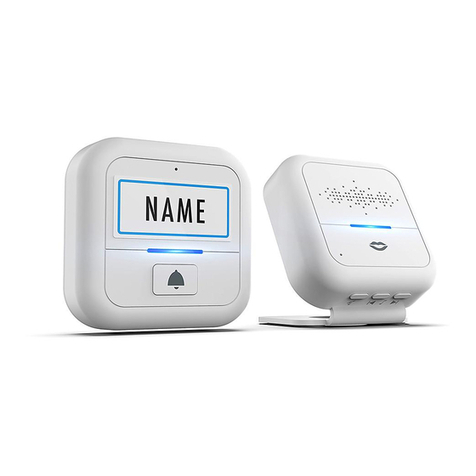
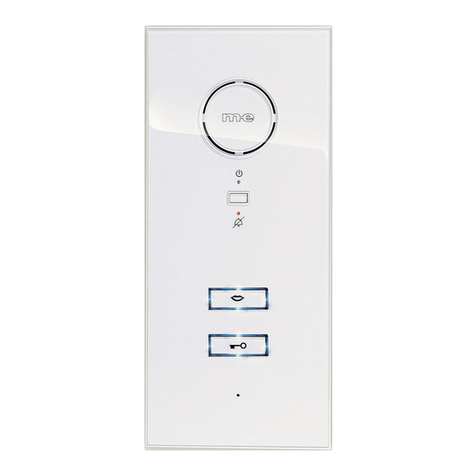
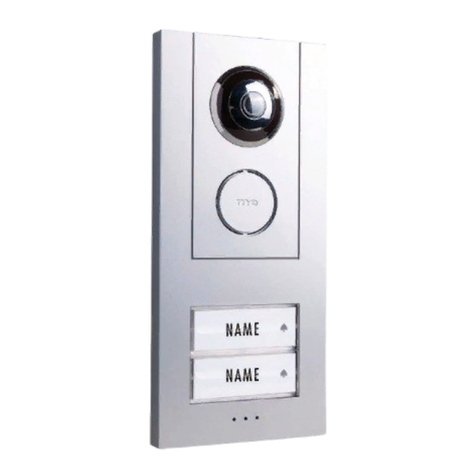
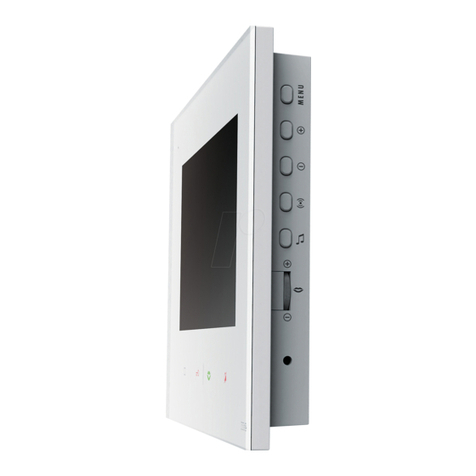
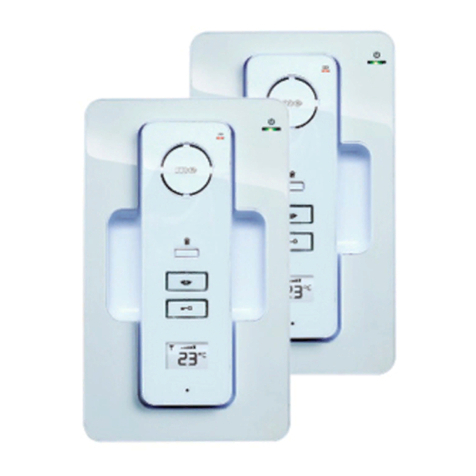
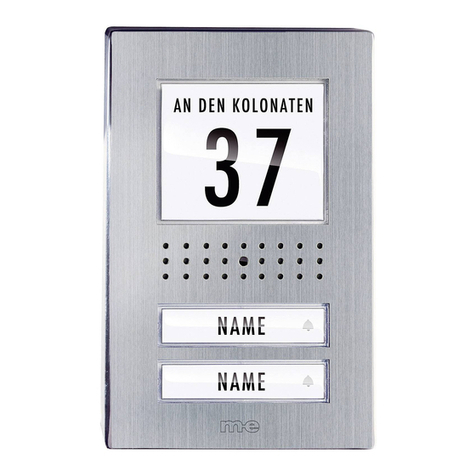
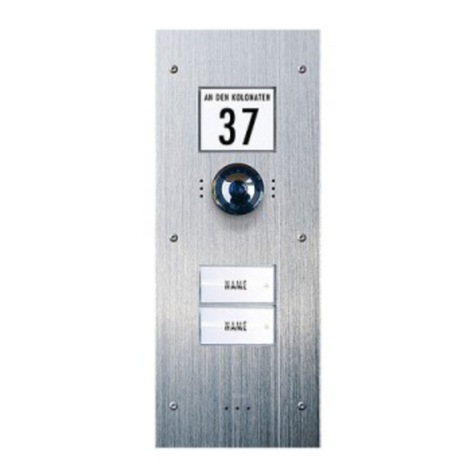
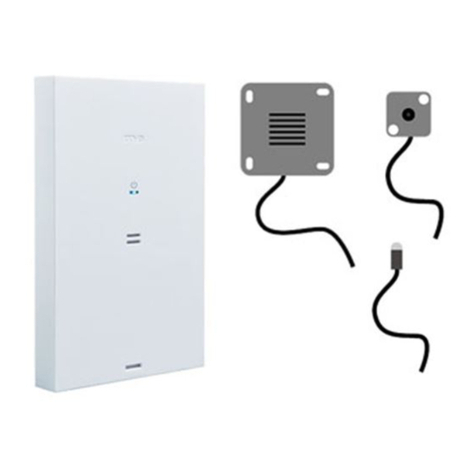
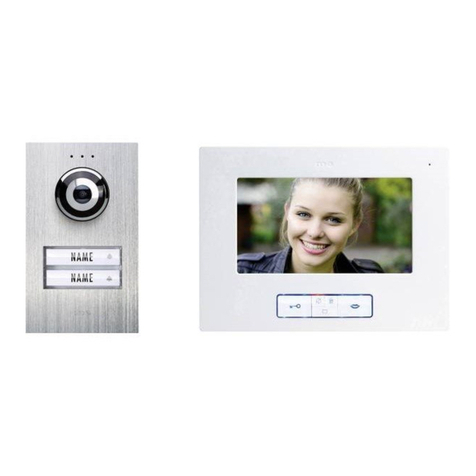
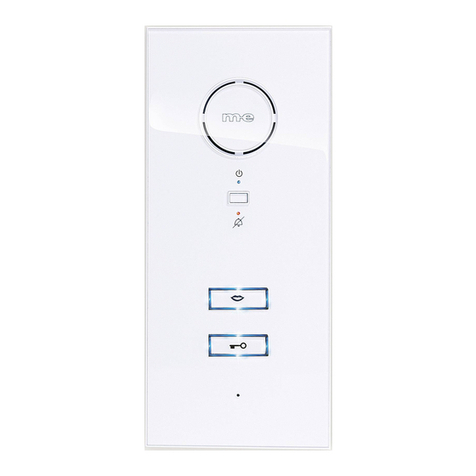
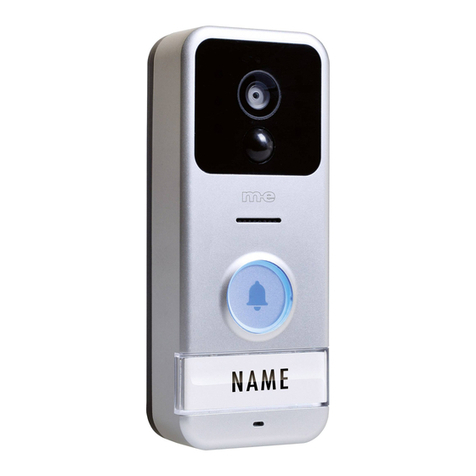
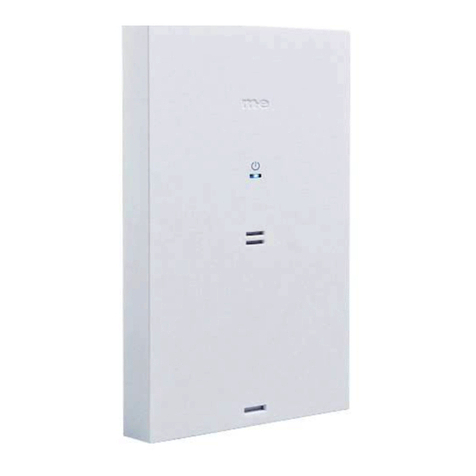
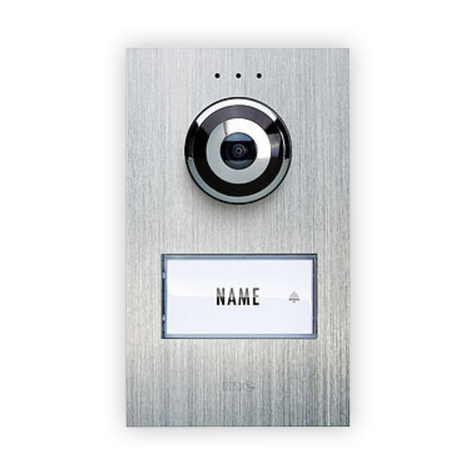
M-E Easy2Wire VDB Series User manual

VDB-9170
VDB-9270
VDB-70
BETRIEBSANLEITUNG
OPERATING INSTRUCTIONS
MODE D’EMPLOI
GEBRUIKSAANWIJZING
easy2wire VD_UP_I-Manual_210x240_RZ3.indd 1 29.10.14 16:39

easy2wire VDB | DEUTSCH
DE
2
Abb. A
DIAGRAM A
ILLUSTRATION A
AFBEELDING A
AAUSSENSTATION• OUTDOOR STATION • BOÎTIER EXTÉRIEUR • BUITENSTATION
1,2 Nm
max.
5 5
1
2
13
14
78 9
6
11
10
12
4
3
easy2wire VD_UP_I-Manual_210x240_RZ3.indd 2 29.10.14 16:39

DE
DEUTSCH | easy2wire VDB
3
Abb. B
DIAGRAM B
ILLUSTRATION B
AFBEELDING B
B
1
2
7
5
3
4 6
9
8
11
13
12
141717
10
7“ INNENSTATION •INDOOR STATION • BOÎTIER INTÉRIEUR • BINNENSTATION
15
16
18
easy2wire VD_UP_I-Manual_210x240_RZ3.indd 3 29.10.14 16:39

easy2wire VDB | DEUTSCH
DE
4
A. 8 Terminal für externe Kamera
A. 9 Lautstärke-Potentiometer
A. 10 Terminal für BUS-, Spannungs- und Türöffneranschluss
A. 11 Anschlussbuchse Mikrofon
A. 12 Terminalabdeckung
A. 13 Montagehilfe
A. 14 UP-Schale
Innenstation
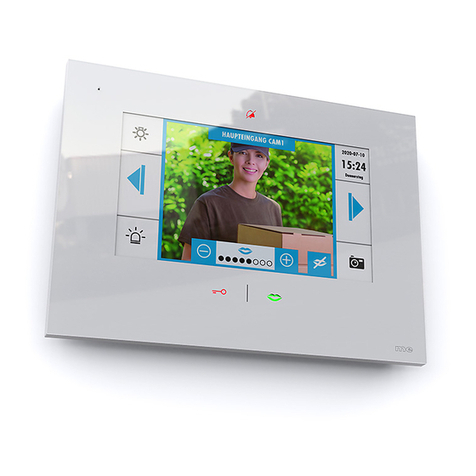
B. 1 Bildschirm
B. 2 Bildschirmtaste
B. 3 Stummtaste
B. 4 Türöffnertaste
B. 5 Mikrofon
B. 6 Sprechtaste
B. 7 Interntaste
B. 8 Menütaste
B. 9 OSD + Taste
B. 10 OSD - Taste
B. 11 Melodie
B. 12 Lautstärke +
B. 13 Lautstärke -
B. 14 Gehäuserückseite
B. 15 Potentiometer für Klingellautstärke
B. 16 DIP-Schalter für Codierung
B. 17 Gehäuseschrauben
B. 18 Anschluss für VTX-BELL
INSTALLATION
Folgende Leitungen werden benötigt
2 Leitungen von der Außenstation zu der/den Innenstation/en sowie
2 Leitungen von der Außenstation zum Türöffner. Die Leitung kann
wahlweise sternförmig oder von Station zu Station verlegt werden. Für
die Verbindung von Station zu Station befinden sich in der Innenstation
zwei zweipolige Anschlussklemmen für die BUS-Leitung (line+ u. line-),
Eingang und Ausgang, bei Sternverdrahtung wird die BUS-Leitung nur
an Eingang angeschlossen Die Betriebsspannung wird entweder an
einer Innenstation oder an der Außenstation angeschlossen. Sie sollten
sie aber nicht doppelt zu führen. Achten Sie bei allen Anschlüssen auf
korrekte Polung.
Anschluss eines Türöffners
Der Türöffner wird direkt durch zwei Leitungen mit der Außenstation
verbunden. Es ist keine zusätzliche Stromversorgung nötig, um den
Türöffner anzusteuern. Der Türöffner muss für 12 Volt Gleichspannung
EINLEITUNG
Easy2Wire VIDEO-TÜRSPRECH-SYSTEM (Unterputz)
Vielen Dank für den Kauf des Easy2Wire Türsprech-Systems. Sie
haben eine hochwertige Anlage mit Edelstahl-Abdeckung gekauft.
Die Edelstahl-Abdeckungen werden aufwändig per Hand gefertigt
und besitzen dadurch individuelle Merkmale, die als ein Zeichen von
Qualität anzusehen sind.
Pflegehinweis Edelstahl
Bitte säubern Sie Edelstahl-Oberflächen nie mit handelsüblichen
Reinigungsmitteln, da diese zu scharf sind. Bitte nur mit Edelstahlrei-
nigungs- bzw. Pflegespray säubern. Sollten Sie dieses nicht zur Hand
haben, bitte nur klares Wasser verwenden.
Wird dieser Pflegetipp nicht beachtet, kann es zu Verfärbungen bzw. im
schlimmsten Fall zu Rostschäden kommen.
VERPACKUNGSINHALT
VDB-9170
1x Einfamilien-Außenstation
1x Innenstation
1x Befestigungsmaterial
1x Betriebs- und Montageanleitung
VDB-9270
1x Zweifamilien-Außenstation
2x Innenstation
1x Befestigungsmaterial
1x Betriebs- und Montageanleitung
VDB-70
1x Innenstation
1x Befestigungsmaterial
1x Betriebs- und Montageanleitung
LEGENDE
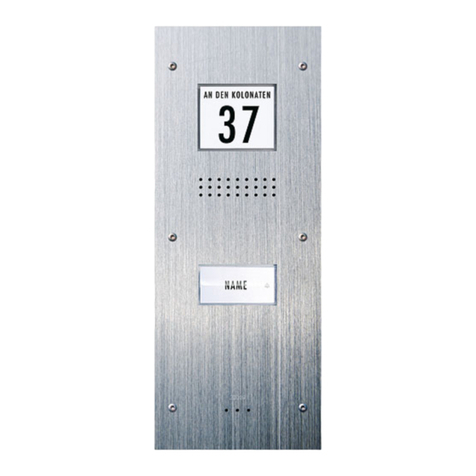
A. 1 Mikrofon
A. 2 Helligkeitssensor
A. 3 Kamera
A. 4 Klingeltaste(n)
A. 5 Gehäuseschrauben
A. 6 Schrauben für Terminalabdeckung
A. 7 Dip-Schalter für Öffnungszeit des Türöffners
easy2wire VD_UP_I-Manual_210x240_RZ3.indd 4 29.10.14 16:39

DE
DEUTSCH | easy2wire VDB
5
3. Das Loch für die Kabeldurchführung in der UP-Schale lässt sich mit
einem scharfen Messer aus der UP-Schale heraustrennen, z.B. mit
einem Cutter-Messer.
Hinweis:
Das Loch für die Türsprechstelle sollte so abgemessen sein, dass die
Unterputzschale gerade hineinpasst und bündig mit der Hauswand
abschließt.
4. Um die Unterputzschale mit der Wand zu verankern, markieren
Sie zunächst mittels der Löcher im Boden der UP-Schale die 4
äußeren Befestigungslöcher an der Wand und bohren Sie dann die
entsprechenden Löcher (Durchmesser ca. 6 mm).
5. In die Löcher stecken Sie dann die mitgelieferten Dübel. Die UP-
Schale wird jetzt mit den Schrauben fixiert. Dabei ist auf geraden
Sitz der UP-Schale zu achten, kontrollieren Sie dies ggf. mit einer
Wasserwaage. Auch darf sich die UP-Schale nicht verziehen.
HINWEIS: Wenn die Verschraubung die UP-Schale nicht ausreichend
fixiert, können Sie die Hohlräume an den Seiten mit geeignetem
Kleber füllen.
6. Beim Verputzen stecken Sie die mitgelieferte Einputzhilfe in die
UP-Schale. Dadurch wird verhindert, dass die UP-Schale sich mit
Mörtel/Putz füllt und anschließend aufwändig gesäubert werden
muss. Achten Sie beim Verputzen darauf, dass sich die Gewindeein-
sätze nicht mit Mörtel/Putz zusetzen.
7. Setzen Sie die Außeneinheit in die UP-Schale ein. Um ein Herausfal-
len der Außeneinheit zu verhindern, können Sie die mitgelieferte
Montagehilfe (A.13) benutzen. Diese wird einfach mit der mitge-
lieferten Schraube mit der UP-Schale verschraubt und verhindert
dadurch ein Herausfallen der Außenstation aus der UP-Schale.
8. Entfernen Sie die Terminalabdeckung, indem Sie die beiden
Schrauben (A.6) herausdrehen und dann die Terminalabdeckung
herausnehmen und führen Sie die Kabel durch die dafür vorgese-
hene Öffnung ein.
9. Schließen Sie nun die Kabel an die Türsprechstelle an.
(Siehe Punkt ANSCHLUSS)
Namensschild anpassen
Das Namensschild besteht aus zwei transparenten Kunststoffteilen,
welche durch 2 bzw. 4 kleine Schrauben miteinander
verbunden sind.
10. Entfernen Sie beide Schrauben des Namenschildes und nehmen
Sie es auseinander, zwischen den beiden Kunststoffteilen liegt die
Folie für die Beschriftung.
ausgelegt sein und darf nicht mehr als 1A Strom benötigen. Bei einigen
Türöffnern ist auf korrekte Polung zu achten.
Anschluss des Funk-Erweiterungsmoduls VTX-BELL
Mit dem VTX-BELL kann das Klingelsignal per Funk an Empfänger der
BELL-Serie (z.Z. BELL 200 RX, BELL 210 USB und BELL 220 RX) weiter-
geleitet werden. Das Funkmodul wird auf den 3-poligen Stecker (B.18)
innerhalb der Innenstation gesteckt.
WICHTIG: Das Netzteil bitte erst mit dem Stromnetz verbinden, wenn
die Anlage vollständig montiert ist. Ansonsten können während der
Installation Kurzschlüsse auftreten, die die Geräte im schlimmsten Fall
zerstören.
HINWEIS: Die Außenstation ist gemäß IP 44 spritzwassergeschützt.
Bei starkem Regen, insbesondere wenn zusätzlich ein starker Wind
weht, kann trotzdem Wasser ins Gehäuse eindringen. Daher empfehlen
wir die Montage nur im geschützten Außenbereich. Ist eine Montage im
geschützten Außenbereich nicht möglich, sollte ein Wetterschutz über der
Außenstation montiert werden.
AUSSENSTATION
MONTAGE
Die Türsprechstelle ist für eine Unterputz-Montage vorgesehen.
Vorbereitung
Achten Sie beim Abnehmen des Frontcovers darauf, dass die Namens-
schilder nicht herausfallen, damit sie nicht beschädigt werden.
Die Kamera sollte in einer Höhe von ca. 1,50 bis 1,60m (Mitte Kamera)
montiert werden. Vor der Montage der Türsprechstelle sollten Sie
testen, ob die Kamera einen Besucher ausreichend erfasst. Passen
Sie, falls erforderlich, die Montagehöhe und den Montageort an Ihre
Gegebenheiten an.
1. Entfernen Sie die vier Schrauben(A.5) der Edelstahl-Frontplatte mit
einem Torx-Schlüssel (T10) und heben Sie diese dann vorsichtig
nach oben ab. Achten Sie darauf, dass Mikrofonkabel nicht abzurei-
ßen. Jetzt können Sie die Unterputzschale freilegen, indem Sie die
Außenstation herausnehmen.
2. Halten Sie die UP-Schale ausgerichtet an die Wand und zeichnen
Sie deren Umriss mit einem geeigneten Stift auf die Wand. Achten
Sie darauf, dass sich die Anschlusskabel, die benötigt werden, im
mittleren Bereich der UP-Schale befinden. Die Kabel sollten nicht zu
kurz bemessen sein.
easy2wire VD_UP_I-Manual_210x240_RZ3.indd 5 29.10.14 16:39

easy2wire VDB | DEUTSCH
DE
6
11. Beschriften Sie die Folie mit einem wischfesten Filzstift oder
drucken Sie sich einen Einleger für das Namensschild* per PC und
Drucker aus (Es kann normales Papier benutzt werden, besser ge-
eignet ist bedruckbare Folie, welche Sie im Schreibwarengeschäft
erhalten können).
12. Legen Sie den beschrifteten Einleger zwischen beide Kunststoffteile
und verschrauben Sie diese wieder miteinander.
*Größe des Namenschildes:
VDB-9170: 71mm x 34mm
VDB-9270: 71mm x 15 mm
13. Um das Frontcover wieder auf die Außenstation setzen zu können,
setzen Sie die Namensschilder in die Außenstation ein und fixieren
Sie sie seitlich mit den mitgelieferten Klebestreifen, damit diese
nicht herausfallen können. Alternativ können Sie die Namens-
schilder auch mit transparentem Klebeband fixieren.
14. Entfernen Sie die Montagehilfe und sichern Sie die Außenstation
mit der Hand gegen ein Herausfallen. Eine zweite Person kann
hilfreich sein.
15. Stecken Sie den Stecker des Mikrofons wieder auf die Platine und
setzen Sie das Frontcover auf die Außenstation. Achten Sie dabei
darauf, das Kabel des Mikrofons nicht zu quetschen.
16. Verschrauben Sie das Frontcover mit den 4 dafür vorgesehenen Torx-
Schrauben. Achten Sie dabei darauf, die Schrauben nicht zu ver-
kanten oder zu überdrehen. Das maximale Anzugsmoment beträgt
1,2 Nm. Dieser Wert darf nicht überschritten werden, andernfalls
könnten die Gewindeeinsätze in der UP-Schale unbrauchbar werden
oder herausreißen.
Hinweis: Zur Abdichtung der Frontplatte liegt selbstklebender Schaum-
stoff bei. Dieser wird am Rand von hinten auf die Frontplatte geklebt.
MONTAGE DER INNENSTATION
Die Montagehöhe der Innenstationen können Sie Ihren Gegebenheiten
entsprechend frei wählen.
1. Das Gehäuse der Innenstation ist ist mit zwei Schrauben (B.17)
verschraubt und wird durch Nasen und Nuten zusammengehalten.
Um das Gehäuseunterteil vom Vorderteil zu trennen, schrauben
Sie die beiden Schrauben heraus, dann kann das Unterteil einfach
abgezogen werden.
2. Benutzen Sie das Gehäuseunterteil als Hilfe zum Anzeichnen
der Bohrlöcher. Achten Sie dabei darauf, das Unterteil gerade
auszurichten.
3. Bohren Sie die Befestigungslöcher mit einem 6mm-Bohrer und
stecken Sie in jedes Loch einen Dübel.
4. Stecken Sie die Leitungen durch das dafür vorgesehene Einfüh-
rungsloch im Gehäuseunterteil und verschrauben Sie dieses.
5. Schließen Sie die Leitungen entsprechend des Verdrahtungsplanes
an und setzen Sie das Gehäusevorderteil auf das Gehäuseunterteil.
Achten Sie dabei darauf, dass es richtig einrastet.
6. Verschrauben Sie das Gehäuse wieder mit den beiden Schrauben
(B.17).
EINSTELUNGEN an INNEN- und AUSSENSTATION
CODIERUNG (Innenstation)
An den Innenstationen befinden sich Dip-Schalter (B.16) zur Codierung.
Jede Innenstation muss auf den richtigen Code eingestellt werden.
Wenn eine Partei mehere Innenstationen hat, ist die Codierung bei
allen, der Partei zugehörigen Innenstation, gleich einzustellen.
1-Familien-Version
Dip-Schalter 1 „ON“ alle anderen „OFF“
2-Familenversion
Innenstation(en) für Familie 1
Dip-Schalter 1 „ON“ alle anderen „OFF“
Innenstation(en) für Familie 2
Dip-Schalter 2 „ON“ alle anderen „OFF“
HINWEIS: Werden zwei oder mehr Innenstationen angeschlossen, ist
DIP-Schalter 6 bei der letzten Innenstation auf „ON“ zu stellen.
SPRECHLAUTSTÄRKE (Außenstation)
Mit dem Potentiometer (A.9) wird die Sprachlautstärke der Außensta-
tion eingestellt. Für volle Lautstärke drehen Sie das Potentiometer im
Uhrzeigersinn vorsichtig bis zum Anschlag und dann ein klein wenig
zurück. Durch Drehen gegen den Uhrzeigersinn wird die Lautstärke
verringert.
SRECHLAUTSTÄRKE (Innenstation)
An der Innenstation können Sie die Gesprächslautstärke mit den beiden
seitlichen Tastern B.12 und B.13 in mehreren Stufen einstellen.
easy2wire VD_UP_I-Manual_210x240_RZ3.indd 6 29.10.14 16:39

DE
DEUTSCH | easy2wire VDB
7
INBETRIEBNAHME
Nachdem alle Komponenten angeschlossen und codiert wurden, verbin-
den Sie das Netzteil mit dem 230V-Netz. Danach klingeln Sie einmal,
um das System zu initialisieren. Diese Initialisierung muss jedes Mal
durchgeführt werden, wenn die Anlage zwischenzeitlich stromlos war.
BEDIENUNG
1. Drücken Sie auf die Klingeltaste (A.4).
2. An der/den entsprechenden Innenstation/en ertönt der
eingestellte Klingelton
3. Nehmen Sie das Gespräch an der Innenstation durch kurzen Druck
auf die Sprech-Taste (B.6) an.
4. Ist ein Türöffner angeschlossen, können Sie durch kurzen Druck auf
die Türöffner-Taste (B.4) den Türöffner aktivieren.
5. Durch erneutes kurzes Drücken der Sprech-Taste wird die Anlage
wieder in den Standby-Betrieb geschaltet.
TECHNISCHE DATEN
Außenstation
Betriebsspannung: 15 Volt DC / min. 1A
Stromaufnahme: 130 ± 50 mA
Temperaturbereich: -20 bis + 50°C
Abmessungen: 161 x 235 x 40 mm (3 mm) + Linse
Türöffner-Anschluss: 12 Volt DC / 1A max.
Spitzwassergeschützt gemäß IP 44
Innenstation
Betriebsspannung: 15 Volt DC / min. 1A
Stromaufnahme: 130 ± 50 mA
Temperaturbereich: 0 bis + 50°C
Abmessungen: 220 x 164 x 22 mm
HINWEISE
Unter Einwirkung von starken statischen, elektrischen oder hochfre-
quenten Feldern (Entladungen, Mobiltelefonen, Funkanlagen, Handys,
Mikrowellen) kann es zu Funktionsbeeinträchtigungen der Geräte (des
Gerätes) kommen.
KLINGELLAUTSTÄRKE (Innenstation)
Mit dem Potentiometer (B.15) wird die Klingellautstärke der Innenstation
eingestellt. Für volle Lautstärke drehen Sie das Potentiometer im Uhr-
zeigersinn vorsichtig bis zum Anschlag und dann ein klein wenig zurück.
Durch Drehen gegen den Uhrzeigersinn wird die Lautstärke verringert.
KLINGELTON ÄNDERN (Innenstation)
Über die Taste B.11 kann der Klingelton geändert werden. Drücken Sie
die Sprechaste (B.6) um die Innenstation zu aktivieren. Danach drücken
Sie auf die Melodietaste (B.11), eine Melodie wird abgespielt. Drücken
Sie die Melodietaste so oft, bis der gewünschte Klingelton abgespielt
wird. Zur Bestätigung drücken Sie auf die Sprechtaste. Danach ist der
eingestellte Ton gespeichert.
Wird die Anlage Stromlos geschaltet, wird die Meldoie wieder auf die
Werkseinstellung zurückgesetzt.
KLINGELMELODIE DEAKTIVIEREN (z.B. bei Nachtruhe)
Die Klingelmelodie kann deaktiviert werden, um z.B. bei Nachtruhe nicht
gestört zu werden. Drücken Sie dazu einmal kurz auf die Stummtaste
(B.3) der Inneneinheit. Die LED unter der Stummtaste leuchtet zur
Erinnerung bei deaktivierter Melodie rot. Um die Melodie wieder zu
aktivieren, drücken Sie erneut kurz auf die Stummtaste, die rote LED
erlischt und die Melodie ist wieder aktiviert.
Das optische Signal (Leuchtrahmen der Sprech- und Türöffner-Taste)
bleibt auch bei deaktivierter Klingelmelodie aktiv und zeigt weiterhin
ein Klingeln an. Des weiteren blinkt die rote LED wenn bei aktivierter
Stummschaltung geklingelt wurde.
HINWEIS: Falls das VTX-BELL-Modul genutzt wird, so wird dieses im
Ruhemodus auch deaktiviert, d.h. die angeschlossenen Empfänger geben
ebenfalls kein Signal ab.
Helligkeit
Drücken Sie die Menü-Taste (B.8) an der Innenstation einmal, im OSD
wird „Bright“ angezeigt. Jetzt kann die Helligkeit über die Taste (B.9)
erhöht und über die Taste (B.10) verringert werden.
Kontrast
Drücken Sie die Taste Menü (B.8) an der Innenstation zweimal, im OSD
wird „Contrast“ angezeigt. Jetzt kann der Kontrast über die Taste (B.9)
erhöht und über die Taste (B.10) verringert werden.
Farbsättigung
Drücken Sie die Taste Menü (B.8) an der Innenstation dreimal, im OSD
wird „Color“ angezeigt. Jetzt kann die Farbsättigung über die Taste
(B.9) erhöht und über die Taste (B.10) verringert werden.
easy2wire VD_UP_I-Manual_210x240_RZ3.indd 7 29.10.14 16:39

easy2wire VDB | DEUTSCH
DE
8
nommen wurden. Ihre gesetzlichen Rechte als Kunde werden in keiner
Weise durch diese Garantie beeinträchtigt.
Bitte beachten Sie!
Es besteht kein Anspruch auf Garantie in u. a. folgenden Fällen:
• Bedienungsfehler
• Störungen durch andere Funkanlagen (z.B. Handybetrieb)
• Fremdeingriffe/-wirkungen
• Mechanische Beschädigungen
• Feuchtigkeitsschäden
• Kein Garantie-Nachweis (Kaufbeleg)
Bei Schäden, die durch Nichtbeachten dieser Bedienungsanleitung
verursacht werden, erlischt der Garantieanspruch. Für Folgeschäden
übernehmen wir keine Haftung! Bei Sach- oder Personenschäden, die
durch unsachgemäße Handhabung oder Nichtbeachten der Sicherheits-
hinweise verursacht werden, übernehmen wir keine Haftung. In solchen
Fällen erlischt jeder Garantieans
Haftungsbeschränkung:
Der Hersteller ist nicht für den Verlust oder die Beschädigung irgendwel-
cher Art einschließlich der beiläufigen oder Folgeschäden haftbar, die
direkt oder indirekt aus der Störung dieses Produktes resultieren.
DE
Diese Bedienungsanleitung ist eine Publikation der
m-e GmbH modern-electronics,
An den Kolonaten 37, 26160 Bad Zwischenahn
Diese Bedienungsanleitung entspricht dem technischen Stand bei
Drucklegung. Änderung in Technik und Ausstattung vorbehalten.
Reinigung und Pflege
Netzbetriebene Geräte vor dem Reinigen vom Netz trennen (Stecker
ziehen). Die Oberfläche des Gehäuses kann mit einem mit Seifenlauge
angefeuchtetem weichen Tuch gereinigt werden. Verwenden Sie keine
Scheuermittel oder Chemikalien. Staubablagerungen an Lüftungs-
schlitzen nur mit einem Pinsel lösen und gegebenenfalls mit einem
Staubsauger absaugen. Die Saugdüse nicht direkt an das Gerät halten.
SICHERHEITSHINWEISE
Bei Beschädigung von Gehäusen, Steckern, Netzkabel oder bei Schäden
an der Isolation, Geräte sofort außer Betrieb nehmen und Netzleitungen
abziehen. STROMSCHLAG - LEBENSGEFAHR. (Netzstecker aus der Steck-
dose ziehen!) Schäden sofort durch Fachmann beheben lassen!
Keine eigenen Reparaturversuche durchführen!
Aus Sicherheits- und Zulassungsgründen (CE) ist das eigenmächtige
Umbauen und/oder Verändern des Produkts nicht gestattet.
Lassen Sie das Verpackungsmaterial nicht achtlos liegen, Plastikfolien/-
tüten, Styroporteile etc. könnten für Kinder zu einem gefährlichen
Spielzeug werden.
Die Inneneinheiten sind nur für trockene Innenräume geeignet (keine
Badezimmer o.ä. Feuchträume). Vermeiden Sie das Feucht- oder
Nasswerden der Geräte.
Wenden Sie sich an eine Fachkraft, wenn Sie Zweifel über die Arbeits-
weise, die Sicherheit oder den Anschluss des Geräts haben.
Gehen Sie vorsichtig mit dem Produkt um - durch Stöße, Schläge oder
dem Fall aus bereits geringer Höhe wird es beschädigt.
2 JAHRE BESCHRÄNKTE GARANTIE
Es wird für die Dauer von 2 Jahren ab Kaufdatum gewährleistet, dass
dieses Produkt frei von Defekten in den Materialien und in der Ausfüh-
rung ist. Dies trifft nur zu, wenn das Gerät in üblicher Weise benutzt
wird und regelmäßig instand gehalten wird. Die Verpflichtungen dieser
Garantie werden auf die Reparatur oder den Wiedereinbau irgendeines
Teils des Gerätes begrenzt und gelten nur unter der Bedingung, dass
keine unbefugten Veränderungen oder versuchte Reparaturen vorge-
easy2wire VD_UP_I-Manual_210x240_RZ3.indd 8 29.10.14 16:39

DE
DEUTSCH | easy2wire VDB
9
easy2wire VD_UP_I-Manual_210x240_RZ3.indd 9 29.10.14 16:39

Abb. A
DIAGRAM A
ILLUSTRATION A
AFBEELDING A
AAUSSENSTATION• OUTDOOR STATION • BOÎTIER EXTÉRIEUR • BUITENSTATION
1,2 Nm
max.
5 5
1
2
13
14
78 9
6
11
10
12
4
3
GB
easy2wire VDB | ENGLISH
1010
easy2wire VD_UP_I-Manual_210x240_RZ3.indd 10 29.10.14 16:39

GB
Abb. B
DIAGRAM B
ILLUSTRATION B
AFBEELDING B
B
1
2
7
5
3
4 6
9
8
11
13
12
141717
10
7“ INNENSTATION •INDOOR STATION • BOÎTIER INTÉRIEUR • BINNENSTATION
15
16
18
ENGLISH | easy2wire VDB
1111
easy2wire VD_UP_I-Manual_210x240_RZ3.indd 11 29.10.14 16:39

GB
easy2wire VDB | ENGLISH
1212
INTRODUCTION
Easy2Wire DOOR VIDEO INTERCOM SYSTEM (flush mounted)
Thank you for purchasing the Easy2Wire intercom system. You have
acquired a high-quality system with a stainless steel cover. The stainless
steel covers are made carefully by hand and therefore have individual
characteristics that should be considered a mark of quality.
Notes on the care of stainless steel
Never clean the stainless steel surfaces with commercial cleaning pro-
ducts as these are too aggressive. Please only clean them with stainless
steel cleaner or care spray. If this is not available use only clear water.
Failure to observe this care tip can lead to discoloration or in the worst
case to rust damage.
PACKAGE CONTENTS
VDB-9170
1x One-family outdoor station
1x Indoor station
1x Mounting materials
1x Operating and assembly instructions
VDB-9270
1x Two-family outdoor station
2x Indoor station
1x Mounting materials
1x Operating and assembly instructions
VDB-70
1x Indoor station
1x Mounting materials
1x Operating and assembly instructions
LEGEND
A. 1 Microphone
A. 2 Brightness sensor
A. 3 Camera
A. 4 Ringer button(s)
A. 5 Casing screws
A. 6 Screws for terminal cover
A. 7 DIP switch for opening time of door opener
A. 8 Terminal for external camera
A. 9 Volume potentiometer
A. 10 Terminal for BUS, voltage and door opener connections
A. 11 Connection plug for microphone
A. 12 Terminal cover
A. 13 Mounting aid
A. 14 Flush mounting shell
Indoor station
B. 1 Screen
B. 2 Screen button
B. 3 Mute button
B. 4 Door opener button
B. 5 Microphone
B. 6 Talk button
B. 7 Internal button
B. 8 Menu button
B. 9 OSD + button
B. 10 OSD - button
B. 11 Melody
B. 12 Volume +
B. 13 Volume -
B. 14 Back of casing
B. 15 Potentiometer for ringer volume
B. 16 DIP switch for encoding
B. 17 Casing screws
B. 18 Connection for VTX-BELL
INSTALLATION
The following wires are required:
2 wires from the outdoor station to the indoor station(s) and 2 wires
from the outdoor station to the door opener. The lines can either be
laid radially or station-to-station. There are two 2-pole terminals in the
indoor station for the BUS line (line + and line -), input and output, for
a station-to-station connection. For radial wiring the BUS line is only
connected to the input. The supply voltage is either connected to one
indoor station or to the outdoor station. There should not be a double
feed. Ensure correct poling on all connections.
Connecting a door opener
The door opener is connected directly to the outdoor station with two
lines. No additional power supply is necessary to control the door
opener. The door opener must be designed for 12-volt direct voltage
and may not require more than 1 A current. Some door openers require
correct poling.
easy2wire VD_UP_I-Manual_210x240_RZ3.indd 12 29.10.14 16:39

GB
ENGLISH | easy2wire VDB
1313
Connecting the radio extension module VTX-BELL
The VTX-BELL can be used to transfer the bell signal by radio to the
recipient of the BELL series (currently BELL 200 RX, BELL 210 USB and
BELL 220 RX). The radio module is attached to the 3-pole plug (B.18)
inside the indoor station.
IMPORTANT: Please only connect the mains power supply to the
power once the system has been fully mounted. Otherwise short-
circuiting can occur during installation, which can destroy the apparatus
in the worst case.
NOTE: The outdoor station is splash proof in accordance with IP 44. In
heavy rain, particularly in conjunction with high winds, it is still possible
for water to penetrate the casing. We therefore recommend only
mounting the station in a protected outdoor area. If it is not possible to
mount the station in a protected indoor area then weather protection
should be fitted over the outdoor station.
OUTDOOR STATION
ASSEMBLY
The intercom system is designed for flush mounting.
Preparation
Please make sure that the nameplates do not fall out when you remove
the front cover as this could damage them.
The camera should be mounted at a height of approx. 1.5 m - 1.6 m
(middle of the camera). Before mounting the intercom system you
should test whether the camera captures a visitor fully enough. Adjust
the mounting height and mounting position to your circumstances.
1. Remove both lower screws (A.5) on the stainless steel front plate
using a Torx screwdriver (T10) and then lift it carefully upwards.
Make sure that you do not rip off the microphone cable. Now
you can reveal the flush mounting shell by removing the outdoor
station.
2. Hold the flush mounting shell on the wall and draw around its
circumference using a suitable pen. Make sure that the necessary
connection cables are in the centre of the flush mounting shell. The
cables should not be too short.
3. The hole for the cable penetration on the flush mounting shell can
be removed from the flush mounting shell with a sharp knife or
cutter.
Note: The hole for the intercom unit should be measured out so that
the flush mounting shell just fits in and sits flush on
the house wall.
4. To anchor the flush mounting shell on the wall first mark the 4
outer mounting holes on the wall using the holes on the base of
the flush mounting shell and then drill the corresponding holes
(diameter approx. 6 mm).
5. Then insert the supplied dowels into the holes. The flush mounting
shell is now fixed using the screws. Please ensure that the flush
mounting shell is fitted in a straight line. Check this with a spirit
level if necessary. It is also important that the flush mounting shell
is not distorted.
NOTE: If the screws on the flush mounting shell do not hold it securely
enough you can fill the side cavities with suitable adhesive.
6. Insert the supplied mounting aid into the flush mounting shell
when plastering. This prevents the flush mounting shell filling with
mortar/plaster and then needing complex cleaning. Please ensure
that the thread inserts are not blocked with mortar/plaster while
plastering.
7. Insert the outdoor unit into the flush mounting shell. You can use
the supplied mounting aid (A.13) to prevent the outdoor unit from
falling out. This is simply screwed onto the flush mounting shell
with the supplied screw and prevents the outdoor station from
falling out of the flush mounting shell.
8. Remove the terminal cover by removing both screws (A.6) and then
removing the terminal cover. Feed the cables through the opening
for this purpose.
9. Now connect the cables to the intercom.
(see item: CONNECTION)
Adjusting the nameplate
The nameplate comprises two transparent plastic parts that are
connected with 2 or 4 small screws.
10. Remove both screws and take the nameplate apart. The foil for
inscription is between the two plastic parts.
11. Write on the foil with a smear-resistant felt pen or print a
nameplate* using a PC and printer (you can use normal paper but
printable foil from stationery shop is better suited).
12. Place the inscribed nameplate (foil) between the two plastic parts
and screw them back together.
*Size of the nameplate:
VDB-9170: 71 mm x 34 mm
VDB-9270: 71 mm x 15 mm
13. Insert the nameplates into the outdoor station and fix at the side
with the supplied strip of sticky tape in order to be able to replace
the front cover on the outdoor station and so they cannot fall out.
Alternatively you can fix the nameplates with clear sticky tape.
easy2wire VD_UP_I-Manual_210x240_RZ3.indd 13 29.10.14 16:39

GB
easy2wire VDB | ENGLISH
1414
INNENSTATION
INDOOR STATION
BOÎTIER INTÉRIEUR
BINNENSTATION
14. Remove the mounting aid and secure the outdoor station with your
hand to prevent it from falling out. A second person can be helpful.
15. Insert the microphone cable back into the board and replace the
front cover onto the outdoor station. Please ensure you do not crush
the microphone cable.
16. Screw the front cover on with the 4 Torx screws supplied for this
purpose. Please ensure that you do not tip or overtighten the
screws. The maximum tightening torque is 1.2 Nm. This value may
not be exceeded or the thread inserts on the flush mounting shell
can become unusable or tear out.
Note: self-adhesive foam is included to seal the front plate. This is
adhered on the edge of the front plate from the back.
ASSEMBLY OF THE INDOOR STATION
You can select the mounting height for the indoor station according to
your circumstances.
1. The casing on the indoor station is screwed together with two
screws (B.17) and is kept together with projections and notches. To
separate the back section from the front section remove both screws
and the back section can then be simply removed.
2. Use the back section of the casing as an aid to draw the drill holes.
Make sure that you place the back section in a straight line.
3. Drill the mounting holes with a 6 mm drill and insert one dowel into
each hole.
4. Feed the wires through the correct insertion hole in the back section
of the casing and screw this.
5. Connect the wires in accordance with the wiring plan and place the
front casing section on the back casing section. Make sure that it
clicks into place correctly.
6. Screw the casing back together with the two screws (B.17).
SETTINGS ON THE INDOOR AND OUTDOOR STATIONS
ENCODING (Indoor station)
There are DIP switches (B.16) on the indoor station for encoding. Each
indoor station needs to be set to the correct code. If one party has
several indoor stations then the encoding must be the same for all
indoor stations belonging to the party.
One-family version
DIP switch 1 „ON“, all others „OFF“
2-family version
Indoor station(s) for family 1
DIP switch 1 „ON“, all others „OFF“
Indoor station(s) for family 2
DIP switch 2 „ON“, all others „OFF“
NOTE: If two or more indoor stations are connected then DIP switch 6
must be switched to “ON” on the last indoor station.
CONVERSATION VOLUME (outdoor station)
The conversation volume on the outdoor station is set using the
potentiometer (A.9). For full volume turn the potentiometer carefully in
a clockwise direction to its limit and then turn it back a little. Turn it in
an anti-clockwise direction to reduce the volume.
CONVERSATION VOLUME (indoor station)
You can set the conversation volume on the indoor station in several
stages using the two buttons B.12 and B.13 on the side.
RINGER VOLUME (indoor station)
The ringer volume on the indoor station is set using the potentiometer
(B.15). For full volume turn the potentiometer carefully in a clockwise
direction to its limit and then turn it back a little. Turn it in an anti-
clockwise direction to reduce the volume.
CHANGING THE RING TONE (indoor station)
The ring tone can be changed using button B.11. Press the talk button
(B.6) to activate the indoor station. Then press on the melody button
(B.11) and a melody will play. Keep pressing the melody button until the
desired ring tone plays. To confirm the melody press the talk button. The
set melody is then saved.
If the system is disconnected from the mains the melody will be set back
to the factory setting.
DEACTIVATING THE RINGER MELODY (e.g. during the night)
It is possible to deactivate the ringer melody, e.g. in order not to be
disturbed at night. To do this, press the mute button (B.3) on the indoor
unit down once, briefly. The LED on the mute button lights up red to
remind you that the melody is deactivated. To re-activate the melody
press the mute button briefly again. The red LED will go out and the
melody is reactivated.
The optical signal (the illuminated frame on the talk and door opener
button) remains active even when the ringer melody is deactivated and
continues to light up when the bell is rung. The red LED also flashes if
the bell is rung while muted.
easy2wire VD_UP_I-Manual_210x240_RZ3.indd 14 29.10.14 16:39

GB
ENGLISH | easy2wire VDB
151515
NOTE: If the VTX-BELL module is used then this is also deactivated in
quiet mode, i.e. the connected receiver also does not emit a signal.
Brightness
Press the menu button (B.8) on the indoor station once and the OSD
will display ‘Bright’. The brightness can now be increased using the
button (B.9) and reduced using the button (B.10).
Contrast
Press the menu button (B.8) twice on the indoor station and the OSD
will display ‘Contrast’. The contrast can now be increased using the
button (B.9) and reduced using the button (B10).
Colour saturation
Press the menu button (B.8) three times on the indoor station and the
OSD will display ‘Color’. The colour saturation can now be increased
using the button (B.9) and reduced using the button (B10).
INITIAL OPERATION
Connect the mains power supply unit to the 230 V network once all
the components are connected and encoded. Then ring the bell once in
order to initialise the system. This initialisation needs to be carried out
each time the system is disconnected from the mains.
OPERATION
1. Press the ringer button (A.4).
2. The set melody will sound at the corresponding indoor station(s).
3. Accept the conversation at the indoor station by briefly pressing on
the talk button (B.6).
4. If a door opener is connected you can activate the door opener by
pressing briefly on the door opener button (B.4).
5. Press the talk button again briefly in order to switch the system
back to standby.
TECHNICAL DATA
Outdoor station
Supply voltage: 15 volt DC / min. 1 A
Power consumption: 130 ± 50 mA
Temperature range: -20 to +50°C
Dimensions: 161 x 235 x 40 mm (3 mm) + lens
Door opener connection: 12 volt DC / 1 A max.
Splash-proof in accordance with IP 44
Indoor station
Supply voltage: 15 Volt DC / min. 1 A
Power consumption: 130 ± 50 mA
Temperature range: 0 to +50°C
Dimensions: 220 x 164 x 22 mm
NOTES
The functionality of the unit can be affected by the influence of strong
static, electrical or high frequency fields (discharging, mobile phones,
radios, microwaves).
Cleaning and maintenance
Always disconnect mains powered units from the mains supply before
cleaning (disconnect the plug). The unit housing can be cleaned using
a soapy soft cloth. Do not use any abrasive materials or chemicals.
Remove dust build-up from ventilation slits using a brush and clean up
using a vacuum cleaner. Do not hold the vacuum cleaner nozzle directly
against the unit.
SAFETY INSTRUCTION
In the event of damage to the housing, connectors, power cables or
isolation shielding, switch off the device immediately and disconnect
from the mains power. ELECTRIC SHOCK – DANGER OF LOSS OF LIFE.
(Unplug the mains connector from the socket!). Damage should be
repaired immediately by a specialist!
Never carry out repairs yourself!
For reasons of safety and licensing (CE), unauthorised conversion and /
or modification of the product is prohibited.
Do not leave packaging material lying about since plastic foils and
pockets and polystyrene parts etc. could be lethal toys for children.
The interior unit is suitable only for dry interior rooms (not bathrooms
and other moist places). Do not allow the devices to get moist or wet.
easy2wire VD_UP_I-Manual_210x240_RZ3.indd 15 29.10.14 16:39

GB
easy2wire VDB | ENGLISH
161616
GB
These operating instruction are published by
m-e GmbH modern-electronics,
An den Kolonaten 37, 26160 Bad Zwischenahn/Germany
The operating instructions reflect the current technical specifications at
time of print. We reserve the right to change the technical or physical
specifications.
In industrial institutions, the accident prevention regulations of the Asso-
ciation of Commercial Professional Associations for electrical installations
and equipment must be observed. Please consult a specialist should
you have doubts regarding the method of operation, the safety, or the
connections of the device.
Handle the product with care – it is sensitive to bumps, knocks or falls
even from low heights.
2 YEAR LIMITED GUARANTEE
For two years after the date of purchase, the defect-free condition of
the product model and its materials is guaranteed. This guarantee is
only valid when the device is used as intended and is subject to regular
maintenance checks. The scope of this guarantee is limited to the
repair or reinstallation of any part of the device, and is only valid if no
unauthorised modifications or attempted repairs have been undertaken.
Customer statutory rights are not affected by this guarantee.
Please note!
No claim can be made under guarantee in the following circumstances:
• Operational malfunction
• Empty batteries or faulty accumulator
• Fault through other radio installation (i.e. mobile operation)
• Unauthorised modifications / actions
• Mechanical damage
• Moisture damage
• No proof of guarantee (purchase receipt)
Claims under warranty will be invalidated in the event of damage caused
by non-compliance with the operating instructions. We do not accept any
responsibility for consequential damage! No liability will be accepted for
material damage or personal injury caused by inappropriate operation
or failure to observe the safety instructions. In such cases, the guarantee
will be rendered void.
Liability limitation
The manufacturer is not liable for loss or damage of any kind including
incidental or consequential damage which is the direct or indirect result
of a fault to this product.
easy2wire VD_UP_I-Manual_210x240_RZ3.indd 16 29.10.14 16:39

GB
ENGLISH | easy2wire VDB
1717
easy2wire VD_UP_I-Manual_210x240_RZ3.indd 17 29.10.14 16:39

Abb. A
DIAGRAM A
ILLUSTRATION A
AFBEELDING A
AAUSSENSTATION• OUTDOOR STATION • BOÎTIER EXTÉRIEUR • BUITENSTATION
1,2 Nm
max.
5 5
1
2
13
14
78 9
6
11
10
12
4
3
FR
easy2wire VDB | FRANÇAIS
18
easy2wire VD_UP_I-Manual_210x240_RZ3.indd 18 29.10.14 16:39
FR
Abb. B
DIAGRAM B
ILLUSTRATION B
AFBEELDING B
B
1
2
7
5
3
4 6
9
8
11
13
12
141717
10
7“ INNENSTATION •INDOOR STATION • BOÎTIER INTÉRIEUR • BINNENSTATION
15
16
18
FRANÇAIS | easy2wire VDB
19
easy2wire VD_UP_I-Manual_210x240_RZ3.indd 19 29.10.14 16:39
FR
easy2wire VDB | FRANÇAIS
20
INTRODUCTION
SYSTÈME D’INTERPHONE VIDÉO Easy2Wire (encastré)
Nous vous remercions d’avoir choisi le système d’interphone Easy2Wire.
Vous avez acheté un système de haute qualité avec cache en acier
inoxydable. Les caches en acier inoxydable sont fabriqués à la main
et possèdent ainsi des caractéristiques individuelles qui doivent être
considérées comme un signe de qualité.
Conseil d’entretien de l’acier inoxydable
Ne jamais nettoyer les surfaces d’acier inoxydable avec des détergents
du commerce, car ceux-ci sont trop agressifs. Utiliser uniquement des
sprays de nettoyage et d’entretien de l’acier inoxydable. Si vous n’en
avez pas, nettoyer à l’eau claire.
Le non-respect de ce conseil d’entretien peut entraîner des décolorations
voire dans le pire des cas des dommages de rouille.
CONTENU
VDB-9170
1x Station extérieure pour maison individuelle
1x Station intérieure
1x Matériel de fixation
1x Notice de montage et d’utilisation
VDB-9270
1x Station extérieure pour maison jumelée
2x Stations intérieures
1x Matériel de fixation
1x Notice de montage et d’utilisation
VDB-70
1x Station intérieure
1x Matériel de fixation
1x Notice de montage et d’utilisation
LÉGENDE
A. 1 Microphone
A. 2 Capteur de luminosité
A. 3 Caméra
A. 4 Bouton(s) de sonnerie
A. 5 Vis du boîtier
A. 6 Vis pour cache du terminal
A. 7 Commutateur Dip pour le temps d’ouverture de la gâche électrique
A. 8 Terminal pour caméra externe
A. 9 Potentiomètre du volume
A. 10 Terminal pour raccord BUS, de tension et gâche électrique
A. 11 Prise de raccordement microphone
A. 12 Cache de terminal
A. 13 Aide au montage
A. 14 Boîte à encastrer
Station interne
B. 1 Écran
B. 2 Bouton écran
B. 3 Bouton mode silencieux
B. 4 Bouton gâche électrique
B. 5 Microphone
B. 6 Bouton communication
B. 7 Bouton interne
B. 8 Bouton menu
B. 9 Bouton OSD +
B. 10 Bouton OSD -
B. 11 Mélodie
B. 12 Volume +
B. 13 Volume -
B. 14 Fond du boîtier
B. 15 Potentiomètre pour le volume de la sonnerie
B. 16 Commutateur DIP pour le codage
B. 17 Vis du boîtier
B. 18 Raccord pour VTX-BELL
INSTALLATION
Les câbles suivants sont nécessaires :
2 câbles de la station extérieure à la/aux station(s) intérieure(s) ainsi
que 2 câbles de la station extérieure à la gâche électrique. Le câble
peut être cheminé soit en étoile, soit de station à station. Pour le
raccordement de station à station, il y a deux bornes de raccordement
bipolaires pour la ligne BUS (line+ et line-), l’entrée et la sortie, en
cas de câblage en étoile, le câble BUS n’est raccordé qu’à l’entrée. La
tension d’alimentation est raccordée à une des stations intérieures ou à
la station extérieure. En revanche, il ne faut pas la cheminer en double.
Veiller à la bonne polarité sur tous les raccords.
Raccordement d’une gâche électrique
La gâche électrique est directement reliée à la station extérieure au
moyen de deux câbles. Une alimentation électrique supplémentaire
n’est pas nécessaire pour commander la gâche électrique. La gâche
easy2wire VD_UP_I-Manual_210x240_RZ3.indd 20 29.10.14 16:39
This manual suits for next models
3
Table of contents
Languages:
Other M-E Intercom System manuals

M-E
M-E AERCOM AC-110 User manual

M-E
M-E FRS-106 User manual

M-E
M-E VISTUS VD-6310 User manual

M-E
M-E ADF-710 Manual

M-E
M-E VDV-610 COMPACT User manual

M-E
M-E VS-10 User manual

M-E
M-E VISTADOOR-System ADV-310 User manual

M-E
M-E VISTA DOOR VDV-B90 User manual

M-E
M-E VISTUS AD-4010 User manual

M-E
M-E BELL-250 RX User manual

M-E
M-E VISTA DOOR ADV-100 Series User manual

M-E
M-E VDV-807 User manual

M-E
M-E VISTADOOR VDV Series User manual

M-E
M-E easy2wire VDB-6170 User manual

M-E
M-E VISTA DOOR ADV-F10 User manual

M-E
M-E VDV-907 User manual

M-E
M-E VISTADOOR VDV-800 User manual

M-E
M-E AERCOM AC-210 User manual

M-E
M-E ADF-210 User manual

M-E
M-E ADV 112 WW User manual