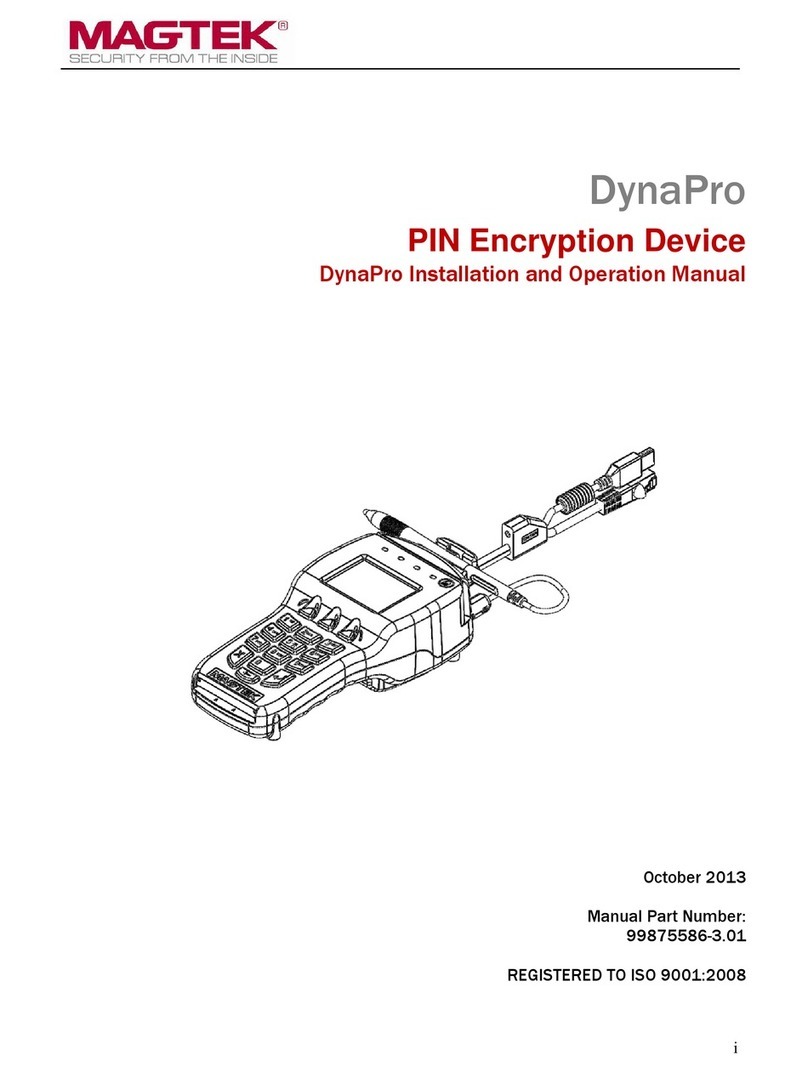
Magtek DynaPro Go User manual

DynaPro Go| Handheld PIN Pad Device with MSR/Contact/Contactless | Installation and Operation Manual
Page 2 of 60 (D998200129-10)
Copyright © 2006 - 2018 MagTek, Inc.
Printed in the United States of America
INFORMATION IN THIS PUBLICATION IS SUBJECT TO CHANGE WITHOUT NOTICE AND
MAY CONTAIN TECHNICAL INACCURACIES OR GRAPHICAL DISCREPANCIES. CHANGES
OR IMPROVEMENTS MADE TO THIS PRODUCT WILL BE UPDATED IN THE NEXT
PUBLICATION RELEASE. NO PART OF THIS DOCUMENT MAY BE REPRODUCED OR
TRANSMITTED IN ANY FORM OR BY ANY MEANS, ELECTRONIC OR MECHANICAL, FOR
ANY PURPOSE, WITHOUT THE EXPRESS WRITTEN PERMISSION OF MAGTEK, INC.
MagTek® is a registered trademark of MagTek, Inc.
MagnePrint® is a registered trademark of MagTek, Inc.
Magensa™ is a trademark of MagTek, Inc.
MagneSafe™ is a trademark of MagTek, Inc.
DynaPro™ and DynaPro Mini™, are trademarks of MagTek, Inc.
IPAD® is a trademark of MagTek, Inc.
AAMVA™ is a trademark of AAMVA.
American Express® and EXPRESSPAY FROM AMERICAN EXPRESS® are registered trademarks of
American Express Marketing & Development Corp.
Apple Pay® is a registered trademark to Apple Inc.
D-PAYMENT APPLICATION SPECIFICATION® is a registered trademark to Discover Financial
Services CORPORATION
MasterCard® is a registered trademark and PayPass™ and Tap & Go™ are trademarks of MasterCard
International Incorporated.
Visa® and Visa payWave® are registered trademarks of Visa International Service Association.
ANSI®, the ANSI logo, and numerous other identifiers containing "ANSI" are registered trademarks,
service marks, and accreditation marks of the American National Standards Institute (ANSI).
ISO® is a registered trademark of the International Organization for Standardization.
PCI Security Standards Council® is a registered trademark of the PCI Security Standards Council, LLC.
EMVCo™ and EMV™ are trademarks of EMVCo and its licensors.
UL™ and the UL logo are trademarks of UL LLC.
Microsoft®, Windows® and .NET® are registered trademarks of Microsoft Corporation.
All other system names and product names are the property of their respective owners.

DynaPro Go| Handheld PIN Pad Device with MSR/Contact/Contactless | Installation and Operation Manual
Page 3 of 60 (D998200129-10)
Table 1-1 - Revisions
Rev Number
Date
Notes
10
Initial release

DynaPro Go| Handheld PIN Pad Device with MSR/Contact/Contactless | Installation and Operation Manual
Page 4 of 60 (D998200129-10)
LIMITED WARRANTY
MagTek warrants that the products sold pursuant to this Agreement will perform in accordance with
MagTek’s published specifications. This warranty shall be provided only for a period of one year from
the date of the shipment of the product from MagTek (the “Warranty Period”). This warranty shall apply
only to the “Buyer” (the original purchaser, unless that entity resells the product as authorized by
MagTek, in which event this warranty shall apply only to the first repurchaser).
During the Warranty Period, should this product fail to conform to MagTek’s specifications, MagTek
will, at its option, repair or replace this product at no additional charge except as set forth below. Repair
parts and replacement products will be furnished on an exchange basis and will be either reconditioned or
new. All replaced parts and products become the property of MagTek. This limited warranty does not
include service to repair damage to the product resulting from accident, disaster, unreasonable use,
misuse, abuse, negligence, or modification of the product not authorized by MagTek. MagTek reserves
the right to examine the alleged defective goods to determine whether the warranty is applicable.
Without limiting the generality of the foregoing, MagTek specifically disclaims any liability or warranty
for goods resold in other than MagTek’s original packages, and for goods modified, altered, or treated
without authorization by MagTek.
Service may be obtained by delivering the product during the warranty period to MagTek (1710 Apollo
Court, Seal Beach, CA 90740). If this product is delivered by mail or by an equivalent shipping carrier,
the customer agrees to insure the product or assume the risk of loss or damage in transit, to prepay
shipping charges to the warranty service location, and to use the original shipping container or equivalent.
MagTek will return the product, prepaid, via a three (3) day shipping service. A Return Material
Authorization (“RMA”) number must accompany all returns. Buyers may obtain an RMA number by
contacting Technical Support at (888) 624-8350.
EACH BUYER UNDERSTANDS THAT THIS MAGTEK PRODUCT IS
OFFERED AS IS. MAGTEK MAKES NO OTHER WARRANTY, EXPRESS OR
IMPLIED, AND MAGTEK DISCLAIMS ANY WARRANTY OF ANY OTHER
KIND, INCLUDING ANY WARRANTY OF MERCHANTABILITY OR FITNESS
FOR A PARTICULAR PURPOSE.
IF THIS PRODUCT DOES NOT CONFORM TO MAGTEK’S
SPECIFICATIONS, THE SOLE REMEDY SHALL BE REPAIR OR
REPLACEMENT AS PROVIDED ABOVE. MAGTEK’S LIABILITY, IF ANY,
SHALL IN NO EVENT EXCEED THE TOTAL AMOUNT PAID TO MAGTEK
UNDER THIS AGREEMENT. IN NO EVENT WILL MAGTEK BE LIABLE TO
THE BUYER FOR ANY DAMAGES, INCLUDING ANY LOST PROFITS, LOST
SAVINGS, OR OTHER INCIDENTAL OR CONSEQUENTIAL DAMAGES
ARISING OUT OF THE USE OF, OR INABILITY TO USE, SUCH PRODUCT,
EVEN IF MAGTEK HAS BEEN ADVISED OF THE POSSIBILITY OF SUCH
DAMAGES, OR FOR ANY CLAIM BY ANY OTHER PARTY.

DynaPro Go| Handheld PIN Pad Device with MSR/Contact/Contactless | Installation and Operation Manual
Page 5 of 60 (D998200129-10)
LIMITATION ON LIABILITY
EXCEPT AS PROVIDED IN THE SECTIONS RELATING TO MAGTEK’S LIMITED WARRANTY,
MAGTEK’S LIABILITY UNDER THIS AGREEMENT IS LIMITED TO THE CONTRACT PRICE OF
THIS PRODUCT.
MAGTEK MAKES NO OTHER WARRANTIES WITH RESPECT TO THE PRODUCT, EXPRESSED
OR IMPLIED, EXCEPT AS MAY BE STATED IN THIS AGREEMENT, AND MAGTEK
DISCLAIMS ANY IMPLIED WARRANTY, INCLUDING WITHOUT LIMITATION ANY IMPLIED
WARRANTY OF MERCHANTABILITY OR FITNESS FOR A PARTICULAR PURPOSE.
MAGTEK SHALL NOT BE LIABLE FOR CONTINGENT, INCIDENTAL, OR CONSEQUENTIAL
DAMAGES TO PERSONS OR PROPERTY. MAGTEK FURTHER LIMITS ITS LIABILITY OF ANY
KIND WITH RESPECT TO THE PRODUCT, INCLUDING ANY NEGLIGENCE ON ITS PART, TO
THE CONTRACT PRICE FOR THE GOODS.
MAGTEK’S SOLE LIABILITY AND BUYER’S EXCLUSIVE REMEDIES ARE STATED IN THIS
SECTION AND IN THE SECTION RELATING TO MAGTEK’S LIMITED WARRANTY.

DynaPro Go| Handheld PIN Pad Device with MSR/Contact/Contactless | Installation and Operation Manual
Page 6 of 60 (D998200129-10)
FCC INFORMATION
This device complies with Part 15 of the FCC Rules. Operation is subject to the following two
conditions: (1) This device may not cause harmful interference, and (2) This device must accept any
interference received, including interference that may cause undesired operation.
Note: This equipment has been tested and found to comply with the limits for a Class B digital device,
pursuant to part 15 of the FCC Rules. These limits are designed to provide reasonable protection against
harmful interference in a residential installation. This equipment generates, uses and can radiate radio
frequency energy and, if not installed and used in accordance with the instructions, may cause harmful
interference to radio communications. However, there is no guarantee that interference will not occur in a
particular installation. If this equipment does cause harmful interference to radio or television reception,
which can be determined by turning the equipment off and on, the user is encouraged to try to correct the
interference by one or more of the following measures:
•Reorient or relocate the receiving antenna.
•Increase the separation between the equipment and receiver.
•Connect the equipment into an outlet on a circuit different from that to which the receiver is
connected.
•Consult the dealer or an experienced radio/TV technician for help.
Caution: Changes or modifications not expressly approved by MagTek could void the
user’s authority to operate this equipment.
CANADIAN DECLARATION OF CONFORMITY
This digital apparatus does not exceed the Class B limits for radio noise from digital apparatus set out in
the Radio Interference Regulations of the Canadian Department of Communications.
Le présent appareil numérique n’émet pas de bruits radioélectriques dépassant les limites applicables aux
appareils numériques de la classe B prescrites dans le Réglement sur le brouillage radioélectrique édicté
par le ministère des Communications du Canada.
This Class B digital apparatus complies with Canadian ICES-003.
Cet appareil numérique de la classe B est conformé à la norme NMB-003 du Canada.
INDUSTRY CANADA (IC) RSS
This device complies with Industry Canada licence-exempt RSS standard(s). Operation is subject to the
following two conditions: (1) This device may not cause interference, and (2) This device must accept
any interference, including interference that may cause undesired operation of the device.
Le présent appareil est conforme aux CNR d'Industrie Canada applicables aux appareils radio exempts de
licence. L'exploitation est autorisée aux deux conditions suivantes: (1) L'appareil ne doit pas produire de
brouillage, et (2) L'utilisateur de l'appareil doit accepter tout brouillage radioélectrique subi, même si le
brouillage est susceptible d'en compromettre le fonctionnement.
CUR/UR
This product is recognized per Underwriter Laboratories and Canadian Underwriter Laboratories 1950.

DynaPro Go| Handheld PIN Pad Device with MSR/Contact/Contactless | Installation and Operation Manual
Page 7 of 60 (D998200129-10)
CE STANDARDS
Testing for compliance with CE requirements was performed by an independent laboratory. The unit
under test was found compliant with standards established for Class B devices.
EU STATEMENT
Hereby, MagTek Inc. declares that the radio equipment types Wideband Transmission System (802.11
wireless) and Non-Specific Short Range Device (contactless) are in compliance with Directive
2014/53/EU. The full text of the EU declaration of conformity is available at the following internet
address: https://www.magtek.com/Content/DocumentationFiles/D998200238.pdf.
AUSTRALIA / NEW ZEALAND STATEMENT
Testing for compliance with AS/NZS standards was performed by a registered and accredited laboratory.
The unit under test was found compliant with standards established under AS/NZS CISPR 32 (2013),
AS/NZS 4268 Table 1, Row 59 DTS 2400-2483MHz SRD (802.11), and AS/NZS 4268 (2017) Table 1,
Row 43 13.553-13.567MHz (contactless reader).
UL/CSA
This product is recognized per UL 60950-1, 2nd Edition, 2011-12-19 (Information Technology
Equipment - Safety - Part 1: General Requirements), CSA C22.2 No. 60950-1-07, 2nd Edition,
2011-12 (Information Technology Equipment - Safety - Part 1: General Requirements).
ROHS STATEMENT
When ordered as RoHS compliant, this product meets the Electrical and Electronic Equipment (EEE)
Reduction of Hazardous Substances (RoHS) European Directive 2002/95/EC. The marking is clearly
recognizable, either as written words like “Pb-free,” “lead-free,” or as another clear symbol ( ).
PCI STATEMENT
PCI Security Standards Council, LLC (“PCI SSC”) has approved this PIN Transaction Security Device to
be in compliance with PCI SSC’s PIN Security Requirements.
When granted, PCI SSC approval is provided by PCI SSC to ensure certain security and operational
characteristics important to the achievement of PCI SSC’s goals, but PCI SSC approval does not under
any circumstances include any endorsement or warranty regarding the functionality, quality or
performance of any particular product or service. PCI SSC does not warrant any products or services
provided by third parties. PCI SSC approval does not under any circumstances include or imply any
product warranties from PCI SSC, including, without limitation, any implied warranties of
merchantability, fitness for purpose, or non-infringement, all of which are expressly disclaimed by PCI
SSC. All rights and remedies regarding products and services which have received PCI SSC approval
shall be provided by the party providing such products or services, and not by PCI SSC.

1 - Table of Contents
DynaPro Go| Handheld PIN Pad Device with MSR/Contact/Contactless | Installation and Operation Manual
Page 8 of 60 (D998200129-10)
1Table of Contents
Limited Warranty .............................................................................................................................................. 4
FCC Information ................................................................................................................................................ 6
Canadian Declaration Of Conformity ............................................................................................................. 6
Industry Canada (IC) RSS................................................................................................................................. 6
CUR/UR............................................................................................................................................................... 6
CE STANDARDS................................................................................................................................................. 7
EU Statement..................................................................................................................................................... 7
Australia / New Zealand Statement .............................................................................................................. 7
UL/CSA ............................................................................................................................................................... 7
RoHS STATEMENT............................................................................................................................................. 7
PCI Statement ................................................................................................................................................... 7
1Table of Contents...................................................................................................................................... 8
2Introduction .............................................................................................................................................11
2.1 About DynaPro Go..........................................................................................................................11
2.2 Protection for All Points Within the Payment Infrastructure...................................................13
2.3 Security and Ease of Integration by Design ...............................................................................13
2.4 Remote Services ............................................................................................................................ 13
2.5 Peace of Mind .................................................................................. Error! Bookmark not defined.
2.6 Tamper Responsiveness ...............................................................................................................13
2.7 Liquid Crystal Display.....................................................................................................................13
2.8 10-Digit Backlit Numeric Keypad With Function Keys .............................................................14
2.9 Low-Power Standby Modes...........................................................................................................14
2.10 Major Components.....................................................................................................................15
2.11 About Terminology.....................................................................................................................15
3Planning and Preparation .....................................................................................................................16
3.1Logistical Planning.........................................................................................................................16
3.2 Network Planning...........................................................................................................................18
4Installation...............................................................................................................................................19
4.1 About Inspection.............................................................................................................................19
4.2 About Software ...............................................................................................................................20
4.3 About Connecting to a Host..........................................................................................................20
4.3.1 How to Connect DynaPro Go to a Computer Host or Charger via USB ..........................20
4.3.2 How to Connect DynaPro Go to a Host via 802.11 Wireless ..........................................21
5Configuration...........................................................................................................................................22
5.1 How to Configure the LCD Display Brightness...........................................................................23
5.1.1 LCD Display Brightness Auto Mode.....................................................................................24
5.1.2 LCD Display Brightness Manual Mode................................................................................24

1 - Table of Contents
DynaPro Go| Handheld PIN Pad Device with MSR/Contact/Contactless | Installation and Operation Manual
Page 9 of 60 (D998200129-10)
5.2 How to Configure the Keypad Backlight.....................................................................................25
5.3 How to Change the Active Connection........................................................................................ 26
5.4 How to Configure Network Settings (ADVANCED).....................................................................27
5.4.1 How to Configure the Network to Support 802.11 Wireless Connections.................... 27
5.4.2 How to Configure the Host for 802.11 Wireless ...............................................................28
5.4.3 How to Configure the Device for 802.11 Wireless ........................................................... 29
5.4.4 How to Test the 802.11 Wireless Connection...................................................................34
6Operation .................................................................................................................................................35
6.1 Overview...........................................................................................................................................35
6.2 How to Read Device Status ..........................................................................................................37
6.2.1 Welcome Screen Status Icons .............................................................................................37
6.2.2 Device Details Screens..........................................................................................................38
6.2.3 Health and Safety Information ............................................................................................40
6.2.4 Wireless Status Screen ......................................................................................................... 40
6.2.5 OFFLINE Screen......................................................................................................................41
6.3 Power Management.......................................................................................................................42
6.3.1 How to Charge the Battery ................................................................................................... 42
6.3.2 How to Power On / Power Off ..............................................................................................43
6.3.3 Battery Warnings and Automatic Power Off......................................................................43
6.3.4 Sleep Mode .............................................................................................................................44
6.3.5 USB Suspend .......................................................................................................................... 44
6.3.6 Maintenance Reset................................................................................................................44
6.4 How to Start a Handheld Wireless Transaction......................................................................... 46
6.5 Card Reading .................................................................................................................................. 47
6.5.1 How to Swipe Magnetic Stripe Cards..................................................................................47
6.5.2 How to Insert Contact Chip Cards........................................................................................48
6.5.3 How to Tap Contactless Cards / Devices ........................................................................... 50
6.5.4 How to Enter Card Information Manually...........................................................................52
6.5.5 How to Select the Card Type ................................................................................................52
6.6 How to Verify the Transaction Amount .......................................................................................53
6.7 How to Enter PINs........................................................................................................................... 54
6.8 How to Use Signature Capture .....................................................................................................54
6.9 How to Enter Passcodes................................................................................................................ 55
7Maintenance............................................................................................................................................56
7.1 Mechanical Maintenance..............................................................................................................56
7.2 Updates to Firmware, Documentation, Security Guidance...................................................... 56
8Developing Custom Software ...............................................................................................................57
Appendix A Technical Specifications .......................................................................................................58

1 - Table of Contents
DynaPro Go| Handheld PIN Pad Device with MSR/Contact/Contactless | Installation and Operation Manual
Page 10 of 60 (D998200129-10)

2 - Introduction
DynaPro Go| Handheld PIN Pad Device with MSR/Contact/Contactless | Installation and Operation Manual
Page 11 of 60 (D998200129-10)
2Introduction
2.1 About DynaPro Go
MagTek’s DynaPro Go is a handheld secure PIN entry device that is ideal for credit, prepaid, gift, and
debit cards for mobile point of sale applications where you need unmatched convenience and security.
Reduce your interchange rates, reduce chargebacks, and increase your customer satisfaction and sales
with DynaPro Go.
DynaPro Go provides a mobile solution that is convenient without sacrificing security. Bring multiple
low-cost, yet secure point-of-service terminals directly to the customer wherever and whenever they are
ready to buy. The magnetic stripe card reader is capable of reading any ISO or AAMVA encoded
magnetic stripe data, the contact chip card slot is located in the bottom of the device ready to read contact
chip cards (ICC), and the contactless reader is directly behind the LCD display. The backlit keypad
provides a better user experience when used in low-light settings such as taxi cabs.
DynaPro Go meets and exceeds PCI PTS 4.x, SRED security requirements for PEDs. The MagTek
MagneSafe™ Security Architecture (MSA), EMV chip card technology, and NFC capability exceed
current PCI requirements. The enclosure and associated electronics form a Tamper Resistant Security
Module (TRSM) where attempts to penetrate or modify the unit cause all keys to be cleared and/or stop
the unit from functioning.
DynaPro Go product features include:
•PCI PTS 4.x, SRED
•Meets EMV Level 1 and Level 2 requirements
•Triple DES encryption
•DUKPT key management
•Device/mutual authentication
•Card data authentication
•Tokenization and masked data
•Wireless and USB connection
•Ergonomic and ruggedized design
•Secured by MagneSafe Security Architecture
•MagnePrint card authentication
•Generates dynamic payment card data with each swipe
•Reads ANSI/ISO/AAMVA cards plus custom formats
•EMV chip card reader
•Fast and reliable magnetic stripe reading
•LCD graphical display
•Backlit keypad
•Reads up to 3 tracks of card data
•Bi-directional read

2 - Introduction
DynaPro Go| Handheld PIN Pad Device with MSR/Contact/Contactless | Installation and Operation Manual
Page 12 of 60 (D998200129-10)
Table 2-1 - Available Models and Options
Part No. Description Cable USB 802.11 Bluetooth BLE
Sig
Cap.
30056215
DYNAPRO GO
DEMO / TEST,
SIGCAP, 802.11
WIRELESS
micro-USB Yes Yes No No Yes
30056216
DYNAPRO GO PCI,
SIGCAP, 802.11
WIRELESS
micro-USB Yes Yes No No Yes

2 - Introduction
DynaPro Go| Handheld PIN Pad Device with MSR/Contact/Contactless | Installation and Operation Manual
Page 13 of 60 (D998200129-10)
2.2 Protection for All Points Within the Payment Infrastructure
DynaPro Go delivers industry best practices for data protection, using triple DES encryption
(TDEA/3DES) and derived unique key per transaction (DUKPT) key management. PIN, magnetic
stripe, chip card (contact/contactless), NFC, and manually keyed data are encrypted as soon as they are
entered into the device. Using proven and tested industry standards gives merchants, processors, issuers,
and acquirers the flexibility to outsource or manage decryption services themselves, avoiding the risk
imposed by unproven, proprietary encryption algorithms.
When used with Magensa Solutions and the MagneSafe Security Architecture, the device delivers a
layered approach to transaction security that combines encryption, tokenization, authentication, and
dynamic data to protect card data. The MagnePrint® card authentication service can identify and
detect counterfeit magnetic stripe ATM, debit, credit, and gift cards, and render them useless. This state-
of-the-art security is designed to identify and prevent fraud before it happens.
The card reader is capable of reading any ISO or AAMVA encoded magnetic stripe data, and includes a
contact chip card (ICC) reader on the front of the device under the keypad and a contactless reader behind
the LCD display.
2.3 Security and Ease of Integration by Design
DynaPro Go is a durable device made for easy connection. MagTek is your partner in development and
provides a comprehensive platform of drivers, APIs, and Software Development Kits (SDKs). The SDKs
include tools, documentation, and sample code for developing applications on a variety of platforms for
fast development and easy integration.
DynaPro Go can interface through standard micro-USB cabling to recharge the battery and to perform
synchronization with compliant hosts, or connect via TCP/IP over 802.11 wireless. The display module
is a backlit display and the keypad has well-contoured keys with tactile feedback for convenient entry of
PINs or other data.
2.4 Remote Services
MagTek’s secure remote services include key injection and device configuration. These services are
compliant with PCI P2PE environments, and eliminate the need for merchants to manage sensitive
information such as encryption keys or device configuration settings. This allows the upgrade of keys or
device security settings throughout the life of the device in the field.
2.5 Tamper Responsiveness
DynaPro Go’s enclosure and its associated electronics have been designed to form a Tamper-
Responsive, Tamper-Evident Secure Cryptographic Device (SCD). The covers are securely attached
and incorporate sensing circuits to detect any attempts to open the unit. Internal spaces within DynaPro
Go have been minimized to reduce the possibility of unauthorized modifications.
In addition, any attempt to penetrate or modify the device electronically will cause the unit to
permanently erase its stored encryption keys, after which the device will cease to function.
2.6 Liquid Crystal Display
The Liquid Crystal Display (LCD) screen is a 2.4 inch 320x240 pixel QVGA color TFT display with a
contactless card reader behind it for “tap the screen” contactless function. The display can either adapt its
brightness based on ambient lighting, or stay at a pre-set brightness level. The display shows pre-
programmed static and animated messages, including vertical scrolling for longer prompt lists, and
animations on the Swipe Card and Insert Cardscreens.

2 - Introduction
DynaPro Go| Handheld PIN Pad Device with MSR/Contact/Contactless | Installation and Operation Manual
Page 14 of 60 (D998200129-10)
2.7 10-Digit Backlit Numeric Keypad With Function Keys
During normal operation, cardholders use the device’s numeric keypad to securely enter PINs and other
numeric data (see Figure 2-1 on page 15). An audible tone provides feedback when pressing keys, and a
backlight makes data entry easy even in low light conditions.The keypad includes additional function
keys cardholders may press during a transaction:
•Cardholders can press the green ENTER (“OK”) key to indicate they have finished their input.
•Cardholders can press the red CANCEL(“X”) key to halt the current operation. Depending on the
context, it may cancel the entire transaction.
•When presented with on-screen selection options, cardholders can press the Left Function Key,
Middle Function Key, or Right Function Key to select the desired response.
2.8 Low-Power Standby Modes
To conserve battery power, DynaPro Go enters low-power mode or powers off in response to a variety of
events, including screen timeouts (“Sleep Mode”), USB Suspend directives from a connected USB host,
critically low battery power, and periodic maintenance resets. Details about how DynaPro Go manages
and conserves battery power can be found in section 6.3 Power Management.

2 - Introduction
DynaPro Go| Handheld PIN Pad Device with MSR/Contact/Contactless | Installation and Operation Manual
Page 15 of 60 (D998200129-10)
2.9 Major Components
The major components of DynaPro Go are shown in Figure 2-1. In addition to the components shown,
the device has a tamper trigger recessed in the bottom that is intended for manufacturer use only.
Do not insert anything into the tamper trigger hole! Doing so will erase all injected keys;
the device will stop functioning, and will have to be returned to the manufacturer for re-
configuration.
Figure 2-1 – DynaPro Go Major Components
2.10 About Terminology
In this document, DynaPro Go is referred to as the device. It is designed to be connected to a host, which
is a piece of general-purpose electronic equipment which can send commands and data to, and receive
data from, the device. Host types include PC and Mac computers/laptops, tablets, and smartphones.
Generally, the host must have software installed that communicates with the device and is capable of
processing transactions. During a transaction, the host and its software interact with the operator, such
as a customer service representative, while the device interacts with the cardholder (even if the
cardholder is using a virtual representation of the card account, such as a smartphone).

3 - Planning and Preparation
DynaPro Go| Handheld PIN Pad Device with MSR/Contact/Contactless | Installation and Operation Manual
Page 16 of 60 (D998200129-10)
3Planning and Preparation
The guidelines in the following sections will assist management and network administrators in planning
for the physical and network requirements of deploying and using DynaPro Go. The most effective way
to ensure smooth deployment of a solution is to consider these factors before receiving the device.
3.1 Logistical Planning
•Determine what type of host DynaPro Go will connect to. This can be a computer with a USB port or
connected to a TCP/IP network that is equipped with 802.11 wireless. When planning, include any
additional support or devices required by the host and DynaPro Go, such as physical locations,
mounting, power connections, and charging cradles.
•Determine what software will be installed on the host and how it will be configured. Software can
include operating system, transaction processing software, security software, and so on. Include any
additional support required by the software, such as network connections. Information about software
is provided in section 4.2 About Software.
•Configure the host software to select which combinations of magnetic stripe swipe, EMV contact card
insertion, contactless payment tap, and/or manual entry the host will direct the device to accept (see
section 6.5 Card Reading). This decision may differ based on location, situation, and other factors,
or may be uniform across all transactions and devices and hosts you are deploying.
•Determine how DynaPro Go will be physically presented to the cardholder.
•Select which connection type the solution will use. Available connection types include USB and
TCP/IP over 802.11 wireless, and only one interface can be active at a time. The connection types
available in each model are listed in Table 2-1 - Available Models and Options on page 12.
•Determine how DynaPro Go should be configured, and specify that configuration when ordering the
device. For example:
oDetermine whether the device should be Always Listening for wireless messages from the
host, or creating Device-Initiated connections on demand.
oDetermine whether the LCD display backlight should operate in Manual mode (constant
brightness) or Auto mode (adaptive to ambient light).
•Select and configure a secure workstation advanced operators will use to configure and update the
device. The workstation must be configured as follows:
oAvailable USB port
oA secure means of obtaining files, either via the network (such as SFTP) or via removable
media, such as USB flash drives.
o99510127 DYNAPRO/DYNAPRO GO/DYNAPRO MINI WINDOWS SDK INSTALL
(EXE) installed. This software includes the MagTek PCI PED Host App Simulator tool
advanced operators use to configure the device.
oIt may also need a browser connection to a certificate authority (CA) for downloading
certificates.
•Determine the charging schedule(s) and location(s). For example, high-traffic mission-critical
solutions may benefit from keeping multiple devices charging for fast swap-out. Charging cradles
and accessories are available directly from MagTek. Make sure there is an adequate number of USB
wall chargers and / or USB ports available for the number of devices you are charging together, and
make sure the electrical socket-outlet at a given charging location can support the total load.
Solutions using large numbers of devices may benefit from using a large-scale universal USB charger
/ hub. Details about charging are provided in section 6.3.1 How to Charge the Battery. Details
about maximum power consumption are provided in Appendix A Technical Specifications.

3 - Planning and Preparation
DynaPro Go| Handheld PIN Pad Device with MSR/Contact/Contactless | Installation and Operation Manual
Page 17 of 60 (D998200129-10)
•Determine how to inspect devices upon arrival, upon installation, and periodically during live usage,
to ensure malicious individuals have not tampered with them. Details about inspection are provided
in section 4.1 About Inspection.
•Develop procedures for maintaining the device(s). Detailed guidance is provided in section 6.9 How
to Enter Passcodes.
•Determine how to train operators. Training may include material from section 5 Configuration and
section 6 Operation.

3 - Planning and Preparation
DynaPro Go| Handheld PIN Pad Device with MSR/Contact/Contactless | Installation and Operation Manual
Page 18 of 60 (D998200129-10)
3.2 Network Planning
If DynaPro Go will communicate with the host via TCP/IP and an 802.11 wireless access point, network
administrators should do the following before deployment:
1) Coordinate with your sales representative to obtain the certificate chain that must be installed on the
host to enable TLS communication with the device.
2) Determine how the IP addresses of all DynaPro Go devices and the host will be allocated.
3) The device configuration supports connection to only one access point. Make sure there is adequate
signal strength between the access point and all locations where the device will operate wirelessly.
4) The device supports WPA2-PSK (TKIP), WPA2-PSK (AES), or WPA2-PSK (TKIP/AES)
wireless security. Make sure the access point is configured to support one of these.
5) Determine whether to use MAC filtering on the access point and plan a way for MACs for new
devices to be added to the list.
6) If the device and host will use static IP addresses, allocate those addresses and determine what
Gateway and Subnet Mask the devices should use.
7) Configure the network’s DNS server in one of three ways:
a) Register the host as providing an mDNS Service name, or
b) Register the host with a DNS name, or
c) Don’t register the host with DNS, and exclusively use IP address.
8) Determine what ports the device and host will use to communicate. By default, the device expects the
host connect to port 26, must be able to access DNS via UDP using port 53, and must be able to
access DHCP on port 67. Make sure the network and firewalls are configured so the device and host
can initiate connections on the selected port(s).
9) DynaPro Go does not require an Internet gateway.

4 - Installation
DynaPro Go| Handheld PIN Pad Device with MSR/Contact/Contactless | Installation and Operation Manual
Page 19 of 60 (D998200129-10)
4Installation
Installing DynaPro Go is straightforward: The acquirer configures the Certificate Authority, public keys,
terminal and payment brand settings before deployment; end users need only set up a host with
appropriate software, configure the software, and connect the device to the host. This section provides
general information about solutions that incorporate DynaPro Go, including host software, connecting the
device, and charging the device.
4.1 About Inspection
It is important to regularly and thoroughly inspect a device in live usage, and its immediate surroundings,
to make sure malicious individuals have not tampered with it. MagTek recommends inspection training
for all device operators, and an inspection schedule with checkpoints in place to make sure inspections are
being done as specified and as scheduled. MagTek provides an easy-to-follow guide for inspecting the
device in D998200133 DYNAPRO GO DEVICE INSPECTION.
Before the device is deployed, it is also important to inspect the packaging to make sure it has not been
tampered with in storage or in transit. MagTek provides details for inspecting the integrity of the device’s
packaging in D998200134 DYNAPRO GO PACKAGE INSPECTION.

4 - Installation
DynaPro Go| Handheld PIN Pad Device with MSR/Contact/Contactless | Installation and Operation Manual
Page 20 of 60 (D998200129-10)
4.2 About Software
In any solution, DynaPro Go is connected to a host, which must have software installed that knows how
to communicate with the device, and which is capable of processing transactions. To set up the host to
work with DynaPro Go, follow the installation and configuration instructions provided by the vendor of
the host or the host software. For information about developing custom host software, see section 8
Developing Custom Software.
4.3 About Connecting to a Host
The following sections provide steps for connecting DynaPro Go to a host via the various available
physical connection types.
4.3.1 How to Connect DynaPro Go to a Computer Host or Charger via USB
Figure 4-1 - Connecting DynaPro Go to a Computer or USB Charger
To connect DynaPro Go to a host computer or charger using the Micro USB port, follow these steps:
1) In any order:
•Connect the small end of the USB cable to DynaPro Go as shown in Figure 4-1.
•Connect the large end of the USB cable to the charger or to the host computer’s USB port.
2) As soon as DynaPro Go starts receiving power through USB, it will automatically power on.
3) If you want DynaPro Go to communicate with the host via USB (as opposed to merely using it as a
power source to charge the battery), make sure it is configured to use the USB connection. See
section 5.3 How to Change the Active Connection.
4) If the specific DynaPro Go serial number you are connecting has not been connected to the host
before, the Windows system tray on the host will report it is Installing device driver software.
Other manuals for DynaPro Go
6
Table of contents
Other Magtek Security System manuals
Popular Security System manuals by other brands

Honeywell
Honeywell PROSiXSIRENO Installation and setup guide

Hills
Hills VoiceNav user manual

Teletek electronics
Teletek electronics SensoIRIS MCP150MR installation instructions

Consilium
Consilium Salwico CS3000 installation manual

Orion
Orion SC144 Quick installation guide

AQUADYNE
AQUADYNE OCTOPUS 4000 Installing