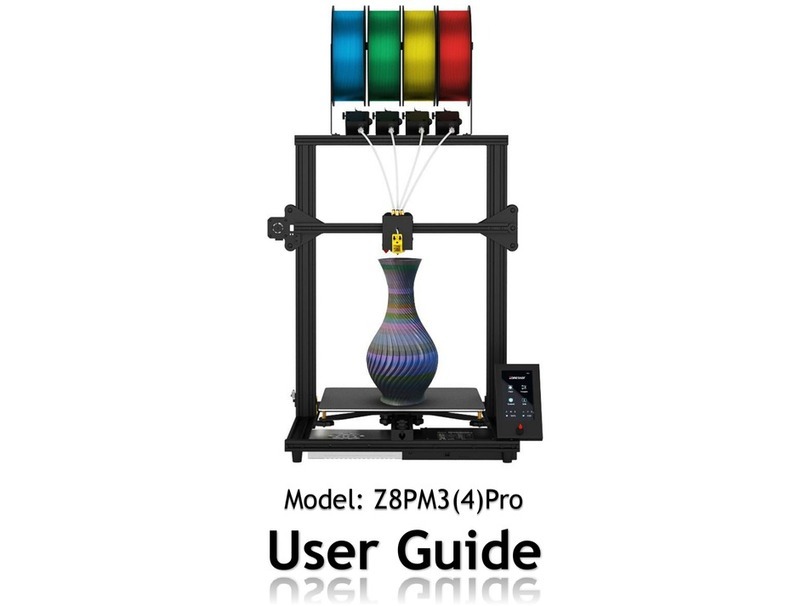
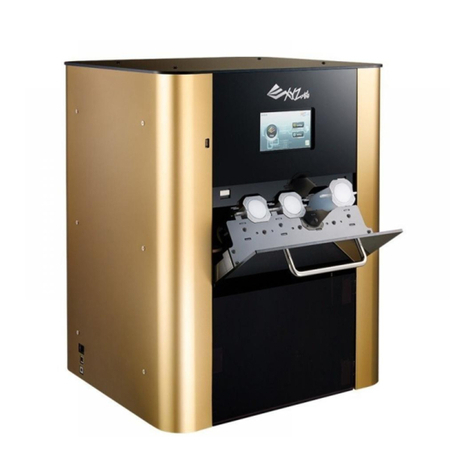
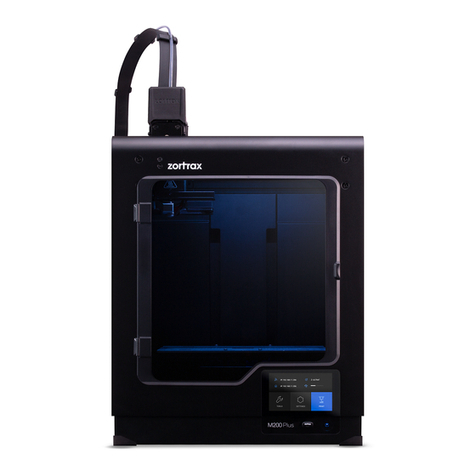
Makermade 300X User instructions

SETTING UP YOUR
300X 3D PRINTER
The complete assembly guide by
Last Updated 12.23.2020 v1.1

2
300X USER GUIDE
SETTING UP YOUR 300X
TABLE OF CONTENTS
SECTION 1. Introduction - 3
SECTION 2. What’s in the box - 4
SECTION 3. Assembling the 300x - 6
SECTION 4. Your First Print - 9
SECTION 5. About 3D Printing - 10
SECTION 5. Appendix - 21
This work is licensed under the creative commons Attribution
Non commercial-no Derivatives 4.0 International license. Last Updated 12.23.2020
Version v1.1

3
300X USER GUIDE
Thanks for buying the 300x 3D Printer by Maker Made, with practical features for creative
creatures! The following instructions are intended for beginners - with no prior 3D printing
experience.
Here are some notes on the layout:
1. First off, I’m Drew and I took the lead on creating this guide. My notes are tips and tricks to
help you along. They are in a different font, blue, and look like this:
They are meant to answer some of the “why” questions you might have and give you tips to get
started. We suggest printing the guide in color, if you want a paper copy to go along with the
quick start guide.
2. 300x setup can be broken down into two main parts: building the 300x and starting your first
print. There are a few steps involved, so let’s get started!
3. If you need any help, join us in one of our weekly 3D Printing videoconference Q&A sessions,
or send us an email at support@makermade.com.
Drew’s Note: Let us know how this guide can be improved. We love to hear from you!
SECTION 1. INTRODUCTION
This work is licensed under the creative commons Attribution
Non commercial-no Derivatives 4.0 International license. Last Updated 12.23.2020
Version v1.1

4
300X USER GUIDE
WHAT’S IN THE BOX?
X-AXIS GANTRY Y-AXIS BASE WITH MAGNETIC
BUILD SURFACE
SPOOL HOLDER (3 PARTS)
BLACK M3 SCREEN MOUNT BOLTS
(X2)
BLACK SPOOL HOLDER SCREWS
(X2)
SILVER M4 GANTRY BOLTS (X4)
SCREEN AND MOUNT ADJUSTABLE PHILLIPS/FLATHEAD
SCREWDRIVER
2mm, 2.5mm, 3mm ALLEN
WRENCHES
200g PLA ROLL PRINT REMOVAL SCRAPER USB A-B CORD FOR WIRED
COMPUTER CONNECTION
FILAMENT CLIPPERS POWER CORD EXTRA ZIP TIES FOR CORD
MAINTENANCE
This work is licensed under the creative commons Attribution
Non commercial-no Derivatives 4.0 International license. Last Updated 12.23.2020
Version v1.1

5
300X USER GUIDE
WHAT’S IN THE BOX?
NOZZLE UNCLOGGING TOOL MICROUSB FOR SCREEN POWER USB DRIVE
Drew’s Note: Also included is a welcome letter and a quick start
guide. We are so excited that you have chosen to 3D print with
us!
This work is licensed under the creative commons Attribution
Non commercial-no Derivatives 4.0 International license. Last Updated 12.23.2020
Version v1.1

6
300X USER GUIDE
The 300x 3D Printer comes in several pieces to assemble.
Drew’s Note: Here is a layout of the practical features of the 300x!
ASSEMBLING YOUR 300X
Touchscreen
BLTouch Print Bed
Leveling Sensor
X-Axis Stepper Motor
Y-Axis Stepper Motor
Z-Axis Stepper Motors
Print Bed
X-Axis Gantry
Nozzle
Base
Extruder Stepper
Motor
Filament Holder
Extruder
Power Switch
X-Axis Limit Switch
This work is licensed under the creative commons Attribution
Non commercial-no Derivatives 4.0 International license. Last Updated 12.23.2020
Version v1.1

7
300X USER GUIDE
1. Unbox 300x and remove all foam from the base. 2. Place X-axis gantry into ports on top of the base, with
the silver and black stepper motors toward the back and
the nozzle toward the front.
3. Use a 3mm Allen wrench (largest) to screw 2 long
silver M4 bolts into each side of base to secure the
gantry.
4. Plug in microUSB (into either port) and HDMI into
back of screen. It is a tight fit, so ensure that the HDMI
is plugged in completely. Plug the other end of the USB
into one of the Raspberry Pi USB ports.
5. Attach the screen mount to frame using 2.5mm Allen
wrench (middle sized) and two black M3 bolts.
6. Plug in print bed to base, with connector clip on top.
3D PRINTER ASSEMBLY
This work is licensed under the creative commons Attribution
Non commercial-no Derivatives 4.0 International license. Last Updated 12.23.2020
Version v1.1

8
300X USER GUIDE
7. Plug gantry into base, with connector clip on top. 8. Plug in both Z-axis stepper motors from the back of
the printer. The connection will only fit one way.
9. Plug in X-axis stepper motor and smaller limit switch.
The wires are labeled with an “X”.
10. Plug in extruder stepper motor, the wire labeled “E”.
11. Attach filament axel to mount by inserting axel
threads through the mounting hole. Hand thread to
tighten the nut on the opposite side of the slanted
L-bracket.
12. Use two long Phillips screws to attach filament
holder to the top left of the gantry. Face the axel toward
the back of the printer.
3D PRINTER ASSEMBLY
This work is licensed under the creative commons Attribution
Non commercial-no Derivatives 4.0 International license. Last Updated 12.23.2020
Version v1.1

9
300X USER GUIDE
13. Plug in the power in the back and flip the switch on
the right side to turn it on. It will take about a minute for
the internal Raspberry Pi computer to boot.
14. Choose Mode.
The 300x comes with two different modes:
Home/Office and Education.
One is for hobbyists and businesses, while the education
mode includes tutorials and extra on how to 3D print.
You can change your mode and other settings at any
time by tapping menu at the bottom of the screen.
15. Follow the on screen instructions for the initial
setup, Wi-Fi, and calibration settings for your new 3D
printer.
Follow the instructions to download the latest printer
firmware and update to the newest features.
The name you give to your printer will be used to
connect to it over a web browser.
The on screen tutorials will walk you through how to
calibrate and 3D print on the 300x.
No downloaded software is required to slice files or
operate the 300x!
16. To connect to the 300x wirelessly using a web
browser, either connect the printer to your Wi-Fi,
ethernet, or connect to the Wi-Fi network on your
computer named “Maker Made” that the printer
broadcasts until it connects to your network.
Then, open any web browser and go to:
http://[your-printer-name].local
Note: Bonjour Print Services must be installed for the
printer page to load on a Windows computer.
To install Bonjour, install any Apple program (such as
iTunes) on your computer or find the newest stand-alone
version at support.apple.com.
YOUR FIRST PRINT
This work is licensed under the creative commons Attribution
Non commercial-no Derivatives 4.0 International license. Last Updated 12.23.2020
Version v1.1

10
300X USER GUIDE
ABOUT 3D PRINTING
You built your 300x 3D printer! Now let’s learn how to print.
Drew’s Note: To better understand 3D printing, here is a brief overview of the process,
materials, and how to troubleshoot. More pictures coming soon!
THE 3D PRINTING PROCESS
The 3D printing process is usually split into three main parts: creating or finding a digital file, converting the
digital file for your printer, and printing!
PART 1: CREATE OR FIND A DIGITAL .STL FILE
You can create a 3D model—a digital geometry—using any CAD (computer- aided design) software program.
We recommend free programs, such as TinkerCAD and OnShape. Autodesk’s Fusion360 is my favorite and free
for education. These programs take some time to learn, and can be challenging. But they are also rewarding,
especially when you watch your own creation being printed on your 3D printer! There are also many websites with
premade file libraries. Check out the Maker Marketplace, to find and post your creations!
Every CAD program allows users to save or export digital files for 3D printing. You want to save your file as an STL
file (“filename.stl”). The STL file is the standard file format for 3D printing. In some programs, it’s as easy as the
Save command. In others, you need to select the File > Export option, and choose the STL format. OBJ files can
also be sliced and 3D printed. If your file is not designed properly or is corrupted, it will not print properly. If the
print fails, this is where digital troubleshooting will begin.
PART 2: CONVERT YOUR DIGITAL FILE FOR YOUR 3D PRINTER (SLICING)
Slicing is the process of converting your design to Gcode that the printer can read. On the 300x, slicing is easy,
because it includes Cura, a popular slicer engine! However, the 300x is pending as one of the pre-selected non-
networked machines in Cura, if you want to download it on your computer.
To print on your 300x, just tap on your STL file (or click it, if connected through a web browser). Then you need to
choose the physical properties of how your model will print. You can change the print profile to “High Quality” for
a smoother, higher quality part, although the build will take longer, or “Fast Quality” to print at a lower quality in
less time. You may also need to check “Generate Support” if your model needs to print with support, change the
infill if you want a stronger, more dense model.
The following is an introduction to Cura and how to set up your machine on your computer. When you are satisfied
with the slicing settings and have chosen the filament you are using, you are ready to begin printing!
This work is licensed under the creative commons Attribution
Non commercial-no Derivatives 4.0 International license. Last Updated 12.23.2020
Version v1.1

11
300X USER GUIDE
1. Once Cura is installed, you need to add your 300x. If
you already have a machine in Cura, click on its name and
choose “Add a non-networked printer”.
2. Now choose “Custom” and select “Custom FFF Printer”.
Name the printer 300x and select “Add”.
This work is licensed under the creative commons Attribution
Non commercial-no Derivatives 4.0 International license. Last Updated 12.23.2020
Version v1.1

12
300X USER GUIDE
3. Now we are ready to add our printer settings!
First, we have to add the automatic leveling
command. In the “Start G-code” box, click after the
command “G28 ;Home”, hit enter on your keyboard,
and type “G29” as shown. This command must be
in the starting Gcode for the BLTouch sensor to
work properly!
Drew’s Note: G29 is very important! Without it,
your nozzle will slam into the print bed on your
printer. Then only way to stop it is to turn off your
machine. This is because the BLTouch tells the
nozzle where to stop by using this command.
4. Check the “Heated Bed” box and add the proper
printing area in the settings. We can leave the other
settings in this tab the same for now. Change X, Y,
and Z to:
• X (Width): 300
• Y (Depth): 300
• Z (Height): 400
Drew’s Note: The proper size and heated bed
selections are very important! Without them, your
print size in Cura will not utilize the full print size
and you will not have the option of turning on the
heated bed for printing.
This work is licensed under the creative commons Attribution
Non commercial-no Derivatives 4.0 International license. Last Updated 12.23.2020
Version v1.1

13
300X USER GUIDE
5. Click the tab that reads “Extruder 1”. In the box next to
“Compatible Material Diameter” replace the numbers with
“1.75” as shown. Then click “Next”.
Drew’s Note: The correct material diameter is very
important! If you don’t change this command, your prints
will come out squishy and under-extruded. All of the
printer Gcode is based on algorithms around the correct
material diameter.
6. Your printer is almost set up! We just need to upload the proper profiles for
printing. Click the profile tab, where it says “Fine 0.1mm”.
This work is licensed under the creative commons Attribution
Non commercial-no Derivatives 4.0 International license. Last Updated 12.23.2020
Version v1.1

14
300X USER GUIDE
7. Click “Custom” and then the chevron in the “Profile”
dropdown menu.
Drew’s Note: Your 300x will print without loading these
profiles. However, it won’t look as nice and will lead to
more print failures. I made these profiles to take full
advantage of the quality and features of the 300x!
8. Let’s import our profiles! Click manage profiles to get to
the import screen.
This work is licensed under the creative commons Attribution
Non commercial-no Derivatives 4.0 International license. Last Updated 12.23.2020
Version v1.1

15
300X USER GUIDE
9. Click “Import” and import these following settings from
Dropbox. If you download the whole folder, you will have to
unzip it before they will become visible in Cura.
300x Printing Profiles
10. After you import each one you will get a popup that will
tell you if they successfully imported. Click “OK” once you
have imported each of the profiles.
This work is licensed under the creative commons Attribution
Non commercial-no Derivatives 4.0 International license. Last Updated 12.23.2020
Version v1.1

16
300X USER GUIDE
11. Next, activate the profile you want to use! Select the
“300x Normal Quality” profile and click “Activate” at the
top. Your profile is now active! Click close to exit the menu.
12. You can switch between different profiles any time by clicking on the “Profile” dropdown and
selecting the profile you want. You can change any setting and even make your own profiles in this
settings screen!
Drew’s Note: When the 300x is added to Cura this January, you will no longer have to manually
add these settings. They will be added automatically when you choose the Maker Made 300x
from the non-networked printer list!
This work is licensed under the creative commons Attribution
Non commercial-no Derivatives 4.0 International license. Last Updated 12.23.2020
Version v1.1

17
300X USER GUIDE
13. Now, we’re ready to import a model. From Part 1, you
learned that .STL files are the best for 3D printing. Import a
.STL file by clicking “File” > “Open File” or the folder in the
top left. You can create a . STL file or use one from the USB
drive that was included with your printer.
14. Now we can modify our model for printing! Click on your STL file and the left modification
menu will appear. You can move (move the model to another place), scale (change the size), or
rotate (to rotate the flattest side on the build surface) with the menu options.
Drew’s Note: These features are also coming very soon to the 300x onboard slicer!
This work is licensed under the creative commons Attribution
Non commercial-no Derivatives 4.0 International license. Last Updated 12.23.2020
Version v1.1

18
300X USER GUIDE
15. We are now ready to slice! To rename your file, click on the name in the bottom left. To slice,
click “Slice” in the bottom right corner.
16. Once your model is sliced, you are ready to send it to the printer. Plug in your USB drive in
your computer and select “Save to Removable Drive”. Plug the USB drive into your printer and
select your print!
Drew’s Note: Our web uploading update is coming very soon! When it does, select “Save to
File” instead, navigate to http://300x.local to upload the file to the printer on your network.
This work is licensed under the creative commons Attribution
Non commercial-no Derivatives 4.0 International license. Last Updated 12.23.2020
Version v1.1

19
300X USER GUIDE
PART 3: PRINT!
The last and most fun step is printing! Once you choose your file to print and slice it, your 300x will heat the
nozzle and build plate to melt the filament. When it’s heated, the printer will run the print bed calibration and
begin!
Make sure your filament is fully loaded and the print sensor is calibrated to the correct height. If your print curls
up or pops loose, the nozzle is too far away. If the first layer of your print is barely showing up, or the extruder is
making a popping noise, then your nozzle is too close.
Adjust the knobs under your printer to raise or lower your bed, or re-run the print bed calibration again to reset
your Z-Offset. The Z-Offset is the distance your BLTouch print bed sensor uses to calibrate - it is the distance
your nozzle is programmed to be from the print bed. See the troubleshooting section for more information.
PART 4: DIFFERENT FILAMENT TYPES
Filament is the material a 3D printer uses to create your model. It is a thermoplastic formed into a continuous
wire and wound onto a spool so it is compatible with a 3D printer’s extrusion system.
The 300x has a dual-geared extruder and can print in several different materials. The three we recommend
beginning with are:
PLA (polylactic acid) is a biodegradable thermoplastic polymer derived from the starch in plants (normally corn)
that is used for 3D printing. It’s easy to print with and inexpensive. It’s the main one we print with!
TPU (thermoplastic urethane) is a semi-flexible plastic that is used in 3D printing. It’s like flexible rubber!
PETG (polyethylene terephthalate glycol) is a thermoplastic polymer that is chemical resistant and durable. Most
water bottles are made of PETG. It is an excellent impact and temperature-resistant material, that perfect for
when you need something more Durable than PLA!
Drew’s Note: I don’t recommend printing in ABS. ABS is better suited for
injecting molding and produces harmful fumes. It is also hard to print with and
requires a bed temperature of 110C. Although the 300x print bed can reach
110C, the default magnetic print surface will demagnetize.
This work is licensed under the creative commons Attribution
Non commercial-no Derivatives 4.0 International license. Last Updated 12.23.2020
Version v1.1

20
300X USER GUIDE
PART 5: THE TROUBLESHOOTING PROCESS
Whether you are using a CNC, laser cutter, or 3D printer, all digital manufacturing requires some troubleshooting.
Here are some quick tips to help you determine what is wrong:
Step 1: Diagnose the problem. This may seem obvious, but many problems can be solved if you take a step back
and see exactly what the printer is doing incorrectly.
Step 2: Determine if the problem is mechanical or digital. Mechanical problems are in the actual operation of the
printer, such as the motors that drive the X, Y, and Z axes, the motor that pushes the filament, the nozzle heater,
and the calibration of the build plate. The most common mechanical problem is caused by a build plate that is
not calibrated correctly. Other mechanical problems include under-extrusion, a clogged nozzle, and an unplugged
connector on a motor or limit switch.
Digital problems are in the slice file that you prepare in Cura or another slicing program. Important slice file
settings include layer height, print (nozzle) temperature, and print speed.
Once you narrow down the problem, you can start trying things to fix it!
Drew’s Note: The 300x comes with pre-programmed troubleshooting tutorials!
Just tap the “tutorial” button in education or you can find them in the menu.
You can also join our weekly 3D printing livestreams for help. You can find the
link here!
This work is licensed under the creative commons Attribution
Non commercial-no Derivatives 4.0 International license. Last Updated 12.23.2020
Version v1.1
