ProJet MJP 5600 User manual

8/11/22, 10:47 AM
User Guide
infocenter.3dsystems.com/projetmjp5600/print/book/export/html/706
1/119
User Guide
ProJet MJP 5600
User Guide
Rev E
Original Instructions
NOTE: Please refer back to http://infocenter.3dsystems.com/projetmjp5600/user-guide for the most
up-to-date User Guide
INTRODUCTION
The ProJet® MJP 56003D printer system is a Multi-Jet Printer (MJP) printer. The solid imaging 3D printer
produces plastic prototype parts from 3D solid Computer-Aided Design (CAD) models and through the 3D
printer system client software. The parts are generated in a rapid prototype (RP) environment. The primary
features of the printer are the user interface, build chamber including the print engine, and the material
delivery module (MDM), which contains the materials and waste bag.
®

8/11/22, 10:47 AM
User Guide
infocenter.3dsystems.com/projetmjp5600/print/book/export/html/706
2/119
IMPORTANT SAFETY INFORMATION
Safety Symbols and Denitions
READ SYMBOL: Read the Service Manual before opening doors or removing panels. Access panels
are for Service only and should be opened only by authorized servicepersonnel or trained
maintenance personnel.
UV RADIATION HAZARD: Invisible UV radiation is accessible in the vicinity of this sign or behind the
panel. Radiation can cause eye injury or blindness, burn injury and/or re. Access panels are for
service only and should be opened only by authorized servicepersonnel.
ELECTRICAL SHOCK HAZARD: High voltage electricity is accessible in the vicinity of this sign or
behind the access panel. High voltage can cause severe burns or death, as well as res. Access
panels are for service only and should be opened only by authorized servicepersonnel.
HOT SURFACE HAZARD: A hot surface is accessible in the vicinity of this sign or behind the access
panel. Avoid contact. Hot surfaces can cause burn injury or re. Allow surface to cool before
touching. Access panels are for service only and should be opened only by authorized
servicepersonnel or trained maintenance personnel.
HARMFUL IRRITANT WARNING: Indicates that skin or eye irritation could result while exposed to a chemical
composition.
CAUTION: Indicates the possibility of loss of data or damage to equipment.
WARNING: Indicates the possibility of injury or death to personnel.
CRUSH/PINCH HAZARD WARNING: A crush or pinch hazard is in the vicinity of this sign or behind
the access panel. Access panels are for service only and should be opened only by authorized
servicepersonnel.
HAND ENTANGLEMENT WARNING:GEARS OR MOVING PARTS HAZARD IN THE VICINITY OF THIS
SIGN OR BEHIND THE ACCESS PANEL. ACCESS PANELS ARE FOR SERVICE ONLY AND SHOULD BE
OPENED ONLY BY AUTHORIZED SERVICEPERSONNEL.
WEAR GLOVES: when handling certain materials or touching surfaces that may contain the materials.
ULTRAVIOLET RADIATION INSIDE: Exposure may cause eye damage. Do not operate without covers. Wear
UV eye protection.
SPLASH HAZARD WARNING: Splashing liquid may be present in this area. Wear safety glasses with side
shields to provide eye protection.
Emergency Disconnect Device
The power cord is classied as the emergency disconnect device for this 3D printer system. A 36 inch
distance of unobstructed access aroundthe printer is required. In an emergency situation, the user must
have unobstructed access to the power cord.
The label below is located on the E-chassis of the 3D printer system.

8/11/22, 10:47 AM
User Guide
infocenter.3dsystems.com/projetmjp5600/print/book/export/html/706
3/119
Safety Guidelines
Before using the 3D printer system, your company should have a safety program in place. The safety
program should:
Label and point out hazardous equipment, materials, and procedures.
Explain what to do in case of an emergency.
Provide information about hazards of equipment and materials in the form of Global Health and Safety sheets.
The Global Health and Safety sheets are provided with all materials supplied by 3D Systems.
General
The 3D printer system is designed with built in safety features. Improper use can lead to malfunctions that
can cause injury to personnel. To prevent unsafe operation, the 3D printer system will automatically shut
down if unsafe conditions are detected.
Follow these safety guidelines when operating the 3D printer system:
Read and follow all 3D printer system instructions.
Follow all safety rules and heed all cautions and warnings in this guide.
Do not attempt to open chamber door while build in progress.
Do not use any material without reviewing the Global Health and Safety Data Sheets (SDS).
Dress power and communication cables behind 3D printer system to prevent tripping.
Do not attempt to access, service, or adjust 3D printer system components. Do not attempt to perform any
maintenance procedures unless specically trained to do so.
Do not operate the 3D printer system without all safety systems and guards in place and functional.
Operators are trained to operate 3D printer system and perform all necessary tasks to create a part.
Authorized servicepersonnel are those who completed the 3D Systems service training package and were
certied to perform service tasks. Certication may occur at different levels, and service providers should
only perform tasks they are authorized and certied to complete.
Do not ignore warning signs posted during 3D printer system service operations.
If an error message appears on the touchscreen refer to Troubleshootingsection in the User Guide before
resuming operation.
To prevent potential skin-irritation and sensitization due to contact with waste material, follow all guidelines
in buildmaterial Safety in this section.
To prevent pinch injuries to the hand, use caution when replacing platform inside the build chamber.

8/11/22, 10:47 AM
User Guide
infocenter.3dsystems.com/projetmjp5600/print/book/export/html/706
4/119
Electrical
WARNING: HAZARDOUS VOLTAGE EXISTS INSIDE THE 3D PRINTER SYSTEM. INJURY OR DEATH
FROM ELECTRICAL SHOCK CAN RESULT IF YOU REMOVE THE 3D PRINTER SYSTEM’S EXTERNAL
PANELS. PANELS SHOULD ONLY BE REMOVED FOR SERVICE BY AUTHORIZED SERVICEPERSONNEL.
TO PREVENT ELECTRICAL SHOCK, THE 3D PRINTER SYSTEM WILL NOT OPERATE UNLESS
EXTERNAL PANELS ARE INSTALLED. VERIFY FACILITY’S ELECTRICAL SERVICE RATING BEFORE
CONNECTING POWER TO THE 3D PRINTER SYSTEM.
Ultraviolet (UV) Light
WARNING: HAZARDOUS UV RADIATION EXISTS INSIDE THE 3D PRINTER SYSTEM’S BUILD CHAMBER
DURING PRINT JOB. EYE INJURY OR BLINDNESS CAN RESULT IF THE CHAMBER DOOR IS OPENED
WHILE A PRINT JOB IS IN PROGRESS. IF PRINT JOB IS RUNNING, ABORT PRINT JOB BEFORE
ATTEMPTING TO OPEN CHAMBER DOOR. TO PREVENT EYE INJURY, ULTRAVIOLET (UV) LIGHT INSIDE
THE CHAMBER WILL NOT OPERATE WHEN CHAMBER DOOR IS OPEN. WHEN CLOSED, THE CHAMBER
DOOR KEEPS UV RADIATION FROM ESCAPING. THE CHAMBER DOOR REMAINS LOCKED IF PRINT
JOB IS PAUSED.
The UV lamps in the 3D printer system have the following specications:
Irradiance at UV Emitting Window: 2W/cm2
Emitting Window: 75x10mm, 110x10mm
Total UV Power: Up to 22W
Pure UV Output: 380-420nm
Build Material Safety
Users of the 3D printer system should be informed of potential hazards of buildmaterial prior to working
with a 3D printer system, or performing duties which may result in exposure to uncured buildmaterial, such
as removal and disposal of empty material bottles and waste bag.
Disposal
Disposal of fully cured buildmaterial produced by the 3D printer system is not subject to regulations of any
known agency worldwide.
Uncured buildmaterial waste is classied as regulated, and in some areas hazardous, and may require special
packaging, transportation, and disposal. Waste bags lled with VisiJet support and buildmaterials and the
material bottles may be disposed of according to your local codes. The disposal of partially cured or uncured
buildmaterial must comply with all local, state, and federal environmental safety regulations. Applicable
buildmaterial “waste” includes bottles (empty or full) and waste bags. Any cleaning materials used to clean up
spilled uncured buildmaterial should be disposed of in compliance with local, state, and federal environmental
safety regulations.
Do not contaminate drains, soil or surface waters with this material or its container. Reduce waste by
attempting to utilize product completely. Dispose of this container and its contents in accordance with all local,
state, and federal regulations. Do not reuse or rell.

8/11/22, 10:47 AM
User Guide
infocenter.3dsystems.com/projetmjp5600/print/book/export/html/706
5/119
Support Material, cured or uncured, is not hazardous.
To nd out facility disposal requirements, contact an approved waste disposal provider. Your local
environmental regulatory agency should have a list of qualied providers. You will need to give disposal
service provider a copy of the buildmaterial Global Health and Safety sheets, and possibly other forms
included in the Appendix of your VisiJet Post Processing Guide, such as Waste Prole Worksheet and SNUR
(Signicant New Use Regulation - U.S. only). A report will be provided, indicating disposal requirements, as
well as a quotation for regularly scheduled pickups. If assistance is needed locating a waste disposal
provider, or completing a waste disposal form, contact 3D Systems Technical Support Hot line.
3D Systems assumes no liability or responsibility for proper disposal of uncured buildmaterial. Proper
disposal of uncured material is the sole responsibility of the user.
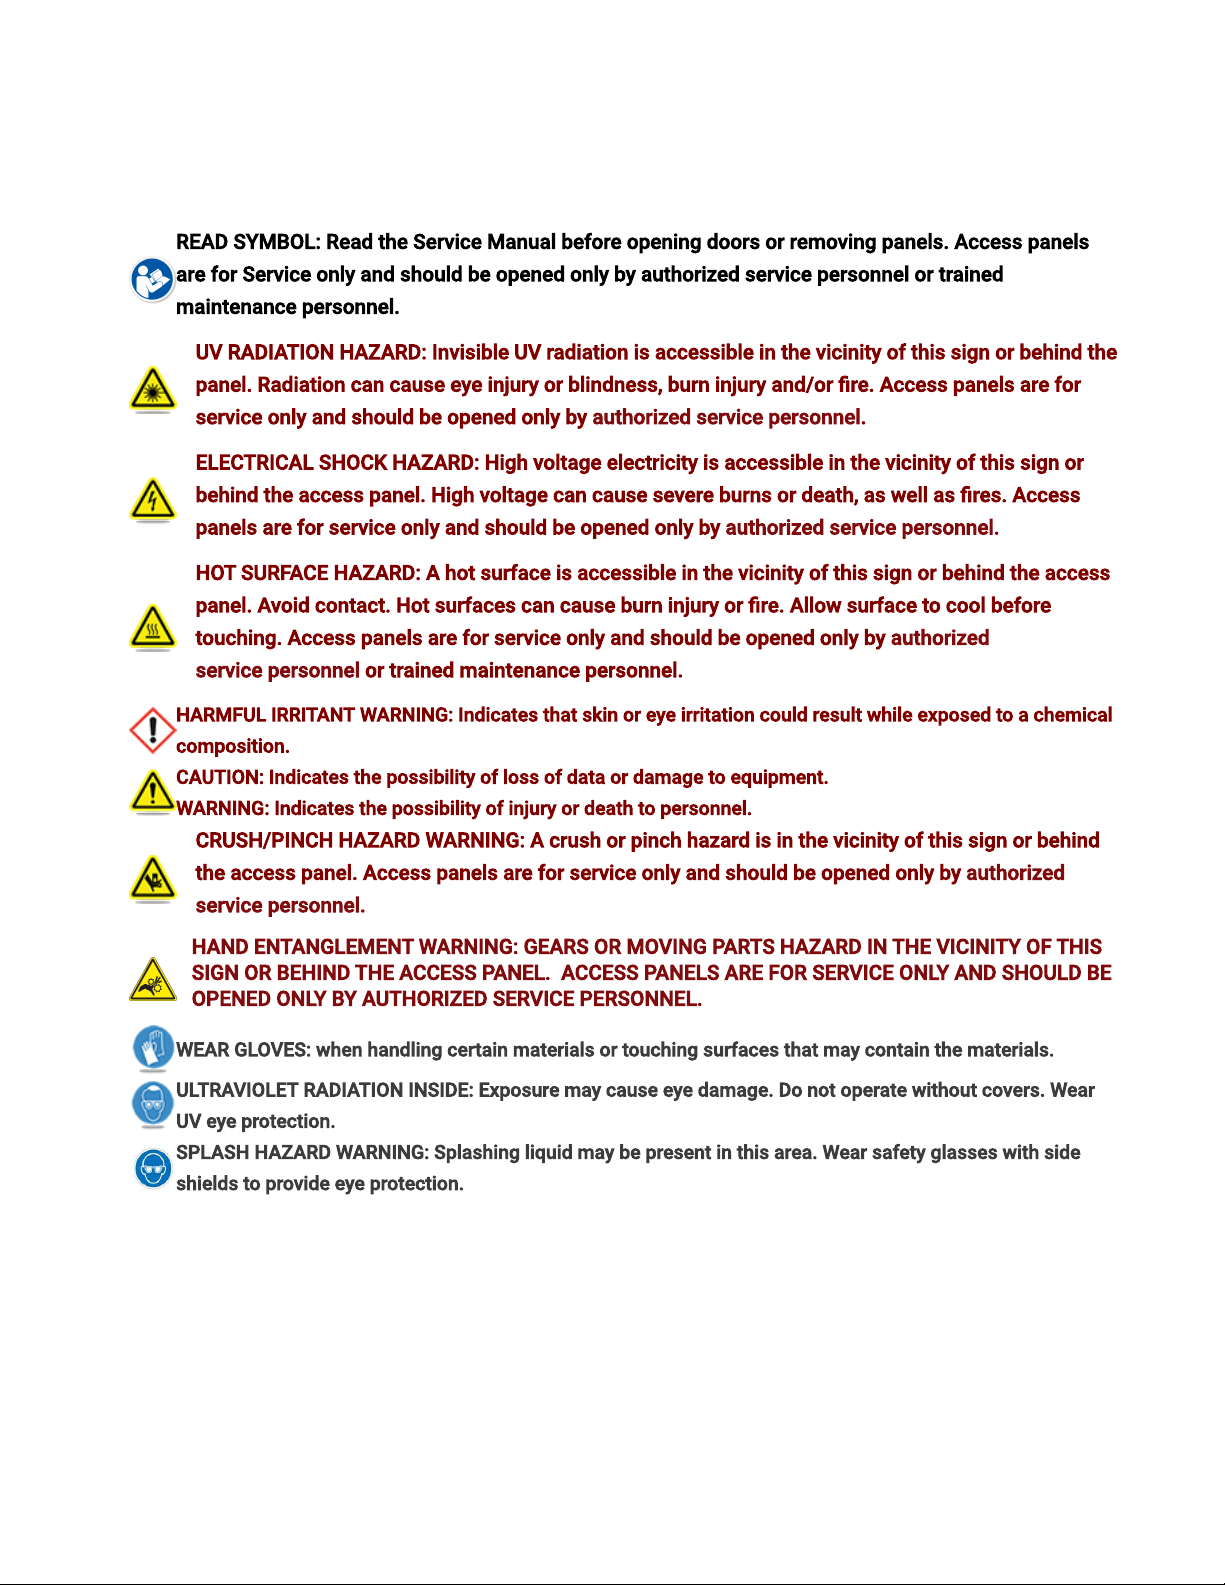
Health Hazard / Irritant
Caution: UncuredVisiJet build material is a sensitizer. Skin or eye irritation could occur when exposed to the
chemical composition of the material. Any chemical may exert harmful effects if it contacts or enters the
body. VisiJet build material is a sensitizer and irritant.
Skin Sensitization: Uncured VisiJet buildmaterial is a sensitizer. Skin or eye irritation could occur when
exposed to the chemical composition of the material
Uncured material is a sensitizer and can cause allergic reactions if it contacts skin without protective gloves and
sleeves. To avoid sensitization, do not allow uncured material to contact skin. Consult the GHS sheets for
specic information about the sensitization potential.
Once sensitized, a severe allergic reaction may occur when subsequently exposed to very low levels.
Ingestion:UncuredVisiJet buildmaterial is toxic if ingested.
Uncured material is toxic if ingested. Uncured material must not be present where food and drink are stored,
prepared, or consumed and must not be ingested. After handling materials, wash hands with soap and cold
water before consuming or preparing food.
Inhalation: Under normal operation, inhalation is not an expected route of entry.
Contact With Uncured Material: Employees should be alerted to clean and rinse off any contacted surface
promptly in order to prevent further contamination. Ensure a convenient washroom location is provided with
access to soap, water, and disposable paper towels.
Handling Finished Parts: Finished (cured) parts can be handled or disposed of the same as standard
household plastic products. VisiJet parts are not recyclable. VisiJet materials are not intended for, and
cannot be used for medical implant or food or drink handling applications.
Exposure Control: The 3D printer system has a variety of built-in engineering controls which are designed to
prevent operator exposure. Do not try to change or disable these controls.
Appropriate hygienic practices should be followed, including washing with soap and cold water before
meals, breaks, smoking, applying cosmetics, using toilet facilities, and after work.
Material Handling

8/11/22, 10:47 AM
User Guide
infocenter.3dsystems.com/projetmjp5600/print/book/export/html/706
6/119
Emergency
Chemtrec USA (800) 424-9300; Europe +1-703-527-3887
Packaging Inspection: VisiJet materials are supplied in bottles. These bottles are packaged with cardboard
packing material inside the shipping carton. Upon receipt of material shipments, inspect cardboard carton
exterior for signs of damage and leakage. If leakage is observed, DO NOT open carton, contact 3D Systems
Field Service Engineer or 3D Systems authorized servicepersonnel. If no leakage is observed, store shipping
carton until material is used.
Building: If uncured material is observed on the part or platform after build, this is an abnormal condition,
and is an indication the 3D printer system requires servicing by 3D Systems or an authorized servicing
reseller. Assume any liquid or paste-like material is buildmaterial. Do not directly touch uncured
buildmaterial without protective gloves and protective sleeves. Discontinue use of the 3D printer system,
pending service by a 3D Systems Technical Support Representative or your servicing reseller.
Flammability and Combustibility: Do not expose materials to heat at or above 230°F (110°C), ames,
sparks, or any source of ignition. (Though the U.S. Department of Transportation does not consider VisiJet
materials a “ammability hazard,” they do classify them “combustible” based on ash points.) For more
information on VisiJet material ash points and combustibility, see the VisiJet Post Processing Guide.
Personal ProtectiveEquipment
Skin Protection: Performing some procedures in this manual will expose the user to uncured build
material. To prevent contact, wear a chemically resistant apron or lab coat, protective sleeves (Tyvex) and
chemically resistant protective gloves. Nitrile gloves are recommended. Do not use Latex gloves.
For some procedures, heat resistant gloves are required. Where a “heat resistant glove” is referenced, 3D
Systems recommends wearing a thermal liner with a nitrile glove worn over the liner. The thermal liner must
be capable of withstanding temperatures up to 90 degrees C.
Eye protection: In the event of a leak or spill of uncured buildmaterial, wear safety glasses with side shields
to provide eye protection.
Respiratory protection: Because of the 3D printer system’s built in engineering controls, respiratory
protection is not necessary during normal operation. A NIOSH-approved (or equivalent) dust mask is
recommended when dry sanding cured material parts.
First Aid Measures
General Information: Ensure that eyewash stations and safety showers are close to the workstation
location.
In case of inhalation: May cause respiratory irritation. Move affected person to fresh air. If respiratory
irritation occurs or if breathing becomes dicult, seek medical attention immediately.
In case of skin contact: May cause irritation or sensitization by skin contact , including redness and/or
swelling. Immediately ush skin with plenty of cold water. After the area has been thoroughly rinsed, use
soap and cold water to cleanse the area. Remove contaminated clothing and shoes. Get medical attention
if symptoms occur. Wash clothing before reuse.

8/11/22, 10:47 AM
User Guide
infocenter.3dsystems.com/projetmjp5600/print/book/export/html/706
7/119
In case of eye contact: Irritating to eyes. Causes redness, swelling and pain. Immediately ush eyes with
plenty of water for at least 15 minutes. Remove contact lenses immediately. Get medical attention if
symptoms persist.
In case of ingestion: Irritating to mouth, throat and stomach. If ingested, drink plenty of water and seek
immediate medical attention. Do not induce vomiting.
Self-protection of the rst aider: Put on appropriate protective equipment (see section 7). Move exposed
person to fresh air. Remove contaminated clothing and shoes.
Ecological Information
Ecotoxicity: The aquatic toxicity of the product is unknown; however based on components, it is predicted
that uncured buildmaterial may be harmful to aquatic organisms or cause long-term adverse effects in the
aquatic environment. Prevent contamination of soil, drains and surface waters.
Regulatory Information
VisiJet support material has no known regulatory requirements.
In the U.S., uncured material is subject to special EPA disposal regulations and record-keeping
requirements. “Uncured VisiJet material” includes any buildmaterial bottles (empty or full) and waste bag,
and about half of the material in a waste bag is uncured buildmaterial. For complete disposal regulation
details, see thePost Processing Guide.
In the U.S., the following disposal records must be kept for ve years after the date of disposal:
The quantity of buildmaterial received (new or “virgin”).
The name and address of the shipping location (the “responsible party” - generally your waste disposal service
provider).
The quantity of buildmaterial shipped (disposed). For further information, see the Post Processing Guide.
For assistance, contact 3D Systems Technical Support.
Spilled VisiJet Material
Spills of material are highly unlikely and should NOT occur in normal operation of the 3D printer system.
The rst priority is to protect users from inadvertently touching material. Spills of support material can be
cleaned without use of protective gear, and disposed of as oce trash. Handling uncured buildmaterial
requires use of gloves, protective sleeves and other personal protective equipment to ensure no direct
contact with uncured buildmaterial. If you don’t know which material it is, assume it to be uncured
buildmaterial, and handle accordingly with the recommended personal protective equipment.
Promptly clean up spilled material, dispose of clean up materials and waste material per local regulatory
requirements. Discontinue use of the 3D printer system, and contact 3D Systems Technical Support for a
service visit to determine and repair the source of leakage.
Small spills of uncured liquid buildmaterial can be cleaned up using disposable towels, non-reusable rags,
or absorbing materials such as sawdust, clay, diatomaceous earth, or activated charcoal. If spilled material
is hot (liquid), wait until cools and gels before wiping up. After wiping up the spill, wipe surface with
denatured or isopropyl alcohol and clean thoroughly with soap and water.

8/11/22, 10:47 AM
User Guide
infocenter.3dsystems.com/projetmjp5600/print/book/export/html/706
8/119
Advise the service provider involved of the spilled material, and provide other material information prior to
contact with the material. Advise them of disposal requirements for buildmaterial and clean-up products if
buildmaterial (uncured) is the spilled material.
Tools contaminated with buildmaterial should be cleaned prior to reuse. Solvents such as denatured
alcohol or Isopropyl Alcohol (IPA), are normally required to clean equipment and tools. Wash with soap and
water to remove any traces of excess buildmaterial or solvent. Contact solvent suppliers for information on
proper handling of solvents if used for clean-up.
Waste Removal
WARNING: UNCURED BUILDMATERIAL IS A SENSITIZER. SKIN OR EYE IRRITATION COULD OCCUR
WHEN EXPOSED TO THE CHEMICAL COMPOSITION OF THE MATERIAL.
Wear protective gloves and protective sleeves before removing any waste product from the 3D printer
system. Be careful not to spill, drop, or expose others to these materials - particularly buildmaterial bottles
or waste bag. Dispose of all waste material appropriately per local regulatory requirements. Please refer to
the Safety Data Sheetsfor information regardingmaterial safety and handling.
Open waste drawer.
Remove the waste bag from the waste bag holder by lifting the waste bag straight up and out of the waste
drawer.
Seal bag and dispose according to your local regulatory guidelines.
Replace new waste bag by reversing the previous process. Close waste drawer after waste bag is installed.
Material handling and Storage
VisiJet®S500- Support Material VisiJet® CR-CL, CE-NT, CR-WT, CE-BK, CR-BK -
Build Material
Shelf life 5 yr. Shelf life 2 yr.
Climate Cool, dry area with adequate
ventilation
Climate Cool, dry area with adequate
ventilation
Storage Class N/A Storage Class
10
Environmentally hazardous
liquids
Storage
Temperature
Below 95°F (35°C) Storage
Temperature
Below 95°F (35°C)
Environmental
Conditions
No direct sunlight, heat,
ames, or UV energy.
Environmental
Conditions
No direct sunlight, heat,
ames, or UV energy.
NOTE: For optimal results, keep stored cartons closed, and do not open until bottle is ready for use.

8/11/22, 10:47 AM
User Guide
infocenter.3dsystems.com/projetmjp5600/print/book/export/html/706
9/119
Always check bottle’s expiration date before loading. Do not load bottles into 3D printer system if they are
about to expire. When 3D printer system detects an expired bottle, it aborts the build and rejects the bottle if
the expiration date has expired for support material or more than one year past the expiration date for
buildmaterial.
NOTE: When storing material bottles that have been used but still have materials in them, do not place
the bottles on their side; stand bottles in the upright position. Also, in the case where used bottles with
materials are removed from the MDM and are still warm, it must be stored with the cap vented. If the
warm bottle is not vented, the wax will contract during cooling and the bottle’s bottom may become at
which will prevent re-engagement in the MDM. See “Material Delivery Modules (MDM) and Material
Bottles” on page 25 for a description of the MDM.
Support material bottles must be loaded in the left side material delivery module. The buildmaterial bottles must be loaded
in the right material delivery module. Before loading material bottles into the 3D printer system, inspect bottles for signs of
damage or leakage. Do not load a damaged or leaking bottle. Dispose of them according to local regulations.

8/11/22, 10:47 AM
User Guide
infocenter.3dsystems.com/projetmjp5600/print/book/export/html/706
10/119
ProJet® MJP 5600 PRINTER FEATURES
Build Modes
The ProJet® MJP 56003D Professional System features fourbuild modes and improved print speed to
deliver high delity prototypes for a variety of applications. The build area in all modes is 518 x 381 x
299mm, (20.4 x 15 x 11.8 inches), (x,y,z).
UHD, Ultra High Denition Mode – Allows the user to build very high resolution parts with exceptional
surface nish and superior accuracy. UHD mode prints at 16 micron layer thickness.
UHDS, Ultra High Denition Mode (Single Material) – Allows user to print very high resolution parts with
exceptional surface nish, superior accuracy and higher throughput (print speed). UHDS mode will print the
entire build in one of the base materials loaded on the printer. The user can select which material to run in
this single material mode. UHDS mode prints at 16 micron layer thickness.
XHD, Extreme High Denition Mode - Allows the user to build at the very highest resolution and surface
quality. XHD mode prints at 13 micron layer thickness.
XHDS, Extreme High Denition Mode (Single Material) – Allows the user to build at the very highest
resolution and surface quality and higher throughput (print speed). XHDS mode will print the entire build in
one of the base materials loaded on the printer. The user can select which material to run in this single
material mode. XHDS mode prints at 13 micron layer thickness.
Part Stacking and Nesting
Stacking: The user can utilize the entire build area by stacking parts vertically in the z-direction to ll up the
entire build envelop with parts. The user can control the space between layers to minimize support material
usage and build time. Hours can be saved by stacking parts and submitting single, long builds overnight and
weekends.
Nesting capability allows parts to be placed within the boundaries of one another but not overlapping the
part structure itself.
Simultaneously use Two Materials for Part Building
The ProJet® MJP 5600 provides the simultaneous use of two build materials along with a support material.
The 3D printer system has a total of four material delivery modules, (MDM). Each MDM holds two bottles of
material. This provides for a total of four bottles of support material and four bottles of buildmaterial.
Support material is loaded into both MDMs located on the left side of the machine, for a total of four
bottles.
Build material is loaded into the MDMs located on the right side of the machine. The upper MDM is
designated MDM “A” and the lower MDM is designated MDM “B”. Two bottles of buildmaterial A are placed
into MDM “A” and two bottles of part material B are placed into MDM “B”.
The following buildmaterials are available for the ProJet® MJP 5600:
VisiJet® CR-CL, Rigid Clear Build Material
VisiJet® CR-BK, RigidBlack Build Material
VisiJet® CR-WT, Rigid White ABS-like Build Material
VisiJet® CE-NT, Elastomeric Natural Build Material

8/11/22, 10:47 AM
User Guide
infocenter.3dsystems.com/projetmjp5600/print/book/export/html/706
11/119
VisiJet® CE-BK, Elastomeric Black Build Material
VisiJet® CR-CL 200Rigid Clear Build Material
VisiJet® CR-WT 200Rigid White ABS-like Build Material
The following supportmaterials are available for the ProJet® MJP 5600:
VisiJet® S500.
NOTE: For more detailed information regarding ProJet 5600 material characteristics please click here.

8/11/22, 10:47 AM
User Guide
infocenter.3dsystems.com/projetmjp5600/print/book/export/html/706
12/119
AT A GLANCE
The ProJet® MJP 5600Printer
The ProJet® MJP 5600is a multi-jet 3D printing system. The solid imaging 3D printer system produces
plastic prototype parts from 3D solid Computer-Aided Design (CAD) models. File types include: .stl, .ctl, .obj,
.ply, .zpr, .zbd, .amf, .wrl, .3ds, .fbx, .mjpddd, .bdz, .iges, .igs, .step, .stp and.slc, The primary components are
the touchscreen, build chamber, material delivery modules (MDMs), and waste drawers.
The three dimensional solid parts built by the 3D printer system consist of one support material and one (or
two) part materials. The support material is a wax based material providing adhesion to the print platform,
as well as, providing supports for the part material to build the model.
The part material used to build parts is an ultraviolet (UV) curable material. After a layer of material is
deposited in the build chamber, the part is exposed to a UV ash lamp. The UV energy is absorbed by the
material converting the liquid build material to a solid polymer. When the build is complete the partis
adhered to the print platform by means of the support material.
Touchscreen Control Panel
The ProJet® MJP 5600touchscreen control panel provides a graphical user interface (GUI) for the user.
With the exception of submitting print jobs, the touchscreen control panel provides full control of the 3D
printer system including:
Set up
Selecting, starting, pausing and aborting print jobs
Diagnostics
Test prints and demo prints
The full functionality of the 10" touchscreen control panel is described later in this chapter.

8/11/22, 10:47 AM
User Guide
infocenter.3dsystems.com/projetmjp5600/print/book/export/html/706
13/119
Material Delivery Modules (MDM) and Waste Drawers
The 3D printer system has a total of four material delivery modules (MDM), shown open in the gure below.
There are two MDMs for support material (left side) and two MDMs for part material (right side).
EachMDM holds two bottles of material. This provides for a total of four bottles of support material and
four bottles of buildmaterial.
The support material is delivered in 1.75 kg. plastic bottles and the part material is delivered in 2 kg. plastic
bottles. The bottles are placed in the machine’sMDM.The ProJet® MJP 5600allows for the simultaneous
use of two different part materials.

8/11/22, 10:47 AM
User Guide
infocenter.3dsystems.com/projetmjp5600/print/book/export/html/706
14/119
The ProJet® MJP 5600has two waste drawers, (left and right). The waste drawers are located adjacent to
the upper MDMs and can be accessed by opening the MDM. The right waste drawer collects waste from
the waste tank and the left waste drawer (not shown), collects waste from the Head Maintenance Station,
(HMS).
Build Chamber
The gure below shows the ProJet® MJP 5600with the build chamber door open. The user will access the
build chamber to install a print platform before each build and to remove the completed parts at the
completion of a build. The build chamber door is equipped with an interlock which prevents the user from
accessing the build chamber during a build. This prevents the user from access to moving parts and
protects the user from exposure to the UV curing lamps.

8/11/22, 10:47 AM
User Guide
infocenter.3dsystems.com/projetmjp5600/print/book/export/html/706
15/119
3D SPRINT
3D SPRINT is a client workstation software package that is used to manipulate the .stl, .ctl, .obj etc.les
that are subsequently sent to the ProJet® MJP 5600as print jobs. Print jobs cannot be submitted
locally(at the 3D printer system itself), and must be submitted through 3D SPRINT.

8/11/22, 10:47 AM
User Guide
infocenter.3dsystems.com/projetmjp5600/print/book/export/html/706
16/119
Touchscreen Control Panel
Throughout this document, the touchscreen control panel will be referred to as the “touchscreen”.
The top portion of the touchscreen displays the printer name, the 3D printer system type, software version
and print time remaining.Depending on the tool selected, the toolbar section of the touchscreen will display
various screens in relation to the selected tool. The tool buttons allow the user to perform various tasks and
provides printing information during the printing process.

8/11/22, 10:47 AM
User Guide
infocenter.3dsystems.com/projetmjp5600/print/book/export/html/706
17/119
INDICATION & NAVIGATION ICONS
Warm up Select this icon when the machine is in a Standby or
Conserve state. This will begin warming the machine.

8/11/22, 10:47 AM
User Guide
infocenter.3dsystems.com/projetmjp5600/print/book/export/html/706
18/119
DeleteSelect a print job and press this key to delete the print job
from the print queue.
Copy Select a print job and press this key to duplicate the print
job.
The duplicate will appear in the print queue.
Move to Top Select a print job and press this key to move the print
job to the rst position in the print queue.
Move Up Select a print job and press this key to move the print
job
“up” one position in the print queue.
Move Down Select a print job and press this key to move the print
job “down” one position in the print queue.
Back ArrowReturns you back to the previous window
Navigates to another table or screen
Queue Displays the print les waiting to be printed
History Displays the print history of the machine
The touchscreen also provides a pop-up keypad for entering any required data. For example, the network
screen requires data to be entered for each eld, (3D printer system Name, IP Address, etc.).

8/11/22, 10:47 AM
User Guide
infocenter.3dsystems.com/projetmjp5600/print/book/export/html/706
19/119

8/11/22, 10:47 AM
User Guide
infocenter.3dsystems.com/projetmjp5600/print/book/export/html/706
20/119
To enter the name, press the data eld adjacent to Printer Name. The keypad is displayed. Enter the text
needed and press the Enter key.
To enter the IP Address, press the data eld adjacent to “IP Address”. The keypad is displayed. Press the
123 key to enter numeric data. When the eld is complete, press the Enter key.
STATUS SCREEN
Other manuals for MJP 5600
3
Table of contents
Other ProJet 3D Printer manuals

ProJet
ProJet MJP 5600 User manual

ProJet
ProJet 3-D Modelers User manual

ProJet
ProJet MJP 2500 User manual

ProJet
ProJet HD3000 User manual

ProJet
ProJet 1000 User manual

ProJet
ProJet 160 Guide

ProJet
ProJet MJP 5600 Installation manual

ProJet
ProJet 60 Series User manual

ProJet
ProJet MJP 5600 User manual

ProJet
ProJet MJP 2500 User manual