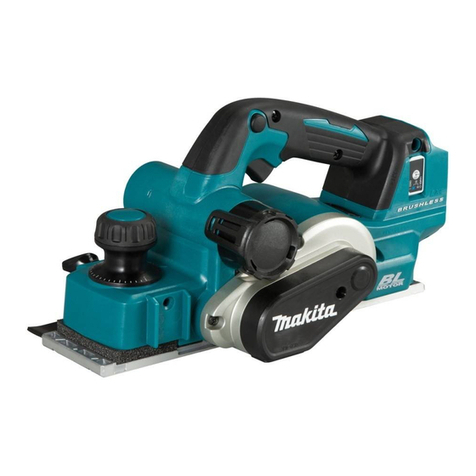
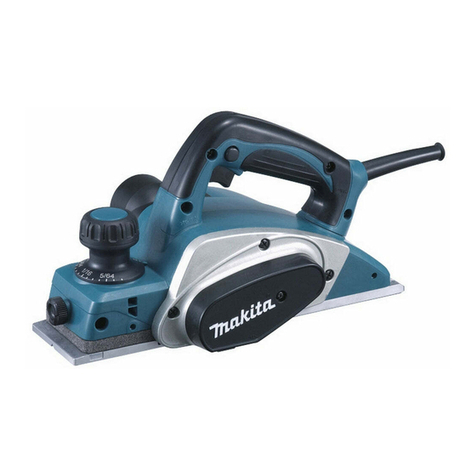
Makita BKP180Z Manual

PRODUCT
Standard equipment
Optional accessories
Note: The standard equipment for the tool shown above may vary by country.
Model No.
Description
CONCEPT AND MAIN APPLICATIONS
BKP180 (LXPK01)*1
18V Cordless Planer 82mm (3-1/4")
Model BKP180 is a 18V 82mm Cordless Planer developed
with the same advantages of our AC power planer Model KP0800.
Battery BL1815 is not compatible with this model.
BKP180 is available in the following variations.
BKP180RF
DC18RA
DC18RA
Model No. Quantity
Charger
1
2
Battery Battery
cover
Planer blade (re-sharpenable type) or T.C.T. Mini planer blade (disposable type) ....... 1
Sharpening holder assembly (for countries using re-sharpenable type Planer blade) ... 1
Dressing stone (for countries using re-sharpenable type Planer blade) ......................... 1
Blade gauge assembly .................................................................................................... 1
Socket wrench 9 ............................................................................................................. 1
Guide rule ....................................................................................................................... 1
Dust nozzle ..................................................................................................................... 1
Plastic carrying case [except for BKP180Z (LXPK01Z)*1] .......................................... 1
Planer blade (re-sharpenable type, disposable type)
Guide rule
Blade gauge assembly
Dust nozzle
Dressing stone
Elbow
Fast charger DC18RA
Charger DC18SD
Automotive charger DC18SE
Charger DC24SC
Li-ion battery BL1830
Dust bag
Specification
14,000
Yes
3.4 (7.4)
No load speed: rpm= min.-1
Battery BL1830
Capacities: mm (")
Electric brake
Cell
Voltage: V
Capacity: Ah
Li-ion
18
BKP180
(LXPK01)*1
3.0
Model
Specifications
P 1/ 10
Type
No No No
1
No
NoBL1830
BL1830
Planing width
Planing depth
Shiplapping
82 (3-1/4)
2.0 (5/64)
9 (11/32)
Weight according to
EPTA-Procedure 01/2003*2:kg (lbs)
Dimensions: mm (")
Width (W)
Height (H)
Length (L) 333 (13-1/8)
157 (6-3/16)
160 (6-5/16)
BKP180Z (LXPK01Z)*1
BKP180RFE (LXPK01)*1
*1: Model no. for North and Central American countries
*2: with Battery BL1830, Planer blade 82 and Dust nozzle
TECHNICAL INFORMATION
H
W
L

P 2/ 10
Repair
CAUTION: Repair the machine in accordance with “Instruction manual” or “Safety instructions”.
[1] NECESSARY REPAIRING TOOLS
[2] LUBRICATIONS
Fig. 1
Code No. Description Use for
1R004 Retaining ring pliers ST-2 removing / assembling Retaining Ring S-8
1R291 Retaining ring S & R pliers
1R269 Baring extractor (small) removing Ball bearings
1R263 Baring extractor removing Knob cover
Item No. Description Lubricant
VG100 a little
AmountPortion to lubricate
Knob cover
Knob
Main Frame
Rubber packing
24
24 Front base
17
Makita grease N No.217 Cam plate
(b) Cylindrical portion where Main frame contacts
(a) Threaded portion
Surface where Knob contacts
Apply the following lubricants to protect parts and product from unusual abrasion.
(b)
(a)

P 3/ 10
Repair
[3] DISASSEMBLY/ASSEMBLY
[3]-1. Poly V-Belt 4-241
DISASSEMBLING
Bracket
Poly V-belt 4-241
Note: When replacing Armature, Drum and
V-pulleys and reuse Poly V-belt 4-241,
lever up Poly V-belt 4-241 with Slotted
screwdriver while turning V-pulley 4-33.5.
Poly V-belt 4-241
2. Cut Poly V-belt 4-241 with Nippers
when it has damage.
1. Remove M4x16 Pan head screw
and separate Belt cover from
Main frame complete.
Fig. 2
M4x16
Pan head screw
Belt cover
Disassemble Poly V-belt 4-241. (Fig. 2)
Assemble Poly V-belt 4-241. (Figs. 3 and 4)
ASSEMBLING
Fig. 3 Fig. 4
V-pulley 4-24L
on Motor side
1. Hook Poly V-belt 4-241
with V-pulley 4-24L.
3. Turn V-pulleys 4-24L and 4-33.5 counterclockwise
by hands to fit Poly V-belt 4-241 to V-pulleys
while holding Poly V-belt firmly.
2. Hook a part of Poly V-belt
4-241 with V-pulley 4-33.5.
If it is difficult to completely fit Poly
V-belt to V-pulleys, continue turning
V-pulleys until all the grooves are
engaged with the projections of Poly
V-belt.
V-pulley 4-33.5
on Drum side
Projections on Poly V-belt 4-241
Two positions of
Poly V-belt 4-241
Grooves on V-pulleys

P 4/ 10
Repair
[3] DISASSEMBLY/ASSEMBLY
[3]-2. Motor section
DISASSEMBLING
(1) Remove Poly V-belt 4-241. (Refer to Fig. 2)
(2) Separate Bracket section from Main frame complete. (Fig. 5)
Fig. 5
Fig. 6
1. Remove Carbon brushes. 2. Remove four 4x18 Tapping screws. 3. Remove Bracket by tapping Main frame
complete with Plastic hammer. Armature
and Drum complete come with Bracket.
Carbon brush
Carbon brush
Main frame
complete
4x18 Tapping screw
(4 pcs.)
5. Hold Armature by gloved hand,
engage 12.7mm Square side to
Square portion of V-pulley 4-24L
and Remove V-pulley by turning
clockwise.
6. Remove Armature from Bracket
by tapping Armature shaft with
Plastic hammer.
7. Remove Ball bearings
of both side of Armature
with 1R269.
Impact
driver
Phillips bit Bit adapter
(P/N:A-33750 or P/N:134873-0)
4. Set Phillips bit and Bit adapter
(P/N:A-33750 or P/N:134873-0)
to Impact driver for removing
V-pulley. 12.7mm
Square side
V-pulley 4-24L
Armature
(3) Disassemble Armature from Bracket. And remove Ball bearings. (Fig. 6)
Armature
Bracket
Ball bearings
Caution: Do not pinch your finger in this step.
Armature tends to be strongly pulled
back into Main frame complete due to
the strong magnet force toward Yoke unit.

P 5/ 10
Repair
[3] DISASSEMBLY/ASSEMBLY
[3]-2. Motor section (cont.)
DISASSEMBLING
(4) Remove Yoke unit. (Fig. 7)
Fig. 7
Fig. 8
8. Remove Baffle plate. 9. Remove Yoke unit by tapping Main frame
complete with Plastic hammer.
While aligning Notch of Bracket side to Pilot Rib, insert Yoke unit into Mainframe
complete to fit Notch of Commutator side to the accepting Rib which is molded in
Main frame complete on the Commutator side.
(2) Assemble Armature to Bracket, and set V-pulley 4-24L to Armature by taking the disassembling
step in reverse. (Refer to Fig. 6)
Note in Assembling:
1. Tighten V-pulley 4-24L to Armature shaft by turning it counterclockwise.
2. It is not necessary to tighten V-pulley 4-24L to very high torque.
Reaction torque caused by stopping the rotation prevents V-pulley 4-24L from being loose.
(3) further assemble by taking the disassembling step in reverse. (Refer to Figs. 5, 3 and 2)
ASSEMBLING
Baffle plate Yoke unit
Notch of
Bracket side
Notch of
Commutator side
Pilot Rib
(1) Assemble Yoke unit to Main frame complete. (Fig. 8)
Main frame
complete

P 6/ 10
Repair
[3] DISASSEMBLY/ASSEMBLY
[3]-3. Drum
DISASSEMBLING
Fig. 9
(1) Disassemble Bracket (with Armature, Drum). (Refer to Figs. 2 and 5)
(2) Set Phillips bit and Bit adapter to Impact driver in order to remove V-pulley 4-33.5. (Refer to Fig. 6)
(3) Disassemble Drum from Bracket. And remove Ball bearing 6000DDW. (Fig. 9)
V-pulley 4-33.5
Drum
Note in Disassemble: When holding Drum,
cover it with cloth, or grip it with gloved hand.
2. Remove Drum from Bracket
by tapping Drum shaft with
Plastic hammer.
3. Remove Ball bearing 6000DDW
(V-pulley side) with 1R269.
Bit adapter
Drum
Ball bearing
6000DDW
1R269
Fig. 10
ASSEMBLING
1. Hold Drum by hand, engage Bit adapter
to Square portion of V-pulley 4-33.5
and Remove V-pulley by turning it
counterclockwise.
4. The clearance between Ball bearing 608ZZ
and Drum is too small to insert the jaws of
1R269. Therefore, sharpen the jaws.
Ball bearing
608ZZ
Drum
5. Insert the jaws of 1R269 into the clearance between
Ball bearing 608ZZ and Drum, and fix the jaws of
1R269 in Vise.
And then, remove Ball bearing 608ZZ from Drum.
Ball bearing 608ZZ
(4) Remove Ball bearing 608ZZ with 1R269. (Fig. 10)
Take the disassembling step in reverse. (Refer to Figs. 10, 9and 5)
Note in Assembling
1. Tighten V-pulley 4-33.5 to Drum shaft by turning it clockwise.
2. It is not necessary to tighten V-pulley 4-33.5 to very high torque.
Reaction torque caused by stopping the rotation prevents V-pulley 4-33.5 from being loose.

P 7/ 10
Repair
[3] DISASSEMBLY/ASSEMBLY
[3]-4. Front Base, Base, Foot
DISASSEMBLING
Fig. 11
Disassemble Front base and Base (rear side). (Fig. 11)
1. Remove Knob cover by levering up
with 1R263 inserted into the gap
between Knob cover and Knob.
4. Front base can be removed.
2. Remove Retaining ring S-8
with 1R004 or 1R291.
3. Use Knob cover as a socket wrench
temporarily for removing M10 Hex nut.
Turn Knob cover counterclockwise
while holding Knob by hand.
M10 Hex nut can be removed from
the thread of Front base.
5. Remove Base (rear) by unscrewing four 4x18
Tapping screws.
6. Foot can be removed in
separating Base from
Main frame complete.
Knob cover Retaining Ring S-8
M10 Hex nut
Knob
1R263 1R263
M10 Hex nut
Knob cover
Knob
Front base
Rubber packing
Compression
spring 18
Foot
4x18 Tapping screw (4pcs.)
M10 Hex nut
Thread portion
of Front base
Knob
Knob cover
Foot
Base (rear)
Base (rear)

P 8/ 10
Repair
[3] DISASSEMBLY/ASSEMBLY
[3]-4. Front Base, Base, Foot (cont.)
ASSEMBLING
Fig. 12
(1) Assemble Foot to Base (rear) before assembling Base to Main frame. (Fig. 12)
Assemble Base with Foot to Main frame by taking the disassembling step in reverse. (Refer to Fig. 11)
(2) Assemble Font base to Main frame. Then adjust the planing depth to zero. (Fig. 13)
Fig. 13
3. Assemble Front base to pass
its Threaded pole through
Main frame and Knob.
7. Assemble Retaining ring S-8 to Threaded pole
of Front base.
And install Knob cover by pressing to Knob.
4. Set M10 Hex nut to Threaded
pole of Front base. And engage
Knob cover with M10 Hex nut.
5. Turn Knob cover clockwise until
the surfaces of Front base and
Base contact the rule completely.
Planing depth will be set at the
zero level by the above adjustment.
Base
Base
1. Pass Long pin of Foot through
Torsion spring 7.
2. Facing Torsion spring 7 side to the opposite side of Belt cover side,
assemble Foot to Base (rear) with putting Torsion spring’s tail
on the Base.
Foot
Torsion spring 7
Long pin
of Foot
Belt cover side
Belt cover side
Torsion spring 7
Hook this tail
with Base.
Front base
Knob
M10
Hex nut
Rubber packing
Compression
spring 18
Knob cover
Front base
Main
frame
Threaded pole
Threaded pole
Knob cover
Retaining
ring S-8
6. While holding M10 Hex nut on Threaded pole of
Main frame with Knob cover functioning as Socket
wrench temporarily, align the indication "0" on Knob
to the triangle mark on Main frame.
And them, remove Knob cover.
Knob cover
Triangle
mark
0Knob
Knob cover
Foot

Circuit diagram
Wiring diagram
P 9/ 10
White
Yellow
Color index of lead wires' sheath
Black
Red
Base
Base
Brush holder A
2. Pass Brush holder's lead wires through the opening of
Motor housing. Pass their lead wires through Line filter
if it is used.
3. Place Line filter into Motor housing if Line filter is used.
And tightening Brush holder's Lead wires, put them
into Lead wire holders.
Motor housing viewed
from Rear cover side
Motor housing, viewed
from Bracket side
Brush holder A
*Line filter
Motor
Housing
Controller
Terminal
AS Switch
Wiring of Brush Holder's Lead Wire
1. Tightening Brush Holder's Lead Wires
and put them in Lead wire holders.
And guide them to inside of Motor
housing through the opening.
Brush holder B
Brush holder B
Opening
Fig. D-1
Fig. D-2
Lead wire holders
Line filter
Line filter
Opening
Lead wire
holders
*Line filter is not used for some countries.

Wiring diagram
P 10/ 10
Fig. D-4
Fig. D-3
Wiring to Terminal
Wire connecting
portions
The Flag connectors have to be connected so that
their wire connecting portions are located over
the mark of + - poles.
Rib
*Line Filter
Pass Lead wires between these Ribs.
Controller
Terminal
Switch
Wiring in Main frame
Put Lead wires into
Lead wire holders.
Slack Lead wires for connecting to
Switch have to be put in this portion.
First, put Controller’s lead wires into Lead wire holder.
And then, put Field lead wires (red), (black) on Controller’s
lead wires when fixing them with this Lead wire holder.
Place Field lead wires in this Lead wire
holder, when setting *Line filter to Motor
housing.
*Line filter is not used for some countries.
This manual suits for next models
4
Table of contents
Other Makita Planer manuals

Makita
Makita DKP181 User manual

Makita
Makita DKP181 User manual

Makita
Makita KP0810 User manual

Makita
Makita 2012NB User manual

Makita
Makita M1901 User manual

Makita
Makita KP0810 User manual

Makita
Makita 1911B User manual

Makita
Makita DKP140 User manual

Makita
Makita 2012NB User manual

Makita
Makita 1923H User manual

Makita
Makita DKP181 User manual

Makita
Makita MT M1901 Manual

Makita
Makita N1923B User manual

Makita
Makita 1050D User manual

Makita
Makita BKP140 User manual

Makita
Makita HG 1100 User manual

Makita
Makita 1806B User manual

Makita
Makita 1051D User manual

Makita
Makita 1806B User manual

Makita
Makita 1050D User manual