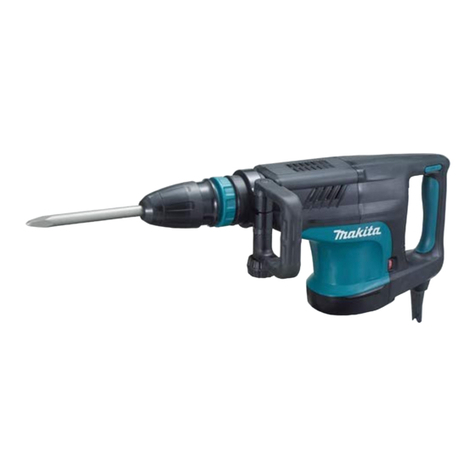
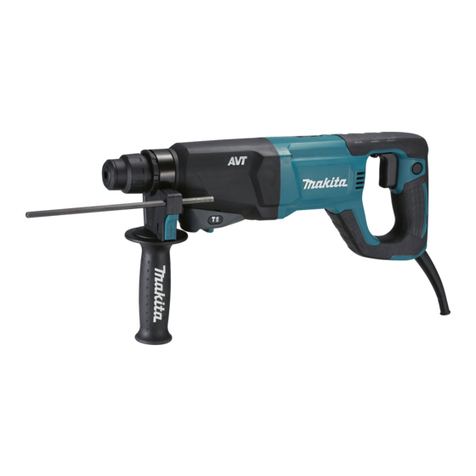
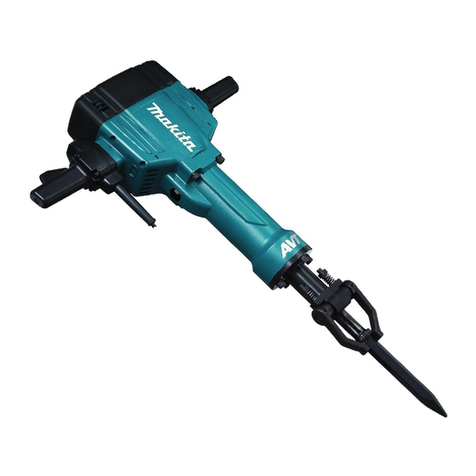
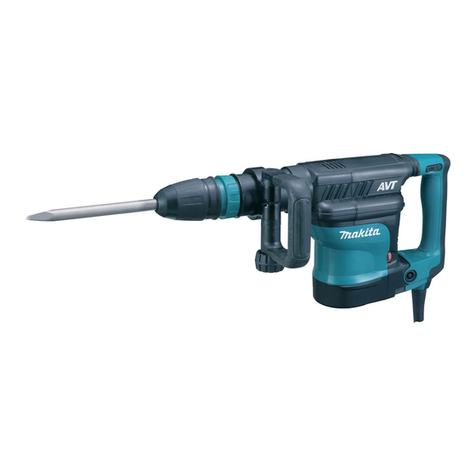
Makita HM002G User manual

INSTRUCTION MANUAL
MANUEL D'INSTRUCTION
MANUAL DE INSTRUCCIONES
Cordless Demolition Hammer
Marteau Piqueur sans l
Martillo de Demolición Inalámbrico
HM002G
IMPORTANT: Read Before Using.
IMPORTANT : Lire avant usage.
IMPORTANTE: Lea antes de usar.

2ENGLISH
ENGLISH (Original instructions)
SPECIFICATIONS
Model: HM002G
Blows per minute 950 - 1,900/min
Rated voltage D.C. 72 V - 80 V max
Overall length 574 mm (22-5/8")
Net weight 12.0 - 13.3 kg (26.5 - 29.3 lbs)
• Duetoourcontinuingprogramofresearchanddevelopment,thespecicationshereinaresubjecttochange
without notice.
• Specicationsmaydierfromcountrytocountry.
• Theweightmaydierdependingontheattachment(s),includingthebatterycartridge.Thelightestandheavi-
est combination, according to EPTA-Procedure 01/2014, are shown in the table.
Applicable battery cartridge and charger
Batterycartridge BL4025 / BL4040*
*:Recommendedbattery
Charger DC40RA
•
Someofthebatterycartridgesandchargerslistedabovemaynotbeavailabledependingonyourregionofresidence.
WARNING: Only use the battery cartridges and chargers listed above.Useofanyotherbatterycartridges
andchargersmaycauseinjuryand/orre.
SAFETY WARNINGS
General power tool safety warnings
WARNING: Read all safety warnings, instruc-
tions, illustrations and specications provided
with this power tool. Failure to follow all instructions
listedbelowmayresultinelectricshock,reand/or
seriousinjury.
Save all warnings and instruc-
tions for future reference.
Theterm"powertool"inthewarningsreferstoyour
mains-operated(corded)powertoolorbattery-operated
(cordless) power tool.
Work area safety
1. Keep work area clean and well lit. Cluttered or
dark areas invite accidents.
2. Do not operate power tools in explosive atmo-
spheres, such as in the presence of ammable
liquids, gases or dust. Power tools create sparks
whichmayignitethedustorfumes.
3. Keep children and bystanders away while
operating a power tool. Distractions can cause
youtolosecontrol.
Electrical Safety
1. Power tool plugs must match the outlet. Never
modify the plug in any way. Do not use any
adapter plugs with earthed (grounded) power
tools. Unmodiedplugsandmatchingoutletswill
reduce risk of electric shock.
2. Avoid body contact with earthed or grounded
surfaces, such as pipes, radiators, ranges and
refrigerators. There is an increased risk of elec-
tricshockifyourbodyisearthedorgrounded.
3. Do not expose power tools to rain or wet con-
ditions. Water entering a power tool will increase
the risk of electric shock.
4. Do not abuse the cord. Never use the cord for
carrying, pulling or unplugging the power tool.
Keep cord away from heat, oil, sharp edges
or moving parts. Damaged or entangled cords
increase the risk of electric shock.
5. When operating a power tool outdoors, use an
extension cord suitable for outdoor use. Use of
a cord suitable for outdoor use reduces the risk of
electric shock.
6. If operating a power tool in a damp location is
unavoidable, use a ground fault circuit inter-
rupter (GFCI) protected supply. Use of a GFCI
reduces the risk of electric shock.
7. Power tools can produce electromagnetic
elds (EMF) that are not harmful to the user.
However, users of pacemakers and other similar
medical devices should contact the maker of their
device and/or doctor for advice before operating
this power tool.
Personal Safety
1. Stay alert, watch what you are doing and use
common sense when operating a power tool.
Do not use a power tool while you are tired or
under the inuence of drugs, alcohol or med-
ication. A moment of inattention while operating
powertoolsmayresultinseriouspersonalinjury.

3ENGLISH
2. Use personal protective equipment. Always
wear eye protection. Protective equipment such
asdustmask,non-skidsafetyshoes,hardhat,or
hearing protection used for appropriate conditions
willreducepersonalinjuries.
3. Prevent unintentional starting. Ensure the
switch is in the o-position before connecting
to power source and/or battery pack, picking
up or carrying the tool.Carryingpowertoolswith
yourngerontheswitchorenergisingpowertools
that have the switch on invites accidents.
4. Remove any adjusting key or wrench before
turning the power tool on.Awrenchorakeyleft
attachedtoarotatingpartofthepowertoolmay
resultinpersonalinjury.
5. Do not overreach. Keep proper footing and
balance at all times. This enables better control
of the power tool in unexpected situations.
6. Dress properly. Do not wear loose clothing or
jewellery. Keep your hair, clothing and gloves
away from moving parts.Looseclothes,jewel-
leryorlonghaircanbecaughtinmovingparts.
7. If devices are provided for the connection of
dust extraction and collection facilities, ensure
these are connected and properly used. Use of
dust collection can reduce dust-related hazards.
8.
Do not let familiarity gained from frequent use
of tools allow you to become complacent and
ignore tool safety principles. A careless action can
causesevereinjurywithinafractionofasecond.
9. Always wear protective goggles to protect
your eyes from injury when using power tools.
The goggles must comply with ANSI Z87.1 in
the USA.
It is an employer's responsibility to enforce the
use of appropriate safety protective equipment
by the tool operators and by other persons in
the immediate working area.
Power tool use and care
1. Do not force the power tool. Use the correct
power tool for your application. The correct
powertoolwilldothejobbetterandsaferatthe
rate for which it was designed.
2. Do not use the power tool if the switch does
not turn it on and o.Anypowertoolthatcannot
be controlled with the switch is dangerous and
must be repaired.
3. Disconnect the plug from the power source
and/or remove the battery pack, if detachable,
from the power tool before making any adjust-
ments, changing accessories, or storing power
tools.Suchpreventivesafetymeasuresreduce
theriskofstartingthepowertoolaccidentally.
4. Store idle power tools out of the reach of chil-
dren and do not allow persons unfamiliar with
the power tool or these instructions to operate
the power tool. Power tools are dangerous in the
hands of untrained users.
5. Maintain power tools and accessories. Check
for misalignment or binding of moving parts,
breakage of parts and any other condition that
may aect the power tool’s operation. If dam-
aged, have the power tool repaired before use.
Manyaccidentsarecausedbypoorlymaintained
power tools.
6. Keep cutting tools sharp and clean.Properly
maintained cutting tools with sharp cutting edges
arelesslikelytobindandareeasiertocontrol.
7. Use the power tool, accessories and tool bits
etc. in accordance with these instructions, tak-
ing into account the working conditions and
the work to be performed. Use of the power tool
foroperationsdierentfromthoseintendedcould
result in a hazardous situation.
8. Keep handles and grasping surfaces dry,
clean and free from oil and grease.Slippery
handles and grasping surfaces do not allow for
safe handling and control of the tool in unexpected
situations.
9. When using the tool, do not wear cloth work
gloves which may be entangled. The entangle-
mentofclothworkglovesinthemovingpartsmay
resultinpersonalinjury.
Battery tool use and care
1. Recharge only with the charger specied by
the manufacturer. A charger that is suitable for
onetypeofbatterypackmaycreateariskofre
whenusedwithanotherbatterypack.
2. Use power tools only with specically desig-
nated battery packs.Useofanyotherbattery
packsmaycreateariskofinjuryandre.
3. When battery pack is not in use, keep it away
from other metal objects, like paper clips,
coins, keys, nails, screws or other small metal
objects, that can make a connection from one
terminal to another.Shortingthebatterytermi-
nalstogethermaycauseburnsorare.
4. Under abusive conditions, liquid may be
ejected from the battery; avoid contact. If con-
tact accidentally occurs, ush with water. If
liquid contacts eyes, additionally seek medical
help.Liquidejectedfromthebatterymaycause
irritation or burns.
5. Do not use a battery pack or tool that is dam-
aged or modied.Damagedormodiedbatteries
mayexhibitunpredictablebehaviourresultingin
re,explosionorriskofinjury.
6. Do not expose a battery pack or tool to re or
excessive temperature.Exposuretoreortem-
peratureabove130°Cmaycauseexplosion.
7. Follow all charging instructions and do not
charge the battery pack or tool outside the
temperature range specied in the instruc-
tions.Chargingimproperlyorattemperatures
outsidethespeciedrangemaydamagethe
batteryandincreasetheriskofre.
Service
1. Have your power tool serviced by a qualied
repair person using only identical replacement
parts.Thiswillensurethatthesafetyofthepower
tool is maintained.
2. Never service damaged battery packs. Service
ofbatterypacksshouldonlybeperformedbythe
manufacturer or authorized service providers.
3. Follow instruction for lubricating and chang-
ing accessories.
4. Do not modify or attempt to repair the appli-
ance or the battery pack except as indicated in
the instructions for use and care.

4ENGLISH
Cordless Demolition Hammer safety
warnings
1. Wear ear protectors. Exposure to noise can
cause hearing loss.
2. Use auxiliary handle(s), if supplied with the
tool.Lossofcontrolcancausepersonalinjury.
3.
Hold power tool by insulated gripping sur-
faces, when performing an operation where the
cutting accessory may contact hidden wiring.
Cuttingaccessorycontactinga"live"wiremay
make exposed metal parts of the power tool "live"
and could give the operator an electric shock.
4. Wear a hard hat (safety helmet), safety glasses
and/or face shield. Ordinary eye or sun glasses
are NOT safety glasses. It is also highly recom-
mended that you wear a dust mask and thickly
padded gloves.
5.
Be sure the bit is secured in place before operation.
6. Under normal operation, the tool is designed
to produce vibration. The screws can come
loose easily, causing a breakdown or accident.
Check tightness of screws carefully before
operation.
7. In cold weather or when the tool has not been
used for a long time, let the tool warm up for
a while by operating it under no load. This
will loosen up the lubrication. Without proper
warm-up, hammering operation is dicult.
8. Always be sure you have a rm footing. Be
sure no one is below when using the tool in
high locations.
9. Hold the tool rmly with both hands.
10. Keep hands away from moving parts.
11. Do not leave the tool running. Operate the tool
only when hand-held.
12. Do not point the tool at any one in the area
when operating. The bit could y out and
injure someone seriously.
13.
Do not touch the bit, parts close to the bit, or
workpiece immediately after operation; they
may be extremely hot and could burn your skin.
14.
Some material contains chemicals which may be
toxic. Take caution to prevent dust inhalation and
skin contact. Follow material supplier safety data.
15.
Always be sure that the tool is switched o and
the battery cartridge and the bit are removed
before handing the tool to other person.
16. Before operation, make sure that there is no
buried object such as electric pipe, water pipe
or gas pipe in the working area. Otherwise, the
drillbit/chiselmaytouchthem,resultinganelectric
shock, electrical leakage or gas leak.
17. Do not operate the tool at no-load
unnecessarily.
SAVE THESE INSTRUCTIONS.
WARNING: DO NOT let comfort or familiarity
with product (gained from repeated use) replace
strict adherence to safety rules for the subject
product. MISUSE or failure to follow the safety
rules stated in this instruction manual may cause
serious personal injury.
Symbols
Thefollowingsshowthesymbolsusedfortool.
volts
direct current
number of blow per minute
Important safety instructions for
battery cartridge
1.
Before using battery cartridge, read all instruc-
tions and cautionary markings on (1) battery char-
ger, (2) battery, and (3) product using battery.
2. Do not disassemble or tamper the battery
cartridge.Itmayresultinare,excessiveheat,
or explosion.
3. If operating time has become excessively
shorter, stop operating immediately. It may
result in a risk of overheating, possible burns
and even an explosion.
4. If electrolyte gets into your eyes, rinse them
out with clear water and seek medical atten-
tion right away. It may result in loss of your
eyesight.
5. Do not short the battery cartridge:
(1) Do not touch the terminals with any con-
ductive material.
(2) Avoid storing battery cartridge in a con-
tainer with other metal objects such as
nails, coins, etc.
(3) Do not expose battery cartridge to water
or rain.
A battery short can cause a large current
ow, overheating, possible burns and even a
breakdown.
6. Do not store and use the tool and battery car-
tridge in locations where the temperature may
reach or exceed 50 °C (122 °F).
7. Do not incinerate the battery cartridge even if
it is severely damaged or is completely worn
out. The battery cartridge can explode in a re.
8. Do not nail, cut, crush, throw, drop the battery
cartridge, or hit against a hard object to the
battery cartridge.Suchconductmayresultina
re,excessiveheat,orexplosion.
9. Do not use a damaged battery.
10.
The contained lithium-ion batteries are subject to
the Dangerous Goods Legislation requirements.
Forcommercialtransportse.g.bythirdparties,
forwarding agents, special requirement on pack-
aging and labeling must be observed.
For preparation of the item being shipped, consult-
ing an expert for hazardous material is required.
Pleasealsoobservepossiblymoredetailed
national regulations.
Tapeormaskoopencontactsandpackupthe
batteryinsuchamannerthatitcannotmove
around in the packaging.

5ENGLISH
11.
When disposing the battery cartridge, remove it from
the tool and dispose of it in a safe place. Follow your
local regulations relating to disposal of battery.
12. Use the batteries only with the products
specied by Makita. Installing the batteries to
non-compliantproductsmayresultinare,exces-
siveheat,explosion,orleakofelectrolyte.
13. If the tool is not used for a long period of time,
the battery must be removed from the tool.
14. During and after use, the battery cartridge may
take on heat which can cause burns or low
temperature burns. Pay attention to the han-
dling of hot battery cartridges.
15. Do not touch the terminal of the tool imme-
diately after use as it may get hot enough to
cause burns.
16. Do not allow chips, dust, or soil stuck into the
terminals, holes, and grooves of the battery
cartridge.Itmayresultinpoorperformanceor
breakdownofthetoolorbatterycartridge.
17. Unless the tool supports the use near
high-voltage electrical power lines, do not use
the battery cartridge near a high-voltage elec-
trical power lines.Itmayresultinamalfunction
orbreakdownofthetoolorbatterycartridge.
18. Keep the battery away from children.
SAVE THESE INSTRUCTIONS.
CAUTION: Only use genuine Makita batteries.
Use of non-genuine Makita batteries, or batteries that
havebeenaltered,mayresultinthebatterybursting
causingres,personalinjuryanddamage.Itwill
alsovoidtheMakitawarrantyfortheMakitatooland
charger.
Tips for maintaining maximum
battery life
1.
Charge the battery cartridge before completely dis-
charged. Always stop tool operation and charge the
battery cartridge when you notice less tool power.
2.
Never recharge a fully charged battery cartridge.
Overcharging shortens the battery service life.
3.
Charge the battery cartridge with room tempera-
ture at 10 °C - 40 °C (50 °F - 104 °F). Let a hot
battery cartridge cool down before charging it.
4. When not using the battery cartridge, remove
it from the tool or the charger.
5. Charge the battery cartridge if you do not use
it for a long period (more than six months).
Important safety instructions for
wireless unit
1. Do not disassemble or tamper with the wire-
less unit.
2. Keep the wireless unit away from young chil-
dren. If accidentally swallowed, seek medical
attention immediately.
3. Use the wireless unit only with Makita tools.
4. Do not expose the wireless unit to rain or wet
conditions.
5. Do not use the wireless unit in places where
the temperature exceeds 50 °C (122 °F).
6. Do not operate the wireless unit in places
where medical instruments, such as heart
pace makers are nearby.
7. Do not operate the wireless unit in places
where automated devices are nearby. If oper-
ated,automateddevicesmaydevelopmalfunction
or error.
8. Do not operate the wireless unit in places
under high temperature or places where
static electricity or electrical noise could be
generated.
9. The wireless unit can produce electromagnetic
elds (EMF) but they are not harmful to the
user.
10. The wireless unit is an accurate instrument. Be
careful not to drop or strike the wireless unit.
11. Avoid touching the terminal of the wireless
unit with bare hands or metallic materials.
12. Always remove the battery on the product
when installing the wireless unit into it.
13. When opening the lid of the slot, avoid the
place where dust and water may come into the
slot. Always keep the inlet of the slot clean.
14. Always insert the wireless unit in the correct
direction.
15. Do not press the wireless activation button
on the wireless unit too hard and/or press the
button with an object with a sharp edge.
16. Always close the lid of the slot when
operating.
17. Do not remove the wireless unit from the slot
while the power is being supplied to the tool.
Doingsomaycauseamalfunctionofthewireless
unit.
18. Do not remove the sticker on the wireless unit.
19. Do not put any sticker on the wireless unit.
20. Do not leave the wireless unit in a place where
static electricity or electrical noise could be
generated.
21.
Do not leave the wireless unit in a place subject
to high heat, such as a car sitting in the sun.
22. Do not leave the wireless unit in a dusty or
powdery place or in a place corrosive gas
could be generated.
23. Sudden change of the temperature may bedew
the wireless unit. Do not use the wireless unit
until the dew is completely dried.
24. When cleaning the wireless unit, gently wipe
with a dry soft cloth. Do not use benzine, thin-
ner, conductive grease or the like.
25. When storing the wireless unit, keep it in the
supplied case or a static-free container.
26. Do not insert any devices other than Makita
wireless unit into the slot on the tool.
27. Do not use the tool with the lid of the slot dam-
aged.Water,dust,anddirtcomeintotheslotmay
cause malfunction.
28. Do not pull and/or twist the lid of the slot more
than necessary.Restorethelidifitcomeso
from the tool.
29. Replace the lid of the slot if it is lost or
damaged.
SAVE THESE INSTRUCTIONS.

6ENGLISH
FUNCTIONAL
DESCRIPTION
CAUTION: Always be sure that the tool is
switched o and the battery cartridge is removed
before adjusting or checking function on the tool.
Installing or removing battery
cartridge
CAUTION: Always switch o the tool before
installing or removing of the battery cartridge.
CAUTION: Hold the tool and the battery car-
tridge rmly when installing or removing battery
cartridge.Failuretoholdthetoolandthebattery
cartridgermlymaycausethemtoslipoyourhands
andresultindamagetothetoolandbatterycartridge
andapersonalinjury.
1
2
3
►1. Red indicator 2. Button 3.Batterycartridge
Toremovethebatterycartridge,slideitfromthetool
while sliding the button on the front of the cartridge.
Toinstallthebatterycartridge,alignthetongueonthe
batterycartridgewiththegrooveinthehousingandslip
itintoplace.Insertitallthewayuntilitlocksinplace
withalittleclick.Ifyoucanseetheredindicatoronthe
uppersideofthebutton,itisnotlockedcompletely.
CAUTION: Always install the battery cartridge
fully until the red indicator cannot be seen. If not,
itmayaccidentallyfalloutofthetool,causinginjuryto
youorsomeonearoundyou.
CAUTION: Do not install the battery cartridge
forcibly.Ifthecartridgedoesnotslideineasily,itis
notbeinginsertedcorrectly.
Indicating the remaining battery capacity
Pressthecheckbuttononthebatterycartridgetoindi-
catetheremainingbatterycapacity.Theindicatorlamps
light up for a few seconds.
1
2
►1. Indicator lamps 2. Check button
Indicator lamps Remaining
capacity
Lighted O Blinking
75% to 100%
50% to 75%
25% to 50%
0% to 25%
Charge the
battery.
Thebattery
mayhave
malfunctioned.
NOTE: Depending on the conditions of use and the
ambienttemperature,theindicationmaydierslightly
fromtheactualcapacity.
NOTE:Therst(farleft)indicatorlampwillblinkwhen
thebatteryprotectionsystemworks.
Tool / battery protection system
Thetoolisequippedwithatool/batteryprotectionsys-
tem.Thissystemautomaticallycutsopowertothe
motortoextendtoolandbatterylife.Thetoolwillauto-
maticallystopduringoperationifthetoolorbatteryis
placed under one of the following conditions:
Overload protection
Whenthetoolorbatteryisoperatedinamannerthat
causesittodrawanabnormallyhighcurrent,thetool
automaticallystopswithoutanyindication.Inthissit-
uation,turnthetooloandstoptheapplicationthat
caused the tool to become overloaded. Then turn the
tool on to restart.

7ENGLISH
Overheat protection
Whenthetoolorbatteryisoverheated,thetoolstops
automatically.Inthiscase,letthetoolandbatterycool
before turning the tool on again.
NOTE: When the tool is overheated, the lamp blinks.
Overdischarge protection
Whenthebatterycapacityisnotenough,thetoolstops
automatically.Inthiscase,removethebatteryfromthe
toolandchargethebattery.
Switch action
WARNING: Before installing the battery car-
tridge into the tool, always check to see that the
switch trigger actuates properly and returns to
the "OFF" position when released.
CAUTION: When not operating the tool,
depress the trigger-lock button from side to
lock the switch trigger in the OFF position.
Topreventtheswitchtriggerfromaccidentallypulled,
the trigger-lock button is provided. To start the tool,
depress the trigger-lock button from A ( ) side and pull
theswitchtrigger.Toolspeedisincreasedbyincreas-
ing pressure on the switch trigger. Release the switch
trigger to stop. After use, depress the trigger-lock button
from B ( ) side.
1
2
B A
►1. Trigger-lock button 2. Switch trigger
Using the trigger-lock button for
continuous operation
For continuous operation, depress the trigger-lock but-
ton from B ( ) side while pulling the switch trigger, and
then release the switch trigger. To stop the tool, depress
the trigger-lock button from A ( ) side.
Speed change
1
►1.Speedadjustingdial
Theblowsperminutecanbeadjustedbyturningthe
adjustingdial.
The dial is marked 1 (lowest speed) to 5 (full speed).
Refer to the table for the relationship between the num-
ber settings on the dial and the blows per minute.
Number Blows per minute
51,900/min
41,800/min
31,450/min
21,000/min
1950/min
CAUTION: Do not turn the adjusting dial when
the tool is running. Failure to do so may result in
the loss of control of the tool and cause an injury.
NOTICE: The speed adjusting dial can be turned
only as far as 5 and back to 1. Do not force it past
5 or 1, or the speed adjusting function may no
longer work.
NOTE: Soft no-load rotation function
Blows at no load per minute becomes smaller than
those on load in order to reduce vibration under no
load, but this does not show trouble.
Once operation starts with a bit against concrete,
blows per minute increase and reach the numbers as
shown in the table.
Whentemperatureislow,thetoolmaynothavethis
function even with the motor rotating.

8ENGLISH
Lighting up the front lamp
1
►1. Lamp
CAUTION: Do not look in the light or see the
source of light directly.
Pull the switch trigger to light up the lamp. The lamp
keeps on lighting while the switch trigger is being pulled.
Thelampgoesoutapproximately10secondsafter
releasing the switch trigger.
NOTE:Useadryclothtowipethedirtothelensof
the lamp. Be careful not to scratch the lens of lamp, or
itmaylowertheillumination.
Electronic function
The tool is equipped with the electronic functions for
easyoperation.
• Constant speed control
The speed control function provides the constant
rotation speed regardless of load conditions.
• Soft start
The soft-start function minimizes start-up shock,
andmakesthemachinestartsmoothly.
ASSEMBLY
CAUTION: Always be sure that the tool is
switched o and the battery cartridge is removed
before carrying out any work on the tool.
Side handle (auxiliary handle)
CAUTION: Always use the side handle to
ensure safe operation.
CAUTION: After installing or adjusting the
side handle, make sure that the side handle is
rmly secured.
The side handle can be swung in a vertical direction
andsecuredatanydesiredposition.Itcanalsobe
adjustedateightstepsbackandforthinahorizontal
direction. Loosen the clamp nut to swing the side han-
dle to a desired position, and then tighten the clamp nut
securely.
1
2
►1. Side handle 2. Clamp nut
Installing or removing bit
Grease
Cleantheshankendofthebitandapplygreasebefore
installing the bit.
Coat the shank end of the bit beforehand with a small
amount of grease (about 0.5 - 1 g). This chuck lubrica-
tion assures smooth action and longer service life.
1
2
►1. Shank end 2. Grease
Insert the bit into the tool. Turn the bit and push it in until
it engages.
If the bit cannot be pushed in, remove the bit. Pull the
release cover down a couple of times. Then insert the
bit again. Turn the bit and push it in until it engages.
Afterinstallingthebit,alwaysmakesurethatthebitis
securelyheldinplacebytryingtopullitout.
1 2
►1. Bit 2. Release cover

9ENGLISH
To remove the bit, pull the release cover down all the
wayandpullthebitout.
2
1
►1. Bit 2. Release cover
Bit angle
Thebitcanbesecuredat12dierentangles.To
change the bit angle, slide the change ring cover for-
ward, then turn the change ring cover to change the bit
angle. At the desired angle, slide the change ring cover
back to the original position. The bit will be secured in
place.
After changing the bit angle, make sure the angle is
xedbytryingtorotatethebit.
1
►1. Change ring cover
Dust extractor attachment
Optional accessory
1. Install the hose holder (A).
Loosen the clamp nut, and then remove the hex bolt.
Install the hose holder (A) between the hex bolt and the
clampnutbytighteningtheclampnutrmly.
1
2
3
►1. Hex bolt 2. Hose holder (A) 3. Clamp nut
2. Attachtheholderjointtothetool,andthenattach
thehoseholder(C)totheholderjoint.
1
2
►1.Holderjoint2. Hose holder (C)
NOTE:Thehosejointcanbeattachedtoeitherside
of the tool.
WARNING: Use the mounting part of the tool
only for attaching the holder joint.
Usingthemountingpartforanyotherpurposemay
cause an unexpected accident.

10 ENGLISH
3. Attach the dust cover and the hose to the tool, and
thenxthehosetothehoseholders.
3
21 4
►1. Dust cover 2. Hose 3. Hose holder (A) 4. Hose
holder (C)
4. Connect the hose to the hose of the vacuum
cleanerwiththehosejoint.
NOTE: If the hose is not included, attach the dust
covertothecleaner'sjointorattachittoMakita's
hose ø28.
5. Adjustthedistancebetweenthedustcoverand
the tip of the chisel or bull point. The recommended
distance is 30 mm (1-3/16") to 100 mm (3-15/16").
(1)
►(1) 30 mm (1-3/16") to 100 mm (3-15/16")
OPERATION
CAUTION: Always use the side grip (auxiliary
handle) and rmly hold the tool by both side grip
and switch handle during operations.
CAUTION: Always make sure that the work-
piece is secured before operation. Failure to prop-
erlysecuretheworkpiecemaycausetheworkpiece
tomoveresultingininjury.
CAUTION: Do not pull the tool out forcibly
even the bit gets stuck. Loss of control may
cause injury.
CAUTION: Do not leave the tool stabbed in
the workpiece. Otherwisethetoolmaystartsunin-
tentionallyandcauseaninjury.
NOTE:Ifthebatterycartridgeisinlowtemperature,
thetool’scapabilitymaynotbefullyobtained.Inthis
case,warmupthebatterycartridgebyusingthe
toolwithnoloadforawhiletofullyobtainthetool’s
capability.
Chipping/Scaling/Demolition
Holdthetoolrmlywithbothhands.Turnthetoolon
andapplyslightpressureonthetoolsothatthetoolwill
notbouncearound,uncontrolled.Pressingveryhardon
thetoolwillnotincreasetheeciency.

11 ENGLISH
WIRELESS ACTIVATION
FUNCTION
Optional accessory
What you can do with the wireless
activation function
The wireless activation function enables clean and com-
fortableoperation.Byconnectingasupportedvacuum
cleanertothetool,youcanrunthevacuumcleaner
automaticallyalongwiththeswitchoperationofthetool.
To use the wireless activation function, prepare follow-
ing items:
• Awirelessunit(optionalaccessory)
• A vacuum cleaner which supports the wireless
activation function
The overview of the wireless activation function
setting is as follows. Refer to each section for detail
procedures.
1. Installing the wireless unit
2. Tool registration for the vacuum cleaner
3. Starting the wireless activation function
Installing the wireless unit
Optional accessory
CAUTION: Place the tool on a at and stable
surface when installing the wireless unit.
NOTICE: Clean the dust and dirt on the tool
before installing the wireless unit. Dust or dirt
maycausemalfunctionifitcomesintotheslotofthe
wireless unit.
NOTICE: To prevent the malfunction caused by
static, touch a static discharging material, such
as a metal part of the tool, before picking up the
wireless unit.
NOTICE: When installing the wireless unit,
always be sure that the wireless unit is inserted
in the correct direction and the lid is completely
closed.
1. Openthelidonthetoolasshowninthegure.
1
►1. Lid
2. Insert the wireless unit to the slot and then close
the lid.
Wheninsertingthewirelessunit,aligntheprojections
with the recessed portions on the slot.
1
2
34
►1. Wireless unit 2.Projection3. Lid 4. Recessed
portion

12 ENGLISH
Whenremovingthewirelessunit,openthelidslowly.
The hooks on the back of the lid will lift the wireless unit
asyoupullupthelid.
1
2
3
►1. Wireless unit 2. Hook 3. Lid
After removing the wireless unit, keep it in the supplied
case or a static-free container.
NOTICE: Always use the hooks on the back of
the lid when removing the wireless unit. If the
hooks do not catch the wireless unit, close the lid
completelyandopenitslowlyagain.
Tool registration for the vacuum
cleaner
NOTE: A Makita vacuum cleaner supporting the
wireless activation function is required for the tool
registration.
NOTE: Finish installing the wireless unit to the tool
before starting the tool registration.
NOTE: During the tool registration, do not pull the
switch trigger or turn on the power switch on the
vacuum cleaner.
NOTE: Refer to the instruction manual of the vacuum
cleaner, too.
Ifyouwishtoactivatethevacuumcleaneralongwith
theswitchoperationofthetool,nishthetoolregistra-
tion beforehand.
1. Install the batteries to the vacuum cleaner and the
tool.
2. Setthestand-byswitchonthevacuumcleanerto
"AUTO".
1
►1.Stand-byswitch
3. Press the wireless activation button on the vac-
uum cleaner for 3 seconds until the wireless activation
lamp blinks in green. And then press the wireless acti-
vationbuttononthetoolinthesameway.
12
1
2
►1. Wireless activation button 2. Wireless activation
lamp
If the vacuum cleaner and the tool are linked success-
fully,thewirelessactivationlampswilllightupingreen
for 2 seconds and start blinking in blue.

13 ENGLISH
NOTE:Thewirelessactivationlampsnishblinking
in green after 20 seconds elapsed. Press the wireless
activation button on the tool while the wireless acti-
vation lamp on the cleaner is blinking. If the wireless
activation lamp does not blink in green, push the wire-
lessactivationbuttonbrieyandholditdownagain.
NOTE: When performing two or more tool registra-
tionsforonevacuumcleaner,nishthetoolregistra-
tiononebyone.
Starting the wireless activation
function
NOTE: Finish the tool registration for the vacuum
cleaner prior to the wireless activation.
NOTE: Refer to the instruction manual of the vacuum
cleaner, too.
After registering a tool to the vacuum cleaner, the
vacuumcleanerwillautomaticallyrunsalongwiththe
switch operation of the tool.
1. Install the wireless unit to the tool.
2. Connect the hose of the vacuum cleaner with the
tool.
3. Setthestand-byswitchonthevacuumcleanerto
"AUTO".
1
►1.Stand-byswitch
4. Push the wireless activation button on the tool
briey.Thewirelessactivationlampwillblinkinblue.
21
►1. Wireless activation button 2. Wireless activation
lamp
5. Pull the switch trigger of the tool. Check if the
vacuum cleaner runs while the switch trigger is being
pulled.
To stop the wireless activation of the vacuum cleaner,
push the wireless activation button on the tool.
NOTE: The wireless activation lamp on the tool will
stop blinking in blue when there is no operation for
2hours.Inthiscase,setthestand-byswitchonthe
vacuum cleaner to "AUTO" and push the wireless
activation button on the tool again.
NOTE:Thevacuumcleanerstarts/stopswithadelay.
There is a time lag when the vacuum cleaner detects
a switch operation of the tool.
NOTE: The transmission distance of the wireless unit
mayvarydependingonthelocationandsurrounding
circumstances.
NOTE: When two or more tools are registered to one
vacuumcleaner,thevacuumcleanermaystartrun-
ningevenifyoudonotpulltheswitchtriggerbecause
another user is using the wireless activation function.

14 ENGLISH
Description of the wireless activation lamp status
1
►1. Wireless activation lamp
The wireless activation lamp shows the status of the wireless activation function. Refer to the table below for the
meaning of the lamp status.
Status Wireless activation lamp Description
Color
On
Blinking
Duration
Standby Blue 2 hours The wireless activation of the vacuum cleaner is available. The
lampwillautomaticallyturnowhennooperationisperformed
for 2 hours.
When
the tool is
running.
The wireless activation of the vacuum cleaner is available and the
tool is running.
Tool
registration
Green 20 seconds Readyforthetoolregistration.Waitingfortheregistrationbythe
vacuum cleaner.
2 seconds Thetoolregistrationhasbeennished.Thewirelessactivation
lamp will start blinking in blue.
Cancelling
tool
registration
Red 20 seconds Readyforthecancellationofthetoolregistration.Waitingforthe
cancellationbythevacuumcleaner.
2 seconds Thecancellationofthetoolregistrationhasbeennished.The
wireless activation lamp will start blinking in blue.
Others Red 3 seconds The power is supplied to the wireless unit and the wireless activa-
tion function is starting up.
O - - The wireless activation of the vacuum cleaner is stopped.

15 ENGLISH
Cancelling tool registration for the
vacuum cleaner
Perform the following procedure when cancelling the
tool registration for the vacuum cleaner.
1. Install the batteries to the vacuum cleaner and the
tool.
2. Setthestand-byswitchonthevacuumcleanerto
"AUTO".
1
►1.Stand-byswitch
3. Press the wireless activation button on the vac-
uum cleaner for 6 seconds. The wireless activation
lamp blinks in green and then become red. After that,
press the wireless activation button on the tool in the
sameway.
12
1
2
►1. Wireless activation button 2. Wireless activation
lamp
Ifthecancellationisperformedsuccessfully,thewire-
less activation lamps will light up in red for 2 seconds
and start blinking in blue.
NOTE:Thewirelessactivationlampsnishblinkingin
red after 20 seconds elapsed. Press the wireless acti-
vation button on the tool while the wireless activation
lamp on the cleaner is blinking. If the wireless acti-
vation lamp does not blink in red, push the wireless
activationbuttonbrieyandholditdownagain.

16 ENGLISH
Troubleshooting for wireless activation function
Beforeaskingforrepairs,conductyourowninspectionrst.Ifyoundaproblemthatisnotexplainedinthemanual,
donotattempttodismantlethetool.Instead,askMakitaAuthorizedServiceCenters,alwaysusingMakitareplace-
ment parts for repairs.
State of abnormality Probable cause (malfunction) Remedy
The wireless activation lamp does
not light/blink.
The wireless unit is not installed into the tool.
Thewirelessunitisimproperlyinstalled
into the tool.
Installthewirelessunitcorrectly.
The terminal of the wireless unit and/or
theslotisdirty.
Gentlywipeodustanddirtontheterminalofthe
wireless unit and clean the slot.
The wireless activation button on the
tool has not been pushed.
Push the wireless activation button on the tool
briey.
Thestand-byswitchonthevacuum
cleaner is not set to "AUTO".
Setthestand-byswitchonthevacuumcleanerto
"AUTO".
Nopowersupply
Supplythepowertothetoolandthevacuumcleaner.
Cannotnishtoolregistration/can-
cellingtoolregistrationsuccessfully.
The wireless unit is not installed into the tool.
Thewirelessunitisimproperlyinstalled
into the tool.
Installthewirelessunitcorrectly.
The terminal of the wireless unit and/or
theslotisdirty.
Gentlywipeodustanddirtontheterminalofthe
wireless unit and clean the slot.
Thestand-byswitchonthevacuum
cleaner is not set to "AUTO".
Setthestand-byswitchonthevacuumcleanerto
"AUTO".
Nopowersupply
Supplythepowertothetoolandthevacuumcleaner.
Incorrect operation
Pushthewirelessactivationbuttonbrieyandperform
the tool registration/cancellation procedures again.
Thetoolandvacuumcleanerareaway
from each other (out of the transmission
range).
Get the tool and vacuum cleaner closer to each other. The
maximumtransmissiondistanceisapproximately10m
howeveritmayvaryaccordingtothecircumstances.
Beforenishingthetoolregistration/cancellation;
-theswitchtriggeronthetoolispulledor;
- the power button on the vacuum
cleaner is turned on.
Pushthewirelessactivationbuttonbrieyand
perform the tool registration/cancellation procedures
again.
The tool registration procedures for the
toolorvacuumcleanerhavenotnished.
Perform the tool registration procedures for both the
tool and the vacuum cleaner at the same timing.
Radiodisturbancebyotherappliances
whichgeneratehigh-intensityradio
waves.
Keepthetoolandvacuumcleanerawayfromthe
appliances such as Wi-Fi devices and microwave
ovens.
The vacuum cleaner does not run
along with the switch operation of
the tool.
The wireless unit is not installed into the tool.
Thewirelessunitisimproperlyinstalled
into the tool.
Installthewirelessunitcorrectly.
The terminal of the wireless unit and/or
theslotisdirty.
Gentlywipeodustanddirtontheterminalofthe
wireless unit and clean the slot.
The wireless activation button on the
tool has not been pushed.
Pushthewirelessactivationbuttonbrieyandmake
sure that the wireless activation lamp is blinking in blue.
Thestand-byswitchonthevacuum
cleaner is not set to "AUTO".
Setthestand-byswitchonthevacuumcleanerto
"AUTO".
More than 10 tools are registered to the
vacuum cleaner.
Perform the tool registration again.
If more than 10 tools are registered to the vacuum
cleaner, the tool registered earliest will be cancelled
automatically.
The vacuum cleaner erased all tool
registrations.
Perform the tool registration again.
Nopowersupply
Supplythepowertothetoolandthevacuumcleaner.
Thetoolandvacuumcleanerareaway
from each other (out of the transmission
range).
Get the tool and vacuum cleaner closer each other. The
maximumtransmissiondistanceisapproximately10m
howeveritmayvaryaccordingtothecircumstances.
Radiodisturbancebyotherappliances
whichgeneratehigh-intensityradio
waves.
Keepthetoolandvacuumcleanerawayfromthe
appliances such as Wi-Fi devices and microwave
ovens.
The vacuum cleaner runs while the
tool's switch trigger is not pulled.
Other users are using the wireless
activation of the vacuum cleaner with
their tools.
Turnothewirelessactivationbuttonoftheother
tools or cancel the tool registration of the other
tools.

17
MAINTENANCE
CAUTION: Always be sure that the tool is
switched o and the battery cartridge is removed
before attempting to perform inspection or
maintenance.
NOTICE: Never use gasoline, benzine, thinner,
alcohol or the like. Discoloration, deformation or
cracks may result.
To maintain product SAFETY and RELIABILITY,
repairs,anyothermaintenanceoradjustmentshould
beperformedbyMakitaAuthorizedorFactoryService
Centers,alwaysusingMakitareplacementparts.
OPTIONAL
ACCESSORIES
CAUTION: These accessories or attachments
are recommended for use with your Makita tool
specied in this manual.Theuseofanyother
accessories or attachments might present a risk of
injurytopersons.Onlyuseaccessoryorattachment
for its stated purpose.
Ifyouneedanyassistanceformoredetailsregard-
ingtheseaccessories,askyourlocalMakitaService
Center.
• SDS-MAX bull point
• SDS-MAX cold chisel
• SDS-MAX scaling chisel
• SDS-MAXclayspade
• Bit grease
• Side handle
• Safetygoggles
• Dust extractor attachment
• Wireless unit
• Makitagenuinebatteryandcharger
NOTE:Someitemsinthelistmaybeincludedinthe
toolpackageasstandardaccessories.Theymay
dierfromcountrytocountry.
MAKITA LIMITED
WARRANTY
Pleaserefertotheannexedwarrantysheetforthe
mostcurrentwarrantytermsapplicabletothisproduct.
Ifannexedwarrantysheetisnotavailable,refertothe
warrantydetailssetforthatbelowwebsiteforyour
respectivecountry.
United States of America: www.makitatools.com
Canada: www.makita.ca
Other countries: www.makita.com
ENGLISH

18 FRANÇAIS
FRANÇAIS (Mode d’emploi original)
SPÉCIFICATIONS
Modèle : HM002G
Frappes par minute 950 - 1 900/min
Tension nominale C.C. 72 V - 80 V max.
Longueur totale 574mm(22-5/8″)
Poids net 12,0 - 13,3 kg (26,5 - 29,3 lbs)
• Étantdonnél’évolutionconstantedenotreprogrammederechercheetdéveloppement,lesspécications
contenuesdanscemanuelsontsujettesàmodicationsanspréavis.
• Lesspécicationspeuventvariersuivantlespays.
• Lepoidspeutvarierselonlesaccessoires,ycomprislabatterie.Lapluslégèreetlapluslourdecombinaisons,
selon la procédure EPTA 01/2014, sont indiquées dans le tableau.
Batteries et chargeurs applicables
Batterie BL4025 / BL4040*
* : Batterie recommandée
Chargeur DC40RA
• Suivant la région où vous habitez, il se peut que certaines des batteries et certains des chargeurs énumérés
ci-dessus ne soient pas disponibles.
MISE EN GARDE : Utilisez exclusivement les batteries et chargeurs énumérés ci-dessus. L’utilisation
de toute autre batterie ou tout autre chargeur peut entraîner une blessure et/ou un incendie.
CONSIGNES DE SÉCURITÉ
Consignes de sécurité générales
pour outils électriques
MISE EN GARDE : Lisez toutes les mises en
garde, instructions, illustrations et spécications
qui accompagnent cet outil électrique.Ilyarisque
de décharge électrique, d’incendie et/ou de blessure
grave si les instructions ci-dessous ne sont pas
toutes respectées.
Conservez toutes les mises en
garde et instructions pour réfé-
rence future.
Leterme«outilélectrique»quiguredanslesavertis-
sementsfaitréférenceàunoutilélectriquebranchésur
une prise de courant (par un cordon d’alimentation) ou
alimentéparbatterie(sansl).
Sécurité de la zone de travail
1. Maintenez la zone de travail propre et bien
éclairée. Les zones de travail encombrées ou
sombres ouvrent grande la porte aux accidents.
2. N’utilisez pas les outils électriques dans les
atmosphères explosives, par exemple en pré-
sence de liquides, gaz ou poussières inam-
mables. Les outils électriques produisent des
étincellesaucontactdesquelleslapoussièreou
lesvapeurspeuvents’enammer.
3. Assurez-vous qu’aucun enfant ou curieux ne
s’approche pendant que vous utilisez un outil
électrique. Vous risquez de perdre la maîtrise de
l’outil si votre attention est détournée.
Sécurité en matière d’électricité
1. Les ches d’outil électrique sont conçues pour
s’adapter parfaitement aux prises de courant.
Ne modiez jamais la che de quelque façon
que ce soit. N’utilisez aucun adaptateur de
che sur les outils électriques avec mise à
la terre. Ennemodiantpasleschesetenles
insérant dans des prises de courant pour les-
quelles elles ont été conçues, vous réduirez les
risques de choc électrique.
2.
Évitez tout contact corporel avec les surfaces
mises à la terre, telles que tuyaux, radiateurs, cuisi-
nières et réfrigérateurs. Le risque de choc électrique
estplusélevésivotrecorpssetrouvemisàlaterre.
3. N’exposez pas les outils électriques à la pluie
ou à l’eau. La présence d’eau dans un outil élec-
trique augmente le risque de choc électrique.
4. Ne maltraitez pas le cordon. N’utilisez jamais
le cordon pour transporter, tirer ou débrancher
l’outil électrique. Maintenez le cordon à l’écart
des sources de chaleur, de l’huile, des objets à
bords tranchants et des pièces en mouvement.
Le risque de choc électrique est plus élevé lorsque
les cordons sont endommagés ou enchevêtrés.
5. Lorsque vous utilisez un outil électrique à l’ex-
térieur, utilisez un cordon prolongateur conçu
pour l’usage extérieur. Les risque de choc élec-
trique est moindre lorsqu’un cordon conçu pour
l’usage extérieur est utilisé.

19 FRANÇAIS
6. Si vous devez utiliser un outil électrique dans
un endroit humide, utilisez une source d’ali-
mentation protégée par un disjoncteur de fuite
à la terre.L’utilisationd’undisjoncteurdefuiteàla
terre réduit le risque de choc électrique.
7. Les outils électriques peuvent produire des
champs électromagnétiques (CEM) qui ne sont
pas préjudiciables à l’utilisateur. Les utilisa-
teurs de stimulateur cardiaque ou autres appareils
médicaux similaires doivent toutefois demander
conseilaufabricantet/ouàleurmédecinavant
d’utiliser cet outil électrique.
Sécurité personnelle
1. Restez alerte, attentif à vos mouvements et
faites preuve de bon sens lorsque vous utili-
sez un outil électrique. N’utilisez pas les outils
électriques si vous êtes fatigué ou avez pris
une drogue, de l’alcool ou un médicament. Un
moment d’inattention pendant l’utilisation d’un
outil électrique peut entraîner une grave blessure.
2. Portez des dispositifs de protection person-
nelle. Portez toujours une protection oculaire.
Les risques de blessure seront moins élevés si
vous utilisez des dispositifs de protection tels
qu’unmasqueanti-poussière,deschaussuresà
semelleantidérapante,unecoiurerésistanteou
une protection d’oreilles.
3. Évitez les démarrages accidentels. Assurez-
vous que l’interrupteur est en position d’arrêt
avant de brancher l’outil à la prise de courant
et/ou au bloc-piles, et avant de prendre ou
de transporter l’outil. Vous ouvrez la porte aux
accidents si vous transportez les outils électriques
avec le doigt sur l’interrupteur ou si vous les bran-
chez alors que l’interrupteur est en position de
marche.
4. Retirez toute clé de réglage ou de serrage
avant de mettre l’outil électrique sous tension.
Touteclélaisséeenplacesurunepiècerotative
de l’outil électrique peut entraîner une blessure.
5. Ne vous étirez pas exagérément. Assurez-vous
d’une bonne prise au sol et d’un bon équilibre
en tout temps. Cela vous permettra d’avoir une
meilleure maîtrise de l’outil électrique dans les
situations imprévues.
6. Portez des vêtements adéquats. Ne portez ni
vêtements amples ni bijoux. Gardez vos che-
veux, vêtements et gants à l’écart des pièces
en mouvement.Lesvêtementsamples,bijouxou
cheveuxlongspeuventêtrehappésparlespièces
en mouvement.
7. Si des accessoires sont fournis pour raccorder
un appareil d’aspiration et de collecte de la
poussière, assurez-vous qu’ils sont correc-
tement raccordés et qu’ils sont utilisés de
manière adéquate. L’utilisation d’un appareil de
collectepermetderéduirelesrisquesliésàla
présencedepoussièredansl’air.
8. Évitez d’être complaisant et d’ignorer les
principes de sécurité de l’outil en raison de la
familiarité acquise par un usage fréquent des
outils. Un geste imprudent peut entraîner une
grave blessure en une fraction de seconde.
9. Portez toujours des lunettes à coques de pro-
tection pour protéger vos yeux contre les bles-
sures lors de l’utilisation d’outils électriques.
Les lunettes à coques doivent être conformes
à ANSI Z87.1 aux États-Unis.
L’employeur a la responsabilité d’imposer
l’utilisation d’équipements de protection de
sécurité adéquats aux utilisateurs des outils
électriques et à toute autre personne se trou-
vant dans la zone de travail immédiate.
Utilisation et entretien des outils électriques
1. Ne forcez pas l’outil électrique. Utilisez l’outil
électrique adéquat suivant le type de travail à
eectuer. Si vous utilisez l’outil électrique adé-
quat et respectez le régime pour lequel il a été
conçu,ileectuerauntravaildemeilleurequalité
et plus sécuritaire.
2. N’utilisez pas l’outil électrique s’il n’est pas
possible de l’allumer et de l’éteindre avec son
interrupteur. Un outil électrique dont l’interrupteur
est défectueux représente un danger et doit être
réparé.
3. Avant d’eectuer tout réglage, de remplacer
un accessoire ou de ranger l’outil électrique,
débranchez la che de la source d’alimenta-
tion et/ou retirez la batterie de l’outil électrique
si elle est amovible. Ces mesures préventives de
sécurité réduisent les risques de démarrage acci-
dentel de l’outil électrique.
4. Après l’utilisation d’un outil électrique,
rangez-le hors de portée des enfants et ne
laissez aucune personne l’utiliser si elle n’est
pas familiarisée avec l’outil électrique ou les
présentes instructions d’utilisation. Les outils
électriques représentent un danger entre les
mains de personnes qui n’en connaissent pas le
mode d’utilisation.
5. Eectuez l’entretien des outils électriques et
des accessoires. Assurez-vous que les pièces
mobiles ne sont pas désalignées ou coincées,
qu’aucune pièce n’est cassée et que l’outil
électrique n’a subi aucun dommage aectant
son bon fonctionnement. Le cas échéant,
faites réparer l’outil électrique avant de l’utili-
ser. De nombreux accidents sont causés par des
outils électriques mal entretenus.
6. Maintenez les outils tranchants bien aiguisés
et propres. Un outil tranchant dont l’entretien est
eectuécorrectementetdontlesbordssontbien
aiguisés risquera moins de se coincer et sera plus
facileàmaîtriser.
7. Utilisez l’outil électrique, ses accessoires, ses
embouts, etc., en respectant les présentes
instructions, en tenant compte des conditions
de travail et du type de travail à eectuer.
L’utilisation d’un outil électrique pour d’autres
usages que ceux prévus peut entraîner une situa-
tion dangereuse.
8. Gardez les poignées et surfaces de saisie
sèches, propres et exemptes d’huile et de
graisse. Les poignées et surfaces de saisie glis-
santes ne permettent pas une manipulation sûre
et une bonne maîtrise de l’outil dans les situations
inattendues.

20 FRANÇAIS
9. Lors de l’utilisation de l’outil, ne portez pas
de gants de travail en tissu qui risquent de
s’enchevêtrer dans l’outil. L’enchevêtrement de
gantsdetravailentissudanslespiècesenmou-
vement peut entraîner une blessure.
Utilisation et entretien des outils alimentés par
batterie
1. Pour recharger, utilisez uniquement le char-
geur spécié par le fabricant. L’utilisation d’un
chargeurconçupouruntypedonnédebloc-piles
comporte un risque d’incendie lorsqu’il est utilisé
avecunautretypedebloc-piles.
2. N’utilisez un outil électrique qu’avec le bloc-
piles conçu spéciquement pour cet outil.Ilya
risque de blessure ou d’incendie si un autre bloc-
piles est utilisé.
3. Lorsque vous n’utilisez pas le bloc-piles, ran-
gez-le à l’écart des objets métalliques tels que
trombones, pièces de monnaie, clés, clous,
vis ou autres petits objets métalliques qui
risqueraient d’établir une connexion entre les
bornes. La mise en court-circuit des bornes de
batterie peut causer des brûlures ou un incendie.
4. Dans des conditions d’utilisation inadéquates
de la batterie, il peut y avoir fuite d’électrolyte;
évitez tout contact avec ce liquide. En cas
de contact accidentel, rincez avec beaucoup
d’eau. Si le liquide pénètre dans vos yeux, il
faut aussi consulter un médecin.L’électrolyte
qui s’échappe de la batterie peut causer des
irritations ou des brûlures.
5. N’utilisez pas une batterie ou un outil s’il est
endommagé ou modié. Les batteries endom-
magéesoumodiéespeuventavoiruncomporte-
ment imprévisible dont peut résulter un incendie,
une explosion ou un risque de blessure.
6. N’exposez pas une batterie ou un outil au feu
ou à une température excessive. L’exposition
aufeuouàunetempératuresupérieureà130°C
peut entraîner une explosion.
7. Suivez toutes les instructions de charge et ne
chargez pas la batterie ou l’outil à l’extérieur
de la plage de température spéciée dans les
instructions.Chargerdemanièreinadéquate
ouàdestempératureshorsdelaplagespéciée
peut endommager la batterie et augmenter le
risque d’incendie.
Réparation
1. Faites réparer votre outil électrique par un
réparateur qualié qui utilise des pièces de
rechange identiques aux pièces d’origine. Le
maintien de la sûreté de l’outil électrique sera ainsi
assuré.
2. N’essayez jamais de réparer les batteries
endommagées. La réparation des batteries ne
doitêtreeectuéequeparlefabricantouparun
fournisseurdeserviceaprès-venteagréé.
3. Suivez les instructions de lubrication et de
remplacement des accessoires.
4. Ne modiez pas ou n’essayez pas de réparer
l’appareil ou la batterie autrement que tel
qu’indiqué dans les instructions d’utilisation
et d’entretien.
Consignes de sécurité pour marteau
piqueur sans l
1. Portez des protections d’oreilles. L’exposition
au bruit peut entraîner des lésions de l’ouïe.
2. Utilisez la ou les poignées auxiliaires si elles
sont fournies avec l’outil. Toute perte de maî-
trise comporte un risque de blessure.
3. Tenez l’outil électrique par ses surfaces de
poigne isolées lorsque vous eectuez une
opération au cours de laquelle l’accessoire
de coupe peut entrer en contact avec des ls
dissimulés.Aucontactd’unlsoustension,
l’accessoire de coupe peut mettre sous tension les
parties métalliques dénudées de l’outil électrique
etexposerl’utilisateuràunedéchargeélectrique.
4. Portez une coiure rigide (un casque de sécu-
rité), des lunettes de sécurité et/ou un écran
facial. Les lunettes ordinaires et les lunettes
de soleil NE sont PAS des lunettes de sécurité.
Il est aussi vivement recommandé de porter
un masque antipoussières et des gants à rem-
bourrage épais.
5. Avant l’utilisation, assurez-vous que l’embout
est bien xé en place.
6. Dans des conditions normales d’utilisation,
l’outil est conçu pour produire des vibrations.
Les vis peuvent se desserrer facilement et
causer une panne ou un accident. Avant l’utili-
sation, vériez soigneusement le serrage des
vis.
7. Par temps froid ou lorsque l’outil est resté
inutilisé pendant une longue période, faites-le
réchauer pendant un moment en le faisant
tourner à vide. Cela réchauera le lubriant.
Sans un réchauement adéquat, le martelage
s’eectue dicilement.
8. Pensez toujours à prendre pied solidement.
Assurez-vous qu’il n’y a personne plus bas
lorsque vous utilisez l’outil en position élevée.
9. Tenez l’outil fermement à deux mains.
10. Gardez les mains éloignées des pièces en
mouvement.
11. Ne quittez pas l’outil pendant qu’il tourne.
N’utilisez l’outil qu’une fois que vous l’avez
bien en main.
12. Ne pointez l’outil vers personne autour de
vous pendant l’utilisation. L’embout pourrait
être éjecté et blesser quelqu’un grièvement.
13. Ne touchez pas l’embout, les pièces situées
près de l’embout, ou la pièce immédiatement
après l’utilisation; ils peuvent être extrême-
ment chauds et brûler votre peau.
14. Certains matériaux contiennent des produits
chimiques qui peuvent être toxiques. Prenez
les précautions nécessaires pour éviter l’inha-
lation de ces poussières ou leur contact avec
la peau. Conformez-vous aux consignes de
sécurité du fournisseur du matériau.
15. Assurez-vous toujours que l’outil est éteint et
que la batterie et l’embout sont retirés avant
de remettre l’outil à quelqu’un.
Other manuals for HM002G
8
Table of contents
Languages:
Other Makita Power Hammer manuals

Makita
Makita HM1214C User manual

Makita
Makita HM1205C User manual

Makita
Makita M8600G User manual

Makita
Makita HM1202 User manual

Makita
Makita HM1214C User manual

Makita
Makita M8600 User manual

Makita
Makita HM0871C User manual

Makita
Makita HM1810 Quick start guide

Makita
Makita HM002G User manual

Makita
Makita HM002G User manual

Makita
Makita HM002GZ03 User manual

Makita
Makita DHR243Z User manual

Makita
Makita HM1512 User manual

Makita
Makita HM1800 Quick start guide

Makita
Makita HM0871C User manual

Makita
Makita HM1111C User manual

Makita
Makita HR2455 Quick start guide

Makita
Makita HM001GM201 User manual

Makita
Makita M8600 User manual

Makita
Makita HM0860C User manual