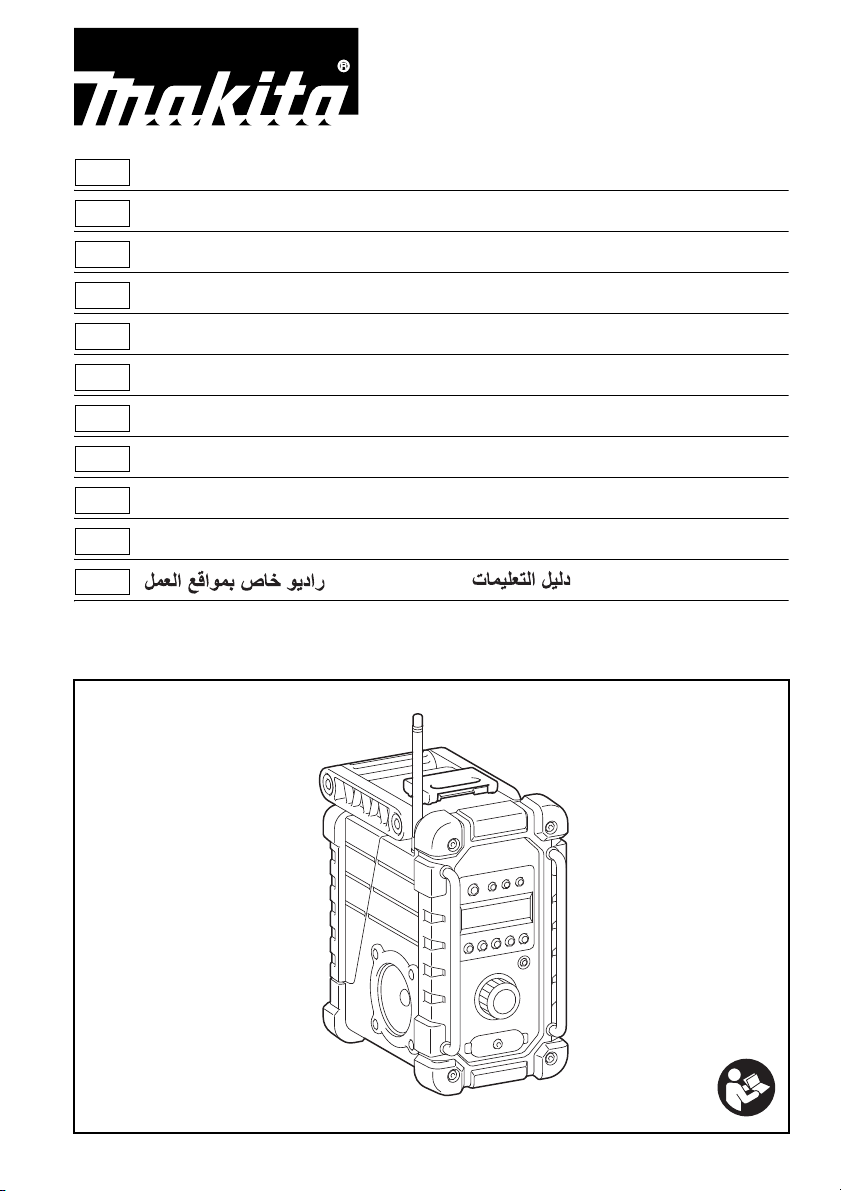
Makita DMR110 User manual

EN
Job Site Radio Instruction manual
FR Radio de chantier Manuel d’instructions
DE Baustellenradio Betriebsanleitung
IT Radio per luoghi di lavoro Istruzioni per l’uso
NL Bouwradio Gebruiksaanwijzing
ES Radio de Trabajo Manual de instrucciones
PT Rádio a Bateria Manual de instruções
DA Byggepladsradio Brugsanvisning
EL Ραδιόφωνο εργοταξίου Οδηγίες χρήσης
PL Akum. Odbiornik radiowy Instrukcja obsługi
AR
DMR109
DMR110

2
1
1 2 3 4
5
11 12
15
10
9
13
6
7
8
14
16 17

3
23
45
67
13
15
18
18
18
18
19
20
21
21
21

4
89
10 11
12
21
23
22
11
11
9
8

5
ENGLISH (Original instructions)
The following show the symbols used for the equipment.
Be sure that you understand their meaning before use.
.................... Read instruction manual.
................... Only for EU countries
Do not dispose of electric equipment
or battery pack together with
household waste material!
In observance of European Directive
2002/96/EC on waste electric and
electronic equipment, 2006/66/EC on
batteries and accumulators and
waste batteries and accumulators
and their implementation in
accordance with national laws,
electric equipment and battery pack
that have reached the end of their life
must be collected separately and
returned to an environmentally
compatible recycling facility.
WARNING:
When using electric tools, basic safety precautions should
always be followed to reduce the risk of fire, electric
shock, and personal injury, including the following:
1. Read this instruction manual and the charger
instruction manual carefully before use.
2. Clean only with dry cloth.
3. Do not install near any heat sources such as radiators,
heat registers, stoves, or other apparatus (including
amplifiers) that produce heat.
4. Only use attachments/accessories specified by the
manufacturer.
5. Unplug this apparatus during lighting storms or when
unused for long periods of time.
6. A battery operated radio with integral batteries or a
separate battery pack must be recharged only with the
specified charger for the battery. A charger that may
be suitable for one type of battery may create a risk of
fire when used with another battery.
7. Use battery operated radio only with specifically
designated battery packs. Use of any other batteries
may create a risk of fire.
8. When battery pack is not in use, keep it away from
other metal objects like: paper clips, coins, keys, nails,
screws, or other small metal objects that can make a
connection from one terminal to another. Shorting the
battery terminals together may cause sparks, burns,
or a fire.
9. Avoid body contact with grounded surfaces such as
pipes, radiators, ranges and refrigerators. There is an
increased risk of electric shock if your body is
grounded.
10. Under abusive conditions, liquid may be ejected from
the battery; avoid contact. If contact accidentally
occurs, flush with water. If liquid contacts eyes,
additionally seek medical help. Liquid ejected from the
battery may cause irritation or burns.
11. The MAINS plug is used as the disconnect device,
and it shall remain readily operable.
SAVE THESE INSTRUCTIONS
1. Before using battery cartridge, read all instructions
and cautionary markings on (1) battery charger, (2)
battery, and (3) product using battery.
2. Do not disassemble battery cartridge.
3. If operating time has become excessively shorter, stop
operating immediately. It may result in a risk of
overheating, possible burns and even an explosion.
4. If electrolyte gets into your eyes, rinse them out with
clear water and seek medical attention right away. It
may result in loss of your eyesight.
5. Do not short the battery cartridge:
(1) Do not touch the terminals with any conductive
material.
(2) Avoid storing battery cartridge in a container with
other metal objects such as nails, coins, etc.
(3) Do not expose battery cartridge to water or rain.
A battery short can cause a large current flow,
overheating, possible burns and even a
breakdown.
A battery short can cause a large current flow,
overheating, possible burns and even a breakdown.
6. Do not store the tool and battery cartridge in locations
where the temperature may reach or exceed 50°C
(122°F).
7. Do not incinerate the battery cartridge even if it is
severely damaged or is completely worn out. The
battery cartridge can explode in a fire.
8. Be careful not to drop or strike battery.
9. Do not use a damaged battery.
10. The contained lithium-ion-batteries are subject to the
Dangerous Goods Legislation requirements. For
commercial transports e.g. by third parties, forwarding
agents, special requirement on packaging and
labeling must be observed.
For preparation of the item being shipped, consulting
an expert for hazardous material is required. Please
also observe possibly more detailed national
regulations.
Tape or mask off open contacts and pack up the
battery in such a manner that it cannot move around in
the packaging.
11. Follow your local regulations relating to disposal of
battery.
SYMBOLS
IMPORTANT SAFETY INSTRUCTIONS
FOR BATTERY CARTRIDGE

6
SAVE THESE INSTRUCTIONS.
CAUTION: Only use genuine Makita batteries. Use of
non-genuine Makita batteries, or batteries that have been
altered, may result in the battery bursting causing fires,
personal injury and damage. It will also void the Makita
warranty for the Makita tool and charger.
Tips for maintaining maximum battery life
1. Charge the battery cartridge before completely
discharged.
Always stop tool operation and charge the battery
cartridge when you notice less tool power.
2. Never recharge a fully charged battery cartridge.
Overcharging shortens the battery service life.
3. Charge the battery cartridge with room
temperature at 10°C - 40°C (50°F - 104°F). Let a hot
battery cartridge cool down before charging it.
4. Charge the battery cartridge if you do not use it for a
long period (more than six months).
1. Power button
2. Band button
3. Advanced setting button
4. Info button
5. Preset button
6. Auto tune button
7. Volume/Tuning Control/Select knob
8. DC IN socket
9. AUX IN 1
10. LCD display
11. Soft bended rod antenna
12. Handle
13. Battery compartment cover (covering battery
cartridge)
14. Speaker
15. Battery compartment locker
16. Input terminal (AUX IN 2)
17. Micro USB port for software upgrade
18. Battery compartment
19. Red indicator
20. Button
21. Battery cartridge
22. Indicator lamps
23. Check button
• FM/DAB (DMR109)
• FM/DAB or DAB+ (DMR110)
• Large LCD display with illumination
• Manual/Preset/Scan tuning
• Rotary tuning and volume control
• 5 preset stations for each band
• Micro USB port for software upgrade
• Stereo speaker for rich sound performance
• Ultra rugged design
• Water resistant to IP64
• Powered by both Makita battery pack and supplied
power adaptor
EXPLANATION OF GENERAL VIEW
(Fig. 1 - 12)
FEATURES

7
The following tables indicate the operating time with a full charged battery.
: Cluster battery : Slide battery
* The operating time is based on the operation in DAB/DAB+ on a single charge.
* Operating time may differ depending on battery type, charging status, and usage condition.
Installing or removing Slide battery
cartridge (Fig. 4 - 6)
CAUTION:
Always switch off the radio before removing the battery
cartridge.
• To install the battery cartridge, align the tongue on the
battery cartridge with the groove in the housing and slip
it into place. Always insert it all the way until it locks in
place with a little click.
• If you can see the red indicator on the upper side of the
button, it is not locked completely. Install it fully until the
red indicator cannot be seen. If not, it may accidentally
fall out of the radio, causing injury to you or someone
around you.
• Do not use force when installing the battery cartridge. If
the cartridge does not slide in easily, it is not being
inserted correctly.
• To remove the battery cartridge, slide it from the radio
while sliding the button on the front of the cartridge or
pressing the buttons on both sides of the cartridge.
Return the battery compartment locker to the original
position.
Reduced power, distortion and a “stuttering sound” are
signs that the battery needs to be replaced.
Note:
The battery pack can’t be charged via the supplied AC
power adaptor.
Installing or removing Cluster battery
cartridge (Fig. 7 & 8)
CAUTION:
Always switch off the radio before removing the battery
cartridge.
• To insert the battery cartridge, align the tongue on the
battery cartridge with the groove in the housing and slip
it into place.
• To remove the battery cartridge, take the battery out of
the terminal while pressing the buttons on the side of
cartridge.
Return the battery compartment locker to the original
position.
Reduced power, distortion and a “stuttering sound” are
signs that the battery needs to be replaced.
Note:
The battery pack can’t be charged via the supplied AC
power adaptor.
OPERATING TIME
Battery
capacity
Battery cartridge voltage At speaker output
= 50 mW + 50 mW
Unit: Hour (Approximately)
7.2 V 10.8 V 14.4 V 18 V
1.0 Ah BL7010 4.5 hour
1.3 Ah
BL1013 5.5 hour
BL1415 5.0 hour
BL1815 6.0 hour
1.5 Ah
BL0715 6.5 hour
BL1015 8.0 hour
BL1415N 7.0 hour
BL1815N 7.5 hour
2.0 Ah BL1020B BL1820
BL1820B 10 hour
3.0 Ah
BL1430
BL1430B 11 hour
BL1830
BL1830B 14 hour
4.0 Ah BL1040B BL1840
BL1840B 20 hour
BL1440 18 hour
5.0 Ah
BL1450 22 hour
BL1850
BL1850B 25 hour
6.0 Ah BL1460B 24 hour
BL1860B 31 hour
INSTALLATION

8
Indicating the remaining battery capacity
(Fig. 9)
Only for battery cartridges with “B” at the end of the model
number
Press the check button on the battery cartridge to indicate
the remaining battery capacity. The indicator lamps light
up for few seconds.
Note:
• Depending on the conditions of use and the ambient
temperature, the indication may differ slightly from the
actual capacity.
Installing the soft bended rod antenna
(Fig. 10 & 11)
Install the soft bended rod antenna as shown in the figure.
Note:
There is a click in the battery compartment designed to
store the removed antenna.
Using supplied AC power adaptor
(Fig. 12)
Remove the rubber protector and insert the adaptor plug
into the DC socket on the front side of the radio. Plug the
adaptor into a standard mains socket outlet. Whenever
the adaptor is used, the battery pack is automatically
disconnected. The AC adaptor should be disconnected
from the main supply when not in use.
This radio has three tuning methods- Scan tuning, Manual
tuning and Memory presets recall.
Selecting a station - DAB
1. Press the Power button to switch on your radio.
2. Select the DAB mode by pressing the Band button.
3. Press the Advanced setting button and rotate the
Volume/Tuning Control/Select knob until “Station List”
is flashing on the screen. Press the Volume/Tuning
Control/Select knob to enter the list of the stations.
4. Rotate the Volume/Tuning Control/Select knob to
scroll through the list of available stations. Press the
knob to select the station.
5. Adjust the desired volume by rotating the Volume/
Tuning Control/Select knob.
Display modes - DAB
Your radio has a range of display options in the DAB
mode:
Press the Info button to cycle through the various options
shown in the following letters (a. to g.).
a. Station name Indicates the station name being
listened to.
b. Program type Indicates the type of station being
listened to. E.g. Pop, Classics, News,
etc.
c. Multiplex name Indicates the name of the DAB
multiplex to which the current station
belongs.
d. Time & date Indicates the current time and date.
e. Frequency and channel
Indicates the frequency and channel
number for the currently tuned DAB
station.
f. Bit rate/Audio type
Indicates the digital audio bit rate and
audio type for the currently tuned
DAB station.
g. Signal strength Indicates the signal strength for the
currently tuned DAB station.
Finding new stations – DAB
From time to time, new DAB radio stations may become
available. Or you may have moved to a different part of
the country. In this case you may need to activate your
radio to scan for new stations.
To allow the radio to find the available stations, it is
recommended to carry out a full scan of the entire DAB
Band III frequencies.
1. Press the Auto tune button.
2. Your radio will perform a full scan of the DAB
frequencies. As new stations are found, the station
counter on the left side in the display will increase and
stations will be added to the list.
Manual tuning – DAB
Manual tuning allows you to tune your radio to a particular
DAB frequency in Band III. This function can also be used
to assist the positioning of the antenna or the radio so as
to optimize reception for a specific channel or frequency.
1. Press the Advanced setting button and rotate the
Volume/Tuning Control/Select knob until “Manual
Tune” shown on the display. Press the Volume/Tuning
Control/Select knob to enter the manual tuning mode.
2. Rotate the Volume/Tuning Control/Select knob to
select the desired DAB channel. Press Volume/Tuning
Control/Select knob to confirm the chosen frequency.
Station order setup – DAB
Your radio has 3 station order settings from which you can
choose. The station order settings are alphanumeric,
ensemble and valid station.
Indicator lamps
Remaining
capacity
Lighted Off Blinking
75% to 100%
50% to 75%
25% to 50%
0% to 25%
Charge the
battery.
The battery may
have
malfunctioned.
OPERATION

9
1. Press the Advanced setting button.
2. Rotate the Volume/Tuning Control/Select knob until
“Station order” appearing on the display, then press
the Volume/Tuning Control/Select knob to enter the
setting.
3. Rotate the Volume/Tuning Control/Select knob to
select the following options and press the knob to
confirm the setting.
Alphanumeric Sorts the station list alpha-numerically
0...9 A...Z
Ensemble Organizes the station list by DAB
multiplex
Valid Shows only those stations for which a
signal can be found
Dynamic Range Control (DRC) – DAB
DRC feature can make quieter sounds easier to hear
when your radio is used in a noisy environment by
reducing the dynamic range of the audio signal. There are
three levels of compression:
DRC 0 No compression applied.
DRC 1/2 Medium compression applied.
DRC 1 Maximum compression applied.
1. Press the Power button to switch on your radio.
2. Press the Band button to select the DAB band.
3. Press the Advanced setting button and rotate the
Volume/Tuning Control/Select knob until “DRC Value”
shown on the display. Then press the Volume/Tuning
Control/Select knob to enter the setting. The display
will show the current DRC value.
4. Rotate the Volume/Tuning Control/Select knob to
select desired DRC setting.
5. Press the Volume/Tuning Control/Select knob to
confirm the setting.
Scan Tuning – FM
1. Press the Power button to turn on the radio.
2. Select the desired waveband by pressing the Band
button. Make sure the soft bended rod antenna has
been well placed for best FM reception. Try to avoid
operating the radio next to a computer screen and
other equipment which will cause interference to the
radio.
3. Press the Auto tune button and the radio will search
and stop automatically when it finds a radio station.
The radio will continue searching for the next available
station unless the operator presses the Auto tune
button to stop the scanning.
4. Rotate the Volume/Tuning Control/Select knob to get
the desired sound level. The LCD display will show
sound level changes.
Note:
In order to use the Volume/Tuning Control/Select knob
to find your desired station, press and hold the
Volume/Tuning Control/Select knob to switch to the
tuning control mode.
5. To turn off the radio, press the Power button.
FM scan zone
When using FM mode, your radio can be set to scan
either local stations or to scan all stations including distant
radio stations.
Manual Tuning – FM
1. Press the Power button to turn on the radio.
2. Press the Band button to select desired waveband.
Adjust the antenna as described above.
3. Rotate the Volume/Tuning Control/Select knob will
change the frequency in the following increment:
FM: 50 or 100 kHz
Note:
In order to use the Volume/Tuning Control/Select knob
to find your desired station, press and hold the
Volume/Tuning Control/Select knob to switch to the
tuning control mode.
4. Keep rotating the Volume/Tuning Control/Select knob
until desired frequency is shown on the display.
5. Rotate the Volume/Tuning Control/Select knob to get
the desired sound level.
6. To turn off the radio, press the Power button.
Display modes – FM
Your radio has a range of display options for FM radio
mode:
Repeat pressing the Info button to cycle through the
different options.
a. Program station Indicates the name of the station
being listened to.
b. Radio text Indicates text message such as
new items, etc.
c. Program type Indicates the type of station being
listened to such as Pop, Classic,
News, etc.
d. Time & date Indicates the current time and date.
e. Frequency Indicates the frequency of the FM
signal.
Storing stations in preset memories (DAB
and FM)
There are 5 memory presets for each waveband.
1. Press the Power button to turn on the radio.
2. Tune to the desired station using one of the methods
previously described.
3. Press and hold the desired Preset button until the
preset number shown on the display, for example,
“P2 Saved”. The station is then stored in the selected
Preset button.
4. Repeat this procedure for the remaining presets.
5. Stations stored in the preset memories can be
overwritten by following the procedures described
above.
Recall stations from the preset memories
(DAB and FM)
1. Press the Power button to turn on the radio.
2. Press the Band button to select your desired
waveband.
3. Press the desired Preset button momentarily. The
preset number and station frequency will appear in the
display.

10
Language options (only available in
DMR110)
There are eight language options available in the radio:
English, German, Italian, French, Dutch, Danish,
Norwegian, and Polish.
1. Press Advanced setting button.
2. Rotate the Volume/Tuning Control/Select knob until
“Language” shown on the display. Press the Volume/
Tuning Control/Select knob to enter the setting.
3. Rotate the Volume/Tuning Control/Select knob to
choose your desired language. Press the Volume/
Tuning Control/Select knob to confirm your setting.
Brightness control
The backlight of the display can be adjusted.
1. Press the Advanced setting button.
2. Rotate the Volume/Tuning Control/Select knob until
“Backlight” shown on the display. Press the Volume/
Tuning Control/Select knob to enter the setting.
3. Rotate the Volume/Tuning Control/Select knob to
choose to enable or disable the backlight function,
then press the Volume/Tuning Control/Select knob to
confirm the setting.
System reset
If your radio fails to work correctly, or some digits on the
display are missing or incomplete, carry out the following
procedure.
1. Press the Advanced setting button.
2. Rotate the Volume/Tuning Control/Select knob until
“Factory Reset” shown on the display. Press the
Volume/Tuning Control/Select knob to enter the
setting.
3. Rotate the Volume/Tuning Control/Select knob to
choose “Yes”. Press the Volume/Tuning Control/
Select knob to confirm the setting and a full reset will
be performed.
Software version
1. Press the Advanced setting button.
2. Rotate the Volume/Tuning Control/Select knob until
“SW Version” shown on the display. Press the Volume/
Tuning Control/Select knob to view the software
version installed in the radio.
Micro USB port for software upgrade
Software updates for your radio may be available in the
future.
As software updates become available software and
information on how to update your radio can be found at
Makita website.
How to play other audios
CAUTION:
Unplug this apparatus before connecting other audios.
• There are 2 AUX IN sockets. AUX IN 1 is located on
the front panel, and AUX IN 2 is located in the battery
compartment.
• Connect a stereo or mono source (i.e. iPod, MP3, or
CD player) to either AUX IN 1 or AUX IN 2 by audio
cord.
• Repeatedly press and release the Band button until
“AU1” or “AU2” is displayed, then AUX function is
activated.
CAUTION:
• Never use gasoline, benzine, thinner, alcohol or the
like. Discoloration, deformation or cracks may result.
Power requirements
AC power adaptor DC 12 V 1A, center pin positive
Battery Cluster battery: 7.2 V - 10.8 V
Slide battery: 10.8 V - 18 V
Frequency coverage FM 87.50 - 108 MHz
DAB/DAB+ 174.928 -
239.200 MHz
DAB/DAB+ Channel block
DAB (Band III) 5A-13F
Compatible standard DAB (DMR109)
DAB/DAB+ (DMR110)
Circuit feature
Loudspeaker 3 inches 8 ohm
Output power 7.2 V: 0.5 W X 2
10.8 V:1.2 W X 2
14.4 V: 2.2 W X 2
18 V: 3.5 W X 2
Input terminal 3.5 mm dia. (AUX IN1/AUX IN2)
Antenna system DAB/FM: soft bended rod antenna
Dimension (L x W x H) in mm
280 x 163 x 302
Weight 4.0 kg (without battery)
MAINTENANCE
SPECIFICATIONS

11
FRANÇAIS (Instructions d’origine)
Les symboles utilisés pour l’appareil sont indiqués
ci-dessous. Assurez-vous d’avoir bien compris leur
signification avant d’utiliser l’appareil.
.................... Lire le manuel d’instructions.
................... Pour les pays européens uniquement
Ne pas jeter les appareils électriques
et les batteries dans les ordures
ménagères !
Conformément à la directive
européenne 2002/96/CE relative aux
déchets d’équipements électriques
ou électroniques (DEEE) et à la
directive 2006/66/CE relative aux
batteries, aux accumulateurs ainsi
qu’aux batteries et accumulateurs
usagés et à leur transposition dans la
législation nationale, les appareils
électriques et les batteries doivent
être collectés à part et être soumis à
un recyclage respectueux de
l’environnement.
AVERTISSEMENT :
Lors de l’utilisation d’outils électriques, vous devez
toujours prendre des précautions élémentaires en matière
de sécurité pour réduire les risques d’incendie, de choc
électrique et de blessure. Ces précautions sont
notamment les suivantes :
1. Avant d’utiliser l’appareil, lisez attentivement son
manuel d’instructions et celui du chargeur.
2. Nettoyez avec un chiffon doux uniquement.
3. N’installez pas l’appareil près de sources de chaleur,
telles que des radiateurs, des bouches de chaleur,
des poêles ou d’autres dispositifs (notamment des
amplificateurs) émetteurs de chaleur.
4. Utilisez uniquement des pièces complémentaires/
accessoires spécifiés par le fabricant.
5. Débranchez cet appareil en cas d’orage ou lorsque
vous ne l’utilisez pas pendant une période prolongée.
6. Les batteries utilisées pour les radios, qu’elles soient
intégrées ou séparées, doivent être rechargées
uniquement à l’aide du chargeur de batterie spécifié.
Un chargeur qui convient à un type de batterie peut
créer un risque d’incendie s’il est utilisé avec une
autre batterie.
7. Les radios fonctionnant à l’aide de batteries doivent
être utilisées uniquement avec les batteries
désignées. L’utilisation d’autres batteries peut créer
un risque d’incendie.
8. Lorsque vous n’utilisez pas la batterie, gardez-la
éloignée de tout objet métallique, comme les
trombones, pièces de monnaie, clés, clous, vis ou
autres petits objets métalliques susceptibles de faire
office de connexion entre deux bornes. Court-circuiter
les bornes de la batterie peut provoquer des
étincelles, des brûlures ou un incendie.
9. Évitez tout contact corporel avec les surfaces mises à
la terre, telles que les tuyaux, radiateurs, cuisinières et
réfrigérateurs. Le risque de choc électrique augmente
si votre corps est mis à la terre.
10. En cas de mauvaise utilisation, du liquide peut fuir de
la batterie ; évitez tout contact. En cas de contact
accidentel, nettoyez la surface en question à l’eau. Si
du liquide entre en contact avec vos yeux, consultez
un médecin. Le liquide éjecté de la batterie peut
provoquer une irritation ou des brûlures.
11. La fiche secteur est utilisée comme dispositif de
déconnexion et doit rester facilement accessible.
CONSERVEZ CES
INSTRUCTIONS
1. Avant d’utiliser la batterie, lisez toutes les consignes
et tous les avertissements inscrits sur (1) le chargeur,
(2) la batterie et (3) l’appareil alimenté par la batterie.
2. Ne démontez pas la batterie.
3. Cessez immédiatement d’utiliser l’appareil si le temps
de fonctionnement devient excessivement court. Il y a
risque de surchauffe, de brûlures, voire d’explosion.
4. Si l’électrolyte pénètre dans vos yeux, rincez-les à
l’eau claire et consultez immédiatement un médecin. Il
y a risque de perte de la vue.
5. Ne court-circuitez pas la batterie :
(1) Ne touchez les bornes avec aucun matériau
conducteur.
(2) Évitez de ranger la batterie dans un contenant
où se trouvent d’autres objets métalliques tels
que des clous, pièces de monnaie, etc.
(3) N’exposez pas la batterie à l’eau ou à la pluie.
Un court-circuit de la batterie risque de
provoquer un fort courant, une surchauffe,
parfois des brûlures, voire une panne.
Un court-circuit de la batterie risque de provoquer un
fort courant, une surchauffe, parfois des brûlures,
voire une panne.
6. Ne rangez pas l’outil ou la batterie dans des endroits
où la température risque d’atteindre ou de dépasser
50 °C (122 °F).
7. Ne jetez pas la batterie au feu, même si elle est
gravement endommagée ou complètement épuisée.
La batterie peut exploser au contact du feu.
8. Veillez à ne pas laisser tomber ou heurter la batterie.
9. N’utilisez pas de batterie endommagée.
10. Les batteries au lithium-ion contenues dans l’appareil
sont soumises à la législation sur les marchandises
dangereuses. Pour les transports commerciaux
réalisés par des transitaires tiers par exemple, les
conditions spéciales figurant sur les emballages et les
étiquettes doivent être respectées.
Lors de la préparation de l’article à expédier, il est
obligatoire de consulter un spécialiste en matières
dangereuses. Respectez également les éventuelles
réglementations nationales plus détaillées.
SYMBOLES
CONSIGNES DE SÉCURITÉ
IMPORTANTES
IMPORTANTES CONSIGNES DE
SÉCURITÉ POUR LA BATTERIE

12
Collez du ruban adhésif sur les contacts ouverts ou
masquez-les et emballez la batterie de sorte qu’elle
ne bouge pas dans le coffret.
11. Suivez les réglementations en vigueur en ce qui
concerne la collecte des batteries.
CONSERVEZ CES
INSTRUCTIONS.
ATTENTION : Utilisez uniquement des batteries
Makita d’origine. L’utilisation de batteries qui ne sont pas
Makita d’origine ou de batteries qui ont été modifiées peut
provoquer des explosions et entraîner des incendies, des
blessures corporelles et des dégâts. Cela peut également
invalider la garantie Makita pour l’outil et le chargeur
Makita.
Conseils pour garantir une durée de vie
optimale de la batterie
1. Rechargez la batterie avant qu’elle soit complètement
épuisée.
Arrêtez toujours l’outil et rechargez la batterie lorsque
vous constatez que la puissance de l’outil diminue.
2. Ne rechargez jamais une batterie complètement
chargée.
La surcharge réduit la durée de service de la batterie.
3. Rechargez la batterie à une température
ambiante comprise entre 10 °C et 40 °C (entre 50 °F
et 104 °F). Si la batterie est chaude, laissez-la refroidir
avant de la charger.
4. Chargez la batterie si vous ne l’avez pas utilisée
pendant une période prolongée (plus de six mois).
1. Bouton d’alimentation
2. Bouton BAND
3. Bouton Paramètres avancés
4. Bouton Info
5. Bouton de Présélection
6. Bouton Auto Tune
7. Bouton de sélection/commande de syntonisation/
volume
8. Prise d’entrée secteur
9. AUX IN 1
10. Écran LCD
11. Antenne tige souple courbée
12. Poignée
13. Couvercle du compartiment à batterie (recouvre la
batterie)
14. Haut-parleur
15. Casier du compartiment des batteries
16. Borne d’entrée (AUX IN 2)
17. Port micro-USB pour mise à jour de logiciel
18. Compartiment à batterie
19. Voyant rouge
20. Bouton
21. Batterie
22. Voyants
23. Bouton de vérification
• FM/DAB (DMR109)
• FM/DAB ou DAB+ (DMR110)
• Grand écran LCD avec rétroéclairage
• Syntonisation manuelle/par balayage/présélection
• Syntonisation par rotation et commande de volume
• 5 stations présélectionnées pour chaque bande
• Port micro-USB pour mise à jour de logiciel
• Haut-parleur stéréo pour des performances audio
optimales
• Conception très robuste
• Résiste à l’eau selon la norme IP64
• Alimentation par un bloc-batterie Makita et un
adaptateur secteur fourni
DESCRIPTIF (Fig. 1 à 12)
CARACTÉRISTIQUES

13
Les tableaux suivants indiquent le temps de fonctionnement avec une batterie entièrement chargée.
: Batterie de type « bloc » : Batterie coulissante
* Le temps de fonctionnement dépend du fonctionnement en mode DAB/DAB+ avec une charge unique.
* Le temps de fonctionnement peut varier selon le type de batterie, l’état du chargement et les conditions d’utilisation.
Installation et retrait d’une batterie
coulissante (Fig. 4 et 6)
ATTENTION :
Mettez toujours la radio hors tension avant de retirer la
batterie.
• Pour installer la batterie, alignez sa languette sur la
rainure qui se trouve à l’intérieur du capot, puis faites
glisser la batterie pour la mettre en place. Insérez-la
toujours bien à fond, jusqu’à ce qu’elle se verrouille en
émettant un léger déclic.
• Si vous voyez le voyant rouge sur la face supérieure du
bouton, la batterie n’est pas parfaitement verrouillée.
Installez-la à fond, jusqu’à ce que le voyant rouge ne
soit plus visible. À défaut, elle risque de tomber
accidentellement de la radio et de vous blesser ou de
blesser une personne située près de vous.
• N’appliquez pas une force excessive lors de
l’installation de la batterie. Si la batterie ne glisse pas
aisément, elle n’est pas insérée correctement.
• Pour retirer la batterie de la radio, faites glisser le
bouton à l’avant de la batterie et sortez la batterie.
Vous pouvez également appuyer sur les boutons situés
de chaque côté de la batterie.
Remettez le casier du compartiment à batterie en position
d’origine.
Une alimentation réduite, une déformation et un « son
saccadé » sont des signes qui indiquent que la batterie
doit être remplacée.
Remarque :
Il n’est pas possible de recharger le bloc-batterie à l’aide
de l’adaptateur secteur fourni.
Installation et retrait d’une batterie de
type«bloc»(Fig.7et8)
ATTENTION :
Mettez toujours la radio hors tension avant de retirer la
batterie.
• Pour insérer la batterie, alignez sa languette sur la
rainure qui se trouve à l’intérieur du carter, puis glissez
la batterie pour la mettre en place.
• Pour retirer la batterie, dégagez-la de la borne tout en
appuyant sur les boutons situés de chaque côté de la
batterie.
Remettez le casier du compartiment à batterie en position
d’origine.
TEMPS DE FONCTIONNEMENT
Capacité de
la batterie
Tension de la batterie Au niveau de la sortie du haut-parleur
= 50 mW + 50 mW
Unité : Heure (environ)
7,2 V 10,8 V 14,4 V 18 V
1,0 Ah BL7010 4,5 heures
1,3 Ah
BL1013 5,5 heures
BL1415 5,0 heures
BL1815 6,0 heures
1,5 Ah
BL0715 6,5 heures
BL1015 8,0 heures
BL1415N 7,0 heures
BL1815N 7,5 heures
2,0 Ah BL1020B BL1820
BL1820B 10 heures
3,0 Ah
BL1430
BL1430B 11 heures
BL1830
BL1830B 14 heures
4,0 Ah BL1040B BL1840
BL1840B 20 heures
BL1440 18 heures
5,0 Ah
BL1450 22 heures
BL1850
BL1850B 25 heures
6,0 Ah BL1460B 24 heures
BL1860B 31 heures
INSTALLATION

14
Une alimentation réduite, une déformation et un « son
saccadé » sont des signes qui indiquent que la batterie
doit être remplacée.
Remarque :
Il n’est pas possible de recharger le bloc-batterie à l’aide
de l’adaptateur secteur fourni.
Indication de l’autonomie restante de la
batterie (Fig. 9)
Uniquement pour les batteries dont le numéro de modèle
se termine par la lettre « B »
Appuyez sur le bouton de vérification pour indiquer
l’autonomie restante de la batterie. Les voyants s’allument
alors pendant quelques secondes.
Remarque :
• Selon les conditions d’utilisation et la température
ambiante, les indications peuvent différer légèrement
de l’autonomie réelle restante.
Installation de l’antenne tige souple
courbée (Fig. 10 et 11)
Installez l’antenne tige souple courbée comme illustré sur
la figure.
Remarque :
Le compartiment à batterie comporte un déclic destiné à
ranger l’antenne qui a été déposée.
Utilisation de l’adaptateur secteur fourni
(Fig. 12)
Retirez le capuchon en caoutchouc et insérez la fiche de
l’adaptateur dans la prise secteur sur la façade de la
radio. Branchez l’adaptateur dans une prise de courant
standard. En cas d’utilisation de l’adaptateur, le
bloc-batterie est automatiquement déconnecté.
Débranchez l’adaptateur secteur de l’alimentation lorsque
vous ne l’utilisez pas.
Cette radio dispose de trois méthodes de syntonisation :
la syntonisation par balayage, la syntonisation manuelle
et le rappel des présélections en mémoire.
Sélection d’une station – DAB
1. Appuyez sur le bouton d’alimentation pour allumer
votre radio.
2. Appuyez sur le bouton BAND pour sélectionner le
mode DAB.
3. Appuyez sur le bouton Paramètres avancés et tournez
le bouton de sélection/commande de syntonisation/
volume jusqu’à ce que « Liste de stations » clignote
sur l’écran. Appuyez sur le bouton de sélection/
commande de syntonisation/volume pour afficher la
liste des stations.
4. Tournez le bouton de sélection/commande de
syntonisation/volume pour faire défiler la liste des
stations disponibles. Appuyez sur ce bouton pour
sélectionner la station.
5. Réglez le volume souhaité en tournant le bouton de
sélection/commande de syntonisation/volume.
Modes d’affichages – DAB
Votre radio possède plusieurs options d’affichage pour le
mode DAB :
Appuyez sur le bouton Info pour parcourir les différentes
options indiquées aux points suivants (a. à g.).
a. Nom de la station Affiche le nom de la station
écoutée.
b. Type de programme Affiche le type de la station
écoutée. Par ex., Pop,
Classique, Informations, etc.
c. Nom du multiplex Indique le nom du multiplex
DAB auquel appartient la
station actuelle.
d. Heure et date Indique l’heure et la date
actuelles.
e. Fréquence et canal Indique la fréquence et le
numéro de canal de la station
DAB actuellement syntonisée.
f. Débit binaire/Format audio
Indique le débit binaire de
l’audio numérique et le format
audio de la station DAB
actuellement syntonisée.
g. Force du signal Indique la force du signal de la
station DAB actuellement
syntonisée.
Trouver de nouvelles stations – DAB
Il arrive que de nouvelles stations radio DAB soient
disponibles. Ou bien vous vous êtes peut-être déplacé
dans une autre partie du pays. Dans ce cas, vous devez
activer votre radio pour balayer et trouver de nouvelles
stations.
Pour permettre à la radio de trouver les stations
disponibles, il est recommandé d’effectuer un balayage
complet de toutes les fréquences DAB Bande III.
1. Appuyez sur le bouton Auto Tune.
Voyants
Autonomie
restante
Allumé Éteint Clignotant
75 % à 100 %
50 % à 75 %
25 % à 50 %
0%à25%
Recharger la
batterie.
Il est possible que
la batterie ait mal
fonctionné.
FONCTIONNEMENT

15
2. Votre radio effectuera un balayage complet des
fréquences DAB. À mesure que de nouvelles stations
sont trouvées, le compteur de stations, situé à gauche
de l’affichage, augmentera et des stations s’ajouteront
à la liste.
Syntonisation manuelle – DAB
La syntonisation manuelle vous permet de syntoniser
votre radio sur une fréquence DAB particulière en Bande
III. Cette fonction peut également être utilisée pour
faciliter le positionnement de l’antenne ou la radio afin
d’optimiser la réception d’un canal ou d’une fréquence
spécifique.
1. Appuyez sur le bouton Paramètres avancés et tournez
le bouton de sélection/commande de syntonisation/
volume jusqu’à ce que « Syntonisation manuelle »
s’affiche sur l’écran. Appuyez sur le bouton de
sélection/commande de syntonisation/volume pour
sélectionner le mode de syntonisation manuelle.
2. Tournez le bouton de sélection/commande de
syntonisation/volume pour sélectionner le canal DAB
souhaité. Appuyez sur le bouton de sélection/
commande de syntonisation/volume pour confirmer la
fréquence choisie.
Création de l’ordre des stations – DAB
Votre radio dispose de 3 réglages d’ordre de stations que
vous pouvez choisir. Les réglages d’ordre de stations sont
le réglage alphanumérique, d’ensemble et de station
valide.
1. Appuyez sur le bouton Paramètres avancés.
2. Tournez le bouton de sélection/commande de
syntonisation/volume jusqu’à ce que « Ordre des
stations » apparaisse sur l’affichage, puis appuyez sur
ce bouton pour sélectionner le paramètre.
3. Tournez le bouton de sélection/commande de
syntonisation/volume pour sélectionner les options
suivantes, puis appuyez sur ce bouton pour confirmer
le paramètre.
Alphanumérique Trie la liste des stations dans l’ordre
alphanumérique de 0 à 9 et de A à Z
D’ensemble Organise la liste des stations par
multiplex DAB
Station valide Affiche uniquement les stations pour
lesquelles un signal peut être trouvé
Contrôle de la gamme dynamique (DRC) –
DAB
La fonction DRC peut vous aider à mieux entendre les
sons faibles lorsque vous utilisez la radio dans un
environnement bruyant, en réduisant la gamme
dynamique du signal audio. Il y a trois niveaux de
compression :
DRC 0 Aucune compression appliquée.
DRC 1/2 Compression moyenne appliquée.
DRC 1 Compression maximale appliquée.
1. Appuyez sur le bouton d’alimentation pour allumer
votre radio.
2. Appuyez sur le bouton BAND pour sélectionner la
bande DAB.
3. Appuyez sur le bouton Paramètres avancés et tournez
le bouton de sélection/commande de syntonisation/
volume jusqu’à ce que « Valeur DRC » s’affiche sur
l’écran. Puis, appuyez sur le bouton de sélection/
commande de syntonisation/volume pour sélectionner
le paramètre. L’écran affichera la valeur DRC actuelle.
4. Tournez le bouton de sélection/commande de
syntonisation/volume pour sélectionner le paramètre
DRC souhaité.
5. Appuyez sur le bouton de sélection/commande de
syntonisation/volume pour confirmer le paramètre.
Syntonisation par balayage – FM
1. Appuyez sur le bouton d’alimentation pour allumer la
radio.
2. Appuyez sur le bouton BAND pour sélectionner la
gamme d’ondes souhaitée. Assurez-vous que
l’antenne tige souple courbée est correctement placée
pour optimiser la réception FM. Évitez de faire
fonctionner la radio près de l’écran d’un ordinateur ou
d’un autre appareil susceptible de provoquer des
interférences avec la radio.
3. Appuyez sur le bouton Auto Tune pour que la radio
cherche une station radio et s’arrête automatiquement
lorsqu’elle en trouve une. La radio continue de
chercher la station suivante disponible, sauf si
l’opérateur appuie sur le bouton Auto Tune pour
arrêter le balayage.
4. Tournez le bouton de sélection/commande de
syntonisation/volume pour obtenir le niveau audio
souhaité. Sur l’écran LCD sont affichés les
changements de niveau audio.
Remarque :
Afin d’utiliser le bouton de sélection/commande de
syntonisation/volume pour trouver votre station
souhaitée, maintenez enfoncé ce bouton pour passer
en mode de commande de syntonisation.
5. Pour éteindre la radio, appuyez sur le bouton
d’alimentation.
Zone de balayage FM
Lorsque vous utilisez le mode FM, vous pouvez régler
votre radio pour qu’elle balaie les stations locales ou pour
qu’elle balaie toutes les stations, y compris les stations
radio éloignées.
Syntonisation manuelle – FM
1. Appuyez sur le bouton d’alimentation pour allumer la
radio.
2. Appuyez sur le bouton BAND pour sélectionner la
gamme d’ondes souhaitée.
Réglez l’antenne comme décrit ci-dessus.
3. Tournez le bouton de sélection/commande de
syntonisation/volume pour modifier la fréquence selon
les incréments suivants :
FM : 50 ou 100 kHz
Remarque :
Afin d’utiliser le bouton de sélection/commande de
syntonisation/volume pour trouver votre station
souhaitée, maintenez enfoncé ce bouton pour passer
en mode de commande de syntonisation.
4. Continuez de tourner le bouton de sélection/
commande de syntonisation/volume jusqu’à ce que
vous obteniez la fréquence souhaitée à l’écran.

16
5. Tournez le bouton de sélection/commande de
syntonisation/volume pour obtenir le niveau audio
souhaité.
6. Pour éteindre la radio, appuyez sur le bouton
d’alimentation.
Modes d’affichage – FM
Votre radio possède plusieurs options d’affichage pour le
mode radio FM :
Répétez en appuyant sur le bouton Info pour parcourir les
différentes options.
a. Station de programme Indique le nom de la station
écoutée.
b. Texte radio Indique le message textuel,
tel que de nouveaux
éléments, etc.
c. Type de programme Indique le type de station
écoutée, par exemple Pop,
Classique, Informations, etc.
d. Heure et date Indique l’heure et la date
actuelles.
e. Fréquence Indique la fréquence du
signal FM.
Enregistrement des stations dans des
mémoires présélectionnées (DAB et FM)
Il existe 5 présélections mémorisées pour chaque gamme
d’ondes.
1. Appuyez sur le bouton d’alimentation pour allumer la
radio.
2. Syntonisez la radio jusqu’à la station souhaitée selon
l’une des méthodes décrites précédemment.
3. Maintenez enfoncé le bouton de Présélection souhaité
jusqu’à ce que le numéro présélectionné s’affiche sur
l’écran, par exemple, « P2 sauvegardé ». La station
est alors enregistrée dans le bouton de Présélection
sélectionné.
4. Répétez cette procédure pour les présélections
restantes.
5. Pour remplacer les stations enregistrées dans les
mémoires présélectionnées, procédez comme indiqué
précédemment.
Rappel des stations des mémoires
présélectionnées (DAB et FM)
1. Appuyez sur le bouton d’alimentation pour allumer la
radio.
2. Appuyez sur le bouton BAND pour sélectionner votre
gamme d’ondes souhaitée.
3. Appuyez brièvement sur le bouton de Présélection
souhaité. Le numéro et la fréquence de la station
présélectionnés apparaissent sur l’écran.
Langues (uniquement disponible pour
DMR110)
Huit langues sont disponibles dans la radio : l’anglais,
l’allemand, l’italien, le français, le néerlandais, le danois,
le norvégien et le polonais.
1. Appuyez sur le bouton Paramètres avancés.
2. Tournez le bouton de sélection/commande de
syntonisation/volume jusqu’à ce que « Langue »
apparaisse sur l’écran. Appuyez sur le bouton de
sélection/commande de syntonisation/volume pour
sélectionner le paramètre.
3. Tournez le bouton de sélection/commande de
syntonisation/volume pour sélectionner votre langue.
Appuyez sur le bouton de sélection/commande de
syntonisation/volume pour confirmer votre paramètre.
Réglage de la luminosité
Vous pouvez régler le rétroéclairage de l’affichage.
1. Appuyez sur le bouton Paramètres avancés.
2. Tournez le bouton de sélection/commande de
syntonisation/volume jusqu’à ce que
« Rétroéclairage » apparaisse sur l’écran. Appuyez
sur le bouton de sélection/commande de
syntonisation/volume pour sélectionner le paramètre.
3. Tournez le bouton de sélection/commande de
syntonisation/volume pour choisir d’activer ou de
désactiver la fonction rétroéclairage, puis appuyez sur
ce bouton pour confirmer le paramètre.
Réinitialisation du système
Si votre radio ne fonctionne pas correctement ou si
certains chiffres affichés sont manquants ou incomplets,
procédez comme suit.
1. Appuyez sur le bouton Paramètres avancés.
2. Tournez le bouton de sélection/commande de
syntonisation/volume jusqu’à ce que
« Réinitialisation » apparaisse sur l’écran. Appuyez
sur le bouton de sélection/commande de
syntonisation/volume pour sélectionner le paramètre.
3. Tournez le bouton de sélection/commande de
syntonisation/volume pour sélectionner « Oui ».
Appuyez sur le bouton de sélection/commande de
syntonisation/volume pour confirmer le paramètre.
Une réinitialisation complète sera effectuée.
Version du logiciel
1. Appuyez sur le bouton Paramètres avancés.
2. Tournez le bouton de sélection/commande de
syntonisation/volume jusqu’à ce que « Version
logiciel » apparaisse sur l’écran. Appuyez sur le
bouton de sélection/commande de syntonisation/
volume pour afficher la version du logiciel installé sur
la radio.
Port micro-USB pour mise à jour de
logiciel
Les mises à jour de logiciel pour votre radio peuvent être
disponibles à l’avenir.
Puisque des mises à jour de logiciel sont disponibles,
vous pouvez trouver le logiciel et des informations sur la
manière de mettre à jour votre radio sur le site internet
de Makita.
Comment lire d’autres appareils audio
ATTENTION :
Débranchez cet appareil avant d’y raccorder d’autres
appareils audio.
• Il y a 2 prises d’entrée AUX IN. La prise AUX IN 1 se
trouve sur le panneau avant, et la prise AUX IN 2 dans
le compartiment à batteries.

17
• Raccordez une source stéréo ou mono (par exemple,
un lecteur iPod, MP3 ou CD) à la prise AUX IN 1 ou
AUX IN 2 à l’aide d’un cordon audio.
• Enfoncez et relâchez plusieurs fois le bouton BAND
jusqu’à ce que « AU1 » ou « AU2 » s’affiche pour
activer la fonction AUX.
ATTENTION :
• N’utilisez jamais d’essence, de benzine, de diluant,
d’alcool ou de produit similaire. Ces produits risquent
de provoquer des décolorations, des déformations ou
des fissures.
Puissance consommée
Adaptateur secteur 12 V C.C./1 A, broche
centrale positive
Batterie Batterie de type « bloc » :
7,2 V - 10,8 V
Batterie coulissante :
10,8 V - 18 V
Gamme de fréquences FM 87.50 - 108 MHz
DAB/DAB+ 174,928 -
239,200 MHz
Blocage des canaux DAB/DAB+
DAB (Band III) 5A-13F
Norme compatible DAB (DMR109)
DAB/DAB+ (DMR110)
Fonction du circuit
Haut-parleur 3 pouces 8 ohm
Puissance de sortie 7,2 V : 0,5 W x 2
10,8 V :1,2 W x 2
14,4 V : 2,2 W x 2
18 V : 3,5 W x 2
Borne d’entrée diamètre 3,5 mm
(AUX IN 1/AUX IN 2)
Système d’antenne DAB/FM : antenne tige souple
courbée
Dimensions (L x P x H) en mm
280 x 163 x 302
Poids 4,0 kg (sans la batterie)
ENTRETIEN
SPÉCIFICATIONS

18
DEUTSCH (Originalanweisungen)
Im Folgenden sind die im Zusammenhang mit diesem
Gerät verwendeten Symbole dargestellt. Machen Sie sich
vor der Benutzung des Geräts unbedingt mit diesen
Symbolen vertraut.
.................... Lesen Sie die Betriebsanleitung.
................... Nur für EU-Länder
Entsorgen Sie Elektrowerkzeuge,
Batterien und Akkus nicht über den
Hausmüll!
Gemäß Europäischer Richtlinie
2002/96/EG über Elektro- und
Elektronik-Altgeräte, 2006/66/EG
über Batterien und Akkumulatoren
sowie Altbatterien und
Altakkumulatoren und Umsetzung in
nationales Recht müssen
verbrauchte Elektrowerkzeuge,
Altbatterien und Altakkumulatoren
getrennt gesammelt und einer
umweltgerechten Wiederverwertung
zugeführt werden.
WARNUNG:
Bei der Verwendung von Elektrogeräten müssen stets
grundlegende Sicherheitsmaßnahmen befolgt werden, zu
denen auch die im Folgenden genannten gehören, um die
Gefahr von Verletzungen, Stromschlägen und Bränden zu
verringern:
1. Lesen Sie vor der Verwendung des Geräts die
vorliegende Betriebsanleitung sowie die
Betriebsanleitung zum Ladegerät aufmerksam durch.
2. Reinigen Sie dieses Gerät lediglich mit einem
trockenen Tuch.
3. Stellen Sie dieses Gerät nicht in der Nähe von
Wärmequellen wie etwa Radiatoren, Heizregistern,
Öfen oder anderen wärmeerzeugenden Apparaturen
(einschließlich Verstärker) auf.
4. Verwenden Sie ausschließlich vom Hersteller
vorgegebene Anbaugeräte bzw. Zubehörteile.
5. Ziehen Sie bei einem Gewitter, oder wenn Sie das
Gerät für längere Zeit nicht verwenden, den
Netzstecker dieses Geräts.
6. Ein akkubetriebenes Radio mit eingebauten Akkus
oder einem herausnehmbaren Akkupack darf nur mit
dem spezifizierten Ladegerät geladen werden. Ein für
einen bestimmten Akkutyp vorgesehenes Ladegerät
kann Feuer verursachen, wenn es für andere Akkus
verwendet wird.
7. Ein akkubetriebenes Radio darf nur mit den dafür
speziell vorgesehenen Akkupacks verwendet werden.
Bei Verwendung anderer Akkus besteht Brandgefahr.
8. Zurzeit nicht verwendete Akkus dürfen nicht in der
Nähe von anderen metallischen Gegenständen wie
Büroklammern, Münzen, Schlüssel, Nägeln,
Schrauben oder sonstigen metallischen
Kleingegenständen aufbewahrt werden, da die Gefahr
besteht, dass eine leitende Verbindung zwischen den
Kontakten hergestellt wird. Ein Kurzschluss der
Akkukontakte kann Funken oder Verbrennungen
verursachen und stellt eine Brandgefahr dar.
9. Vermeiden Sie Körperkontakt zu geerdeten Flächen
wie Rohren, Radiatoren, Herdplatten und Heiz- bzw.
Kühlelementen. Wenn Ihr Körper geerdet ist, besteht
bei einem elektrischen Schlag eine erhöhte Gefahr.
10. Bei unsachgemäßem Gebrauch kann Flüssigkeit aus
dem Akku austreten; vermeiden Sie in diesem Fall
jeglichen Kontakt mit der Flüssigkeit. Wenn Sie
versehentlich mit Akkuflüssigkeit in Berührung
geraten, waschen Sie die betroffene Stelle gründlich
mit Wasser ab. Wenn die Flüssigkeit in die Augen
geraten ist, suchen Sie anschließend umgehend
einen Arzt auf. Die aus dem Akku austretende
Flüssigkeit kann Hautreizungen und Verbrennungen
verursachen.
11. Der NETZSTECKER wird als Trenneinrichtung
genutzt und muss ständig zugänglich sein.
BEWAHREN SIE DIESE
ANLEITUNG SORGFÄLTIG AUF
1. Lesen Sie sich vor der Verwendung des Akkublocks
alle Anweisungen und Sicherheitshinweise für das
Akkuladegerät (1), den Akku (2) und das Produkt (3),
für das der Akku verwendet wird, sorgfältig durch.
2. Der Akkublock darf nicht zerlegt werden.
3. Falls die Betriebsdauer erheblich kürzer wird,
beenden Sie den Betrieb umgehend. Andernfalls
besteht die Gefahr einer Überhitzung sowie die
Gefahr von Verbrennungen und sogar einer
Explosion.
4. Wenn Elektrolyt in die Augen geraten ist, waschen Sie
die Augen mit klarem Wasser aus, und suchen Sie
sofort einen Arzt auf. Anderenfalls kann es zum
Verlust des Augenlichts kommen.
5. Vermeiden Sie einen Kurzschluss des Akkublocks:
(1) Die Kontakte dürfen nicht mit leitenden
Materialien in Berührung kommen.
(2) Der Akkublock darf nicht in einem Behälter
aufbewahrt werden, in dem sich andere
metallische Gegenstände wie beispielsweise
Nägel, Münzen usw. befinden.
(3) Der Akkublock darf keiner Feuchtigkeit und
keinem Regen ausgesetzt werden. Ein
Kurzschluss des Akkus kann zu hohen
elektrischen Strömen, Überhitzung,
Verbrennungen und sogar zu einer Zerstörung
des Geräts führen.
Ein Kurzschluss des Akkus kann zu hohen
elektrischen Strömen, Überhitzung, Verbrennungen
und sogar zu einer Zerstörung des Geräts führen.
6. Gerät und Akkublock dürfen nicht an Orten
aufbewahrt werden, an denen Temperaturen von 50°C
oder mehr auftreten können.
SYMBOLE
WICHTIGE SICHERHEITSHINWEISE
WICHTIGE
SICHERHEITSANWEISUNGEN FÜR
AKKUBLOCK

19
7. Auch schwer beschädigte oder völlig unbrauchbar
gewordene Akkublöcke dürfen nicht verbrannt
werden. Ein Akkublock kann in den Flammen
explodieren.
8. Lassen Sie den Akku nicht fallen und vermeiden Sie
Schläge gegen den Akku.
9. Verwenden Sie niemals einen beschädigten Akku.
10. Die enthaltenen Lithium-Ionen-Akkus unterliegen den
gesetzlichen Bestimmungen über Gefahrgüter. Beim
kommerziellen Transport durch Dritte, z. B.
Speditionsunternehmen, sind die besonderen
Verpackungs- und Kennzeichnungsvorschriften zu
beachten.
Es ist unbedingt erforderlich, einen Fachmann für
Gefahrstoffe bei der Vorbereitung der Ware für den
Versand zu konsultieren. Bitte beachten Sie auch die
geltenden nationalen Bestimmungen, die
möglicherweise weitere Maßnahmen vorschreiben.
Offene Kontakte müssen abgeklebt oder abgedeckt
werden und der Akku muss so verpackt werden, dass
er in der Verpackung nicht verrutschen kann.
11. Befolgen Sie die in Ihrem Land geltenden
Bestimmungen zur Entsorgung von Akkus.
BEWAHREN SIE DIESE
ANLEITUNG SORGFÄLTIG AUF.
ACHTUNG: Verwenden Sie ausschließlich
Originalakkus von Makita. Die Verwendung von Akkus
anderer Hersteller als Makita oder von abgeänderten
Akkus kann zu einer Explosion der Akkus und in Folge zu
Feuer sowie Personen- und Sachschäden führen.
Darüber hinaus verfällt die von Makita für das Werkzeug
und Ladegerät ausgesprochene Garantie.
Tipps für eine maximale Nutzungsdauer
von Akkus
1. Laden Sie den Akkublock auf, bevor der Akku
vollständig entladen ist.
Beenden Sie stets den Betrieb des Geräts und laden
Sie den Akkublock auf, sobald Sie eine verringerte
Leistung feststellen.
2. Ein voll aufgeladener Akkublock darf niemals erneut
geladen werden.
Durch Überladung wird die Lebensdauer des Akkus
verkürzt.
3. Laden Sie den Akkublock bei einer Zimmer-
temperatur von 10 °C bis 40 °C auf. Lassen Sie einen
heißen Akkublock vor dem Aufladen abkühlen.
4. Laden Sie den Akkublock auf, wenn Sie diesen für
längere Zeit nicht verwenden (mehr als sechs
Monate).
1. Ein/Aus-Taste
2. Taste BAND
3. Einstelltaste ADVANCED (Erweiterte Einstellungen)
4. Taste INFO
5. Tasten PRESETS für voreingestellte Sender
6. Taste AUTOTUNE für automatische Sendersuche
7. Drehknopf VOLUME für Lautstärke/
Sendereinstellung/Auswahl
8. Buchse DC IN
9. Buchse AUX IN 1
10. LCD-Display
11. Flexible Stabantenne
12. Griff
13. Akkufachabdeckung (deckt den Akkublock ab)
14. Lautsprecher
15. Akkufachverriegelung
16. Eingangsbuchse (AUX IN 2)
17. Micro-USB-Anschluss für Softwareaktualisierung
18. Akkufach
19. Roter Bereich
20. Taste
21. Akkublock
22. Anzeigenlampen
23. Akkuprüftaste
• FM/DAB (DMR109)
• FM/DAB oder DAB+ (DMR110)
• Großes LCD-Display mit Beleuchtung
• Sendereinstellung Manuell / Voreingestellte Sender /
Sendersuchlauf
• Sendereinstellung und Lautstärkeregelung durch
Drehknopf
• 5 Senderspeicher für jedes Band
• Micro-USB-Anschluss für Softwareaktualisierung
• Stereo-Lautsprecher für volles Klangbild
• Äußerst robuster Aufbau
• Spritzwasser geschützt gemäß IP64
• Stromversorgung durch Makita Akkublock oder über
den mitgelieferten Netzadapter
ERLÄUTERUNG DER
GESAMTDARSTELLUNG (Abb. 1 bis 12)
EIGENSCHAFTEN

20
In der folgenden Tabelle ist die jeweilige Betriebsdauer bei vollständig geladenem Akku angegeben.
: Aufsteckakku : Einschubakku
* Die Betriebsdauer basiert auf dem Betrieb in DAB/DAB+ pro Aufladung.
* Die Betriebszeit variiert je nach Akkutyp, Ladezustand und Nutzungsbedingungen.
Einschubakkublock einsetzen bzw.
entfernen (Abb. 4 bis 6)
ACHTUNG:
Schalten Sie stets das Gerät aus, bevor Sie den
Akkublock entfernen.
• Zum Einsetzen des Akkublocks müssen Sie die
Akkublockzunge zur inneren Gehäusenut ausrichten
und den Akkublock in Position schieben. Setzen Sie
den Akkublock unbedingt vollständig ein, bis er mit
einem Klick einrastet.
• Ist weiterhin der oben auf der Taste befindliche rote
Bereich sichtbar, dann ist der Akkublock nicht ganz
eingerastet. Setzen Sie den Akkublock vollständig ein,
bis der rote Bereich nicht mehr sichtbar ist. Andernfalls
kann der Block versehentlich aus dem Gerät fallen und
Sie oder Personen in Ihrem Umfeld verletzen.
• Wenden Sie beim Einsetzen des Akkublocks keine
Gewalt an. Wenn der Akkublock nicht leicht
hineingleitet, ist er nicht korrekt angesetzt.
• Zum Entnehmen des Akkublocks schieben Sie die
Taste auf der Vorderseite des Akkublocks bzw. drücken
Sie die Tasten an beiden Seiten des Akkublocks, und
ziehen Sie den Akkublock gleichzeitig aus dem Radio
heraus.
Setzen Sie die Akkufachverriegelung wieder auf der
ursprünglichen Position auf.
Verringerte Leistung, Verzerrungen und ein „stotternder“
Ton sind Anzeichen dafür, dass der Akku ausgetauscht
werden muss.
Hinweis:
Der Akkublock kann nicht über den mitgelieferten
Netzadapter geladen werden.
Aufsteckakku einsetzen bzw. entfernen
(Abb. 7 und 8)
ACHTUNG:
Schalten Sie stets das Gerät aus, bevor Sie den
Akkublock entfernen.
• Zum Einsetzen des Akkublocks richten Sie die Zunge
des Akkublocks an der Rille im Gehäuse aus und
schieben Sie den Akkublock in die ordnungsgemäße
Position.
• Drücken Sie zum Entfernen des Akkublocks die an der
Akkuseite befindlichen Knöpfe und ziehen Sie den
Akkublock heraus.
Setzen Sie die Akkufachverriegelung wieder auf der
ursprünglichen Position auf.
BETRIEBSDAUER
Akkuladung
Nennspannung des Akkublocks Bei Lautsprecherleistung
= 50 mW + 50 mW
Einheit: Stunden (Näherungswert)
7,2 V 10,8 V 14,4 V 18 V
1,0 Ah BL7010 4,5 Stunden
1,3 Ah
BL1013 5,5 Stunden
BL1415 5,0 Stunden
BL1815 6,0 Stunden
1,5 Ah
BL0715 6,5 Stunden
BL1015 8,0 Stunden
BL1415N 7,0 Stunden
BL1815N 7,5 Stunden
2,0 Ah BL1020B BL1820
BL1820B 10 Stunden
3,0 Ah
BL1430
BL1430B 11 Stunden
BL1830
BL1830B 14 Stunden
4,0 Ah BL1040B BL1840
BL1840B 20 Stunden
BL1440 18 Stunden
5,0 Ah
BL1450 22 Stunden
BL1850
BL1850B 25 Stunden
6,0 Ah BL1460B 24 Stunden
BL1860B 31 Stunden
MONTAGE
This manual suits for next models
2
Table of contents
Languages:
Other Makita Radio manuals

Makita
Makita DMR108 User manual

Makita
Makita DMR050 User manual

Makita
Makita XRM05 User manual

Makita
Makita XRM12 User manual

Makita
Makita DMR055 User manual

Makita
Makita DMR057 User manual

Makita
Makita DMR055 User manual

Makita
Makita XRM02W User manual

Makita
Makita XRM06X User manual

Makita
Makita DMR200 User manual

Makita
Makita DMR116 User manual

Makita
Makita MR004G User manual

Makita
Makita DMR057 User manual

Makita
Makita GRM03 User manual

Makita
Makita DMR109 User manual

Makita
Makita DMR106 User manual

Makita
Makita DMR114 User manual

Makita
Makita DMR113 User manual

Makita
Makita DMR108AR User manual

Makita
Makita DMR108 User manual