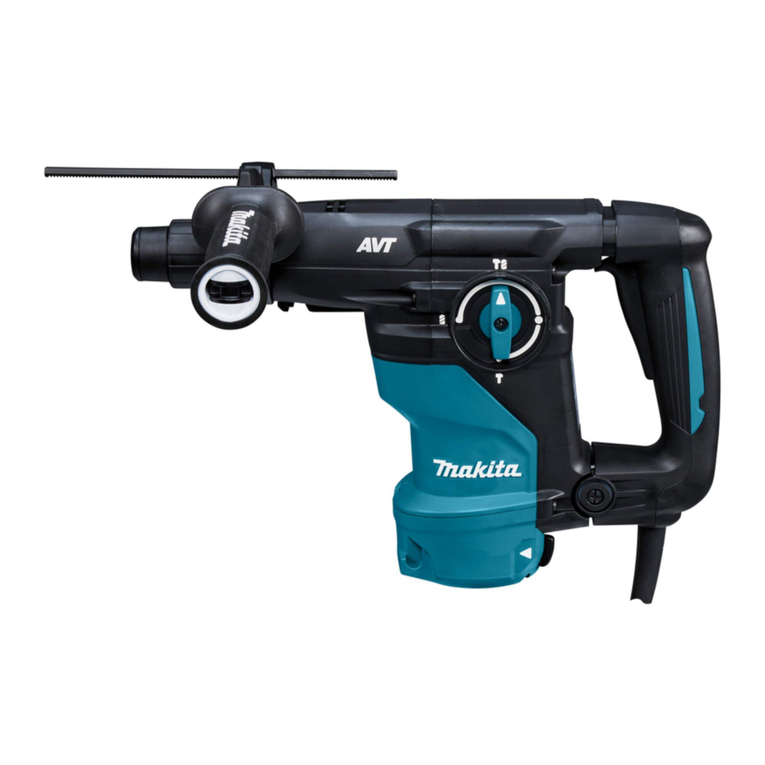
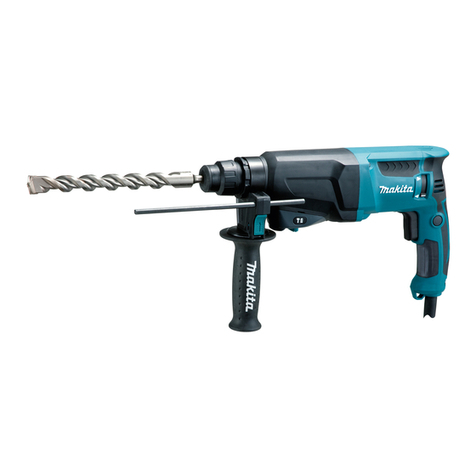
Makita HR3011FC User manual

HR3011FC
HR3012FC
HR3001C
EN Combination Hammer INSTRUCTION MANUAL 9
ID Bor Getar Kombinasi PETUNJUK PENGGUNAAN 18
VI
Máy Khoan Đa Năng Cầm Tay
Hoạt Động Bằng Động Cơ
Điện
TÀI LIỆU HƯỚNG DẪN 29
TH 39

1
Fig.1
1
Fig.2
AB
1
Fig.3
1
32
Fig.4
2
4
1
3
Fig.5
1
2
Fig.6
1
Fig.7
1
Fig.8
2

1
Fig.9
1
Fig.10
1
Fig.11
1
2
Fig.12
1
Fig.13
1
2
Fig.14
1
Fig.15
1 2
4
3
Fig.16
3

1
Fig.17
2
3
1
Fig.18
2
111
Fig.19
1
2
Fig.20
Fig.21
2
111
Fig.22
1
2
Fig.23
Fig.24
4

1
Fig.25
Fig.26
2
1
4
3
Fig.27
1
Fig.28
1
Fig.29
1
Fig.30
5

2
1
Fig.31
1
A
Fig.32
1
2
Fig.33
1
Fig.34
1
Fig.35
Fig.36
1
Fig.37
6

1
2
Fig.38
2
1
Fig.39
Fig.40
Fig.41
2
1
Fig.42
1
2
Fig.43
Fig.44
Fig.45
7

1
2
Fig.46
8

9ENGLISH
ENGLISH (Original instructions)
SPECIFICATIONS
Model: HR3011FC HR3012FC HR3001C
Capacities Concrete 30 mm
Core bit 80 mm
Diamond core bit (dry type) 80 mm
Steel 13 mm
Wood 32 mm
No load speed 0 - 840 min-1
Blows per minute 0 - 4,500 min-1
Overall length 369 mm 386 mm 369 mm
Net weight 4.4 - 4.8 kg 4.5 - 4.7 kg 4.1 - 4.5 kg
Safety class /II
Optional accessory
Model: DX10 (For HR3011FC) DX11 (For HR3012FC)
Applicable workpiece and
workmode
for concrete drilling only
(not for metal or wood, and not for core drilling or chiseling)
Suction performance 0.35 l/min
Operating stroke Up to 190 mm
Suitable drill bit Up to 265 mm
Net weight 1.2 kg
• Duetoourcontinuingprogramofresearchanddevelopment,thespecicationshereinaresubjecttochange
without notice.
• Specicationsmaydierfromcountrytocountry.
• Theweightmaydierdependingontheattachment(s).Thelightestandheaviestcombination,accordingto
EPTA-Procedure01/2014,areshowninthetable.
Symbols
Thefollowingsshowthesymbolswhichmaybeused
for the equipment. Be sure that you understand their
meaning before use.
Read instruction manual.
DOUBLEINSULATION
Only for EU countries
Do not dispose of electric equipment
together with household waste material! In
observance of the European Directive, on
Waste Electric and Electronic Equipment
and its implementation in accordance with
national law, electric equipment that have
reached the end of their life must be col-
lected separately and returned to an envi-
ronmentally compatible recycling facility.
Intended use
Thetoolisintendedforhammerdrillinganddrillingin
brick, concrete and stone as well as for chiselling work.
It is also suitable for drilling without impact in wood,
metal, ceramic and plastic.
Power supply
Thetoolshouldbeconnectedonlytoapowersupplyof
the same voltage as indicated on the nameplate, and
canonlybeoperatedonsingle-phaseACsupply.They
are double-insulated and can, therefore, also be used
from sockets without earth wire.
SAFETY WARNINGS
General power tool safety warnings
WARNING: Read all safety warnings, instruc-
tions, illustrations and specications provided
with this power tool. Failure to follow all instructions
listedbelowmayresultinelectricshock,reand/or
seriousinjury.
Save all warnings and instruc-
tions for future reference.
Theterm“powertool”inthewarningsreferstoyour
mains-operated (corded) power tool or battery-operated
(cordless) power tool.

10 ENGLISH
Work area safety
1. Keep work area clean and well lit. Cluttered or
dark areas invite accidents.
2. Do not operate power tools in explosive atmo-
spheres, such as in the presence of ammable
liquids, gases or dust. Power tools create sparks
which may ignite the dust or fumes.
3. Keep children and bystanders away while
operating a power tool. Distractions can cause
you to lose control.
Electrical safety
1. Power tool plugs must match the outlet. Never
modify the plug in any way. Do not use any
adapter plugs with earthed (grounded) power
tools. Unmodiedplugsandmatchingoutletswill
reduce risk of electric shock.
2. Avoid body contact with earthed or grounded
surfaces, such as pipes, radiators, ranges and
refrigerators.Thereisanincreasedriskofelec-
tric shock if your body is earthed or grounded.
3. Do not expose power tools to rain or wet con-
ditions. Water entering a power tool will increase
the risk of electric shock.
4. Do not abuse the cord. Never use the cord for
carrying, pulling or unplugging the power tool.
Keep cord away from heat, oil, sharp edges
or moving parts. Damaged or entangled cords
increase the risk of electric shock.
5. When operating a power tool outdoors, use an
extension cord suitable for outdoor use. Use of
a cord suitable for outdoor use reduces the risk of
electric shock.
6. If operating a power tool in a damp location
is unavoidable, use a residual current device
(RCD) protected supply. Use of an RCD reduces
the risk of electric shock.
7. Use of power supply via an RCD with a rated
residual current of 30 mA or less is always
recommended.
8. Power tools can produce electromagnetic
elds (EMF) that are not harmful to the user.
However, users of pacemakers and other similar
medical devices should contact the maker of their
device and/or doctor for advice before operating
this power tool.
9. Do not touch the power plug with wet hands.
10. If the cord is damaged, have it replaced by the
manufacturer or his agent in order to avoid a
safety hazard.
Personal safety
1. Stay alert, watch what you are doing and use
common sense when operating a power tool.
Do not use a power tool while you are tired or
under the inuence of drugs, alcohol or med-
ication. A moment of inattention while operating
powertoolsmayresultinseriouspersonalinjury.
2. Use personal protective equipment. Always
wear eye protection. Protective equipment such
as a dust mask, non-skid safety shoes, hard hat or
hearing protection used for appropriate conditions
willreducepersonalinjuries.
3. Prevent unintentional starting. Ensure the
switch is in the o-position before connecting
to power source and/or battery pack, picking
up or carrying the tool. Carrying power tools with
yourngerontheswitchorenergisingpowertools
that have the switch on invites accidents.
4. Remove any adjusting key or wrench before
turning the power tool on. A wrench or a key left
attached to a rotating part of the power tool may
resultinpersonalinjury.
5. Do not overreach. Keep proper footing and
balance at all times.Thisenablesbettercontrol
of the power tool in unexpected situations.
6. Dress properly. Do not wear loose clothing or
jewellery. Keep your hair and clothing away
from moving parts.Looseclothes,jewelleryor
long hair can be caught in moving parts.
7. If devices are provided for the connection of
dust extraction and collection facilities, ensure
these are connected and properly used. Use of
dust collection can reduce dust-related hazards.
8. Do not let familiarity gained from frequent use
of tools allow you to become complacent and
ignore tool safety principles. A careless action
cancausesevereinjurywithinafractionofa
second.
9. Always wear protective goggles to protect
your eyes from injury when using power tools.
The goggles must comply with ANSI Z87.1 in
the USA, EN 166 in Europe, or AS/NZS 1336
in Australia/New Zealand. In Australia/New
Zealand, it is legally required to wear a face
shield to protect your face, too.
It is an employer's responsibility to enforce
the use of appropriate safety protective equip-
ments by the tool operators and by other per-
sons in the immediate working area.
Power tool use and care
1. Do not force the power tool. Use the correct
power tool for your application.Thecorrect
powertoolwilldothejobbetterandsaferatthe
rate for which it was designed.
2. Do not use the power tool if the switch does
not turn it on and o. Any power tool that cannot
be controlled with the switch is dangerous and
must be repaired.
11 ENGLISH
3. Disconnect the plug from the power source
and/or remove the battery pack, if detachable,
from the power tool before making any adjust-
ments, changing accessories, or storing power
tools. Such preventive safety measures reduce
the risk of starting the power tool accidentally.
4. Store idle power tools out of the reach of chil-
dren and do not allow persons unfamiliar with
the power tool or these instructions to operate
the power tool. Power tools are dangerous in the
hands of untrained users.
5. Maintain power tools and accessories. Check
for misalignment or binding of moving parts,
breakage of parts and any other condition that
may aect the power tool’s operation. If dam-
aged, have the power tool repaired before use.
Many accidents are caused by poorly maintained
power tools.
6. Keep cutting tools sharp and clean. Properly
maintained cutting tools with sharp cutting edges
are less likely to bind and are easier to control.
7. Use the power tool, accessories and tool bits
etc. in accordance with these instructions, tak-
ing into account the working conditions and
the work to be performed. Use of the power tool
foroperationsdierentfromthoseintendedcould
result in a hazardous situation.
8. Keep handles and grasping surfaces dry,
clean and free from oil and grease. Slippery
handles and grasping surfaces do not allow for
safe handling and control of the tool in unexpected
situations.
9. When using the tool, do not wear cloth work
gloves which may be entangled.Theentangle-
ment of cloth work gloves in the moving parts may
resultinpersonalinjury.
Service
1. Have your power tool serviced by a qualied
repair person using only identical replacement
parts.Thiswillensurethatthesafetyofthepower
tool is maintained.
2. Follow instruction for lubricating and chang-
ing accessories.
ROTARY HAMMER SAFETY
WARNINGS
1. Wear ear protectors. Exposure to noise can
cause hearing loss.
2. Use auxiliary handle(s), if supplied with the
tool.Lossofcontrolcancausepersonalinjury.
3. Hold power tool by insulated gripping sur-
faces, when performing an operation where
the cutting accessory may contact hidden wir-
ing or its own cord. Cutting accessory contacting
a“live”wiremaymakeexposedmetalpartsofthe
powertool“live”andcouldgivetheoperatoran
electric shock.
4. Wear a hard hat (safety helmet), safety glasses
and/or face shield. Ordinary eye or sun glasses
are NOT safety glasses. It is also highly recom-
mended that you wear a dust mask and thickly
padded gloves.
5. Be sure the bit is secured in place before
operation.
6. Under normal operation, the tool is designed
to produce vibration. The screws can come
loose easily, causing a breakdown or accident.
Check tightness of screws carefully before
operation.
7. In cold weather or when the tool has not been
used for a long time, let the tool warm up for
a while by operating it under no load. This
will loosen up the lubrication. Without proper
warm-up, hammering operation is dicult.
8. Always be sure you have a rm footing. Be
sure no one is below when using the tool in
high locations.
9. Hold the tool rmly with both hands.
10. Keep hands away from moving parts.
11. Do not leave the tool running. Operate the tool
only when hand-held.
12. Do not point the tool at any one in the area
when operating. The bit could y out and
injure someone seriously.
13. Do not touch the bit, parts close to the bit, or
workpiece immediately after operation; they
may be extremely hot and could burn your
skin.
14. Some material contains chemicals which may
be toxic. Take caution to prevent dust inhala-
tion and skin contact. Follow material supplier
safety data.
15. Do not touch the power plug with wet hands.
SAVE THESE INSTRUCTIONS.
WARNING: DO NOT let comfort or familiarity
with product (gained from repeated use) replace
strict adherence to safety rules for the subject
product. MISUSE or failure to follow the safety
rules stated in this instruction manual may cause
serious personal injury.
FUNCTIONAL
DESCRIPTION
CAUTION: Always be sure that the tool is
switched o and unplugged before adjusting or
checking function on the tool.
Switch action
CAUTION: Before plugging in the tool, always
check to see that the switch trigger actuates
properly and returns to the “OFF” position when
released.
Tostartthetool,simplypulltheswitchtrigger.Tool
speed is increased by increasing pressure on the switch
trigger. Release the switch trigger to stop.
►Fig.1: 1. Switch trigger

12 ENGLISH
Lighting up the front lamp
For HR3011FC, HR3012FC only
CAUTION: Do not look in the light or see the
source of light directly.
Toturnonthelamp,pulltheswitchtrigger.Releasethe
switchtriggertoturnito.
►Fig.2: 1. Lamp
NOTE:Useadryclothtowipethedirtothelensof
the lamp. Be careful not to scratch the lens of lamp, or
it may lower the illumination.
Reversing switch action
CAUTION: Always check the direction of
rotation before operation.
CAUTION: Use the reversing switch only after
the tool comes to a complete stop. Changing the
direction of rotation before the tool stops may dam-
age the tool.
NOTICE: When changing the direction of rota-
tion, be sure to fully set the reversing switch to A
side or B side. Otherwise, when the switch trigger is
pulled, the motor may not rotate or the tool may not
work properly.
Thistoolhasareversingswitchtochangethedirec-
tion of rotation. Move the reversing switch lever to the
position A side for clockwise rotation or to the position B
side for counterclockwise rotation.
►Fig.3: 1. Reversing switch lever
Changing the quick change chuck
for SDS-plus
For HR3012FC only
ThequickchangechuckforSDS-pluscanbeeasily
exchanged for the quick change drill chuck.
Removing the quick change chuck
for SDS-plus
CAUTION: Before removing the quick change
chuck for SDS-plus, be sure to remove the bit.
Grasp the change cover of the quick change chuck
for SDS-plus and turn in the direction of the arrow
until the change cover line moves from the symbol
to the symbol. Pull forcefully in the direction of the
arrow.
►Fig.4: 1. Quick change chuck for SDS-plus
2. Change cover 3. Change cover line
Installing the quick change drill
chuck
Check the line of the quick change drill chuck shows
the symbol. Grasp the change cover of the quick
change drill chuck and set the line to the symbol.
Place the quick change drill chuck on the spindle of the
tool. Grasp the change cover of the quick change drill
chuck and turn the change cover line to the symbol
until a click can clearly be heard.
►Fig.5: 1. Quick change drill chuck 2. Spindle
3. Change cover line 4. Change cover
Selecting the action mode
NOTICE: Do not rotate the action mode chang-
ing knob when the tool is running.Thetoolwillbe
damaged.
NOTICE: To avoid rapid wear on the mode
change mechanism, be sure that the action mode
changing knob is always positively located in one
of the three action mode positions.
Rotation with hammering
For drilling in concrete, masonry, etc., rotate the action
mode changing knob to the symbol. Use a tungsten-
carbide tipped bit (optional accessory).
►Fig.6: 1. Rotation with hammering 2. Action mode
changing knob
Rotation only
For drilling in wood, metal or plastic materials, rotate
the action mode changing knob to the symbol. Use a
twist drill bit or wood drill bit.
►Fig.7: 1. Rotation only
Hammering only
For chipping, scaling or demolition operations, rotate
the action mode changing knob to the symbol. Use a
bull point, cold chisel, scaling chisel, etc.
►Fig.8: 1. Hammering only
Torque limiter
NOTICE: As soon as the torque limiter actuates,
switch o the tool immediately.Thiswillhelppre-
vent premature wear of the tool.
NOTICE: Drill bits such as hole saw, which tend
to pinch or catch easily in the hole, are not appro-
priate for this tool.Thisisbecausetheywillcause
the torque limiter to actuate too frequently.
Thetorquelimiterwillactuatewhenacertaintorque
levelisreached.Themotorwilldisengagefromthe
output shaft. When this happens, the drill bit will stop
turning.

13 ENGLISH
Electronic function
Thetoolisequippedwiththeelectronicfunctionsfor
easy operation.
• Constantspeedcontrol
Thespeedcontrolfunctionprovidestheconstant
rotation speed regardless of load conditions.
Air duct
For HR3011FC, HR3012FC only
CAUTION: Do not put your nger into the air
duct or do not insert any other object into the air
duct.Otherwiseyoumaygetinjuredorthetoolmay
get damaged.
Theairductistoconnecttothedustcollectionsystem.
When using the dust collection system, read the section
about the dust collection system.
►Fig.9: 1. Air duct
ASSEMBLY
CAUTION: Always be sure that the tool is
switched o and unplugged before carrying out
any work on the tool.
Side grip (auxiliary handle)
CAUTION: Always use the side grip to ensure
safe operation.
CAUTION: After installing or adjusting the
side grip, make sure that the side grip is rmly
secured.
Toinstallthesidegrip,followthestepsbelow.
1. Loosen the thumb screw on the side grip.
►Fig.10: 1.Thumbscrew
2. Attach the side grip while pressing the thumb
screwsothatthegroovesonthegriptintheprotru-
sions on the tool barrel.
►Fig.11: 1.Thumbscrew
3. Tightenthethumbscrewtosecurethegrip.The
gripcanbexedatdesiredangle.
Grease
Coat the shank end of the drill bit beforehand with a
small amount of grease (about 0.5 - 1 g).
Thischucklubricationassuressmoothactionandlon-
ger service life.
Installing or removing drill bit
Clean the shank end of the drill bit and apply grease
before installing the drill bit.
►Fig.12: 1. Shank end 2. Grease
Insertthedrillbitintothetool.Turnthedrillbitandpush
it in until it engages.
After installing the drill bit, always make sure that the
drill bit is securely held in place by trying to pull it out.
►Fig.13: 1. Drill bit
Toremovethedrillbit,pullthechuckcoverdownallthe
way and pull the drill bit out.
►Fig.14: 1. Drill bit 2. Chuck cover
Chisel angle (when chipping,
scaling or demolishing)
Thechiselcanbesecuredatthedesiredangle.To
change the chisel angle, rotate the action mode chang-
ingknobtotheOsymbol.Turnthechiseltothedesired
angle.
►Fig.15: 1. Action mode changing knob
Rotate the action mode changing knob to the sym-
bol.Thenmakesurethatthechiselissecurelyheldin
place by turning it slightly.
Depth gauge
Thedepthgaugeisconvenientfordrillingholesof
uniform depth.
Press and hold the lock button, and then insert the
depth gauge into the hex hole. Make sure that the
toothed side of the depth gauge faces the marking.
►Fig.16: 1. Depth gauge 2. Lock button 3. Marking
4.Toothedside
Adjustthedepthgaugebymovingitbackandforth
whilepressingthelockbutton.Aftertheadjustment,
release the lock button to lock the depth gauge.
NOTE: Make sure that the depth gauge does not
touch the main body of the tool when attaching it.
Dust cup
Optional accessory
Use the dust cup to prevent dust from falling over the
tool and on yourself when performing overhead drilling
operations. Attach the dust cup to the bit as shown in
thegure.Thesizeofbitswhichthedustcupcanbe
attached to is as follows.
Model Bit diameter
Dust cup 5 6 mm - 14.5 mm
Dust cup 9 12 mm - 16 mm
►Fig.17: 1. Dust cup
Dust cup set
Optional accessory
For Models HR3011FC, HR3001C
NOTICE: When using the dust cup set in
HR3011FC, HR3001C, the spacer is also requied.
Before installing the dust cup set, remove the bit from
the tool if installed.

14 ENGLISH
Attach the spacer to the dust cup set. symbol on the
dust cup is aligned with the groove in the spacer.
►Fig.18: 1. Spacer 2. symbol 3. Groove
Install the dust cup set with the spacer on the tool so
that the symbol on the dust cup is aligned with the
groove in the tool.
►Fig.19: 1. symbol 2. Groove
Toremovethedustcupset,removethebitwhilepulling
the chuck cover in the direction of the arrow.
►Fig.20: 1. Bit 2. Chuck cover
Hold the spacer and pull it out.
►Fig.21
For Model HR3012FC
Before installing the dust cup set, remove the bit from
the tool if installed.
Install the dust cup set on the tool so that the sym-
bol on the dust cup is aligned with the groove in the tool.
►Fig.22: 1. symbol 2. Groove
Toremovethedustcupset,removethebitwhilepulling
the chuck cover in the direction of the arrow.
►Fig.23: 1. Bit 2. Chuck cover
Hold the root of dust cup and pull it out.
►Fig.24
NOTE: If you connect a vacuum cleaner to the dust
cup set, remove the dust cap before connecting it.
►Fig.25: 1. Dust cap
NOTE:Ifthecapcomesofromthedustcup,attach
it with its printed side facing up so that groove on the
captsintheinsideperipheryoftheattachment.
►Fig.26
Tool hanger
Optional accessory
WARNING: Do not use damaged tool hanger
and screw.
WARNING: Use the screw provided with the
tool hanger only.
WARNING: Before using the tool hanger,
check for damages, cracks or deformations, and
make sure that the screw is tightened.
CAUTION: Install or remove the tool hanger
on a stable table or surface.
Thetoolhangerisintendedforconnectingthelanyard
(tetherstrap).Toinstallthetoolhangertothetool,
follow the steps below.
1. Disconnect the plug from the power source.
2. Inserttheprojectionsofthetoolhangerintothe
holes on the tool.
3. Tightenthescrewsrmly.
►Fig.27: 1.Toolhanger2. Hole 3.Projection
4. Screw
DUST COLLECTION
SYSTEM
For HR3011FC, HR3012FC only
Optional accessory
Thedustcollectionsystemisdesignedtocollectdusts
eectivelywhentheconcretedrillingoperation.
►Fig.28: 1. Dust collection system
CAUTION: Make sure that the tool is switched
o and unplugged before carrying out any work
on the tool. Failure to do so may result in personal
injuryfromaccidentalstart-up.
CAUTION: Always attach the lter to the
dust collection system. Failure to do so cause dust
inhalation.
CAUTION: Check that the lter is not dam-
aged. Failure to do so may cause dust inhalation.
NOTICE: Do not use the dust collection system
for core drilling or chiseling. Thedustcollection
system is intended for drilling only.
NOTICE: Do not use the dust collection system
for metal or wood. Thedustcollectionsystemis
intended for concrete only.
NOTICE: Do not use the dust collection system
for drilling in wet concrete or use this system
in wet environment. Failure to do so may cause
malfunction.
NOTE:Thedustcollectionsystemcollectsthegener-
ated dust at a considerable rate, but not all dust can
be collected.
Installing or removing the dust
collection system
NOTICE: Before installing the dust collection
system, clean the joint parts of the tool and the
dust collection system.
Foreignmattersonthejointpartsmaycauseitdi-
cult to install the dust collection system. Particularly
the foreign matters on the electrical interface may
cause malfunction.
If any dust remains on the air duct, the dust comes
intothetoolandcausesjamintheairoworbreak-
age of the tool.
Hook the dust collection system on the tool, and then
insert the dust collection system all the way, until it locks
in place with a little double click.
After that, make sure that the dust collection system is
securely installed.
►Fig.29: 1. Air duct
When removing the dust collection system, press the
lock-obutton.
►Fig.30: 1.Lock-obutton

15 ENGLISH
Adjusting the nozzle position of the
dust collection system
CAUTION: Do not point the nozzle at yourself
or others when releasing the nozzle by pushing
the guide adjustment button.
Pushintheguidewhilepushingtheguideadjustment
button,andthenreleasetheguideadjustmentbuttonat
the desired position.
►Fig.31: 1. Guide 2.Guideadjustmentbutton
Adjusting the drilling depth of the
dust collection system
Slidethedepthadjustmentbuttontothedesiredposi-
tionwhilepushingit.Thedistance(A)isthedrilling
depth.
►Fig.32: 1.Depthadjustmentbutton
Beating dust on the lter
CAUTION: Do not turn the dial on the dust
case while the dust case is removed from the
dust collection system. Doing so may cause dust
inhalation.
CAUTION: Always switch o the tool when
turning the dial on the dust case.Turningthedial
while the tool is running may result in the loss of
control of the tool.
Bybeatingthedustonthelterinsidethedustcase,
youcankeepthevacuumeciencyandalsoreducethe
number of times to dispose of the dust.
Turnthedialonthedustcasethreetimesaftercol-
lecting every 50,000 mm3of dust or when you feel the
vacuum performance declined.
NOTE: 50,000 mm3of dust equivalents to drilling 10
holes of ø10 mm and 14 mm depth (2 holes of ø65"
and 3/8" depth).
►Fig.33: 1. Dust case 2. Dial
Disposing of dust
CAUTION: Wear dust mask when disposing
of dust.
CAUTION: Empty the dust case regularly
before the dust case becomes full. Failure to do so
may decrease the dust collection performance, and
then cause dust inhalation.
CAUTION: Replace the lter with new one
after approximately 200 times of dust fulllment
as a guide.Acloggedlterdecreasesdustcollection
performance, and then cause dust inhalation.
NOTICE: When cleaning the lter, tap the case
of the lter gently by hand to remove dust. Do not
tap the lter directly; touch the lter with brush
or similar; or blow compressed air on the lter.
Doing so may damage the lter.
1. Remove the dust case while pressing down the
lever of the dust case.
►Fig.34: 1. Lever
2. Open the cover of the dust case.
►Fig.35: 1. Cover
3. Disposeofthedust,andthencleanthelter.
►Fig.36
Replacing lter of dust case
1. Remove the dust case while pressing down the
lever of the dust case. (Refer to the section for dispos-
ing of dust.)
2. Opentheltercoverofthedustcase.
►Fig.37: 1. Filter cover
3. Removethelterfromtheltercase.
►Fig.38: 1. Filter 2. Filter case
4. Attachanewltertotheltercase,andthen
attachtheltercover.
5. Close the cover of the dust case, and then attach
the dust case to the dust collection system.
Replacing sealing cap
If the sealing cap is worn out, the performance of the
dust collection decreases. Replace it if it is worn out.
Remove the sealing cap, and then attach a new one
with its protrusion facing upward.
►Fig.39: 1. Protrusion 2. Sealing cap
OPERATION
CAUTION: Always use the side grip (auxiliary
handle) and rmly hold the tool by both side grip
and switch handle during operations.
CAUTION: Always make sure that the work-
piece is secured before operation.
CAUTION: Do not pull the tool out forcibly
even the bit gets stuck. Loss of control may
cause injury.
CAUTION: For HR3011FC, HR3012FC only
Before using the dust collection system with the
tool, read the section about the dust collection
system.
►Fig.40

16 ENGLISH
Hammer drilling operation
CAUTION:Thereistremendousandsudden
twisting force exerted on the tool/drill bit at the time of
hole break-through, when the hole becomes clogged
with chips and particles, or when striking reinforcing
rods embedded in the concrete. Always use the side
grip (auxiliary handle) and rmly hold the tool by
both side grip and switch handle during opera-
tions. Failure to do so may result in the loss of control
ofthetoolandpotentiallysevereinjury.
Set the action mode changing knob to the symbol.
Position the drill bit at the desired location for the hole,
then pull the switch trigger. Do not force the tool. Light
pressure gives best results. Keep the tool in position
and prevent it from slipping away from the hole.
Do not apply more pressure when the hole becomes
clogged with chips or particles. Instead, run the tool at
an idle, then remove the drill bit partially from the hole.
By repeating this several times, the hole will be cleaned
out and normal drilling may be resumed.
NOTE: Eccentricity in the drill bit rotation may occur
whileoperatingthetoolwithnoload.Thetoolauto-
maticallycentersitselfduringoperation.Thisdoesnot
aectthedrillingprecision.
Chipping/Scaling/Demolition
Set the action mode changing knob to the symbol.
Holdthetoolrmlywithbothhands.Turnthetoolon
and apply slight pressure on the tool so that the tool will
not bounce around, uncontrolled.
Pressing very hard on the tool will not increase the
eciency.
►Fig.41
Drilling in wood or metal
CAUTION: Hold the tool rmly and exert care
when the drill bit begins to break through the
workpiece.Thereisatremendousforceexertedon
the tool/drill bit at the time of hole break through.
CAUTION: A stuck drill bit can be removed
simply by setting the reversing switch to reverse
rotation in order to back out. However, the tool
may back out abruptly if you do not hold it rmly.
CAUTION: Always secure workpieces in a
vise or similar hold-down device.
NOTICE: Never use “rotation with hammering”
when the drill chuck is installed on the tool.The
drill chuck may be damaged.
Also,thedrillchuckwillcomeowhenreversingthe
tool.
NOTICE: Pressing excessively on the tool will
not speed up the drilling. In fact, this excessive
pressure will only serve to damage the tip of your drill
bit, decrease the tool performance and shorten the
service life of the tool.
Set the action mode changing knob to the symbol.
For Models HR3011FC, HR3001C
Optional accessory
Attach the chuck adapter to a keyless drill chuck to
which 1/2"-20 size screw can be installed, and then
install them to the tool. When installing it, refer to the
section“Installingorremovingdrillbit”.
►Fig.42: 1. Keyless drill chuck 2. Chuck adapter
For Model HR3012FC
Use the quick change drill chuck as standard equip-
ment.Wheninstallingit,referto“changingthequick
changechuckforSDS-plus”.
Hold the ring and turn the sleeve counterclockwise to
openthechuckjaws.Placethebitinthechuckasfaras
itwillgo.Holdtheringrmlyandturnthesleeveclock-
wise to tighten the chuck.
►Fig.43: 1. Sleeve 2. Ring
Toremovethebit,holdtheringandturnthesleeve
counterclockwise.
Diamond core drilling
NOTICE: If performing diamond core drilling
operations using “rotation with hammering”
action, the diamond core bit may be damaged.
When performing diamond core drilling opera-
tions, always set the action mode changing knob to
the positiontouse“rotationonly”action.
Blow-out bulb
Optional accessory
After drilling the hole, use the blow-out bulb to clean the
dust out of the hole.
►Fig.44
Using dust cup set
Optional accessory
Fit the dust cup set against the ceiling when operating
the tool.
►Fig.45
NOTICE: Do not use the dust cup set when drill-
ing in metal or similar. It may damage the dust
cup set due to the heat produced by small metal
dust or similar.
NOTICE: Do not install or remove the dust cup
set with the drill bit installed in the tool. It may
damage the dust cup set and cause dust leak.

17 ENGLISH
Connecting lanyard (tether strap) to
tool hanger
Safety warnings specic for use at height
Read all safety warnings and instructions. Failure
to follow the warnings and instructions may result in
seriousinjury.
1. Always keep the tool tethered when working
“at height”. Maximum lanyard length is 2 m.
The maximum permissible fall height for lan-
yard (tether strap) must not exceed 2 m.
2. Use only with lanyards appropriate for this tool
type and rated for at least 7.5 kg.
3. Do not anchor the tool lanyard to anything on
your body or on movable components. Anchor
the tool lanyard to a rigid structure that can
withstand the forces of a dropped tool.
4. Make sure the lanyard is properly secured at
each end prior to use.
5. Inspect the tool and lanyard before each use
for damage and proper function (including
fabric and stitching). Do not use if damaged or
not functioning properly.
6. Do not wrap lanyards around or allow them to
come in contact with sharp or rough edges.
7. Fasten the other end of the lanyard outside
the working area so that a falling tool is held
securely.
8. Attach the lanyard so that the tool will move
away from the operator if it falls. Dropped tools
willswingonthelanyard,whichcouldcauseinjury
or loss of balance.
9. Do not use near moving parts or running
machinery. Failure to do so may result in a crush
or entanglement hazard.
10. Do not carry the tool by the attachment device
or the lanyard.
11. Only transfer the tool between your hands
while you are properly balanced.
12. Do not attach lanyards to the tool in a way that
keeps switches or trigger-lock (if supplied)
from operating properly.
13. Avoid getting tangled in the lanyard.
14. Keep lanyard away from the drilling area of the
tool.
15. Use multi-action and screw gate type cara-
bineers. Do not use single action spring clip
carabineers.
16. In the event the tool is dropped, it must be
tagged and removed from service, and should
be inspected by a Makita Factory or Authorized
Service Center.
►Fig.46: 1.Toolhanger2. Lanyard (tether strap)
MAINTENANCE
CAUTION: Always be sure that the tool is
switched o and unplugged before attempting to
perform inspection or maintenance.
NOTICE: Never use gasoline, benzine, thinner,
alcohol or the like. Discoloration, deformation or
cracks may result.
TomaintainproductSAFETYandRELIABILITY,
repairs,anyothermaintenanceoradjustmentshould
be performed by Makita Authorized or Factory Service
Centers, always using Makita replacement parts.
OPTIONAL
ACCESSORIES
CAUTION: These accessories or attachments
are recommended for use with your Makita tool
specied in this manual.Theuseofanyother
accessories or attachments might present a risk of
injurytopersons.Onlyuseaccessoryorattachment
for its stated purpose.
If you need any assistance for more details regard-
ing these accessories, ask your local Makita Service
Center.
• Carbide-tippeddrillbits(SDS-Pluscarbide-tipped
bits)
• Corebit
• Bullpoint
• Diamondcorebit
• Coldchisel
• Scalingchisel
• Groovingchisel
• Chuckadapter
• Keylessdrillchuck
• Bitgrease
• Depthgauge
• Blow-outbulb
• Dustcup
• Dustcupset
• Spacer(forHR3011FC,HR3001C)
• Dustcollectionsystem(forHR3011FC,
HR3012FC)
• Safetygoggles
• Toolhanger
NOTE: Some items in the list may be included in the
toolpackageasstandardaccessories.Theymay
dierfromcountrytocountry.

18 BAHASA INDONESIA
BAHASA INDONESIA (Petunjuk Asli)
SPESIFIKASI
Model: HR3011FC HR3012FC HR3001C
Kapasitas Beton 30 mm
Mata bor berteras 80 mm
Mata bor berteras intan
(tipe kering)
80 mm
Baja 13 mm
Kayu 32 mm
Kecepatan tanpa beban 0 - 840 min-1
Hembusan per menit 0 - 4.500 min-1
Panjangkeseluruhan 369 mm 386 mm 369 mm
Berat bersih 4,4 - 4,8 kg 4,5 - 4,7 kg 4,1 - 4,5 kg
Kelas keamanan /II
Aksesori pilihan
Model: DX10 (Untuk HR3011FC) DX11 (Untuk HR3012FC)
Bendakerjadanmode
kerjayangsesuai
hanya untuk pengeboran beton
(bukan untuk logam atau kayu, dan bukan untuk pengeboran atau pemahatan berteras)
Kinerjaisapan 0,35 l/min
Gerakan pengoperasian Hingga 190 mm
Mata bor yang sesuai Hingga 265 mm
Berat bersih 1,2 kg
• Karenakesinambunganprogrampenelitiandanpengembangankami,spesikasiyangdisebutkandisinidapat
berubah tanpa pemberitahuan.
• Spesikasidapatberbedadarisatunegarakenegaralainnya.
• Beratalatmungkinberbedatergantungperangkattambahanyangdipasang.Kombinasialatterberatdan
teringan,sesuaiProsedurEPTA01/2014,ditunjukkanpadatabel.
Simbol
Berikut ini adalah simbol-simbol yang dapat digunakan
pada peralatan ini. Pastikan Anda memahami arti
masing-masing simbol sebelum menggunakan
peralatan.
Bacapetunjukpenggunaan.
ISOLASI GANDA
Hanya untuk negara-negara Uni Eropa
Jangan membuang peralatan listrik
atau baterai bersama-sama dengan
bahan limbah rumah tangga! Dengan
memerhatikanPetunjukEropa,tentang
Limbah Peralatan Listrik dan Elektronik
serta pelaksanaannya sesuai dengan
ketentuan hukum nasional, peralatan
listrik yang telah habis umur pakainya
harus dikumpulkan secara terpisah dan
dikembalikan ke fasilitas daur ulang yang
kompatibel secara lingkungan.
Penggunaan
Mesin ini digunakan untuk pengeboran dengan
getar dan mengebor batu bata, beton dan batu serta
pekerjaanpemahatan.
Juga cocok untuk pengeboran tanpa hentakan pada
kayu, logam, keramik dan plastik.
Pasokan daya
Mesin harus terhubung dengan pasokan daya listrik
yang bervoltase sama dengan yang tertera pada pelat
nama,danhanyadapatdijalankandenganlistrikAC
fase tunggal. Mesin diisolasi ganda dan oleh sebab itu
dapat dihubungkan dengan soket tanpa kabel.

19 BAHASA INDONESIA
PERINGATAN
KESELAMATAN
Peringatan keselamatan umum
mesin listrik
PERINGATAN: Bacalah semua peringatan
keselamatan, petunjuk, ilustrasi dan spesikasi
yang disertakan bersama mesin listrik ini.
Kelalaianuntukmematuhisemuapetunjukyang
tercantum di bawah ini dapat menyebabkan sengatan
listrik, kebakaran dan/atau cedera serius.
Simpanlah semua peringatan
dan petunjuk untuk acuan di
masa depan.
Istilah“mesinlistrik”dalamsemuaperingatanmengacu
padamesinlistrikyangdijalankandengansumberlistrik
jala-jala(berkabel)ataubaterai(tanpakabel).
Keselamatan tempat kerja
1. Jaga tempat kerja selalu bersih dan
berpenerangan cukup.Tempatkerjayang
berantakan dan gelap mengundang kecelakaan.
2. Jangan gunakan mesin listrik dalam
lingkungan yang mudah meledak, misalnya
jika ada cairan, gas, atau debu yang mudah
menyala. Mesin listrik menimbulkan bunga api
yang dapat menyalakan debu atau uap tersebut.
3. Jauhkan anak-anak dan orang lain saat
menggunakan mesin listrik. Bila perhatian
terpecah, anda dapat kehilangan kendali.
Keamanan Kelistrikan
1. Steker mesin listrik harus cocok dengan
stopkontak. Jangan sekali-kali mengubah
steker dengan cara apa pun. Jangan
menggunakan steker adaptor dengan mesin
listrik terbumi (dibumikan). Steker yang
tidak diubah dan stopkontak yang cocok akan
mengurangi risiko sengatan listrik.
2. Hindari sentuhan tubuh dengan permukaan
terbumi atau yang dibumikan seperti pipa,
radiator, kompor, dan kulkas. Risiko sengatan
listrikbertambahjikatubuhAndaterbumikanatau
dibumikan.
3. Jangan membiarkan mesin listrik kehujanan
atau kebasahan. Air yang masuk ke dalam mesin
listrik akan meningkatkan risiko sengatan listrik.
4. Jangan menyalahgunakan kabel. Jangan
sekali-kali menggunakan kabel untuk
membawa, menarik, atau mencabut mesin
listrik dari stopkontak. Jauhkan kabel dari
panas, minyak, tepian tajam, atau bagian
yang bergerak. Kabel yang rusak atau kusut
memperbesar risiko sengatan listrik.
5. Bila menggunakan mesin listrik di luar
ruangan, gunakan kabel ekstensi yang
sesuai untuk penggunaan di luar ruangan.
Penggunaan kabel yang sesuai untuk
penggunaan luar ruangan mengurangi risiko
sengatan listrik.
6. Jika mengoperasikan mesin listrik di lokasi
lembap tidak terhindarkan, gunakan pasokan
daya yang dilindungi peranti imbasan arus
(residual current device - RCD). Penggunaan
RCD mengurangi risiko sengatan listrik.
7. Penggunaan pasokan daya melalui RCD
dengan kapasitas arus sisa 30 mA atau kurang
selalu dianjurkan.
8. Mesin listrik dapat menghasilkan medan
magnet (EMF) yang tidak berbahaya bagi
pengguna. Namun, pengguna alat pacu
jantungatauperalatanmedissejenisnyaharus
berkonsultasi dengan produsen peralatan tersebut
dan/atau dokter mereka sebelum mengoperasikan
mesin listrik ini.
9. Jangan menyentuh colokan daya dengan
tangan basah.
10. Jika kabel rusak, penggantian harus
dilakukan oleh produsen atau agennya untuk
menghindari bahaya keselamatan.
Keselamatan Diri
1. Jaga kewaspadaan, perhatikan pekerjaan Anda
dan gunakan akal sehat bila menggunakan
mesin listrik. Jangan menggunakan mesin
listrik saat Anda lelah atau di bawah pengaruh
obat bius, alkohol, atau obat.Sekejapsaja
lalai saat menggunakan mesin listrik dapat
menyebabkan cedera badan serius.
2. Gunakan alat pelindung diri. Selalu gunakan
pelindung mata. Peralatan pelindung seperti
masker debu, sepatu pengaman anti-selip, helm
pengaman, atau pelindung telinga yang digunakan
untuk kondisi yang sesuai akan mengurangi risiko
cedera badan.
3. Cegah penyalaan yang tidak disengaja.
Pastikan bahwa sakelar berada dalam posisi
mati (o) sebelum menghubungkan mesin
ke sumber daya dan/atau paket baterai, atau
mengangkat atau membawanya. Membawa
mesinlistrikdenganjariAndapadasakelarnya
atau mengalirkan listrik pada mesin listrik
yang sakelarnya hidup (on) akan mengundang
kecelakaan.
4. Lepaskan kunci-kunci penyetel sebelum
menghidupkan mesin listrik. Kunci-kunci yang
masih terpasang pada bagian mesin listrik yang
berputar dapat menyebabkan cedera.
5. Jangan meraih terlalu jauh. Jagalah pijakan
dan keseimbangan sepanjang waktu. Hal ini
memungkinkan kendali yang lebih baik atas mesin
listrik dalam situasi yang tidak diharapkan.
6. Kenakan pakaian yang memadai. Jangan
memakai pakaian yang longgar atau
perhiasan. Jaga jarak antara rambut dan
pakaian Anda dengan komponen mesin yang
bergerak. Pakaian yang longgar, perhiasan,
ataurambutyangpanjangdapattersangkutpada
komponen yang bergerak.
7. Jika tersedia fasilitas untuk menghisap dan
mengumpulkan debu, pastikan fasilitas
tersebut terhubung listrik dan digunakan
dengan baik. Penggunaan pembersih debu dapat
mengurangi bahaya yang terkait dengan debu.

20 BAHASA INDONESIA
8. Jangan sampai Anda lengah dan mengabaikan
prinsip keselamatan mesin ini hanya karena
sudah sering mengoperasikannya dan sudah
merasa terbiasa.Tindakanyanglalaidapat
menyebabkan cedera berat dalam sepersekian
detiksaja.
9. Selalu kenakan kacamata pelindung
untuk melindungi mata dari cedera saat
menggunakan mesin listrik. Kacamata
harus sesuai dengan ANSI Z87.1 di Amerika
Serikat, EN 166 di Eropa, atau AS/NZS 1336 di
Australia/Selandia Baru. Di Australia/Selandia
Baru, secara hukum Anda juga diwajibkan
mengenakan pelindung wajah untuk
melindungi wajah Anda.
Menjadi tanggung jawab atasan untuk
menerapkan penggunaan alat pelindung
keselamatan yang tepat bagi operator mesin
dan orang lain yang berada di area kerja saat
itu.
Penggunaan dan pemeliharaan mesin listrik
1. Jangan memaksa mesin listrik. Gunakan
mesin listrik yang tepat untuk keperluan
Anda. Mesin listrik yang tepat akan menuntaskan
pekerjaandenganlebihbaikdanamanpada
kecepatan sesuai rancangannya.
2. Jangan gunakan mesin listrik jika sakelar
tidak dapat menyalakan dan mematikannya.
Mesin listrik yang tidak dapat dikendalikan
dengan sakelarnya adalah berbahaya dan harus
diperbaiki.
3. Cabut steker dari sumber listrik dan/atau lepas
paket baterai, jika dapat dilepas, dari mesin
listrik sebelum melakukan penyetelan apa pun,
mengganti aksesori, atau menyimpan mesin
listrik. Langkah keselamatan preventif tersebut
mengurangi risiko hidupnya mesin secara tak
sengaja.
4. Simpan mesin listrik jauh dari jangkauan anak-
anak dan jangan biarkan orang yang tidak
paham mengenai mesin listrik tersebut atau
petunjuk ini menggunakan mesin listrik. Mesin
listrik sangat berbahaya di tangan pengguna yang
tak terlatih.
5. Rawatlah mesin listrik dan aksesori. Periksa
apakah ada komponen bergerak yang tidak
lurus atau macet, komponen yang pecah, dan
kondisi-kondisi lain yang dapat memengaruhi
pengoperasian mesin listrik. Jika rusak,
perbaiki dahulu mesin listrik sebelum
digunakan. Banyak kecelakaan disebabkan oleh
kurangnya pemeliharaan mesin listrik.
6. Jaga agar mesin pemotong tetap tajam dan
bersih. Mesin pemotong yang terawat baik
denganmatapemotongyangtajamtidakmudah
macet dan lebih mudah dikendalikan.
7. Gunakan mesin listrik, aksesori, dan mata
mesin, dll. sesuai dengan petunjuk ini, dengan
memperhitungkan kondisi kerja dan jenis
pekerjaan yang dilakukan. Penggunaan mesin
listrik untuk penggunaan yang lain dari peruntukan
dapat menimbulkan situasi berbahaya.
8. Jagalah agar gagang dan permukaan
pegangan tetap kering, bersih, dan bebas dari
minyak dan pelumas. Gagang dan permukaan
pegangan yang licin tidak mendukung keamanan
penanganan dan pengendalian mesin dalam
situasi-situasi tak terduga.
9. Ketika menggunakan mesin, jangan
menggunakan sarung tangan kain yang dapat
tersangkut. Sarung tangan kain yang tersangkut
pada komponen bergerak dapat mengakibatkan
cedera pada pengguna.
Servis
1. Berikan mesin listrik untuk diperbaiki hanya
kepada oleh teknisi yang berkualikasi dengan
menggunakan hanya suku cadang pengganti
yang serupa.Haliniakanmenjaminterjaganya
keamanan mesin listrik.
2. Patuhi petunjuk pelumasan dan penggantian
aksesori.
PERINGATAN KESELAMATAN
MESIN BOR GETAR ROTARI
1. Kenakan pelindung telinga.Terpaankebisingan
dapat menyebabkan hilangnya pendengaran.
2. Gunakan gagang tambahan, jika disertakan
bersama mesin ini. Kehilangan kendali dapat
menyebabkan cedera.
3. Pegang mesin listrik pada permukaan
genggam yang terisolasi saat melakukan
pekerjaan bila mesin pemotong mungkin
bersentuhan dengan kawat tersembunyi atau
kabelnya sendiri. Aksesori pemotong yang
menyentuhkawat“hidup”dapatmenyebabkan
bagian logam pada mesin teraliri arus listrik dan
menyengat pengguna.
4. Kenakan helm pengaman, kaca mata
pengaman dan/atau pelindung muka. Kaca
mata biasa atau kaca mata hitam BUKANLAH
kaca mata pengaman. Anda sangat dianjurkan
untuk mengenakan masker debu dan sarung
tangan tebal.
5. Pastikan mata mesin terpasang pada
tempatnya sebelum penggunaan.
Other manuals for HR3011FC
7
This manual suits for next models
2
Table of contents
Languages:
Other Makita Tools manuals

Makita
Makita HR3540C User manual

Makita
Makita HR2650 User manual

Makita
Makita HR3011FC User manual

Makita
Makita JS8000 User manual

Makita
Makita HR2653 User manual

Makita
Makita BHR261 User manual

Makita
Makita DHR202 User manual

Makita
Makita HM1511 User manual

Makita
Makita HR2650 User manual

Makita
Makita EX2650LH User manual

Makita
Makita HR3540C User manual

Makita
Makita BHR242 User manual

Makita
Makita HR2631F User manual

Makita
Makita HR007G User manual

Makita
Makita HR2631FTJ User manual

Makita
Makita DTR181 User manual

Makita
Makita DHR182 User manual

Makita
Makita HM1317C User manual

Makita
Makita HR2320T User manual

Makita
Makita DGP180 User manual