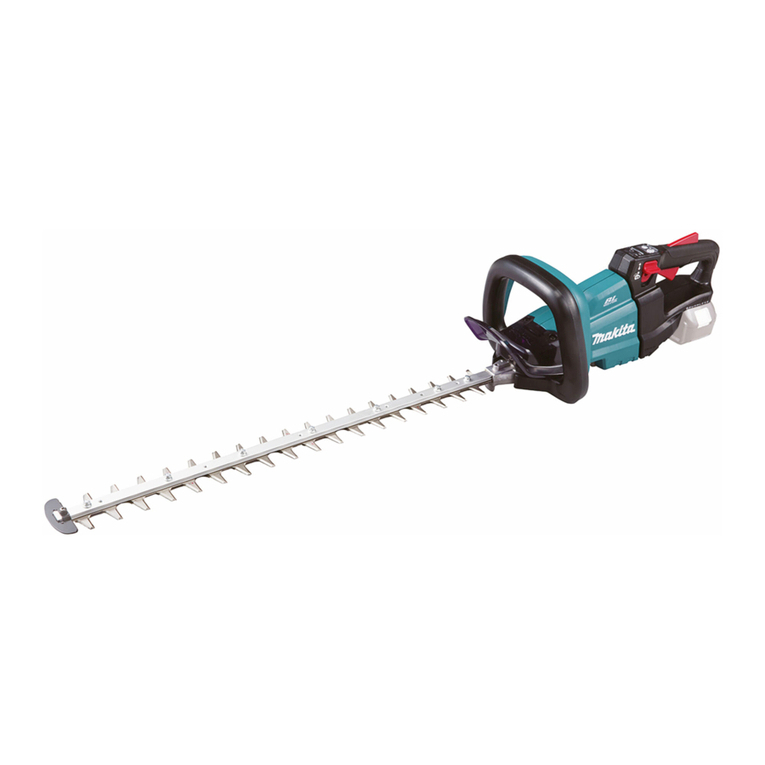
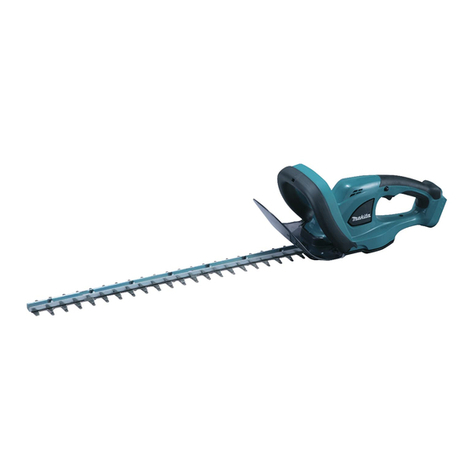
Makita DUH501 User manual

DUH501
DUH601
DUH751
DUH502
DUH602
DUH752
EN Cordless Hedge Trimmer INSTRUCTION MANUAL 8
SL Brezžični rezalnik za živo
mejo NAVODILA ZA UPORABO 16
SQ Prerës shkurresh me bateri MANUALI I PËRDORIMIT 24
BG Акумулаторен храсторез РЪКОВОДСТВО ЗА
ЕКСПЛОАТАЦИЯ 32
HR Bežični trimer za živicu PRIRUČNIK S UPUTAMA 42
МК Безжична фреза за жива
ограда УПАТСТВО ЗА УПОТРЕБА 50
SR Бежични тример за живу
ограду УПУТСТВО ЗА УПОТРЕБУ 59
RO Maşină de tuns gardul viu
fără cablu MANUAL DE INSTRUCŢIUNI 68
UK Акумуляторна пила для
підрізання живоплоту ІНСТРУКЦІЯ З
ЕКСПЛУАТАЦІЇ 77
RU Аккумуляторный Кусторез РУКОВОДСТВО ПО
ЭКСПЛУАТАЦИИ 87

1
2
3
Fig.1
1
2
Fig.2
1
Fig.3
2
1
Fig.4
12
3
Fig.5
2
1
Fig.6
1
Fig.7
1
Fig.8
2

1
2
Fig.9
1
Fig.10
1
5
2
3
4
Fig.11
1
2
Fig.12
1
1
Fig.13
1
Fig.14
3

1
2
3
4
5
Fig.15
1
2
Fig.16
1
2
Fig.17
1
2
Fig.18
2
1
Fig.19
1
1
2
Fig.20
1
Fig.21
4

1
Fig.22
1
Fig.23
(1)
(2)
Fig.24
Fig.25
Fig.26
Fig.27
Fig.28
Fig.29
5

Fig.30
Fig.31
Fig.32
1
Fig.33
Fig.34
1
2
Fig.35
1
2
Fig.36
1
Fig.37
6

1
2
Fig.38
2
1
Fig.39
7

8ENGLISH
ENGLISH (Original instructions)
SPECIFICATIONS
Model: DUH501 DUH601 DUH751
Blade length 500 mm 600 mm 750 mm
Strokes per minute 0 - 2,000 / 0 - 3,600 / 0 - 4,400 min-1
Overall length 1,016 mm 1,121 mm 1,261 mm
Rated voltage D.C. 18 V
Net weight 3.8 - 4.5 kg
Model: DUH502 DUH602 DUH752
Blade length 500 mm 600 mm 750 mm
Strokes per minute 0 - 2,000 / 0 - 3,600 / 0 - 4,400 min-1
Overall length 1,016 mm 1,121 mm 1,261 mm
Rated voltage D.C. 18 V
Net weight 3.8 - 4.5 kg
• Duetoourcontinuingprogramofresearchanddevelopment,thespecicationshereinaresubjecttochange
withoutnotice.
• Specicationsmaydifferfromcountrytocountry.
• Theweightmaydifferdependingontheattachment(s),includingthebatterycartridge.Thelightestandheavi-
estcombination,accordingtoEPTA-Procedure01/2014,areshowninthetable.
Applicable battery cartridge
BL1815N / BL1820 / BL1820B / BL1830 / BL1830B / BL1840 / BL1840B / BL1850 / BL1850B / BL1860B
• Someofthebatterycartridgeslistedabovemaynotbeavailabledependingonyourregionofresidence.
WARNING: Only use the battery cartridges listed above.Useofanyotherbatterycartridgesmaycause
injuryand/orre.
Symbols
Thefollowingsshowthesymbolsusedfortheequip-
ment.Besurethatyouunderstandtheirmeaningbefore
use.
Readinstructionmanual.
Do not expose to moisture.
Ni-MH
Li-ion
OnlyforEUcountries
Donotdisposeofelectricequipmentorbattery
packtogetherwithhouseholdwastematerial!
InobservanceoftheEuropeanDirectives,
onWasteElectricandElectronicEquipment
andBatteriesandAccumulatorsandWaste
BatteriesandAccumulatorsandtheirimple-
mentationinaccordancewithnationallaws,
electricequipmentandbatteriesandbattery
pack(s)thathavereachedtheendoftheirlife
mustbecollectedseparatelyandreturnedtoan
environmentallycompatiblerecyclingfacility.
Intended use
Thetoolisintendedfortrimminghedges.
Noise
Applicablestandard:EN60745-2-15
Model Sound pressure level Sound power level
LPA(dB(A)) UncertaintyK
(dB(A))
LPA(dB(A)) UncertaintyK
(dB(A))
DUH501 84 397 3
DUH601 82 395 3
DUH751 84 397 3
DUH502 81.3 386.8 3
DUH602 82.1 387.4 3
DUH752 80.5 387.8 3

9ENGLISH
NOTE:Thedeclarednoiseemissionvalue(s)hasbeenmeasuredinaccordancewithastandardtestmethodand
maybeusedforcomparingonetoolwithanother.
NOTE:Thedeclarednoiseemissionvalue(s)mayalsobeusedinapreliminaryassessmentofexposure.
WARNING: Wear ear protection.
WARNING: The noise emission during actual use of the power tool can differ from the declared val-
ue(s) depending on the ways in which the tool is used especially what kind of workpiece is processed.
WARNING: Be sure to identify safety measures to protect the operator that are based on an estimation
of exposure in the actual conditions of use (taking account of all parts of the operating cycle such as the
times when the tool is switched off and when it is running idle in addition to the trigger time).
Vibration
Thevibrationtotalvalue(tri-axialvectorsum)deter-
minedaccordingtoEN60745-2-15:
Model DUH501
Vibrationemission(ah):2.5m/s2
Uncertainty(K):1.5m/s2
Model DUH601
Vibrationemission(ah):2.5m/s2or less
Uncertainty(K):1.5m/s2
Model DUH751
Vibrationemission(ah):2.5m/s2
Uncertainty(K):1.5m/s2
Model DUH502
Vibrationemission(ah):2.5m/s2
Uncertainty(K):1.5m/s2
Model DUH602
Vibrationemission(ah):2.5m/s2or less
Uncertainty(K):1.5m/s2
Model DUH752
Vibrationemission(ah):2.5m/s2or less
Uncertainty(K):1.5m/s2
NOTE:Thedeclaredvibrationtotalvalue(s)hasbeen
measuredinaccordancewithastandardtestmethod
andmaybeusedforcomparingonetoolwithanother.
NOTE:Thedeclaredvibrationtotalvalue(s)mayalso
beusedinapreliminaryassessmentofexposure.
WARNING: The vibration emission during
actual use of the power tool can differ from the
declared value(s) depending on the ways in which
the tool is used especially what kind of workpiece
is processed.
WARNING: Be sure to identify safety mea-
sures to protect the operator that are based on an
estimation of exposure in the actual conditions of
use (taking account of all parts of the operating
cycle such as the times when the tool is switched
off and when it is running idle in addition to the
trigger time).
EC Declaration of Conformity
For European countries only
TheECdeclarationofconformityisincludedasAnnexA
tothisinstructionmanual.
SAFETY WARNINGS
General power tool safety warnings
WARNING:
Read all safety warnings, instruc-
tions, illustrations and specications provided with this
power tool.Failuretofollowallinstructionslistedbelow
mayresultinelectricshock,reand/orseriousinjury.
Save all warnings and instruc-
tions for future reference.
Theterm"powertool"inthewarningsreferstoyour
mains-operated(corded)powertoolorbattery-operated
(cordless)powertool.
Cordless Hedge Trimmer Safety Warnings
1.
Keep all parts of the body away from the cutter
blade. Do not remove cut material or hold mate-
rial to be cut when blades are moving. Make sure
the switch is off when clearing jammed material.
Amomentofinattentionwhileoperatingthehedge
trimmermayresultinseriouspersonalinjury.
2.
Carry the hedge trimmer by the handle with the
cutter blade stopped. When transporting or storing
the hedge trimmer always t the cutting device
cover.Properhandlingofthehedgetrimmerwill
reducepossiblepersonalinjuryfromthecutterblades.
3.
Hold the power tool by insulated gripping sur-
faces only, because the cutter blade may contact
hidden wiring.Cutterbladescontactinga"live"wire
maymakeexposedmetalpartsofthepowertool
"live"andcouldgivetheoperatoranelectricshock.
4.
DANGER - Keep hands away from blade.Contact
withbladewillresultinseriouspersonalinjury.
5. Do not use the hedge trimmer in the rain or in
wet or very damp conditions.Theelectricmotor
isnotwaterproof.
6.
First-time users should have an experienced hedge
trimmer user show them how to use the trimmer.
7. The hedge trimmer must not be used by
children or young persons under 18 years of
age.Youngpersonsover16yearsofagemaybe
exemptedfromthisrestrictioniftheyareundergo-
ingtrainingunderthesupervisionofanexpert.
8.
Use the hedge trimmer only if you are in good
physical condition.Ifyouaretired,yourattentionwill
bereduced.Beespeciallycarefulattheendofawork-
ingday.Performallworkcalmlyandcarefully.The
userisresponsibleforalldamagestothirdparties.

10 ENGLISH
9. Never use the trimmer when under the inu-
ence of alcohol, drugs or medication.
10. Work gloves of stout leather are part of the
basic equipment of the hedge trimmer and
must always be worn when working with it.
Also wear sturdy shoes with anti-skid soles.
11.
Before starting work check to make sure that the
trimmer is in good and safe working order. Ensure
guards are tted properly. The hedge trimmer
must not be used unless fully assembled.
12. Make sure you have a secure footing before
starting operation.
13. Hold the tool rmly when using the tool.
14.
Do not operate the tool at no-load unnecessarily.
15. Immediately switch off the motor and remove
the battery cartridge if the cutter should come
into contact with a fence or other hard object.
Check the cutter for damage, and if damaged
repair immediately.
16. Before checking the cutter, taking care of
faults, or removing material caught in the cut-
ter, always switch off the trimmer and remove
the battery cartridge.
17. Switch off the trimmer and remove the battery
cartridge before doing any maintenance work.
18. When moving the hedge trimmer to another
location, including during work, always
remove the battery cartridge and put the blade
cover on the cutter blades. Never carry or
transport the trimmer with the cutter running.
Never grasp the cutter with your hands.
19.
Clean the hedge trimmer and especially the
cutter after use, and before putting the trimmer
into storage for extended periods. Lightly oil the
cutter and put on the cover.Thecoversupplied
withtheunitcanbehungonthewall,providinga
safeandpracticalwaytostorethehedgetrimmer.
20. Store the hedge trimmer with the cover on, in
a dry room. Keep it out of reach of children.
Never store the trimmer outdoors.
21.
Never point the shear blades to yourself or others.
22. If the blades stop moving due to the stuck of
foreign objects between the blades during
operation, switch off the tool and remove the
battery cartridge, and then remove the foreign
objects using tools such as pliers. Removing
theforeignobjectsbyhandmaycauseaninjury
forthereasonthatthebladesmaymoveinreac-
tiontoremovingtheforeignobjects.
23. Avoid dangerous environment. Don't use the
tool in damp or wet locations or expose it to
rain. Water entering the tool will increase the
risk of electric shock.
24. Do not dispose of the battery(ies) in a re. The
cell may explode. Check with local codes for
possible special disposal instructions.
25.
Do not open or mutilate the battery(ies). Released
electrolyte is corrosive and may cause damage to
the eyes or skin. It may be toxic if swallowed.
26.
Do not charge battery in rain, or in wet locations.
27. Check the hedges and bushes for foreign
objects, such as wire fences or hidden wiring
before operating the tool.
SAVE THESE INSTRUCTIONS.
WARNING: DO NOT let comfort or familiarity
with product (gained from repeated use) replace
strict adherence to safety rules for the subject
product. MISUSE or failure to follow the safety
rules stated in this instruction manual may cause
serious personal injury.
Important safety instructions for
battery cartridge
1.
Before using battery cartridge, read all instruc-
tions and cautionary markings on (1) battery char-
ger, (2) battery, and (3) product using battery.
2. Do not disassemble battery cartridge.
3. If operating time has become excessively
shorter, stop operating immediately. It may
result in a risk of overheating, possible burns
and even an explosion.
4.
If electrolyte gets into your eyes, rinse them out
with clear water and seek medical attention right
away. It may result in loss of your eyesight.
5. Do not short the battery cartridge:
(1) Do not touch the terminals with any con-
ductive material.
(2) Avoid storing battery cartridge in a con-
tainer with other metal objects such as
nails, coins, etc.
(3) Do not expose battery cartridge to water
or rain.
A battery short can cause a large current ow, over-
heating, possible burns and even a breakdown.
6. Do not store the tool and battery cartridge in
locations where the temperature may reach or
exceed 50 °C (122 °F).
7. Do not incinerate the battery cartridge even if
it is severely damaged or is completely worn
out. The battery cartridge can explode in a re.
8. Be careful not to drop or strike battery.
9. Do not use a damaged battery.
10.
The contained lithium-ion batteries are subject to
the Dangerous Goods Legislation requirements.
Forcommercialtransportse.g.bythirdparties,
forwardingagents,specialrequirementonpack-
agingandlabelingmustbeobserved.
Forpreparationoftheitembeingshipped,consultingan
expertforhazardousmaterialisrequired.Pleasealso
observepossiblymoredetailednationalregulations.
Tapeormaskoffopencontactsandpackupthe
batteryinsuchamannerthatitcannotmove
aroundinthepackaging.
11. Follow your local regulations relating to dis-
posal of battery.
12. Use the batteries only with the products
specied by Makita.Installingthebatteriesto
non-compliantproductsmayresultinare,exces-
siveheat,explosion,orleakofelectrolyte.
SAVE THESE INSTRUCTIONS.
CAUTION:
Only use genuine Makita batteries.
Useofnon-genuineMakitabatteries,orbatteriesthat
havebeenaltered,mayresultinthebatterybursting
causingres,personalinjuryanddamage.Itwillalso
voidtheMakitawarrantyfortheMakitatoolandcharger.

11 ENGLISH
Tips for maintaining maximum
battery life
1. Charge the battery cartridge before completely
discharged. Always stop tool operation and
charge the battery cartridge when you notice
less tool power.
2.
Never recharge a fully charged battery cartridge.
Overcharging shortens the battery service life.
3.
Charge the battery cartridge with room tempera-
ture at 10 °C - 40 °C (50 °F - 104 °F). Let a hot
battery cartridge cool down before charging it.
4. Charge the battery cartridge if you do not use
it for a long period (more than six months).
FUNCTIONAL
DESCRIPTION
CAUTION: Always be sure that the tool is
switched off and the battery cartridge is removed
before adjusting or checking function on the tool.
Installing or removing battery
cartridge
CAUTION: Always switch off the tool before
installing or removing of the battery cartridge.
CAUTION: Hold the tool and the battery car-
tridge rmly when installing or removing battery
cartridge.Failuretoholdthetoolandthebattery
cartridgermlymaycausethemtoslipoffyourhands
andresultindamagetothetoolandbatterycartridge
andapersonalinjury.
►Fig.1: 1.Redindicator2. Button 3.Batterycartridge
Toremovethebatterycartridge,slideitfromthetool
whileslidingthebuttononthefrontofthecartridge.
Toinstallthebatterycartridge,alignthetongueonthe
batterycartridgewiththegrooveinthehousingandslip
itintoplace.Insertitallthewayuntilitlocksinplace
withalittleclick.Ifyoucanseetheredindicatoronthe
uppersideofthebutton,itisnotlockedcompletely.
CAUTION: Always install the battery cartridge
fully until the red indicator cannot be seen.Ifnot,
itmayaccidentallyfalloutofthetool,causinginjuryto
youorsomeonearoundyou.
CAUTION: Do not install the battery cartridge
forcibly.Ifthecartridgedoesnotslideineasily,itis
notbeinginsertedcorrectly.
Indicating the remaining battery capacity
Only for battery cartridges with the indicator
►Fig.2: 1.Indicatorlamps2.Checkbutton
Pressthecheckbuttononthebatterycartridgetoindicatetheremain-
ingbatterycapacity.Theindicatorlampslightupforafewseconds.
Indicator lamps Remaining
capacity
Lighted Off Blinking
75% to 100%
50% to 75%
25% to 50%
0% to 25%
Charge the
battery.
Thebattery
mayhave
malfunctioned.
NOTE:Dependingontheconditionsofuseandthe
ambienttemperature,theindicationmaydifferslightly
fromtheactualcapacity.
Tool / battery protection system
Thetoolisequippedwithatool/batteryprotectionsystem.This
systemautomaticallycutsoffpowertothemotortoextendtooland
batterylife.Thetoolwillautomaticallystopduringoperationifthe
toolorbatteryisplacedunderoneofthefollowingconditions:
Status Indicator lamps
On Off Blinking
Overload
Overheat
Over
discharge
Overload protection
Ifthetoolisoverloadedbyentangledbranchesorother
debris, andthemiddleindicatorsstartblinkingand
thetoolautomaticallystops.
Inthissituation,turnthetooloffandstoptheapplication
thatcausedthetooltobecomeoverloaded.Thenturn
the tool on to restart.

12 ENGLISH
NOTICE: Depending on the usage conditions,
the tool is automatically turned off without any
indication if the tool is overloaded by entangled
branches or debris. In this case, switch off the
tool and remove the battery cartridge, and then
remove entangled branches or debris using tools
such as pliers. After removing the branches or
debris, install the battery cartridge and turn on
the tool again.
Overheat protection for tool or battery
Therearetwotypesofoverheating;tooloverheating
andbatteryoverheating.Whenthetooloverheating
occurs,allspeedindicatorsblink.Whenthebatteryover
heatingoccurs, indicatorblinks.
Iftheoverheatingoccurs,thetoolstopsautomatically.
Letthetooland/orbatterycooldownbeforeturningthe
tool on again.
Overdischarge protection
Whenthebatterycapacitybecomeslow,thetoolstops
automaticallyand indicatorblinks.
Ifthetooldoesnotoperateevenwhentheswitchesare
operated,removethebatteryfromthetoolandcharge
thebattery.
Angle setting of the handle
CAUTION: Always make sure that the handle
is locked in the desired position before operation.
CAUTION: Do not pull down the lever to
unlock the handle while pulling the switch trigger.
Do not pull the switch trigger while pulling down
the lever and turning the handle. Failure to do so
maycauseamalfunctionofthetool.
Youcansettheangleofthehandleto0°,45°,or90°
totheleftorright.Tochangetheangleofthehandle,
turn the handle while pulling down the lever, and then
release the lever.
►Fig.3: 1. Lever
Power switch action
WARNING: For your safety, this tool is
equipped with lock-off lever which prevents the
tool from unintended starting. NEVER use the tool
if it runs when you simply press the switch lever
and pull the switch trigger without pressing the
lock-off lever. Return the tool to our authorized
service center for proper repairs BEFORE further
usage.
WARNING: NEVER tape down or defeat pur-
pose and function of lock-off lever.
WARNING: Before installing the battery car-
tridge on the tool, always check to see that the
switch trigger and switch lever actuate properly
and return to the "OFF" position when released.
Operatingatoolwithaswitchthatdoesnotactuate
properlycanleadtolossofcontrolandseriousper-
sonalinjury.
CAUTION: Never put your nger on the
switch when carrying.Thetoolmaystartuninten-
tionallyandcauseinjury.
NOTICE: Do not pull the switch trigger hard with-
out pressing the lock-off lever. This can cause
switch breakage.
Pressandholdthemainpowerbuttontoturnonthe
tool.Thepowerlamplightsupwhenthetoolisturned
on.Toturnoffthetool,pressandholdthemainpower
buttonagain.Thepowerlampgoesoffwhenthetoolis
turnedoff.
►Fig.4: 1.Powerlamp2.Mainpowerbutton
NOTE:Thetoolisautomaticallyturnedoffifthetoolis
notoperatedforacertainperiod.
Topreventtheswitchtriggerfrombeingaccidentally
pulled,alock-offleverisprovided.Tostartthetool,
depressthelock-offlever,andthenpresstheswitch
leverandpulltheswitchtrigger.Thetoolspeed
increasesbyincreasingpressureontheswitchtrigger.
Releasetheswitchtriggertostop.
►Fig.5: 1.Switchlever2.Lock-offlever3.Switch
trigger
Speed adjusting
Youcanadjustthetoolspeedbytappingthemain
powerbutton.
Eachtimeyoutapthemainpowerbutton,thelevelof
speedwillchange.
►Fig.6: 1.Powerlamp2.Mainpowerbutton
Indicator Mode Stroke speed
High 4,400 min-1
Medium 3,600 min-1
Low 2,000 min-1
Reverse button for debris removal
WARNING: If the entangled branches or
debris cannot be removed by the reverse func-
tion, switch off the tool and remove the bat-
tery cartridge, and then remove the entangled
branches or debris using tools such as pliers.
Failuretoswitchoffthetoolandremovethebat-
terycartridgemayresultinseriouspersonalinjury
fromaccidentalstart-up.Removingtheentangled
branchesordebrisbyhandmaycauseaninjury,
sincetheshearbladesmaymoveinreactionto
removing them.

13 ENGLISH
Thistoolhasareversebuttontochangethedirection
ofshearbladesmovement.Itisonlyforremoving
branchesanddebrisentangledinthetool.
Toreversetheshearbladesmovement,tapthereverse
buttonwhentheshearbladeshavestopped,thenpress
theswitchleverandpulltheswitchtriggerwhilepress-
ingthelock-offlever.Thepowerlampstartsblinking,
andtheshearbladesmoveinreversedirection.
Whenentangledbranchesanddebrisareremoved,
the tool returns to the regular movement and the power
lampstopsblinkingandlightsup.
►Fig.7: 1.Reversebutton
NOTE:Iftheentangledbranchesordebriscannotbe
removed,releaseandpulltheswitchtriggeruntilthey
are removed.
NOTE:Ifyoutapthereversebuttonwhiletheshear
bladesarestillmoving,thetoolcomestostopandto
bereadyforreversemovement.
ASSEMBLY
CAUTION: Always be sure that the tool is
switched off and the battery cartridge is removed
before carrying out any work on the tool.
CAUTION: When replacing the shear blades,
always wear gloves so that your hands do not
directly contact the blades.
NOTICE: When replacing the shear blades, do
not wipe off grease from the gear and crank.
Installing or removing the shear
blades
CAUTION: Attach the blade cover before
removing or installing the shear blades.
Youcaninstall500mm,600mm,or750mmshear
bladestoyourtool.
1.
Placethetoolupsidedown,andthenremove6screws.
►Fig.8: 1.Screw
2. Removethecoverandtheplate.
►Fig.9: 1. Cover 2.Plate
NOTE:Theplatemayremainonthecover.
3. Remove the rod.
►Fig.10: 1. Rod
NOTE:Therodmayremainonthecover.
4. Remove2screws,thefeltpad,thewashers,and
thesleeves,andthenremovetheshearblades.
►Fig.11: 1. Felt pad 2.Screw3. Washer 4. Sleeve
5.Shearblades
5. Removethebladecover.
6. Attachthebladecovertothenewshearblades.
7. Adjustthecranksothat2holesarelinedupon
the alignment line.
►Fig.12: 1. Hole 2.Alignmentline
8. Aligntheprotrusionsontheshearbladesvertically
at the same position.
►Fig.13: 1.Protrusion
9. Attachthefeltpadtotheshearblades.
►Fig.14: 1. Felt pad
10. Inserttheprotrusionontheshearbladestothe
holeontherod,thenalignthepositionofthefeltpad
withtheholesonthetool,andthenattachnewsleeves
and washers.
►Fig.15: 1.Protrusion2. Hole 3. Felt pad 4. Washer
5. Sleeve
NOTICE: Apply a small amount of grease to the
inner periphery of the hole of the rod.
NOTICE: Be careful not to lose the washers and
the sleeves.
11. Aligntheholesontheshearbladeswiththeholes
onthetool,andthentighten2screwstoxtheshear
blades.
►Fig.16: 1.Screw2. Hole
12. Attachtherod.
►Fig.17: 1. Rod 2. Small hole
NOTICE: Apply a small amount of grease to the
inner periphery of the small hole of the rod.
NOTICE: Make sure that the protrusion on the
shear blades ts in the small hole on the rod.
13. Attachtheplate.
►Fig.18: 1.Protrusion2.Plate
NOTICE: Make sure that the protrusion on the
shear blades ts in the hole on the plate.
14. Attachthecover,andthentighten6screws.
►Fig.19: 1. Cover 2.Screw
NOTICE: Be sure to attach 2 long screws to the
center holes.
NOTICE: If the shear blades do not move
smoothly, the shear blades are not engaged with
the rods properly. Install the shear blades again.
NOTICE: If the parts other than the shear
blades such as the rods are worn out, ask Makita
Authorized Service Centers for parts replacement
or repairs.
Installing or removing the chip receiver
Optional accessory
CAUTION: When installing or removing the
chip receiver, always wear gloves so that your
hands do not directly contact the shear blades.
NOTICE: The blade cover cannot be installed if
the chip receiver is installed on the tool. Before
carrying or storing the tool, uninstall the chip
receiver, and then install the blade cover to avoid
blade exposure.
NOTICE: Be sure to remove the blade cover
before installing the chip receiver.

14 ENGLISH
Thechipreceivergathersdiscardedleavesandmakes
clean-upafterwardmucheasier.Itcanbeinstalledon
eithersideofthetool.
Toinstallthechipreceiver,alignthehooksofthechip
receiverwiththearrowmarksontheshearblades,and
thenpressthechipreceiveragainsttheshearbladesso
thatthehookstintothegroovesontheshearblades.
►Fig.20: 1. Hook 2.Arrowmark
►Fig.21: 1. Hook
NOTICE: Make sure that the chip receiver does
not overlap the branch catcher.
►Fig.22: 1.Branchcatcher
Toremovethechipreceiver,presstheleversonboth
sides to release the hooks.
►Fig.23: 1. Lever
NOTICE: Never try to remove the chip receiver
by an excessive force with its hooks locked in the
grooves of the shear blades.
OPERATION
WARNING: Keep hands away from shear
blades.
CAUTION: Avoid operating the tool in very
hot weather as much as practicable. When operat-
ing the tool, be careful of your physical condition.
CAUTION: Be careful not to accidentally
contact a metal fence or other hard objects while
trimming.Theshearbladesmaybreakandcause
aninjury.
CAUTION: Be careful not to allow the shear
blades to contact the ground.Thetoolmayrecoil
andcauseaninjury.
CAUTION: Overreaching with a hedge trim-
mer, particularly from a ladder, is extremely
dangerous.Donotworkwhilestandingonanything
wobblyorinrm.
NOTICE: Do not attempt to cut branches thicker
than 10 mm in diameter with the tool.Cutbranches
to10cmlowerthanthecuttingheightusingbranch
cuttersbeforeusingthetool.
►Fig.24: (1) Cutting height (2)10cm
NOTICE: Do not cut down dead trees or similar
hard objects.Doingsomaydamagethetool.
NOTICE: Do not trim the grass or weeds while
using the shear blades.Theshearbladesmay
becometangledinthegrassorweeds.
Holdthetoolwithbothhands,presstheswitchlever
andpulltheswitchtriggerwhilepressingthelock-off
lever,andthenmoveitforward.
►Fig.25
Forbasicoperation,tilttheshearbladestowardthe
trimmingdirectionandmoveitcalmlyandslowlyatthe
speedrateof3to4secondspermeter.
►Fig.26
Tocutahedgetopevenly,tieastringatthedesired
height and trim along it.
►Fig.27
Ifthechipreceiverisattachedtotheshearblades,it
gathersdiscardedleavesandmakesclean-upafter-
wardmucheasier.
►Fig.28
Tocutahedgesideevenly,cutfromthebottomtotop.
►Fig.29
Whentrimmingtomakearoundshape(trimmingbox-
woodorrhododendron,etc.),trimfromtheroottothe
topforabeautifulnish.
►Fig.30
MAINTENANCE
CAUTION: Always be sure that the tool is
switched off and the battery cartridge is removed
before attempting to perform inspection or
maintenance.
TomaintainproductSAFETYandRELIABILITY,
repairs,anyothermaintenanceoradjustmentshould
beperformedbyMakitaAuthorizedorFactoryService
Centers,alwaysusingMakitareplacementparts.
Cleaning the tool
Cleanthetoolbywipingoffdustwithadryclothorone
dippedinsoapywaterandwrungout.
NOTICE: Never use gasoline, benzine, thinner,
alcohol or the like. Discoloration, deformation or
cracks may result.
Shear blade maintenance
Beforetheoperationoronceperhourduringoperation,
applylow-viscosityoil(machineoil,orspray-typelubri-
catingoil)totheshearblades.
►Fig.31
Afteroperation,removedustfrombothsidesofthe
shearbladeswithawiredbrush,wipeitoffwithacloth
andthenapplylow-viscosityoil(machineoil,orspray-
typelubricatingoil)totheshearblades.
►Fig.32
NOTICE: Do not wash the shear blades in water.
Doingsomaycauserustordamagetothetool.
NOTICE: Dirt and corrosion cause excessive
blade friction and shorten the operating time per
battery charge.

15 ENGLISH
Storage
Thehookholeinthetoolbottomisconvenientforhang-
ingthetoolfromanailorscrewonthewall.
Attachthebladecovertotheshearbladessothatthe
bladesarenotexposed.Storethetooloutofthereach
ofchildren.Storethetoolinaplacenotexposedto
moisture or rain.
►Fig.33: 1. Hole
Grinding the shear blades
NOTICE: If the shear blades have considerably
deformed by grinding, replace the shear blades
with new ones.
1. Installthebatterycartridgetothetool.
2. Turnonandstartthetoolsothattheupperblade
andlowerbladearepositionedalternately.
►Fig.34
3. Turnoffthetoolandremovethebatterycartridge
fromthetool.
4. Removethescrew,andthenremovethebranch
catcher.
►Fig.35: 1.Screw2.Branchcatcher
5. Settheangleofaleto45°,andgrindtheupper
bladefrom3directionswiththele.
►Fig.36: (1) File (2)45°
CAUTION: Before grinding the shear blades,
make sure that the tool is switched off and the
battery cartridge is removed from the tool.
6. Placethetoolupsidedown,andthenremovethe
burrsfromtheshearbladeswiththele.
►Fig.37: 1. File
7. Settheangleoftheleto45°,andgrindthelower
bladefrom3directionswiththele.
8. Return the tool to normal position, and then
removetheburrsfromtheshearbladeswiththele.
9. Attachthebranchcatcherbytighteningthescrew.
Grease lubrication
Interval of lubrication:Every100operatinghours
1. Remove3screws,andthenremovethebottom
cover.
►Fig.38: 1.Screw2.Bottomcover
2. Removethecapfromthegreasevessel,andthen
attachthegreasevesseltotheholeonthecoverby
turning the grease vessel.
►Fig.39: 1. Cover 2. Grease vessel
3. Applythegreasetothetool(Approximately5gas
aguide).
4. Remove the grease vessel.
5. Attachthebottomcover,andthentighten3
screws.
OPTIONAL
ACCESSORIES
CAUTION: These accessories or attachments
are recommended for use with your Makita tool
specied in this manual.Theuseofanyother
accessoriesorattachmentsmightpresentariskof
injurytopersons.Onlyuseaccessoryorattachment
foritsstatedpurpose.
Ifyouneedanyassistanceformoredetailsregard-
ingtheseaccessories,askyourlocalMakitaService
Center.
• Shearbladeassembly
• Shearbladecover
• Chipreceiver
• Greasevessel
• Makitagenuinebatteryandcharger
NOTE:Someitemsinthelistmaybeincludedinthe
toolpackageasstandardaccessories.Theymay
differfromcountrytocountry.

16 SLOVENŠČINA
SLOVENŠČINA (Originalna navodila)
TEHNIČNI PODATKI
Model: DUH501 DUH601 DUH751
Dolžinarezila 500 mm 600 mm 750 mm
Hodi na minuto 0 – 2.000/0 – 3.600/0 – 4.400 min-1
Celotnadolžina 1.016 mm 1.121 mm 1.261 mm
Nazivnanapetost D.C. 18 V
Netoteža 3,8 – 4,5 kg
Model: DUH502 DUH602 DUH752
Dolžinarezila 500 mm 600 mm 750 mm
Hodi na minuto 0 – 2.000/0 – 3.600/0 – 4.400 min-1
Celotnadolžina 1.016 mm 1.121 mm 1.261 mm
Nazivnanapetost D.C. 18 V
Netoteža 3,8 – 4,5 kg
• Kernenehnoopravljamoraziskaveinrazvijamosvojeizdelke,selahkotehničnipodatkivtemdokumentu
spremenijobrezobvestila.
• Tehničnipodatkiselahkorazlikujejooddržavedodržave.
• Težaselahkorazlikujegledenapriključke,vključnozakumulatorskobaterijo.Najlažjainnajtežjakombinacijav
skladuspostopkomEPTA01/2014staprikazanivpreglednici.
Uporabna akumulatorska baterija
BL1815N / BL1820 / BL1820B / BL1830 / BL1830B / BL1840 / BL1840B / BL1850 / BL1850B / BL1860B
• Nekaterezgorajnavedeneakumulatorskebaterijemordavvašidržaviprebivališčanisonavoljo.
OPOZORILO: Uporabljajte le zgoraj navedene akumulatorske baterije.Uporabadrugihakumulatorskih
baterijlahkopovzročitelesnepoškodbein/alipožar.
Simboli
Naslednjisimboliseuporabljajovpovezavisstrojem.
Preduporaboizdelkaseobveznoseznaniteznjihovim
pomenom.
Preberitenavodilazauporabo.
Neizpostavljajtevlagi.
Ni-MH
Li-ion
SamozadržaveEU
Nezavrziteizrabljeneelektričneopremealiaku-
mulatorskegasklopamedgospodinjskeodpadke!
VskladuzEvropskimidirektivamioodpadni
električniinelektronskiopremi,baterijahin
akumulatorjih,odpadnihbaterijahinakumu-
latorjihterupoštevanjemnjihovihdoločilv
skladuzdržavnozakonodajojetrebaelek-
tričnoopremo,baterijeinakumulatorje,katerih
življenjskicikeljepretekel,zbiratiločenoin
jihdostavitivustrezenobratzarecikliranje,ki
delujeskladnozokoljevarstvenimizahtevami.
Predvidena uporaba
Orodjejenamenjenorezanjuživemeje.
Hrup
Veljavnistandard:EN60745-2-15
Model Ravenzvočnegatlaka Ravenzvočnemoči
LPA(dB(A)) OdstopanjeK
(dB(A))
LPA(dB(A)) OdstopanjeK
(dB(A))
DUH501 84 397 3
DUH601 82 395 3
DUH751 84 397 3
DUH502 81,3 386,8 3
DUH602 82,1 387,4 3
DUH752 80,5 387,8 3

17 SLOVENŠČINA
OPOMBA:Navedenevrednostioddajanjahrupasobileizmerjenevskladusstandardnimimetodamitestiranjain
selahkouporabljajozaprimerjavoorodij.
OPOMBA:Navedenevrednostioddajanjahrupaselahkouporabljajotudipripredhodnioceniizpostavljenosti.
OPOZORILO: Uporabljajte zaščito za sluh.
OPOZORILO: Oddajanje hrupa med dejansko uporabo električnega orodja se lahko razlikuje od nave-
denih vrednosti, odvisno od načina uporabe orodja in predvsem vrste obdelovanca.
OPOZORILO: Upravljavec mora za lastno zaščito poznati varnostne ukrepe, ki temeljijo na oceni izpo-
stavljenosti v dejanskih pogojih uporabe (poleg časa proženja je treba upoštevati celoten delovni cikel,
vključno s časom, ko je orodje izklopljeno, in časom, ko deluje v prostem teku).
Vibracije
Skupnevrednostivibracij(vektorskavsotatrehosi)v
skladuzEN60745-2-15:
Model DUH501
Emisijevibracij(ah):2,5m/s2
Odstopanje(K):1,5m/s2
Model DUH601
Emisijevibracij(ah):2,5m/s2alimanj
Odstopanje(K):1,5m/s2
Model DUH751
Emisijevibracij(ah):2,5m/s2
Odstopanje(K):1,5m/s2
Model DUH502
Emisijevibracij(ah):2,5m/s2
Odstopanje(K):1,5m/s2
Model DUH602
Emisijevibracij(ah):2,5m/s2alimanj
Odstopanje(K):1,5m/s2
Model DUH752
Emisijevibracij(ah):2,5m/s2alimanj
Odstopanje(K):1,5m/s2
OPOMBA:Navedeneskupnevrednostioddajanja
vibracijsobileizmerjenevskladusstandardnimi
metodamitestiranjainselahkouporabljajozaprimer-
javoorodij.
OPOMBA:Navedeneskupnevrednostioddajanja
vibracijselahkouporabljajotudipripredhodnioceni
izpostavljenosti.
OPOZORILO: Oddajanje vibracij med
dejansko uporabo električnega orodja se lahko
razlikuje od navedenih vrednosti, odvisno
od načina uporabe orodja in predvsem vrste
obdelovanca.
OPOZORILO: Upravljavec mora za lastno
zaščito poznati varnostne ukrepe, ki temeljijo
na oceni izpostavljenosti v dejanskih pogojih
uporabe (poleg časa proženja je treba upoštevati
celoten delovni cikel, vključno s časom, ko je
orodje izklopljeno, in časom, ko deluje v prostem
teku).
Izjava o skladnosti ES
Samo za evropske države
IzjavaESoskladnostijevključenavdodatkuA,kije
priložentemnavodilomzauporabo.
VARNOSTNA
OPOZORILA
Splošna varnostna opozorila za
električno orodje
OPOZORILO: Preberite vsa varnostna opo-
zorila in navodila s slikami in tehničnimi podatki,
ki so dobavljeni skupaj z električnim orodjem.
Obneupoštevanjuspodajnavedenihnavodilobstaja
nevarnostelektričnegaudara,požarain/alihudih
telesnihpoškodb.
Shranite vsa opozorila in navo-
dila za poznejšo uporabo.
Izraz„električnoorodje“vopozorilihsenanašanavaše
električnoorodje(skablom)alibaterijskoelektrično
orodje(brezkabla).
Varnostna opozorila za brezžični
rezalnik za živo mejo
1. Ne približujte delov telesa rezilu kose. Ne
odstranjujte odrezanega materiala in ne držite
materiala, ki ga boste rezali, kadar se rezila
premikajo. Kadar čistite zataknjen material, se
prepričajte, da je stikalo izklopljeno.Trenutek
nepazljivostipridelusškarjamizaživomejolahko
privededohudihtelesnihpoškodb.
2. Rezalnik za živo mejo nosite tako, da ga držite
za ročaj, rezila kose pa so ustavljena. Kadar
prenašate ali shranjujete rezalnik za živo mejo,
vedno namestite pokrov rezalne naprave.
Ustreznorokovanjezrezalnikomzaživomejobo
zmanjšalomorebitnetelesnepoškodbezaradi
rezil.
3. Držite električno orodje na izoliranih držalnih
površinah, saj lahko rezilo kose prereže skrito
električno napeljavo.Čeprerežetevodnike
podnapetostjo,sopodnapetostjovsineizolirani
kovinskidelielektričnegaorodja,zaradičesar
lahkoupravljavecutrpielektričniudar.
4. NEVARNOST - Ne približujte rok rezilu.Stikz
rezilompovzročihudetelesnepoškodbe.
5. Rezalnika za živo mejo ne uporabljajte v dežju
ali v zelo vlažnih pogojih.Električnimotorni
vodotesen.

18 SLOVENŠČINA
6. Uporabnike, ki prvič uporabljajo rezalnik za
živo mejo, naj izkušeni uporabnik pouči o
uporabi orodja.
7. Rezalnika za živo mejo ne smejo uporabljati
otroci ali mlajši od 18 let.Mladoletneosebe,
starejšeod16let,solahkoizvzeteizteomejitve,
česeusposabljajopodnadzoromstrokovnjaka.
8. Z rezalnikom za živo mejo delajte samo, če ste
v dobri zični kondiciji.Česteutrujeni,bovaša
zbranostzmanjšana.Šeposebejboditepozorni
obkoncudelovnegadne.Vsadelaopravljajte
mirnoinzbrano.Uporabnikjeodgovorenzavse
poškodbe,povzročenetretjimosebam.
9. Nikoli ne uporabljajte rezalnika pod vplivom
alkohola, drog ali zdravil.
10. Delovne rokavice iz robustnega usnja so del
osnovne opreme rezalnika za živo mejo in jih
je pri delu treba vedno nositi. Prav tako nosite
močne čevlje z nedrsečim podplatom.
11. Pred začetkom dela se prepričajte, da je
rezalnik v dobrem in varnem stanju za delo.
Zagotovite, da so ščitniki pravilno nameščeni.
Rezalnika za živo mejo ni dovoljeno uporab-
ljati, če ni v celoti sestavljen.
12.
Pred začetkom uporabe zagotovite trdno stojišče.
13. Med uporabo trdno držite orodje.
14. Ne uporabljajte orodja brez obremenitve po
nepotrebnem.
15. Če rezalnik pride v stik z ograjo ali drugim
trdim predmetom, takoj ugasnite motor in
odstranite akumulatorsko baterijo. Preverite,
ali je rezalnik poškodovan, in ga v tem primeru
takoj popravite.
16. Preden rezalnik pregledate, odpravite napake
ali odstranite material, ki se je ujel v rezalnik,
vedno izklopite rezalnik in odstranite akumula-
torsko baterijo.
17. Pred vzdrževalnimi deli izklopite rezalnik in
odstranite akumulatorsko baterijo.
18. Kadar prenašate rezalnik za živo mejo na
drugo lokacijo, tudi med delom, vedno odstra-
nite akumulatorsko baterijo in namestite
pokrov rezila. Nikoli ne prenašajte ali preva-
žajte rezalnika, kadar deluje. Nikoli ne prije-
majte rezalnika z rokami.
19. Po uporabi in preden shranite rezalnik za
živo mejo za dlje časa ga očistite (še posebej
rezilo). Rahlo naoljite rezalnik in namestite
pokrov.Pokrov,kijepriloženenoti,lahkoobesite
nasteno,karomogočavareninpraktičennačin
shranjevanjarezalnikazaživomejo.
20. Rezalnik za živo mejo shranjujte z nameščenim
pokrovom in v suhem prostoru. Shranjujte
nedosegljivo otrokom. Rezalnika nikoli ne
shranjujte na prostem.
21. Rezil nikoli ne usmerite proti sebi ali drugim
osebam.
22. Če se med delovanjem rezila nehajo premikati,
ker so se med njih zataknili tujki, izklopite
orodje, odstranite akumulatorsko baterijo in
nato odstranite tujke z orodjem, kot so klešče.
Odstranjevanjetujkovzrokamilahkopovzroči
poškodbe,sajsezaradiodstranjevanjatujkov
lahkopremaknejorezila.
23. Izogibajte se nevarnemu okolju. Orodja ne
uporabljajte na vlažnih ali mokrih mestih in
ga ne izpostavljajte dežju. Voda, ki prodre v
orodje, bo povečala nevarnost električnega
udara.
24. Akumulatorja/-ev ni dovoljeno metati v ogenj.
Celica lahko eksplodira. Preverite lokalne
predpise glede morebitnih posebnih navodil za
odstranjevanje.
25. Ne odpirajte ali spreminjajte akumulatorja/
-ev. Sproščeni elektrolit je koroziven in lahko
povzroči poškodbe oči ali kože. Pri zaužitju je
lahko strupen.
26. Akumulatorja ne polnite v dežju ali na mokrih
mestih.
27. Pred uporabo orodja preverite, da v živi meji
in grmičevju ni tujkov, kot so žične ograje ali
skrite žice.
SHRANITE TA NAVODILA.
OPOZORILO: NE dovolite, da bi zaradi udob-
nejšega dela ali znanja o uporabi izdelka (prido-
bljenega z večkratno uporabo) opustili strogo
upoštevanje varnostnih zahtev v okviru pravilne
uporabe orodja. ZLORABA ali neupoštevanje var-
nostnih zahtev v teh navodilih za uporabo lahko
povzroči resne telesne poškodbe.
Pomembna varnostna navodila za
akumulatorsko baterijo
1. Pred uporabo baterijskega vložka preberite
vsa navodila in opozorilne oznake na (1) pol-
nilniku akumulatorja, (2) akumulatorju in (3)
izdelku, ki uporablja akumulator.
2. Ne razstavljajte baterijskega vložka.
3. Če se je čas delovanja občutno skrajšal, takoj
prenehajte uporabljati orodje. V nasprotnem
primeru lahko pride do pregretja, morebitnih
opeklin in celo eksplozije.
4. Če pride elektrolit v stik z očmi, jih sperite s
čisto vodo in takoj poiščite zdravniško pomoč.
Posledica je lahko izguba vida.
5. Ne povzročite kratkega stika baterijskega
vložka:
(1) Ne dotikajte se priključkov s kakršnim
koli prevodnim materialom.
(2) Izogibajte se shranjevanju baterijskega
vložka v vsebniku z drugimi kovinskimi
predmeti kot so žeblji, kovanci itn.
(3) Ne izpostavljajte baterijskega vložka vodi
ali dežju.
Kratek stik akumulatorja lahko povzroči velik
električni tok, pregrevanje, morebitne opekline
in celo okvaro.
6. Ne shranjujte orodja in baterijskega vložka
na mestih, kjer lahko temperatura doseže ali
preseže 50 °C.
7. Ne sežigajte baterijskega vložka, tudi če je
hudo poškodovan ali v celoti izpraznjen.
Baterijski vložek lahko v ognju eksplodira.
8. Poskrbite, da akumulator ne bo izpostavljen
padcem ali udarcem.
9. Ne uporabljajte poškodovanih akumulatorjev.

19 SLOVENŠČINA
10. Priložene litij-ionske baterije ustrezajo zahte-
vam zakonodaje v zvezi z nevarnim blagom.
Zakomercialneprevoze,npr.tiste,kijihopravljajo
tretjestrankeincarinskiposredniki,jetrebaupo-
števatiposebnezahtevevzvezizembalažoin
označevanjem.
Medpostopkompripravenaodpremoizdelkase
jetrebaposvetovatisstrokovnjakomzanevarne
snovi.Pritemupoštevajtetudipodrobnejšenacio-
nalne predpise.
Odprtestikeoblepitezlepilnimtrakomalijihdru-
gačezaščitite,baterijopazapakirajtetako,dasev
embalažinemorepremikati.
11. Upoštevajte lokalne uredbe glede odlaganja
akumulatorja.
12. Baterije uporabljajte le z izdelki, ki jih določi
Makita.Čenamestitebaterijevneskladneizdelke,
lahkopridedopožara,pregrevanja,eksplozijeali
puščanjaelektrolita.
SHRANITE TA NAVODILA.
POZOR: Uporabljajte le originalne baterije
Makita.ČeuporabljateneoriginalnebaterijeMakita
alibaterije,kisobilespremenjene,lahkopridedo
eksplozijebaterijeinposledičnodopožara,telesnih
poškodbalimaterialneškode.Stakšnouporabo
bostetudirazveljaviligarancijoMakitazaorodjein
polnilnik Makita.
Nasveti za ohranjanje največje
zmogljivosti akumulatorja
1. Napolnite baterijski vložek, preden se v celoti
izprazni. Ko opazite, da ima orodje manjšo
moč, vedno ustavite delovanje orodja in napol-
nite baterijski vložek.
2. Nikoli znova ne polnite popolnoma napol-
njenega baterijskega vložka. Prenapolnjenje
skrajša življenjsko dobo akumulatorja.
3. Baterijski vložek s sobno temperaturo pol-
nite pri temperaturi okolja od 10 °C do 40 °C.
Počakajte, da se vroč baterijski vložek pred
polnjenjem ohladi.
4. Če baterijskega vložka ne uporabljate dalj časa
(več kot 6 mesecev), ga napolnite.
OPIS DELOVANJA
POZOR: Pred nastavljanjem ali preizkusom
delovanja orodja se prepričajte, ali je orodje
izključeno in ali je akumulatorska baterija
odstranjena.
Nameščanje ali odstranjevanje
akumulatorske baterije
POZOR: Vedno izklopite orodje, preden name-
stite ali odstranite akumulatorsko baterijo.
POZOR: Kadar nameščate ali odstranjujete
akumulatorsko baterijo, trdno držite orodje in
akumulatorsko baterijo.Čeorodjainakumulatorske
baterijenedržitetrdno,selahkozgodi,davamzdr-
snetaizrok,posledicapajelahkopoškodbaorodjain
akumulatorskebaterijetertelesnapoškodba.
►Sl.1: 1.Rdečiindikator2.Gumb3.Baterijskivložek
Čeželiteodstranitiakumulatorskobaterijo,jopotisniteiz
orodja,pritempapomikajtegumbnasprednjistranivložka.
Akumulatorskobaterijovstavitetako,daporavnate
jezičeknabaterijizutoromnaohišjuinjopotisnetev
ležišče.Potisnitejodokonca,dasezaskoči.Čejerdeči
indikatornazgornjistranigumbaviden,pomeni,da
baterijaniustreznozaklenjena.
POZOR: Vedno namestite akumulatorsko
baterijo tako, da rdeči indikator ni več viden.Če
teganeupoštevate,lahkobaterijanepričakovano
padeizorodjainpoškodujevasaliosebevneposre-
dnibližini.
POZOR: Ne nameščajte akumulatorske bate-
rije s silo.Česeakumulatorskabaterijanezaskoči
zlahka,nipravilnovstavljena.
Prikazuje preostalo raven
napolnjenosti akumulatorja
Samo za akumulatorske baterije z indikatorjem
►Sl.2: 1.Indikatorskelučke2.Gumbzapreverjanje
Pritisnitegumbzapreverjanjenabaterijskemvložku,
dapreveriteravennapolnjenostiakumulatorja.
Indikatorskelučkenakratkozasvetijo.
Indikatorske lučke Prikaz pre-
ostale ravni
napolnjenosti
Sveti Ne sveti Utripa
od 75 % do
100 %
od 50 % do
75 %
od 25 % do
50 %
od 0 % do
25 %
Napolnite
akumulator.

20 SLOVENŠČINA
Indikatorske lučke Prikaz pre-
ostale ravni
napolnjenosti
Sveti Ne sveti Utripa
Akumulator
jemorda
okvarjen.
OPOMBA:Odvisnoodpogojevuporabeinokoljske
temperatureseoznačbalahkonekolikorazlikujeod
dejanskenapolnjenosti.
Zaščitni sistem orodja/akumulatorja
Orodjejeopremljenozzaščitnimsistemomzaorodje/
akumulator.Sistemsamodejnoprekinenapajanje
orodja,dapodaljšaživljenjskodoboorodjainakumula-
torja.Orodjesesamodejnozaustavimeddelovanjem,
čeorodjealiakumulatordelujetapodnaslednjimipogoji:
Stanje Indikatorske lučke
Sveti Ne sveti Utripa
Preobremenitev
Pregrevanje
Prekomerna
izpraznjenost
Zaščita pred preobremenitvijo
Čejeorodjepreobremenjenozaradizapletenihvejicin
drugihostankov,začnetautripatilučka insrednja
lučka,orodjepasesamodejnozaustavi.
Vtemprimeruizklopiteorodjeinprenehajteizvajati
delo,kijepovzročilopreobremenitevorodja.Natovklo-
piteorodjeingaznovazaženite.
OBVESTILO:
Odvisno od pogojev uporabe se orodje
zaradi preobremenjenosti zaradi zapletenih vejic in drugih
ostankov samodejno zaustavi brez opozorila. V tem pri-
meru izklopite orodje, odstranite akumulatorsko baterijo
in odstranite zapletene vejice ter druge ostanke z orod-
jem, kot so klešče. Ko odstranite vejice in ostanke, name-
stite akumulatorsko baterijo in znova vklopite orodje.
Varovalo pred pregrevanjem za
orodje in akumulator
Obstajatadvevrstipregrevanja:pregrevanjeorodjainpregre-
vanjeakumulatorja.Pripregrevanjuorodjautripajovselučke
zahitrost.Pripregrevanjuakumulatorjautripalučka .
Vprimerupregrevanjaseorodjesamodejnozaustavi.
Počakajte,daseorodjein/aliakumulatorohladita,
predenznovavklopiteorodje.
Zaščita pred izpraznjenjem
Koseravennapolnjenostiakumulatorjazniža,seorodje
samodejnoustaviinutripalučka .
Čeorodjenedeluje,tudičesostikalavklopljena,
odstraniteakumulatorizorodjainganapolnite.
Nastavitev kota ročaja
POZOR: Pred začetkom dela se vedno prepri-
čajte, da je ročaj ustrezno pritrjen.
POZOR: Ročice ne pritisnite navzdol, da bi
odklenili ročaj, medtem ko pritiskate sprožilec. Ne
pritisnite sprožilca, medtem ko ročico pritiskate
navzdol in obračate ročaj. V nasprotnem primeru
lahkopridedookvareorodja.
Kotročajalahkonastavitena0°,45°ali90°vlevoali
desno.Dabispremenilikotročaja,gaobračajte,med-
temkoročicopritiskatenavzdol,innatosprostiteročico.
►Sl.3: 1.Ročica
Delovanje vklopno-izklopnega stikala
OPOZORILO:
Za večjo varnost je orodje opre-
mljeno z ročico za zaklep, ki preprečuje nenamerni
zagon orodja. NIKOLI ne uporabljajte orodja, kadar
začne delovati, če pritisnete preklopno ročico in
sprožilec, ne da bi pritisnili tudi ročico za zaklep.
PRED nadaljnjo uporabo orodje vrnite na poobla-
ščeni servisni center, da ga ustrezno popravijo.
OPOZORILO:
NIKOLI ne zalepite ročice za
zaklep ali onemogočite njenega delovanja in funkcije.
OPOZORILO:
Preden namestite akumulatorsko
baterijo v orodje, se vedno prepričajte, da sprožilec
in preklopna ročica delujeta brezhibno in se vrneta
v položaj za izklop (OFF), ko ju spustite. Uporaba
orodjasstikalom,kisenesprožipravilno,lahkoprivede
doizgubenadzorainresnihtelesnihpoškodb.
POZOR: Pri prenašanju orodja ne polagajte
prsta na stikalo.Orodjeselahkonenamernovklopi
inpovzročipoškodbo.
OBVESTILO: Ne pritiskajte sprožilnega stikala
s silo, ne da bi pri tem pritisnili ročico za zaklep.
Stikalo se namreč lahko zlomi.
Pritisniteinpridržiteglavnigumbzavklop/izklop,davklopite
orodje.Lučkazavklop/izklopzasveti,kojeorodjevklopljeno.
Zaizklopznovapridržiteglavnigumbzavklop/izklop.Lučka
zavklop/izklopugasne,kojeorodjeizklopljeno.
►Sl.4: 1.Lučkazavklop/izklop2.Glavnigumbza
vklop/izklop
OPOMBA:Orodjesesamodejnoizklopi,čeganekaj
časaneuporabljate.
Zazaščitoprednehotenimvklopomsprožilcajeorodje
opremljenozročicozazaklep.Zazagonorodjapriti-
sniteročicozazaklepinnatošepreklopnoročicoter
sprožilec.Hitrostorodjasepoveča,kopovečatepritisk
nasprožilec.Čeželiteustavitiorodje,spustitesprožilec.
►Sl.5: 1.Preklopnaročica2.Ročicazazaklep
3.Sprožilnostikalo
Other manuals for DUH501
10
This manual suits for next models
5
Table of contents
Languages:
Other Makita Trimmer manuals

Makita
Makita BC231UD User manual

Makita
Makita UH353D User manual

Makita
Makita BUH550 User manual

Makita
Makita DUR364LZ User manual

Makita
Makita RBC221 User manual

Makita
Makita rt0700c User manual

Makita
Makita DUR365U User manual

Makita
Makita BUR141 User manual

Makita
Makita UM3830 User manual

Makita
Makita M3700 User manual

Makita
Makita UR017G User manual

Makita
Makita 3710 User manual

Makita
Makita DRT50 User manual

Makita
Makita DUR194 User manual

Makita
Makita BUR142U User manual

Makita
Makita DUR365U User manual

Makita
Makita DUR364L User manual

Makita
Makita UR002G User manual

Makita
Makita UH004G User manual

Makita
Makita RBC220 User manual