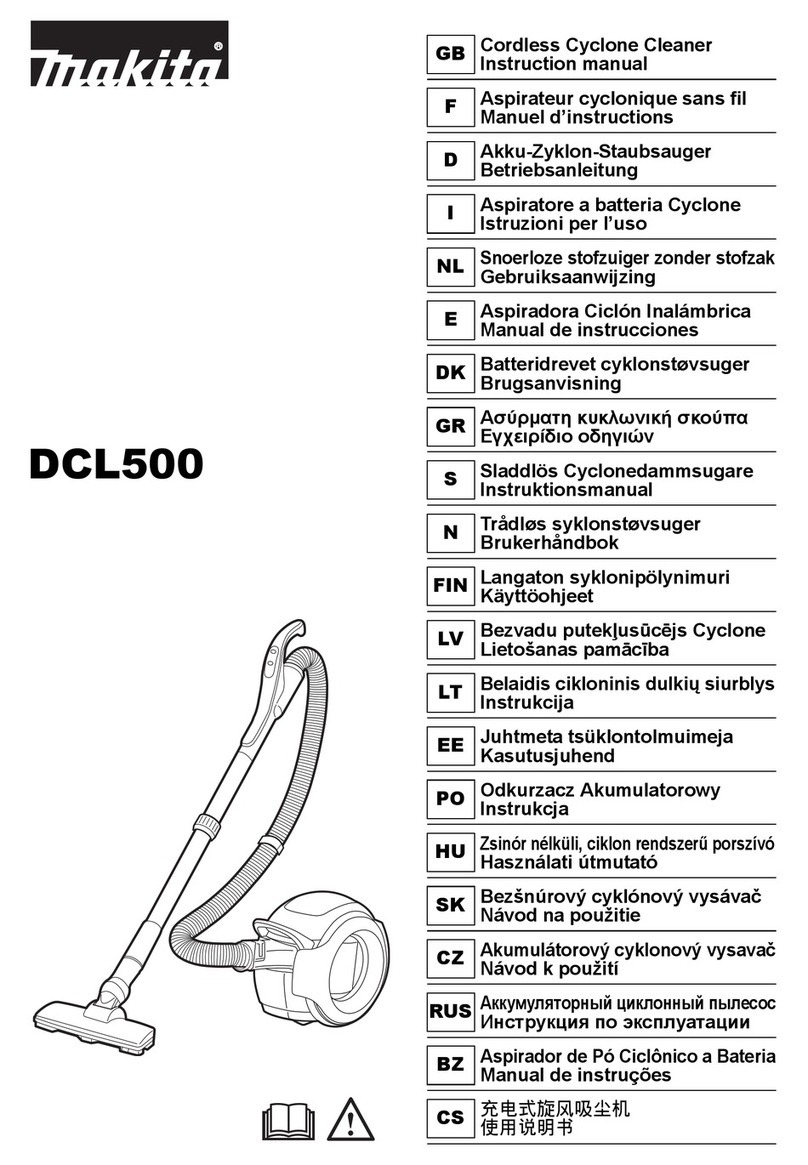
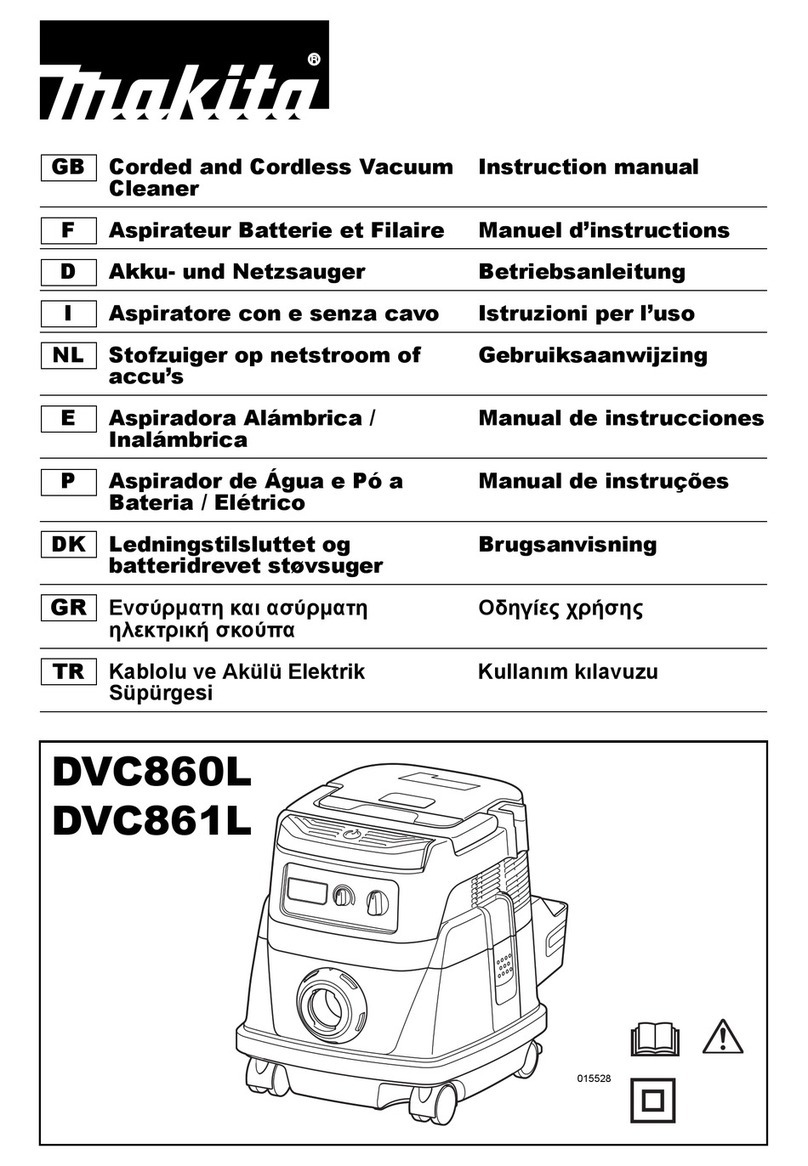
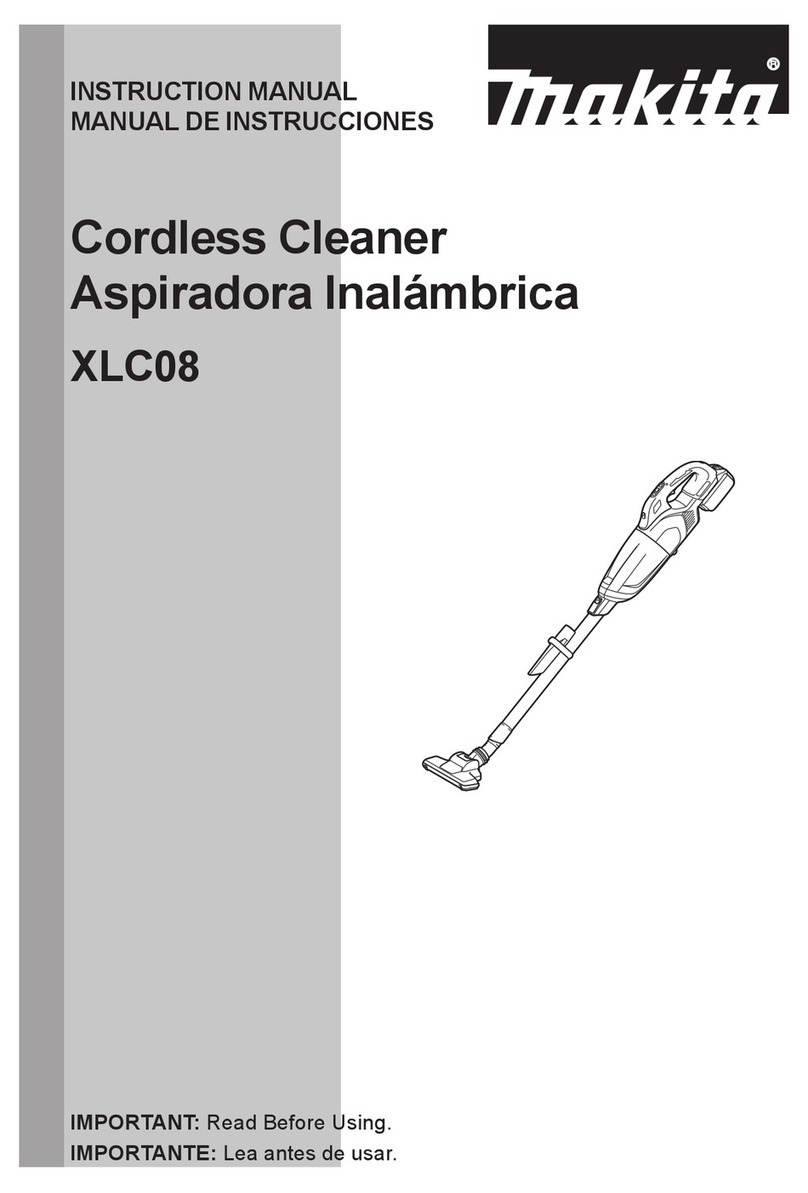
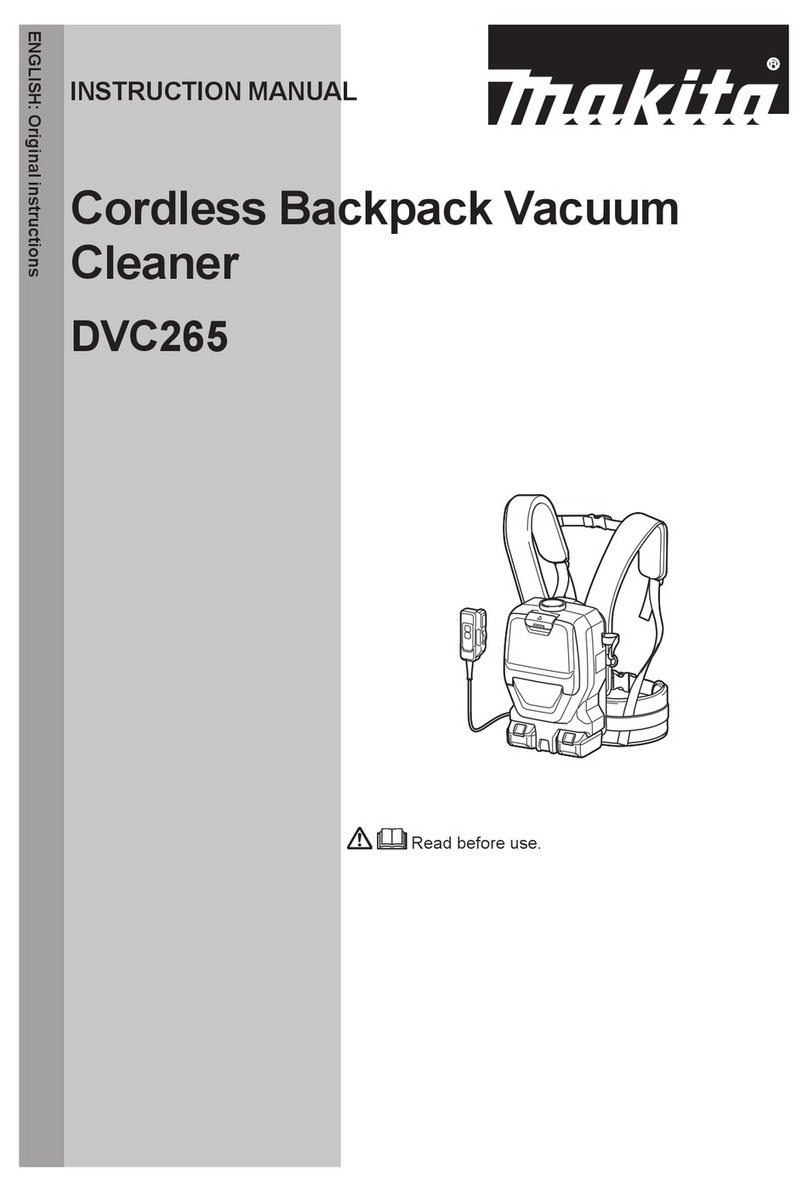
Makita DCL282F User manual

DCL282F
EN Cordless Cleaner INSTRUCTION MANUAL 8
ID Pembersih Tanpa Kabel PETUNJUK PENGGUNAAN 15
VI Máy Hút Bụi Cầm Tay Hoạt
Động Bằng Pin TÀI LIỆU HƯỚNG DẪN 23
TH 30

Fig.1
3
1
2
Fig.2
1
2
Fig.3
1
2
Fig.4
1
2
3
Fig.5
Fig.6
1
2
Fig.7
1
23
Fig.8
2

1
Fig.9
Fig.10
Fig.11
Fig.12
1
Fig.13
1
2
Fig.14
Fig.15
1
23
Fig.16
3

1
Fig.17
Fig.18
Fig.19
Fig.20
1
Fig.21
1
2
3
Fig.22
Fig.23
1
2
Fig.24
4

Fig.25
1
Fig.26
1
2
3
Fig.27
1
2
Fig.28
1 2
3
Fig.29
Fig.30
1
Fig.31
1
2
Fig.32
5

1
Fig.33
1
2
Fig.34
1
2
Fig.35
1
2
Fig.36
Fig.37
Fig.38
Fig.39
1
Fig.40
6

1
Fig.41
1
Fig.42
1
Fig.43
7

8ENGLISH
ENGLISH (Original instructions)
WARNING
This appliance can be used by children aged from 8 years and
above and persons with reduced physical, sensory or mental capa-
bilities or lack of experience and knowledge if they have been given
supervision or instruction concerning use of the appliance in a safe
way and understand the hazards involved. Children shall not play
with the appliance. Cleaning and user maintenance shall not be
made by children without supervision.
SPECIFICATIONS
Model: DCL282F
Capacity with a dust bag 500 mL
with a paper lter 330 mL
Continuous
use (with bat-
tery BL1830B)
1 (Normal speed mode) Approx. 50 min
2 (High speed mode) Approx. 20 min
3 (Max speed mode) Approx. 15 min
Overall length 1,016 mm
Rated voltage D.C. 18 V
Net weight 1.3 - 1.6 kg
• Due to our continuing program of research and development, the specications herein are subject to change
without notice.
• Specications may differ from country to country.
• The weight does not include accessories but battery cartridge(s). The lightest and heaviest combination weight
of the appliance and battery cartridge(s) are shown in the table.
Applicable battery cartridge and charger
Battery cartridge BL1815N / BL1820 / BL1820B / BL1830 / BL1830B / BL1840 /
BL1840B / BL1850 / BL1850B / BL1860B
Charger DC18RC / DC18RD / DC18RE / DC18SD / DC18SE / DC18SF
• Some of the battery cartridges and chargers listed above may not be available depending on your region of
residence.
WARNING: Only use the battery cartridges and chargers listed above. Use of any other battery cartridges
and chargers may cause injury and/or re.
Symbols
The followings show the symbols used for the equip-
ment. Be sure that you understand their meaning before
use.
Read instruction manual.
Ni-MH
Li-ion
Only for EU countries
Do not dispose of electric equipment or
battery pack together with household
waste material! In observance of the
European Directives, on Waste Electric
and Electronic Equipment and Batteries
and Accumulators and Waste Batteries and
Accumulators and their implementation
in accordance with national laws, electric
equipment and batteries and battery
pack(s) that have reached the end of
their life must be collected separately and
returned to an environmentally compatible
recycling facility.

9ENGLISH
Intended use
The tool is intended for collecting dry dust.
SAFETY WARNINGS
Cordless cleaner safety warnings
WARNING: IMPORTANT! READ CAREFULLY
all safety warnings and all instructions BEFORE
USE . Failure to follow the warnings and instructions
may result in electric shock, re and/or serious injury.
1. Do not expose to rain. Store indoors.
2. Do not allow to be used as a toy. Close
attention is necessary when used by or near
children.
3. Use only as described in this manual. Use only
manufacturer's recommended attachments.
4. Do not use with damaged battery. If appliance
is not working as it should, has been dropped,
damaged, left outdoors, or dropped into water,
return it to a service center.
5. Do not handle appliance with wet hands.
6. Do not put any object into openings. Do not
use with any opening blocked; keep free of
dust, lint, hair, and anything that may reduce
air ow.
7. Keep hair, loose clothing, ngers, and all parts
of body away from openings and moving parts.
8. Turn off all controls before removing the
battery.
9. Use extra care when cleaning on stairs.
10. Do not use to pick up ammable or combusti-
ble liquids, such as gasoline, or use in areas
where they may be present.
11. Use only the charger supplied by the manufac-
turer to recharge.
12. Do not pick up anything that is burning or
smoking, such as cigarettes, matches, or hot
ashes.
13. Do not use without dust bag and/or lters in
place.
14. Do not charge the battery outdoors.
15. Recharge only with the charger specied by
the manufacturer. A charger that is suitable for
one type of battery pack may create a risk of re
when used with another battery pack.
16. Use power tools only with specically desig-
nated battery packs. Use of any other battery
packs may create a risk of injury and re.
17. When (the) battery pack is not in use, keep
it away from other metal objects, like paper
clips, coins, keys, nails, screws or other small
metal objects, that can make a connection
from one terminal to another.
18. Under abusive conditions, liquid may be
ejected from the battery; avoid contact. If con-
tact accidentally occurs, ush with water.
19. Do not use a battery pack or tool that is dam-
aged or modied. Damaged or modied batteries
may exhibit unpredictable behaviour resulting in
re, explosion or risk of injury.
20. Do not expose a battery pack or tool to re or
excessive temperature. Exposure to re or tem-
perature above 130 °C may cause explosion.
21. Follow all charging instructions and do not
charge the battery pack or tool outside the
temperature range specied in the instruc-
tions. Charging improperly or at temperatures
outside the specied range may damage the
battery and increase the risk of re.
SAVE THESE INSTRUCTIONS.
ADDITIONAL SAFETY RULES
This appliance is intended for household use.
1. Read this instruction manual and the charger
instruction manual carefully before use.
2. Do not pick up the following materials:
— Hot materials such as lit cigarettes or
spark/metal dust generated by grinding/
cutting metal
— Flammable materials such as gasoline,
thinner, benzine, kerosene or paint
— Explosive materials like nitroglycerin
— Ignitable materials such as Aluminum,
zinc, magnesium, titanium, phosphorus
or celluloid
— Wet dirt, water, oil or the like
— Hard pieces with sharp edges, such as
wood chips, metals, stones, glasses,
nails, pins or razors
— Powder to clot such as cement or toner
— Conductive dust such as metal or carbon
— Fine particle like concrete dust
Such action may cause re, injury and/or prop-
erty damage.
3. Stop operation immediately if you notice any-
thing abnormal.
4. If you drop or strike the cleaner, check it care-
fully for cracks or damage before operation.
5. Do not bring close to stoves or other heat
sources.
6. Do not block the intake hole or vent holes.
SAVE THESE INSTRUCTIONS.
Important safety instructions for
battery cartridge
1. Before using battery cartridge, read all instruc-
tions and cautionary markings on (1) battery
charger, (2) battery, and (3) product using
battery.
2. Do not disassemble battery cartridge.
3. If operating time has become excessively
shorter, stop operating immediately. It may
result in a risk of overheating, possible burns
and even an explosion.
10 ENGLISH
4. If electrolyte gets into your eyes, rinse them
out with clear water and seek medical atten-
tion right away. It may result in loss of your
eyesight.
5. Do not short the battery cartridge:
(1) Do not touch the terminals with any con-
ductive material.
(2) Avoid storing battery cartridge in a con-
tainer with other metal objects such as
nails, coins, etc.
(3) Do not expose battery cartridge to water
or rain.
A battery short can cause a large current
ow, overheating, possible burns and even a
breakdown.
6. Do not store the tool and battery cartridge in
locations where the temperature may reach or
exceed 50 °C (122 °F).
7. Do not incinerate the battery cartridge even if
it is severely damaged or is completely worn
out. The battery cartridge can explode in a re.
8. Be careful not to drop or strike battery.
9. Do not use a damaged battery.
10. The contained lithium-ion batteries are subject
to the Dangerous Goods Legislation require-
ments.
For commercial transports e.g. by third parties,
forwarding agents, special requirement on pack-
aging and labeling must be observed.
For preparation of the item being shipped, consult-
ing an expert for hazardous material is required.
Please also observe possibly more detailed
national regulations.
Tape or mask off open contacts and pack up the
battery in such a manner that it cannot move
around in the packaging.
11. Follow your local regulations relating to dis-
posal of battery.
12. Use the batteries only with the products
specied by Makita. Installing the batteries to
non-compliant products may result in a re, exces-
sive heat, explosion, or leak of electrolyte.
SAVE THESE INSTRUCTIONS.
CAUTION: Only use genuine Makita batteries.
Use of non-genuine Makita batteries, or batteries that
have been altered, may result in the battery bursting
causing res, personal injury and damage. It will
also void the Makita warranty for the Makita tool and
charger.
Tips for maintaining maximum
battery life
1. Charge the battery cartridge before completely
discharged. Always stop tool operation and
charge the battery cartridge when you notice
less tool power.
2. Never recharge a fully charged battery car-
tridge. Overcharging shortens the battery
service life.
3. Charge the battery cartridge with room tem-
perature at 10 °C - 40 °C (50 °F - 104 °F). Let
a hot battery cartridge cool down before
charging it.
4. Charge the battery cartridge if you do not use
it for a long period (more than six months).
FUNCTIONAL
DESCRIPTION
CAUTION: Always be sure that the tool is
switched off and the battery cartridge is removed
before adjusting or checking function on the tool.
CAUTION: Take care not to trap nger(s)
between cleaner and battery as shown in diagram
when loading battery. Trapping nger(s) may cause
injury.
► Fig.1
Installing or removing battery
cartridge
CAUTION: Always switch off the tool before
installing or removing of the battery cartridge.
CAUTION: Hold the tool and the battery car-
tridge rmly when installing or removing battery
cartridge. Failure to hold the tool and the battery
cartridge rmly may cause them to slip off your hands
and result in damage to the tool and battery cartridge
and a personal injury.
► Fig.2: 1. Red indicator 2. Button 3. Battery cartridge
To remove the battery cartridge, slide it from the tool
while sliding the button on the front of the cartridge.
To install the battery cartridge, align the tongue on the
battery cartridge with the groove in the housing and slip
it into place. Insert it all the way until it locks in place
with a little click. If you can see the red indicator on the
upper side of the button, it is not locked completely.
CAUTION: Always install the battery cartridge
fully until the red indicator cannot be seen. If not,
it may accidentally fall out of the tool, causing injury to
you or someone around you.
CAUTION: Do not install the battery cartridge
forcibly. If the cartridge does not slide in easily, it is
not being inserted correctly.
Battery protection system
The tool is equipped with a tool/battery protection sys-
tem. This system automatically cuts off power to the
motor to extend tool and battery life. The tool will auto-
matically stop during operation if the tool or battery is
placed under one of the following conditions.
Overloaded:
The tool is operated in a manner that causes it to draw
an abnormally high current.

11 ENGLISH
In this situation, turn the tool off and stop the application
that caused the tool to become overloaded. Then turn
the tool on to restart.
If the tool does not start, the battery is overheated. In
this situation, let the battery cool before turning the tool
on again.
Low battery voltage:
The remaining battery capacity is too low and the tool
will not operate. In this situation, remove and recharge
the battery.
Indicating the remaining battery
capacity
Only for battery cartridges with the indicator
► Fig.3: 1. Indicator lamps 2. Check button
Press the check button on the battery cartridge to indi-
cate the remaining battery capacity. The indicator lamps
light up for a few seconds.
Indicator lamps Remaining
capacity
Lighted Off Blinking
75% to 100%
50% to 75%
25% to 50%
0% to 25%
Charge the
battery.
The battery
may have
malfunctioned.
NOTE: Depending on the conditions of use and the
ambient temperature, the indication may differ slightly
from the actual capacity.
Switch action
► Fig.4: 1. ON/speed change button 2. OFF button
To start the cleaner, simply push the ON/speed change
button. To switch off, push the OFF button.
You can change the cleaner speed in three steps by
pushing the ON/speed change button.
The rst push on this button is for high speed mode, the
second push for max speed mode and the third push for
normal speed mode. Each push on this button repeats
the high/max/normal speed cycle alternatively.
Lighting up the lamp
CAUTION: Do not look in the light or see the
source of light directly.
To turn on the lamp, push the ON/speed change button.
Push the OFF button to turn off the lamp. During the
tool actuating, the lamp turns on.
When the remaining battery capacity gets low, the lamp
starts blinking.
► Fig.5: 1. ON/speed change button 2. OFF button
3. Lamp
NOTE: The timing, at which the lamp starts blinking,
depends on the temperature at work place and the
battery cartridge conditions.
ASSEMBLY
CAUTION: Always be sure that the tool is
switched off and the battery cartridge is removed
before carrying out any work on the tool.
Dust bag and paper lter
Install either dust bag or paper lter before using
cleaner.
Use the dust stopper when installing either dust bag or
paper lter.
Dust bag are usable many times repeatedly by cleaning
it out.
Paper lter is a throw-away type. Throw away the entire
paper lter without emptying when it has become full.
NOTICE: To prevent dust from getting into the
motor:
• Make sure that the dust bag or paper lter is
installed before use.
• Insert the dust stopper together with the
dust bag or paper lter all the way into the
slots when installing them.
• Do not use a broken or ripped bag.
Otherwise the motor may be broken.
NOTICE: Do not fold the cardboard at its open-
ing when installing the paper lter.
NOTICE: Never throw away the dust stopper
because it needs to be used repeatedly whenever
either the dust bag or the paper lter is used.
NOTICE: The paper lter for the cleaner is an
important component for maintaining the tool
performance. Using other than the genuine paper
lter may cause smokes or ignition.
NOTE: When the dust bag or the paper lter is not
installed in the cleaner, the front cover does not close
completely.
► Fig.6
Installing dust bag
Use the dust stopper when installing dust bag. Be
careful not to take the upper side for the lower side by
mistake because they are different each other.
► Fig.7: 1. Upper side of dust stopper 2. Lower side of
dust stopper
1. Insert the protrusion of the dust bag into the lower
groove on the dust stopper as shown in the gure.
► Fig.8: 1. Dust stopper 2. Lower groove 3. Dust bag

12 ENGLISH
2. There is no distinction between the upper and
lower sides of the dust bag. You may insert its protru-
sion of either side into the lower groove of the dust
stopper.
► Fig.9: 1. Lower groove
3. Overlap the frame of dust stopper with that of the
dust bag.
► Fig.10
4. Place the dust stopper and the dust bag together
into the cleaner cavity in the same direction of arrow on
the dust stopper. Insert them all the way into the slots in
the cleaner cavity.
► Fig.11
5. Spread the cloth part of the dust bag inside the
cleaner.
► Fig.12
6. Close the front cover completely.
► Fig.13: 1. Front cover
Installing the paper lter
Use the dust stopper also when installing paper lter.
Be careful not to take the upper side for the lower side
by mistake because they are different each other.
► Fig.14: 1. Upper side of dust stopper 2. Lower side
of dust stopper
1. Unfold the entrance of the paper lter before
setting it on the dust stopper.
► Fig.15
2. Insert the protrusion of the paper lter into the
lower groove on the dust stopper as shown in the gure.
► Fig.16: 1. Dust stopper 2. Lower groove 3. Paper
lter
3. There is no distinction between the upper and
lower sides of the paper lter. You may insert its pro-
trusion of any side into the lower groove of the dust
stopper.
► Fig.17: 1. Lower groove
4. Overlap the frame of dust stopper with that of the
paper lter.
► Fig.18
5. Place the dust stopper and the paper lter
together into the cleaner cavity in the same direction of
arrow on the dust stopper. Insert them all the way into
the slots in the cleaner cavity.
► Fig.19
6. Spread the container part of the paper lter inside
the cleaner.
► Fig.20
7. Close the front cover completely.
► Fig.21: 1. Front cover
OPERATION
CAUTION: Do not move your face close to
the air vent when operating the cleaner. If foreign
objects are blown into eyes, it may result in personal
injury.
Installing or removing the cleaner
attachment
CAUTION: After installing attachment, check
if it is securely installed. If install attachment imper-
fectly, it may come off and cause personal injury.
CAUTION: Be careful not to hit your hand on
the wall etc. when removing the attachment.
When using the extension wand with
lock function
To install the extension wand, insert it to the suction
inlet of the cleaner until it clicks. Make sure that the
extension wand is locked.
► Fig.22: 1. Suction inlet 2. Extension wand 3. Hook
NOTE: When installing the extension wand, be
sure to align the release button with the hook
on the extension wand. If they are not aligned, the
wand will not be locked and may come off from the
cleaner.
NOTE: When installing the extension wand with-
out lock function (optional accessory), twist and
insert it to the suction inlet of the cleaner. To dis-
connect, twist and remove it.
► Fig.23
To remove, pull the extension wand while pushing the
release button.
► Fig.24: 1. Release button 2. Extension wand
When using the nozzle
To install the nozzle, twist and insert it securely to the
suction inlet of the cleaner or the end of extension
wand. To disconnect, twist and remove it.
► Fig.25
Cleaning (Suction)
Nozzle
Attach the nozzle to clean off tables, desks, furniture,
etc. The nozzle slips on easily.
► Fig.26: 1. Nozzle
Nozzle + Extension wand (Straight
pipe)
The extension wand ts in between the nozzle and the
cleaner itself. This arrangement is convenient for clean-
ing a oor in a standing position.
► Fig.27: 1. Cleaner body 2. Extension wand
3. Nozzle

13 ENGLISH
Corner nozzle
Fit on the corner nozzle for cleaning corners and crev-
ices of a car or furniture.
► Fig.28: 1. Corner nozzle 2. Cleaner body
Corner nozzle + Extension wand
(Straight pipe)
In tight quarters where the cleaner itself cannot
squeeze in, or in high places hard to reach, use this
arrangement.
► Fig.29: 1. Corner nozzle 2. Extension wand
3. Cleaner body
Cleaning without nozzle
You can pick up powder and dust without nozzle.
► Fig.30
For picking up dust on a oor in a standing position, it is
convenient to attach the extension wand to the cleaner.
► Fig.31: 1. Extension wand
Disposing of dust
CAUTION: Empty the cleaner before it
becomes too full, or the suction force weakens.
CAUTION: When closing the front cover, be
careful not to pinch your ngers.
NOTICE: Never throw away the dust stopper
because it should be used whenever either the
dust bag or the paper lter is used.
NOTICE: When the dust bag/paper lter is not
inside of the cleaner, the front cover does not
close completely. Do not force to close the front
cover. It may result in deforming or breakage of
the tool.
NOTICE: When disposing of dust, also clean the
room for the dust bag/paper lter. The remaining
dust and dirt in the room may cause the sponge lter
to be clogged or the motor to be damaged.
1. Push the button to open the front cover. Opening
it until a click is heard allows a positive stop at that
position.
► Fig.32: 1. Front cover 2. Button
2. Pull out both the orange-colored dust stopper and
dust bag/paper lter together at the same time.
► Fig.33: 1. Dust stopper
3. Perform the procedures below depending on the
dust container type:
When using the dust bag
Remove the dust stopper and empty the dust bag.
► Fig.34: 1. Dust stopper 2. Dust bag
When using the paper lter
Remove the dust stopper and dispose of the paper lter.
► Fig.35: 1. Dust stopper 2. Paper lter
4. Place the dust bag/new paper lter and dust stop-
per together into the cleaner and close the front cover.
NOTE: The cleaner is constructed in such a way that
the front cover comes off when trying to force the
front cover open at the angle of more than 90°. If the
front cover comes off, insert it into the front cover joint
in place.
► Fig.36: 1. Front cover 2. Front cover joint
MAINTENANCE
CAUTION: Always be sure that the tool is
switched off and the battery cartridge is removed
before attempting to perform inspection or
maintenance.
To maintain product SAFETY and RELIABILITY,
repairs, any other maintenance or adjustment should
be performed by Makita Authorized or Factory Service
Centers, always using Makita replacement parts.
NOTICE: Never use gasoline, benzine, thinner,
alcohol or the like. Discoloration, deformation or
cracks may result.
After use
NOTICE: Putting the cleaner against the wall
without any other support cause the cleaner to
fall down and be damaged.
► Fig.37
Cleaning
Cleaner body
From time to time wipe off the outside (cleaner body) of
the cleaner using a cloth dampened in soapy water.
Clean out also the suction opening, dust bag/paper lter
mounting area and the dust stopper.
► Fig.38
Dust bag
Wash the dust bag in soapy water when it is clogged
with dust and the cleaner power becomes weak. Dry it
out thoroughly before use. An insufciently dried lter
may cause poor suction and shorten the service life of
the motor.
► Fig.39
NOTE: Paper lter is a throw-away type.
When the sponge lter is clogged with dust, remove it
from the cleaner and then wipe it off or wash in water.
Dust stopper
Wipe dust off from the dust stopper.
Remove dust and dirt on the sponge part by lightly
tapping it.
► Fig.40: 1. Sponge part

14 ENGLISH
Removing and installing the sponge
lter
CAUTION: After cleaning sponge lter, be
sure to install it on the cleaner. If washed in water,
dry it up before installing. An insufciently dried
sponge lter may shorten the service life of the motor.
To remove the sponge lter, remove the dust bag or
paper lter and then pinch and take the sponge lter
out.
► Fig.41: 1. Sponge lter
Press in the whole edge of the sponge lter against the
recessed wall inside the dust bag/paper lter mounting
area.
► Fig.42: 1. Recessed wall
Wall mount for cordless cleaner
Optional accessory
NOTE: The screw to mount the holder is not included.
Prepare a screw which ts with the material to screw
into.
Attach the wall mount for cordless cleaner to a hard
wooden wall, beam or column, where the wall mount
for cordless cleaner can be rmly secured. Always be
sure that the wall mount for cordless cleaner is securely
attached before hanging the cleaner.
► Fig.43: 1. Wall mount for cordless cleaner
CAUTION: Do not hang the cleaner to the wall
mount violently or hang other appliances than the
cleaner.
Troubleshooting
Before asking for repairs, check the following points.
Symptom Area to be investigated Fixing method
Weak suction power Is dust bag or paper lter full of dust ? Empty dust bag or paper lter.
Is dust bag clogged ? Dust down or wash the dust bag.
Is paper lter clogged ? Replace paper lter.
Is the battery cartridge exhausted ? Charge the battery cartridge.
Not working Is the battery cartridge exhausted ? Charge the battery cartridge.
Dust case cover does not close Is dust bag or paper lter set ? Set dust bag or paper lter.
NOTE: Do not attempt to repair cleaner by yourself.
OPTIONAL
ACCESSORIES
CAUTION: These accessories or attachments
are recommended for use with your Makita tool
specied in this manual. The use of any other
accessories or attachments might present a risk of
injury to persons. Only use accessory or attachment
for its stated purpose.
If you need any assistance for more details regard-
ing these accessories, ask your local Makita Service
Center.
• Extension wand (Straight pipe)
• Nozzle
• Nozzle for carpet
• Shelf brush
• Corner nozzle
• Round brush
• Flexible hose
• Paper lter
• Wall mount for cordless cleaner
• Makita genuine battery and charger
• Free nozzle
• Seat nozzle
• Crevice nozzle
NOTE: Some items in the list may be included in the
tool package as standard accessories. They may
differ from country to country.

15 BAHASA INDONESIA
BAHASA INDONESIA (Petunjuk Asli)
PERINGATAN
Peralatan ini dapat digunakan oleh anak-anak berumur 8 tahun
ke atas dan orang dengan kekurangan kemampuan sik, indra,
atau jiwa atau kurangnya pengalaman dan pengetahuan jika
mereka diawasi atau panduan yang berkaitan dengan penggunaan
peralatan secara aman dan pemahaman bahaya yang dapat terjadi.
Jangan membiarkan anak-anak bermain dengan peralatan ini.
Pembersihan dan perawatan pengguna tidak boleh dilakukan oleh
anak-anak tanpa pengawasan.
SPESIFIKASI
Model: DCL282F
Kapasitas dengan kantong debu 500 mL
dengan saringan kertas 330 mL
Penggunaan
secara terus
menerus
(dengan
baterai
BL1830B)
1 (Mode kecepatan normal) Sekitar. 50 min
2 (Mode kecepatan tinggi) Sekitar. 20 min
3 (Mode kecepatan maks) Sekitar. 15 min
Panjang keseluruhan 1.016 mm
Tegangan terukur D.C. 18 V
Berat bersih 1,3 - 1,6 kg
• Karena kesinambungan program penelitian dan pengembangan kami, spesikasi yang disebutkan di sini dapat
berubah tanpa pemberitahuan.
• Spesikasi dapat berbeda dari satu negara ke negara lainnya.
• Berat tidak termasuk aksesori selain kartrid baterai. Berat gabungan paling ringan dan paling berat dari
peralatan dan kartrid baterai ditampilkan dalam tabel.
Kartrid dan pengisi daya baterai yang dapat digunakan
Kartrid baterai BL1815N / BL1820 / BL1820B / BL1830 / BL1830B / BL1840 /
BL1840B / BL1850 / BL1850B / BL1860B
Pengisi daya DC18RC / DC18RD / DC18RE / DC18SD / DC18SE / DC18SF
• Beberapa kartrid baterai dan pengisi daya yang tercantum di atas mungkin tidak tersedia, tergantung wilayah
tempat tinggal Anda.
PERINGATAN: Hanya gunakan kartrid dan pengisi daya baterai yang tercantum di atas. Penggunaan
kartrid dan pengisi daya baterai lain dapat menimbulkan risiko cedera dan/atau kebakaran.

16 BAHASA INDONESIA
Simbol
Berikut ini adalah simbol-simbol yang digunakan pada
peralatan ini. Pastikan Anda mengerti makna masing-
masing simbol sebelum menggunakan alat.
Baca petunjuk penggunaan.
Ni-MH
Li-ion
Hanya untuk negara-negara Uni Eropa
Jangan membuang peralatan listrik
atau baterai bersama-sama dengan
bahan limbah rumah tangga! Dengan
memerhatikan Petunjuk Eropa, tentang
Limbah Peralatan Listrik dan Elektronik
serta Baterai dan Akumulator serta
Limbah Baterai dan Akumulator dan
pelaksanaannya sesuai dengan ketentuan
hukum nasional, peralatan listrik dan
baterai dan paket baterai yang telah habis
umur pakainya harus dikumpulkan secara
terpisah dan dikembalikan ke fasilitas daur
ulang yang kompatibel secara lingkungan.
Penggunaan
Mesin ini digunakan untuk membersihkan debu kering.
PERINGATAN
KESELAMATAN
Peringatan keselamatan pembersih
tanpa kabel
PERINGATAN: PENTING BACALAH semua
peringatan keselamatan dan semua petunjuk
SEBELUM MENGGUNAKAN DENGAN SAKSAMA.
Kelalaian mematuhi peringatan dan petunjuk dapat
menyebabkan sengatan listrik, kebakaran, dan/atau
cedera serius.
1. Jangan membiarkan alat kehujanan. Simpan di
dalam ruangan.
2. Jangan jadikan alat ini sebagai mainan.
Perhatikan dengan saksama saat digunakan
oleh anak-anak atau dekat dengan mereka.
3. Gunakan hanya sebagaimana dijelaskan dalam
buku panduan ini. Gunakan hanya peralatan
tambahan yang direkomendasikan produsen.
4. Jangan digunakan dengan baterai yang
rusak. Jika peralatan tidak bekerja dengan
semestinya, terjatuh, rusak, tertinggal di
luar, atau terjatuh ke dalam air, kembalikan
peralatan ke pusat servis.
5. Jangan menggunakan peralatan dengan
tangan yang basah.
6. Jangan menaruh benda apa pun di dalam
bukaan. Jangan digunakan saat bukaan
terhalang; bersihkan dari debu, benang,
rambut, dan apa pun yang dapat mengurangi
aliran udara.
7. Jauhkan rambut, pakaian yang longgar, jari,
dan semua bagian tubuh dari bukaan dan
bagian yang bergerak.
8. Matikan semua kontrol sebelum melepas
baterai.
9. Berhati-hatilah saat membersihkan lantai.
10. Jangan digunakan untuk membersihkan cairan
yang mudah terbakar, seperti bensin, atau
digunakan di area di mana terdapat cairan
tersebut.
11. Hanya gunakan pengisi daya yang disertakan
oleh produsen untuk mengisi daya.
12. Jangan membersihkan apa pun yang bisa
terbakar atau berasap, seperti rokok, abu atau
abu panas.
13. Jangan menggunakan tanpa kantong debu
dan/atau saringan pada tempatnya.
14. Jangan mengisi daya baterai di luar ruangan.
15. Isi ulang baterai hanya dengan pengisi daya
yang ditentukan oleh pabrikan. Pengisi daya
yang cocok untuk satu jenis paket baterai dapat
menimbulkan risiko kebakaran ketika digunakan
untuk paket baterai yang lain.
16. Gunakan mesin listrik hanya dengan
paket baterai yang telah ditentukan secara
khusus. Penggunaan paket baterai lain dapat
menimbulkan risiko cedera dan kebakaran.
17. Ketika paket baterai tidak digunakan, jauhkan
dari benda logam lain, seperti penjepit
kertas, uang logam, kunci, paku, sekrup,
atau benda logam kecil lainnya, yang dapat
menghubungkan satu terminal ke terminal
lain.
18. Pemakaian yang salah, dapat menyebabkan
keluarnya cairan dari baterai; hindari kontak.
Jika terjadi kontak secara tidak sengaja, bilas
dengan air.
19. Jangan menggunakan paket baterai atau
mesin yang sudah rusak atau telah diubah.
Baterai yang rusak atau telah diubah dapat
menyebabkan hal-hal yang tidak dapat diprediksi
yang dapat menyebabkan kebakaran, ledakan
atau risiko cidera.
20. Jangan membiarkan paket baterai atau mesin
dekat dengan api atau suhu yang berlebihan.
Pajanan api atau suhu di atas 130 °C dapat
menyebabkan ledakan.
21. Ikuti semua petunjuk pengisian daya dan
jangan mengisi daya paket baterai atau
mesin di luar rentang suhu yang ditentukan
di panduan. Mengisi daya secara tidak tepat
atau pada suhu di luar rentang yang ditentukan
dapat merusak baterai dan meningkatkan risiko
kebakaran.
SIMPAN PETUNJUK INI.

17 BAHASA INDONESIA
ATURAN KESELAMATAN
TAMBAHAN
Peralatan ini ditujukan untuk penggunaan rumah
tangga.
1. Baca petunjuk penggunaan dan petunjuk
instruksi pengisian daya ini dengan hati-hati
sebelum menggunakan alat.
2. Jangan membersihkan bahan-bahan berikut:
— Bahan panas seperti rokok atau percikan/
debu logam yang ditimbulkan dari proses
gerinda/pemotongan logam
— Bahan-bahan mudah terbakar seperti
bensin, tiner, kerosin atau cat
— Bahan-bahan mudah meledak seperti
nitrogliserin
— Bahan-bahan yang dapat menyulut api
seperti Aluminium, seng, magnesium,
titanium, fosforus atau seluloid
— Debu basah, air, minyak atau sejenisnya
— Potongan keras dengan tepian tajam
seperti serpihan kayu, logam, batu, kaca,
paku, pin atau pisau cukur
— Bubuk menggumpal seperti semen atau
toner
— Debu konduktif seperti logam atau karbon
— Partikel halus seperti debu beton
Tindakan tersebut dapat menyebabkan
kebakaran, cedera dan/atau kerusakan
properti.
3. Segera hentikan pengoperasian segera jika
Anda melihat adanya sesuatu yang tidak wajar.
4. Jika Anda menjatuhkan atau menabrakkan
pembersih, periksa secara hati-hati apakah
terdapat keretakan atau kerusakan sebelum
pengoperasian.
5. Jangan digunakan dekat dengan kompor atau
sumber panas lainnya.
6. Jangan menghalangi lubang asupan atau
lubang ventilasi.
SIMPAN PETUNJUK INI.
Petunjuk keselamatan penting untuk
kartrid baterai
1. Sebelum menggunakan kartrid baterai,
bacalah semua petunjuk dan penandaan pada
(1) pengisi daya baterai, (2) baterai, dan (3)
produk yang menggunakan baterai.
2. Jangan membongkar kartrid baterai.
3. Jika waktu beroperasinya menjadi sangat
singkat, segera hentikan penggunaan. Hal
tersebut dapat menimbulkan risiko panas
berlebih, kemungkinan mengalami luka bakar
atau bahkan terjadi ledakan.
4. Jika elektrolit mengenai mata Anda, basuh
dengan air bersih dan segera cari pertolongan
medis. Hal tersebut dapat mengakibatkan
hilangnya kemampuan penglihatan Anda.
5. Jangan menghubungkan terminal kartrid
baterai:
(1) Jangan menyentuhkan terminal dengan
bahan penghantar listrik apa pun.
(2) Hindari menyimpan kartrid baterai pada
wadah yang berisi benda logam lain
seperti paku, uang logam, dsb.
(3) Jangan membiarkan baterai terkena air
atau kehujanan.
Hubungan singkat baterai dapat menyebabkan
aliran arus listrik yang besar, panas berlebih,
kemungkinan mengalami luka bakar dan
bahkan kerusakan pada baterai.
6. Jangan menyimpan mesin dan kartrid baterai
pada lokasi dengan suhu yang bisa mencapai
atau melebihi 50 °C.
7. Jangan membuang kartrid baterai di tempat
pembakaran sampah walaupun benar-benar
rusak atau tidak bisa digunakan sama sekali.
Kartrid baterai bisa meledak jika terbakar.
8. Berhati-hatilah jangan sampai baterai jatuh
atau terbentur.
9. Jangan menggunakan baterai yang rusak.
10. Baterai litium-ion yang disertakan sesuai
dengan persyaratan Perundangan Makanan
Berbahaya.
Harus ada pengawasan untuk pengangkutan
komersial misalnya oleh pihak ketiga, ekspeditor,
persyaratan khusus terhadap pengemasan dan
pelabelan.
Diperlukan adanya konsultasi dengan ahli
mengenai material berbahaya untuk persiapan
barang yang akan dikirimkan. Perhatikan pula
peraturan nasional yang lebih terperinci yang
mungkin ada.
Beri perekat atau tutupi bagian yang terbuka
dan kemasi baterai dengan cara yang tidak akan
menimbulkan pergeseran dalam pengemasan.
11. Patuhi peraturan setempat yang berkaitan
dengan pembuangan baterai.
12. Gunakan baterai hanya dengan produk yang
ditentukan oleh Makita. Memasang baterai pada
produk yang tidak sesuai dapat menyebabkan
kebakaran, kelebihan panas, ledakan, atau
kebocoran elektrolit.
SIMPAN PETUNJUK INI.
PERHATIAN: Gunakan baterai asli Makita.
Penggunaan baterai Makita yang tidak asli, atau
baterai yang sudah diubah, akan mengakibatkan
baterai mudah terbakar, cedera dan kerusakan. Akan
menghilangkan garansi Makita pada pengisi daya
dan alat Makita.
Tip untuk menjaga agar umur
pemakaian baterai maksimum
1. Isi ulang kartrid baterai sebelum habis sama
sekali. Selalu hentikan penggunaan mesin dan
ganti kartrid baterai jika Anda melihat bahwa
mesin kurang tenaga.
2. Jangan pernah mengisi ulang kartrid baterai
yang sudah diisi penuh. Pengisian ulang yang
berlebih memperpendek umur pemakaian
baterai.

18 BAHASA INDONESIA
3. Isi ulang kartrid baterai pada suhu ruangan
10 °C - 40 °C. Biarkan kartrid baterai yang
panas menjadi dingin terlebih dahulu sebelum
diisi ulang.
4. Isi ulang daya kartrid baterai jika Anda tidak
menggunakannya untuk jangka waktu yang
lama (lebih dari enam bulan).
DESKRIPSI FUNGSI
PERHATIAN: Selalu pastikan bahwa mesin
dimatikan dan kartrid baterai dilepas sebelum
menyetel atau memeriksa kerja mesin.
PERHATIAN: Berhati-hatilah agar jari Anda
tidak terjepit antara pembersih dan baterai seperti
yang ditunjukkan pada diagram saat memasang
baterai. Jari yang terjepit dapat menyebabkan
cedera.
► Gbr.1
Memasang atau melepas baterai
PERHATIAN: Selalu matikan mesin sebelum
memasang atau melepas kartrid baterai.
PERHATIAN: Pegang mesin dan kartrid
baterai kuat-kuat saat memasang atau melepas
kartrid baterai. Kelalaian untuk memegang mesin
dan kartrid baterai kuat-kuat bisa menyebabkan
keduanya tergelincir dari tangan Anda dan
mengakibatkan kerusakan pada mesin dan kartrid
baterai dan cedera diri.
► Gbr.2: 1. Indikator berwarna merah 2. Tombol
3. Kartrid baterai
Untuk melepas kartrid baterai, geser dari mesin sambil
menggeser tombol pada bagian depan kartrid.
Untuk memasang kartrid baterai, sejajarkan lidah
kartrid baterai dengan alur pada rumah dan masukkan
ke dalam tempatnya. Masukkan seluruhnya sampai
terkunci pada tempatnya dan terdengar bunyi klik kecil.
Jika Anda bisa melihat indikator berwarna merah pada
sisi atas tombol, berarti tidak terkunci sepenuhnya.
PERHATIAN: Selalu pasang kartrid baterai
sepenuhnya sampai indikator berwarna merah
tidak terlihat. Jika tidak, bisa terlepas dari mesin
secara tidak sengaja, menyebabkan luka pada Anda
atau orang di sekitar Anda.
PERHATIAN: Jangan memasang kartrid
baterai secara paksa. Jika kartrid tidak bergeser
dengan mudah, berarti tidak dimasukkan dengan
benar.
Sistem perlindungan baterai
Mesin ini dilengkapi dengan sistem perlindungan
mesin/baterai. Sistem ini memutus aliran daya ke
motor secara otomatis untuk memperpanjang umur
pakai mesin dan baterai. Mesin akan berhenti secara
otomatis saat penggunaan jika mesin atau baterai
berada dalam salah satu kondisi berikut ini.
Kelebihan beban:
Mesin dijalankan dengan cara yang menyebabkannya
menarik arus tinggi yang tidak normal.
Untuk situasi ini, matikan mesin dan hentikan pekerjaan
yang menyebabkan mesin mengalami kelebihan beban.
Kemudian, nyalakan mesin untuk kembali memulai
pekerjaan.
Jika mesin tidak menyala, baterai mengalami kelebihan
panas. Untuk situasi ini, biarkan baterai mendingin
sebelum kembali menyalakan mesin.
Tegangan baterai rendah:
Kapasitas baterai yang tersisa terlalu rendah dan mesin
tidak akan beroperasi. Untuk situasi ini, lepas dan isi
ulang baterai.
Mengindikasikan kapasitas baterai
yang tersisa
Hanya untuk kartrid baterai dengan indikator
► Gbr.3: 1. Lampu indikator 2. Tombol pemeriksaan
Tekan tombol pemeriksaan pada kartrid baterai untuk
melihat kapasitas baterai yang tersisa. Lampu indikator
menyala selama beberapa detik.
Lampu indikator Kapasitas
yang tersisa
Menyala Mati Berkedip
75% hingga
100%
50% hingga
75%
25% hingga
50%
0% hingga
25%
Isi ulang
baterai.
Baterai
mungkin
sudah rusak.
CATATAN: Tergantung kondisi penggunaan dan suhu
lingkungannya, penunjukkan mungkin saja sedikit
berbeda dari kapasitas sebenarnya.

19 BAHASA INDONESIA
Kerja sakelar
► Gbr.4: 1. Tombol pengubah kecepatan/ON
2. Tombol OFF (Mati)
Untuk memulai pengoperasian, cukup tekan tombol
pengubah kecepatan/ON. Untuk mematikan, tekan
tombol OFF.
Anda dapat mengubah kecepatan pengoperasian
melalui tiga langkah dengan menekan tombol
pengubah kecepatan/ON.
Menekan pertama pada tombol ini adalah untuk mode
kecepatan tinggi, tekanan kedua untuk mode kecepatan
maksimal dan tekanan ketiga untuk kecepatan normal.
Setiap menekan pada tombol ini akan mengulangi
siklus kecepatan tinggi/maksimal/normal secara
bergantian.
Menyalakan lampu
PERHATIAN: Jangan melihat lampu atau
sumber cahaya secara langsung.
Untuk menyalakan lampu, tekan tombol pengubah
kecepatan/ON. Tekan tombol OFF untuk mematikan
lampu. Selama mesin dijalankan, lampu menyala.
Saat kapasitas baterai yang tersisa lemah, lampu mulai
berkedip.
► Gbr.5: 1. Tombol pengubah kecepatan/ON
2. Tombol OFF (Mati) 3. Lampu
CATATAN: Dalam kondisi tersebut, di mana lampu
mulai berkedip, tergantung pada suhu di tempat kerja
dan kondisi kartrid baterai.
PERAKITAN
PERHATIAN: Selalu pastikan bahwa mesin
dimatikan dan kartrid baterai dilepas sebelum
melakukan pekerjaan apa pun pada mesin.
Kantong debu dan saringan kertas
Pasang kantong debu atau saringan kertas sebelum
menggunakan pembersih.
Gunakan penahan debu saat memasang kantong debu
atau saringan kertas.
Kantong debu dapat digunakan secara berulang kali
dengan membersihkannya.
Saringan debu adalah tipe pakai-buang. Buang
keseluruhan saringan kertas tanpa mengosongkannya
saat sudah terisi penuh.
PEMBERITAHUAN: Untuk mencegah debu
masuk ke dalam motor:
• Pastikan kantong debu atau saringan kertas
telah terpasang sebelum digunakan.
• Masukkan penahan debu bersamaan
dengan kantong debu atau saringan kertas
seluruhnya ke dalam celah saat memasang
keduanya.
• Jangan menggunakan kantong yang rusak
atau sobek.
Jika tidak, motor bisa rusak.
PEMBERITAHUAN: Jangan melipat papan saat
memasang saringan kertas.
PEMBERITAHUAN: Jangan membuang
penahan debu karena harus digunakan secara
berulang kali kapan pun saat kantong debu atau
saringan kertas digunakan.
PEMBERITAHUAN: Saringan kertas untuk
pembersih adalah komponen yang penting untuk
menjaga kinerja mesin. Menggunakan saringan
kertas palsu dapat menyebabkan asap atau
terbakar.
CATATAN: Saat kantong debu atau saringan kertas
tidak terpasang di dalam pembersih, penutup depan
tidak akan menutup sepenuhnya.
► Gbr.6
Memasang kantong debu
Gunakan penahan debu saat memasang kantong debu.
Berhati-hatilah untuk tidak memasang sisi bagian atas
untuk sisi bagian bawah karena kedua sisi tersebut
berbeda satu sama lain.
► Gbr.7: 1. Sisi bagian atas penahan debu 2. Sisi
bagian bawah penahan debu
1. Masukkan tonjolan kantong debu ke dalam alur
sisi bawah pada penahan debu seperti ditunjukkan
pada gambar.
► Gbr.8: 1. Penahan debu 2. Alur bagian bawah
3. Kantong debu
2. Tidak ada perbedaan antara sisi bagian atas dan
bagian bawah kantong debu. Anda dapat memasukkan
tonjolan salah satu sisi ke dalam alur bagian bawah
pada penahan debu.
► Gbr.9: 1. Alur bagian bawah
3. Sesuaikan rangka penahan debu dengan kantong
debu.
► Gbr.10
4. Tempatkan penahan debu dan kantong debu
secara bersamaan ke dalam lubang pembersih searah
dengan tanda panah pada penahan debu. Masukkan
seluruhnya ke dalam celah di lubang pembersih.
► Gbr.11
5. Pasang bagian kain pada kantong debu di dalam
pembersih.
► Gbr.12
6. Tutup penutup depan sepenuhnya.
► Gbr.13: 1. Penutup depan

20 BAHASA INDONESIA
Memasang saringan kertas
Gunakan juga penahan debu saat memasang saringan
kertas. Berhati-hatilah untuk tidak memasang sisi
bagian atas untuk sisi bagian bawah karena kedua sisi
tersebut berbeda satu sama lain.
► Gbr.14: 1. Sisi bagian atas penahan debu 2. Sisi
bagian bawah penahan debu
1. Buka lipatan saringan kertas sebelum
memasangnya pada penahan debu.
► Gbr.15
2. Masukkan tonjolan saringan kertas ke dalam alur
sisi bawah pada penahan debu seperti ditunjukkan
pada gambar.
► Gbr.16: 1. Penahan debu 2. Alur bagian bawah
3. Saringan kertas
3. Tidak ada perbedaan antara sisi bagian atas
dan bagian bawah saringan kertas. Anda dapat
memasukkan tonjolan dari sisi mana pun ke dalam alur
bawah pada penahan debu.
► Gbr.17: 1. Alur bagian bawah
4. Sesuaikan rangka penahan debu dengan saringan
kertas.
► Gbr.18
5. Tempatkan penahan debu dan saringan kertas
secara bersamaan ke dalam lubang pembersih searah
dengan tanda panah pada penahan debu. Masukkan
seluruhnya ke dalam celah di lubang pembersih.
► Gbr.19
6. Pasang bagian wadah pada saringan kertas di
dalam pembersih.
► Gbr.20
7. Tutup penutup depan sepenuhnya.
► Gbr.21: 1. Penutup depan
PENGGUNAAN
PERHATIAN: Jangan mendekatkan wajah
Anda ke ventilasi udara saat mengoperasikan
pembersih. Jika benda asing terlempar ke mata, ini
dapat menyebabkan cedera badan.
Memasang atau melepas perangkat
tambahan pembersih
PERHATIAN: Setelah memasang perangkat
tambahan, periksa apakah perangkat sudah
terpasang dengan kencang. Jika pemasangan
perangkat tambahan tidak sempurna, perangkat
dapat terlepas dan menyebabkan cedera.
PERHATIAN: Berhati-hatilah agar tangan
Anda tidak menghantam dinding dll. saat melepas
perangkat tambahan.
Saat menggunakan pipa sambungan
dengan fungsi pengunci
Untuk memasang pipa sambungan, masukkan ke
tempat masuk pengisap pada pembersih sampai
berbunyi klik. Pastikan pipa sambungan terkunci.
► Gbr.22: 1. Tempat masuk pengisap 2. Pipa
sambungan 3. Kait
CATATAN: Saat memasang pipa sambungan,
pastikan untuk menyejajarkan tombol pelepas
dengan kait pada pipa sambungan. Jika tidak
sejajar, pipa tidak akan terkunci dan dapat terlepas
dari pembersih.
CATATAN: Saat memasang pipa sambungan
tanpa fungsi pengunci (aksesori opsional), putar
dan masukkan ke tempat masuk pengisap dari
pembersih. Untuk melepaskan, putar dan lepaskan.
► Gbr.23
Untuk melepaskan, tarik pipa sambungan sambil
menekan tombol pelepas.
► Gbr.24: 1. Tombol pelepas 2. Pipa sambungan
Saat menggunakan nosel
Untuk memasang nosel, putar dan masukkan dengan
aman ke tempat masuk pengisap pembersih atau
ujung pipa sambungan. Untuk melepaskan, putar dan
lepaskan.
► Gbr.25
Pembersihan (Pengisap)
Nosel
Pasangkan nosel untuk membersihkan meja, kursi,
furnitur, dsb. Nosel akan mudah bergerak.
► Gbr.26: 1. Nosel
Nosel + pipa sambungan (Pipa lurus)
Pipa sambungan terpasang antara nosel dan
pembersih. Susunan ini nyaman untuk membersihkan
lantai dengan posisi berdiri.
► Gbr.27: 1. Badan pembersih 2. Pipa sambungan
3. Nosel
Nosel sudut
Pasangkan nosel sudut untuk membersihkan sudut dan
celah-celah pada mobil atau furnitur.
► Gbr.28: 1. Nosel sudut 2. Badan pembersih
Nosel sudut + Pipa sambungan (Pipa
lurus)
Di ruang yang sempit di mana pembersih tidak dapat
menjangkaunya, atau di tempat tinggi yang sulit
dijangkau, gunakan susunan ini.
► Gbr.29: 1. Nosel sudut 2. Pipa sambungan
3. Badan pembersih
Other manuals for DCL282F
10
Table of contents
Languages:
Other Makita Vacuum Cleaner manuals

Makita
Makita DVC750L User manual

Makita
Makita VC2211MX1 User manual

Makita
Makita DVC150L User manual

Makita
Makita DCL140 User manual

Makita
Makita VC012G User manual

Makita
Makita XLC03 User manual

Makita
Makita VC002GL User manual

Makita
Makita DRC200 User manual

Makita
Makita DCL282F User manual

Makita
Makita DCL283FZW User manual

Makita
Makita DVC260 User manual

Makita
Makita VC1310L Manual

Makita
Makita VC008G User manual

Makita
Makita VC3211M User manual

Makita
Makita VC3012M User manual

Makita
Makita LC06ZW User manual

Makita
Makita DVC560 User manual

Makita
Makita VC009G User manual

Makita
Makita DCL500Z User manual

Makita
Makita VC1310LX1 User manual