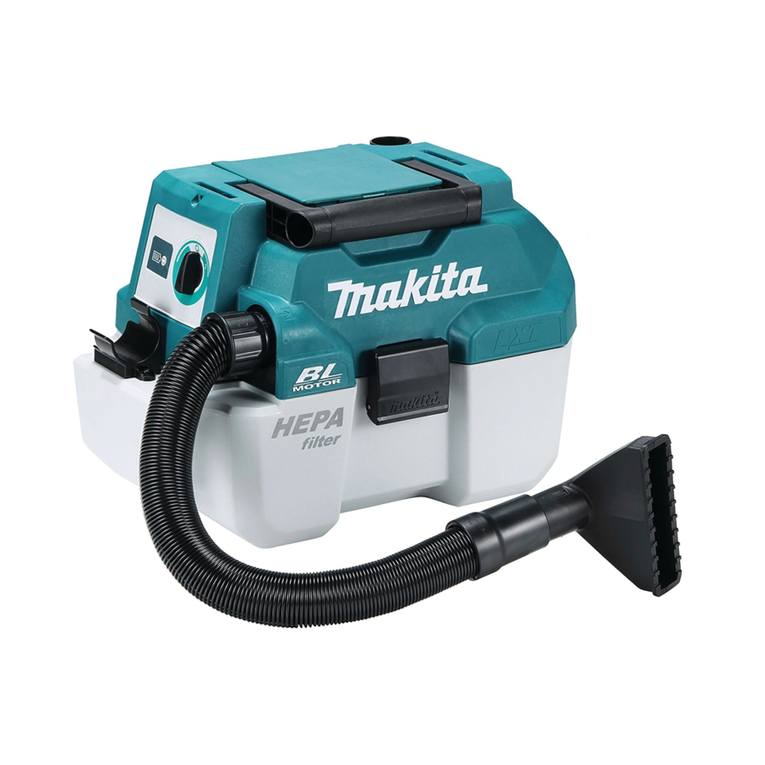
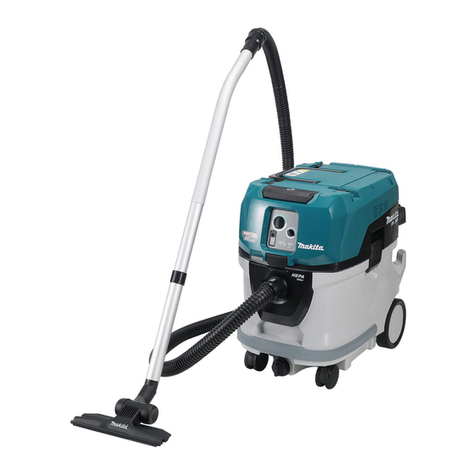
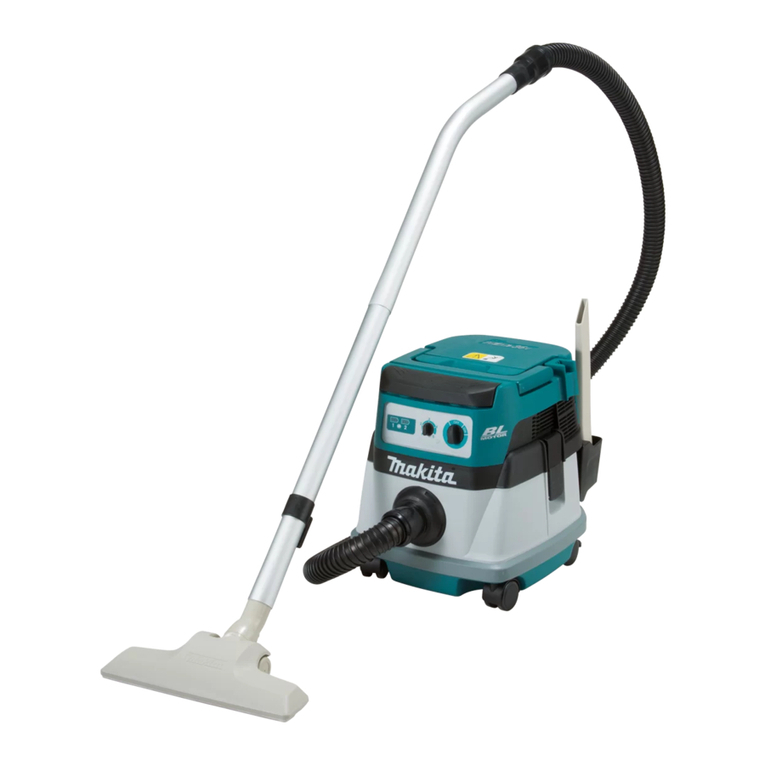
Makita DVC150L User manual

DVC150L
DVC151L
EN Corded and Cordless Vacuum
Cleaner INSTRUCTION MANUAL 6
FR Aspirateur Batterie Et Filaire MANUEL D’ INSTRUCTIONS 14
DE Akku- und Netzsauger BETRIEBSANLEITUNG 23
IT Aspirapolvere a lo e a
batteria ISTRUZIONI PER L’ USO 33
NL Stroom- en accustofzuiger GEBRUIKSAANW IJZING 43
ES Aspiradora Alámbrica /
Inalámbrica MANUAL DE
INSTRUCCIONES 52
PT Aspirador de Água e Pó a
Bateria / Elétrico MANUAL DE INSTRUÇÕ ES 61
DA Støvsuger med eller uden
ledning BRUGSANVISNING 70
EL Ενσύρματη και φορητή
σκούπα αναρρόφησης ΕΕΙΙΔΙ ΔΗΙΝ 79
TR Kablolu ve Akülü Süpürge KULLANMA KILAVUZU 8 9

1
4
5
2
3
Fig.1
1
2
3
4
5
Fig.2
1
Fig.3
12
1
Fig.4
2
1
Fig.5
1
Fig.6
1
2
Fig.7
2

12
1
2
Fig.8
1 212
Fig.9
2
1
3
Fig.10
12
3
4
Fig.11
Fig.12
2
1
Fig.13
1
2
3
4
5
6
6
6
Fig.14
3

1
2
3
3
Fig.15
1
1
Fig.16
1
2
Fig.17
1
2
Fig.18
1
Fig.19
Fig.20
Fig.21
Fig.22
4

Fig.23
Fig.24
Fig.25
Fig.26
Fig.27
1
Fig.28
Fig.29
5

6ENGLISH
ENGLISH (Original instructions)
W ARNING
T h is mac h ine is not intend ed f or use by persons ( inc lud ing c h ild ren)
w ith red uc ed ph y sic al, sensory or mental c apabilities, or a lac k of
ex perienc e and know led ge.
C h ild ren sh ould be superv ised to ensure th at th ey d o not play w ith
th e applianc e.
SPECIFICATIONS
Model: DVC150L DVC151L
Standard lter type
Cloth lter (for dry and wet dust)
Powder lter (for dry dust)
Volume ow (air) D C operation
( w ith BL 1 8 5 0B, ø 38 mm x 2.5 m h ose)
2.1 m3/ min
A C operation
( w ith ø 38 mm x 2.5 m h ose) 3.6 m3/ min
Vac uum D C operation
( w ith BL 1 8 5 0B, ø 38 mm x 2.5 m h ose)
9 .0 kP a
A C operation
( w ith ø 38 mm x 2.5 m h ose) 24 .0 kP a
R ec ov erable c apac ity D ust 1 5 L
W ater 1 2 L -
D imensions ( L x W x H ) 36 6 mm x 334 mm x 4 21 mm
R ated v oltage D .C . 36 V
Net w eigh t 8 .9 - 9 .6 kg 9 .6 - 1 0.3 kg
S af ety c lass /II
Due to our continuing program of research and development, the specications herein are subject to change
w ith out notic e.
Specications and battery cartridge may differ from country to country.
• T h e w eigh t d oes not inc lud e ac c essories but battery c artrid ge( s) . T h e ligh test and h eav iest c ombination w eigh t
of th e applianc e and battery c artrid ge( s) are sh ow n in th e table.
For wet dust, the oat and the water lter or cloth lter are required.
Applicable battery cartridge and charger
Battery c artrid ge BL 1 8 1 5 N / BL 1 8 20 / BL 1 8 20B / BL 1 8 30 / BL 1 8 30B / BL 1 8 4 0 /
BL 1 8 4 0B / BL 1 8 5 0 / BL 1 8 5 0B / BL 1 8 6 0B
C h arger D C 1 8 R C / D C 1 8 R D / D C 1 8 R E / D C 1 8 S D / D C 1 8 S E / D C 1 8 S F
• S ome of th e battery c artrid ges and c h argers listed abov e may not be av ailable d epend ing on y our region of
resid enc e.
WARNING: Only use the battery cartridges and chargers listed above. U se of any oth er battery c artrid ges
and chargers may cause injury and/or re.

7ENGLISH
Symbols
The followings show the symbols used for the equip-
ment. Be sure th at y ou und erstand th eir meaning bef ore
use.
R ead instruc tion manual.
T ake partic ular c are and attention.
W arning! T h e c leaner may c ontain h az -
ard ous d ust.
Nev er stand on th e c leaner.
D ust c lass L ( ligh t) . T h e c leaners are c apa-
ble of pic king up d ust c lass L . F ollow y our
c ountry ' s regulations relating to d usts and
to oc c upational h ealth and saf ety .
D O U BL E I NS U L A T I O N
Ni-MH
Li-ion O nly f or EU c ountries
Do not dispose of electric equipment or
battery pac k togeth er w ith h ouseh old
w aste material! I n observ anc e of th e
European D irec tiv es, on W aste Elec tric
and Electronic Equipment and Batteries
and A c c umulators and W aste Batteries and
A c c umulators and th eir implementation
in ac c ord anc e w ith national law s, elec tric
equipment and batteries and battery
pac k( s) th at h av e reac h ed th e end of
th eir lif e must be c ollec ted separately and
returned to an env ironmentally c ompatible
rec y c ling f ac ility .
Intended use
T h e tool is suitable f or c ommerc ial use, f or ex ample in
hotels, schools, hospitals, factories, shops, ofces and
rental businesses.
DVC150L
T h e tool is intend ed f or c ollec ting both w et and d ry d ust.
DVC151L
T h e tool is intend ed f or c ollec ting d ry d ust only .
Power supply
T h e tool sh ould be c onnec ted only to a pow er supply of
th e same v oltage as ind ic ated on th e nameplate, and
c an only be operated on single-ph aseA C supply . T h ey
are d ouble-insulated and c an, th eref ore, also be used
f rom soc kets w ith out earth w ire.
Noise
T h e ty pic al A -w eigh ted noise lev el d etermined ac c ord -
ing to EN6 0335 -2-6 9 :
Model DVC150L
S ound pressure lev el ( L pA ) : 75 d B( A )
U nc ertainty ( K) : 2.5 d B( A )
Model DVC151L
S ound pressure lev el ( L pA ) : 75 d B( A )
U nc ertainty ( K) : 2.5 d B( A )
T h e noise lev el und er w orking may ex c eed 8 0 d B ( A ) .
NOTE:
T h e d ec lared noise emission v alue( s) h as been
measured in ac c ord anc e w ith a stand ard test meth od
and may be used f or c omparing one tool w ith anoth er.
NOTE:
T h e d ec lared noise emission v alue( s) may
also be used in a preliminary assessment of ex posure.
WARNING: W ear ear protection.
WARNING:
The noise emission during actual
use of the power tool can differ from the declared
value(s) depending on the ways in which the tool is
used especially what kind of workpiece is processed.
WARNING:
Be sure to identify safety measures
to protect the operator that are based on an estima-
tion of exposure in the actual conditions of use (tak-
ing account of all parts of the operating cycle such
as the times when the tool is switched off and when
it is running idle in addition to the trigger time).
Vibration
T h e v ibration total v alue ( tri-ax ial v ec tor sum) d eter-
mined ac c ord ing to EN6 0335 -2-6 9 :
Vibration emission ( ah ,M) : 2.5 m/ s2or less
U nc ertainty ( K) : 1 .5 m/ s2
NOTE: T h e d ec lared v ibration total v alue( s) h as been
measured in ac c ord anc e w ith a stand ard test meth od
and may be used f or c omparing one tool w ith anoth er.
NOTE: T h e d ec lared v ibration total v alue( s) may also
be used in a preliminary assessment of ex posure.
WARNING: The vibration emission during
actual use of the power tool can differ from the
declared value(s) depending on the ways in which
the tool is used especially what kind of workpiece
is processed.
WARNING: Be sure to identify safety mea-
sures to protect the operator that are based on an
estimation of exposure in the actual conditions of
use (taking account of all parts of the operating
cycle such as the times when the tool is switched
off and when it is running idle in addition to the
trigger time).
EC Declaration of Conformity
For European countries only
T h e EC d ec laration of c onf ormity is inc lud ed asA nnex A
to th is instruc tion manual.
SAFETY W ARNINGS
Corded and cordless vacuum
cleaner safety warnings
WARNING: IMPORTANT! READ CAREFULLY
all safety warnings and all instructions BEFORE
USE. F ailure to f ollow th e w arnings and instruc tions
may result in electric shock, re and/or serious injury.

8ENGLISH
1 . Before use, make sure that this cleaner must
be used by people who have been adequately
instructed on the use of this cleaner.
2.
If foam/liquid comes out, switch off immediately.
3. Clean the water level limiting device regularly
and examine it for signs of damage.
4 . Do not use the cleaner ithout the lter.
Replace a damaged lter immediately.
5 . USE OF EX TENSION CORD. W hen using an
extension cord because of the great distance
to your power source, try to employ a cord that
is sufciently thick but not too long, or cleaner
performance will be adversely affected. For
outdoor applications use an extension cord
suitable for outdoor use.
6 . VOLTAGE W ARNING: Before connecting the
cleaner to a power source (receptacle, outlet,
etc.) be sure the voltage supplied is the same
as that specied on the nameplate of the
cleaner. A power source with voltage greater
than that specied for the cleaner can result
in SERIOUS INJURY to the operator as well
as damage to the cleaner. If in doubt, DO NOT
PLUG IN THE CLEANER. Using a power source
with voltage less than the nameplate rating is
harmful to the motor.
7. AVOID UNINTENTIONAL STARTING. Be sure
switch is OFF when plugging in.
8 . Do not attempt to pick up ammable materials,
re orks, lighted cigarettes, hot ashes, hot
metal chips, sharp materials such as razors,
needles, broken glass or the like.
9 .
NEVER USE THE CLEANER IN THE VICINITY
OF GASOLINE, GAS, PAINT,ADHESIVES OR
OTHER HIGHLY EX PLOSIVE SUBSTANCES.
The switch emits sparks when turned ON and
OFF.And so does the motor commutator during
operation. A dangerous explosion may result.
1 0.
Never vacuum up toxic, carcinogenic, combusti-
ble or other hazardous materials such as asbes-
tos, arsenic, barium, beryllium, lead, pesticides,
or other health endangering materials.
1 1 . Never use the cleaner outdoors in the rain.
1 2. Do not use close to heat sources (stoves, etc.).
1 3. GUARD AGAINST ELECTRIC SHOCK. Prevent
body contact with grounded surfaces. For
example; pipes, radiators, ranges, refrigerator
enclosures.
14. Do not block cooling vents. These vents per-
mit cooling of the motor. Blockage should be
carefully avoided otherwise the motor will burn
out from lack of ventilation.
15. Keep proper footing and balance at all times.
16. DO NOT ABUSE CORD. Never carry the cleaner
by cord or yank it to disconnect from recepta-
cle. Keep cord away from heat, oil, and sharp
edges. Inspect cleaner cords periodically and
if damaged, have repaired by authorized ser-
vice facility. Inspect extension cords periodi-
cally and replace if damaged.
1 7. Do not fold, tug or step on the hose.
18. Stop the cleaner immediately if you notice
poor performance or anything abnormal
during operation.
19. DISCONNECT THE CLEANER. W hen not in
use, before servicing, and when changing
accessories.
20. Clean and service the cleaner immediately
after each use to keep it in tiptop operating
condition.
21 . MAINTAIN THE CLEANER W ITH CARE. Keep
the cleaner clean for better and safer per-
formance. Follow instructions for changing
accessories. Keep handles dry, clean, and free
from oil and grease.
22. CHECK DAMAGED PARTS. Before further use
of the cleaner, a guard or other part that is
damaged should be carefully checked to deter-
mine that it will operate properly and perform
its intended function. Check for alignment of
moving parts, binding of moving parts, break-
age of parts, mounting, and any other condi-
tions that may affect its operation. A guard or
other part that is damaged should be properly
repaired or replaced by an authorized service
center unless otherwise indicated elsewhere
in this instruction manual. Have defective
switches replaced by authorized service cen-
ter. Don’ t use the cleaner if switch does not
turn it on and off.
23. REPLACEMENT PARTS. W hen servicing, use
only identical replacement parts.
24 . STORE IDLE CLEANER. W hen not in use, the
cleaner should be stored indoors.
25 . Wet lters and the interior part of the liuid
container shall be dried before storage.
26 . Be kind to your cleaner. Rough handling can
cause breakage of even the most sturdily built
cleaner.
27. Do not attempt to clean the exterior or interior
with benzine, thinner or cleaning chemicals.
Cracks and discoloration may be caused.
28 . Do not use cleaner in an enclosed space where
ammable, explosive or toxic vapors are given
off by oil-base paint, paint-thinner, gasoline,
some mothproong substances, etc., or in
areas here ammable dust is present.
29 . Do not leave the cleaner cord lying on the oor
after you have nished a cleaning job. It can
become a tripping hazard or may cause dam-
age to the cleaner.
30. Do not operate this or any tool while under the
inuence of drugs or alcohol.
31 . As a basic rule of safety, use safety goggles or
safety glasses with side shields.
32. Use a dust mask in dusty work conditions.
33. This machine is not intended for use by per-
sons including children with reduced physical,
sensory or mental capabilities, or lack of expe-
rience and knowledge.
34 . Young children should be supervised to
ensure that they do not play with the cleaner.
35 . Never handle plug cord or cleaner with wet
hands.
36 . Use extreme caution when cleaning on stairs.
37. Do not use the cleaner as a stool or work
bench. The machine may fall down and may
result in personal injury.

9ENGLISH
Battery tool use and care
1 . Recharge only ith the charger specied by
the manufacturer. A c h arger th at is suitable f or
one type of battery pack may create a risk of re
w h en used w ith anoth er battery pac k.
2. Use poer tools only ith specically desig-
nated battery packs. U se of any oth er battery
packs may create a risk of injury and re.
3. W hen battery pack is not in use, keep it away
from other metal objects, like paper clips,
coins, keys, nails, screws or other small metal
objects, that can make a connection from one
terminal to another. S h orting th e battery termi-
nals together may cause burns or a re.
4 .
Under abusive conditions, liuid may be ejected
from the battery; avoid contact. If contact acci-
dentally occurs, ush ith ater. If liuid contacts
eyes, additionally seek medical help. Liquid ejected
f rom th e battery may c ause irritation or burns.
5 . Do not use a battery pack or tool that is dam-
aged or modied. Damaged or modied batteries
may ex h ibit unpred ic table beh av iour resulting in
re, explosion or risk of injury.
6 . Do not expose a battery pack or tool to re or
excessive temperature. Exposure to re or tem-
perature abov e 1 30 ° C may c ause ex plosion.
7. Follow all charging instructions and do not
charge the battery pack or tool outside the
temperature range specied in the instruc-
tions. C h arging improperly or at temperatures
outside the specied range may damage the
battery and increase the risk of re.
SAVE THESE INSTRUCTIONS.
WARNING: DO NOT let comfort or familiarity
with product (gained from repeated use) replace
strict adherence to safety rules for the subject
product. MISUSE or failure to follow the safety
rules stated in this instruction manual may cause
serious personal injury.
Important safety instructions for
battery cartridge
1 .
Before using battery cartridge, read all instruc-
tions and cautionary markings on (1) battery char-
ger, (2) battery, and (3) product using battery.
2. Do not disassemble battery cartridge.
3.
If operating time has become excessively shorter,
stop operating immediately. It may result in a risk of
overheating, possible burns and even an explosion.
4 .
If electrolyte gets into your eyes, rinse them out
with clear water and seek medical attention right
away. It may result in loss of your eyesight.
5 . Do not short the battery cartridge:
( 1 ) Do not touch the terminals with any con-
ductive material.
( 2) Avoid storing battery cartridge in a con-
tainer ith other metal objects such as
nails, coins, etc.
( 3)
Do not expose battery cartridge to water or rain.
A battery short can cause a large current o,
overheating, possible burns and even a breakdown.
6 . Do not store the tool and battery cartridge in
locations where the temperature may reach or
exceed 50 ° C (122 ° F).
7. Do not incinerate the battery cartridge even if
it is severely damaged or is completely worn
out. The battery cartridge can explode in a re.
8 . Be careful not to drop or strike battery.
9 . Do not use a damaged battery.
1 0.
The contained lithium-ion batteries are subject to
the Dangerous Goods Legislation requirements.
F or c ommerc ial transports e.g. by th ird parties,
forwarding agents, special requirement on pack-
aging and labeling must be observ ed .
F or preparation of th e item being sh ipped , c onsult-
ing an expert for hazardous material is required.
P lease also observ e possibly more d etailed
national regulations.
T ape or mask of f open c ontac ts and pac k up th e
battery in suc h a manner th at it c annot mov e
around in th e pac kaging.
1 1 . Follow your local regulations relating to dis-
posal of battery.
1 2. Use the batteries only with the products
specied by Makita. I nstalling th e batteries to
non-compliant products may result in a re, exces-
siv e h eat, ex plosion, or leak of elec troly te.
SAVE THESE INSTRUCTIONS.
CAUTION: Only use genuine Makita batteries.
U se of non-genuine Makita batteries, or batteries th at
h av e been altered , may result in th e battery bursting
causing res, personal injury and damage. It will
also v oid th e Makita w arranty f or th e Makita tool and
c h arger.
Tips for maintaining maximum
battery life
1 . Charge the battery cartridge before completely
discharged. Always stop tool operation and
charge the battery cartridge when you notice
less tool power.
2. Never recharge a fully charged battery car-
tridge. Overcharging shortens the battery
service life.
3. Charge the battery cartridge with room tem-
perature at 10 ° C - 40 ° C (50 ° F - 104 ° F). Let
a hot battery cartridge cool down before
charging it.
4 . Charge the battery cartridge if you do not use
it for a long period (more than six months).
PARTS DESCRIPTION
Model DVC150L
(Cloth lter (for dry and wet dust) model)
Fig.1: 1. T ank c ov er 2. F loat 3. F loat c age 4. C loth
lter 5. T ank
Model DVC151L
(Powder lter (for dry dust) model)
Fig.2: 1. T ank c ov er 2. Powder lter (HEPA)
3. D amper 4. Prelter 5. T ank

10 ENGLISH
FUNCTIONALDESCRIPTION
Use with AC power:
WARNING: Before plugging the cleaner,
always make sure that the cleaner is switched off.
P lugging th e c leaner w ith th e sw itc h on may c ause an
unexpected start resulting in serious personal injury.
C onnec t th e plug to a pow er supply .
Fig.3: 1. P lug ( th e sh ape and c ord length may d if f er
f rom c ountry to c ountry )
T h e A C pow er ind ic ator ligh ts up w h en setting th e
stand -by sw itc h to " I " sid e.
Fig.4: 1. A C pow er ind ic ator
NOTE:
Ev en operating in D C pow er mod e, th e c leaner is
automatic ally c h anged into A C pow er mod e w h en plugged in.
NOTE:
I f th e c leaner is unplugged d uring operation w ith
th e battery inserted , th e c leaner gets into stand -by state.
Use with battery:
CAUTION: Always be sure that the cleaner is
switched off, unplugged, and the battery cartridge
is removed before adjusting or checking function
on the cleaner.
Installing or removing battery cartridge
CAUTION: Always switch off the tool before
installing or removing of the battery cartridge.
CAUTION: Hold the cleaner and the battery
cartridge rmly hen installing or removing bat-
tery cartridge. F ailure to h old th e c leaner and th e
battery cartridge rmly may cause them to slip off
y our h and s and result in d amage to th e c leaner and
battery cartridge and a personal injury.
CAUTION: Be careful not to pinch your n-
gers when opening or closing the battery cover.
Failure to do so may cause personal injury.
To install the battery cartridge, release the lock rst, and
th en open th e battery c ov er.A f ter th at, insert th e battery
c artrid ge.
Fig.5: 1. L oc k 2. Battery c ov er
A lign th e tongue on th e battery c artrid ge w ith th e groov e in
th e h ousing and slip it into plac e. I nsert it all th e w ay until it
loc ks in plac e w ith a little c lic k. T h en loc k th e battery c ov er.
Fig.6: 1. Battery c artrid ge
T o remov e th e battery c artrid ge, slid e it f rom th e tool
w h ile slid ing th e button in f ront of th e c artrid ge.
CAUTION: Always install the battery cartridge
fully until the red indicator cannot be seen. I f not,
it may ac c id entally f all out of th e c leaner, c ausing
injury to you or someone around you.
CAUTION: Do not install the battery cartridge
forcibly. I f th e c artrid ge d oes not slid e in easily , it is
not being inserted c orrec tly .
NOTE: T h e c leaner d oes not w ork w ith only one
battery c artrid ge.
NOTE: R emov e th e plug of th e c leaner f rom th e
ex tension c ord w h en using th e c leaner w ith th e
batteries.
Indicating the remaining battery capacity
Only for battery cartridges with the indicator
Fig.7: 1. I nd ic ator lamps 2. C h ec k button
P ress th e c h ec k button on th e battery c artrid ge to ind i-
c ate th e remaining battery c apac ity . T h e ind ic ator lamps
ligh t up f or a f ew sec ond s.
Indicator lamps Remaining
capacity
Lighted Off Blinking
75 % to 1 00%
5 0% to 75 %
25 % to 5 0%
0% to 25 %
C h arge th e
battery .
T h e battery
may h av e
malf unc tioned .
NOTE: D epend ing on th e c ond itions of use and th e
ambient temperature, th e ind ic ation may d if f er sligh tly
f rom th e ac tual c apac ity .
Indicating the remaining battery capacity
Fig.8 : 1. Battery ind ic ator 2. C h ec k button
Fig.9
P ress th e c h ec k button to ind ic ate th e remaining battery
c apac ities. T h e battery ind ic ators c orrespond to eac h
battery .
Battery indicator status Remaining
battery
capacity
On Off Blinking
5 0% to 1 00%
20% to 5 0%
0% to 20%
C h arge th e
battery

11 ENGLISH
Tool / battery protection system
The tool is equipped with a tool/battery protection system. This
sy stem automatic ally c uts of f pow er to th e motor to ex tend tool and
battery lif e. T h e tool w ill automatic ally stop d uring operation if th e
tool or battery is plac ed und er one of th e f ollow ing c ond itions:
Overload protection
W h en th e tool is operated in a manner th at c auses it to
d raw an abnormally h igh c urrent, th e tool automatic ally
stops w ith out any ind ic ation. I n th is situation, turn th e
tool of f and stop th e applic ation th at c aused th e tool to
bec ome ov erload ed . T h en turn th e tool on to restart.
Overheat protection
On Blinking
W h en th e tool is ov erh eated , th e tool stops automatic ally , and
th e battery ind ic ator blinks about 6 0 sec ond s. I n th is situation,
let th e tool c ool d ow n bef ore turning th e tool on again.
Overdischarge protection
W h en th e battery c apac ity bec omes low , th e tool stops
automatic ally . I f th e prod uc t d oes not operate ev en
w h en th e sw itc h es are operated , remov e th e batteries
f rom th e tool and c h arge th e batteries.
Switch action
Fig.10: 1. S tand -by sw itc h 2. P ow er button
3. Suction force adjusting knob
T o start th e c leaner:
1 . S et th e stand -by sw itc h to th e " I " sid e. T h e c leaner
gets into stand -by state.
2. P ress th e pow er button.
T o make th e c leaner get into stand -by mod e, press th e
pow er button again.
T o turn of f th e c leaner, set th e stand -by sw itc h to th e " O " sid e.
The suction power can be adjusted according to your work need.
S uc tion pow er c an be inc reased by turning th e suc tion f orc e
adjusting knob from the sy mbol to th e sy mbol.
NOTICE:A lw ay s set th e stand -by sw itc h to th e " O "
sid e w h en not using th e c leaner f or long time. T h e
c leaner c onsumes pow er d uring stand -by state.
Auto-suction stop during wet
suction operation
Only for the cloth lter model
WARNING: Do not use for a long time while
the oat is at ork. Using the cleaner with its oat at
w ork f or a long time c an c ause ov erh eat, resulting in
th e c leaner d ef ormation.
WARNING: Do not pick up foam or soapy
liquid. Picking up foam or soapy liquid can cause
foam to come out of air exit before the oat works.
C ontinuing to using in th is c ond ition may c ause an
elec tric sh oc k and breakage of th e c leaner.
Auto-suction stop works only when using with the oat
and oat cage.
The cleaner has a oat mechanism that prevents water
f rom immersing into th e motor w h en pic king up more
th an a c ertain amount of w ater. W h en th e tank is f ull
and th e c leaner no longer pic ks up w ater, sw itc h of f th e
c leaner and empty th e tank.
Locking or unlocking the caster
Fig.11: 1. C aster 2. S topper lev er 3. F R EE position
4. L O C K position
L oc king th e c aster is c onv enient w h en storing th e c leaner,
stopping th e w ork on th e w ay and keeping th e c leaner still.
T o operate th e stopper, mov e it by h and .
T o loc k th e c aster w ith a stopper, low er th e stopper
lev er and th e c aster no longer w ill rotate. T o release th e
c aster f rom th e loc ked position, raise th e stopper lev er.
NOTE:
W h en mov ing th e c leaner, make sure th at th e
c aster is unloc ked . Mov ing th e c leaner w ith th e c aster
in th e loc ked position may c ause d amage to th e c aster.
Carriage handle
W h en c arry ing th e c leaner, c arry it by h old ing th e h an-
d le on th e h ead . T h e h and le is retrac table at th e h ead
w h en not in use.
Fig.12
ASSEMBLY
CAUTION: Always be sure that the cleaner is
switched off, unplugged, and the battery cartridge
is removed before carrying out any work on the
cleaner.
CAUTION: Always wear dust mask during
assembly or maintenance.
Installing the poder lter (HEPA)
and prelter (for dry dust)
Optional accessory for cloth lter model
CAUTION: Never pick up water or other liq-
uids or et dusts hen using the poder lter.
Picking up such things may cause the powder lter
breakage.
To use powder lter:
1.
Remove the oat cage and oat by removing the bolts.
Fig.13: 1. F loat 2. F loat c age
2. Place the prelter in the tank with aligning the
mounting position markings.
3. Mount the damper on the powder lter and then
place them in the prelter with aligning the mounting
position markings.
4. F inally , mount th e tank c ov er and loc k it.
Fig.14: 1. T ank c ov er 2. Powder lter (HEPA)
3. D amper 4. Prelter 5. T ank 6. Mounting
position marking

12 ENGLISH
NOTICE:
Before using the poder lter, make
sure that prelter and damper are alays used
together. It is not allowed to install powder lter solely.
Installing the ater lter
Optional accessory for cloth lter model
CAUTION:
Never pick up water or wet dust with-
out the oat and the cloth lter or the ater lter.
CAUTION:
For picking up wet dust, make sure that
the oat cage and the oat are installed on the cleaner.
CAUTION: When installing the ater lter on
the tank, set it tight at the opening of the tank so
that the hook of the ater lter engages the tank
opening rmly and there is no space beteen the
ater lter and the tank.
To pick up water or wet dust only, the water lter is more
suitable than the cloth lter.
When installing the water lter, align its mounting posi-
tion mark w ith th e one on th e tank.
Fig.15: 1. Water lter 2. T ank 3. Mounting position
marking
NOTE: It is recommended using water lter when
pic king up large amount of w ater repeated ly .
O th erw ise v ac uum ability may be red uc ed in c ase of
cloth lter.
Installing the paper pack
Optional accessory
WARNING: W hen using the paper pack, also
use the cloth lter or prelter together that is
preinstalled on the cleaner. F ailure to use th e c loth
lter / prelter together may cause unusual noise and
heat, resulting in a re.
CAUTION: (For the cloth lter model)
• Never pick up water or other liquids or wet
dusts when using the paper pack. P ic king
up suc h th ings may c ause th e paper pac k
breakage.
• Before using the paper pack, make sure that
poder lter (optional accessory), damper
(optional accessory) and prelter are alays
used together.
CAUTION: (For the powder lter model)
• Before using the paper pack, make sure
that poder lter, damper and prelter are
always used together.
1. R emov e th e rubber h old er.
Fig.16: 1. R ubber h old er
2. Ex tend th e paper pac k.
3. A lign th e paper pac k opening w ith th e d ust suc tion
opening of th e c leaner.
4. I nsert th e c ard board of th e paper pac k onto th e
h old er so th at it is positioned at th e end bey ond th e
d etent protrusion.
Fig.17: 1. P aper pac k 2. H old er
Installing the polyethylene bag
C leaner c an also be used w ith out poly eth y lene bag.
H ow ev er, using poly eth y lene bag is easier to empty th e
tank w ith out letting y our h and s d irty .
S pread th e poly eth y lene bag in th e tank. I nsert it betw een
th e h old er plate and th e tank, and pull it to th e h ose inlet.
Fig.18 : 1. H old er plate 2. P oly eth y lene bag
S pread th e bag around th e top of th e tank so th at th e c loth
lter / prelter edge can catch and hold the bag securely.
Fig.19: 1. Cloth lter / prelter
NOTE: A poly eth y lene bag av ailable on th e
market c an be used . 0.04 mm or th ic ker one is
rec ommend ed .
NOTE: T oo muc h d ust w ill tear th e bag easily , so
d o not c ollec t th e d ust more th an th e h alf of th e bag
c apac ity .
Emptying the polyethylene bag
WARNING: Always make sure that the cleaner
is switched off, unplugged, and the battery car-
tridge is removed before emptying the polyeth-
ylene bag. F ailure to d o so may c ause an elec tric
shock and serious personal injury.
CAUTION: Do not apply a great impact on the
oat cage and tank. A pply ing a great impac t may
c ause d ef ormation and d amage to th e parts.
CAUTION: Empty the tank at least once a day
although this depends on picked-up dust volume
in the tank. O r, th e suc tion f orc e w ill w eaken and th e
motor may be broken.
CAUTION: Do not grab the hook when empty-
ing the tank. G rabbing th e h ook may c ause th e h ook
to break.
U nh ook and lif t up th e tank c ov er.
Shake off the dust from the cloth lter / prelter and then
take th e poly eth y lene bag out of th e tank.
Fig.20
NOTE: T ake th e poly eth y lene bag c aref ully out of th e
tank so th at th e poly eth y lene bag c annot be c augh t
and torn by th e protrusion insid e th e tank w h en emp-
ty ing it.
NOTE: Empty th e poly eth y lene bag bef ore it
bec omes f ull. T oo muc h d ust in th e tank may c ause
th e poly eth y lene bag to be torn.
Installing the tool box
1. R elease th e loc k of th e battery c ov er, and open
th e battery c ov er.
2. S et th e rails on th e tool box along th e groov es on
th e h ousing.
3. C lose th e battery c ov er and apply th e loc k.
Fig.21
T h e tool box is c onv enient f or c arry ing batteries, ex ten-
sion c od e, pipe, or c uf f s.
Fig.22

13 ENGLISH
Connecting the hose
NOTICE: Never force the hose for bending or
stamp it. Never move the cleaner by a hose.
F orc ing, stamping and pulling th e h ose may c ause a
breakage or d ef ormation of th e h ose.
NOTICE: W hen picking up large wastes such as
planer carvings, concrete dusts or similar other
than small wastes, use the 38 mm inner diameter
hose (optional accessory). U sing th e 28 mm inner
d iameter h ose ( optional ac c essory ) may c ause a
hose stufng and damage.
I nsert th e h ose onto th e mounting port of th e tank and
turn it c loc kw ise until it loc ks.
Fig.23
MAINTENANCE
CAUTION: Always be sure that the cleaner is
switched off, unplugged, and the battery cartridge
is removed before attempting to perform inspec-
tion or maintenance.
NOTICE: Never use gasoline, benzine, thinner,
alcohol or the like. Discoloration, deformation or
cracks may result.
T o maintain prod uc t S A F ET Y and R EL I A BI L I T Y ,
repairs, any other maintenance or adjustment should
be perf ormed by Makita A uth oriz ed or F ac tory S erv ic e
C enters, alw ay s using Makita replac ement parts.
Storage of power supply cord
Y ou c an w ind up th e pow er supply c ord around th e tool
box .
Fig.24
Storage of accessories
T h e pipes c an be plac ed into th e pipe h old er w h en not
using th e c leaner f or a sh ort time.
Fig.25
Fig.26
T h e h ose c an be stored around th e tool by c onnec ting
eac h end s.
Fig.27
Cleaning of cloth lter
Only for the cloth lter model
Clogged cloth lter causes poor suction performance.
Clean out the cloth lter from time to time.
To remove dust or particles adhering to the cloth lter,
shake the frame bottom quickly several times.
Fig.28 : 1. Cloth lter
Cleaning of poder lter (HEPA) and
prelter
Only for the powder lter model
Clogged powder lter, prelter and damper cause poor
suction performance. Clean out the lters and dampers
f rom time to time.
To remove dust or particles adhering to the lters, shake
the frame bottom quickly several times.
Fig.29
Occasionally wash the powder lter in water, rinse and
d ry th orough ly in th e sh ad e bef ore use. Nev er w ash
lters in a washing machine.
NOTE: Do not rub or scratch the powder lter, the
prelter or the damper with hard objects such as a
brush and a pad d le.
NOTE: The lters wear out in course of time. It is
rec ommend ed to h av e some spares f or th em.
OPTIONAL
ACCESSORIES
CAUTION: These accessories or attachments
are recommended for use with your Makita tool
specied in this manual. T h e use of any oth er
ac c essories or attac h ments migh t present a risk of
injury to persons. Only use accessory or attachment
f or its stated purpose.
I f y ou need any assistanc e f or more d etails regard -
ing th ese ac c essories, ask y our loc al Makita S erv ic e
C enter.
• H ose
• F ront c uf f ( 22, 24 , 38 )
• S traigh t pipe
• C orner noz z le
• R ound brush
Powder lter, HEPA (for dry dust)
• D amper
Prelter
• Noz z le assembly
• Bent pipe
• P oly eth y lene bag
• P aper pac k
• H old er set
Water Filter (option for the cloth lter model)
• Makita genuine battery and c h arger
NOTE: S ome items in th e list may be inc lud ed in th e
tool pac kage as stand ard ac c essories. T h ey may
d if f er f rom c ountry to c ountry .

14 FRANÇAIS
FRANÇAIS (Instructions originales)
AVERTISSEMENT
C ette mac h ine n’ est pas d estiné e à ê tre utilisé e par d es personnes
(y compris les enfants) aux facultés physiques, sensorielles ou
mentales d iminué es ou sans ex pé rienc e ni ex pertise.
Les enfants doivent faire l’objet d’une surveillance an d’éviter qu’ils
ne jouent avec l’appareil.
SPÉ CIFICATIONS
Modè le : DVC150L DVC151L
Type de ltre standard F iltre en tissu
( pour les poussiè res sè c h es et
h umid es)
F iltre à poud re
( pour les poussiè res sè c h es)
Débit volumétrique (air) F onc tionnement C C
( av ec BL 1 8 5 0B, un tuy au d e
ø 38 mm x 2,5 m)
2,1 m3/ min
F onc tionnement C A
( av ec un tuy au d e ø 38 mm x 2,5 m)
3,6 m3/ min
Vid e F onc tionnement C C
( av ec BL 1 8 5 0B, un tuy au d e
ø 38 mm x 2,5 m)
9 ,0 kP a
F onc tionnement C A
( av ec un tuy au d e ø 38 mm x 2,5 m)
24 ,0 kP a
C apac ité d e ré c upé ration P oussiè re 1 5 L
Eau 1 2 L -
D imensions ( L x P x H ) 36 6 mm x 334 mm x 4 21 mm
T ension nominale 36 V C C
P oid s net 8 ,9 - 9 ,6 kg 9 ,6 - 1 0,3 kg
C até gorie d e sé c urité /II
tant donné l’évolution constante de notre programme de recherche et de développement, les spécications
contenues dans ce manuel sont sujettes à modication sans préavis.
Les spécications et la batterie peuvent tre différentes suivant les pays.
• L e poid s ne c omprend pas les ac c essoires, mais la ou les batteries. L e poid s c ombiné le plus lé ger et le plus
lourd de l’appareil et de la ou des batteries est indiqué dans le tableau.
Pour la poussière humide, le otteur et le ltre à eau ou le ltre en tissu sont nécessaires.
Batterie et chargeur applicables
Batterie BL 1 8 1 5 N / BL 1 8 20 / BL 1 8 20B / BL 1 8 30 / BL 1 8 30B / BL 1 8 4 0 /
BL 1 8 4 0B / BL 1 8 5 0 / BL 1 8 5 0B / BL 1 8 6 0B
C h argeur D C 1 8 R C / D C 1 8 R D / D C 1 8 R E / D C 1 8 S D / D C 1 8 S E / D C 1 8 S F
• C ertains c h argeurs et batteries ré pertorié s c i-d essus peuv ent ne pas ê tre d isponibles selon la ré gion où v ous
ré sid ez .
AVERTISSEMENT : N’ utilisez que les batteries et les chargeurs répertoriés ci-dessus. L ’ utilisation
d’autres batteries et chargeurs peut provoquer des blessures et/ou un incendie.

15 FRANÇAIS
Symboles
Vous trouv erez c i-d essous les sy mboles utilisé s pour
l’appareil. Veillez à comprendre leur signication avant
toute utilisation.
L ire le mod e d ’ emploi.
Veuillez ê tre prud ent et rester attentif .
Avertissement Il se peut que l’aspirateur
c ontienne d es poussiè res d angereuses.
Ne vous tenez jamais sur l’aspirateur.
C até gorie d e poussiè re L ( lé gè re) . U n
aspirateur est c apable d e ramasser les
poussiè res d e c até gorie L . S uiv ez les
ré glementations d e v otre pay s c onc ernant
les poussiè res et la santé et la sé c urité
au trav ail.
D O U BL E I S O L A T I O N
Ni-MH
Li-ion Uniquement pour les pays européens
Ne jetez pas les appareils électriques ou
les batteries av ec v os ord ures mé nagè res !
C onf ormé ment aux d irec tiv es europé ennes
relatives aux déchets d’équipements
électriques et électroniques et aux piles
et accumulateurs ainsi qu’aux déchets de
piles et d ’ ac c umulateurs et leur mise en
œ uv re c onf ormé ment aux lois nationales,
les équipements électriques et les piles et
batteries en n de vie doivent faire l’objet
d’une collecte sélective et tre conés à
une usine d e rec y c lage respec tueuse d e
l’ env ironnement.
Utilisations
L ’ outil est pré v u pour un usage c ommerc ial, par
ex emple, d ans les h ô tels, é c oles, h ô pitaux , usines,
magasins, bureaux et agenc es d e loc ation.
DVC150L
L ’ outil est c onç u pour la c ollec te d es poussiè res sè c h es
et h umid es.
DVC151L
L ’ outil est c onç u pour la c ollec te d es poussiè res sè c h es
uniquement.
Alimentation
L’outil ne devra tre raccordé qu’à une alimentation
de la mme tension que celle qui gure sur la plaque
signalétique, et il ne pourra fonctionner que sur un
c ourant sec teur monoph asé . R é alisé av ec une d ouble
isolation, il peut d e c e f ait ê tre alimenté par une prise
sans mise à la terre.
Bruit
Niveau de bruit pondéré A typique, déterminé selon
EN6 0335 -2-6 9 :
Modè le DVC150L
Niv eau d e pression sonore ( L pA ) : 75 d B ( A )
I nc ertitud e ( K) : 2,5 d B ( A )
Modè le DVC151L
Niv eau d e pression sonore ( L pA ) : 75 d B ( A )
I nc ertitud e ( K) : 2,5 d B ( A )
L e niv eau d e bruit en f onc tionnement peut d é passer 8 0 d B ( A ) .
NOTE : L a ou les v aleurs d ’é mission d e bruit d é c la-
ré es ont é té mesuré es c onf ormé ment à la mé th od e
d e test stand ard et peuv ent ê tre utilisé es pour c om-
parer les outils entre eux .
NOTE : L a ou les v aleurs d ’é mission d e bruit d é c la-
ré es peuv ent aussi ê tre utilisé es pour l’ é v aluation
pré liminaire d e l’ ex position.
AVERTISSEMENT : Portez un serre-tê te
antibruit.
AVERTISSEMENT : L’ émission de bruit
lors de l’ usage réel de l’ outil électrique peut ê tre
différente de la ou des valeurs déclarées, suivant
la façon dont l’ outil est utilisé, particuliè rement
selon le type de piè ce usinée.
AVERTISSEMENT : Les mesures de sécurité
à prendre pour protéger l’ utilisateur doivent ê tre
basées sur une estimation de l’ exposition dans
des conditions réelles d’ utilisation (en tenant
compte de toutes les composantes du cycle
d’ utilisation, comme par exemple le moment de
sa mise hors tension, lorsqu’ il tourne à vide et le
moment de son déclenchement).
Vibrations
Valeur totale d e v ibrations ( somme d e v ec teur triax ial)
d é terminé e selon EN6 0335 -2-6 9 :
É mission d e v ibrations ( ah , M) : 2,5 m/ s2ou moins
I nc ertitud e ( K) : 1 ,5 m/ s2
NOTE : L a ou les v aleurs d e v ibration totales d é c la-
ré es ont é té mesuré es c onf ormé ment à la mé th od e
d e test stand ard et peuv ent ê tre utilisé es pour c om-
parer les outils entre eux .
NOTE : L a ou les v aleurs d e v ibration totales d é c la-
ré es peuv ent aussi ê tre utilisé es pour l’ é v aluation
pré liminaire d e l’ ex position.
AVERTISSEMENT : L’ émission de vibrations
lors de l’ usage réel de l’ outil électrique peut ê tre
différente de la ou des valeurs déclarées, suivant
la façon dont l’ outil est utilisé, particuliè rement
selon le type de piè ce usinée.
AVERTISSEMENT : Les mesures de sécurité
à prendre pour protéger l’ utilisateur doivent ê tre
basées sur une estimation de l’ exposition dans
des conditions réelles d’ utilisation (en tenant
compte de toutes les composantes du cycle
d’ utilisation, comme par exemple le moment de
sa mise hors tension, lorsqu’ il tourne à vide et le
moment de son déclenchement).
Déclaration de conformité CE
Pour les pays européens uniquement
L a d é c laration d e c onf ormité C E est f ournie enA nnex e
A à c e mod e d ’ emploi.

16 FRANÇAIS
CONSIGNES DE SÉ CURITÉ
Consignes de sécurité pour
aspirateur batterie et laire
AVERTISSEMENT : IMPORTANT ! LIRE
ATTENTIVEMENT toutes les consignes de
sécurité et toutes les instructions AVANT
UTILISATION. L e non-respec t d es av ertissements et
d es instruc tions peut entraî ner une é lec troc ution, un
inc end ie et/ ou d e grav es blessures.
1 . Avant l’ utilisation, veillez à ce que l’ aspirateur
soit utilisé par des personnes ayant reçu des
instructions adéquates quant à son utilisation.
2. Si de la mousse ou un liquide sort, éteignez-le
immédiatement.
3. Nettoyez réguliè rement le dispositif limitant le
niveau deau et vériez uil ne présente pas
de signes de dommage.
4 .
Nutilisez pas laspirateur sans le ltre. Remplacez
immédiatement le ltre sil est endommagé.
5 .
UTILISATION D’ UNE RALLONGE. Lorsque vous
utilisez une rallonge en raison de l’ éloigne-
ment de votre source d’ alimentation, essayez
demployer un cordon ui est sufsamment
épais mais pas trop long sous peine d’ affecter
négativement les performances de l’ aspirateur.
En cas d’ utilisation à l’ extérieur, utilisez une
rallonge convenant pour l’ utilisation à l’ air libre.
6 . AVERTISSEMENT DE TENSION : Avant de
connecter l’ aspirateur à une source d’ alimen-
tation (che femelle, prise, etc.), vériez ue la
tension fournie est la mê me que celle indiquée
sur la plaque signalétique de l’ aspirateur.
Une source d’ alimentation avec une tension
supérieure celle spéciée pour laspirateur
peut BLESSER GRAVEMENT l’ opérateur
ainsi qu’ endommager l’ aspirateur. En cas de
doute, NE BRANCHEZ PAS L’ ASPIRATEUR.
L’ utilisation d’ une source d’ alimentation avec
une tension inférieure à celle sur la plaque
signalétique est dangereuse pour le moteur.
7.
É VITEZ LES DÉ MARRAGES INTEMPESTIFS. Veillez
à mettre l’ outil hors tension lors du branchement.
8 .
Nessayez pas daspirer des matériaux inam-
mables, du matériel pyrotechnique, des cigarettes
allumées, des cendres chaudes, des copeaux de
métal chauds, des matériaux tranchants comme un
rasoir, des aiguilles, des morceaux de verre, etc.
9 .
N’ UTILISEZ JAMAIS L’ ASPIRATEUR À
PROX IMITÉ D’ ESSENCE, GAZ, PEINTURE,
ADHÉ SIFS OU AUTRES SUBSTANCES TRÈ S
EX PLOSIVES. L’ interrupteur émet des étincelles
à la mise sous et hors tension. Tout comme le
commutateur du moteur pendant le fonctionne-
ment. Une dangereuse explosion peut survenir.
1 0. Naspirez jamais des matériaux toxiues, can-
cérigè nes, combustibles ou d’ autres produits
dangereux comme l’ amiante, l’ arsenic, le
baryum, le béryllium, le plomb, les pesticides
ou d’ autres matiè res présentant un danger
pour la santé.
1 1 . Nutilisez jamais laspirateur lextérieur sous
la pluie.
1 2. N’ utilisez pas l’ aspirateur prè s de sources de
chaleur (cuisiniè res, etc.).
1 3. MESURES DE PRÉ VENTION CONTRE
L’ É LECTROCUTION. É vitez tout contact phy-
sique avec des surfaces mises à la terre. Par
exemple : tuyaux, radiateurs, cuisiniè res,
réfrigérateurs.
14. Ne bloquez pas les fentes d’ aération. Ces
fentes permettent le refroidissement du
moteur. Il faut éviter soigneusement de les blo-
quer sous peine de griller le moteur en raison
d’ un manque d’ aération.
15. Maintenez constamment une bonne assise et
un bon équilibre.
16. NE MALTRAITEZ PAS LE CORDON
DALIMENTATION. Ne transportez jamais
l’ aspirateur par le cordon, et pour le débran-
cher de la che femelle, ne tirez pas sur le
cordon. Tenez le cordon à l’ écart de la chaleur,
de l’ huile et de bords tranchants. Inspectez
réguliè rement les cordons de l’ aspirateur et
sils sont endommagés, conez leur répara-
tion à un centre de service aprè s-vente agréé.
Inspectez les rallonges périodiquement et
remplacez-les si elles sont détériorées.
1 7.
Ne pliez pas le tuyau, ni ne tirez ou marchez dessus.
18. Arrê tez immédiatement l’ aspirateur si vous
remarquez des performances médiocres
ou toute autre anomalie pendant le
fonctionnement.
19. DÉ BRANCHEZ L’ ASPIRATEUR. Lorsque vous
n’ utilisez pas l’ aspirateur, avant de le réparer
et lors du remplacement des accessoires.
20. Procédez au nettoyage et à l’ entretien de l’ as-
pirateur immédiatement aprè s chaque utilisa-
tion pour le maintenir dans des conditions de
fonctionnement optimales.
21 . ENTRETENEZ SOIGNEUSEMENT
LASPIRATEUR. Laspirateur doit toujours tre
propre pour améliorer la sécurité et les per-
formances. Suivez les instructions pour rem-
placer les accessoires. Les poignées doivent
toujours tre sches, propres et exemptes
d’ huile ou de graisse.
22. VÉ RIFIEZ LES PIÈ CES ENDOMMAGÉ ES.
Avant toute nouvelle utilisation de l’ aspirateur,
vériez soigneusement un carter de protec-
tion ou toute autre piè ce endommagés pour
déterminer qu’ ils fonctionnent bien et rem-
plissent leurs fonctions respectives. Vériez
l’ alignement des piè ces mobiles, le blocage
des piè ces mobiles, les piè ces cassées, l’ ins-
tallation et tout autre état susceptible d’ affec-
ter le fonctionnement. Un carter de protection
ou toute autre piè ce endommagés doivent
ê tre réparés ou remplacés correctement par
un centre de service aprè s-vente agréé sauf
indication contraire de ce mode d’ emploi.
Conez le remplacement des interrupteurs
défectueux à un centre de service aprè s-vente
agréé. N’ utilisez pas l’ aspirateur s’ il ne peut
pas ê tre mis sous et hors tension au moyen de
l’ interrupteur.

17 FRANÇAIS
23.
PIÈ CES DE RECHANGE. En cas de réparation, utili-
sez uniquement des piè ces de rechange identiques.
24 . RANGEZ L’ ASPIRATEUR APRÈ S UTILISATION.
Lorsque vous n’ utilisez pas l’ aspirateur, ran-
gez-le à l’ intérieur.
25 .
Les ltres humides et la partie intérieure du récipient
de liquide doivent ê tre séchés avant rangement.
26 . É pargnez votre aspirateur. Une manipulation
brutale peut entraî ner la rupture de l’ aspirateur
le plus robuste.
27. Ne nettoyez pas l’ extérieur ou l’ intérieur avec
du benzè ne, du diluant ou d’ autres produits
chimiques de nettoyage. Vous risqueriez de le
ssurer ou de le décolorer.
28 . N’ utilisez pas l’ aspirateur dans un endroit
fermé o des vapeurs inammables, explo-
sives ou toxiques sont dégagées par de la
peinture à base d’ huile, du diluant pour pein-
ture, de l’ essence, certains produits antimites,
etc., ou dans des endroits exposés à des pous-
sires inammables.
29 . Ne laissez pas le cordon de l’ aspirateur à
mê me le sol aprè s avoir terminé d’ aspirer. Il
pourrait faire trébucher quelqu’ un ou endom-
mager l’ aspirateur.
30. N’ utilisez pas cet outil ou tout autre sous l’ em-
prise de drogues, de médicaments ou d’ alcool.
31 . Par mesure de sécurité, utilisez des lunettes
à coques ou des lunettes de sécurité avec
écrans latéraux.
32. Utilisez un masque anti-poussiè re dans des
conditions de travail poussiéreuses.
33. Cette machine n’ est pas destinée à ê tre utilisée
par des personnes (y compris les enfants) aux
facultés physiques, sensorielles ou mentales
diminuées ou sans expérience ni expertise.
34 . Les jeunes enfants doivent tre sous la sur-
veillance dun adulte an de sassurer uils ne
jouent pas avec laspirateur.
35 . Ne manipulez jamais la che de cordon ou las-
pirateur avec les mains mouillées.
36 . Redoublez de précaution lorsque vous net-
toyez des escaliers.
37. N’ utilisez pas l’ aspirateur comme marchepied
ou établi. La machine pourrait tomber et pro-
voquer des blessures corporelles.
Utilisation et entretien des outils fonctionnant sur batterie
1 . Rechargez la batterie uniquement avec le char-
geur spécié par le fabricant. Un chargeur qui
est adapté à un type spécique de batterie peut
présenter un risque d’incendie s’il est utilisé avec
un autre ty pe d e batterie.
2. Utilisez un outil électrique uniquement avec la
batterie spéciuement indiuée. L ’ utilisation
de toute autre batterie peut présenter un risque de
blessure et d ’ inc end ie.
3. Lorsque vous n’ utilisez pas la batterie, tenez-la
lécart des objets métalliues, comme des
trombones, piè ces de monnaie, clés, clous,
vis ou autres petits objets métalliues, sus-
ceptibles de créer une connexion entre deux
bornes. C ourt-c irc uiter les bornes d ’ une batterie
entre elles peut provoquer des brlures ou un
inc end ie.
4 . Dans des conditions d’ utilisation inadéquate,
il peut y avoir une fuite de l’ électrolyte de la
batterie. Le cas échéant, évitez tout contact
avec ce liquide. En cas de contact accidentel,
rincez à l’ eau. Si le liquide pénè tre dans les
yeux, consultez par ailleurs un médecin. L e
liquide s’échappant de la batterie peut provoquer
une irritation ou des brlures.
5 . N’ utilisez pas une batterie ou un outil s’ ils sont
endommagés ou modiés. U ne batterie end om-
magée ou modiée peut avoir un comportement
impré v isible susc eptible d ’ entraî ner un inc end ie,
une ex plosion ou d es blessures.
6 . N’ exposez pas la batterie ou l’ outil au feu ou à
une température excessive. L ’ ex position au f eu
ou à une tempé rature supé rieure à 1 30 ° C peut
provoquer une explosion.
7.
Respectez toutes les instructions de charge et
ne chargez pas la batterie ou l’ outil en dehors de
la plage de température indiquée dans les ins-
tructions. U ne c h arge inc orrec te ou à une tempé ra-
ture en dehors de la plage indiquée peut endomma-
ger la batterie et augmenter le risque d’incendie.
CONSERVEZ CES INSTRUCTIONS.
AVERTISSEMENT : NE vous laissez PAS
tromper (au l dune utilisation répétée) par un
sentiment d’ aisance et de familiarité avec le
produit, en négligeant le respect rigoureux des
consignes de sécurité qui accompagnent le pro-
duit en question. La MAUVAISE UTILISATION de
l’ outil ou l’ ignorance des consignes de sécurité
indiquées dans ce mode d’ emploi peut entraî ner
de graves blessures.
Consignes de sécurité importantes
pour la batterie
1 . Avant d’ utiliser la batterie, lisez toutes les
instructions et précautions relatives (1) au
chargeur de batterie, (2) à la batterie, et (3) au
produit utilisant la batterie.
2. Ne démontez pas la batterie.
3. Cessez immédiatement l’ utilisation si le temps
de fonctionnement devient excessivement
court. Il y a risque de surchauffe, de brû lures,
voire d’ explosion.
4 . Si l’ électrolyte pénè tre dans vos yeux, rin-
cez-les à l’ eau claire et consultez immédiate-
ment un médecin. Il y a risque de perte de la
vue.
5 . Ne court-circuitez pas la batterie :
( 1 ) Ne touchez les bornes avec aucun maté-
riau conducteur.
( 2) É vitez de ranger la batterie dans un
conteneur avec dautres objets métal-
liques, par exemple des clous, des piè ces
de monnaie, etc.
( 3) N’ exposez pas la batterie à l’ eau ou à la
pluie.
Un court-circuit de la batterie peut provoquer
une intensité de courant élevée, une sur-
chauffe, parfois des brû lures et mê me une
panne.

18 FRANÇAIS
6 . Ne rangez pas l’ outil et la batterie dans un
endroit où la température risque d’ atteindre ou
de dépasser 50 ° C.
7. Ne jetez pas la batterie au feu mme si elle est
sérieusement endommagée ou complè tement
épuisée. La batterie peut exploser au contact
du feu.
8 . É vitez de laisser tomber ou de cogner la
batterie.
9 . N’ utilisez pas la batterie si elle est
endommagée.
1 0. Les batteries au lithium-ion contenues sont
soumises aux exigences de la législation sur
les marchandises dangereuses.
L ors d u transport c ommerc ial par d es tierc es
parties ou d es transitaires par ex emple, d es ex i-
gences spéciques en matière d’étiquetage et
d ’ emballage d oiv ent ê tre respec té es.
P our la pré paration d e l’ artic le ex pé d ié , il est
né c essaire d e c onsulter un ex pert en maté riau
d angereux . Veuillez é galement respec ter les
ré glementations nationales susc eptibles d ’ ê tre
plus d é taillé es.
R ec ouv rez les c ontac ts ex posé s av ec d u ruban
adhésif ou du ruban de masquage et emballez la
batterie de telle sorte qu’elle ne puisse pas bouger
d ans l’ emballage.
1 1 . Suivez les réglementations locales en matiè re
de mise au rebut des batteries.
1 2. Utilisez les batteries uniquement avec les
produits spéciés par Makita. L ’ insertion d e
batteries d ans d es prod uits non c onf ormes peut
provoquer un incendie, une chaleur excessive,
une ex plosion ou une f uite d e l’ é lec troly te.
CONSERVEZ CES
INSTRUCTIONS.
ATTENTION : N’ utilisez que des batteries
Makita d’ origine. L’utilisation de batteries de marque
autre que Makita ou de batteries modiées peut pro-
voquer l’explosion des batteries, ce qui présente un
risque d’incendie, de dommages matériels et corpo-
rels. C ela annulera é galement la garantie Makita pour
l’ outil et le c h argeur Makita.
Conseils pour assurer la durée
de vie optimale de la batterie
1 . Chargez la batterie avant qu’ elle ne soit com-
pltement déchargée. Arrtez toujours loutil
et rechargez la batterie quand vous remarquez
que la puissance de l’ outil diminue.
2. Ne rechargez jamais une batterie complte-
ment chargée. La surcharge réduit la durée de
service de la batterie.
3. Chargez la batterie à une température
ambiante comprise entre 10 ° C et 40 ° C. Avant
de charger une batterie chaude, laissez-la
refroidir.
4 . Rechargez la batterie si elle est restée inutili-
sée pendant une période prolongée (plus de
six mois).
DESCRIPTION DES PIÈ CES
Modèle DVC150L
(Modèle avec ltre en tissu (pour les poussières sèches et humides))
Fig.1:
1. C ouv erc le d u ré serv oir 2. F lotteur 3. C h ambre
du otteur 4. F iltre en tissu 5. R é serv oir
Modèle DVC151L
(Modèle avec ltre à poudre (pour les poussières sèches))
Fig.2:
1. C ouv erc le d u ré serv oir 2. F iltre à poud re
( H EP A ) 3. A mortisseur 4. Préltre 5. R é serv oir
DESCRIPTION DU
FONCTIONNEMENT
Utilisation sur le courant secteur :
AVERTISSEMENT :
Avant de brancher l’ aspi-
rateur, assurez-vous toujours ue son interrupteur
est en position d’ arrê t. Il y a risque de démarrage
intempestif et d e blessure grav e si l’ on branc h e l’ aspira-
teur alors que l’interrupteur est en position de marche.
Branchez la che dans une source d’alimentation.
Fig.3: 1. F ic h e ( la f orme et la longueur d u c ord on
peuv ent v arier d ’ un pay s à l’ autre)
Le voyant d’alimentation secteur s’allume lorsque vous
plac ez le bouton d e v eille sur le c ô té « I » .
Fig.4: 1. Voy ant d ’ alimentation sec teur
NOTE :
Mê me si v ous utilisez le mod e d ’ alimentation
CC, l’aspirateur bascule automatiquement sur le mode
d’alimentation secteur lorsque vous le branchez.
NOTE : S i l’aspirateur est d é branc h é en c ours d e
fonctionnement alors que la batterie est insérée, il
entre en é tat d e v eille.
Utilisation sur batterie :
ATTENTION : Assurez-vous toujours ue
l’ aspirateur est hors tension et débranché, et que
sa batterie est retirée avant de lajuster ou de
vérier son fonctionnement.
Insertion ou retrait de la batterie
ATTENTION : teignez toujours loutil avant
de mettre en place ou de retirer la batterie.
ATTENTION : Tenez fermement l’ aspirateur et
la batterie lors de la mise en place ou du retrait de
la batterie. S i v ous ne tenez pas f ermement l’ aspira-
teur et la batterie, ils peuv ent v ous glisser d es mains,
et s’ abî mer ou v ous blesser.
ATTENTION : Veillez à ne pas vous pincer les
doigts lors de l’ ouverture ou de la fermeture du
couvercle de batterie. Vous risqueriez autrement de
v ous blesser.

19 FRANÇAIS
P our mettre la batterie en plac e, libé rez d ’ abord le
v errou, puis ouv rez le c ouv erc le d e batterie. C ec i f ait,
insé rez la batterie.
Fig.5: 1. Verrou 2. C ouv erc le d e batterie
A lignez la languette sur la batterie av ec la rainure sur le
compartiment et insérez-la. Insérez-la à fond jusqu’à ce
qu’un léger déclic se fasse entendre. Verrouillez ensuite
le c ouv erc le d e batterie.
Fig.6: 1. Batterie
P our retirer la batterie, f aites-la glisser h ors d e l’ outil
tout en f aisant glisser le bouton à l’ av ant d e la batterie.
ATTENTION : Toujours installer la batterie
fond jusu ce ue lindicateur rouge soit invi-
sible. S inon, elle pourrait tomber ac c id entellement d e
l’aspirateur, au risque de vous blesser ou de blesser
quelqu’un se trouvant à proximité.
ATTENTION : N’ insérez pas la batterie de
force. Si elle ne glisse pas facilement, c’est que vous
ne l’ insé rez pas c orrec tement.
NOTE : L ’ aspirateur ne f onc tionne pas av ec une
seule batterie.
NOTE : Retirez la che de l’aspirateur de la rallonge
lorsque vous utilisez l’aspirateur avec les batteries.
Indication de la charge restante de
la batterie
Uniquement pour les batteries avec voyant
lumineux
Fig.7: 1. T é moins 2. Bouton de vérication
Appuyez sur le bouton de vérication sur la batterie
pour indiquer la charge restante de la batterie. Les
témoins s’allument pendant quelques secondes.
Témoins Charge
restante
Allumé É teint Clignotant
75 % à 1 00 %
5 0 % à 75 %
25 % à 5 0 %
0 % à 25 %
C h argez la
batterie.
A nomalie
possible
d e la batterie.
NOTE : S elon les c ond itions d ’ utilisation et la tem-
pé rature ambiante, l’ ind ic ation peut ê tre lé gè rement
d if f é rente d e la c apac ité ré elle.
Indication de la charge restante de
la batterie
Fig.8 : 1. T é moin d e la batterie 2. Bouton d e
vérication
Fig.9
Appuyez sur le bouton de vérication pour indiquer la
c h arge restante d e la batterie. L es té moins d e batterie
correspondent à chaque batterie.
Statut du témoin de la batterie Charge
restante de la
batterie
Allumé É teint Clignotant
5 0 % à 1 00 %
20 % à 5 0 %
0 % à 20 %
C h argez la
batterie
Systè me de protection de l’ outil/la
batterie
L’outil est équipé d’un système de protection de l’outil/la
batterie. Ce système coupe automatiquement l’alimen-
tation v ers le moteur pour prolonger la d uré e d e v ie d e
l’ outil et d e la batterie. S i l’ outil ou la batterie se trouv e
d ans l’ une d es situations suiv antes, l’ outil c essera
automatiquement de fonctionner.
Protection contre la surcharge
Lorsque l’outil est utilisé d’une manière provoquant un
appel d e c ourant anormalement é lev é , l’ outil s’arrê te
automatiquement sans indication. Dans ce cas, éteignez
l’outil et arrtez la tche ayant provoqué la surcharge de
l’ outil. P uis rallumez l’ outil pour reprend re la tâ c h e.
Protection contre la surchauffe
Allumé Clignotant
En c as d e surc h auf f e d e l’ outil, c elui-c i s’ arrê te automa-
tiquement et le témoin de la batterie clignote pendant
6 0 sec ond es env iron. D ans c e c as, laissez l’ outil ref roi-
d ir av ant d e rallumer l’ outil.
Protection contre la décharge totale
de la batterie
Lorsque la charge restante de la batterie devient très
faible, l’outil s’arrte automatiquement. Si le produit ne
f onc tionne pas mê me en ac tionnant les boutons, retirez
les batteries d e l’ outil et c h argez -les.

20 FRANÇAIS
Fonctionnement de la gâ chette
Fig.10: 1. Bouton d e v eille 2. Bouton d ’ alimenta-
tion 3. Bouton d e ré glage d e la puissanc e
d ’ aspiration
P our mettre en marc h e l’ aspirateur :
1 . P lac ez le bouton d e v eille sur la position « I » .
L ’ aspirateur se met à l’ é tat d e v eille.
2. A ppuy ez sur le bouton d ’ alimentation.
Pour que l’aspirateur entre en mode de veille, appuyez
à nouv eau sur le bouton d ’ alimentation.
P our é teind re l’ aspirateur, plac ez le bouton d e v eille sur
la position « O » .
L a puissanc e d ’ aspiration peut ê tre ré glé e en f onc tion
d e v os besoins.
L a puissanc e d ’ aspiration peut ê tre augmenté e en tour-
nant le bouton d e ré glage d e la puissanc e d ’ aspiration
d u sy mbole au sy mbole .
REMARQUE : Placez toujours le bouton de veille
sur la position « O » si v ous pré v oy ez d e ne pas
utiliser l’aspirateur pend ant une pé riod e prolongé e.
L ’ aspirateur c onsomme d e l’ é nergie à l’ é tat d e v eille.
Arrê t automatique de l’ aspiration
pendant l’ aspiration humide
Uniquement pour le modèle avec ltre en tissu
AVERTISSEMENT : N’ utilisez pas l’ aspira-
teur pendant une période prolongée si le otteur
fonctionne. Si vous utilisez l’aspirateur avec son ot-
teur f onc tionnant pend ant une pé riod e prolongé e, une
surc h auf f e peut se prod uire et d é f ormer l’ aspirateur.
AVERTISSEMENT : Ne ramassez pas la
mousse ou les liquides savonneux. S i v ous
ramassez de la mousse ou des liquides savonneux,
la mousse peut s’ é c h apper d e la sortie d ’ air av ant
que le otteur fonctionne. Si vous continuez à utiliser
l’ aspirateur d ans c ette c ond ition, v ous pourriez v ous
é lec troc uter ou l’ aspirateur pourrait ê tre c assé .
L’arrt automatique de l’aspiration fonctionne uniquement
lorsque vous utilisez le otteur et la chambre du otteur.
L’aspirateur est pourvu d’un système de otteur qui
empê c h e l’ immersion d e l’ eau d ans le moteur lors d u
ramassage d’une plus grande quantité d’eau. Lorsque
le réservoir est plein et que l’aspirateur ne ramasse plus
d ’ eau, mettez -le h ors tension et v id ez le ré serv oir.
Blocage ou déblocage de la roulette
Fig.11: 1. R oulette 2. F rein d e bloc age 3. P osition
L I BR E 4. P osition BL O Q U É E
Bloquer la roulette s’avère pratique pour ranger l’as-
pirateur, interrompre la tâ c h e en c ours et immobiliser
l’ aspirateur.
P our utiliser le f rein, bougez -le av ec la main.
Pour bloquer la roulette avec le frein, abaissez le frein de
bloc age et la roulette ne pourra plus tourner. P our libé rer la
roulette de la position bloquée, soulevez le frein de blocage.
NOTE : Lorsque vous déplacez l’aspirateur, assu-
rez-vous que la roulette est débloquée. Si vous dépla-
cez l’aspirateur avec la roulette en position bloquée,
vous risquez d’endommager la roulette.
Poignée de transport
T ransportez l’ aspirateur en le tenant par la poigné e
situé e sur la tê te. L a poigné e est ré trac table sur la tê te
lorsqu’elle n’est pas utilisée.
Fig.12
ASSEMBLAGE
ATTENTION : Assurez-vous toujours ue
l’ aspirateur est hors tension et débranché, et
que sa batterie est retirée avant d’ effectuer toute
tâ che dessus.
ATTENTION : Portez toujours un masue
anti-poussiè re pendant l’ assemblage ou
l’ entretien.
Mise en place du ltre poudre
(HEPA) et du préltre (pour les
poussiè res sè ches)
Accessoire en option pour le modèle avec ltre en
tissu
ATTENTION : Ne ramassez jamais deau,
d’ autres liquides ou de poussiè res humides
lorsue vous utilisez le ltre poudre. Le ltre à
poud re pourrait autrement se rompre.
Utilisation du ltre à poudre :
1. Retirez la chambre du otteur et le otteur en
d é posant les boulons.
Fig.13: 1. F lotteur 2. Chambre du otteur
2. Placez le préltre dans le réservoir en alignant les
repè res d ’emplac ement d e montage.
3. Montez l’amortisseur sur le ltre à poudre, puis
placez-les dans le préltre en alignant les repères
d ’ emplac ement d e montage.
4. Enn, montez le couvercle du réservoir et
v errouillez -le.
Fig.14: 1. C ouv erc le d u ré serv oir 2. F iltre à
poud re ( H EP A ) 3.A mortisseur 4. Préltre
5. R é serv oir 6. R epè re d ’emplac ement d e
montage
REMARQUE : Avant dutiliser le ltre poudre,
assurez-vous ue le préltre et lamortisseur sont
toujours utilisés ensemble. I l est interd it d ’installer
uniquement le ltre à poudre.
Other manuals for DVC150L
5
This manual suits for next models
1
Table of contents
Languages:
Other Makita Vacuum Cleaner manuals

Makita
Makita DVC665 User manual

Makita
Makita DCL142 User manual

Makita
Makita DVC261 User manual

Makita
Makita XCV22 User manual

Makita
Makita DCL286F User manual

Makita
Makita 191D73-9 User manual

Makita
Makita VC008G User manual

Makita
Makita VC2211M User manual

Makita
Makita VC4210M User manual

Makita
Makita DCL180F User manual

Makita
Makita DVC152L User manual

Makita
Makita DRC300 User manual

Makita
Makita DVC860L User manual

Makita
Makita DVC350 User manual

Makita
Makita DVC660Z User manual

Makita
Makita DRC200 User manual

Makita
Makita DVC340 User manual

Makita
Makita XCV19 User manual

Makita
Makita DCL140 User manual

Makita
Makita VC011G User manual