For right or left hand use:
• Right hand orientation of 1” kits is easily changed
by converting #5 Tool and FasGroov Square for left
hand fabrication. Tool handles may also be turned
around to provide left hand grip angle.
Right hand
operation.
Left hand
operation.
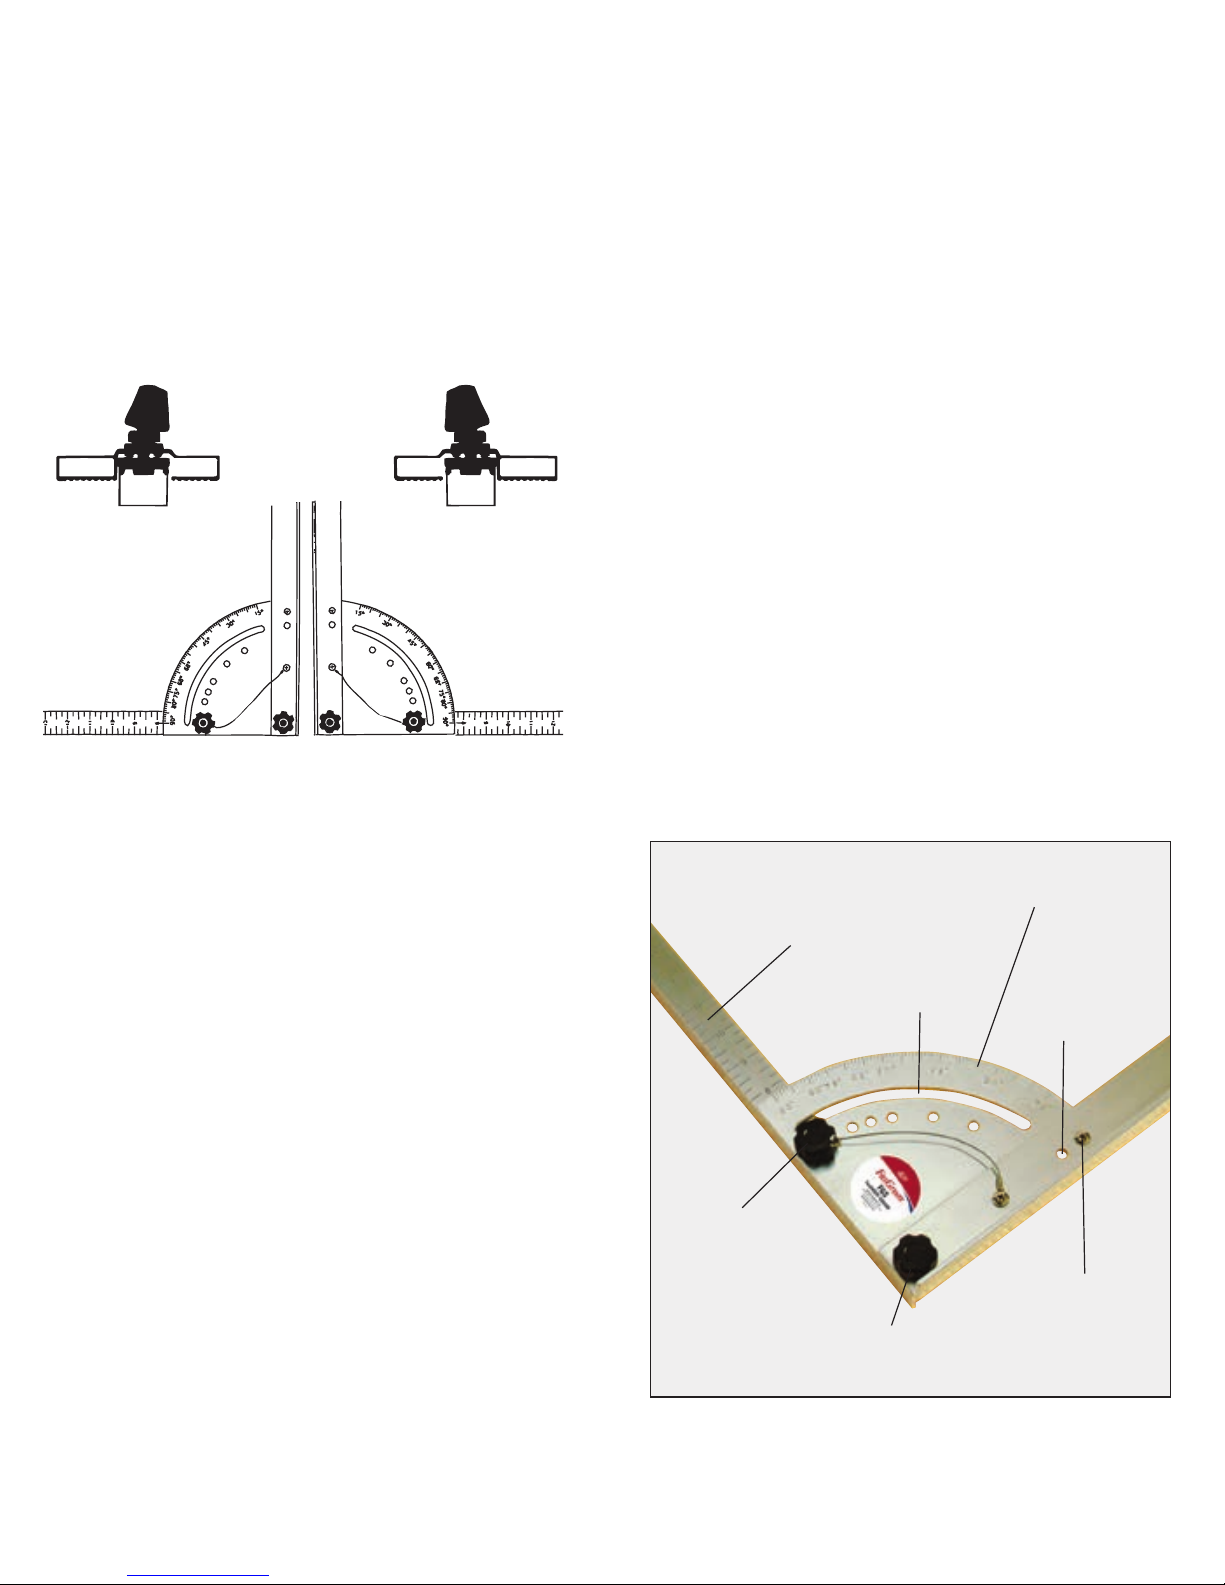
CONVERTING FASGROOV
SQUARE FOR LEFT HAND USE.
1. Remove the angle adjustment knob and the end pivot knob.
2. Position the ruler stamped leg so that the 3 holes are to
your left. (Rule reads left to right.)
3. Remove the protractor for the “L” shaped leg by removing
the two screws.
4. Flip the protractor over and install on the opposite end of the
“L” shaped leg.
5. Place the “L” leg/protractor assembly on top of the ruled leg.
6. Align the pivot knob holes and install the pivot knob.
7. Install the angle adjustment knob in any of the fixed positions
or the sliding position.
8. After converting your square for left hand use, double check
the accuracy in the fixed 90° position with a roofing square.
Built-in manufacturing hole tolerances will allow you
to true the square.
Note: 1-1/2” Kits cannot be converted for left hand use.
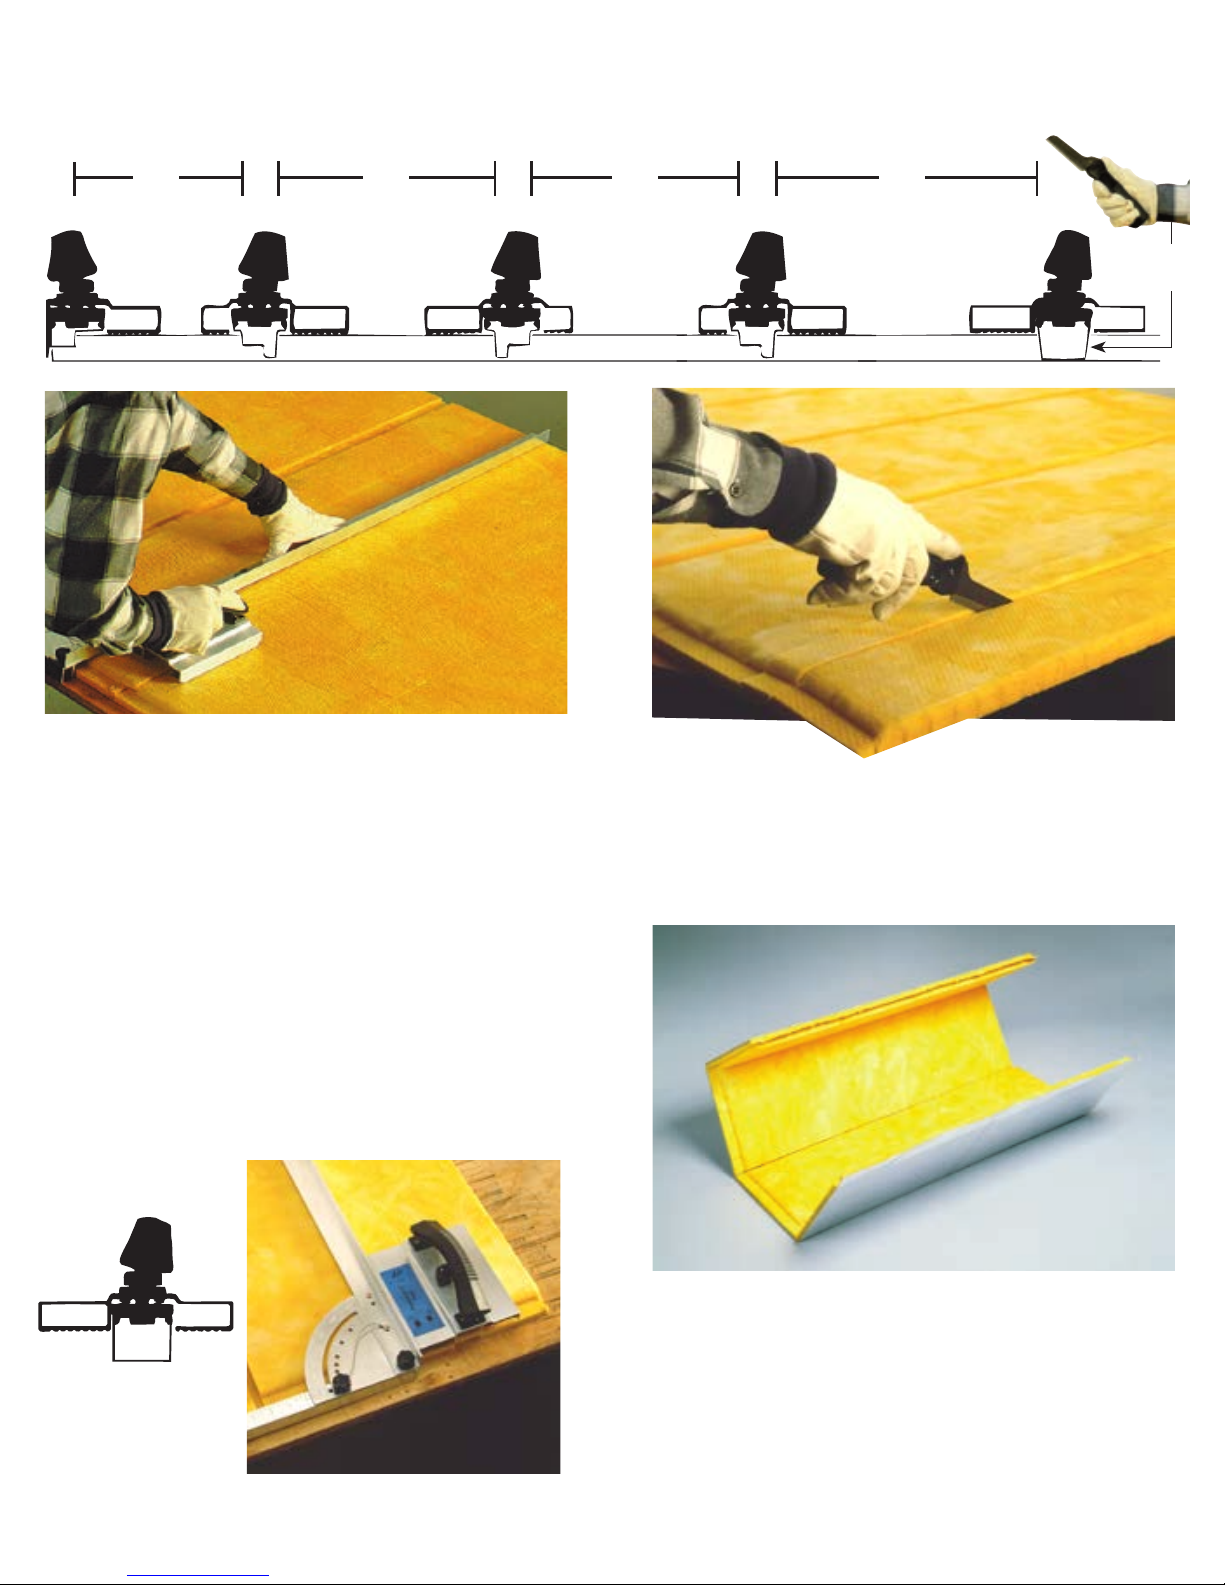
SETTING UP TOOL
Adjusting Fasgroov Square:
PREDETERMINED SETTINGS
Place adjustment knob into hole corresponding
to most used angles.
OTHER ANGLES
Place adjustment screw into protractor
adjustment slot and tighten at desired angle.
STORAGE
Step 1:
Remove angle adjustment knob and
fold ends of FasGroov Square together.
Step 2:
Place angle adjustment knob into the
storage hole and tighten.
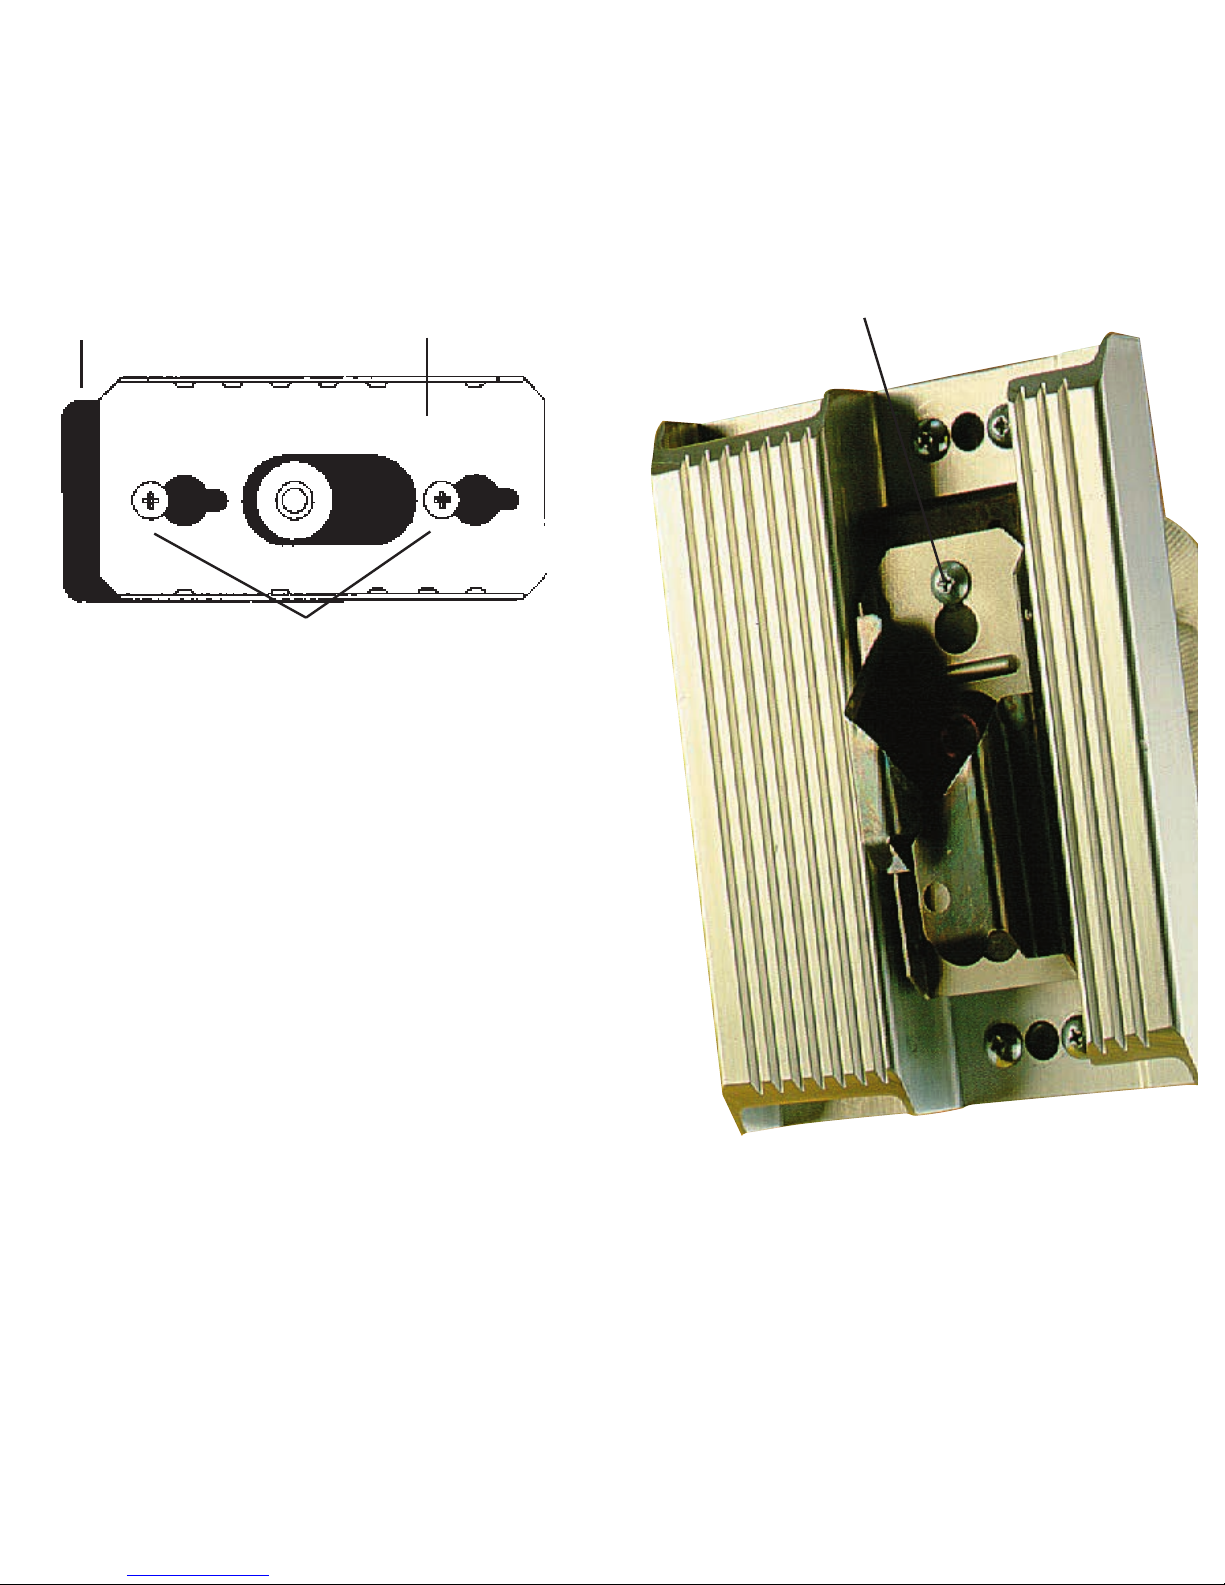
Ruler stamped leg.
Pivot knob.
Angle adjustment
knob shown here in
90° predetermined
hole setting.
Adjustment slot
for other angles. Storage Hole
for angle
adjustment knob.
Screws holding
protractor to “L”
shaped leg.
Protractor scale etched 2 sides
for right or left hand use.
8 9