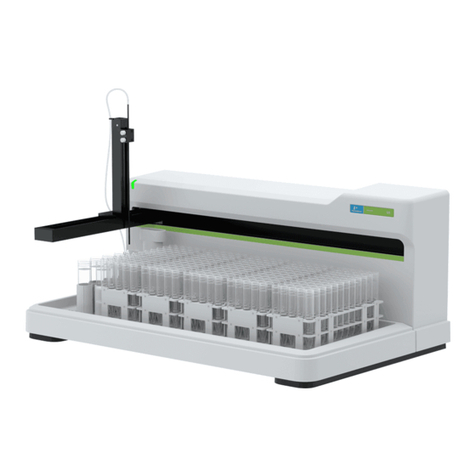
Malvern APS5000 User guide

PARTICLE SIZE
MOLECULAR SIZE
ZETASIZER APS
BASIC GUIDE
MAN0494
MRK1946-01
www.malvern.com
Malvern Instruments Limited
Grovewood Road, Malvern
Worcestershire, WR14 1XZ, UK
Tel +44 1684 892456
Fax +44 1684 892789
MRK1946-01_APS_basic_guide_cover_58pp.indd 1MRK1946-01_APS_basic_guide_cover_58pp.indd 1 06/08/2013 17:27:3506/08/2013 17:27:35


Zetasizer APS
Basic Guide
MAN0494 Issue 1.0 July 2013
English
MAN0494-1 (Zetasizer APS Basic Guide).book Page i Friday, August 9, 2013 2:08 PM

Copyright © 2008, 2013 Malvern Instruments Ltd.
Malvern Instruments pursues a policy of continual improvement due to technical development. We
therefore reserve the right to deviate from information, descriptions, and specifications in this
publication without notice. Malvern Instruments shall not be liable for errors contained herein or
for incidental or consequential damages in connection with the furnishing, performance or use of
this material. No reproduction or transmission of any part of this publication is allowed without the
express written permission of Malvern Instruments Ltd.
Head office:
Malvern Instruments Ltd.
Enigma Business Park,
Grovewood Road,
Malvern,
Worcestershire WR14 1XZ
United Kingdom.
Tel + [44] (0)1684-892456
Fax + [44] (0)1684-892789
Zetasizer, Malvern and the 'hills' logo are registered trademarks in the UK and/or other countries,
and are owned by Malvern Instruments Ltd.
Windows is a registered trademark of Microsoft Corporation.
Tygon is a registered trademark of Saint-Gobain Corporation.
MAN0494-1 (Zetasizer APS Basic Guide).book Page ii Friday, August 9, 2013 2:08 PM

Zetasizer APS Basic Guide Page i
Introduction to this manual
Introduction . . . . . . . . . . . . . . . . . . . . . . . . . . . . . . . . . . . . . . . . . 1-1
Using this manual. . . . . . . . . . . . . . . . . . . . . . . . . . . . . . . . . . . . . 1-1
Access to the instrument . . . . . . . . . . . . . . . . . . . . . . . . . . . . . . . 1-2
Where to get help . . . . . . . . . . . . . . . . . . . . . . . . . . . . . . . . . . . . . 1-2
Site requirements
Introduction . . . . . . . . . . . . . . . . . . . . . . . . . . . . . . . . . . . . . . . . . 2-1
Environmental conditions . . . . . . . . . . . . . . . . . . . . . . . . . . . . . . . 2-1
Space required. . . . . . . . . . . . . . . . . . . . . . . . . . . . . . . . . . . . . . . 2-2
Power requirements . . . . . . . . . . . . . . . . . . . . . . . . . . . . . . . . . . . 2-3
Computer specification. . . . . . . . . . . . . . . . . . . . . . . . . . . . . . . . . 2-4
Additional services . . . . . . . . . . . . . . . . . . . . . . . . . . . . . . . . . . . . 2-4
Laser safety . . . . . . . . . . . . . . . . . . . . . . . . . . . . . . . . . . . . . . . . . 2-5
Health and safety
General warnings and Safety regulations . . . . . . . . . . . . . . . . . . . . 3-1
Electrical warnings and Safety regulations . . . . . . . . . . . . . . . . . . . 3-2
PAT testing . . . . . . . . . . . . . . . . . . . . . . . . . . . . . . . . . . . . . . . . . 3-2
Power cords and Power safety . . . . . . . . . . . . . . . . . . . . . . . . . . . 3-2
Laser safety regulations . . . . . . . . . . . . . . . . . . . . . . . . . . . . . . . . 3-4
Temperature warnings . . . . . . . . . . . . . . . . . . . . . . . . . . . . . . . . . 3-5
Sample handling warnings . . . . . . . . . . . . . . . . . . . . . . . . . . . . . . 3-6
Moving the system . . . . . . . . . . . . . . . . . . . . . . . . . . . . . . . . . . . . 3-7
Disposal of the instrument . . . . . . . . . . . . . . . . . . . . . . . . . . . . . . 3-8
Making a measurement
Introduction . . . . . . . . . . . . . . . . . . . . . . . . . . . . . . . . . . . . . . . . . 4-1
Switching on & starting the software . . . . . . . . . . . . . . . . . . . . . . . 4-1
Making a measurement . . . . . . . . . . . . . . . . . . . . . . . . . . . . . . . . 4-2
Viewing the results . . . . . . . . . . . . . . . . . . . . . . . . . . . . . . . . . . . . 4-7
Table of contents
MAN0494-1 (Zetasizer APS Basic Guide).book Page i Friday, August 9, 2013 2:08 PM

Table of Contents Zetasizer APS Basic Guide
Page ii MAN 0494
Maintenance
Introduction . . . . . . . . . . . . . . . . . . . . . . . . . . . . . . . . . . . . . . . . . 5-1
Transit locks. . . . . . . . . . . . . . . . . . . . . . . . . . . . . . . . . . . . . . . . . 5-1
Cleaning the instrument . . . . . . . . . . . . . . . . . . . . . . . . . . . . . . . . 5-3
Replacing the system fuse . . . . . . . . . . . . . . . . . . . . . . . . . . . . . . 5-8
Replacing the tubing and needle . . . . . . . . . . . . . . . . . . . . . . . . . . 5-8
Installing the Zetasizer APS. . . . . . . . . . . . . . . . . . . . . . . . . . . . . 5-19
Changing the computer . . . . . . . . . . . . . . . . . . . . . . . . . . . . . . . 5-21
Appendix
Specification . . . . . . . . . . . . . . . . . . . . . . . . . . . . . . . . . . . . . . . . A-1
Chemical compatibility . . . . . . . . . . . . . . . . . . . . . . . . . . . . . . . . . A-2
Disposal of Electrical & Electronic Equipment . . . . . . . . . . . . . . . . . A-3
Regulatory statements . . . . . . . . . . . . . . . . . . . . . . . . . . . . . . . . . A-4
MAN0494-1 (Zetasizer APS Basic Guide).book Page ii Friday, August 9, 2013 2:08 PM

Zetasizer APS Basic Guide Page 1-1
1
Introduction
to this manual
Introduction
This manual covers the operation and maintenance of the Zetasizer APS particle
analyser.
Note
For the Zetasizer serial number double-click the APS icon in the status
bar.
Using this manual
Read the Health and Safety information in Chapter 3 before using the instrument.
For more detail on the Zetasizer software, use its Help system. Each window has a
Help button giving information about it. Advice buttons present sample-related
content.
Menu commands
Software menu commands are referred to in the form main menu-menu item.
As an example, the command Measure-Plate Scheduler refers to selecting the
Plate Scheduler item from the Measure menu. Menu commands are shown in
bold text.
Zetasizer
instrument
Model
number Measurement types
Zetasizer APS APS2000 Particle size
Zetasizer APS +
PTC-1000
APS5000 Particle size
MAN0494-1 (Zetasizer APS Basic Guide).book Page 1 Friday, August 9, 2013 2:08 PM

Chapter 1 Introduction to this manual
Page 1-2 MAN 0494
1
Access to the instrument
Malvern personnel
Malvern personnel (service engineers, representatives, etc.) have full access to the
instrument and are the only people authorised to perform all service procedures
that may require the removal of the main covers.
Warning!
Removal of the main covers by unauthorized personnel, even a supervisor,
will invalidate the warranty of the instrument. It is however permissible to
lift off the front cover, which provides internal access to the user-servicea-
ble tubes and needle. Refer to Chapter 5 for more information on this.
Supervisor
The supervisor is responsible for the management and safety of the instrument and
its operation. The supervisor also trains the operators. They can perform all user
maintenance routines identified in Chapter 5.
The supervisor has access to a more detailed manual in English.
Operator
An operator is a person trained in the use of the system. The operator can perform
all user maintenance routines identified in Chapter 5, except changing the fuse.
Warning!
Failure to follow these guidelines could result in exposure to hazardous
voltages and laser radiation.
Where to get help
Help desk
Direct all queries regarding the system to the local Malvern representative initially.
Please quote the following information:
Model and serial number of the instrument (located on the rear panel).
The Zetasizer software version (select Help-About within the software).
MAN0494-1 (Zetasizer APS Basic Guide).book Page 2 Friday, August 9, 2013 2:08 PM

Introduction to this manual Chapter 1
Zetasizer APS Basic Guide Page 1-3
Contact the United Kingdom help desk if the local Malvern representative is not
available. The direct line to the United Kingdom Helpdesk is +44 (0) 1684 891800.
This help line is primarily English speaking.
Remote support
Malvern Instruments offers a remote support service over the Internet. (A direct
Internet connection must be available.)
Benefits include fast and efficient fault diagnosis, reducing downtime and costs.
Online user training is also available, plus software updates.
Malvern website - www.malvern.com
The Malvern website offers a comprehensive range of particle characterization
resources for use by customers 24 hours a day, seven days a week.
Resources include software downloads, frequently asked questions, a knowledge
base and Application Notes, plus information on other particle characterization
solutions that Malvern can provide.
MAN0494-1 (Zetasizer APS Basic Guide).book Page 3 Friday, August 9, 2013 2:08 PM

Chapter 1 Introduction to this manual
Page 1-4 MAN 0494
MAN0494-1 (Zetasizer APS Basic Guide).book Page 4 Friday, August 9, 2013 2:08 PM

Zetasizer APS Basic Guide Page 2-1
2
Site requirements
Introduction
This document outlines site requirements for a Zetasizer APS. Ensure all these are
met before the instrument is delivered.
Environmental conditions
The site must be:
Indoors and away from strong light (windows).
Away from heat sources like radiators.
Well ventilated (for noxious materials).
On a horizontal vibration-free bench.
We recommend that the computer is positioned to the right of the instrument.
MAN0494-1 (Zetasizer APS Basic Guide).book Page 1 Friday, August 9, 2013 2:08 PM

Chapter 2 Site requirements
Page 2-2 MAN 0494
2
Space required
Provide enough space to allow easy access to all components and connections. This
diagram shows the recommended space for a system. Always place the (optional)
PTC-1000 to the left of the instrument as the heat output is from the left side of
the PTC-1000 and this will prevent hot air being directed towards the APS.
ill 8330
Allow at least 800mm above the bench surface for access to the plate holder area.
The system dimensions are given below:
Component Width Depth Height
Zetasizer APS 500mm 410mm 420mm
PTC-1000 195mm 351mm 304mm
Computer Refer to manufacturer’s literature.
800mm
500mm
100mm
150mm
200mm
200mm
MAN0494-1 (Zetasizer APS Basic Guide).book Page 2 Friday, August 9, 2013 2:08 PM

Site requirements Chapter 2
Zetasizer APS Basic Guide Page 2-3
Power requirements
The mains power supply must be clean and filtered. If necessary, fit an Un-inter-
ruptible Power Supply (UPS) to remove any spikes or noise. The power require-
ments are:
Power cords and Power safety
The notes in this section indicate best practice. Adhere to these when connecting
the instrument to the power supply.
Warning!
Do not operate this product with a damaged power cord set. If the power
cord set is damaged in any way, replace it immediately.
Warning!
Do not use the power cord supplied with this product on any other
products.
Power cord set requirements
Power cord sets must meet the requirements of the country where the product is
used. For more information, contact a Malvern representative.
General requirements
The following requirements apply to all countries:
The power cord must be approved by an acceptable accredited agency respon-
sible for evaluation in the country where the power cord set will be installed.
Component Power requirement Power sockets required
Zetasizer APS 90-260V AC, 50-60Hz,
150W
1
PTC-1000 115-230V AC, 50-60Hz,
294W
1
Computer See manufacturer’s documentation
Computer monitor See manufacturer’s documentation
Printer See manufacturer’s documentation
MAN0494-1 (Zetasizer APS Basic Guide).book Page 3 Friday, August 9, 2013 2:08 PM

Chapter 2 Site requirements
Page 2-4 MAN 0494
The power cord set must have a minimum current capacity of 10A (7A in Japan
only) and a nominal voltage rating of 125 or 250 volts AC, as required by each
country's power system.
The area of the wire must be a minimum of 0.75mm2or 18AWG, and the
length of the cord must be less than 3m.
The power cord must be routed so it will not be walked on, pinched by items
placed on or against it, or become wet. Pay particular attention to the plug, the
electrical outlet and the point where the cord exits the product.
Computer specification
As with any software, running other applications at the same time may affect the
speed of the Zetasizer software.
Minimum recommended specification
Contact the Malvern Helpdesk or website for the recommended computer specifi-
cation, otherwise consult the Software update notification document supplied on
the software CD.
Note:
A laptop computer must have a free USB port to operate with the system.
Networks
The PC running the Zetasizer software can be connected to a network, but the
Zetasizer software must be run locally.
Additional services
Purge specification
If measuring samples at low temperatures there is a risk of condensation occurring
on the cell; this occurs when the measurement temperature is less than the ‘dew
point’ of the ambient air surrounding the cell being measured. This is particularly
likely in humid climates.
If this may be a problem the purge inlet port can be used to connect a dry air supply
i.e. a supply with a dew point below the target temperature. This removes any
MAN0494-1 (Zetasizer APS Basic Guide).book Page 4 Friday, August 9, 2013 2:08 PM

Site requirements Chapter 2
Zetasizer APS Basic Guide Page 2-5
moisture in the air immediately surrounding the cell and prevents condensation. If
using the purge inlet connector, the air or Nitrogen supply must conform to the
following specification:
Compressed air to DIN 8573-1
Oil = Class 1
Water = Class 3
Particulate = Class 3
Pressure = 100 kPa
Caution!
The purge air line supply must conform to the above specification. Failure
to meet this specification may result in permanent damage to the instru-
ment and invalidate the warranty.
Telephone socket specification
The telephone socket for remote support needs a direct Internet connection.
Laser safety
Zetasizer APS instruments are Class 1 laser products and as such, require no special
laser safety considerations during normal operation. However, during servicing
(which must be performed by a qualified Malvern representative), the servicing
engineer may be exposed to class 3b or above laser radiation. We therefore recom-
mend that the administrative controls recommendations of the Laser Safety Regu-
lations (IEC 60825-1(1993) +A1(1997)+A2(2001) are implemented.
MAN0494-1 (Zetasizer APS Basic Guide).book Page 5 Friday, August 9, 2013 2:08 PM

Chapter 2 Site requirements
Page 2-6 MAN 0494
MAN0494-1 (Zetasizer APS Basic Guide).book Page 6 Friday, August 9, 2013 2:08 PM

Zetasizer APS Basic Guide Page 3-1
3
Health and safety
General warnings and Safety regulations
Warning!
The instrument or samples to be measured may be hazardous if misused.
Read and fully understand this section before operating the system.
Warning!
Use of the system in a manner not specified by Malvern Instruments Ltd
may impair the protection provided by the system.
The instrument must only be stored or operated in environmental conditions con-
forming to Chapter 2.
Positioning the Instrument
Warning!
Do not position the instrument such that the power cord, where it exits the
product, is unreachable for disconnection.
Warning!
Do not obstruct the ventilation slots underneath the instrument, nor the
fans on the rear panel. Restricting airflow can damage the instrument or
cause overheating.
MAN0494-1 (Zetasizer APS Basic Guide).book Page 1 Friday, August 9, 2013 2:08 PM

Chapter 3 Health and safety
Page 3-2 MAN 0494
3
Electrical warnings and Safety
regulations
Warning!
The Zetasizer APS contains high voltage components. Only Malvern
trained personnel are permitted to remove its main cover.
The instrument is mains powered and all power cables and electrical sockets should
be treated accordingly. Do not place cables where they may become wet.
Should the instrument become wet (e.g. sample or dispersant is spilt), switch it off
and disconnect it from the mains power supply immediately. Scrupulously clean
and dry the instrument before re-applying power.
Warning!
This product must be connected to a protective earth.
The metal parts of the optical unit and the accessories are earthed via a
protective earth connection.
PAT testing
If PAT testing is required, connect the earth lead to the earth stud underneath the
rear right-hand corner of the instrument. We recommend that the product is PAT
tested annually, or if it is suspected that its electrical safety has been compromised.
Power cords and Power safety
The notes in this section indicate best practice. Follow these when connecting the
instrument to the power supply.
Warning!
Do not operate this product with a damaged power cord set. Replace a
damaged power cord set immediately.
MAN0494-1 (Zetasizer APS Basic Guide).book Page 2 Friday, August 9, 2013 2:08 PM

Health and safety Chapter 3
Zetasizer APS Basic Guide Page 3-3
Warning!
Do not use the supplied power cord on any other products.
Power cord set requirements
Power cord sets must meet the requirements of the country where the product is
used. For further information on the requirements, contact a Malvern
representative.
General requirements
These requirements apply to all countries:
The power cord must be approved by an acceptable accredited agency respon-
sible for evaluation in the country where the power cord set will be installed.
The power cord set must have a minimum current capacity of 10A (7A in Japan
only) and a nominal voltage rating of 125 or 250 volts AC, as required by each
country's power system.
The area of the wire must be a minimum of 0.75mm2or 18AWG, and the
length of the cord must be less than 3m.
The power cord must be routed so it will not be walked on, pinched by items
placed on or against it, or become wet. Pay particular attention to the plug, the
electrical outlet, and the point where the cord exits the product.
Power safety information
The following notes are guidelines for connecting the Malvern Instruments power
supply using single and multiple extension leads, connection via AC Adapters and
use of Uninterruptible Power Supplies (UPS).
Warning!
To prevent electric shock, plug the instrument or accessory into correctly
earthed electrical outlets.
The power cord supplied is equipped with a grounding connection to
ensure grounding integrity is maintained.
Advice on use of Extension leads
Follow this advice when using single or multiple socket extension leads. These
are also called ‘trailing sockets’.
MAN0494-1 (Zetasizer APS Basic Guide).book Page 3 Friday, August 9, 2013 2:08 PM

Chapter 3 Health and safety
Page 3-4 MAN 0494
Ensure the lead is connected to a wall power outlet and not to another
extension lead. The extension lead must be designed for grounding plugs and
plugged into a grounded wall outlet.
Ensure that the total ampere rating of the products being plugged into the
extension lead does not exceed the ampere rating of the extension lead.
Use caution when plugging a power cord into a multiple socket extension
lead. Some extension leads may allow a plug to be inserted incorrectly.
Incorrect insertion of the power plug could result in permanent damage to the
instrument or accessory, as well as risk of electric shock and/or fire. Ensure that
the ground connection (prong/pin) of the power cord plug is inserted into the
mating ground contact of the extension lead
Advice on use of AC adapters (when used)
Warning!
Do not use adapter plugs that bypass the grounding feature, or remove the
grounding feature from the plug or adapter.
Place the AC adapter in a ventilated area, such as a desk top or on the floor.
The AC adapter may become hot during normal operation. Take care when
handling the adapter during or immediately after operation.
Use only the Malvern-provided AC adapter approved for use with the instru-
ment and/or accessory. Using another AC adapter may cause a fire or explo-
sion.
Advice on use of Uninterruptible Power Supplies (UPS)
To help protect the instrument and/or accessory from sudden, transient
increases/decreases in electrical power, use a surge suppressor, line conditioner
or UPS.
Laser safety regulations
The Zetasizer APS is a Class 1 laser product. As such, there is no exposure to laser
radiation in normal operation of the instrument. The standard laser has a maxi-
mum cw-power of 60mW at 830nm (invisible, near infrared).
MAN0494-1 (Zetasizer APS Basic Guide).book Page 4 Friday, August 9, 2013 2:08 PM
This manual suits for next models
3
Table of contents
Other Malvern Laboratory Equipment manuals

Malvern
Malvern Nano Series User manual
Malvern
Malvern MICROCAL PEAQ-ITC User manual
Malvern
Malvern MicroCal iTC200 User manual

Malvern
Malvern Zetasizer uV User manual

Malvern
Malvern Zetasizer Nano Series User manual

Malvern
Malvern Zetasizer Nano Series User manual

Malvern
Malvern MicroCal iTC200 User manual
Malvern
Malvern MPT-2 User manual

Malvern
Malvern Visco 88 User manual

Malvern
Malvern Mastersizer 2000 User manual

