3
Connect Up
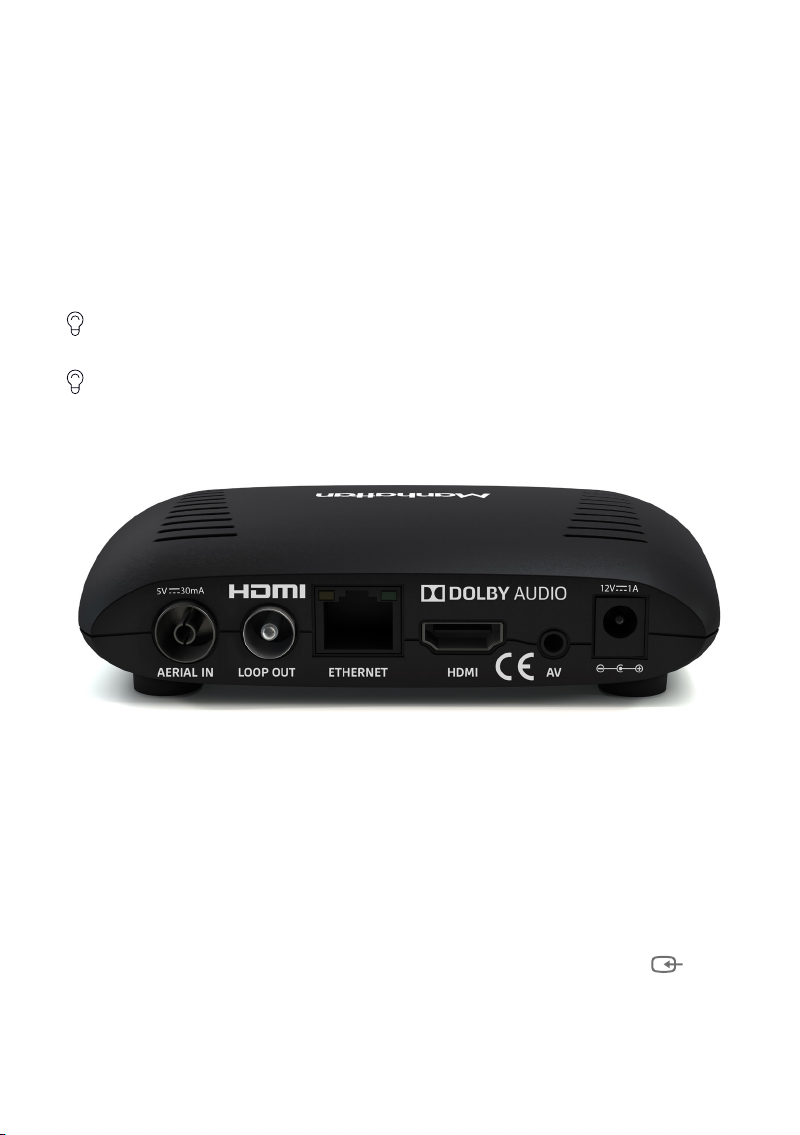
• Connect the coaxial TV aerial cable from your aerial wall socket to your T1.
• Next, connect the T1 to your TV using the HDMI cable provided.
• To view Freeview’s free and premium streaming channels or receive software
updates over the internet, connect the T1 to your router using an Ethernet cable.
• Finally, plug the AC power adapter into a wall socket that is turned o, then
connect the other end to the T1.
If you want to use your TV’s tuner, connect the Loop Out connector to the Aerial input of
your TV. See the back cover for details of using Loop Out in Standby.
If your TV doesn’t have an HDMI input, the T1 has an analogue AV output that you should
be able to connect to your TV using the Manhattan T1 AV Kit (not included). See the
included leaflet or contact us for more details.
Switch On
• Open the battery compartment cover on the back of the remote by pushing the
catch. Insert the batteries, matching the + and – symbols to what is marked on the
inside of the compartment. Replace the cover.
• Turn on the wall socket you connected the Manhattan T1 to and it will switch on.
• Turn on your TV set and choose the HDMI input you connected your Manhattan
T1 to. Most TV remotes use a button labelled ‘AV’, ‘SOURCE’, ‘INPUT’ or , with
each press cycling through your inputs.
Follow the on-screen instructions to set up your T1. It takes about 5 minutes, which is
the perfect amount of time to read the rest of this Guide!