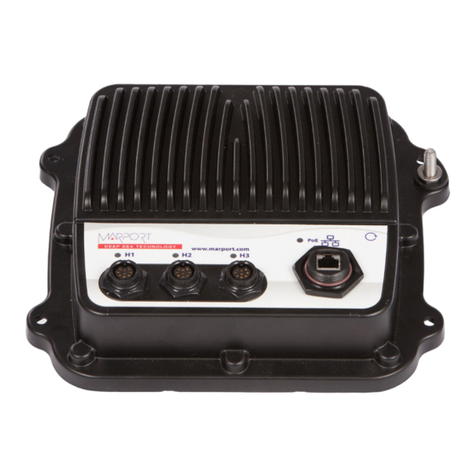
Marport M6 Mx User manual

Service Manual
M6 System
with Mx Computer
and Mac Mini


Contents | ii
Contents
Legal.................................................................................................4
History...........................................................................................................................................................................4
Copyright......................................................................................................................................................................5
Disclaimer.................................................................................................................................................................... 5
Introduction and Presentation..........................................................6
Introduction................................................................................................................................................................6
Safety Guidelines...................................................................................................................................................... 7
Description.................................................................................................................................................................. 8
M6 and Mx computer System Overview.............................................................................................8
Equipment List.............................................................................................................................................11
Technical Specifications...........................................................................................................................12
Installation Steps.................................................................................................................................................... 13
Computer Configuration..................................................................14
Configuring Mac Mini Settings.........................................................................................................................14
Setting Up the Mac....................................................................................................................................14
Disabling Automatic Updates................................................................................................................ 14
Disabling Sleeping Mode......................................................................................................................... 15
Changing Security & Privacy Settings................................................................................................16
Changing Desktop Wallpaper and Screen Saver.............................................................................18
Adding a Virtual Keyboard.....................................................................................................................20
Disabling Automatic Search of Wireless Keyboard....................................................................... 21
Installing Software Applications......................................................................................................................22
Downloading Software Applications...................................................................................................22
Installing Mozilla Firefox....................................................................................................................... 23
Installing Java..............................................................................................................................................23
Installing Scala/Scala2 and Scala Replay/ScalaReplay2..............................................................24
Installing Mosa2.........................................................................................................................................25
Automatically Opening Scala/Scala2 at Start Up...........................................................................26
Sharing System Information............................................................................................................................. 27
Creating Computer Backups with Time Machine......................................................................................27
Installation..................................................................................... 28
Formatting the Mx computer...........................................................................................................................29
Changing from One System to Another.............................................................................................31
Installing the System............................................................................................................................................32
System Cabling........................................................................................................................................................34
Powering the Mx computer............................................................................................................................... 36
Changing Mx computer IP Address................................................................................................................36
Configuring Mac Mini Network........................................................................................................................37
Installing a New Ethernet Cable......................................................................................................................38

Contents | iii
Configuring the Receivers.................................................................................................................................. 39
Updating the Mx Receivers....................................................................................................................39
Changing Receiver 2 IP Address..........................................................................................................40
Removing M6 Protection.................................................................................................................................... 43
Updating the Receiver Firmware.....................................................................................................................44
Installing Hydrophones....................................................................................................................................... 47
List of Marport Hydrophones...............................................................................................................47
Connecting the Hydrophone to the Receiver................................................................................. 49
Adding Temperature Data from the Hydrophones to the System..........................................50
Understanding Receiver LEDs............................................................................................................................51
Exporting/Importing the Receiver Configuration......................................................................................53
Servicing and Maintenance............................................................ 54
Interference Check.................................................................................................................................................54
Spectrum Analyzer Display....................................................................................................54
Checking Noise Interference................................................................................................. 55
Checking Noise Interference.................................................................................................56
Estimating the Efficiency of Hydrophones................................................................................................. 60
Troubleshooting...................................................................................................................................................... 61
Receiver page: only one receiver displayed.....................................................................................61
System web page is empty.................................................................................................................... 63
No Internet Access....................................................................................................................................64
Java error messages appear when opening the system web page..........................................64
I cannot click on some items in the system web page...............................................................66
Antifouling System Causes Interferences........................................................................................69
Giving Remote Access to the Computer....................................................................................................... 70
Recording Audio Files.......................................................................................................................................... 70
Support Contact.......................................................................................................................................................71
Appendix.........................................................................................72
Frequency Plan........................................................................................................................................................72
Index.................................................................................................................77

M6 - Mx computer System | V2 | Legal
Legal
History
V1 04/08/19 First release
V2 07/16/20
Now documents Mosa2 version 02.03, Scala version
01.06.34 and Scala2 version 02.02.
Updated topics:
•Diagram for installation with two Mac minis
•Changing Mx computer IP Address on page 36
•Updating the Receiver Firmware on page 44
•Exporting/Importing the Receiver Configuration on
page 53
TE SC sensor is no longer documented in this guide.
| 4

M6 - Mx computer System | V2 | Legal
Copyright
© 2020 Marport. All Rights reserved.
No part of this document may be reproduced, stored in a retrieval system or transmitted in any
form by any means; electronic, mechanical, photocopying or otherwise, without the express
written permission from Marport. “Marport ”, the Marport logo and Software Defined Sonar are
registered trademarks of Marport. All other brands, products and company names mentioned
are the trademark and property of its respective owners only. Marport is a division of Airmar
Technology Corporation.
Disclaimer
Marport endeavors to ensure that all information in this document is correct and fairly stated, but
does not accept liability for any errors or omissions.
• Scala: 01.06.06-01.06.34 / Scala2: 02.02
U.S. Patent 9,091,790
| 5

M6 - Mx computer System | V2 | Introduction and Presentation
Introduction and Presentation
Read this section to get a basic knowledge of your M6 system.
Tip: Click Marport logo at the bottom of pages to come back to the table of contents.
Introduction
The M6 is the latest addition to Marport’s acoustic receiver range.
It has the same functions as the M4 system and is meant to replace it. It has the latest advanced
features of the Mx receivers:
• It works with the latest digital signal processing, combined with the smartest software available.
• You can receive up to 100 simultaneous data from sensors. This way, you can have a full
coverage of data received from sensors to efficiently monitor the trawl.
• You can listen to 6 hydrophones simultaneously. Only data coming from the hydrophone
delivering the best signal is interpreted. This way, you do not need an hydrophone selection
switch, as often used in older types of receivers.
• Thanks to the numerous hydrophones, you can have a better reception of the sensors.
• You can receive data from standard sensors, net sounders and high-definition sensors at the
same time.
• Data received can be displayed on echogram images that you can watch from the wheelhouse.
• The receiver can detect signals received even from a long transmission range.
• There is a large frequency range. This way, you have enough bandwidth to add multiple sensors.
• There are 2 NMEA and 4 NTC entries to receive hydrophones' temperature data.
This M6 system works with an Apple Mac mini, an Mx computer and two Mx receivers. The SDS
computer processes the signal and displays on a screen connected to the Mac mini data received.
You can configure the sensors and display data to suit your needs.
Note:
These labels tag topics or actions that are specific to Scala and/or Scala2.
Depending on the version you have, you may follow either one of these labels.
| 6

M6 - Mx computer System | V2 | Introduction and Presentation
Safety Guidelines
Important: To ensure proper and safe use of this equipment, carefully read and follow the
instructions in this manual.
Product installation and use
Install and use this product in accordance with this user manual. Incorrect use of the product may
cause damage to the components or void the warranty.
Only qualified Marport dealers can do installation and maintenance interventions.
| 7

M6 - Mx computer System | V2 | Introduction and Presentation
Description
M6 and Mx computer System Overview
Ethernet cable
Marport junction box
extension cable & hydrophone
cable
Manufacturer standard
cable
(Blurred) Optional
elements
1Screens 8NMEA multiplexer
2Mac computer 9Power supply (recommended power supply:
MEAN WELL HEP-150-24 A)
3Wireless trackball mouse 10 Mx receiver (ref. M6REC)
4Scala/Scala2 software dongle 11 Junction boxes (x2) (ref. 46-055-01)
5Mx computer 12 Thru-hull penetration (ref. TH-1-XX)
6Ethernet switch, connected with USB to
Ethernet adapter
13 Hydrophones (ref. NC-1-XX)
7Internet
| 8

M6 - Mx computer System | V2 | Introduction and Presentation
If you need to work with more than three monitors, it is possible to use two Mac minis:
Ethernet cable
Marport junction box
extension cable & hydrophone
cable
Manufacturer standard
cable
(Blurred) Optional
elements
1Monitors, 3 per mac mini:
• Monitor #1: HDMI
• Monitor #2: HDMI/DVI/VGA
• Monitor #3: HDMI/DVI/VGA
8Ethernet switch (not provided by Marport)
2Mac mini 2018 (x 2) (ref. MAC-0-01) 9Mx computer
3Scala/Scala2 software dongle (x 2) 10 Power supply (recommended power supply:
MEAN WELL HEP-150-24 A)
4Wireless trackball mouse (x 2) 11 Mx receiver (ref. M6REC)
5Ethernet switch (optional): connected to
computers with USB to Ethernet adapter
12 Junction boxes (x2) (ref. 46-055-01)
6NMEA multiplexer (optional): ShipModul
MiniPlex or NPort Device Server (necessary
to share data between the two computers)
13 Thru-hull penetration (ref. TH-1-XX)
| 9

M6 - Mx computer System | V2 | Introduction and Presentation
Equipment List
Here are the hardware and software you need to install a system with a Mx computer.
Computer
• 1 Mac mini i7 computer
• 1 wireless trackball mouse
• 1 Mac mini power cord
• 2 Thunderbolt to HDMI/VGA/DVI adapter
• 1 Ethernet cable for connection with Mx computer
• 1 Scala/Scala2 software dongle
Receiver
• 2 Mx receivers
• 4 Mx hydrophone junction boxes (ref. 46-055-01)
• 2 CAT5e network cables
• 2 Ethernet connector kits
• 2 Mx hardware kit (mounting screws and ground straps)
Mx computer
Aaon compact fanless box PC. Reference: PO boxer-6639M
Power supply: MEAN WELL HEP-150-24 A
Optional Equipment (not included)
• 1 to 3 monitors
• 1 Uninterruptible Power Supply (UPS) to prevent problems if the mains power fails
(recommended). Size: 500VA.
• Additional hydrophone junction boxes
• 1 test hydrophone that you can keep on board and connect to the receiver to do functional tests.
• 1 NMEA converter junction box (ref. NC-2-TEMP) to receive temperature data from
hydrophones
• 1 NMEA multiplexer to receive NMEA data and display them in Scala/Scala2: ShipModul
MiniPlex-3E-N2K if using NMEA2000 and NMEA0183 or Miniplex-3E if using only NMEA0183.
• If using Mosa2 on a tablet computer: refer to Marport sales offices to know the recommended
model.
Software
Software Application Name Definition
Marport validated MacOS Operating system on computer
Scala/Scala2 Marport software application collecting, processing, storing
and displaying data received from sensors, sounders and other
connected devices.
| 11

M6 - Mx computer System | V2 | Introduction and Presentation
Software Application Name Definition
Scala Replay/ScalaReplay2 Marport software application replaying data recorded in
Scala/Scala2.
Mosa2 Marport software application used to configure sensors. Can be
used on desktop or tablet computers.
Mozilla Firefox (from version
22 to 51)
Web browser
Java (version 7 or lower) To correctly display system web page.
FileZilla File management tool.
TeamViewer To give remote access of your computer to support service
Technical Specifications
Receivers
Frequency range 33-57 kHz
Active bandwidth 24 kHz
Max. number of Rx/Tx channels 6
Max. number of hydrophones 6
Bearing to sensor measurement Yes
Distance to sensor measurement Yes
Number of simultaneous data reception 100
Number of high resolution sounders (NBTE,
HDTE)
10
Temperature input 4 NTC + 2 NMEA
Network cables CAT5e, 100 meters max., U/FTP shielding*
Important: *Make sure to respect these specifications if installing a new Ethernet network
cable.
Mx computer
Product reference PO boxer-6639M
Dimension (W x H x D) 264.2 mm x 186.2 mm x 96.4 mm (10.4” x 3.8” x 6.1”)
Weight 4.5 kg (8.8 lb)
Operating temperature Ambient with Airflow
-20°C ~ 50°C
Storage temperature -45°C ~ 70°C (-49°F ~ 185°F)
| 12

M6 - Mx computer System | V2 | Computer Configuration
Computer Configuration
Read this section to learn how to configure the Mac computer.
Important: This section applies only to technicians from Marport offices.
Configuring Mac Mini Settings
If you do not have a computer already configured and you are beginning from scratch, you need to
apply all the following settings.
Setting Up the Mac
When you switch on the Mac for the first time, you need to enter setup details.
Procedure
1. A setup assistant appears when switching on the computer for the first time. Follow the
instructions.
2. From Create a Computer Account, you can use marport for full name, account name and
password.
Disabling Automatic Updates
You need to disable automatic updates because some applications installed on the computer may
not be compatible with the latest versions of OS.
Procedure
1. From the top left corner of the screen, click Apple Menu > System Preferences > App Store.
2. In App Store, clear Automatically check for updates.
3. If the computer uses macOS Mojave:
| 14

M6 - Mx computer System | V2 | Computer Configuration
a) Click Apple Menu > System Preferences > Software Update.
b) Clear Automatically keep my Mac up to date.
c) Click Advanced and clear Check for updates.
Disabling Sleeping Mode
You need to change Energy Saver settings.
Procedure
1. From the top left corner of the screen, click Apple Menu > System Preferences > Energy
Saver.
2. From Turn display off after, drag the handle to Never.
3. Deselect Enable Power Nap and Put hard disks to sleep when possible.
| 15

M6 - Mx computer System | V2 | Computer Configuration
4. Some versions of Mac OS may also have the option Start up automatically after a power failure:
select it.
Changing Security & Privacy Settings
You need to change the security and privacy settings to be able to open applications you
downloaded.
Procedure
1. From the top left corner of the screen, click Apple Menu > System Preferences > Security &
Privacy.
2. To be able to make changes, click the lock at the bottom of the window and enter the password
of the computer.
3. Deselect Require password.
4. You need to add Anywhere option in the list under Allow apps downloaded from:
| 16

M6 - Mx computer System | V2 | Computer Configuration
a) From the top right corner of the screen, click the magnifying glass and type Terminal.
b) Select Terminal from the results.
c) In the terminal, enter sudo spctl --master-disable.
d) Press enter.
Anywhere option is now displayed in your Security & Privacy preferences.
5. Click Privacy > Accessibility and add Scala/Scala2 and TeamViewer to the list of apps that can
control the computer. Select the check boxes.
| 17

M6 - Mx computer System | V2 | Computer Configuration
6. If the computer is under macOS Catalina you need to give full disk access to Scala/Scala2, Scala
Replay/ScalaReplay2 and TeamViewer: click Privacy > Full Disk Access, then add Scala/Scala2,
Scala Replay/ScalaReplay2 and TeamViewer to the list.
Note: If you do not give full disk access to them, you may see messages asking access to
Documents or Downloads folders whenever you start these software and this will block
the automatic opening of Scala/Scala2.
Changing Desktop Wallpaper and Screen Saver
You need to disable the screen saver and put a Marport wallpaper.
Procedure
1. From the top left corner of the screen, click Apple Menu > System Preferences > Desktop &
Screen Saver.
2. Click the tab Screen Saver and select Start after: Never.
| 18

M6 - Mx computer System | V2 | Computer Configuration
3. Click the tab Desktop. Click Folders, then the add icon from the bottom left corner.
4. Select the Downloads folder and click Choose.
5. Select Marport wallpaper in the Downloads folder (See Downloading Software Applications on
page 22 to know where to find Marport wallpaper).
| 19
This manual suits for next models
1
Table of contents
Other Marport Marine Equipment manuals

Marport
Marport M6 PRO User manual

Marport
Marport Scala2 User manual

Marport
Marport Trawl Explorer User manual

Marport
Marport PRO DOCK User manual

Marport
Marport Trawl Explorer User manual

Marport
Marport Pro Trident XXL bottle User manual

Marport
Marport Trawl Explorer User manual

Marport
Marport M6 User manual