WEAR WORK GLOVES (RUBBER COATED PREFERRED)
FOR GRIPPINGTHE ADAPTER. This tool is designed to
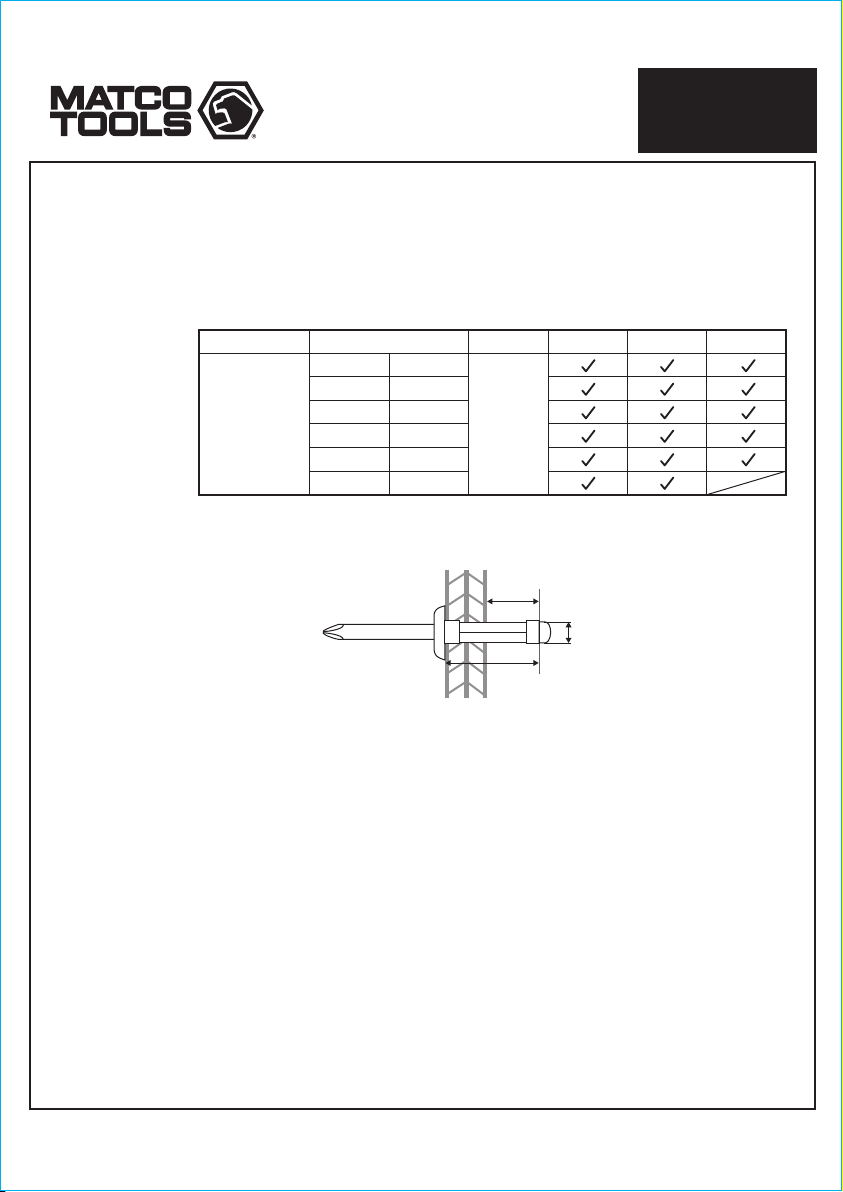
be used in drills chucks to set blind rivets up to 1/4" in
aluminum, steel and copper, and up to 7/32" in stainless
steel. No use esta herramienta fuera de la intención de
su diseño. Nunca modifique la herramienta para ningún
otro propósito o uso.
Estudie, entienda y siga todas las instrucciones
que se proveen con este producto. Lea las
instrucciones detenidamente antes de instalar,
operar, dar servicio o reparar esta herramienta.
Guarde estas instrucciones en un lugar seguro
y accesible.
APLICACIÓN DE LA HERRAMIENTA
HECHO en China
para Matco especificaciones
El fabricante garantiza este producto al usuario original contra defectos
de materiales o de mano de obra durante un periodo de un año a partir
de la fecha de compra.
El fabricante se reserva el derecho a determinar si una pieza o piezas
fallaron debido a material defectuoso, mano de obra, o por otras
causas.
Esta garantía no cubre fallas causadas por accidentes, alteraciones o
uso indebido.
El fabricante, a su entera discreción, reparará o reemplazará los
productos cubiertos por esta garantía sin costo alguno. Las
reparaciones o reemplazos de productos cubiertos por esta garantía
quedan garantizados durante el resto del periodo original de garantía.
El fabricante o sus representantes autorizados de servicio deben llevar
a cabo todas las reparaciones de garantía.Toda reparación hecha al
producto por representantes de servicio no autorizados invalida la
presente garantía. Los derechos que ampara esta garantía están
limitados al usuario original y no se pueden transferir a dueños
posteriores.
Esta garantía reemplaza a todas las demás garantías expresas o
implícitas, incluyendo garantías de comercialización e idoneidad para
un propósito particular. Algunos estados no permiten la exclusión o
limitaciones de daños incidentales o imprevistos, de manera que las
limitaciones mencionadas anteriormente pueden no ser aplicables en
su caso.
GARANTÍA LIMITADA DE UN AÑO
ADVERTENCIA
• El uso de este producto puede exponerlo a productos
químicos que incluyen etilenglicol, vapores de gasolina y
gases de escape del motor, que en el estado de California
son causantes de cáncer, defectos de nacimiento o daños
reproductivos. Para obtener más información, visite
www.P65Warnings.ca.gov . Siempre use equipo de
seguridad aprobado por ANSI, gafas de seguridad y ropa
cuando use este producto. Estudie, comprenda y siga
todas las instrucciones proporcionadas con este
producto. Si no lee y sigue todas las advertencias e
instrucciones de funcionamiento puede ocasionar daños
y lesiones graves o la muerte.
• Siempre use guantes del tipo aprobado por la ANSI para
trabajar con esta herramienta. (tanto usuarios como
espectadores).
• Nunca utilice esta herramienta para cualquier otra cosa
que no sean las aplicaciones para lo que fue diseñada.
• Sólo utilice los accesorios diseñados para esta
herramienta.
• No modifique o altere esta herramienta de ninguna
manera.
• El funcionamiento y/o mantenimiento inadecuado de la
herramienta, la modificación, o la utilización de la
herramienta con accesorios inadecuados podrían causar
lesiones graves o la muerte.
• Siempre usar los correctos accesorios para el trabajo que
Ud. está realizando.
• Trabaje siempre en un área limpia, segura, bien iluminada,
organizada y equipada adecuadamente.
INFORMACIÓN DEL PRODUCTO:
DESEMPACADO
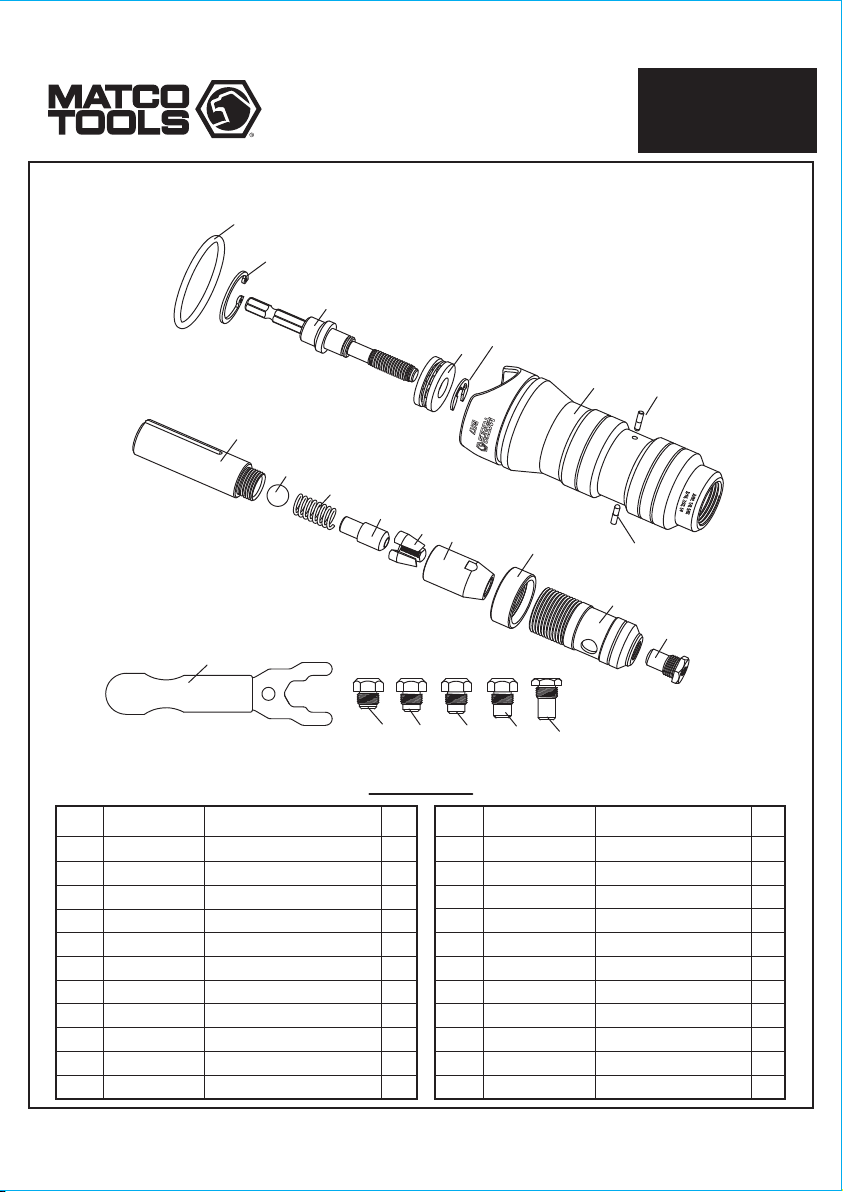
Cuando desempaque el producto, revise el diagrama y la
lista de piezas en página 4 para verificar que se hayan
enviado todas las piezas. De perder piezas o tener piezas
dañadas, favor llamar a su distribuidor inmediatamente.
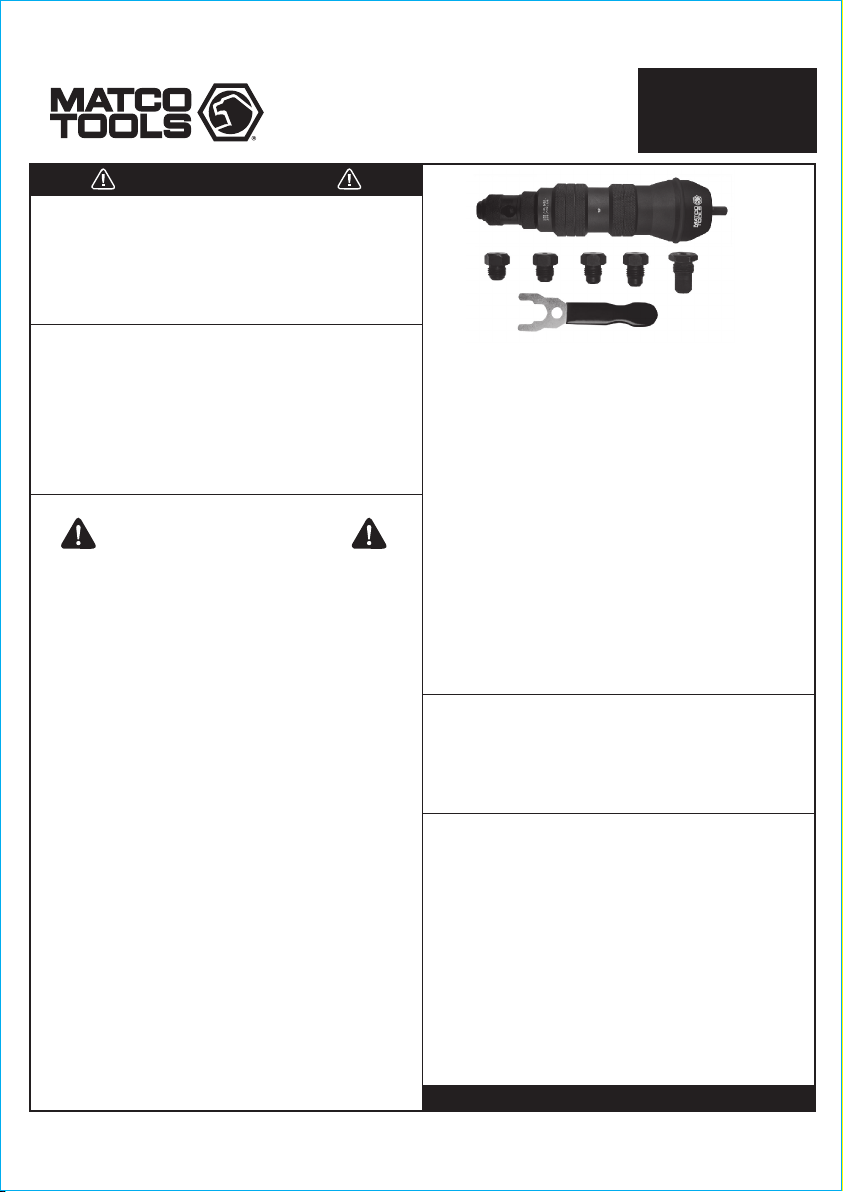
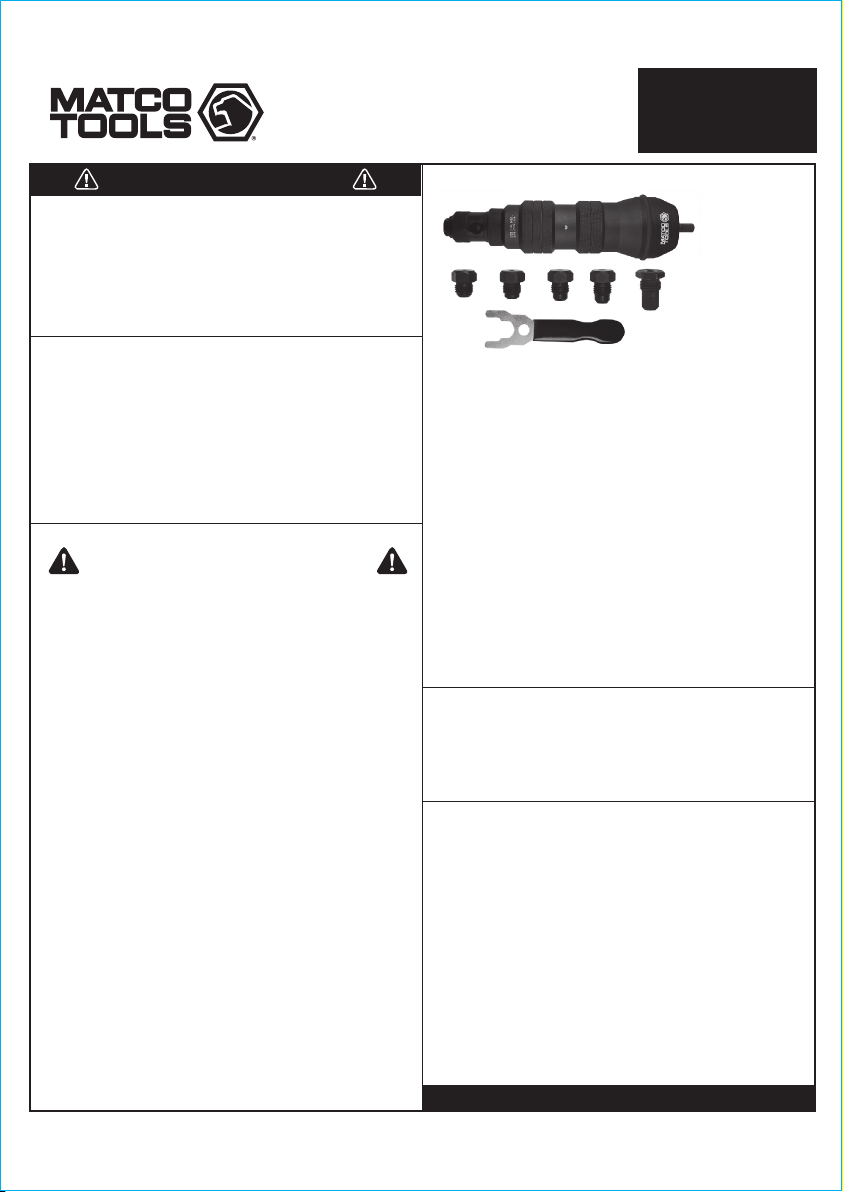
• Adaptability. Easily convert your cordless,
pneumatic or corded drill into a power pop
riveter.
• Versatility. Includes nose pieces for 3/32",
1/8", 5/32", 3/16", 7/32" and 1/4" for steel,
aluminum and copper, or up to 7/32" in
stainless.
• Durability. Features large shielded bearings
and billet aluminum machined body.
• Works on up to 8-6" rivet bodies, with a
maximum stroke of 0.7".
ADVERTENCIA
BLIND RIVET
ADAPTER KIT
BR7
NO LO DESCARTE O DESECHE, ENTREGESELO AL USUARIO
Página 1 1802031-14