Matco warrants its air tools for a period of 1 year to the consumer. We will repair any air tool covered
under this warranty which proves to be defective in material or workmanship during the warranty period.
In order to have your tool repaired, return the tool to any Warranty Center, freight prepaid. Please include
a copy of your proof of purchase and a brief description of the problem. The tool will be inspected and
if any part or parts are found to be de fec tive in ma te ri al or work man ship, they will be repaired free of
charge and the re paired tool will be re turned to you freight pre paid.
This warranty gives you specific rights. You may also have other rights which vary from state to state.
The foregoing obligation is Matco's sole liability under this or any implied warranty and under no cir cum-
stanc es shall Matco be liable for any incidental or consequential damages.
Note: Some states do not allow the exclusion or limitation of incidental or consequential damages so the
above limitation or exclusion may not apply to you.
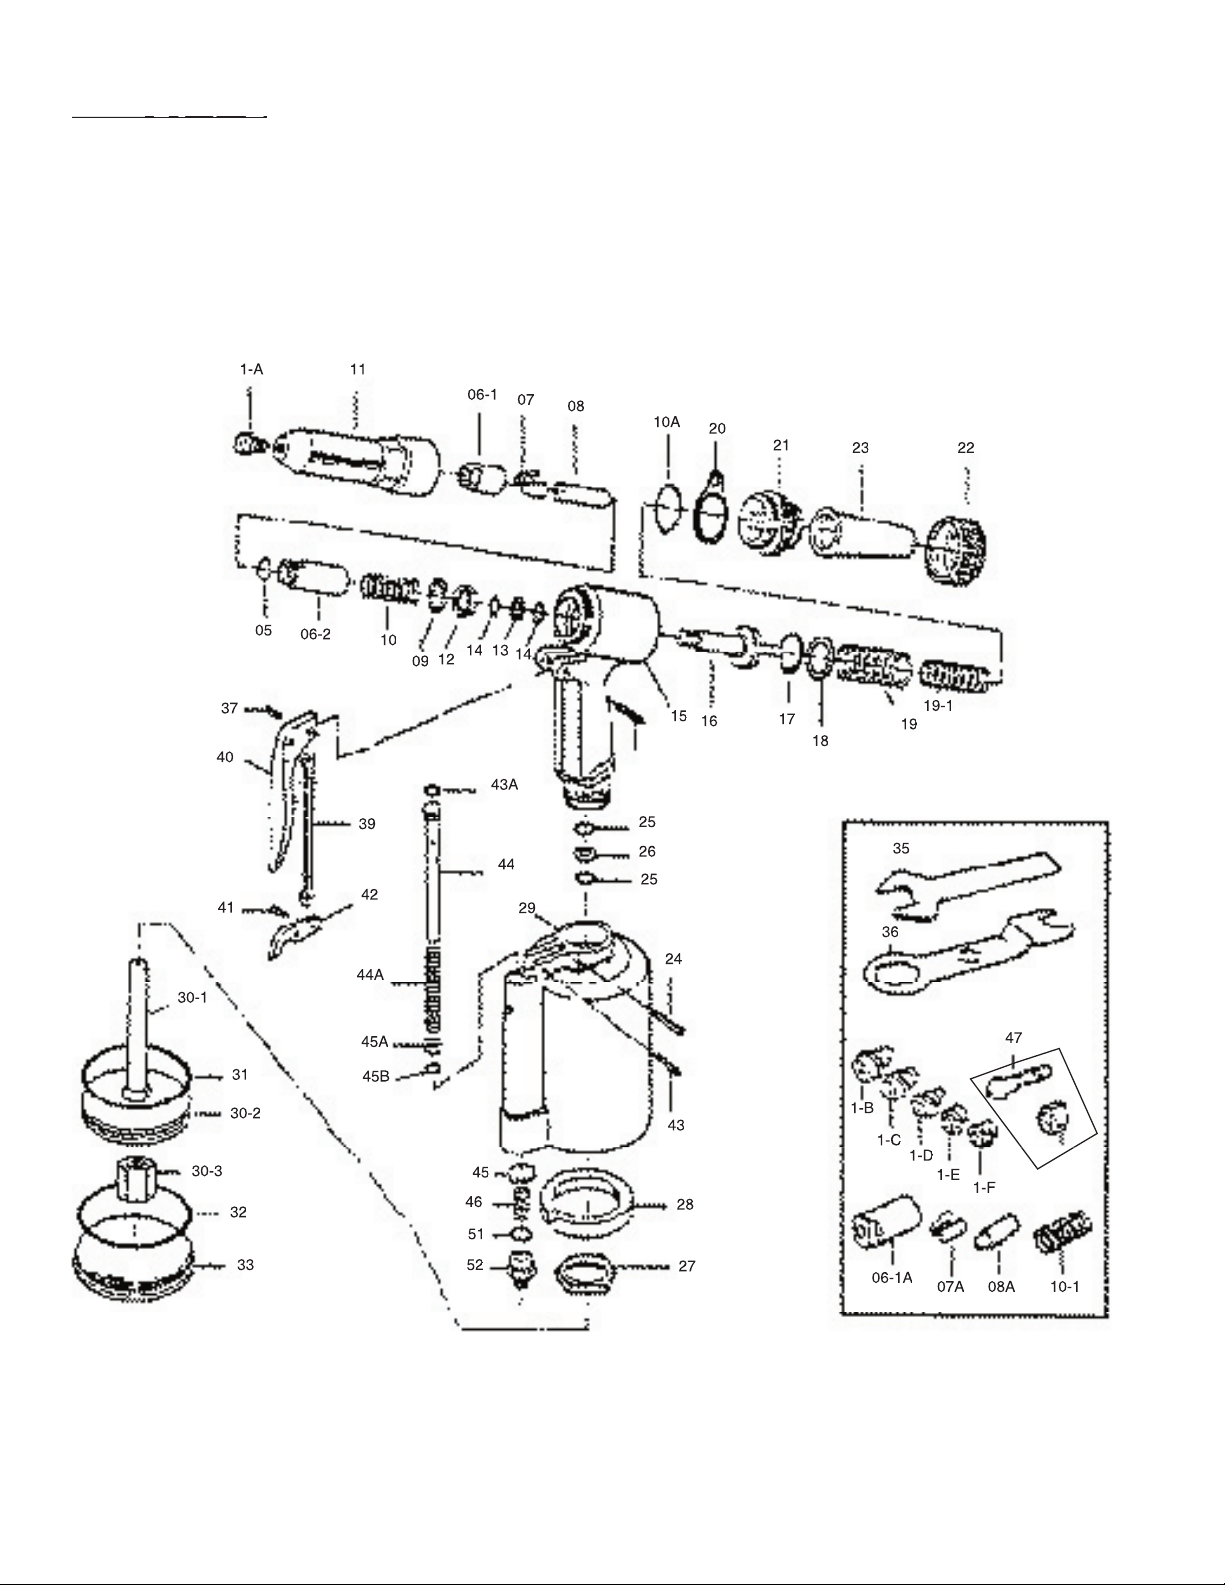
Ref. # Item # DESCRIPTION
1A 38401A 5/32" Nosepiece (optional)
1B 38401B 1/8" Nosepiece (optional)
1C 38401C 3/32" Nosepiece (optional)
1D 38401D 1/4" Nosepiece (standard)
1E 38401E 7/32" Nosepiece (optional)
1F 38401F 3/16" Nosepiece (optional)
05 38405 Jaw Case End Tart O-Ring
06-1 38406-1 Jaw Case Front Tart (3/32", 1/8",
06-2 38406-2 Jaw Case End Tart
06-1A 38406-1A Jaw Case Front Tart (1/4", 7/32",
08 38408 Jaw Pusher (3/32", 1/8", 5/32")
08A 38408A Jaw Pusher (1/4", 7/32", 3/16")
09 38309 Case Washer Ring
10 38410 Jaw Pusher Spring (5/32")
10-1 38410-1 Jaw Pusher Spring (1/4")
10A 38410A Frame Cap O-Ring
17 38417 Oil Piston O-Ring
19 38419 Return Spring (Old)
19-1 38419-1 Return Spring (Small)
Ref. # Item # DESCRIPTION
24 38424 Setting Screw Pin
30-1 38430-1 Air Piston Stem
30-3 38430-3 Air Piston Lock Nut
31 38431 Air Piston O-Ring
43A 38443A Valve Pusher O-Ring
46 38346 Valve Spring (Bottom)
47 38447 Inlet Bushing and Nut
51 38351 Valve Cap O-Ring
Ref. # Item # DESCRIPTION
1A 38401A 5/32" Nosepiece (optional)
1B 38401B 1/8" Nosepiece (optional)
1C 38401C 3/32" Nosepiece (optional)
1D 38401D 1/4" Nosepiece (standard)
1E 38401E 7/32" Nosepiece (optional)
1F 38401F 3/16" Nosepiece (optional)
05 38405 Jaw Case End Tart O-Ring
06-1 38406-1 Jaw Case Front Tart (3/32", 1/8",
06-2 38406-2 Jaw Case End Tart
06-1A 38406-1A Jaw Case Front Tart (1/4", 7/32",
08 38408 Jaw Pusher (3/32", 1/8", 5/32")
08A 38408A Jaw Pusher (1/4", 7/32", 3/16")
09 38309 Case Washer Ring
10 38410 Jaw Pusher Spring (5/32")
10-1 38410-1 Jaw Pusher Spring (1/4")
10A 38410A Frame Cap O-Ring
17 38417 Oil Piston O-Ring
19 38419 Return Spring (Old)
19-1 38419-1 Return Spring (Small)
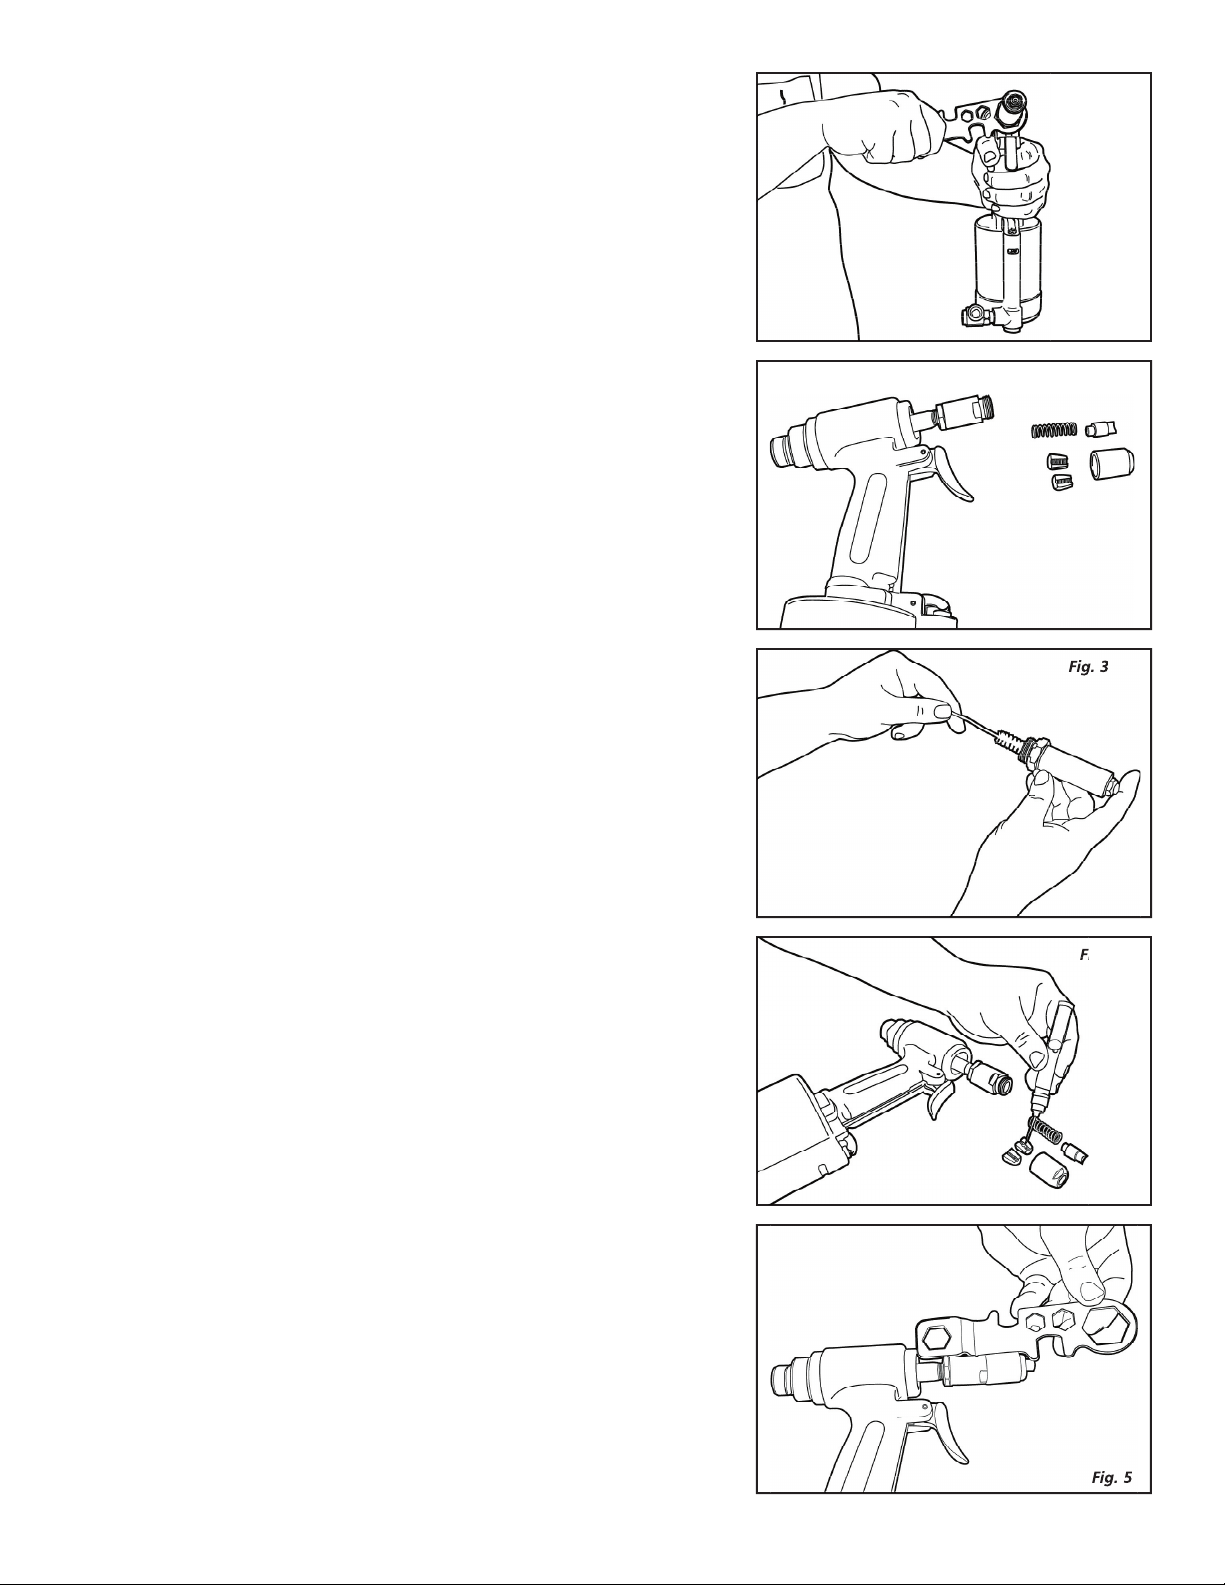
NOTE: in changing nosepieces, be sure to install the correct jaw case front tart, jaws, jaw pusher, and