MBTelehealth SX20 User manual

Rev 15Oct2015
SX20 with
TRC5 Remote Control
User Guide

MBTelehealth –SX20 Quick Set with TRC5 Remote User Guide
Page 2 of 20
Table of Contents
OVERVIEW ......................................................................................................................................3
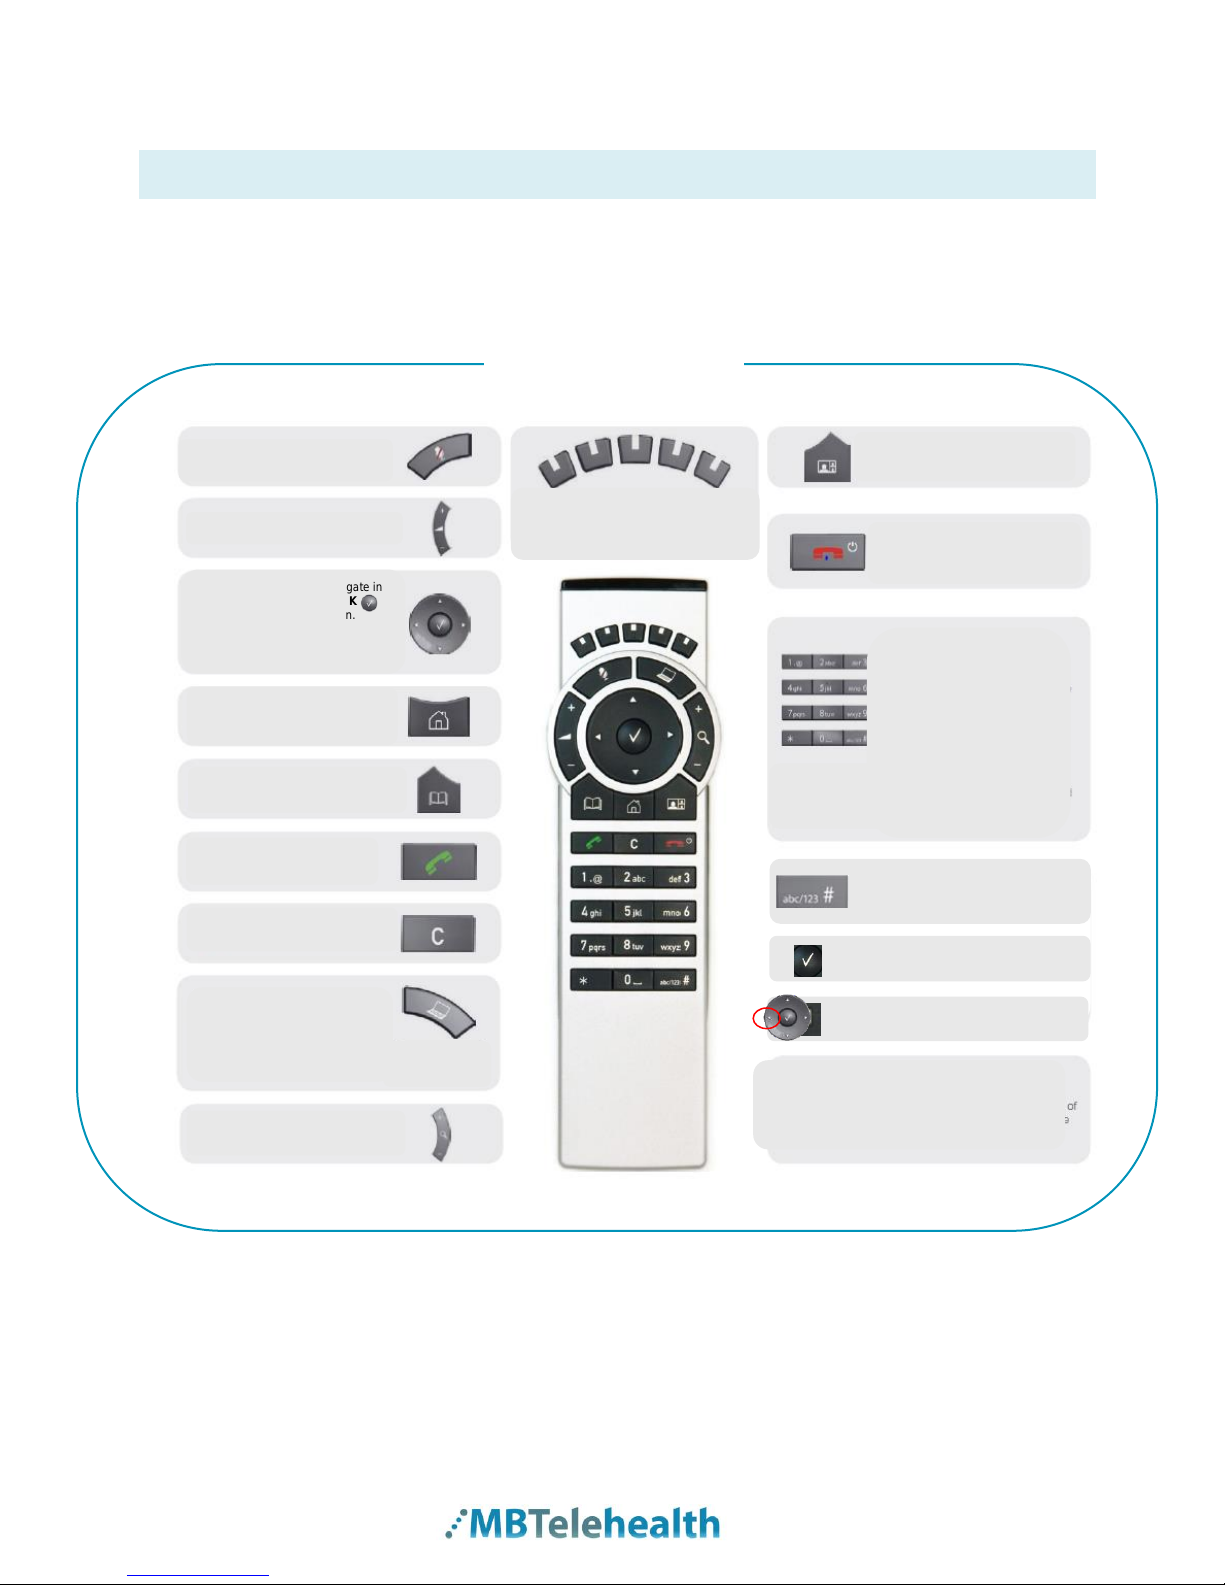
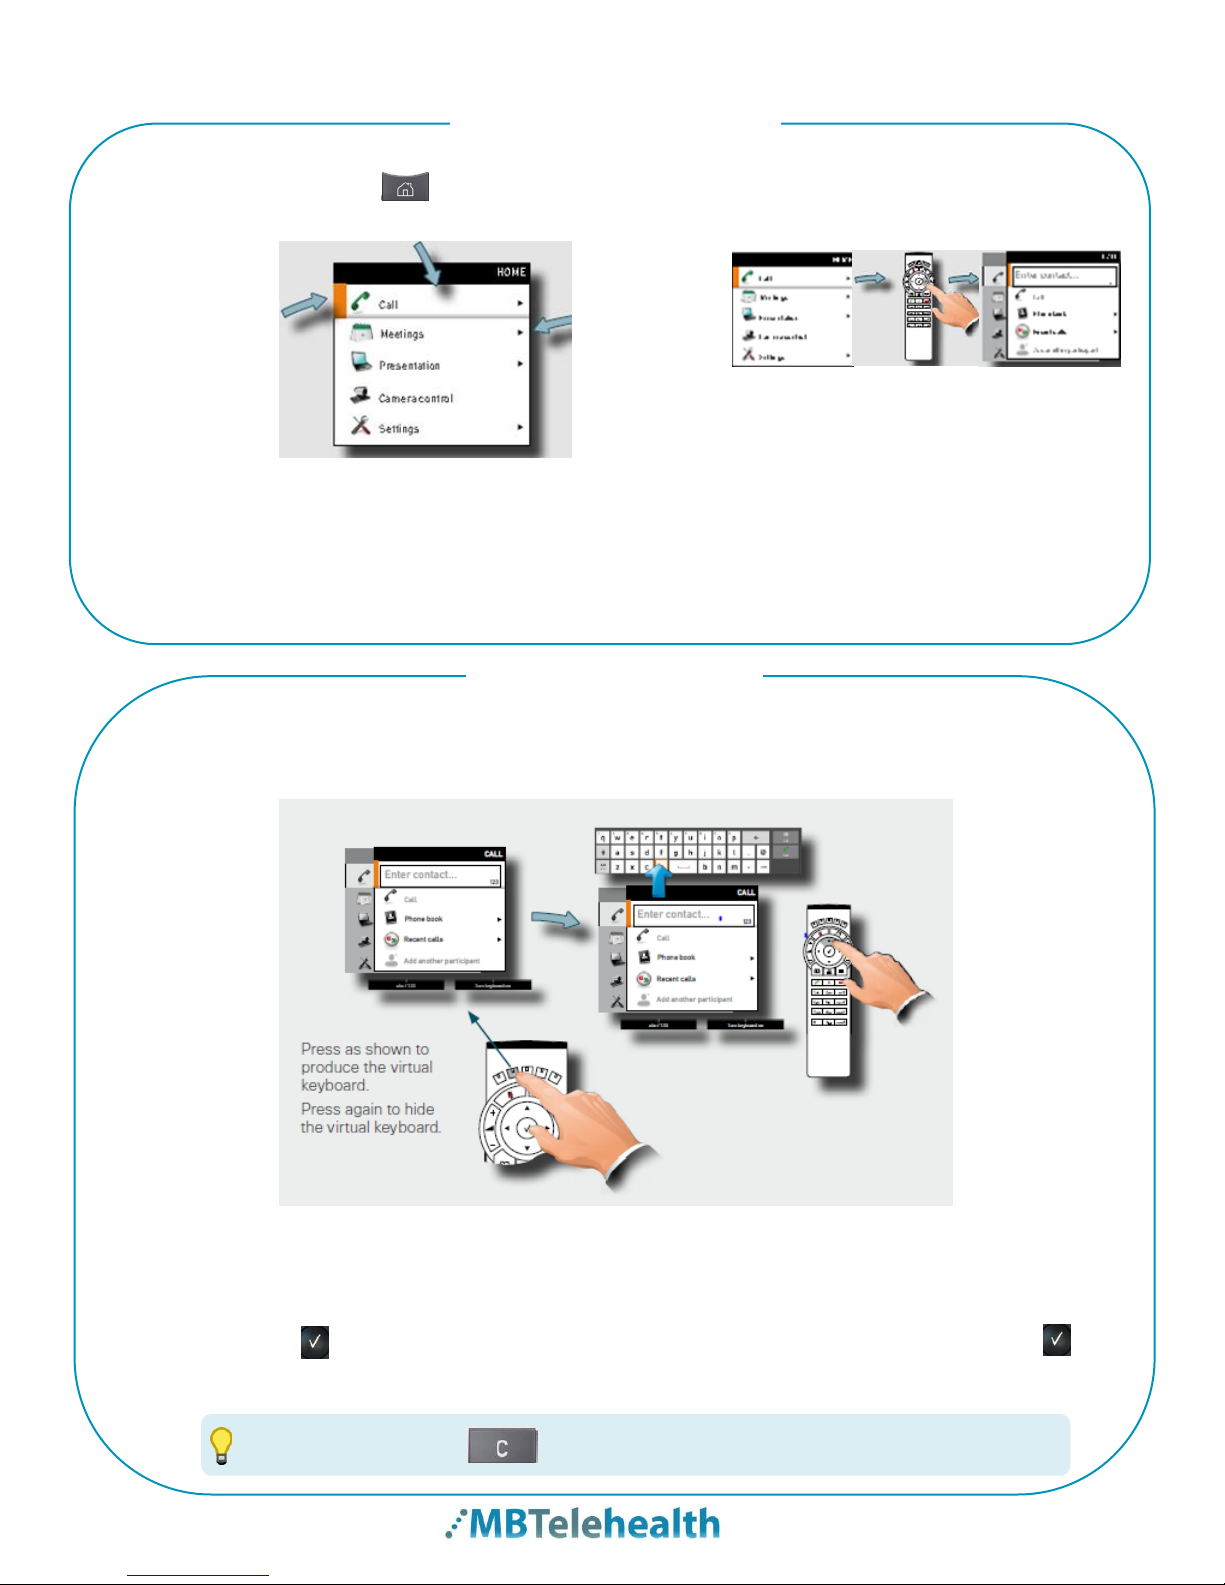
BASIC NAVIGATION........................................................................................................................4
GENERAL USE................................................................................................................................6
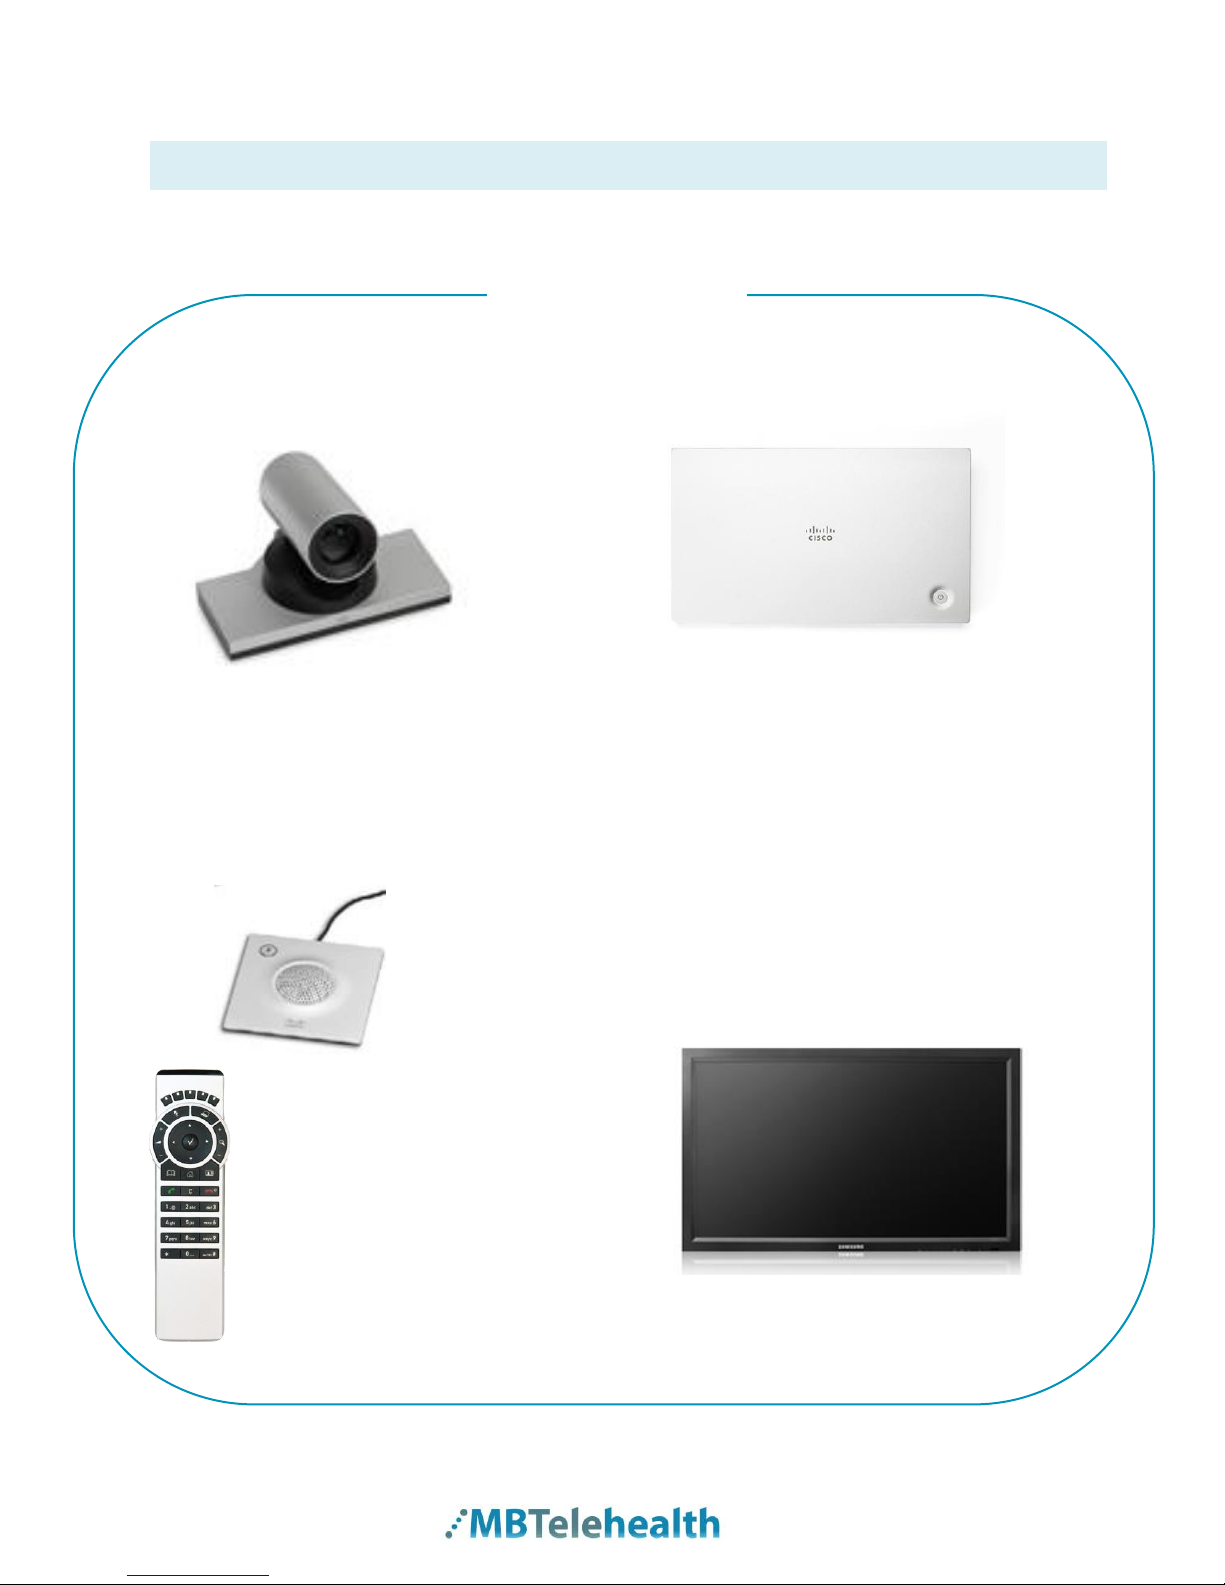
Setup.............................................................................................................................................6
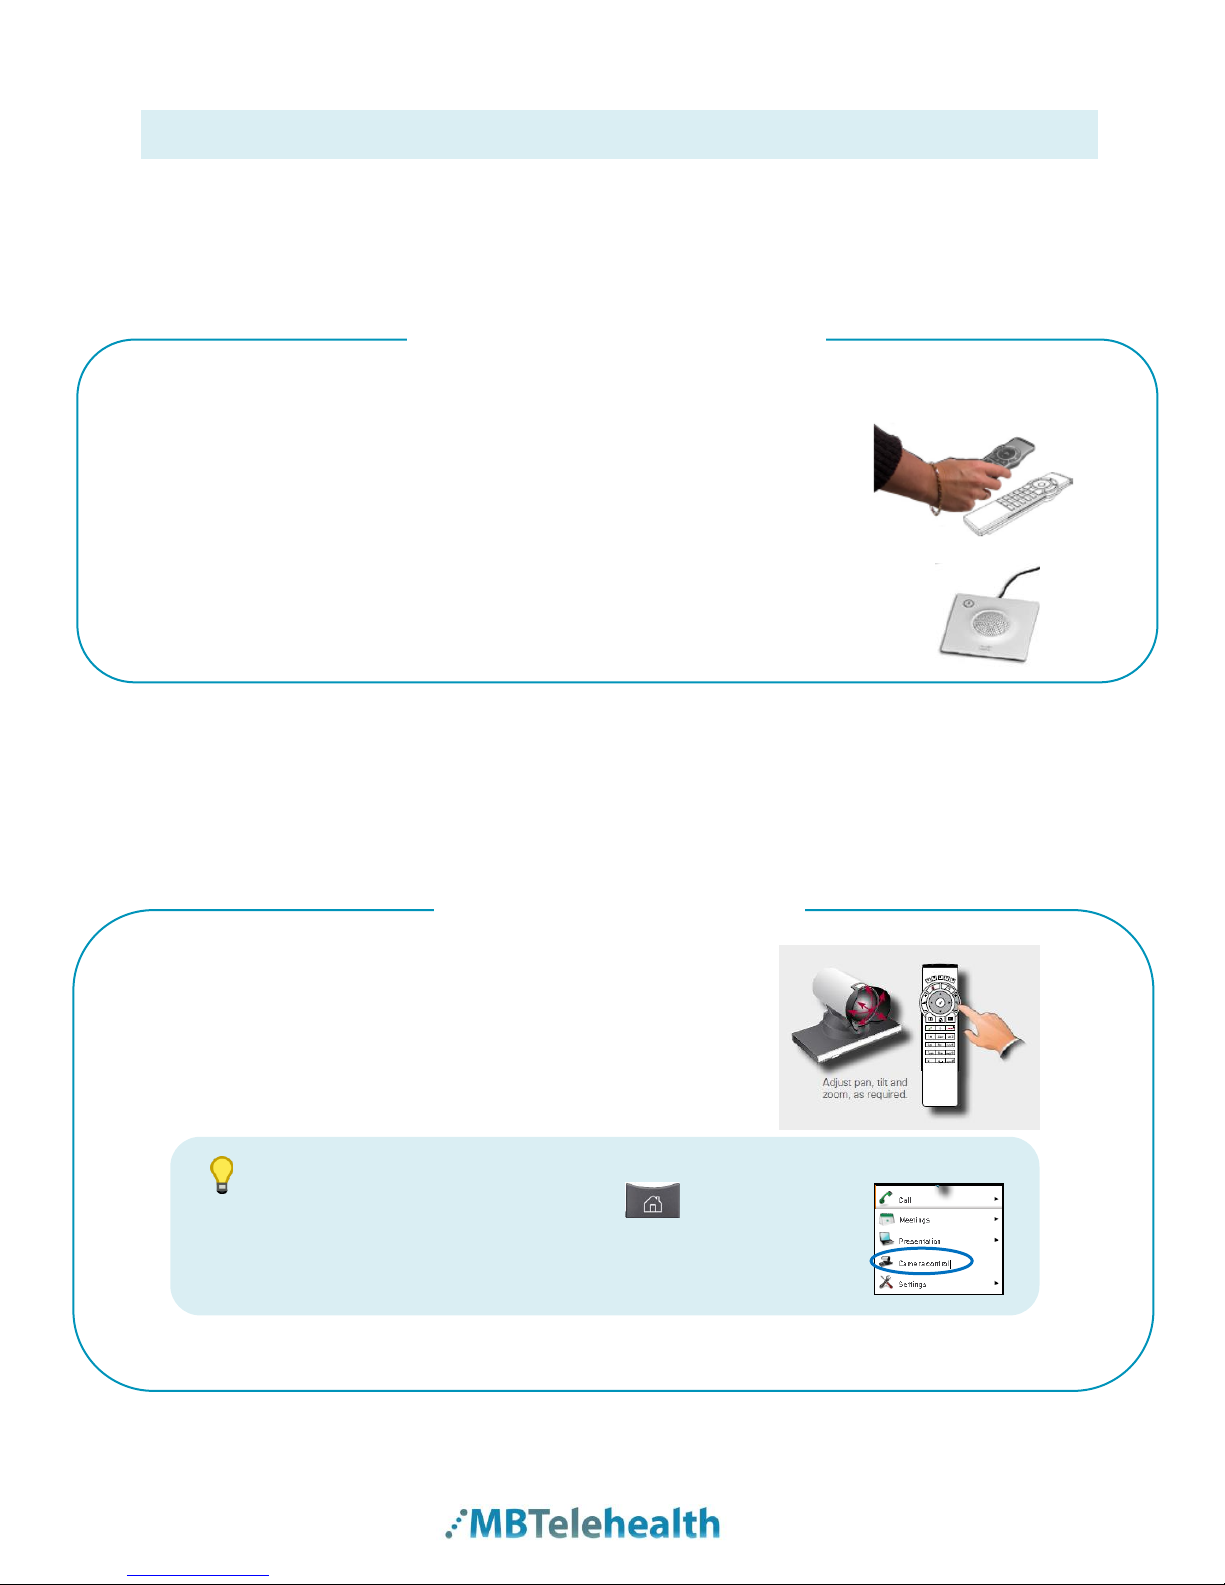
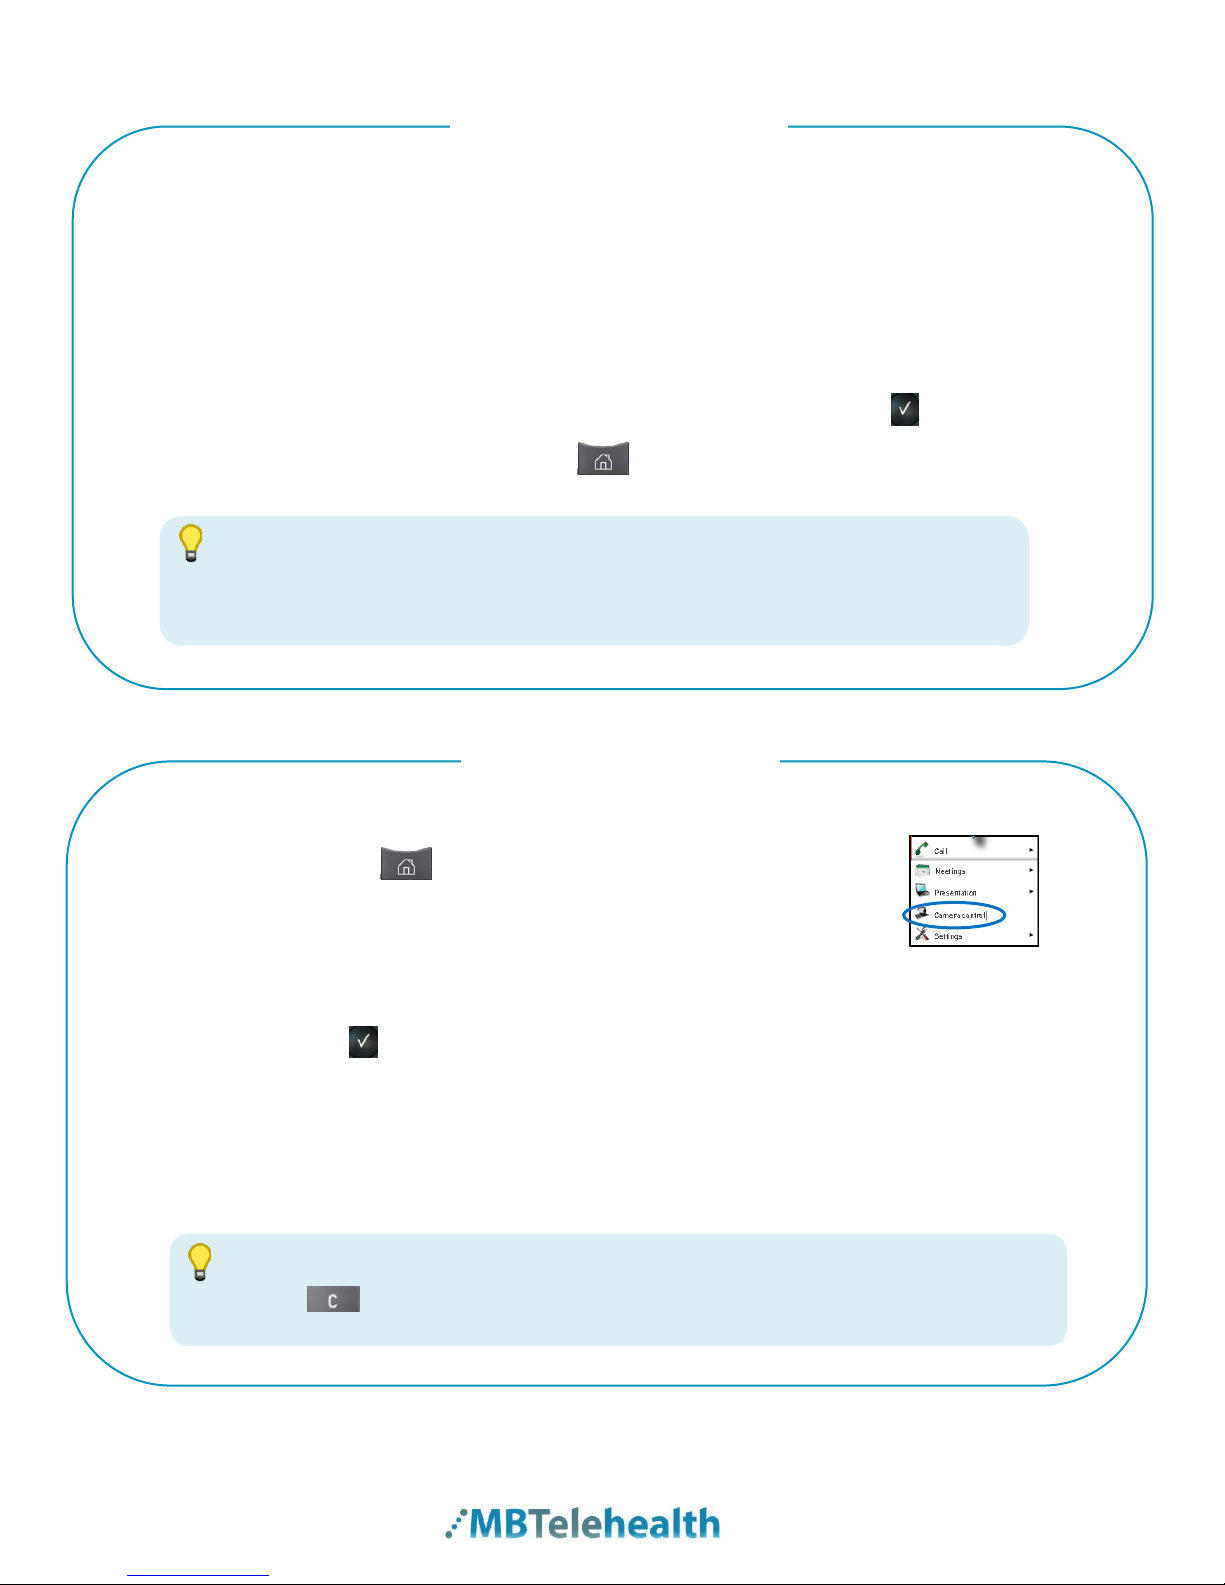
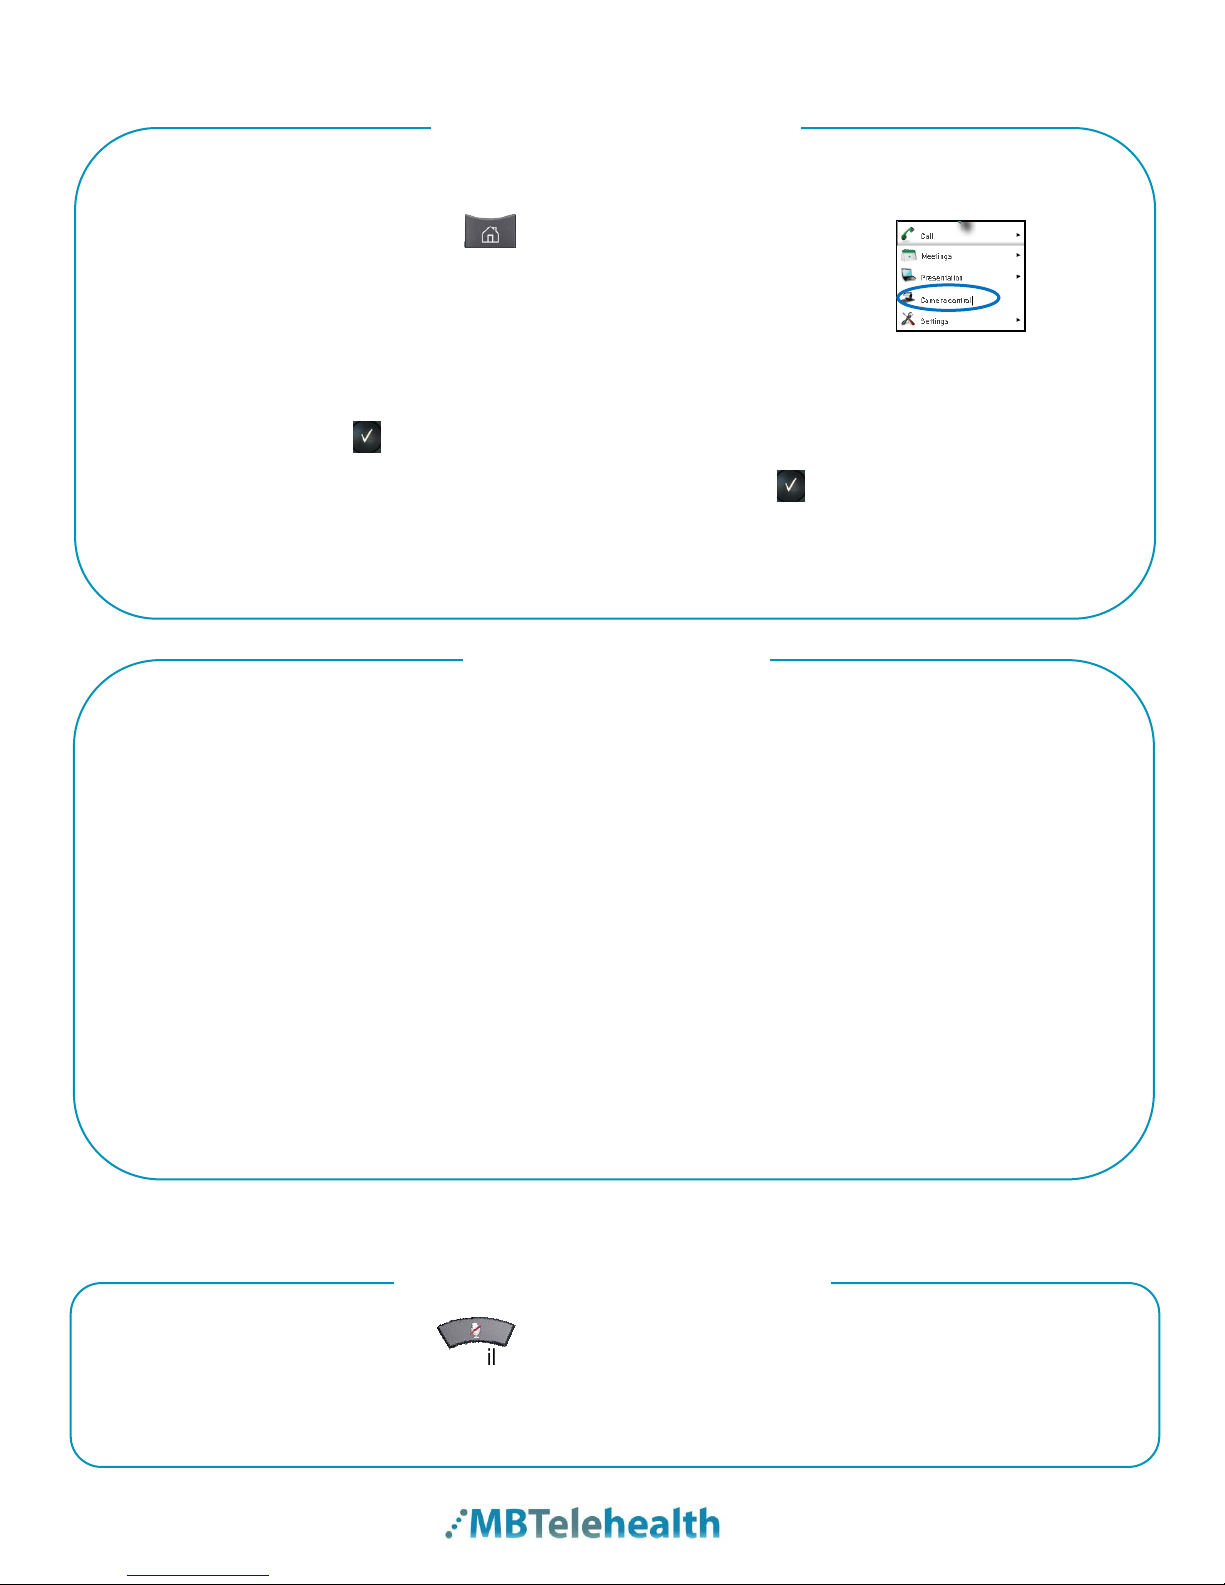
Camera Controls...........................................................................................................................6
Microphone ...................................................................................................................................8
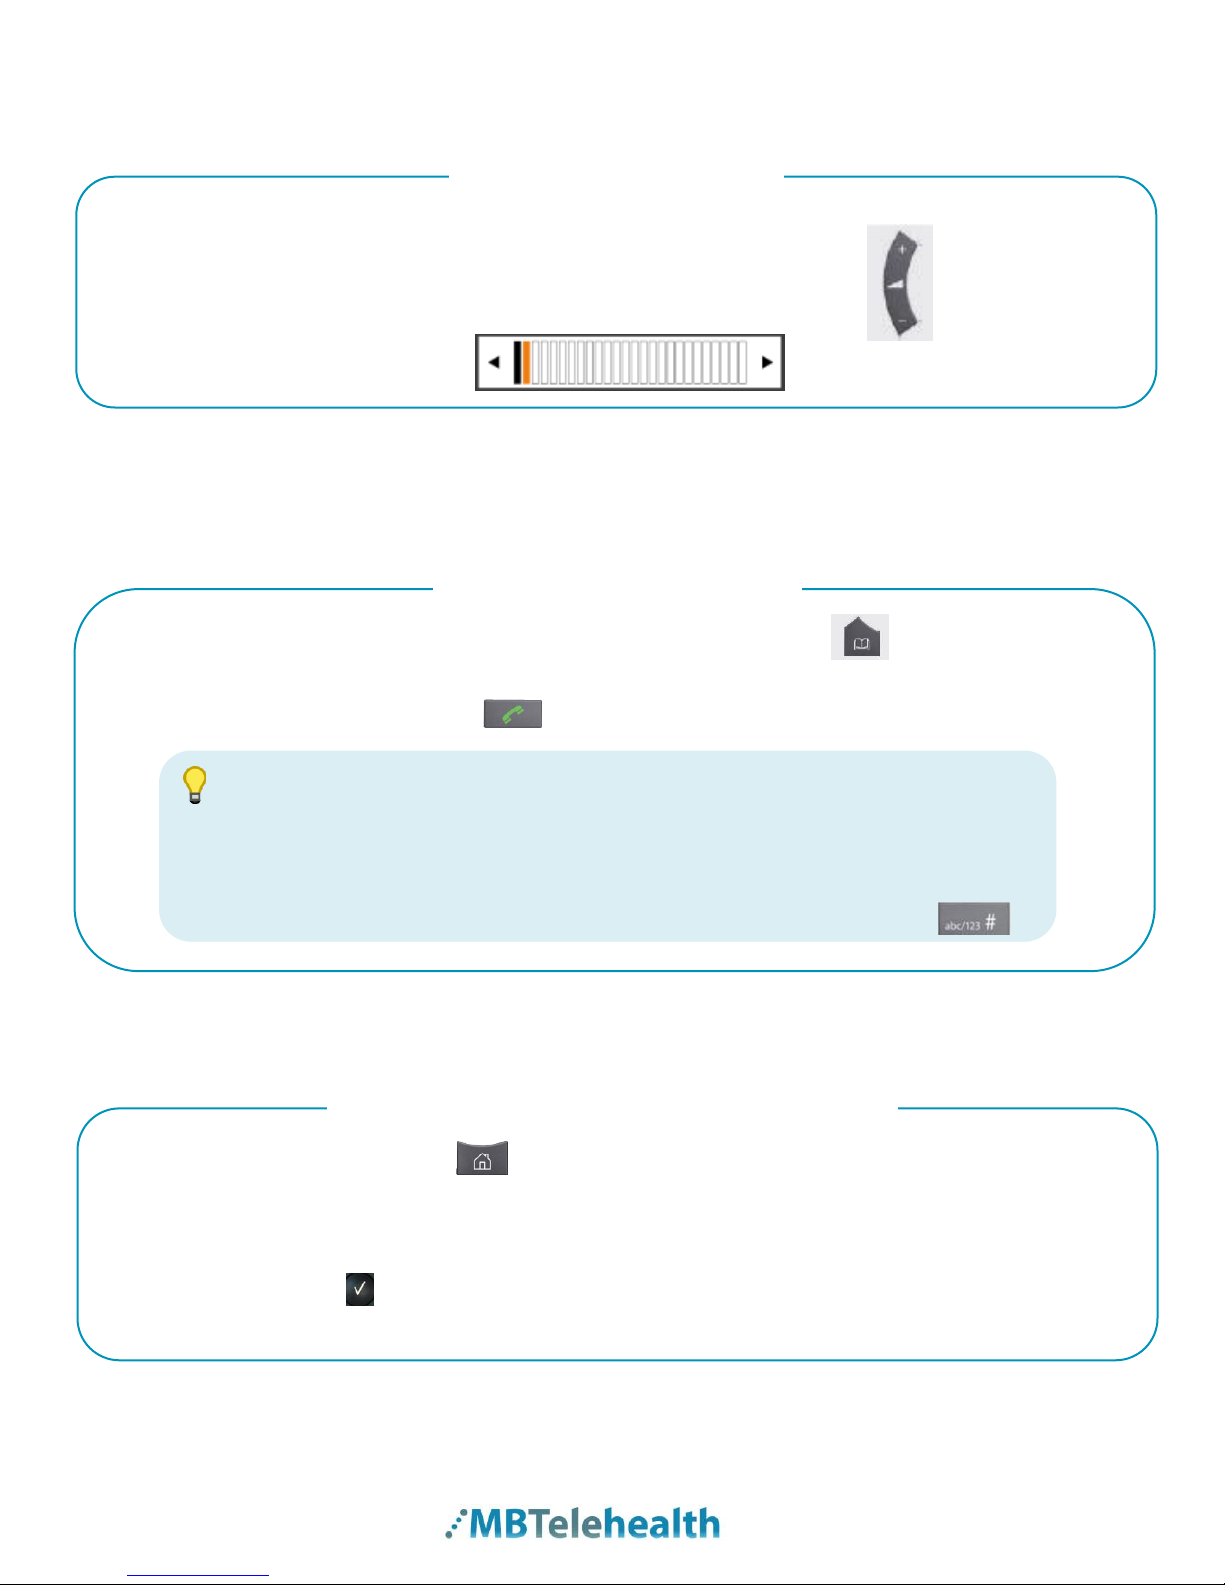
Volume..........................................................................................................................................9
Site to Site Calls............................................................................................................................9
Connecting to a MBT Site...................................................................................................................... 9
Connecting to a site outside the MBT Network ..................................................................................... 9
Far End Control: Site to Site.................................................................................................................10
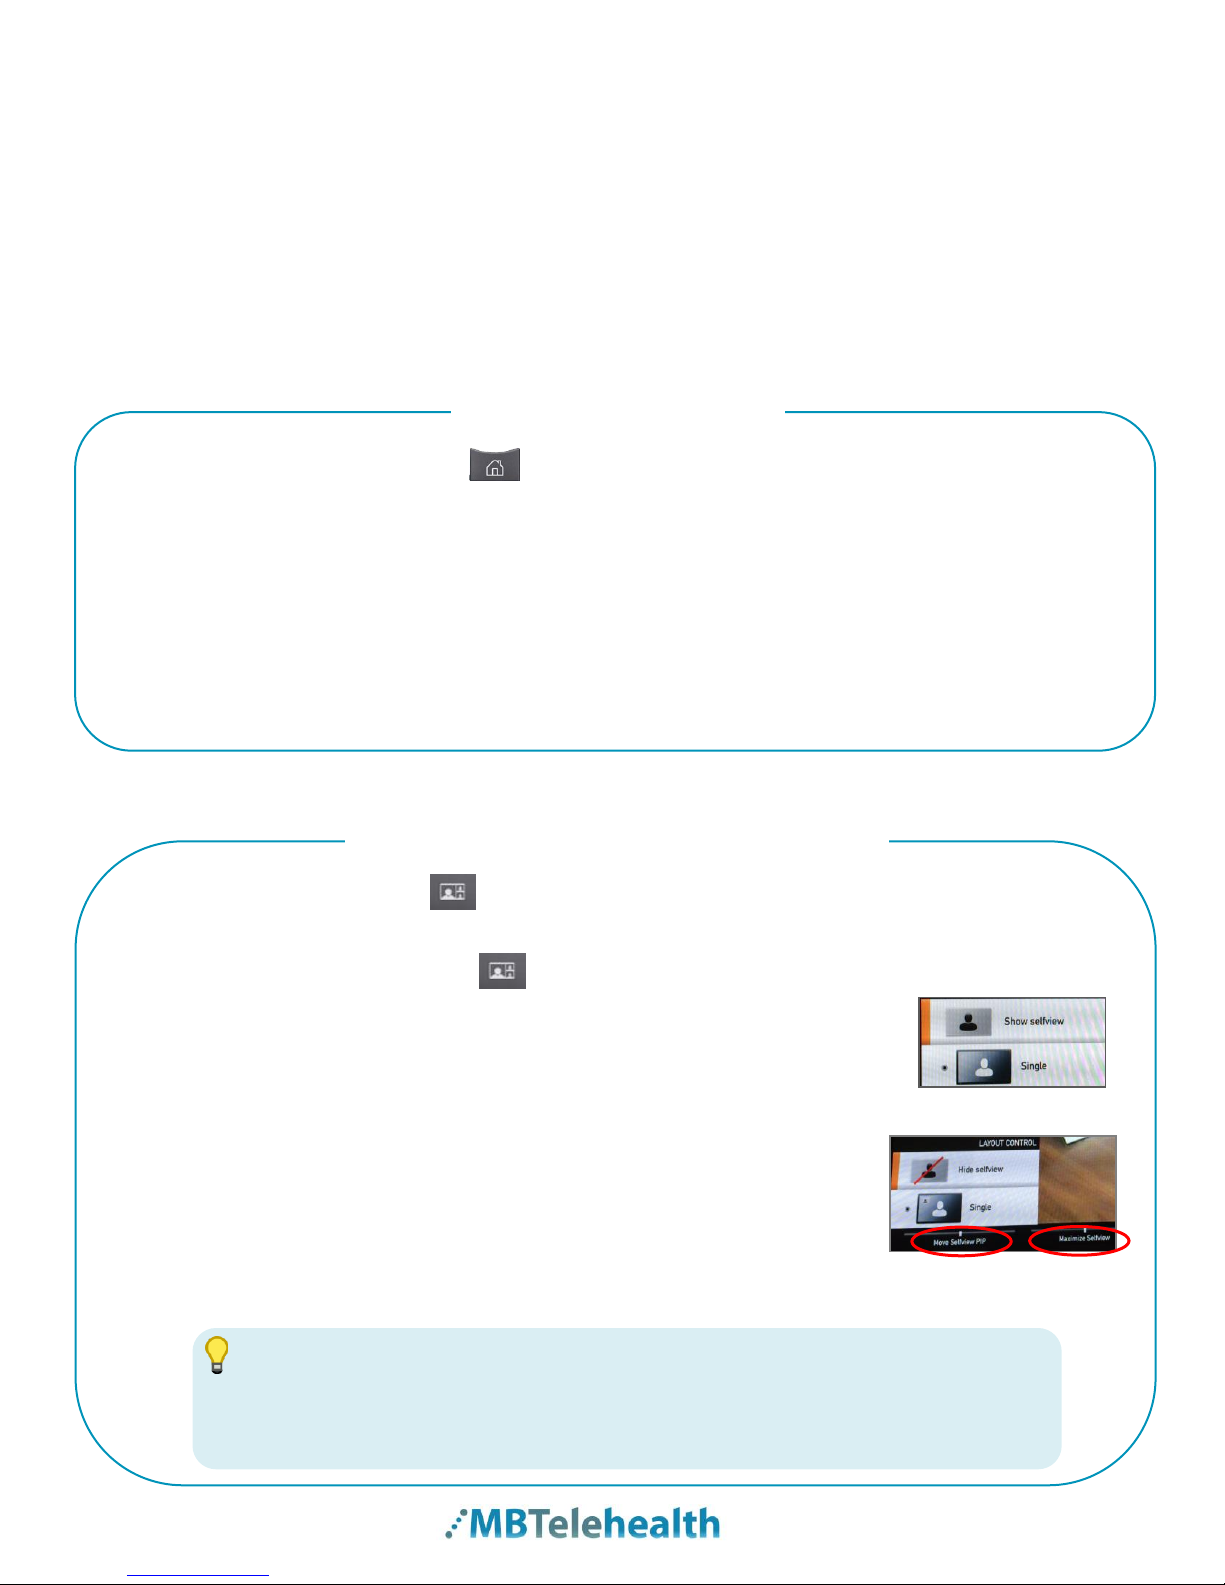
Screen Layout: Site to Site - No presentation.......................................................................................10
Sharing Content: Laptop - Site to Site..................................................................................................11
Sharing Content: Patient Camera - Site to Site.....................................................................................11
Screen Layout: Site to Site - Presentation mode...................................................................................12
Using My Contacts or Recent Calls............................................................................................13
Multi-Site Event Calls (MCU)......................................................................................................14
Connecting to a Multi Site (MCU) Call ................................................................................................14
Screen Layout/Far End: Multi-Site –No Presentation ........................................................................14
Sharing Content: Laptop –Multi Site...................................................................................................14
Sharing Content –Patient Camera Multi Site........................................................................................15
Screen Layout: Multi Site –Presentation Mode...................................................................................16
Receiving and Ending Video Calls..............................................................................................17
DUAL VIDEO ENABLED EQUIPMENT .........................................................................................18
TROUBLESHOOTING ...................................................................................................................19
ADDITIONAL TRAINING INFORMATION .....................................................................................20
VIDEOCONFERENCING ETIQUETTE..........................................................................................20

MBTelehealth –SX20 Quick Set with TRC5 Remote User Guide
Page 3 of 20
OVERVIEW
This user guide will provide you with an overview and the knowledge to setup and use
the SX20 Quick Set videoconference solution and the TRC5 remote.
Screen/Monitor: built-in screen/monitor
displays the far end or the near end
image and content as selected by the
user. In most cases, it’s also the audio
source.
Camera: high quality imaging device which
transmits images to the screen/monitor. The
camera movements are controlled by a
wireless infra-red (IR) remote control that
controls a variety of functions, both on the
near and far end.
Codec: central part of the videoconferencing
equipment. The main task of the codec is the
compression of outgoing video, audio and data,
the decompression of the incoming information
and the transmission of this information
between endpoints. The name codec comes
from a combination of the two words
compression and decompression.
Microphone: will automatically equalize sound levels so that loud
and soft voices are picked up and transmitted to the far end at
approximately the same level.
Remote Control: used to place
calls, adjust the volume, navigate
screens and select options. It
controls all functions of the
videoconferencing equipment,
including moving the camera.
Main Components
The main components included with the SX20 Quick Set are the Camera, Codec,
Ethernet Cable, Microphone, Screen/Monitor and Remote Control. In some instances
there may also be a router.

MBTelehealth –SX20 Quick Set with TRC5 Remote User Guide
Page 4 of 20
BASIC NAVIGATION
Use this key change the layout on
your screen (includes selfview).
These function keys on the top of the
remote correspond to the five context
sensitive softkeys that are found along the
bottom of the screen.
Microphone On/Off.
Adjust volume.
Use the Arrow keys to navigate in
the Menus and the centre OK
key to confirm your selection.
When no menu is open, Arrow
keys are used to move the camera
around.
Use this Home key to display the
Home/Main menu on the screen
–or to exit sub menus.
Use this key to display the Phone
Book on the screen.
Use this key to end a call.
Outside a call, press and hold to
enter standby mode.
Use this key to remove
characters in a text field.
Place a call.
Press to share your
presentation.
Press again to go back to main
camera.
Zoom the camera in and out.
Press and hold this key to toggle
between characters and numbers
when typing in a search field.
Use the back arrow to collapse or
exit a menu.
Use this key to select or accept an
entry
entry.
The remote control is used to operate your video equipment and the system will not work
without it. Here are some commonly used keys on the remote:
Use the keypad to enter
letters and numbers as with a
mobile phone.
Press a key repeatedly to
access the characters
displayed on each key.
Waking up the system
Pick up the remote control, point it towards the
system and press any key on the remote to activate
the system.
Cisco TRC5 Remote

MBTelehealth –SX20 Quick Set with TRC5 Remote User Guide
Page 5 of 20
Softkeys will auto hide at the bottom of the screen after approximately 5 seconds of
inactivity. Pick up the remote and press an Arrow or Zoom key to unhide.
Press an Arrow key or the Zoom +/- key to access the Camera Control softkey
options (Far End, Camera Presets, Camera Settings, Main source, Exit.)
You can move your camera using the arrows and zoom +/- at this point. (note: the
camera control screen can also be selected from the home menu.
In addition to using the keypad on the remote control you can also use the virtual
keyboard. Whenever there is a field that requires entry there will be a Turn Keyboard
On softkey at the bottom of the screen.
1. Press the Turn Keyboard On soft key and use the Up arrow to move the cursor
inside the keyboard.
2. Use all 4 arrow keys to move about the keyboard. Select a letter using the enter
key. The list will keep filtering as you type. Highlight the site and press enter.
3. Press the Turn Off Keyboard soft key when finished.
Example showing a sub menu displayed
by pressing the right arrow key.
The little
triangle
indicates
that a
submenu is
available.
The element
currently selected
is indicated by
an orange
rectangle.
Use the up/down
arrow keys to
Navigate in a
menu.
1
2
3
Press the Ckey on the remote to backspace or remove characters.
TIP
Virtual Keyboard
Navigating the Menus
and Softkeys
Press Home to display the
Home/Main menu on the screen.

MBTelehealth –SX20 Quick Set with TRC5 Remote User Guide
Page 6 of 20
GENERAL USE
The following sections will provide instructions for using your SX20 to place and receive
videoconference calls.
Setup
1. Turn on the screen/monitor if required.
2. Wake the codec by picking up the remote control, point it
towards the system and press any key. After approximately
15-20 seconds you will see the home screen.
3. Place the microphone on the table in front of the participants.
Camera Controls
The camera can be controlled manually or by using Camera Presets.
On the Home screen press the back arrow to exit the
menu and then control the camera using the arrow +/-
key and the zoom +/- keys on the remote.
TIP
Adjust Camera Manually
Setup and use the equipment
Alternately you can Press the Home key on the remote
and select Camera Control. Use the arrows and the zoom +/-
on the remote to move the camera to the desired position.

MBTelehealth –SX20 Quick Set with TRC5 Remote User Guide
Page 7 of 20
Camera presets are useful when images from many different camera positions and
video sources are to be viewed by the far end site(s). Presets are used to switch camera
positions quickly and easily without having to manually move the camera.
(Note: The presets on the mobile carts will need to be modified each time as carts are
typically moved from room to room)
1 Press the arrow or zoom key and the softkeys will appear on the bottom of your
screen.
2 Select Camera Presets, select the desired preset and press OK.
Alternately you can press the Home key , to select Camera Control,
Camera Presets, and then select the desired preset by pressing OK.
1. Move the camera to the desired position using the arrow keys and the zoom +/-.
2. Press Home and then select Camera Control from the menu
on the left of the screen.
3. Select the Camera Presets softkey.
4. Scroll down using the arrow key and select Edit Camera Presets.
5. Click OK or click the forward arrow to bring up the preset listing.
6. Scroll down to the first Not Defined preset.
7. Click the forward arrow and enter the name using the keypad on the remote.
8. Hit the down arrow and select Save New Preset.
To get back to near end camera control, press the back arrow on the remote.
At any time you can use the back arrow to “exit” or “back out” of a menu.
Use Camera Presets
Add a New Preset
TIP
Use the key to remove characters in a text field.
TIP
TIP

MBTelehealth –SX20 Quick Set with TRC5 Remote User Guide
Page 8 of 20
1. Move the camera to the desired position using the arrow keys and the zoom +/-.
2. Press the Home key .
3. Select Camera Control from the menu on the left of the screen.
4. Select the Camera Presets softkey.
5. Scroll down using the arrow key and select Edit Camera Presets.
6. Press OK or press the forward arrow to bring up the preset listing.
7. Scroll down to the preset to be modified and click OK (or the forward arrow).
8. Select Update to Current Camera Position.
The SX20 is set up with three (3) Standard Presets:
Camera presets will be set up and saved as part of equipment implementation but there
may be a need to change or resave presets.
1. Sign –shows the site’s sign with their site name. This is an off screen camera
view that allows users to move about the room without being on camera and
identifies the sites that are connected.
2. Participant (Presenter/Provider/Patient) –close up view of the person or
persons involved in the event. Whether it is the patient, provider or a presenter,
when setting this preset, you want to ensure that the far sites are able see the
person clearly.
3. Room –shows a view of everyone in the room. By setting a preset of the entire
room, you can easily identify everyone in attendance and then switch back to
preset number 2 as necessary. This preset is also helpful for question and
answer periods.
Microphone
1. Press the Mic Off key on the remote control or on the microphone itself.
An onscreen indicator will appear when the microphone is off and the button on
the microphone will change to red.
2. Press the Mic Off key again to unmute. Indicator will show as green.
Modify Existing Preset
Standard Presets
Mute and Unmute the Microphone

MBTelehealth –SX20 Quick Set with TRC5 Remote User Guide
Page 9 of 20
Volume
1. Use the Volume Key to increase or decrease the volume.
A Volume Bar will appear at the bottom right of the screen
Volume Bar
Site to Site Calls
Connecting to a MBT Site
1. For connections to MBT Sites, press the Phone Book key .
2. Scroll down the list of contacts to find the site and equipment you are scheduled
to connect to and press to initiate the call.
Connecting to a site outside the MBT Network
1. Click the Home key and select Call from the menu.
2. Enter the dial in number you have been provided using the number keypad on
the remote.
3. Click OK and select Call. Alternately you can enter the number and then
press the green phone key on the remote to initiate the call.
Adjust the Volume
Connect to a MBT Site
Connect to a site outside the MBT Network
You can also use the Search field to find the site you are scheduled to connect
to by typing the name using the keypad on the remote or by using the virtual
keyboard.
Use the “C” key to backspace and delete any incorrect entries.
Press & hold the abc/123 key to toggle between numeric and characters.
TIP

MBTelehealth –SX20 Quick Set with TRC5 Remote User Guide
Page 10 of 20
Far End Control: Site to Site
Taking Far End Camera Control allows you to move the camera at the far end site.
Before taking control, always request permission first. You may need to take far end
camera control if:
there is an unskilled operator at the far end
the operator requests that you take control
if the operator isn’t able to facilitate the event at their end
1. Press the Home key then select Camera Control.
2. Use the softkey to select Far End which will enable Far End Camera Control.
3. Move the camera to the desired position using the arrow keys and the zoom +/-
keys.
4. Use the softkey to select Near End which will turn off Far End Control
Alternatively you can select the Exit softkey or the OK key on the remote.
(There is a message in the top left of the screen which lets you know if you are
using NEAR END or FAR END CAMERA CONTROL.)
Screen Layout: Site to Site - No presentation
The Screen Layout key on the remote control allows you to control how images
are displayed on your screen.
Press the Screen Layout key to open the Layout Control window.
1. Select Show selfview to display an image of your camera view on
screen and press screen layout again and select Hide selfview to
turn that image off.
2. Press the Move Selfview softkey to move your selfview PIP
around the screen. Each time you press the key the PIP will
move to the next location around the outside of the screen.
3. Press the Maximize Selfview softkey to show your site full screen.
(You will not see the other sites on the screen if you maximize your
selfview.) Press screen layout again and select the Restore Selfview
to return to the previous screen layout.
HINT
The layout and selfview options are different during site to site and multi-site
events as well as when you are in presentation mode. Therefore the
instructions can be found under each applicable section in the guide.
Screen Layout Site to Site –No Presentation
Far End –Site to Site

MBTelehealth –SX20 Quick Set with TRC5 Remote User Guide
Page 11 of 20
Sharing Content: Laptop - Site to Site
1. There will be VGA/ DVI cable already plugged into the equipment.
Plug the VGA end into your laptop and turn the laptop on.
2. Press Presentation on the remote and you should see your laptop
displayed on the telehealth screen.
3. Press the Presentation key on the remote again to turn off presentation or press the
back arrow on the remote to return to near end control.
4. Remove the VGA cable from the laptop to disconnect.
Sharing Content: Patient Camera - Site to Site
The GlobalMed TotalExam HD camera is the only patient camera that can be used with
this videoconferencing equipment.
HINT
If you do not see your PC image, do the following:
on the laptop keyboard, press the Function key (Fn)
and the appropriate F key (often F5, F8 or F10)
simultaneously. A display options menu will appear,
select the option to display on both as shown.
Sharing Content –Laptop
Site to Site
VGA Connector
Sample equipment
(could be fixed or mobile)

MBTelehealth –SX20 Quick Set with TRC5 Remote User Guide
Page 12 of 20
1. Plug the AC adaptor into the POD and into an outlet.
2. Using the HD to VGA adaptor converter that’s attached to your equipment, plug
the HDMI end into the back of the POD and the other end to the VGA cable that’s
attached to your equipment.
3. Connect the camera to the POD using the HDMI/HDMI mini cable.
4. Press the small black power button on the front of the POD. The LED on the
front of the POD will illuminate once both ends of the cables are connected.
5. Press the presentation key on the remote.
6. You should now see the patient camera image displayed on the video
conference monitor. (View the GlobalMed Patient Camera Quick Reference Guide for more
details on how to use the camera).
Screen Layout: Site to Site - Presentation mode
The following menu items are available during presentation mode:
Equal –sites will appear in equal size on the screen
Prominent - your presentation will appear larger than the other site
on your screen
Overlay - your presentation will appear larger and will be overlaid on
the other site
Single - your site will appear full size on your screen
HD to VGA adaptor convertor
HINT
If you are connected to another piece of equipment that has dual video enabled
they are able to see both of your feeds; both your camera view and your
presentation and will have full control over their own layout.
Sharing Content –Patient Camera
Site to Site
Screen Layout Site to Site –Presentation
Menu Items

MBTelehealth –SX20 Quick Set with TRC5 Remote User Guide
Page 13 of 20
The following Softkeys are available during presentation mode:
Minimize Presentation - allows you to view the speaker full screen and puts the
presentation over on the left hand side.
Restore Presentation - allows you to restore the presentation and toggle
between the presenter and presentation in case the presenter is speaking
between slides.
Move presentation PIP- allows you to move your presentation around the
screen
Using My Contacts or Recent Calls
These options apply to both MBT sites and calls outside of the MBT network.
Use the green phone key on the remote to access “Recent Calls”
1. This option just brings up recent calls. (note: sites such as the rural RHA’s may
like this option as they often call the same sites and this will reduce the amount
of scrolling through the entire contact list or the number of steps required to
access recent calls.
Adding to “My Contacts”
1. Select the phone book key on the remote.
2. Scroll down and select a site (ex: Flin Flon-FFPHC-VCU1).
3. Press the right arrow and save to my contacts.
4. Press Save again (This is a great option for rural sites who would like to add your
most frequently called sites from this particular equipment).
Accessing “My Contacts”
1. Press the phone book on the remote and press OK to select My Contacts .
2. Use the down arrow to select the site and press OK.
3. Press Call.
(Alternatively, once your selected site is indicated by an orange border you can
press the green phone key on the remote.)
Select Single to view your
presentation full screen.
Soft keys
HINT
When the presenting site exits the presentation, the only menu items that will be
available is: Hide selfview/Show selfview
Screen Layout Site to Site –Presentation
Softkeys

MBTelehealth –SX20 Quick Set with TRC5 Remote User Guide
Page 14 of 20
Multi-Site Event Calls (MCU)
Connecting to a Multi Site (MCU) Call
If you are participating in a multi-site event (3 or more participating sites) you will
be automatically connected by the MBTelehealth service desk at the scheduled
start time.
Do not attempt to connect to another location.
You will be automatically disconnected at the scheduled end time. ***There will be
a 10 minute warning prior to the disconnection.
When your unit accepts a call it turns the microphone off so you will need to unmute
when your session starts.
Screen Layout/Far End: Multi-Site –No Presentation
During Multi-Site calls, the Screen Layout key allows you to control how the other sites
are displayed on your screen.
1. Press the Home key then select Camera Control.
2. Use the softkey to select Far End which will enable Far End Camera Control.
3. Use the Up/Down arrow keys to scroll through the layout options.
4. Use the soft key to select Near End which will turn off Far End Control.
Sharing Content: Laptop –Multi Site
1. There will be VGA/ DVI cable already plugged into the equipment.
Plug the VGA end into your laptop and turn the laptop on.
1. Press Presentation on the remote and you should see your laptop
displayed on the teleheatlh screen.
2. Press the Presentation key on the remote again to turn off presentation or press the
back arrow on the remote to return to near end control.
3. Remove the VGA cable from the laptop to disconnect.
Screen Layout Multi Site –No Presentation
Sharing Content –Laptop
Multi Site
VGA Connector
HINT
If you do not see your PC image, do the following: on the laptop keyboard,
press the Function key (Fn) and the appropriate
F key (often F5, F8 or F10) simultaneously. A
display options menu will appear, select the
option to display on both as shown.
Connect to an MCU Call

MBTelehealth –SX20 Quick Set with TRC5 Remote User Guide
Page 15 of 20
Sharing Content –Patient Camera Multi Site
The GlobalMed TotalExam HD camera is the only patient camera that can be used with
this videoconferencing equipment.
1. Plug the AC adaptor into the POD and into an outlet.
2. Using the HD to VGA adaptor converter that’s attached to your equipment, plug
the HDMI end into the back of the POD and the other end to the VGA cable that’s
attached to your equipment.
3. Connect the camera to the POD using the HDMI/HDMI mini cable.
4. Press the small black power button on the front of the POD and both the camera
and the POD should be lit up and functioning.
5. Press the presentation key on the remote.
6. You should now see the patient camera image displayed on the video
conference monitor. (View the GlobalMed Patient Camera Quick Reference Guide for more
details on how to use the camera).
HD to VGA adaptor convertor
Sharing Content –Patient Camera
Multi Site

MBTelehealth –SX20 Quick Set with TRC5 Remote User Guide
Page 16 of 20
Screen Layout: Multi Site –Presentation Mode
Equal –sites will appear in equal size on the screen
Prominent - your presentation will appear larger than the other site
on your screen
Overlay - your presentation will appear larger and will be overlaid
on the other site
Single - your site will appear full size on your screen
Minimize Presentation - allows you to view the speaker full screen and puts the
presentation over on the left hand side.
Restore Presentation - allows you to restore the presentation and toggle
between the presenter and presentation in case the presenter is speaking
between slides.
Move presentation PIP- allows you to move your presentation around the
screen.
If you are connected to another piece of equipment that has dual video enabled they
are able to see both of your feeds; both your camera view and your presentation and
have full control over their own layout as they will also have the options above.
HINT
Press the Screen Layout key on the remote to view your menu options. The
Screen Layout key only changes the layout during presentation mode.
When the presenting site exits the presentation, the only menu items that will be
available are: Hide selfview/Show selfview.
HINT
Select Single to view your
presentation full screen.
Soft keys
Screen Layout Multi Site –Presentation
Menu Items
Screen Layout Multi Site –Presentation
Softkeys

MBTelehealth –SX20 Quick Set with TRC5 Remote User Guide
Page 17 of 20
Move Selfview PIP –each time your press the key, the PIP will move around the
outside of the screen.
Maximize Selfview –will show selfview full screen
Receiving and Ending Video Calls
Receiving Calls
Your Cisco SX20 Set Top solution has been configured to automatically accept all
incoming connection requests. This means that both site to site connections initiated
by another site and multi-site connections will be automatically connected. (note: Contact
your FES to confirm if your particular equipment has been configured this way)
You will hear a dial tone that indicates there is an incoming call and your microphone will
automatically mute so that the connecting site cannot overhear what you are discussing.
Once the connection is made, you will need to unmute your microphone so that the other
site(s) can hear you.
If you do not want to accept an incoming call, press to reject the call.
Ending Calls
At the completion of every call, press to disconnect
If you are participating in a multi-site event (3 or more participating sites) you will
be automatically connected by the MBTelehealth service desk at the scheduled start time.
Do not attempt to connect to another location.
You will be automatically disconnected at the scheduled end time. ***There will be a 10
minute warning prior to the disconnection.
When your unit accepts a call it turns the microphone off so you will need to ‘unmute” when
your session starts.
HINT
Receiving and Ending Video Calls
Screen Layout Multi Site –No Presentation
Softkeys

MBTelehealth –SX20 Quick Set with TRC5 Remote User Guide
Page 18 of 20
DUAL VIDEO ENABLED EQUIPMENT
The equipment listed below supports dual video which allows users to display and view
two different live video feeds simultaneously. For instance, you could view both the PC
presentation as well as the person who delivers the presentation. With two video
streams, the receiving site is able to control the layout of how they view each of the
feeds. Note: The above information only applies to point to point calls when both
units are using dual video enabled equipment.
oCisco SX series equipment
oMX200/300 Touchscreen
oVX Clinical Assistant (Mobile Cart)
oErgotron Cart (clinical and non-clinical)
If the connecting video system does not support dual video then no second video stream
will be established for this system and the camera or PC presentation will be shown as
the main video feed.
This information is applicable to point to point calls between a dual video enabled
presenting site and a non-dual video enabled receiving site. If the presenter site
changes the Remote Layout softkey to Equal, the receiving site will see both the
camera and the presentation in equal size within the one video feed. They also have the
ability to show their own selfview in the corner of the screen.
The receiving site does not have the ability to change the layout back to see just the
presentation full screen as they do not have that functionality on their non-dual video
enabled equipment. The presenting site will need to change the Remote Layout back to
Single by using the softkey.
HINT
Use caution when using layout options other than Single as the quality of the
picture will be reduced for the other site.
HINT
If both pieces of equipment are dual video enabled, the remote layout softkey
basically has no function as both sites are able to change their own screen layout
by pressing the Screen Layout key and selecting the desired option.
Dual Video Enabled Equipment
Remote Layout

MBTelehealth –SX20 Quick Set with TRC5 Remote User Guide
Page 19 of 20
TROUBLESHOOTING
Audio Issues
Issue
Possible Cause(s)
Resolution
Far-end site unable to hear you
Your mic is muted (red light is on)
Your microphone is obstructed or
too far from the person speaking
Un-mute your microphone
Check microphone and ensure it
points towards the person speaking
Unable to hear far-end site
Microphone is muted at far end site
Near end monitor and/or codec
volume is too low
Ask far site to un-mute their mic
Increase the volume on the monitor
and/or the codec
Audio distortion from far-end site
Far site monitor volume is too high
Ask the far-end site to turn down
the volume on their monitor
Echo or distortion at near-end when
people speaking
Far-end microphone is situated too
close to the monitor
Speaker/volume is too high on far-
end monitor
Ask to move microphone further
away from monitor
Ask far-end site to turn volume
down on their monitor
Video Issues
Issue
Possible Cause(s)
Resolution
Picture is blank on the monitor
System has gone into “sleep” mode
Monitor has been powered off
Monitor input has changed
Pick up the remote, system will
reactivate in normal mode
Turn the monitor on
Check to see if the monitor input
has been changed (using the select
or input button on the TV Monitor)
Near-end site unable to hear or see
the picture from far-end peripheral
Proper input has not been selected
Cables are not properly connected
Check for correct input selection on
remote control
Check that output from laptop or
patient camera are connected
properly
If you are experiencing any problems with the videoconferencing equipment or have
any questions, please contact the MBTelehealth Service Desk for assistance:
Winnipeg or outside of Manitoba
Phone: (204) 975-7714 Option 1
Outside of Winnipeg (within Manitoba only)
Phone: 1-866-667-9891 (toll free) Option 1
NEED HELP?

MBTelehealth –SX20 Quick Set with TRC5 Remote User Guide
Page 20 of 20
ADDITIONAL TRAINING INFORMATION
For additional information on videoconference equipment visit www.mbtelehealth.ca
or contact your Facilitator-eHealth Solutions.
VIDEOCONFERENCING ETIQUETTE
The following tips on videoconferencing etiquette will help prepare you for a successful
session:
Assume that people can see and hear you as if the Camera and Microphone are
always “Live”.
Always check your selfview so you are aware of what will be displaying at the far-end
site.
Confirm that the other site can see and hear you and identify yourself and anyone
else in the room.
Speak directly towards the microphone and use your normal speaking voice.
Try to avoid a lot of movement or shuffling of papers as this may affect the quality of
the sound transmission.
Due to the audio delay, pause for clients to ask or answer questions or when they
have comments.
Always ensure there are no further questions and that the client is aware of follow-up
instructions before signing off.
Table of contents
Other MBTelehealth Conference System manuals