It pays to check if there is material around this area when at the back of the machine when
cutting the plastic or net. This problem is more common when feeding square bales. To operate
the cradle the frame needs to be moved forward 50mm.
When pushing the bales forward over the cradle slats, have the yellow slat in the top right hand
position as marked on the bale feeder frames. When pushing any bale forward the yellow slat
needs to be in this position. This enables the bale to be pushed over the star wheels to the front
of the cradle. If you try and push the bales over the fixed teeth you will only get the bale about
two thirds of the way on before the front digs in and back lifts. You will need to turn the cradle
to get it the rest of the way either in the paddock while feeding or in the loading area if you still
need to load more bales onto the transfer bed.
The front basket is there for the plastic and the side basket for the net.
LOADING THE BALE
Lower the forks as low as they go. In this position they are set up for a standard 4 - 5 foot bale.
If feeding out 6 foot bales lift the forks at the tyne end 100 - 150mm. Once you have loaded a few
bales you will get the right area, it does not need to be exact. If the bale is coming over and the
front of the bale is landing first, put the forks in lower. If the forks are as low as they can go it is
not a problem, just load that that way. If the bale is coming down with the back end of the bale
hitting the cradle first then put the forks in a bit higher into the bale.
It is easier to have the bales lined up first before loading the first bale. Once you have placed the
first bale into the cradle you cannot see the forks when backing into the second bale so all you
have to do is back straight back into the other bales which solves a lot of problems. Leave a gap
between each bale to cut the plastic off.
Before loading the bales, cut the plastic off all the bales. Then back into the first bale, lift the bale
over until approximately 400mm above the cradle. This distance can vary as it depends on the bale
and what height you find is the best to remove the netting. For finer chop bales you may need it
higher.
Cut the netting underneath and pull it off. Once the netting is off, you can lower the bale onto the
cradle. Move this bale forward to the middle position, then move the sliding frame back to the
rear position. If the frame does not go right back you will not move the diverter valve and the
loading frame will not work.
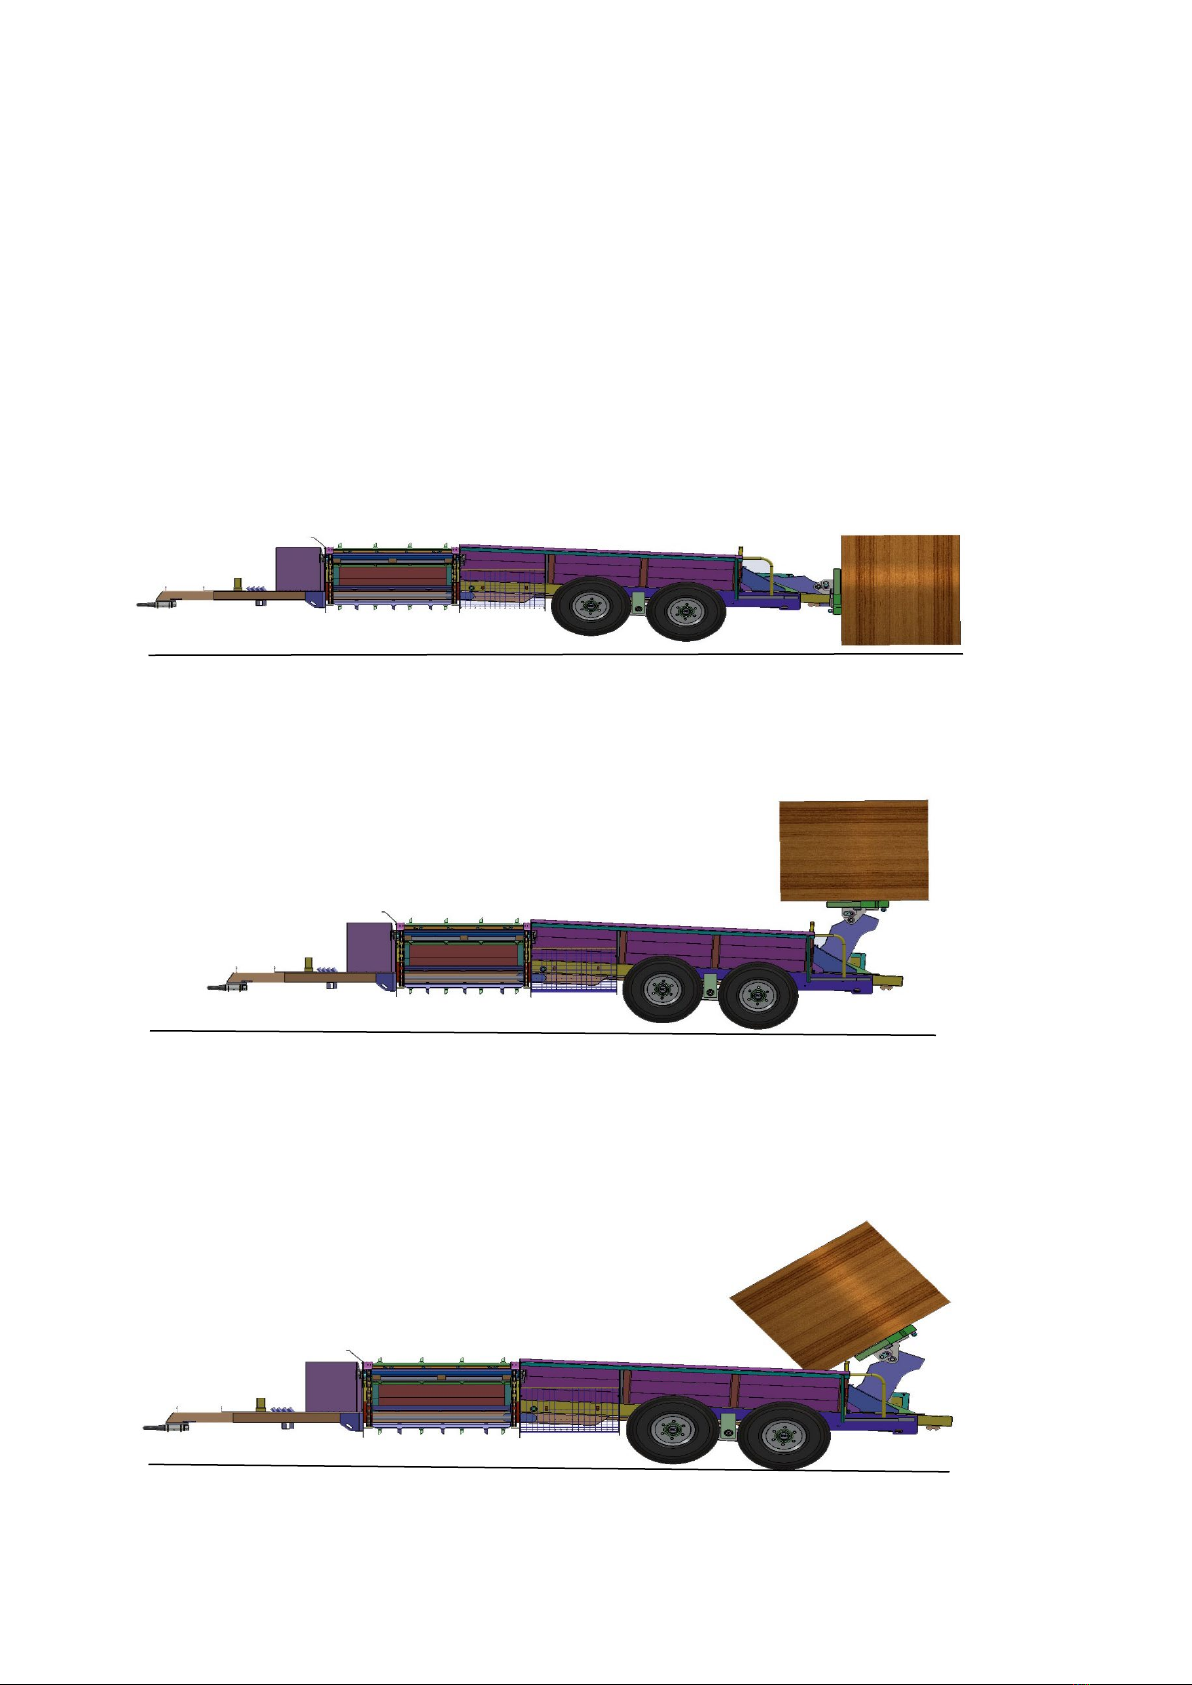
Load the next bale, cut the net off and push the two bales forward. Reverse the moving frame to
the rear again and repeat. Spear the last bale and lift to around 45 degrees. Move the moving
frame forward 50-100mm so the oil flow is now transferred from the loading frame to the cradle.
Another way is to cut the plastic and net off the top half of the bales. Load the bales then remove
the half of the plastic and net which is the now on the top. Leave just over half the plastic on the
bale otherwise it may fall apart when flipping over.
When loading a bale, flip it right over in one movement. If you stop the bale at its full height the
second ram may not have enough power to flip the bale over and you will have to go down again
and then up. Load the bales with the tractor running, using as few revs as possible. With a slow
flow you will have more control. Once the bale is above the cradle you will not be able to lift it up
again so with the first few bales try different heights to get the net off until you find the best