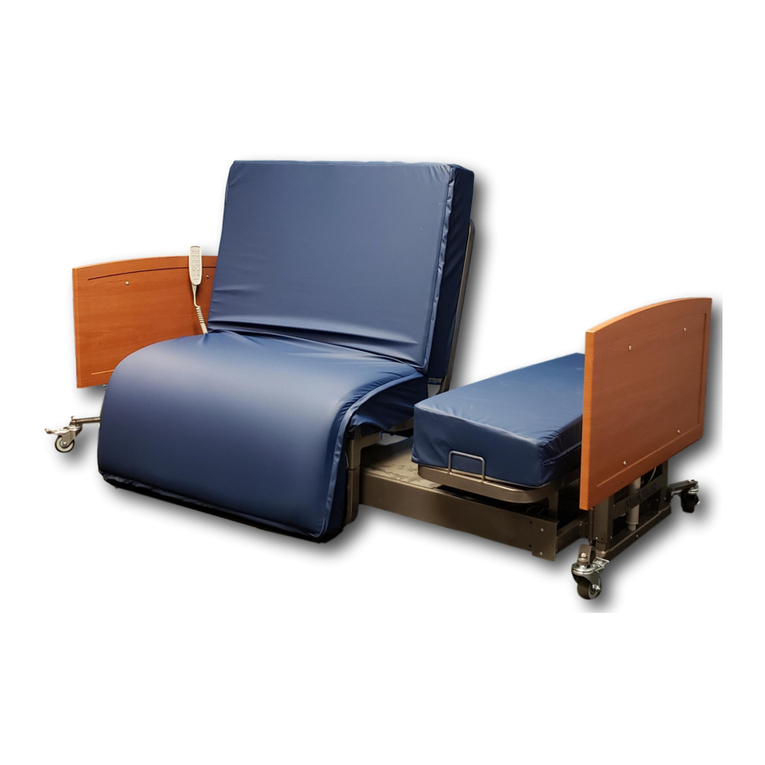
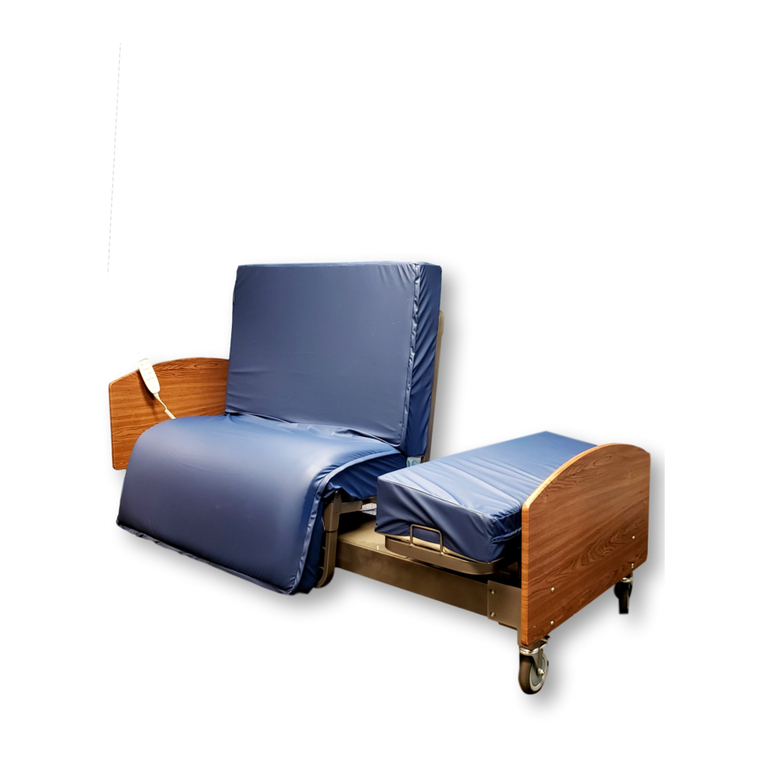
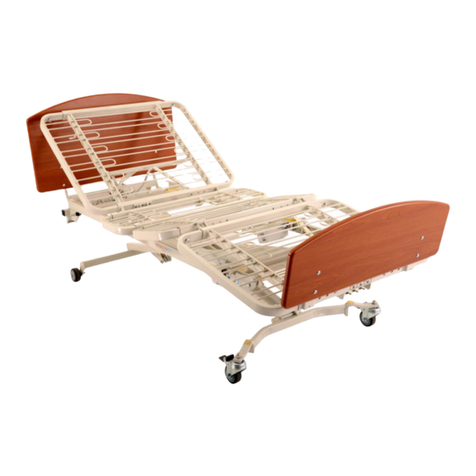
Med-Mizer EX8000 User manual

EX8000 User Manual
Revision 00
MAN-EX8000 REV00 EX8000 USER MANUAL Page 1 of 22
EX8000
USER MANUAL

EX8000 User Manual
Revision 00
MAN-EX8000 REV00 EX8000 USER MANUAL Page 2 of 22
TABLEOF CONTENTS
Overview
Introduction
3
Intended Use
3
Safety Information
3
Specifications
6
Options and Accessories
6
Preparation for Use
Unpacking
7
Disassembly
8
Assembly
11
Operation
Control Options
18
Bed Height Adjustment
18
Head and Knee Adjustment
18
Foot Elevation
19
Bed Transport
19
Bed Deck Expansion & Retraction
20
Maintenance
Cleaning
21
Maintenance and Service
21
Service Part List
22
Warranty
22
3

EX8000 User Manual
Revision 00
MAN-EX8000 REV00 EX8000 USER MANUAL Page 3 of 22
Overview
Introduction
This manual provides instructions for use of the EX8000. Do not operate the bed without first
reading and understanding the warnings and cautions provided herein.
NOTICE: The information in this document is subject to change without notice.
Intended Use
The EX8000 Bed is intended to provide means for a single occupant to recline and sit, and to
assist the occupant in moving between reclining, sitting and standing positions.
The bed is intended for use in the U.S. and Canada long and short-term care facilities, and
homes.
The bed is intended to support a safe working load of 800 lbs. (evenly distributed), which
includes the weight of the occupant, mattress, bedding, and any other items on the bed deck.
The bed is intended for operation by adult users who have read and understand this User Manual.
The bed is intended for indoor use in environments where it will not get wet, where floors are
stable and level, and in ambient temperatures between 41°F and 104°F.
The bed is intended for operation on 120 VAC, 60 Hz mains power.
The bed is not intended to provide a means for transport of the occupant.
Safety Information
This symbol identifies a WARNING or CAUTION:
WARNING represents potentially dangerous situations that can lead to serious physical
injury or death.
CAUTION represents potentially dangerous situations that can lead to minor physical
injury.
General Use Safety
WARNING Bed must be used as specified under the “Intended Use” heading. Use of the
bed outside of the specified conditions may result in personal injury or equipment
damage.

EX8000 User Manual
Revision 00
MAN-EX8000 REV00 EX8000 USER MANUAL Page 4 of 22
WARNING Close supervision by an adult user who has read and understands this User
Manual is required when the bed is used around children or others who have not or
cannot read and/or understand this User Manual.
WARNING The bed mattress must be properly sized to meet entrapment zone
dimensional guidelines published by the Food and Drug Administration.
WARNING Do not spill or spray liquid on the bed. Excessive liquid on the bed can
result in an electric shock hazard. In the event of a liquid spill or excessive liquid on the
bed, unplug the bed immediately. Remove excess liquid and allow bed to dry thoroughly
before restoring power.
WARNING Never permit anyone under the bed while the bed is being used. Failure to
do so could result in personal injury.
WARNING Never operate the bed if a cord or plug is damaged, or it is not working
properly. Contact Qualified Service Personnel for inspection and/or repair. Failure to do
so could result in personal injury.
WARNING Ensure the main power cord is routed where it is not pinched either under or
beside the bed. Failure to do so could result in personal injury or equipment damage.
CAUTION Ensure the grounding cable of the control box is securely fastened to the
frame. Failure to do so could result in personal injury or equipment damage.
CAUTION If a handset is used, the cord must be routed and secured properly to ensure
that cord does not become entangled. Failure to do so could result in equipment damage
or personal injury.
CAUTION Keep all moving parts free of obstruction (i.e. blankets, sheets, pads, tubing,
etc.)
CAUTION Never remove any labels applied to the bed. Failure to do so could result in
personal injury or equipment damage.
CAUTION Do not exceed the maximum allowable weight capacity on this bed. The
maximum weight is the sum of the resident/patient, mattress, bedding material and
headboard and footboards.
CAUTION Keep the bed in low position when the occupant is unattended. High bed
positions increase the risk of injury from falling when getting in or out of bed, or while
reclined.

EX8000 User Manual
Revision 00
MAN-EX8000 REV00 EX8000 USER MANUAL Page 5 of 22
CAUTION Always keep all bed casters locked unless bed is being moved. Unlocked
casters can result in a fall hazard due to unexpected bed movement.
CAUTION To avoid a fire hazard; do not use the bed in an oxygen-enriched
environment or in the presence of explosive gases.
CAUTION To avoid an electric shock hazard; do not plug the power cord into a wall
outlet if the power cord is damaged, if the ground pin is missing, or if the wall outlet does
not provide for the power cord ground pin.
Bed Articulation Safety
WARNING Always confirm the area under the bed and end-boards is free and clear of
children, inattentive adults, pets, and objects when raising and lowering the bed.
CAUTION When lowering the bed or knee in chair position, always ensure limbs or
extremities are not under any portion of the bed or mattress.
CAUTION Always confirm limbs or extremities are within the perimeter of the mattress
and not in a position where they can be trapped or pinched by the support arms and assist
bars when adjusting head and knee elevation.
CAUTION Keep moving parts of bed free of obstructions, including bedding, heating
pads, tubes, cords and wires. Items caught in moving parts may be crushed, cut or pulled
during bed adjustment.
Side Rail and Assist Bar Safety
WARNING Always confirm the side rail and assist bars are locked in the raised position.
Improperly locked support arms and assist bars can result in a fall hazard due to sudden
unexpected movement.
Options and Accessories Safety
CAUTION Use only bed accessories and bed replacement parts supplied or approved by
Med-Mizer® for this bed. Third party accessories and replacement parts that are not
approved by Med-Mizer® may result in personal injury or equipment damage.
Cleaning Safety
WARNING Do not spill or spray liquid on the bed. Excessive liquid on the bed can
result in an electric shock hazard. In the event of a liquid spill or excessive liquid on the
bed, unplug the bed immediately. Remove excess liquid and allow bed to dry thoroughly
before restoring power.

EX8000 User Manual
Revision 00
MAN-EX8000 REV00 EX8000 USER MANUAL Page 6 of 22
CAUTION Follow manufacturer’s instructions for proper use of cleaning agent.
Improperly diluted or improperly applied cleaning agents can result in inadequate
disinfection or a caustic burn hazard.
Maintenance and Service Safety
WARNING Before performing bed maintenance or service, unplug the power cord to
avoid an electric shock hazard.
WARNING If a fault or problem is found during preventative maintenance inspections,
remove the bed from service until the appropriate repair or adjustment is made.
Specifications
Deck Height Range
9.5" to 25.5"
Weight with Standard Boards
299lbs.
Safe Working Load
800 lbs.
Maximum Head Angle
63º ± 3º
Overall Bed Widths
35.5", 38.5", 41.5",
47.5”
Maximum Knee Angle
19º ± 3º
Overall Bed Length
94.00"
Power Requirements
120 VAC, 60 Hz
Overall Bed Weight
270 lbs.
Maximum Current Draw
2.7 amps
Controller Output Voltage
24 VDC
Options and Accessories
BATRAP
Trapeze Accessory
BAEXT
4 Inch Bed Extender
DOLLY-BA
Transport Dolly Accessory
ASRL-PR
Pivoting Assist Bar –Right
ASRL-PL
Pivoting Assist Bar –Left
ASRL-3PL
Pivoting Assist Bar –Left w/ Embedded Controls
ASRL-3PR
Pivoting Assist Bar –Right w/ Embedded Controls
BATT
Battery Backup (Factory Option)
BAUD
Two Position Side Rail (Set)
UD3C
Two Position Side Rail (Set) w/ Embedded Controls
BASCALE
Bariatric Scale
6351
3 Function Pendant
6429
Pendant with Trendelenburg

EX8000 User Manual
Revision 00
MAN-EX8000 REV00 EX8000 USER MANUAL Page 7 of 22
End Board Panels
End Board Options
Headboard and Footboard Finish Options
Custom Headboard and Footboards Available
Preparation for Use
Unpacking (If Shipped LTL/Commercial)
Tools Required:
Utility knife
Side-cutting shears
To unpack bed, footboard and headboard:
1. Use the utility knife to carefully cut the
shrink-wrap film and remove it from
the bed.
2. Use the side-cutting shears to carefully
cut all banding and tie straps.
3. Use the utility knife to carefully open
the carton containing the end boards,
and remove the headboard and
footboard.
4. With two persons, slowly slide bed off
the pallet.

EX8000 User Manual
Revision 00
MAN-EX8000 REV00 EX8000 USER MANUAL Page 8 of 22
Disassembly
Tools Required:
5/8 Wrench
5/8 Socket
Ratchet handle
Side Cutters
1. Lock all four caster then carefully lay entire bed on the ground, make sure to lay it on the
head section side.
2. Using side cutters remove the black sip ties on the top of the bed.
Head
Symbol on
Head
High/Low.

EX8000 User Manual
Revision 00
MAN-EX8000 REV00 EX8000 USER MANUAL Page 9 of 22
3. Now that the wire ties have been removed, locate the two 7/16-14 x 4 ½” bolts. Using
your 5/8” wrench and ratchet both will need to be removed in order to separate foot
section high low mechanism.
4. Once these nuts and bolts are removed the mechanism is free to be lifted off. Do
not discard these bolts; they will be used to assemble the bed. Once the
mechanism is removed, place it in a safe area until bed assembly.
5. Locate the next two 7/16-14 x 4 ½” bolts to be removed. Remove both bolts to release
the head section of the bed from the foot section. Do not discard the nuts and bolts.
There are four ½” washers that will not be used for assembly of the bed; however do not
discard if the bed will be reassembled for transport.

EX8000 User Manual
Revision 00
MAN-EX8000 REV00 EX8000 USER MANUAL Page 10 of 22
6. Remove the head section from the bundle and place in a safe place until bed assembly.
This action will free each section from the entire bundle.
7. The foot high low mechanism is below foot section frame that the head section was
removed from. Locate the other two 7/16-14 x 4 ½” bolts to remove and repeat step 5.
8. Remove the foot section from the foot high low mechanism. Disassembly is complete
and it is now time to place the four sections in proper location for assembly.

EX8000 User Manual
Revision 00
MAN-EX8000 REV00 EX8000 USER MANUAL Page 11 of 22
Assembly
Tools Required:
5/8 Wrench
5/8 Socket
Ratchet handle
Side Cutters
1. Place each of the four sections into place for assembly. Orient like the following.
2. Next assemble the head section deck to the head high low mechanism. Locate the 7/16-14
x 4 ½” bolts and nuts used for disassembly, each will be used to assemble.

EX8000 User Manual
Revision 00
MAN-EX8000 REV00 EX8000 USER MANUAL Page 12 of 22
3. Next place each bolt into the bushings located on the head section deck.
4. Now lift the head section deck onto the two bushings located on the head high low
mechanism.

EX8000 User Manual
Revision 00
MAN-EX8000 REV00 EX8000 USER MANUAL Page 13 of 22
5. Once the bolts are in place and fully seated onto the bushings, use the
5/8” Wrench and Ratchet to firmly tighten the 5/8” nylon nuts to the bolts.
6. Assemble the foot section deck to the high low mechanism, repeat steps 2 thru 5.
7. Connect the foot section deck frame to the head section deck frame. To do so, each
section will be tilted so that assembly will take place underneath each frame. Tip and then
rest the frames like the pictures below. Do the same for each frame making sure the center
of the deck lines up.

EX8000 User Manual
Revision 00
MAN-EX8000 REV00 EX8000 USER MANUAL Page 14 of 22
8. You will see two more 7/16-14 x 1 ½” bolts and nuts on one of the frames. Each will
need to be removed for assembly; do not discard.
9. Once the bolts are removed, locate the bolts that were removed during
disassembly. Line the two frames up until each of the weld bushings align so that
the bolts can easily slide through. Now firmly tighten the two 5/8” nuts to the
bolts and repeat for the other bushing on the frame.

EX8000 User Manual
Revision 00
MAN-EX8000 REV00 EX8000 USER MANUAL Page 15 of 22

EX8000 User Manual
Revision 00
MAN-EX8000 REV00 EX8000 USER MANUAL Page 16 of 22
10. Re- apply the two long bolts to the frame. These are the two nuts and bolts you just
removed from the frame. Each of the frames should be lined up properly so that these can
return to the holes they previously were in. Slide each one back into the holes and firmly
tighten the nuts. Once this is complete the bed is mechanically assembled.
11. Cut tie straps for the foot section motor, as well as the tie straps for the hand pendant
control located by the power cord. Plug the numbered and colored plugs into the
corresponding ports on the control box.
NOTE: All plugs must be pushed all of the way into the port to ensure good mechanical
and electrical connection, failure to do so may result in improper or intermittent operation.

EX8000 User Manual
Revision 00
MAN-EX8000 REV00 EX8000 USER MANUAL Page 17 of 22
12. Flip bed over onto its casters to its flat position and remove all remaining tie straps. Once
the tie straps are removed you can now attach the hi/low actuators to the extension cable
along with a plastic c-clip which can be found in your bag attached to frame.
13. Attach the headboard and footboard to the bed; this can be done by sliding all four
mounting brackets in the respective channel on the bed. The head and footboards are
identical and are attached in the same manner.
Note:C-Clip must be put on after they are plugged together

EX8000 User Manual
Revision 00
MAN-EX8000 REV00 EX8000 USER MANUAL Page 18 of 22
Operation
Control Options
Hand Pendant Control
Bed Height Adjustment
The up arrow raises the bed, and the down arrow lowers the bed.
Head and Knee Adjustment
The head-up arrow raises the head section, and the head-down arrow lowers the head section.
The knee-up arrow raises the knee, and the knee-down arrow lowers the knee.

EX8000 User Manual
Revision 00
MAN-EX8000 REV00 EX8000 USER MANUAL Page 19 of 22
Foot Elevation
To elevate the foot section, first raise the knee to the desired height. Manually lift the foot end of
the foot section and rotate the foot support post upward. Lower the foot section placing the foot
support on the bottom of the foot section.
Bed Transport
To transport an empty bed, unlock the bed casters and use the footboard or headboard to move
the bed. Do not move the bed using the rails, hand held pendant or assist bars as handles. Lock
all four bed casters when bed movement is complete.
NOTE: The bed is not intended to provide a means for transport of the occupant.

EX8000 User Manual
Revision 00
MAN-EX8000 REV00 EX8000 USER MANUAL Page 20 of 22
Bed Deck Expansion or Retraction
To expand deck push the two buttons simultaneously
and pull the tube, release the button until the desired
width is achieved. The first locking location is 39” the
second is 42” , and the final is 48”. Repeat on all four
sections and both sides of bed. Ensure that the section
locks into desired location.
To retract deck, depress both buttons and push the tube
in to the desired location.
To position the head or foot of the deck into the through door position depress the buttons and
push the tube with accessory completely in until the tube stops and in position. Repeat on both
sides of the deck.
Table of contents
Other Med-Mizer Medical Equipment manuals

Med-Mizer
Med-Mizer EX5000 User manual

Med-Mizer
Med-Mizer ActiveCare-Fixed User manual

Med-Mizer
Med-Mizer ActiveCare-Deluxe User manual

Med-Mizer
Med-Mizer AllCare User manual

Med-Mizer
Med-Mizer SelectCare User manual

Med-Mizer
Med-Mizer ActiveCare-Standard User manual

Med-Mizer
Med-Mizer FlexTilt TF16 User manual
Popular Medical Equipment manuals by other brands

Pressalit Care
Pressalit Care R8022 Mounting instruction

Sunrise Medical
Sunrise Medical Guardian IC-5140 User instructions

Ossur
Ossur FORMFIT OA EASE user guide

OHIO WILLOW WOOD
OHIO WILLOW WOOD LimbLogic VS Series Prosthetist's Guide

O2matic
O2matic OMC PC-100 quick guide

Medifab
Medifab Multistand 2000 Therapist and Carer manual