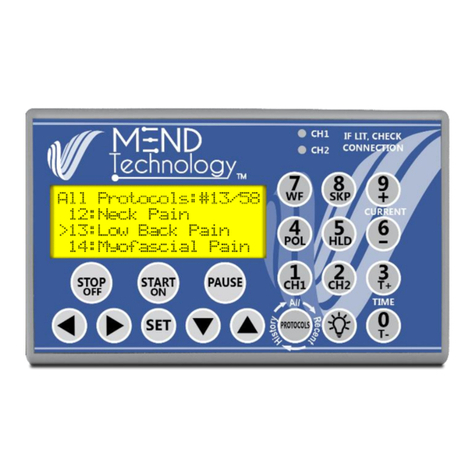
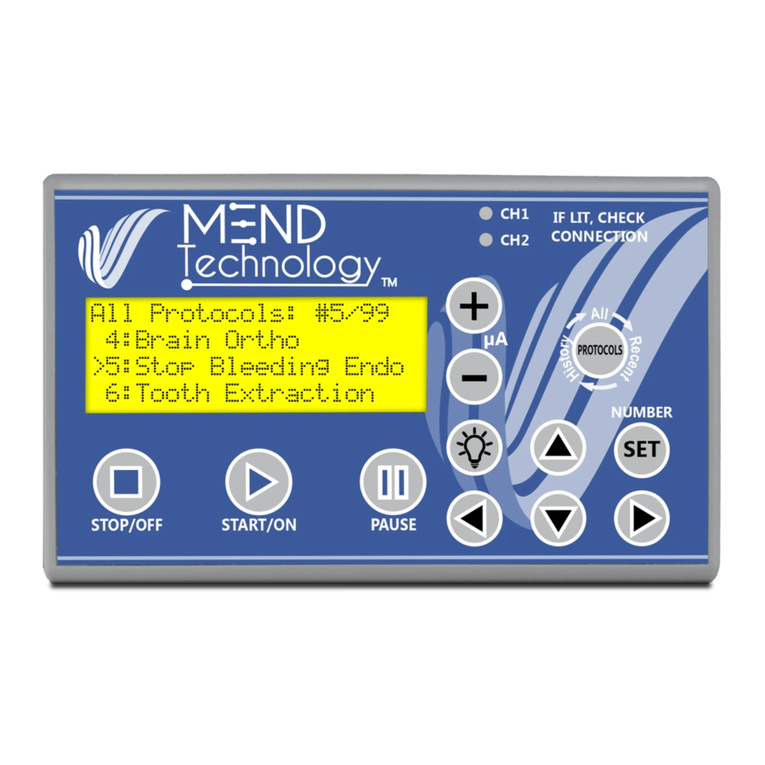
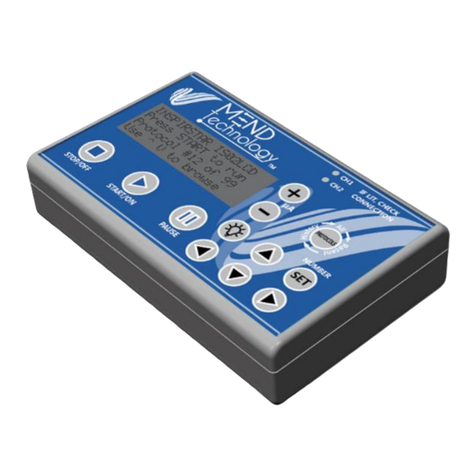
MEND Technology IS02PRO User manual

MEND ProfessionalTM IS02PRO
Owner’s Manual
Ver 1.0, 2016.3.4

2
Warranty & Repairs
Company Address:
MEND Technology, LLC
ATTN: Returns – RMA #
10117 SE Sunnyside Road Ste F40
Clackamas, OR 97015
Phone: 503-594-4045
Fax: 503-594-4046
© 2016 MEND Technology, LLC. All rights reserved. MEND Technology and the
logo are the trademarks of MEND Technology, LLC. Trademarks or registered
trademarks are the property of their respective holders. Software and specifications are
subject to change without notice.
Technical Support:
Website: https://www.mendtechnology.com
Email: support@mendtechnology.com

3
Table of Contents
Introduction .........................................................................................6
Indications.......................................................................................6
Warnings, Contraindications, Adverse Effects, & Precautions ...........7
Warnings & Contraindications .....................................................7
Adverse Effects ...........................................................................7
Precautions and Safety Precautions..............................................8
Warranty and Service .......................................................................8
Main Unit andAccessories.................................................................10
Top Panel and Keypad....................................................................10
Rear Panel .....................................................................................12
Accessories....................................................................................13
Operations .........................................................................................13
Prepare for Running.......................................................................13
Install Batteries..........................................................................13
Connect Wires to IS02PRO........................................................14
Connect Wires to Gloves, Strips, or Electrodes...........................14
Basic Operations............................................................................15
Power ON..................................................................................15
All, Recent and History Protocols ..............................................15
Select a Protocol........................................................................16
Run a Therapy Protocol .............................................................17
Pause the Therapy Protocol........................................................17
Stop the Therapy Protocol..........................................................17
Turn On Back Light...................................................................18
Turn Power Off..........................................................................18
Advanced Operations and Information............................................19
Protocol Run Information and Status..........................................19
Make Run Time Changes...........................................................20
Manual Run Mode-change F1/F2, current, polarity, waveform....22
Settings......................................................................................25
About........................................................................................26
Troubleshooting.................................................................................27

4
1 Introduction
Congratulations on your purchase of the MEND ProfessionalTM device.
The MEND ProfessionalTM is the most advanced two channel manual
mode and programmable transcutaneous electrical nerve stimulator or
"TENS" device currently available. MEND Technology, LLC is a
leading innovator and distributor of state-of-the-art medical devices.
The MEND ProfessionalTM is a high-end precision medical device used
for the relief of pain. This device generates low intensity current pulses
at microampere level and frequency of pulses. Your licensed health care
practitioner is able to program frequency pairs with a variety of
parameters including current intensity, frequency, time, modulated wave
period, wave slope, and polarity.
The MEND ProfessionalTM is a small, portable device that is designed
for use in a doctor's office, clinic or hospital.
Please read this entire manual thoroughly before using it.
CAUTION
Federal Law (USA) restricts this device to sale by or on the
order of a licensed health care practitioner.

5
1.1 Safety Precautions
The device is designed to be applied to the human body. It can be
used externally only.
The device has micro amperage current output. The plugs must be
inserted completely into the jacks. The patient may experience
prickling sensation if the skin contact is too dry.
Use alkaline batteries only. It cannot be connected to external power
source. Any attempt to do so would cause damage of the device and
possibly cause harm to the patient.
Do not immerse the device into water. Do not use the device close
to flammable mixtures or concentrated flammable fumes such as
gasoline.
The device can only be opened and repaired by the manufacturer.
1.2 Indications
The MEND ProfessionalTM is intended for the symptomatic relief of
chronic intractable pain. The degree of efficiency will vary with patient
selection.
1.3 Contraindications, Warnings, Precautions,
and Adverse Effects
CONTRAINDICATIONS
Do not use MEND ProfessionalTM:
-on patients who have a demand type pacemaker or any other
implanted electronic device that cannot be turned off
-over the carotid sinus
-on pregnant women
-for central pain

6
Safety of microcurrent stimulation has not been established during
pregnancy or birth. Microcurrent stimulation is not effective for pain of
central origin including headache.
WARNINGS
The electrodes or gloves of the MEND ProfessionalTM can't be placed
over the carotid sinus (upper side of neck) region. The electrodes/gloves
of MEND ProfessionalTM can't be placed over regions through which
current will flow transcerebrally (through the head). MEND
ProfessionalTM should not be used on patients whose pain syndromes are
not diagnosed and etiology is not established. If another garment
electrode is used as a dispersive electrode, placement of the dispersive
electrode should ensure transthoracic stimulation is not possible.
The MEND ProfessionalTM should be used only under the continued
supervision of a licensed health care practitioner. The MEND
ProfessionalTM has no curative value. The MEND ProfessionalTM is a
symptomatic treatment and as such suppresses the sensation of pain
which could otherwise serve as a protective mechanism.
The electrodes should not be placed over or in proximity of cancerous
lesions, infected or inflamed areas of the skin with open lesions.
Do not allow children to use or handle this device.
Do not operate vehicles or potentially dangerous machinery during
periods of stimulation.
Electronic monitoring equipment such as ECG monitors and ECG
alarms may not operate properly when The MEND ProfessionalTM is in
use.
The MEND ProfessionalTM is not a life-saving device.
PRECAUTIONS
Isolated cases of skin irritation may occur at the site of conductive
materials following long-term application. The effectiveness of the
MEND ProfessionalTM device is highly dependent upon patient selection
by a practitioner qualified in the management of pain. Electrode
placement and stimulation settings should be based on the guidance of

7
the prescribing practitioner. Patients should not use the device while
under the influence of alcohol, controlled substances or narcotic drugs,
directly on the eyeball, or over a vessel that may contain a blood clot.
Caution should be used for persons with suspected or diagnosed
epilepsy.
ADVERSE EFFECTS
Please consult your health care practitioner about possible adverse
effects which may arise from the therapy protocols your health care
practitioner is using. Skin irritation and electrode burns have been
reported at the site of electrode placement following long-term
application. To reduce the risk of skin irritation or burns, keep electrodes
directly against the skin during application.
1.4 Warranty and Service
MEND Technology, LLC warrants that the Product is manufactured by
Inspirstar Inc in accordance with the specifications. There is no warranty
of merchantability nor of fitness for a particular use. The Product is
marketed under section 510(K) of the Federal Food, Drug and Cosmetic
Act as a device substantially equivalent to a device in commerce.
Inspirstar Inc. and MEND Technology, LLC expressly disclaim any
claim that the Product can treat or cure any medical condition or illness.
The user must consult with his or her health care practitioner as to the
recommended use. The Product may only be used under the direct
supervision of a licensed health care provider. There are no other
warranties, expressed or implied. MEND Technology, LLC sole
liability hereunder is to replace the Product with the same or a substitute
product. In no event shall Inspirstar Inc. and/or MEND Technology,
LLC be liable for personal injury or death of any person using or
misusing the Product.
The MEND ProfessionalTM unit may be replaced with the same or a
substitute product within one year of purchase. Electrode Gloves and
electrode wires may be replaced with the same or a substitute product

8
within 3 months of purchase. To replace products or obtain service, first
call your doctor or MEND Technology. If necessary, send the entire unit
with the carrying case and accessories, insured, postage prepaid, and
well packaged, along with the Return Merchandise Authorization
number obtained from MEND Technology. Please remove the batteries
before returning your device.

9
2 MEND Pro Device and Accessories
2.1 Top Panel and Keypad
Figure 1 MEND Professional IS02PRO Top Panel
Channel Status Indication: LED CH1 and CH2 indicate if the output
current can reach their peak current value in the protocol for
channel 1 and channel 2, respectively. If the LED is flashing or ON,
check the connection of the electrode to the body.
Display Area: Menu selection, protocol information, active protocol
parameter information and status are displayed on the LCD screen.
Protocol Running Control:
Press the START/ON key to turn on the unit or to start a
selected protocol.
Press the PAUSE key to pause a running protocol. Use the
START key to resume the protocol.
Press the STOP key to stop a running protocol or to turn off
the MEND ProfessionalTM device.
Display Area
Function and
Number
Keypad
Back light
To select
protocol
number
Protocol
Running
Control
UP/DOWN
Arrow Keys
Channel Status Indication
LEFT/RIGHT
Arrow Keys

10
Arrows:
LEFT arrow key: Back to previous menu level or move cursor
to the left.
RIGHT arrow key: Enter into menu selection or move cursor
to the right.
UP arrow key: Move cursor up or increase number
DOWN arrow key: Move cursor down or decrease number
Number SET: Press the Number SET key to finish editing the
protocol number. In Number SET mode, use the arrow keys or
numeric keys to change the digits of the frequency numbers or
parameters. Press this key again to move to the next number or to
finish entering numbers or parameters. In Manual Run Mode, use
the Number SET key to enter the CH1 and CH2 frequencies after
they are selected on the number pad.
Protocols: Press this key to cycle between “All Protocols”, “Recent
Protocols” and “History Protocols”.
0~9: Number Keypad to input protocol number, select a numbered
menu item enter CH1/CH2 frequencies in Manual Mode.
Function keys: CH1, CH2, Current +/-, Time +/-, WF(waveform),
POL(polarity): During manual operation or run time control, use
these keys to change respective parameters.
Function keys: HLD (hold), SKP (skip): While protocols are
running, use the HLD key to hold/release the timer and use the SKP
to advance to next frequency pair in a protocol.

11
Figure 2 MEND ProfessionalTM Top Panel Details
2.2 Rear Panel
Separated Channel Jacks
CH1 Jack: positive and negative of CH1
CH2 Jack: positive and negative of CH2
Combined Channel Jacks
Positive Jack +: Positives of CH1 and CH2
Negative Jack -: Negatives of CH1 and CH2
Micro USB connection to PC

12
Figure 3 MEND ProfessionalTM Output Jacks and USB port
Output Jacks 3.5 mm Plug Connection
Wire
Connector
s. If you
have alternate colored leads,
ensure you know which
output is each polarity.
Combined Channel Output Jacks
Positive
Jack (+)
Tip CH2+ Red
Ring CH1+ Yellow
Negative
Jack(-)
Tip CH2- Blue
Ring CH1- Green
Separated Channel Output Jacks
CH1 Jack Tip CH1- Red
Ring CH1+ Yellow
CH2 Jack Tip CH2- Blue
Ring CH2+ Green
Table 1 Color Mapping of Output Jacks to Wire Connectors
2.3 Accessories
The MEND device can be used with various accessories that can be
purchased individually. For example, gloves with snap wires, electrodes,
push pin leads, conductive strips and material.
Pushpin Leads
Carrying Bag
Electrode, strip,
Gloves and Wires

13
3 Operations
3.1 Prepare for Operations
The MEND ProfessionalTM device can be used inside the carrying bag.
You will receive two Velcro strips to attach to the back panel of the
MEND ProfessionalTM device. Your travel case has two Velcro strips
attached inside the carrying case.
Install Batteries
The MEND ProfessionalTM uses two alkaline batteries in size “AA”.
Remove the batteries if device is not going to be used for more than one
month. Note: DO NOT use rechargeable Lithium Ion batteries because the
voltage is not compatible with our devices. You may use
non-rechargeable 1.5V Lithium Ion batteries. However, the battery life is
significantly reduced.
Connect Wires to IS02PRO
Insert the 3.5mm plugs into the jacks on the rear panel of IS02PRO.
Insert batteries here

14
Connect Wires to Gloves, Strips or Electrodes
Snap the button or insert the pins on gloves, strips or electrodes.
It is recommended to leave the wires and buttons connected to the gloves
and leave the plugs inserted in MEND ProfessionalTM after use. If you
want to unbutton the electrode wires from the gloves, hold the button base
on the gloves instead of holding the fiber part of the gloves to avoid
damage to the gloves. The mesh gloves and electrodes are intended for
single patient use. Conductive materials and strips can be easily cleaned
and sterilized with alcohol and anti-microbial solutions. These can also be
placed inside (single use) damp towels to conduct current for treatment.
DO NOT WEAR THE GLOVES ON BARE HANDS UNLESS YOU
ARE TREATING YOUR OWN HANDS.
To isolate the conductive gloves from bare hands, wear nitrile gloves first
then put on the conductive Electrode Gloves.

15
3.2 Basic Operations
Power ON
Press START/ON to power on the unit. The Power-On Initial Screen
displays the protocol number of last run protocol. Press START to run this
last used protocol.
All, Recent and History Protocols
All Protocols lists all protocols in user programmed profile.
Recent Protocols lists the protocols that were recently used. Use Recent
Protocols to quickly select your most frequently used protocols.
History Protocols lists the actual protocol running history. The latest used
protocol is displayed on the top of the list. Use History Protocols to check
the therapy history and also select a protocol to run again. Note: the
history will show the exact usage, so you may see the same protocol
multiple times in the history.
To switch between All Protocols, Recent Protocols or History
Protocols: press Protocols key to cycle between the three protocol list
screens.

16
Select a Protocol
You can store up to 999 protocols in the MEND ProfessionalTM device.
There are a number of ways to select the desired protocol.
Select by protocol number: from Power-On Screen, or from All Protocols
screen, press the protocol number with the numeric keys. For example, to
select protocol number #215 of the 345 protocols, press key2, key1 and
key5, protocol 215 will be selected.
Browse to select protocol: Use arrow UP/DOWN keys to browse through
the protocol list.
Protocol details: Press the RIGHT arrow key to see the details of the
protocol. Use the UP/DOWN keys to scroll the screen to view the full
details of the protocol.
Protocol details include:
Name
Description
Time
# of frequency pairs
Frequency combinations
Microamperage

17
Run a Therapy Protocol
Press the START key to run a protocol. The protocol will start and
microcurrent will flow from the output jacks. The protocol will stop after
the programmed run time.
Pause the Therapy Protocol
While a protocol is running, press the PAUSE key if you need to
temporarily stop a protocol, it will pause your protocol for and press
START to continue running.
Stop the Therapy Protocol
You can press the STOP key to stop running a protocol at any time.
Turn on the Back Light
To turn on the LCD back light: press Back Light key to turn on the LCD
back light. The back light will stay on when key pad operations occur
within 10 seconds.
If you do not start
another protocol, the unit
will automatically turn
off.
The maximum time for a
PAUSE is 30 minutes.
If you accidently press
STOP, you can restart the
protocol and skip to the
last frequency pair you
were running.

18
To turn off LCD back light: press the Back Light key to turn off the back
light immediately.
To turn on LCD back light for 30 seconds: press and hold the Back
Light key for 3 seconds, the light will be turned on for 30 seconds.
Turn power off
Press STOP/OFF key to turn off the MEND ProfessionalTM. The unit will
power off automatically if the unit is not in use for 60 seconds.
Note: when you press and
hold the light key, the back
light will not come on
initially, at the 3 second mark
the back light will turn on and
you can release the key.

19
3.3 Advanced Operations and Information
Protocol Run Information and Status
When a protocol is running, the screen will display
the protocol information and status.
During the running of the protocol, the MEND ProfessionalTM uses two
LED lights to indicate the output connection. If the channel status LED
CH1 or CH2 turns on or flashes, check that your leads are inserted firmly
into the jacks and your leads are plugged into the conductive material.
The common problems are loose plugs, plugs are not inserted, the button
or push pin is not inserted into gloves or electrodes, dry skin contact needs
moisture or broken wires.
The device senses the insertion of the plugs in the output jacks. If they are
not connected a message will appear on the LCD screen. And the LCD
lights flash very fast. Slower flashing lights indicate poor conductivity.
Remaining time for the running
frequency pair (Pair 1 of 10)
Output Current
polarity (±)and
intensity(μA)
Output
channel
frequencies
Protocol number and name
Remaining
time
for all 10
frequency pairs in the
protocol
Waveform
name

20
Run Time Changes During a Protocol
To change F1 frequency: Press CH1, the edit cursor will jump to the F1
frequency value. Enter the digits of the new frequency value. For example,
to enter frequency 970.0Hz, press CH1, then 9, 7, 0, 0 and SET.
To change F2 frequency: Press CH2, the edit cursor will jump to F2
frequency value. Then enter the digits of the new frequency value. For
example, to enter 52.9Hz, press CH2, then 5, 2, 9 and SET.
To change output current intensity: Press the 9 function key(+) to
increase current intensity or press the 6 function key(-) to decrease the
current intensity. Or press the Number SET key until the edit cursor has
moved to the output current position, and then use the number keys or
arrow keys to change the value.
To change polarity: Press the 4 function key (POL) to cycle through the
output polarity between ± (alternating), + (polarized positive) and –
(polarized negative).
Table of contents
Other MEND Technology Medical Equipment manuals
Popular Medical Equipment manuals by other brands

RHYTHM
RHYTHM HEALTHCARE HD TRANSFER B3300HD quick start guide
Seers Medical
Seers Medical ST4552 operating instructions
Weinmann
Weinmann JOYCE SilkGel vented Instructions for use
GlobalMIND
GlobalMIND VeinWalker instruction manual
Abbott
Abbott e i-STAT Alinity Quick reference guide
Sirona
Sirona cerec ac operating instructions
