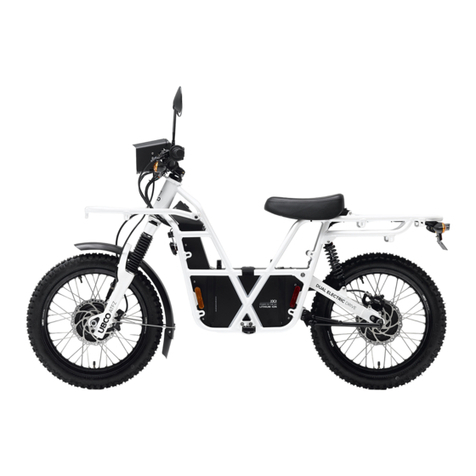
Merkava Falcon 3K User manual

Falcon 3K/5K/8K
User
Manual

Falcon
3/5/SK
Quick
Start
Guide:
DISCLAIMER:
We
recommend
having
a
bicycle
mechanic
assemble this
eBike.
1.
Carefully remove contents
of
box
out
of
the packaging.
You
will find:
• 1 x Falcon 3/5/BK
• 1 x 110V Charger
• Mud Guards (optional)
2.
Install Front wheel and tighten bolts.
3.
Place
handle bar in place and tighten allen screws
4.
Place
LED
lamp
(if
equipped) in place and tighten bolts
5.
Place seat to desired height and tighten quick release latch.
6.
If
you purchased a Falcons/SK with motocross seat you will need
to
remove both frame side
panels in order
to
tighten the bolts
of
the seat into the frame.
7.
Inflate tires
to
about
35-40PSI
or
as
recommended on the tire.
8.
Place your Falcon 3/5/SK in a clean and dry environment and proceed
to
visually check
the
components and ensure
that
all screws and bolts are tightened and
that
tires are correctly
inflated. Check and adjust break levers
to
your preference and check
that
the
single
or
multi
speed derailleur functions properly. This
is
usually already done once at
the
factory and
once before shipping
but
as
a precautionary measure we recommend you
do
this
as
well
before riding.
9. Charge your Falcon 3/5/SK in a clean and dry environment
at
ambient temperature until
light on the charger turns from red
to
green.
See
below
for
instructions on maintaining
your
battery life.
10. Once you've familiarized yourself
with
the
digital display you
will
be ready
to
ride. Please
ride carefully! (see attached instruction
for
SW900 Intelligent display)
IMPORTANT
NOTE:
TO
AVOID
DAMAGING
YOUR
BATTERY
PACK
WE
STRONGLY
RECOMMEND
USER
SHUTS
DOWN
AND
RECHARGE
THE
FALCONS/SK
ONCE
BATTERY
LEVEL
REACHES
10%.
YOU
WILL
ENTER
THIS
CRITICAL
LEVEL
SHORTLY
AFTER
YOUR
DISPLAY
SHOWS
1 .

Quick
Tips:
Here are a
few
tips
to
make the best
use
of
your new Falcon eBike.
Due
to
the weight
of
the bike,
if
you
try
to
pedal
from
a standstill
(with
no
motor
assistance) you will
find
that
it
will
take much
effort
to
get
the bike
to
accelerate. The best practice
is
to
throttle
first
to
get
the bike moving and
get
some momentum then
releasing
the throttle and start
to
pedal. The Pedal
Assist Mode will then kick in and move you forward effortlessly.
Always
start
on
the
lowest
PAS
mode
1.
Because
of
its very high
power
output
and the fact
that
it
takes a second
or
two
for
commands
to
be
transmitted
from
the
pedal
to
the
controller and finally
to
the
motor
on Pedal Assist mode,
we
suggests
only
using
this
PAS
mode
on
long
stretches
of
trails
where you intend
on
maintaining a consistent
speed
for
a while.
In all
other
circumstances, where you're maneuvering around parking lots, crossing roads
or
simply need
to
maintain slow and manageable speeds you should
only
use the
throttle
as
this
is
where you have
the
most control over the bike.
Also keep in mind not to
pedal
AND
throttle simultaneously
as
these are
two
different
riding modes.
Ride safe and have a great season.
Merkava eBikes

SW900
Display
operation:
1.
To
start your eBike insert key and turn once clockwise then long press the
"M"
button
to
activate the display.
2.
To
turn
off
your eBike long press the
"M"
to
deactivate the display and
turn
the key counter
clockwise before removing it.
3.
Short pressing the
"M"
button will toggle between various informations on the screen such
as
TRIP
DISTANCE,
ODOMETER,
AVG
SPEED,
MAX
SPEED
etc.
4.
You
can
change the
Pedal
Assist Mode from 1
to
5 using the "Up" and
"Down"
arrows while
riding.
5.
You
may also ride thie eBike using the
throttle
only.
6.
You
should
only
use
ONE
riding
mode
at a time.
If
using throttle do
not
pedal.
If
pedaling with pedal
assist
mode do not
use
the throttle.
7.
Please
note, throttle only riding will lower the max range on a charge considerably.
8.
To
enter
the
"Walk" mode (constant Gkm/hr speed) long press the "Down" arrow.
9.
To
turn
on the headlight, press the yellow button on the handlebar.
Parameter
settings
functioning:
1.
Long press
"Up"
and "Down" arrows simultaneously
to
enter settings mode. To exit settings
mode repeat
to
long
press
"Up" and "Down" arrows simultaneously
or
simply allow a
few
seconds and the display will revert
to
the main screen automatically.
2.
To change the current setting short
press
either the "Up"
or
"Down" arrow.
3.
Short press the
"M"
button
to
save
the setting and move
to
the next setting.
4.
Repeat
the
above
for
all settings and then exit the setting mode by
Long
pressing
"Up"
and
"Down" arrows simultaneously
Various
Parameter
Settings:
1.
POl:
Screen
Brightness.
Ranges
from
darkest
(1)
to
brightest
(3).
2.
P02:
KM
or
Mile
selection
3.
P03:
Voltage
selection.
This
should
be
set
to
72V
4.
P04:
Auto
shut
off. 0
value
means
display
will
not
shut
off
when
not
in
use.
We
suggest
setting
this
value
to 3
min.
5.
POS:
PAS
Grades
should
be
set
to 1
6.
P06:
Wheel
size
should
be
set
to
26
7.
P07:
Speed
measuring
magnet
should
be
set
to 46
8.
POS:
Speed
limit
should
be
set
to 100 to obtain full motor output
9.
P09:
Zero
start
and
non
zero
start
mode.
O=
Zero
start
mode
and
1 =
Non
zero
start
mode.
Zero
start
mode
means
the throttle will deliver power to the
rear
wheel
even
if the
bike
is
at a
complete
standstill.
It
Is
the
ideal
setting
but
carries
the
risk
of
someone
unintentionally
depressing
the throttle while
not
on
the
eBike
and
losing
control
of it.
Non
Zero
start
mode
means
the
eBike
needs
to
be
in
motion
before the throttle
starts
delivering
power to the
rear
wheel. It
is
a
safer
mode
but not
as
practical
given
that
these
are
fairly
heavy
eBikes.

Most
people
tend
to
use
the
throttle
gently
at
first
to
gain
some
momentum
before
starting
to
pedal.
If
this
Is
your
choice
then
you
must
set
this
value
to
0 =Zero
start
mode.
10.
Pl0:
Driving
modes
0 =
PAS
ONLY.
Throttle
will
not
work
1 =
Throttle
ONLY.
PAS
will
not
work.
2 =
PAS
and
Throttle
will
function.
IMPORTANT: AVOID
PEDALLING
AND
USING
THROmE
AT
THE
SAME
TIME.
EITHER
PEDAL
ON
PAS
MODE
OR
USE
THROTTLE
ONLY.
Doing
both
serves
no
purpose.
11.
Pll:
PAS
sensitivity
should
be
set
to
3
12. P12:
PAS
start
strength
should be
set
to
3
13. P13:
PAS
magnet
type
should be
set
to
12
14. P14:
Controller
Current
limit
should
be
set
to
20
15.
PlS:
No
Function
16. P16: Reset ODOMETER. Long press
"UP"
arrow
for
5 seconds
to
reset
the
ODO
to
0KM.
All
temporary
data
will
automatically
reset
every
time
the
bike
is
turned
off.
17.
FOR
THE
SkW version,
all
settings are
the
same as above
EXCEPT
P07
which
should
be
set
to
32
IMPORTANT
NOTE:
TO AVOID DAMAGING YOUR
BATTERY
PACK
WE
STRONGLY
RECOMMEND
USER
SHUTS
DOWN AND
RECHARGE
THE
FALCON
3/5/SK
ONCE
BATTERY
LEVEL
REACHES
10%.
YOU
WILL
ENTER
THIS
CRmCAL
LEVEL
SHORnY
AFTER
YOUR DISPLAY SHOWS 1.

Maintaining
your
Falcon3/5/8K battery
pack:
Before shipping, each and every transporter
is
checked
for
overall quality control and condition
of
battery pack. Battery
is
tested and fully charged before shipping.
The lithium ion technology
is
intended
to
last
for
several years while being charged and discharged many
times. However,
the
battery's life span will depend on
your
care
of
the
battery.
Battery life will depend on your maintenance and care
of
the battery. Falcon 3/5/8K
uses
advanced
Lithium-Ion batteries made
with
high capacity
SAMSUNG
or
PANASONIC
cells and
they
should
be
charged
at
least once a month (when
not
in
use)
to
ensure the longevity
of
your battery. Make sure
to
only
use
our
supplied 72V/84V charger on your 72V battery.
Allow
your
battery
to
rest
for
10 minutes after charging before riding and
for
10 min after riding before
charging. Unplug
your
battery charger after the light turns green indicating
your
battery
is
fully charged.
Always unplug
the
charger
from
the
wall
outlet
before plugging
or
unplugging
the
other
end
into
your
Falcon 3/5/8K.
Always
use
a
power
bar
to
protect against current surge.
Typical charging
time
after
the
battery
has
reached the
10%
critical low level
is
between 6
to
8 hours
using
the
provided
SAh
charger.
Caution:
Do
not
expose
your
battery
to
extremely low
or
high temperatures
to
avoid potential damage
to
your
battery.»
IMPORTANT
NOTE:
TO
AVOID
DAMAGING
YOUR
BATTERY
PACK
WE
STRONGLY
RECOMMEND
USER
SHUTS
DOWN
AND
RECHARGE
THE
FALCON
3/5/SK
ONCE
BATTERY
LEVEL
REACHES
U>%.
YOU
WILL
ENTER
THIS
CRITICAL
LEVEL
SHORTLY
AFTER
YOUR
DISPLAY
SHOWS
1.

Warranty information:
Merkava stands behind its products. All our transporters benefit from a 2 year limited
warranty.
The COMPANY warrants that the frame will be free from defects in the materials and
workmanship for a period
of
2 years.
The COMPANY warrants that the motor and battery pack will be free from defects in the
materials and workmanship for a period
of
I year•.
The COMPANY warrants that the electrical components including the controller, digital
display and charger will be free from defects in the materials and workmanship for a period
of
6 months.
Before shipping, we conduct spot checks on our transporters to validate overall quality and
condition
of
electrical components including motor and battery pack. These checked units have
their battery tested and fully charged before shipping.
The lithium ion technology we use is intended to last for several years while being charged and
discharged
many
times. However, the battery's life span will depend on your care
of
the battery.
If the PRODUCT proves defective AND a claim is filled during the warranty period, the
COMPANY
at its option, will:
Repair the PRODUCT
by
means
of
telephone support, email support,
or
by
providing the
necessary parts
at
no charge.
Warranty claims must be filed with Merkava by email: info@merka
va
.
ca
•warranty
on
battery will be limited to 6 months
if
it is detennined that
our
guidelines for proper
battery care have
not
been followed.
The following are not covered by the warranty:
• Wear and tear
on
frame, grip tape, levers, tubes, tires, brake discs, brake pads, cables,
seats, plastic fairings and any other component which wears out naturally during usage.
• Minor scratches and stress marks that may occur during shipping and handling.
• Water damage caused
by
exposing sensitive electrical. parts to water such as washing
transporter with hose
or
pressure washer.
• Accidents, misuse, abuse, human errors
or
lack
of
maintenance.
• Acts-of-god such as fire, flood, earthquake, freezing, etc

Warranty
information
continued:
The following will
void
the
warranty:
• The modification
of
your
transporter or
use
outside
those
specified
on
this site.
•
The
serial number of
the
product
has
been
altered or
removed.
•
The
product has been dismantled
and
repaired/reassembled improperly or
with
aftermarket parts.
• Overloading your transporter.
• Storing your transporter
outdoors.
IMPORTANT
NOTE:
TO
AVOID
DAMAGING
YOUR
BATTERY
PACK
WE
STRONGLY
RECOMMEND
USER
SHUTS
DOWN
AND
RECHARGE
THE
FALCON
3/5/BK
ONCE
BAmRY
LEVEL
REACHES
10%.
YOU
WILL
ENTER
THIS
CRITICAL
LEVEL
SHORTLY
AFTER
YOUR
DISPLAY
SHOWS
1
BAR
OR
REACHES.

Safe Operation:
Always
wear a Helmet
• Always Start in
the
slow Pedal Assist mode
• Grip both hand grips
• Check brake level
for
positive braking action
• Turn
the
key
to
the
ON
position
•
Press
"M"power
button
on
the
display
for
2-3 seconds
•
Use
throttle
to
get the eBike in motion then release the
throttle
and start pedaling,
motor
will kick in
within
a second
or
two.
•
You
should
only
use
ONE
riding
mode at a time.
If
using
throttle
do
not
pedal.
If
pedaling
with
pedal assist mode do
not
use
the throttle.
• Once
your
comfortable riding
the
eBike you
can
start using the
throttle
instead
of
pedaling. Please note,
throttle
only riding will lower the max range on a charge
considerably.
•
ALWAYS
follow
your
local laws regarding eBikes and
be
respectful
of
other
riders on
the
trails.
Helmet
Always wear
an
ASTM
and
CPSC
certified helmet when riding. Make sure
that
chin strap
is
attached before
your
ride and follow the helmet manufactures instructions
for
proper user and
fit.
Footwear
Make sure
to
always wear shoes
that
have good traction on the pedals and will stay on your
feet.
Brakes
Squeeze
the
hand brake levers
to
ensure there
is
positive braking action before starting your
ride.
IMPORTANT
NOTE:
TO
AVOID DAMAGING
YOUR
BATTERY
PACK
WE
STRONGLY
RECOMMEND
USER
SHUTS
DOWN
AND
RECHARGE
THE
FALCON
3/5/SK
ONCE
BATTERY
LEVEL
REACHES
10%.
YOU
WILL
ENTER
THIS
CRITICAL
LEVEL
SHORTLY
AFTER
YOUR
DISPLAY
SHOWS
1.
This manual suits for next models
2
Table of contents
Other Merkava Scooter manuals

Merkava
Merkava Cobra5K User manual
Merkava
Merkava FatFold500 User manual

Merkava
Merkava TriboardS00 Standard User manual

Merkava
Merkava Cruiser500 User manual
Merkava
Merkava CobraSK User manual

Merkava
Merkava RF350 User manual
Merkava
Merkava Falcon 5/8K User manual

Merkava
Merkava eFold Fatty500 User manual
