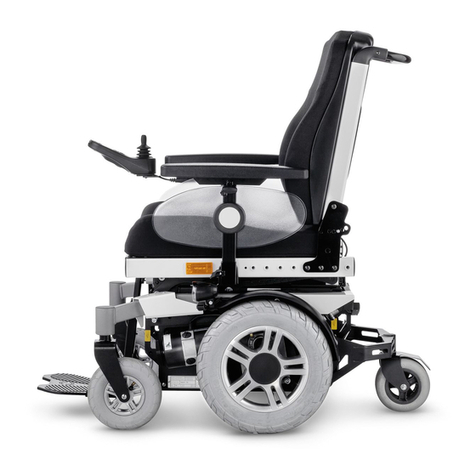
Meyra Ortopedia iTravel 1.054 User manual

en
Operating manual
Electronic travelling wheelchair
Model 1.054, iTravel

2
Contents
Meaning of the applied markers 4
Introduction 4
List of models 4
Indications / contraindications 4
Acceptance 5
Intended purpose 5
Use 5
Adjustment 5
Statutory regulations 6
Combination with manufacturer
foreign products 6
Reinstallment 6
Life span 6
Overview 7
Model: iTravel 7
Operating module 8
Handling of the electronic travelling
wheelchair 9
Securing the electronic travelling
wheelchair 9
Functional checks 9
Driving 9
Brakes 9
Service brake 9
Decelerating the electronic travelling
wheelchair 9
Parking brake 9
Locking the brakes 9
Releasing the brakes 10
Drive-/push mode 10
Selecting the push mode 10
Selecting the motor mode 10
Operating module-functions 10
Battery charging socket 10
Switching the operating module on 10
Battery voltage 10
Battery gauge 11
Evaluation 11
Preselectable maximum speed 11
Preselect the maximum speed 11
Diving speed stages 11
Joystick 12
Drive and steering movement 12
Decelerating the electronic
travelling wheelchair 12
Keys and symbols 13
Selecting the operation 14
Pre-operation checks 14
Battery charging condition 14
Battery charging procedure 15
Calf belt 16
Removing the calf belt 16
Attaching the calf belt 16
Length adjustment of the calf belt 16
Footboard 16
Folding the footboard up/down 16
Back support belt 16
Fitting the back belt 16
Removing the back support upholstery 16
Placing the back support upholstery 16
Seat pad 17
Utensils bag 17
Arm supports 17
Swivel up the arm supports 17
Swivelling down the arm supports 17
Folding/Unfolding 17
Folding 17
Unfolding 18
Battery pack 18
Wheelchair transport with
lithium ion batteries 18
Transport of lithium ion batteries 19

3
Safety information to
lithium ion batteries 19
Retaining strap 19
Walking aid holder 20
Loading and transportation 20
Loading 20
Ramps and lifting platforms 20
Transport of people inside a motor
vehicle 20
Transport security 20
Maintenance 21
Maintenance 21
Maintenance schedule 21
Tyres 22
Wheels 22
Fault correction 23
Error diagnostics 24
Error illustration through the battery
gauge 24
Basic safety information 26
Accompanying person 26
Transferring out of the electronic
travelling wheelchair 26
Reaching for objects 26
Driving on falling, rising or transverse
gradients 26
Crossing obstacles 27
Electrical system 28
Transport in public methods of
transportation 28
Driving on public highways 28
Cleaning 28
Finish 29
Disinfection 29
Repairs 29
Repairs 29
Customer Service 29
Spare parts 30
Information for extended pauses of use 30
Disposal 30
Information for the specialist dealer 31
Programming the driving behaviour 31
Technical data 31
Tyre pressure of pneumatic tyres 32
Maximum range 32
Hill climbing ability 32
Applied norms 32
Values acc. to ISO 7176-15 for
model 1.054 33
Further technical data for model 1.054 33
Meaning of the symbols on the
washing instruction 34
Meaning of the labels on the
electronic travelling wheelchair 34
Meaning of the symbols on the
type plate 35
Warranty / Guarantee 35
Inspection certificate 37
Warrantee / Guarantee section 38
Inspection certificate for transfer 38

4
MEANING OF THE APPLIED
MARKERS
Safety instructions with a coloured back-
ground are mandatory and need to be ob-
served under any circumstance!
☞This symbol indicates tips and recommen-
dations.
[ ] Reference to a picture number.
( ) Reference to a function element within a
picture.
INTRODUCTION
Read and observe this manual before first
operation.
Children and juveniles should read this doc-
umentation together with their parents re-
spectively a supervisor or accompanying
person before first use.
This operating manual is to help you get ac-
customed to the handling of your electronic
travelling wheelchair as well as to prevent ac-
cidents.
☞Please note that the illustrated equipment
variants can deviate from your model.
We have therefore also listed chapters with op-
tions that might not be applicable for your indi-
vidual electronic travelling wheelchair.
Users with visual impairments can find the PDF-
files together with further information on our
website:
< www.meyra.com >.
☞Contact your specialist dealer when re-
quired.
Alternatively users with visual impairments can
have the documentation read out by a helper.
Inform yourself regularly about the product
safety, possible recalls and general handling in-
structions of our products in the < Information
center > on our website:
< www.meyra.com >.
LIST OF MODELS
This operating manual applies to the following
models:
Model 1.054 iTravel
INDICATIONS /
CONTRAINDICATIONS
Consult a doctor immediately in case of al-
lergic reactions and/or skin irritations or pres-
sure sores that occur when using the elec-
tronic travelling wheelchair.
In order to prevent contact allergies, we
recommend to use the electronic travelling
wheelchair only when wearing clothes.
The electronic travelling wheelchair serves to
improve the independent mobility for peo-
ple with limitations in mobility not necessarily
caused by disease.
The electronic travelling wheelchair may not
be used in cases of:
– Cognitive limitations and mental retarding,
that rule out the independent use of the
wheelchair.
– Blind people and people with limited eye-
sight that cannot be compensated with
other aids and lead to constraints in daily
life.
– Influence of impairing medications (ask
your doctor or pharmacist).
– Circumstances that prevent the individual
use of the control device.
– Extreme limitations in balance and/or dis-
orders in perception.
– Inability to sit.

5
☞Please ask your doctor, therapist or special-
ist dealer to these and possible other risks
in combination with this product.
ACCEPTANCE
All products are checked for faults in the facto-
ry and packed in special boxes.
☞However, we request that you check the
electronic travelling wheelchair for pos-
sible transport damage immediately on
receipt – preferably in the presence of the
carrier.
☞The packaging of the electronic travelling
wheelchair should be stored for a further
transport that might become necessary.
INTENDED PURPOSE
The electronic travelling wheelchair was de-
veloped to improve independent mobili-
ty indoors as well as the close environment
(apartment, shopping centers, clinics and care
centers, hotels).
USE
Do not use the electronic travelling wheel-
chair without the seat mounted!
The electronic travelling wheelchair serves
solely for transporting one sitting person.
– Other pulling or transporting uses do not
comply with its intended purpose.
The electronic travelling wheelchair is applica-
ble on level, firm surfaces and can be used as
follows:
– For indoor use (such as apartment, day
care) including short term operation on
close, level and firm outside perimeters.
– Never expose the electronic travelling
wheelchair to extreme temperatures and
damaging environmental conditions, such
as sunlight, extreme cold or salty water.
– Sand and other dirt particles can seize on
moving parts and render them without
function.
National regulations might prevent the use on
busses, trains or in aircraft.
☞Inform yourself at the transportation com-
panies concerning limitations.
☞Before going on a flight clarify the specific
transport conditions with your flight agen-
cy and also the legal regulations concern-
ing transport in a plane in your country of
residence as well as at your destination.
Apply the electronic travelling wheelchair
only according to the specifications and lim-
itations indicated in chapter Technical data on
page 31 .
ADJUSTMENT
Always have adaptation and adjustment
work carried out by a specialist dealer.
The electronic travelling wheelchair offers man-
ifold adjustment possibilities to individual vital
statistics. Before first use an adaptation of the
electronic travelling wheelchair and a practical
instruction in the functionalities of your elec-
tronic travelling wheelchair should be carried
out by your specialist dealer. The adaptation
will take into account the driving experience,
the physical limits of the user and the main
place of use of the electronic travelling wheel-
chair. Before first use, check the functionality of
your electronic travelling wheelchair.
Should your specialist dealer carry out a re-
vision/reconditioning or make fundamental
changes to your electronic travelling wheel-
chair, without the use of original spare parts,
this under certain conditions may result in a re-
marketing of your electronic travelling wheel-
chair. This will further entail that your specialist
dealer might need to conduct new conformity
assessments and tests.

6
☞We recommend a regular control if the
electronic travelling wheelchair adjust-
ment in order to ensure a long-term opti-
mal provision even with changing illness/
handicap patterns of the user. Especially
for children and juveniles an adjustment
every 6 months is recommendable.
STATUTORY REGULATIONS
The electronic travelling wheelchair is not per-
mitted for use in public traffic.
COMBINATION WITH MAN-
UFACTURER FOREIGN
PRODUCTS
Any combination of your electronic travelling
wheelchair with components not supplied by
us generally results in an amendment to your
electronic travelling wheelchair. Please inquire
with us if there is a valid combination clear-
ance/release.
REINSTALLMENT
Before reinstallment the electronic travelling
wheelchair is to undergo a complete inspec-
tion.
☞Hygienical measures required for reinstall-
ment are to be carried out according to a
validated hygienic plan and must include
disinfection.
The service manual, intended for the specialist
dealer provides information to the reinstall-
ment and reinstallment frequency of your elec-
tronic travelling wheelchair.
LIFE SPAN
We expect an average life span of about 5 years
for this product, as far as the product is applied
for its designated purpose and all maintenance
and service guidelines. The life span of your
product depends upon the frequency of use,
the application environment and care. The im-
plementation of spare parts can prolong the
life span of the product. As a rule spare parts
are available up to 5 years after production is
discontinued.
☞The indicated lifespan does not constitute
additional guarantee.

III
III
VIVII
X
VIII
IXXI
V
IV
XII
XIII
7
OVERVIEW
Model: iTravel
The overview shows the most important com-
ponents and operating devices of the electron-
ic travelling wheelchair.
Pos. Description
(I) Back support
(II) Arm support
(III) Seat pad
(IV) Utensils bag
(V) Footplate
(VI) Calf strap
(VII) Steering wheel
(VIII)Operating module
(IX) Driving wheel
(X) Drive
(XI) Support castor
(XII) Battery case
(XIII)Type plate

IX
VII
IV
V
VI
II
VIII
III
Í
8
OVERVIEW
Operating module
The overview shows the operating controls of
the operating module.
Pos. Description
(I) Operating module
(II) Battery charging socket
(III) Joystick
(IV) Reducing the adjusted speed preselection
(V) Horn
(VI) Control display of the battery capacity and
fault indicator
(VII) Switching the operating module on/off
(VIII)Control display of the adjusted preselected
speed
(IX) Increasing the preselected speed

9
HANDLING OF THE ELEC-
TRONIC TRAVELLING
WHEELCHAIR
Securing the electronic travelling
wheelchair
The electronic travelling wheelchair is to be se-
cured as follows to prevent it from rolling off
unintentionally:
1. .Switch the selection lever for drive-/push
mode inwards on both sides to drive mode.
2. Switch off the operating module.
Functional checks
The functions and safety of the electronic trav-
elling wheelchair must be checked before the
start of each journey.
☞Therefore observe chapter Pre-operation
checks on page 14.
Driving
You define the speed and direction yourself
with the joystick movements (driving and
steering lever) while driving as well as the pre-
adjusted maximum final speed of your elec-
tronic travelling wheelchair.
BRAKES
Decelerate your electronic travelling wheel-
chair carefully and in good time. This is espe-
cially the case when driving in front of peo-
ple and while driving downhill!
Service brake
The motors work electrically as operating brake
and carefully decelerate the electronic travel-
ling wheelchair without jerks to stillstand.
Decelerating the electronic travelling
wheelchair
For allotted braking of the electronic travelling
wheelchair slowly guide the joystick (steering
and driving lever) back to the centre position
(zero-setting).
☞The electronic travelling wheelchair stops
in shortest distance after releasing the joy-
sticks.
Parking brake
The parking brakes are only effective when the
selection lever drive-/push mode is set to drive
mode. They disengage automatically when the
wheelchair starts off.
The parking brakes are manually disengaged
by switching the selection lever drive-/push
mode to push mode.
Locking the brakes
It should not be possible to push the elec-
tronic travelling wheelchair forward when
both brakes are locked.
Do not switch to push mode while driving on
slopes.
To engage the brakes pull the selection lever
drive-/push mode on both sides as far as possi-
ble backward into drive mode [1on page 39].
☞Activation of the selection lever is intend-
ed for an accompanying person.

10
Releasing the brakes
Only transfer into or out of the electronic
travelling wheelchair when the electronic
travelling wheelchair is switched off and the
selection lever drive-/push mode on both
sides is in drive mode!
Inadvertently knocking the joystick will set
the electronic travelling wheelchair in mo-
tion without control! – Danger of accidents!
To loosen the brakes press the selection lever
drive-/push mode on both sides forward as far
as possible into push mode [2on page 39].
☞Activation of the selection lever is intend-
ed for an accompanying person.
Drive-/push mode
Only switch the electronic travelling wheel-
chair to push mode when it is standing still
for positioning or in case of emergencies, but
not on slopes/hills.
After push mode do not forget to switch the
drive back to drive mode. Otherwise there
is the danger of your electronic travelling
wheelchair unintentionally rolling off.
Selecting the push mode
1. Switch off the operating module because
the pushing will otherwise be made diffi-
cult by the electric system.
☞Therefore observe chapter Operating
module-functions on page 10.
2. Disengage the brakes [2on page 39].
☞Therefore observe chapter Releasing
the brakes on page 10.
☞The electronic travelling wheelchair
can now be pushed.
Selecting the motor mode
1. Activate the brakes [1on page 39].
☞Therefore observe chapter Locking the
brakes on page 9.
2. Switch the operating module on.
☞Therefore observe chapter Operating
module-functions on page 10.
The electronic travelling wheelchair is now
ready for use.
OPERATING
MODULE-FUNCTIONS
Battery charging socket
Do not insert other objects into the battery
charging socket. – Danger of short circuit!
To charge the lithium ion batteries first switch
off the operating module. Then insert the plug
of the battery charger into the charging socket
(3on page 39) on the front of the operating
module.
Switching the operating module on
Do not move the joystick during the system
test.
Press the ON/OFF key to switch on the oper-
ating module (4on page 39). The electronic
system now performs a system test.
☞The electronic system is ready when the
battery gauge (5on page 39) is perma-
nently lit.
Battery voltage
The battery indicator displays the battery volt-
age after the system test performed by the
electronic system after the operating module
has been switched on (5on page 39).
Less LED segments of the battery gauge are lit
as the battery voltage reduces.

11
Battery gauge
The battery gauge (5on page 39) displays
the existing battery voltage as follows:
The colours mean:
Green Batteries charged
☞The charging status corre-
sponds to the number of
green lit LEDs.
Yellow Recharging recommended.
Red Recharge batteries immediately.
☞An accurate battery indication is only given
during travel on a level surface.
☞Uphill/downhill driving can causes an
inaccurate indication.
Evaluation
The exactness of the battery gauge depends
for example on the temperature, age and strain
on the lithium ion battery is therefore subject
to certain restrictions.
The range of your electronic travelling wheel-
chair, resp. the lithium ion batteries should be
tested once.
Preselectable maximum speed
Danger of accident due to unsuitable setting
of the preselected speed!
After switching on the operating module, the
maximum speed setting will be the same as
that selected before switching off.
Preselect the maximum speed
By pressing the keys (6on page 39) and (7on
page 39) the preselectable final speed can
be decreased or increased.
The display (8on page 39) shows the select-
ed speed step.
Select a low maximum speed for driving situ-
ations in which you do not feel confident/safe
(e.g. driving in confined spaces, or similar).
☞The final speed is to be preselected in de-
pendence on the personal impression of
the respective driving situation!
☞When driving on ramps, hills or slopes the
speed is to be adjusted to the inclination
appropriately. Never exceed the permitted
max speed. – Danger of accidents!
Diving speed stages
The maximum speed can be preselected in 5
driving speed stages [9on page 39].
In driving speed stage 5 (10 on page 39) the
maximum speed of the electronic travelling
wheelchair is 6 km/h.
In speed step 1 (11 on page 39) the max. final
speed lies 20 % of the max. possible speed.

Rearward travel
Forward motion
Deceleration/stopping
Right curve
Right in
a circle
Left in a
circle
12
Joystick
Only move the joystick when the battery in-
dicator (5on page 39) shows a constant
light.
Drive and steering movement
The electronic travelling wheelchair is accel-
erated and braked with the joystick (12 on
page 39). Move the joystick slowly in the de-
sired driving direction.
The further you move the joystick away from
the centre position, the faster the electronic
travelling wheelchair will travel (up to the pre-
selected maximum speed).
A simultaneous lateral deflection of the joystick
causes a curve travel. The electronic travelling
wheelchair will turn almost on the spot if the
joystick is only deflected sideways.
☞The speed is reduced automatically during
reverse or curve driving.
Decelerating the electronic travelling
wheelchair
The electronic travelling wheelchair stops
when you let go of the joystick.
For allotted braking slowly guide the joystick
back to the centre position (zero-setting).

13
Keys and symbols
ON / OFF Switches the operating module on or off when pressing
the key.
☞The electronic will conduct a system test when switched on.
☞Do not motion the joystick during this time.
Horn A signal sounds for as long as the key is pressed.
Max. speed
preselection
< Plus >.
Increases the max. speed preselection in steps (20 %)
when pressing the key.
☞For safety reasons we recommend to only press the
< Plus-key > when the electronic travelling wheel-
chair is standing still.
☞Level 1 (20 %) to max. level 5 (100 %).
Max. speed
preselection
< Minus >.
Reduces the max. speed preselection in steps (20 %)
when pressing the key.
☞For safety reasons we recommend to only press the
< Minus-key > when the electronic travelling wheel-
chair is standing still.
☞Level 5 (100 %) to min. level 1 (20 %).
Display of the
battery charg-
ing condition
With decreasing battery charging condition less seg-
ments light up in the battery gauge.
☞Blinking light segments indicate a fault. Therefore observe chapter Er-
ror diagnostics on page 24.
Display of the fi-
nal speed
The number of lit diodes (LED) shows the preselected
maximum final speed resp. the selected driving profile.
Each LED corresponds to a 20 % level.

14
SELECTING THE OPERATION
In order to obtain operational readiness of the
electronic travelling wheelchair the following
directions are to be carried out in the indicated
order.
1. Unfold the electronic travelling wheelchair
if applicable.
2. Before first use, charge the drive batteries
completely through the operating module
[13 on page 39].
☞Therefore observe chapter Battery
charging procedure on page 15.
3. Check whether the battery plug is insert-
ed correctly into the battery socket (14 on
page 40).
4. Switch the drive motors to the drive mode
[1on page 39]. – For this engage the
brakes.
☞Observe chapter Locking the brakes on
page 9.
5. Check if the arm support stopper is turned
downward (15 on page 40).
6. Switch the operating module on.
Press the On/Off-key (4on page 39) on
the control panel of the operating module.
☞Therefore observe chapter Switching
the operating module on on page 10.
PRE-OPERATION CHECKS
Before starting to drive, the following should
be checked:
1. The technical condition of the electronic
travelling wheelchair.
☞Check screwed connections, e. g.
through slight movements of the com-
ponents, like arm supports, back sup-
port.
☞Through a general visual check.
2. The battery charging condition.
3. The setting of the preselected final speed.
☞Therefore observe chapter Preselectable
maximum speed on page 11.
Battery charging condition
After activation the battery gauge (5on
page 39) shows the battery charging condi-
tion.The displayed value depends on the sur-
rounding temperature, the age of the battery
as well as their type of strain and is therefore to
be observed with limitations.
☞The lithium ion batteries should be
charged immediately when the red LED of
the battery gauge is blinking.
☞Therefore observe chapter Fault correction
on page 23.
☞View chapter Battery voltage on page 10.

15
Battery charging procedure
Do not insert any objects other than the bat-
tery charger plug into the battery charging
socket. – Danger of short circuit!
Use only the included lithium charge to
charge the lithium ion batteries.
The guarantee is only preserved to its full ex-
tent when the included battery charger, sup-
plied by us is used.
Foreign chargers can cause severe damage
to the lithium ion batteries.
Never charge the lithium ion batteries in the
vicinity or in the presence of flammable liq-
uids or gases.
Never charge the lithium ion batteries in
rooms within which moisture deposits can
occur on the electronic travelling wheelchair
and/or the lithium ion batteries.
Never continuously drive the electronic trav-
elling wheelchair completely empty, this can
damage the lithium ion battery.
A deep discharged lithium ion battery may
not be charged again.
☞Have lithium ion batteries replaced
by the specialist dealer.
Only charge the lithium ion battery within
the indicated temperature range.
☞Therefore view chapter Further techni-
cal data for model 1.054 on page 33.
The lithium ion batteries should be charged
right after the daily use of the electronic trav-
elling wheelchair so that the complete driving
performance is available the next day.
Every lithium ion battery is subject to a normal
degree of „self discharge“. If the electronic trav-
elling wheelchair is not used over a longer pe-
riod of time, the battery plug (14 on page 40)
should be pulled off. – For this press the locking
lever (16 on page 40) inward and insert the
battery plug (14 on page 40)
☞Charge preferably during the night. A com-
plete charge of the battery requires about
8 hours.
☞When using the optionally available addi-
tional lithium-ion-batteries the charging
cycle takes double as long.
☞Avoid spark build up through electrical
static (for example caused by synthetic
floor covers).
☞For the battery charging procedure also
observe the operating manual of the bat-
tery charger.
1. Secure the electronic travelling wheelchair.
☞Therefore observe chapter Securing
the electronic travelling wheelchair on
page 9.
2. If applicable insert the main plug (14 on
page 40).
☞The charging procedure is only possi-
ble with inserted battery plug (14 on
page 40).
3. Insert the plug of the charger into an ex-
pertly installed power outlet.
4. Insert the charger plug into the battery
charging socket (13 on page 39) of the
operating module.
5. The charging procedure starts automati-
cally.
6. After a completed charging procedure dis-
connect the battery charger from the sock-
et and remove the battery charging plug
from the battery charging socket.

16
CALF BELT
Do not drive without the calf belt. – Danger
of accidents.
The removable calf belt (17 on page 40) pre-
vents the feet from sliding off the back of the
footboard.
Removing the calf belt
To remove the calf belt, open the velcro fasten-
er.
Attaching the calf belt
For attachment, guide the calf belt around the
frame tubes [18 on page 40] and close the
velcro fastener.
Length adjustment of the calf belt
For length adjustment the calf belt is adjusted
in corresponding length with help of the velcro
fastener.
FOOTBOARD
Do not drive with the footboard folded up-
ward. – Danger of accidents.
Folding the footboard up/down
The footboard is to be folded up for entering or
exiting the wheelchair [19 on page 40].
☞Check the locking points!
1. Remove both feet from the foot plate.
2. Remove the calf belt (1), if present.
☞Therefore observe chapter Calf belt on
page 16.
☞Before starting to drive the footboard has
to be folded down [18 on page 40] and
the calf belt attached.
BACK SUPPORT BELT
Fitting the back belt
The overlapping of the Velcro fastener has to
be at least 10 cm!
The tension of the back support is adjustable.
1. Pull off the flap of the back support and
fold it to the front [20 on page 40].
2. Open the Velcro fastener of the belt that
you wish to adjust and close it again after
adjustment.
3. Pull the back belt to the back again and
attach the velcro strap (21 on page 40).
Removing the back support uphol-
stery
For removal, first pull off the rear part of the
back support upholstery, then fold it over to
the front [22 on page 40] and pull it off of the
adjustable back strap (23 on page 40) [24 on
page 40].
Placing the back support upholstery
For applying, place the back support uphol-
stery centred around the upper back support
tube [21 on page 40] and attach with the
velcro fasteners to the adjustable back support
strap [25 on page 41].
☞When the user leans against the back sup-
port upholstery (26 on page 41) again,
pay attention that:
☞The pressure of the back must be spread
evenly throughout the back support up-
holstery.
☞The head of the user must be held in bal-
ance through the adjustment of the span-
ning straps.
The extended back part of the adjustable
back support strap (23 on page 40) is fas-
tened to the seat with the velcro surface [24 on
page 40].

17
SEAT PAD
The seat cushion is attached to the seat belt
with velcro fasteners [27 on page 41].
UTENSILS BAG
The utensil pouch is attached to the chassis
frame with velcro fasteners [28 on page 41].
ARM SUPPORTS
The arm supports can be swivelled upward [1].
Swivel up the arm supports
Do not grab into the crossbrace angles to
swivel the arm supports. – Danger of jam-
ming!
For swivelling up the arm supports, pull the
respective locking device (29 on page 41)
outward.
4. Pull the locking device (29 on page 41)
outward.
5. Swivel the arm support toward the back
and up [30 on page 41].
Swivelling down the arm supports
Swivel the arm supports down slowly [31 on
page 41].
☞In doing so, the locking device must vis-
ibly and audibly snap into place (32 on
page 41).
☞Check for correct locking. – The arm sup-
port may not let itself be lifted.
FOLDING/UNFOLDING
Do not grab into the cross sections for fold-
ing/unfolding. – Danger of jamming!
For storage or transport e. g. in a motor vehicle
the electronic travelling wheelchair can folded
easily [33 on page 41].
Folding
1. Switch the electronic travelling wheelchair
off.
☞Press the ON/OFF key to switch on the op-
erating module (4on page 39).
2. Swivel the folding lock upwards/inwards
(34 on page 42).
3. Fold the footboard inwards [19 on
page 40].
4. Switch to push mode [2on page 39].
5. Operate the cable pull (35 on page 42)
and fold the electronic travelling wheel-
chair together toward the front [33 on
page 41].
☞The parts that might have been detached
for the transport must be carefully stowed
and carefully attached again before the
next journey!
6. Secure the electronic travelling wheelchair
from unintentional unfolding with help of
the folding fixation.

18
Unfolding
1. If applicable open the folding fixation.
2. Pull the folded electronic travelling wheel-
chair backwards while lifting and in this
way raise it up again [36 on page 42].
☞The locking device of the cord pull (35 on
page 42) has to engage audibly.
3. Check the function of the locking device.
4. Activate the brakes [1on page 39].
☞Therefore observe chapter Locking the
brakes on page 9.
5. Erect the back support [37 on page 42].
☞The locking device (32 on page 41)
of the arm supports has to visibly and
audibly lock into place.
☞Check the locking device by slightly
lifting the arm support. – The arm sup-
port may not let itself be lifted.
6. Fold the footboard down [18 on page 40].
7. Swivel the folding lock outwards (15 on
page 40).
BATTERY PACK
To prolong the range the electronic travelling
wheelchair can optionally be equipped with
two lithium-ion-batteries.
The battery pack is removable [38 on
page 42].
1. Secure the electronic travelling wheelchair.
☞For this observe chapter Securing the elec-
tronic travelling wheelchair on page 9.
2. open the battery box [39 on page 42].
3. Press down the locking lever (16 on
page 40), pull the battery plug (14 on
page 40) and remove the battery pack
[38 on page 42].
Wheelchair transport with lithium
ion batteries
Protect lithium ion batteries from tempera-
tures outside of the approved temperature
range for transport as well as storage.
☞Therefore view chapter Further techni-
cal data for model 1.054 on page 33.
The lithium ion batteries built into your elec-
tronic travelling wheelchair are permitted to be
transported on the road, by train or in the air.
But there are different rules for transport of
your electronic travelling wheelchair. These de-
pend on where and how the electronic travel-
ling wheelchair is to be transported.
Before travelling, inform yourself about the
valid national regulations in your country as
well as at your destination concerning the
transport of lithium ion batteries.
Contact the respective transport agency in the
individual case.
Individual transport agencies may have regula-
tions, that might limit or forbid the transporta-
tion.
Currently, for transport by plane, the lithium ion
batteries have to be removed from your elec-
tronic travelling wheelchair and carried in your
hand baggage.
☞Before going on a flight clarify the spe-
cific transport conditions with your
flight agency and also the legal regula-
tions concerning transport in a plane in
your country of residence as well as at
your destination.
☞For removal observe chapter Battery
pack on page 18 .
☞Observe chapter Transport of lithium ion
batteries on page 19.

19
Transport of lithium ion batteries
Protect the lithium ion batteries so that nei-
ther moisture nor foreign objects (e.g. small
metal parts, nails or other conductive mate-
rials) can get into the gaps of the lithium ion
batteries.
Consult your specialist dealer before shipping
or transporting a damaged lithium ion battery.
Safety information to lithium ion
batteries
Special care is to be taken with lithium ion
batteries.
Lithium ion batteries that have been dropped
are not to be used again, have them replaced
by your specialist dealer immediately.
Lithium ion batteries that have been drop
should not be stored in the apartment/
house.
Defective lithium ion batteries are not to be
used again, have them replaced by your spe-
cialist dealer immediately.
Only the lithium ion batteries supplied by us
may be applied.
☞Lithium ion batteries from other
manufacturers can lead to injuries or
material damages.
Do not damage, modify, heat, burn, short-cir-
cuit, disassembly or place lithium ion batter-
ies in fluids.
Only use the lithium ion battery to operate
your electronic travelling wheelchair.
Protect lithium ion batteries from tempera-
tures outside of the approved temperature
range for transport as well as storage.
☞Therefore view chapter Further techni-
cal data for model 1.054 on page 33.
Should the rare case of overheating or a fire
in the lithium ion battery occur, the battery
manufacturer recommends plenty of water
or sand for extinguishing.
Use only the included lithium charge to
charge the lithium ion batteries.
The guarantee is only preserved to its full ex-
tent when the included battery charger, sup-
plied by us is used.
Foreign chargers can cause severe damage
to the lithium ion batteries.
Never charge the lithium ion batteries in the
vicinity or in the presence of flammable liq-
uids or gases.
Never charge the lithium ion batteries in
rooms within which moisture deposits can
occur on the electronic travelling wheelchair
and/or the lithium ion batteries.
Never continuously drive the electronic trav-
elling wheelchair completely empty, this can
damage the lithium ion battery.
A deep discharged lithium ion battery may
not be charged again.
☞Have lithium ion batteries replaced
by the specialist dealer.
Only charge the lithium ion battery within
the indicated temperature range.
☞Therefore view chapter Further techni-
cal data for model 1.054 on page 33.
RETAINING STRAP
Make sure that no objects are trapped be-
tween belt and the body!
The retrospective assembly of a retaining
strap is only to be carried out by a specialist
workshop!
The retaining strap [40 on page 42] is guided
around the back support.
The retaining strap serves to stabilise the sitting
position and prevents falling forward out of the
electronic travelling wheelchair.
To fasten the retaining strap, pull both ends
forward and audibly let the buckle click into
place. To open the retaining strap, press down

20
the release button and pull the two ends of the
strap apart.
☞The retaining straps can be adjusted in
length and should not be pulled too tight.
WALKING AID HOLDER
The walking aid is to be removed before fold-
ing the electric travel wheelchair.
The walking aid holder serves for safe carrying
along of a walking aid with a tube diameter be-
tween 20 mm and 30 mm [46 on page 43].
To insert the walking aid, proceed as follows:
1. Insert the walking aid into the cup of the
walking aid holder.
2. Afterwards press the top of the walking aid
into the clip.
LOADING AND
TRANSPORTATION
The electronic travelling wheelchair must be
switched off before lifting!
Do not use the back support, leg supports or
arm supports to lift the electronic travelling
wheelchair.
Loading
The electronic travelling wheelchair can also
be loaded with the aid of ramps or lifting plat-
forms.
☞Observe safety and general handling in-
structions < Electric vehicles > chapter
< Ramps and lifting platforms >. – This doc-
ument and further information are avail-
able in the < Information center > on our
website < www.meyra.com >
Ramps and lifting platforms
Observe the operating manual for the ramp
or lifting platform.
Observe the manufacturer's information for
the ramp or lifting platform.
The maximum bearing height specified for
the ramp must be greater than the height (h
on page 42) from the ground to the load-
ing surface, e.g. of the car.
The load capacity of the ramp or lifting plat-
form must be higher than the overall permit-
ted weight of the electronic travelling wheel-
chair.
There is a danger of tilting when driving
backwards on ramps!
Transport of people inside a motor
vehicle
Your individual electronic travelling wheelchair
is not suited as a seat for transport inside a mo-
tor vehicle. – For this observe chapter Meaning
of the labels on the electronic travelling wheel-
chair on page 34.
Transport security
All regulations and directions of the respec-
tive transport company are to be observed.
– Ask for these before the transport.
The electronic travelling wheelchair is only
to be secured through the securing points
[41 on page 43]+[42 on page 43]+[43 on
page 43].
☞The procedure for securing the electronic
travelling wheelchair can be read in the
document < Safety and general handling
instructions electric vehicles > chapter
< Transport in motor vehicles or with con-
veyors >. – This document and further
information are available in the < Informa-
tion center > on our website < www.meyra.
com >.
Table of contents
Other Meyra Wheelchair manuals

Meyra
Meyra BRIX 1.123 User manual
Meyra
Meyra Sprint Operating instructions
Meyra
Meyra 1.360 User manual

Meyra
Meyra 1.135 User manual
Meyra
Meyra 2.322 Manual

Meyra
Meyra Primus 2 3.310 active User manual

Meyra
Meyra 8013039 User manual
Meyra
Meyra DUO User manual
Meyra
Meyra RUNNER 1.445 User manual

Meyra
Meyra 1.750 User manual
Meyra
Meyra 1.736 User manual

Meyra
Meyra 1 612 iCHAIR MC3 27 Use and care manual

Meyra
Meyra MEX-X 1.130 User manual
Meyra
Meyra 2.360 Manual

Meyra
Meyra 2.432 User manual

Meyra
Meyra 3.600 User manual

Meyra
Meyra 9.050 User manual
Meyra
Meyra iChair DYNAMIC 1.623 Manual

Meyra
Meyra SMART 9.906 User manual

Meyra
Meyra 1.155 NANO User manual
