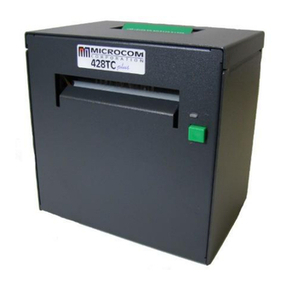
Microcom 470 User manual

MICROCOM CORPORATION
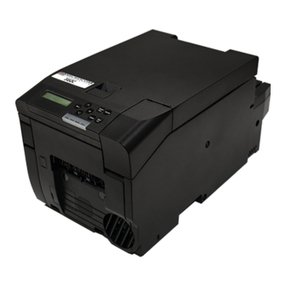
MODEL 470
DIRECT THERMAL / THERMAL TRANSFER PRINTER
OPERATOR'S MANUAL
Part Number 880010-0317
October 1995 Software Version 3.17

Operator's Manual
470 Direct Thermal/Thermal Transfer Printer
- Revised 10/10/95 MSG -
Centronics is a registered trademark of Data Computer Corporation.
Epson is a registered trademark of Seiko Epson Corporation.
FX-86e is a trademark of Seiko Epson Corporation.
HP and LaserJet II are trademarks of Hewlett-Packard Company.
Comstar and I.D. Images are trademarks of Comstar Incorporated.
FastFont is a trademark of Page Technology Marketing, Inc.
Other products, names, and brands are trademarks of their respective holders.
FastFont Typefaces are Copyright ©1993, Page Technology Marketing, Inc.
This manual is subject to change without notice.
Copyright ©1994,1995 Microcom Corporation, Westerville, Ohio - All rights reserved.
Printed in the U.S.A.

))))))))))))))))))))))))))))))))))))))))))))
470 Operators Manual
Table of Contents
List of Tables .............................................................vii
List of Figures .............................................................vii
Introduction ................................................................1
CHAPTER 1: FEATURES AND SPECIFICATIONS .................................3
1.1 SPECIAL FEATURES ............................................3
1.2 BAR CODES ...................................................4
1.3 FONTS .......................................................4
1.4 PRINTING .....................................................4
1.5 INTERFACE COMMUNICATIONS ...................................4
1.6 PHYSICAL .....................................................5
1.7 ENVIRONMENT ................................................5
1.8 ELECTRICAL ...................................................5
1.9 OPTIONS ......................................................5
1.10 APPROVALS ...................................................5
CHAPTER 2: BASIC OPERATION ..............................................7
2.1 UNPACKING THE 470 PRINTER ...................................7
2.2 MOUNTING THE LABEL SUPPLY RACKS ............................7
2.3 INITIAL POWER UP .............................................7
2.4 FRONT PANEL KEYPAD AND STATUS DISPLAY ......................7
2.4.1 PRINT/PAUSE KEY ........................................8
2.4.2 FEED KEY ..............................................8
2.4.3 ON-LINE KEY ............................................9
2.4.4 ALPHA-NUMERIC KEYS ....................................9
2.5 MENU OPERATION ............................................10
2.6 LOADING MEDIA ..............................................11
2.6.1 NORMAL AND TAG/TEAR MODES ..........................11
2.6.2 PEEL-AND-DISPENSE MODE ..............................11
2.7 RIBBON SELECTION ...........................................12
2.8 PRINTHEAD SUPPORT ADJUSTMENT .............................12
2.9 CLEANING INSTRUCTIONS ......................................12
CHAPTER 3: COMMUNICATIONS .............................................13
3.1 CABLE PINOUT ...............................................13
3.2 PRINTER CABLES .............................................14
CHAPTER 4: DESIGNING LABELS USING LDS ..................................15
4.1 CONTROL CHARACTERS .......................................15
4.2 GETTING STARTED ............................................15
4.2.1 PC CONNECTION (SERIAL) ................................15
4.2.2 PC CONNECTION (PARALLEL) .............................16
4.2.3 LEARNING LDS .........................................16
4.3 FORMATTING LABELS: AN OVERVIEW ............................16
4.4 LABEL HEADER ...............................................18

Table of Contents
))))))))))))))))))))))))))))))))))))))))))))
))))))))))))))))))))))))))))))))))))))))))))
470 Operators Manual
4.4.1 A SAMPLE SESSION (HEADER) ............................23
4.5 LABEL FIELDS ................................................24
4.5.1 BIT MAPPED TEXT AND Bar code FIELDS ....................24
4.5.2 VECTOR FONTS .........................................30
4.5.3 GRAPHIC IMAGE FIELDS ..................................33
4.5.4 LINES .................................................35
4.5.5 FILLED RECTANGLE .....................................37
4.5.6 FILLED OVAL ...........................................38
4.5.7 FRAMED OVAL ..........................................39
4.5.8 A SAMPLE SESSION (FIELDS) .............................40
CHAPTER 5: PRINTER COMMANDS ..........................................41
5.1 SPECIAL PRINTER CONTROL CODES .............................41
5.2 PRINTER ENQUIRIES ...........................................42
5.3 SENDING ^D PRINTER COMMANDS ...............................43
5.3.1 SOFTWARE SWITCHES/BATTERY BACKED COMMANDS .......43
5.3.2 PRINTING COMMANDS ...................................49
5.3.3 AUTOSIZING AND VALID GAP COMMANDS ...................50
5.3.4 REAL-TIME CLOCK ......................................52
5.3.5 SERIAL NUMBER COMMANDS .............................54
5.3.6 LABEL HEADER COMMANDS ..............................56
5.3.7 SAVED FORMAT FILE COMMANDS .........................57
5.3.8 LABEL PRESENCE SENSOR CONTROL ................60
5.3.9 TEXT STRINGS COMMANDS ...............................61
5.3.10 MISCELLANEOUS PRINTER COMMANDS ..............64
CHAPTER 6: LOADING GRAPHIC IMAGES .....................................67
6.1 PROCEDURE FOR USING PCX2470 SOFTWARE ....................67
6.2 FORMAT OF GRAPHICS FILES ...................................67
6.3 GRAPHIC IMAGE COMMAND SUMMARY ...........................70
CHAPTER 7: BAR CODES ...................................................71
7.1 TYPES OF BAR CODES .........................................71
7.2 DESIGNING WITH BAR CODES ...................................74
7.2.1 BAR CODE HUMAN READABLES ...........................75
CHAPTER 8: SPECIAL EFFECTS .............................................77
8.1 REVERSED PRINT (WHITE TEXT OVER BLACK) .....................77
CHAPTER 9: DOWNLOADABLE FONTS .......................................79
9.1 DOWNLOADABLE FONT COMMANDS .............................79
9.2 DOWNLOADABLE FONT STRUCTURE .............................80
CHAPTER 10: PROMPTING .................................................83
10.1 SEGMENT, FIELD, AND OP BUFFER COMMANDS ...................83
10.2 PROMPTING COMMANDS .......................................84
Table of Contents
))))))))))))))))))))))))))))))))))))))))))))
))))))))))))))))))))))))))))))))))))))))))))
470 Operators Manual
10.3 CALCULATOR COMMANDS ......................................86
CHAPTER 11: OPTIONS ....................................................89
11.1MICROCOM GRAPHICS CONVERSION UTILITIES ......................89
11.2 MICROCOM DOWNLOADABLE FONT UTILITY .......................89
11.3 ADDITIONAL DOWNLOADABLE FONTS ............................89
11.4 WYSIWYG SOFTWARE PACKAGES ...............................89
11.5 CLEANING KIT ................................................89
APPENDIX A: WARRANTY AND REPAIR PROCEDURES ..........................90
APPENDIX B: LABEL SAMPLES ..............................................91
POWER-UP ........................................................91
LINES .............................................................92
POSTNET ..........................................................92
BAR CODES ........................................................92
MIRROR ...........................................................94
REVERSED PRINTING ................................................95
ROTATIONS ........................................................95
FONTS 470 .........................................................95
APPENDIX C: SAMPLE BASIC PROGRAM ......................................99
APPENDIX D: QUICK REFERENCE COMMAND SUMMARY .......................100
APPENDIX E: HARDWARE DIP SWITCHES ....................................113
Index ...................................................................114

))))))))))))))))))))))))))))))))))))))))))))
470 Operators Manual

))))))))))))))))))))))))))))))))))))))))))))
470 Operators Manual
List of Tables
Serial Port Configuration .....................................................13
Parallel Port Configuration ...................................................14
Print Speed ...............................................................21
Bitmapped Font Descriptions .................................................26
Bar code Symbologies ......................................................27
Character Starting Positions ..................................................28
Circular Bar code Attribute Numbers ...........................................29
Vector Font Descriptions .....................................................31
Enquiry Responses .........................................................42
Clock Field Parameters ......................................................52
Graphic Terminating Codes ..................................................69
UPC Zero Reduction Format .................................................71
Code 128 Special Function Access ............................................73
List of Figures
Front View .................................................................6
Rear View .................................................................6
Printer ...................................................................7
Keypad Layout .............................................................8
Printer Feed Mechanism .....................................................11
Microcom Label ............................................................17
Label Header Parameters of a 4" X 3" Label .....................................19
Four Graphic Images .......................................................34
Lines ....................................................................36
Status Label ..............................................................64
Bar code Rotations .........................................................74
UPC-A Bar code ...........................................................75
Bar code Human Readables ..................................................75
Reverse Imaging ...........................................................78
Prompting Sample .........................................................88

))))))))))))))))))))))))))))))))))))))))))))
470 Operators Manual

))))))))))))))))))))))))))))))))))))))))))))
470 Operators Manual
Introduction
The Microcom 470 is a Direct Thermal or Thermal Transfer label printer with a high resolution
(832 dots or 8 dots/mm), 4.09 inch wide print head. Through the use of dual high speed
processors, the printer has the ability to handle a wide variety of labeling tasks - even the most
demanding applications.
The resident Label Design Software (LDS) is a powerful and easy-to-use package that allows
you to create personalized label formats. It can be driven from a PC, mini-computer,
mainframe, and most special purpose computers.
Among many other features, LDS supports downloadable graphics and fonts, multiple serial
numbering, and flexible character kerning. It offers virtually unlimited text font sizes and all
popular bar code symbologies. Graphic images can be printed or stored in the printer's
memory for future use. Bitmapped Fonts, bar codes, and graphic images can be multiplied in
size and printed in 0,90,180,270 degree rotations. To offer even more flexibility, our new
scaleable or "Vector" fonts and lines can be rotated in one degree increments. Once the labels
are designed, they can be stored in the 470's memory for high speed printer access.
The 470 is capable of printing on most types of label stock or fax paper. It offers operation in a
tag/tear, peel-and-dispense, batch mode, and user-defined advance mode. It can handle blow-
hole, black-line, label gap, and continuous stock.
Many printer applications use the same label format, but change the data on every label. This
is not a problem for the Microcom 470 printer. Data may be changed without down-loading the
same fixed format, or fixed data fields, time after time. This, along with a greatly increased
communication speed, increases data access time and productivity.
Microcom also offers a complete line of software packages which allow quick and easy on-
screen label designing, along with complete database capabilities.

))))))))))))))))))))))))))))))))))))))))))))
470 Operators Manual
2

))))))))))))))))))))))))))))))))))))))))))))
470 Operators Manual 3
CHAPTER 1: FEATURES AND SPECIFICATIONS
The Microcom 470 Direct Thermal/Thermal Transfer printer is designed with many standard
features that are unique when compared to other printers. The 470 is built to meet the
demands of complicated applications and rigorous use. A guarantee of excellence in
engineering is provided by fulfilling the requirements for approval by UL, CSA and the FCC.
1.1 SPECIAL FEATURES
!Historical Dot Control provides increased print quality up to 4.5 ips.
!Menu Driven Printer Control with LCD Display and Keypad
!Operates as tag or ticket feed
!Resolution of 8 dots/mm (.0049" per dot) and a print width of 832 dots (4.09")
!WYSIWYG software compatible
!Prints at speeds up to 8 ips (reduced roll diameter may be necessary above 6 ips)
!Large media supply rack allows roll size up to 10 inches OD
!Prints on die-cut, continuous, fax, or preprinted labels
!Prints on tag stock up to 6.0 mil thickness or 9.0 mill with factory adjustment
!Software-controlled contrast adjustment
!Standard memory of 512Kbytes ROM, 256Kbytes SRAM, and 2Mbytes DRAM
!Internal date and time keeping
!Easy to load label path to prevent label jams or misfeeds
!Detects label gap, black line, or blow-hole stock
!Internal statistical counter for inches and labels printed
!Downloadable Fonts and Graphics capability
!Incrementing and decrementing fields
!Machine state enquiries for security and maintenance

Features and Specifications Chapter 1
))))))))))))))))))))))))))))))))))))))))))))
))))))))))))))))))))))))))))))))))))))))))))
470 Operators Manual
4
1.2 BAR CODES
!Code 39, Interleaved 2 of 5, CODABAR, Code 128, Code 93, Plessey, Modified
Plessey, UPC-A, UPC-E, EAN-8, EAN-13, Postnet, and selectable ratios for producing
HIBC, AIAG, and Logmars
!Bar codes may be printed in 0, 90, 180, and 270 degree rotations
1.3 FONTS
!Vector fonts, converted HP LaserJet II™ font compatibility and 18 resident bit mapped
font styles, including OCR-A
!All Bit Mapped fonts expandable in height and width up to 8 times
!Rotated Vector fonts adjustable from 0 to 360 degrees
(Bit Mapped fonts and bar codes in 0, 90, 180, and 270 degrees)
1.4 PRINTING
!Peel function strips label off of backing
!Tag/tear mode advances label to the tear bar
!Batch mode printing
!User defined label advancement for special stock or application
!Label-presence sensor allows printer to dispense at the operator's pace
!Label back-up prevents wasted media in tag/tear and peel modes
!"Epson® Similar" text emulation mode
1.5 INTERFACE COMMUNICATIONS
!Serial: RS-232C, 25-pin female D-Sub connector (DCE) and 2Kbytes buffer
-Flow control: XON/XOFF, CTS
-Baud rate: 300 to 38400, user-selectable
-Parity: odd, even or none
-Data bits: 7 or 8
!Parallel: 36-pin female Centronics® connector and 2Kbytes buffer

Chapter 1 Features and Specifications
))))))))))))))))))))))))))))))))))))))))))))
))))))))))))))))))))))))))))))))))))))))))))
470 Operators Manual 5
1.6 PHYSICAL
!Construction: Rigid painted steel with high impact molded front panel
!Height: 11.00" (279.4mm)
!Width: 10.125" (257.2mm)
!Depth: 10.10" (256.5mm)
!Weight: 35 LBS (15.89 K/g)
1.7 ENVIRONMENT
!Temperature: 0"C to 40"C operating
!Humidity: 10-90% non-condensing
1.8 ELECTRICAL
!Voltage: Switchable 100,110,120,220,240VAC nom., 50-60 Hz.
!Current: 3 Amps maximum (100VAC)
1.9 OPTIONS
!Cleaning Kit
!Assorted Printer Cables
!On-screen label design PC software packages
!PCX to printer graphics conversion PC software
!PCX to downloadable bitmap PC software
!Downloadable fonts
1.10 APPROVALS
!UL, CSA, Complies with FCC, Class A

Features and Specifications Chapter 1
))))))))))))))))))))))))))))))))))))))))))))
))))))))))))))))))))))))))))))))))))))))))))
470 Operators Manual
6
DISPLAY
KEYPAD
PAPER SLOT
BACKING PAPER SLOT
RIGHT SIDE FRONT PANEL
LEFT SIDE FRONT PANEL
RIGHT SIDE COVER
LEFT SIDE COVER
PAPER SUPPLY RACK
PAPER SUPPLY HOLDER
PAPER SUPPLY
RIBBON VIEW WINDOW
RIGHT PAPER SUPPLY RACK
RACK THUMB SCREW
LEFT PAPER SUPPLY RACK
PAPER SUPPLY HOLDER
PAPER LINE GUIDE
POWER CORD
POWER ENTRY MODULE
POWER SWITCH
SERIAL PORT
PARALLEL PORT
RIGHT SIDE COVER
LEFT SIDE COVER
Microcom 470 Printer
Front View
Figure 1
Microcom 470 Printer
Rear View
Figure 2

))))))))))))))))))))))))))))))))))))))))))))
470 Operators Manual 7
CHAPTER 2: BASIC OPERATION
2.1 UNPACKING THE 470 PRINTER
While unpacking the printer, please check all packing materials closely to avoid misplacing any
necessary parts. After the printer is removed from the box, verify that all parts are present and
in good condition (see Figure 3). All packaging material should be kept and used if the printer
is to be shipped. The printer must be returned in the original container to insure proper
warranty coverage.
Printer Parts figure 3
2.2 MOUNTING THE LABEL SUPPLY RACKS
Position the printer so that the rear is assessable. Refer to Figure 2 and note the mounting
positions of each rack. Notice that the bent flanges point inward. Using the thumbscrews
provided, attach the racks to the printer.
2.3 INITIAL POWER UP
Before connecting the printer to a power source, verify that the voltage selector, located on the
rear of the printer, is set correctly. If not, open the selection door and rotate the cylinder until
the correct voltage is shown.
Plug the printer in and turn the power switch on. The back lighted LCD should illuminate and
temporarily display 'ASSUMING DIRECT THERMAL' or 'ASSUMING THERMAL TRANSFER'. If
this does not occur, check the power source and if necessary call your service organization.
2.4 FRONT PANEL KEYPAD AND STATUS DISPLAY
The front panel contains a 21-key, alphanumeric, keypad and a two-line, back lighted, LCD
display. Through the use of the keypad and display, many printer commands can be directly
entered or modified.

Basic Operation Chapter 2
))))))))))))))))))))))))))))))))))))))))))))
))))))))))))))))))))))))))))))))))))))))))))
470 Operators Manual
8
Keypad Layout
Figure 4
2.4.1 PRINT/PAUSE KEY
The front panel keypad (see Figure 4) contains a label 'PRINT/PAUSE' key. If this key is
pressed the unit will print the currently loaded label format or the default label if no format has
been loaded. If the printer is in the process of printing a predetermined quantity of labels (see
^D73, section 5.3), pressing the 'PRINT/PAUSE' key will pause the printer. Pressing the key
again will allow the printer to continue the batch.
If the 'PRINT/PAUSE' key is depressed when the power is turned on, the printer is put into test
mode and a statistics and test label will be printed (see ^D29 chapter 5.3.10).
2.4.2 FEED KEY
Pressing and holding the 'FEED' key will cause the printer to advance until released. This key
can be use to load and align paper stock.

Chapter 2 Basic Operation
))))))))))))))))))))))))))))))))))))))))))))
))))))))))))))))))))))))))))))))))))))))))))
470 Operators Manual 9
2.4.3 ON-LINE KEY
Pressing the 'ON-LINE' key causes the printer to suspend the processing of characters
through the communication ports and display the message OFF-LINE. If a character is sent to
the printer when communicating serially, the printer will accept the character and send an X-
OFF (assuming X-OFF has been enabled). The printer will continue to receive characters until
the buffer is full, at which time any further characters will be ignored. The Clear to Send signal
is always low when OFF-LINE.
2.4.4 ALPHA-NUMERIC KEYS
The Alpha Numeric keys are used to modify formats and input variable data into the printer.
The unshifted characters are 0 through 9 and the period. The shift key is pressed once for the
characters ADGJMPSVX$ and the clear key, twice for BEHKNQTWZ%, and three times for
CFILORUZ&.

Basic Operation Chapter 2
))))))))))))))))))))))))))))))))))))))))))))
))))))))))))))))))))))))))))))))))))))))))))
470 Operators Manual
10
2.5 MENU OPERATION
General Operation
Press to access the menu screen.
Press or to scroll through options.
Press to accept current option.
Press to exit/cancel current menu/option.
Press to print current label.
Press to advance paper and ribbon (if in transfer mode).
Variable Data Entry
Press to input a 1.
Press then to input an A.
Press then then to input a B.
Press then then then to input a C.
Press then to input a space.
Press or to scroll left or right through entry.

Chapter 2 Basic Operation
))))))))))))))))))))))))))))))))))))))))))))
))))))))))))))))))))))))))))))))))))))))))))
470 Operators Manual 11
2.6 LOADING MEDIA
The following two sections explain the dispensing modes and printing methods. Refer to
figures 2 and 5 for the printer components. If narrow stock is used (3.5 inches wide or less), it
may be necessary to adjust the printhead support screw (see section 2.8).
Thermal Transfer Note:
The 470 will, on power-up, automatically sense a loaded ribbon and select thermal transfer
mode. Please note that the printer will not select thermal transfer mode if the ribbon is loaded
after the printer is turned on. To correct the situation simply cycle the power once the ribbon
has been loaded.
2.6.1 NORMAL AND TAG/TEAR MODES
Place the label supply shaft and stock onto the wire rack. Raise the print head with the lift lever
and insert the paper with the thermally sensitive side up. Follow the loading diagram and
thread the paper through the printer and under the print head. Lower the head lift lever and
you are ready to print.
2.6.2 PEEL-AND-DISPENSE MODE
Follow the paper loading in the normal and tag mode directions. Pull out several inches of
paper and remove the labels. Be sure the leading edge of the stock is flat and square. Rotate
the pinch roller release knob and insert the paper between the black drive roller and the white
pinch roller. Remove the slack and release the pressure on the pinch roller by turning the
release knob.
Printer Feed Mechanism
Figure 5

Basic Operation Chapter 2
))))))))))))))))))))))))))))))))))))))))))))
))))))))))))))))))))))))))))))))))))))))))))
470 Operators Manual
12
2.7 RIBBON SELECTION
Many different ribbons can be used with the 470. However, to extend printhead life and
achieve quality results, it is necessary to correctly match the ribbon to the receiver stock.
Incorrect matching can cause premature printhead failure. Please contact Microcom
concerning recommended media and compatibility.
2.8 PRINTHEAD SUPPORT ADJUSTMENT
When using narrow media, less than 3.5" wide, it is possible to increase print quality and
prevent premature drive roller wear by correctly adjusting the printhead support screw. To
make the adjustment, simply turn the head adjustment screw (see figure 5) clockwise until the
printhead is slightly lifted from the drive roller. Once the head has been lifted from the roller,
verify that the print head has not been lifted too far by printing a test label. If the print quality
on the right side of the label appears weak, then lower the printhead by turning the thumb
screw counter clockwise until the print quality is corrected. If the quality problem appears on
the left side, turn the screw clockwise until the print quality is corrected.
2.9 CLEANING INSTRUCTIONS
The 470 printer and printhead should be cleaned approximately every 7,500 inches or every
two weeks whichever occurs first. The printer should also be cleaned whenever you run out of
label stock. Proper cleaning assures that any adhesive that may come off the end of the
previous roll, is removed. A Microcom cleaning kit (part #040005) should be used for cleaning
and maintaining a Microcom printer product. It is important to note that optimum printhead life
is achieved by cleaning the printer and printhead.
To clean your Microcom 470 printer:
1) Turn the printer off.
2) Lift the printhead using the lift lever at the rear of the printer and remove any label
stock that remains inside the head mechanism.
3) Using the cleaning brush, sweep away all small label and adhesive particles that may
be in the area of the printhead.
4) Moisten a cleaning swab with the cleaning solution and wipe away any adhesive from
the rollers or the aluminum peel bar.
5) Dampen a swab with cleaning solution and lift the print head. Take the moistened swab
and gently wipe the underside of the printhead. Repeat if necessary (if swab is
extremely dirty).
6) Moisten the felt side of a cleaning card with the cleaning solution. Raise the print head
and insert the cleaning card under print head with the felt side facing up. Lower the
print head and press the feed key to feed the card through the printer. Allow the
printhead to ride on the cleaning card. Repeat the process if needed. The cleaning card
may be used once at each end.
WARNING: DO NOT TOUCH THE PRINTHEAD WITH ANY METAL OR SHARP OBJECTS
Table of contents
Other Microcom Printer manuals

Microcom
Microcom 326M User manual

Microcom
Microcom 438 User manual

Microcom
Microcom 226 User manual

Microcom
Microcom 428LT User manual

Microcom
Microcom 400 User manual

Microcom
Microcom 424M User manual

Microcom
Microcom 465 User manual

Microcom
Microcom 426M User manual

Microcom
Microcom 466 User manual

Microcom
Microcom 428T User manual

Microcom
Microcom 814M User manual

Microcom
Microcom 428TM User manual

Microcom
Microcom 424M User manual

Microcom
Microcom 485TM User manual

Microcom
Microcom 410 ECA User manual

Microcom
Microcom 405 Installation and operating instructions

Microcom
Microcom 322M User manual

Microcom
Microcom 438TC User manual

Microcom
Microcom 438TM User manual

Microcom
Microcom 428TC plus User manual