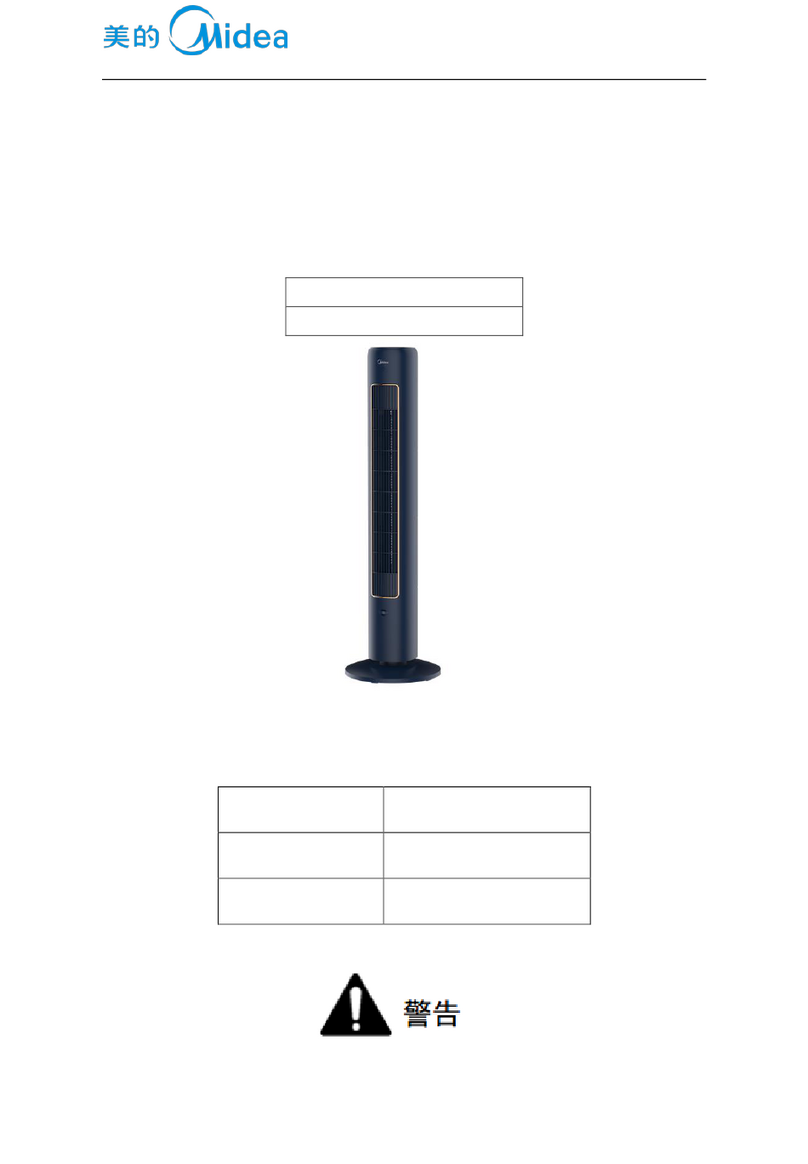
Midea MSF42B9AWT User manual

Electric Bladeless
Tower Fan
version A - 02 - 2021
MSF42B9AWT
MSF42B9ASV
midea.com
USER MANUAL
en
sp
MSF42B9AWT
MSF42B9ASV
Warning Notice: Before using
this product, please read this
manual carefully and keep it for
future reference. For additional
support, please call customer
service at 1-866-646-4332.
The design and specifications are
subject to change without prior
notice for product improvement.
Consult with your dealer or
the manufacturer for details.
Rated voltage: 120V
Rated power: 35W
Frequency: 60Hz

Page 2
Read This Manual
Inside you’ll find many helpful hints on how to use and maintain your appliance
properly. Just a little preventive care on your part can save you a great deal
of time and money over the life of your appliance. You’ll find many answers
to common problems in the troubleshooting tips - you should be able to fix
most of them quickly before calling service. These instructions may not cover
every possible condition of use, so attention to safety details is required when
operating and maintaining this product.
SAFETY PRECAUTIONS
OWNER’S MANUAL
To prevent injury to the user or other people and property damage, the
instructions shown here must be followed. Incorrect operation due to ignoring
of instructions may cause harm or damage. The different levels of risk is shown
by the following indications.
SAFETY PRECAUTIONS .............................2
IMPORTANT INSTRUCTIONS ................... 3
RULES FOR SAFE OPERATION................ 4
ASSEMBLY .................................................... 4
SPECIFICATIONS ........................................ 4
PARTS AND FEATURES ........................... 5
INSTALLATION INSTRUCTIONS .............. 6
OPERATION INSTRUCTIONS ................... 7
USER SERVICING INSTRUCTIONS ........ 11
CLEANING ................................................... 11
SERVICE AND SUPPORT ...........................12
ONE (1) YEAR LIMITED WARRANTY ..... 13
CAUTION
This symbol indicates a hazardous situation, which, if
not avoided, could result in minor or moderate injury.
This symbol addresses practices not related to physical
injury.
NOTICE
This symbol indicates a hazardous situation which, if
not avoided, could result in death or serious injury.
WARNING

Page 3
IMPORTANT INSTRUCTIONS
1. This appliance has a polarized plug (one blade is wider than the other). To
reduce the risk of electric shock, this plug is intended to fit in a polarized
outlet only one way. If the plug does not fit fully in the outlet, reverse the
plug. If it still does not fit, contact a qualified electrician. DO NOT attempt
to bypass or defeat this safety feature.
WARNING
To reduce the risk of fire or electric shock, do not use this fan with any
solid-state speed control device.
2. This product employs overload protection (fuse). A blown fuse indicates
an overload or short-circuit situation. If the fuse blows, unplug the product
from the outlet. Replace the fuse as per the user servicing instructions
(follow product marking for proper fuse rating) and check the product.
If the replacement fuse blows, a short-circuit may be present and the
product should be discarded or returned to an authorized service facility
for examination and/or repair.
a) Do not operate any fan with a damaged cord or plug. Discard fan or
return to an authorized service facility for examination and/or repair.
b) Do not run cord under carpeting. Do not cover cord with throw rugs, runners,
or similar coverings. Do not route cord under furniture or appliances.
Arrange cord away from traffic area and where it will not be tripped over.
3. Do not leave the fan running unattended.
4. Keep electrical appliances out of reach from children or infirm persons. Do
not let them use the appliances without supervision.
5. If the power cord is damaged, it must be replaced by manufacturer or its
service agent or a similarly qualified person in order to avoid a hazard.
6. Place the fan on a flat and firm level surface.
7. This appliance is not intended for use by persons (including children) with
reduced physical, sensory or mental capabilities, or lack of experience and
knowledge, unless they have been given supervision or instruction concerning
use of the appliance by a person responsible for their safety. Children should
be supervised to ensure that they do not play with the appliance.
8. Once the fan is assembled, the rotor blade guard should not be removed.
- Prior cleaning unplug the fan.
- The rotor guard should not be dissembled/opened to clean the rotor blades.
- Wipe the fan enclosure and rotor blade guard with a slightly damp cloth.
Page 4
This electric fan is pre-assembled in factory.
1. Never insert fingers, pencils, or any other object through the grille
when fan is running.
2. Disconnect fan when moving from one location to another.
3. Be sure fan is on a stable surface when operating to avoid overturning.
4. DO NOT use fan in window, rain may create electrical hazard.
5. Household use only.
ASSEMBLY
RULES FOR SAFE OPERATION
SPECIFICATIONS
Model Rated
voltage
Rated
frequency
Rated
power Noise
MSF42B9AWT
MSF42B9ASV 120V ~60Hz 35W 61dB

Page 5
PARTS AND FEATURES
NO. Description NO. Description
1 Operation panel 6 Power cord
2 Display icon panel 7 Power cord plug
3 Airflow outlet 8 Air inlet grille
4 Ambient light of belt 9 Pre-filter
5 Base 10 HEPA filter
NOTICE
Pictures in the manual are for reference only.
1
2
3
4
5
6
7889910 10
Remote Controller ×1 Manual × 1 HEPA Filter ×2

Page 6
INSTALLATION INSTRUCTIONS
Installation Steps
1. Remove the air inlet
grille.
2. Remove the pre-filter
by pressing the raised
part on both sides and
pull outwards.
3. Remove the protective
film of the filter.
4. Install the HEPA filter.
5. Install the pre-filter by
aligning the slots in
position located at the
bottom, then secure
the upper U-shaped
clip.
6. Install the air inlet
grille by aligning the
upper two clips and
press tightly, then
press the two sides on
lower portion, slowly
and gently clip the air
inlet grille in place.
7. Plug-in power cord.
NOTICE
It is recommended to clean the filter once every two weeks and replace it
once every six months (the cleaning and replacement cycle can be adjusted
according to the use environment).
7
Buckling
position
5 6
3 4
1 2
Buckle
Clip

Page 7
OPERATION INSTRUCTIONS
Control area Display area
Button Function Description
“- 澝+”
Startup/Standby.
Set wind speed/timing.
Multi-angle oscillating switch of 30°,60°, 120° and 0°.
In the startup mode, press this button for cyclic switch between normal wind
(12 gears, indicator light is on) /sleep wind (3 gears, indicator light is
on)/baby wind (2 gears, indicator light is on).
Timed shutdown is achieved in the startup state, and reserved startup is
achieved in the standby state;
After clicking , set the timing time by pressing "+, -" (the display screen
shows 0-1-2- … -12-0h in a cycled manner), and when the timing time is 0h, it
indicates cancellation of timing/reservation.
Start up or shut down the mode of the wind changing with the temperature.
In the mode of wind changing with the temperature, the indicator light is on,
and the wind force can be automatically adjusted according to the change of
environmental temperature.
Long press for 3 seconds to reset the filter.
Ambient light function, turn on/off the Ambient light.

Page 8
OPERATION INSTRUCTIONS (cont.)
Additional Features and Maintenance
Remote Control Description
Forced shutdown
There is no operation during the running of the fan, after 12 hours of
continuous operation, the fan will be forced to shut down automatically.
Intelligent memory
When the fan is turned off or powered off, it will run in the state before
turning off or power off when the power is powered on again (the timing
function is not memorized).
Screen-off function
In case of no operation for 60 seconds during normal operation, the
indicator light on the body will be automatically off, but the fan will
continue to operate. Press the ON/OFF button to turn off the fan when
the screen is off, and press the other button to restore display.
Automatic reset of oscillating function upon shutdown
Upon shutdown, the oscillating function is automatically reset.
NOTICE
• The remote control should be normally used within 6 meters of the front
of the product and 30 degrees of the deviation angle.
• The battery contains many heavy metals, acids and bases, etc., which may
threaten human’s health; Waste batteries should be recycled separately.
Power Button/Oscillation -
Start up or shut down air
flow and direction
Startup/Standby
Mode button changes the air
flow type
Start up/Shut down mode
controls the air flow swing
function
Timer button - Set the timed
shutdown/ reserved startup
Air flow Temperature/
Timer increase or
decrease
Press “+" or "-” to set the
air flow speed or timing
feature.

Page 9
Inserting and Replacing Batteries
Filter Replacement
1. Do not dispose of batteries in fire,
batteries may explode or leak.
2. Do not mix old and new batteries.
3. Do not mix alkaline, standard
(carbon-zinc) or rechargeable
(nickel-cadmium) batteries.
4. Non-rechargeable batteries are not
to be recharged.
5. Batteries are to be inserted with
the correct polarity.
6. Remove batteries when exhausted
or when storing product to prevent
damage.
7. Batteries must be removed from
the remote controller before
disposal and disposed of per local
regulations.
NOTICE
• Use manganese or alkaline
batteries of type “AAA”.
• DO not use rechargeable
batteries.
AAA Battery, 1.5 V
Battery
2 x AAA batteries are not include.
1. Filter model: FQ150CJ-2 (including
2 sets).
2. When the indicator light for
replacement of filter is on, the
prompt that reminds you of filter
replacement will appear. If it is not
replaced in time, the prompt will
appear during each startup.
3. Replace a new filter.
4. Long press the button for 3 seconds
to turn off the indicator light for
filter replacement.
12
3 4

Page 10
Pre-Filter Cleaning
1. Unplug the power cord.
2. Take out the filter.
3. Remove the dust with
vacuum cleaner.
4. Install the machine in reverse
order and plug power cord.
OPERATION INSTRUCTIONS (cont.)
12
3 4

Page 11
USER SERVICING INSTRUCTIONS
CLEANING
1. Grasp plug and remove from the
receptacle or other outlet device. Do not
unplug by pulling on cord.
2. Open fuse cover. Slide open fuse
access cover on top of attachment plug
towards blades.
1. Always remove the plug from the power socket.
2. Wipe with a soft, damp cloth. Do not use detergents and abrasives.
3. Do not allow water or other liquids to enter the internal part of the motor.
NOTICE
Use this fan only in accordance with the specifications outlined in this
User Guide. Usage other than what has been specified here may result in
serious injury.
3. Remove fuse carefully. Insert the tip of your tool into fuse slot (close with
the terminal), then prize the fuse gradually and slowly, but not overexert.
If you feel tight, you can try it at several times and prize the fuse little by
little. When one side of the fuse has been prized, then you can get the fuse
out entirely.
4. Risk of fire. Replace fuse only with 2.5 Amp, 125 Volt fuse.
5. Close fuse cover. Slide closed the fuse access cover on top of attachment
plug.
6. Risk of fire. Do not replace attachment plug. Contains a safety device
(fuse) that should not be removed. Discard product if the attachment
plug is damaged.

Page 12
SERVICE AND SUPPORT
In the event of a warranty claim or if service is required for this fan, please
contact us at the following:
Toll Free: 1-866-646-4332
For questions or comments, please write to:
Midea America Corp
5 Sylvan Way, Suite 100
Parsippany, NJ 07054
Phone: 866 646 4332
For your records, staple your sales receipt to this manual and record the
following:
DATE OF PURCHASE:______________________________________________
PLACE OF PURCHASE:_____________________________________________
(STAPLE SALES RECEIPT HERE)
NOTE: PROOF OF PURCHASE IS REQUIRED FOR ALL
WARRANTY CLAIMS

Page 13
ONE (1) YEAR LIMITED WARRANTY
Please read all the instructions before attempting to use this product.
Midea America Corporation warrants as limited herein to the original purchaser
of retail that each new Fan, shall be free of defects in material and workmanship
for a period of one (1) year from the date of original purchase. This one (1) year
warranty is limited to the Motor and Electric Element.
In the event of malfunctions or failure of your Fan, simply deliver or send
the Fan, postage prepaid along with PROOF OF PURCHASE, within the
warranty period of one (1) year, to Midea America Corporation. Midea America
Corporation reserves the right to inspect the claimed defective part or parts to
determine if the defect or malfunction complaint is covered by this warranty.
Midea America Corporation shall, within sixty (60) days after receipt of the
product, at its option, repair and/or replace the defective part or parts free
of charge. This warranty shall only cover defects arising from normal usage.
Midea America Corporation assumes no responsability whatsoever if the Fan
should fail during the warranty period by reason of:
• Misuse, negligence, physical damage or accidents.
• Lack of maintenance (see instructions for proper maintenance).
• Repair by any unauthorized party during the warranty period.
• Damage caused by connection to an improper input voltage (see
specification label on your Fan).
Midea America Corporation makes no further warranties or representations,
express or implied except those contained herein. No representative or dealer
is authorized to assume any other liability regarding tha Fan. The duration
of the implied warranty granted under State law, including warranties of
merchantability and fitness for particular purpose are limited in duration
should the duration of the express warranty grant it hereunder. Midea
America Corporation shall in no event be liable for direct, indirect, special or
consequential damages.
Some states do not allow limitations on how long an implied warranty lasts,
and/or the above limitations or exclusion may not apply to you. This warranty
gives you specific legal rights and you may have other rights which vary from
state to state.

Page 14
OWNER’S MANUAL
PRECAUCIONES DE SEGURIDAD ............ 14
INSTRUCCIONES IMPORTANTES ............ 15
REGLAS DE USO SEGURO ........................ 16
MONTAJE ....................................................... 16
ESPECIFICACIONES .................................... 16
PIEZAS Y CARACTERISTICAS .................. 17
INSTRUCCIONES DE INSTALACIÓN ....... 18
INSTRUCCIONES DE OPERACIÓN .......... 19
INSTRUCCIONES DE MANTENIMIENTO . 23
LIMPIEZA ...................................................... 23
SERVICIO Y SOPORTE .............................. 24
GARANTÍA LIMITADA DE UN (1) AÑOS ......... 25
Lea Este Manual
Dentro de este manual podría encontrar muchos consejos ayudables diciendo
cómo usar y mantener su aparato correctamente. Le cuesta un poco cuidado
antes, le ahorrará mucho tiempo y dinero en su aparato. Puede encontrar
muchas respuestas a los problemas communes en el cuadro de las soluciones
de problemas. Si lea nuestro cuadro de soluciones de problemas primero, quizá
no será necesario llamar por servicio.
PRECAUCIONES DE SEGURIDAD
Para evitar los daños a los usuarios u otra persona, deben seguir las
instrucciones siguientes. Las operaciones incorrectas por la ignora de las
instrucciones puede causar lesiones o daños. Los diferentes grado de seriedad
está clasificado por lo que indica siguiente.
Este símbolo indica una situación peligrosa que, si no
se evita, podría provocar lesiones leves o moderadas.
CAUTION
ATENCIÓN
Este símbolo aborda prácticas no relacionadas con
lesiones físicas.
NOTICE
NOTA
Este símbolo indica una situación peligrosa que, si no
se evita, podría provocar la muerte o lesiones graves.
WARNING
CUIDADO

Page 15
INSTRUCCIONES IMPORTANTES
1. Este dispositivo posee un enchufe polarizado (una de las clavijas es más ancha que
la otra). Para reducir el riesgo de choque eléctrico, este enchufe fue diseñado para
encajar de una sola manera en un tomacorriente polarizado. Si la clavija no entra
completamente en el tomacorriente, inviértala. Si aun así no encaja, contáctese
con un eléctrico calificado. No intente deshacerse de esta medida de seguridad.
CUIDADO
Para reducir el riesgo de incendio o choque eléctrico, no use este ventilador con
ningún tipo de dispositivo de control de velocidad en estado sólido.
2. Este producto posee protección contra sobrecargas eléctricas (fusible). Un
fusible quemado indica que se produjo una sobrecarga o cortocircuito. Si el
fusible se quema, desenchufe el producto del tomacorriente. Remplace el fusible
de acuerdo a las instrucciones de mantenimiento del usuario (siga la clasificación
del producto para seleccionar un fusible adecuado) y revise los productos.
Si el fusible de remplazo se quema, esto puede deberse a la presencia de un
cortocircuito y el producto deberá ser eliminado o regresado a un centro de
servicio técnico autorizado para ser revisado y/o reparado.
a) No utilice el aparato si alguna de las aspas o el cable o el enchufe están
dañados. Deseche el ventilador o envíelo a un centro de servicio técnico
autorizado para que sea revisado y/o reparado.
b) No extienda el cable de la unidad por debajo de alfombras. No lo cubra con
ningún tipo de cubierta. No extienda el cable de la unidad por debajo de
muebles u otros dispositivos. Disponga el cable de tal manera de que quede
lejos de áreas transitadas y en donde no represente peligro de tropiezos.
3. Nunca deje el ventilador funcionando sin supervisión.
4. Mantenga los dispositivos eléctricos fuera del alcance de niños y personas con algún
tipo de discapacidad. No permita que utilicen estos dispositivos sin supervisión.
5. Si el cable de alimentación es dañado, debe ser remplazado por el fabricante,
servicio técnico o personal calificado similar para evitar posibles peligros.
6. Ubique el ventilador sobre un piso plano.
7. Este dispositivo no debe ser utilizado por personas (incluidos niños) con
capacidades físicas, sensoriales o mentales reducidas, o falta de experiencia
y conocimiento, a menos que lo hagan bajo supervisión o hayan recibido
instrucciones por parte de una persona responsable de su seguridad. Los niños
deben ser supervisados para asegurarse de que no jueguen con esta unidad.
8. Cuando el ventilador fue ensamblado, el protector de las aspas se instaló para no
ser retirado.
- Antes de limpiar desconecte el ventilador.
- La protección del rotor no debe ser desarmada ni abierta para limpiar las
aspas del mismo.
- Limpie la carcasa del ventilador y la protección de las aspas con un trapo
ligeramente humedecido.

Page 16
1. Nunca inserte los dedos, lápices o ningún otro tipo de objeto a través
de la rejilla cuando el ventilador esté funcionando.
2. Desconecte el ventilador cuando lo traslade de un lugar a otro.
3. Asegúrese de que el ventilador se encuentre sobre una superficie
estable cuando esté en funcionamiento para evitar que pueda
volcarse y caer.
4. NO use el ventilador en una ventana, la lluvia podría provocar un
peligro eléctrico.
5. Solo para uso doméstico.
REGLAS DE USO SEGURO
ESPECIFICACIONES
Modelo Tensión
nominal
Frecuencia
nominal
Potencia
nominal Ruido
MSF42B9AWT
MSF42B9ASV 120V ~60Hz 35W 61dB
Ese ventilador eléctrico es pre ensamblado en fábrica.
MONTAJE

Page 17
PIEZAS Y CARACTERÍSTICAS
NO. Descripción NO. Descripción
1 Panel de operación 6 Cable de alimentación
2 Panel de visualización 7 Enchufe del cable de alimentación
3 Salida de aire 8 Rejilla de entrada de aire
4 Luz Ambiental tipo cinturón 9 Pre-filtro
5 Base 10 Filtro HEPA
NOTA
Las imágenes del manual son solo referenciales.
1
2
3
4
5
6
7889910 10
Control remoto ×1 Manual × 1 Filtro HEPA ×2

Page 18
INSTRUCCIONES DE INSTALACIÓN
Pasos de Instalación
1. Retire la rejilla de
entrada de aire.
2. Retire el pre-filtro.
Presione la parte
levantada en ambos
costados y tire hacia
afuera, y retire el pre-
filtro.
3. Retire la película
protectora del filtro.
4. Instale el filtro HEPA.
5. Instale el pre-filtro.
Alinee la posición de
la ranura en la parte
inferior y asegure el
broche con forma de
U de la parte superior.
6. Instale la rejilla de
entrada de aire.
Alinee los dos
broches superiores
y presione para que
queden seguros,
luego presione los dos
costados de la parte
inferior, y asegure lenta
y uavemente la rejilla
de entrada de aire
7. Conecte el cable de
alimentación.
NOTA
Se recomienda limpiar el filtro una vez cada dos semanas y remplácelo una
vez cada seis meses (el ciclo de limpieza y reemplazo se puede ajustar de
acuerdo al uso).
7
3 4
1 2
Buckle
Broche
5 6
Buckling
position
Posición de
enganche

Page 19
INSTRUCCIONES DE OPERACIÓN
Área de control Área de visualización
AIRE Saludable
AIRE
INTELIGENTE RESTABLECER LUZ
TEMPORIZADOR MODALIDAD OSCILACIÓN
(Presione 3s, para restablecer filtro)
Botón Descripción
“- 澝+”
Iniciar/Espera
Ajuste velocidad/tiempo de aire
En la modalidad de inicio, presione el botón para cambiar de manera
cíclica entre aire normal (velocidad 12, luz indicadora encendida) / Aire de
reposo (velocidad 3, luz indicadora encendida) / aire suave (velocidad 2,
luz indicadora encendida)
El multi-ángulo de oscilación cambia de 30°, 60°, 120° y 0°.
El apagado programado se logra cuando la unidad está activada, y el encendido
programado se logra cuando la unidad está en modalidad de espera.
Después de hacer clic en , ajuste el tiempo presionando "+, -" (la pantalla
exhibirá 0-1-2- … -12-0h de manera cíclica). Cuando el tiempo sea 0h,
se habrá cancelado la programación.
Active o desactive la modalidad de cambiar el aire con la temperatura.
En esta modalidad, la luz indicadora estará encendida y la fuerza del aire
puede ser ajustada automáticamente de acuerdo a la temperatura ambiente.
Presione durante 3 segundos para restablecer el filtro.
La función de luz ambiente, active/desactive la luz ambiente.
OSCILACIÓN
MODALIDAD
TEMPORIZADOR
AIRE INTELIGENTE
RESTABLECER
LUZ
(Presione 3s, para restablecer filtro)

Page 20
INSTRUCCIONES DE OPERACIÓN (cont.)
Funciones Adicionales y Mantenimiento
Descripción del Control Remoto
Apagado forzado
No se realizan operaciones durante el funcionamiento Después de 12 horas
de operación continua el dispositivo se apagará.
Memoria inteligente
El ventilador se iniciará en la misma modalidad que tuvo la última vez que fue
utilizado cuando sea encendido luego de haber estado apagado (la función de
programación no será memorizada).
Función de apagado de pantalla
En caso de que no se realicen operaciones normales durante 60 segundos,
la luz indicadora en el cuerpo del dispositivo se apagará automáticamente
pero el ventilador seguirá funcionando. Presione el botón ON/OFF para
apagar el ventilador cuando la pantalla esté apagada y luego presione otro
botón para restaurar la visualización.
La función de oscilación se restablecerá automáticamente cuando la
unidad sea apagada
Cuando la unidad sea apagada, la función de oscilación se restablecerá
automáticamente.
NOTA
• El control remoto debe ser usado normalmente en un rango de 6 metros desde la
parte delantera del producto y en un ángulo de desviación de 30 grados.
• La batería contiene metales, ácidos y bases pesados, etc., lo que podrían representar una
amenaza para la salud del ser humano. Las baterías deben ser recicladas por separado.
Activar o desactivar la
oscilación y salida de aire
Iniciar/Espera
Cambie el tipo de aire
Active o desactive la modalidad
de cambiar el aire con la
temperatura.
Ajuste el apagado/inicio
programado
Presione “+, -” para
ajustar la velocidad del
aire o el tiempo de
programación.
This manual suits for next models
1
Table of contents
Languages:
Other Midea Fan manuals

Midea
Midea FT45-14AP User manual

Midea
Midea FS40-16JR User manual

Midea
Midea MKT3H-800G70 User manual

Midea
Midea MF-16FT17NB User manual

Midea
Midea FT40-21M User manual

Midea
Midea NTH15-23AR User manual

Midea
Midea FS40-23MT User manual

Midea
Midea FS40-15AR User manual

Midea
Midea MTF-101K User manual

Midea
Midea FS40-11NR User manual

Midea
Midea FZ10-17KR User manual

Midea
Midea FS40-15AR User manual

Midea
Midea FT30-16A User manual

Midea
Midea FS40-19PRD User manual

Midea
Midea FS40-14BU User manual

Midea
Midea AMS150F-MDLW User manual

Midea
Midea FT30-16JB User manual

Midea
Midea Bahamas Breeze FS45-P1 User manual

Midea
Midea FW4023D User manual

Midea
Midea FT30-8HC User manual