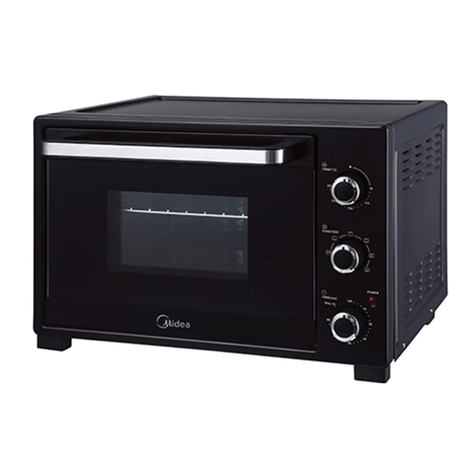
Midea MG25BNM User manual

請在使用本產品前,認真閱讀、理解,並請按照指示操作,請保存好此說明書以日後參考。
型號:MG25BNM
額定電壓:220V~50Hz
額定功率:1500W
焗爐使用說明書

ૹڜ٤ق
ڇࠌشሽᕴขழΔؘႊᙅ༛່ഗءڜ٤ൻΔץאՀ༓រ
ࠌشءขছᓮגาᔹᦰᎅࣔΖ
ᣤᆃലሽᄭᒵΕ༺ᙰ֗௸ᒣ௦ ֽխࢨࠡה᧯խΔאᤛሽΖ
௸ᒣՠ܂ழΔ૿ᄵ৫ױ౨ৰΔᓮ֎ᙟრᤛΖڕᏁᤛᅸࢨฝ೯௸ᒣΔᓮࠌشሽ௸ᒣറ
ش֫Ζല௸ᒣ࣋ᆜڇᄵ᧯૿Ζ
ڇ堚ᑥ௸ᒣছΔؘႊᣂሽᄭΔࢸൾ༺ᙰΖৱ௸ᒣܐথ۟ᄵழֱױၞ۩ᖙ܂Ζ
ᓮլࠌشᐗ୮༼ࠎٙΔא܍႞୭Ζ
ᣤᆃࢮሽᄭᒵΔڇฝ೯௸ᒣছؘႊࢸൾ༺ᙰΔࠀشᠨ֫ჺ೯௸ᒣΖ
լല௸ᒣ࣋ᆜڇᑷ ࢨᔾᑷᄭࡉሽΖ
ᓮլڇ֪؆ࠌشΖ
ڕ࣠ሽ௸ᒣፖࠡהሽᕴٵழࠌشΔױ౨ᄎᖄીሽሁ၌ሉΔۖࠌሽ௸ᒣլ౨إൄࠌشΔሽ
௸ᒣᚨᗑࠌشԫයሽሁΖ
௸ᒣሎ܂ழΔ؆૿ᄵ৫ױ౨ΔᓮլᤛᅸΖ
ڕ࣠ሽᄭᒵჾᡏΔԫࡳᨃ ޓངΔאᝩ܍ٲᙠΖ
ᅝլࠌش௸ᒣழΔױലٙ࣋ࠩ᧯փژ࣋Δլ࣋ᆜࠡה᧯Ζ
ᣤᆃലሽ௸ᒣᔾ࣐ᗏΔࠌشழࣹრᠦ࿗ΕؒΕኟᛥࡉᣊۿΔאທګ־
߀Ζ௸ᒣՠ܂ழΔᣤᆃڇᒣື࣋ᆜٚ۶Ζ
ᓮլലയຨᒣ᧯࣋ᆜڇփףᑷΔܡঞױ౨ڶᡨٲᙠΖ
լ堚ᑥ᥆ᥨቾΔᥨቾறๅᆵ൷ᤛࠩሽᕴցٙۖᖄીሽᚰΖ
௸ᒣ࣍ՠ܂ኪழΔא܍ᗈ႞Δႛױאࠌشඝၨࢨނ֫Ζ
૿ڇࠌشመ࿓խᄎ᧢ᗍΖ
၌ၦଇࢨ᥆ࠠԫࡳլ࿏Ⴞၞ௸ᒣΔא܍ขس־߀ࢨሽᚰٲᙠΖ
ڇࠌشᑿࢨ᥆୲ᕴழΔᓮܑ՛֨ΔאທګٲᙠΖ
୮ؘႊᥨࠝ࿙Δᒔঅࠝ࿙լᖙ܂௸ᒣΖ
ᕴࠠլ౨ڇ؆൷ૠழᕴࢨᗑم൳൳ࠫߓอֱڤՀՠ܂Ζ
ᓮݔঅژڼᎅࣔ
ᔞٽ୮அࠌش
ᤞܫΚ૿ൄᑷ
2
除非在適當監管或指引下,為安全起見,此產品不適宜殘疾、智障、精神病患者、兒童或缺乏相
關經驗及知識人士使用。
:
於
旁
美的客戶服務中心

รԫڻࠌشছᓮࣹრ
ല௸ᒣփٙࡉ٤ຝ࠷נΖ
ࠌشᄵֽ堚ᑥ௸ࡉ௸ᒌΔش௦መ堚ᑥᕪ ᛘؒᚴ௸ᒣփຝΔ٦ش ؒᚴΔৱ
ݙ٤ ৵٦ࠌشΖ
ല௸ᒣ࣋ᆜڇؓ૿ΔࠀᗑࠌشԫයᒵሁΖ
ࠌشছᓮᒔঅ୵ᒌբإᒔڜᇘࠩۯΖ
รԫڻࠌشழΔᏁ٣ലᄵ৫ᓳ່۟Δቃᑷ ։ᤪΔאೈጐྲྀఎᄿΖ
ࣹრΚڇڻࠌشழᄎፊࠩฆ࠺ΔຍإൄွΔฆ࠺լᄎᥛ၌መ ։ᤪΖ
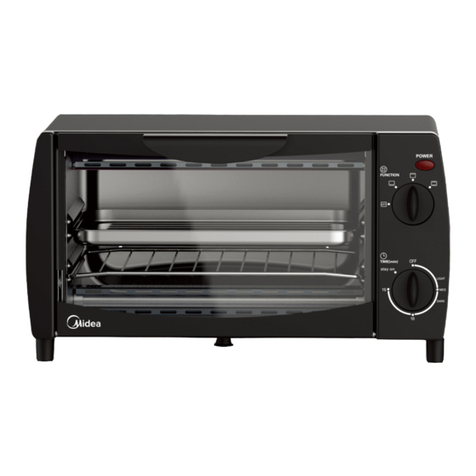
部件名稱:
1. 拉手
2. 外殼
3. 溫度旋鈕
4. 功能旋鈕
5. 時間旋鈕
6. 屑盤
7. 烤盤
8. 烤架
控制設置
時間設定
0-60 分鐘:時間設定最多能夠預設 60 分鐘。時間旋鈕如果沒有扭動,烤箱是
不會運作的。如果時間旋鈕在 O位置,烤箱並不會運作。如果想設定所需時間,
只需要扭動時間旋鈕。當時間旋鈕扭動時,指示燈
。當設定時間結束時
伴隨有鈴響 ,
且自動斷電源
調整時間設定
在烤箱運作時,您可以調整時間設定。只需要扭動時間調到所需時間就可以。
注意:當您想設定的時間少於 5分鐘時,通常是將時間旋鈕扭到 分鐘,再
往後扭到您想設定的時間 這樣的話
,能夠安全準確地設定時間。
。
溫度設定
將溫度旋鈕扭到預 的溫度,可設的溫度範圍是 度到 230 度。
STAY ON
當使用烤麵包功能時不設定時間,可以將時間旋鈕扭到 STAY ON 位置。這樣
的話,烤麵包功 能會一直工作到時間旋鈕歸 O位置。
3
MG25BNM
FUNCTION
10
軟
乾
風
會亮起,
設
持續運作功能
678
12
3
4
5
,
ΰ
100
注意:

功能設定
這一款烤箱擁有 3種不同功能的烘烤方式。
烘烤: 在此功能下,烤箱以最低的加熱運作。
燒烤: 在此過程中,烤箱以中等加熱運作。
烘麵包: 在此功能下,烤箱以中等加熱運作。此功能最好是烤 ,麵包或 烤 肉、牛 等。
使用技巧
警告:烤箱在運作中和運作後,表面都很熱
操作
1食物的高度與烤架相符,並將烤架放在適當位置。
2將食物放置在烤架內,確保烤箱內 ,千萬不要 塑膠或 紙板的容器。
4. 不要讓果汁跌落到烤箱的底部。當烤 時,應當 用滴盤或 屑盤。
6. 安全地關上玻璃門,並且設置好時間旋鈕來運作烤箱。
烤麵包功能
當要烤 米、麵包、曲奇時,運用烤麵包功能鍵。
1. 將烤架放置在所需的位置。
2. 將功能鍵調到 。
3. 最長的烘烤時間大概是 7分鐘。
4. 扭動溫度旋鈕到所需溫度。
5. 烘烤在所需時間內運作。
6. 在食物取出來前,檢查烤箱內溫度是否達到。
7. 記得用烤箱專用手套來取食物,食物和烤箱都是很熱的。
燒烤功能
燒烤功能是專為烤魚、牛肉、牛 、蔬菜等等。
1. 把烤架放在的所需高度。
2. 選擇燒烤功能鍵 。
3. 選擇食物需要烤的時間。
4. 扭動溫度旋鈕到所需溫度。
5. 燒烤在所需時間內運作。
6. 在食物取出來前,檢查烤箱內溫度是否達到。
7. 記得用烤箱專用手套來取食物,食物和烤箱都是很熱的。
4
薄餅
指引
.
.
的容器不會超標 使用
焗使
粟
扒
扒
3.
5.

ᣂ࣍௸݈ᐋ
堚ᑥঅ塄
堚ᑥ௸ᒣছΔؘ٣ࢸൾ༺ᙰΔࠀৱ௸ᒣݙ٤ܐথ৵ֱ౨ၞ۩Ζ
شխࢤ堚ᑥᕪ堚ץ௸ᒌࡉ௸ٙΖ
լࠌشڞᔲ堚ᑥՠࠠΕ࿏ֻࠧࡉፍ፱ࢤ堚ᑥشΔא܍ჾ႞௸ᒌΖ
ش ᛘؒᚴ௸ᒣփຝΖ
ش௦መ堚ᑥᕪ ᛘؒ堚ᑥ૿Ζ
լല௸ᒣ௦ڇֽխࢨ ٚ۶᧯խΖ
ࠡהࣚ೭ؘႊڇ ၞ۩Ζ
烘烤功能
烘烤功能主要用來 烤比較容易咀嚼的肉類、湯或 菜
1. 將烤架放在所需高度。
2. 選擇烘烤功能鍵 。
3. 選擇食物需要烘烤的時間。
4. 扭動溫度旋鈕到所需的溫度。
5. 烘烤在所需時間內運作。
6. 在食物取出來前,檢查烤箱內溫度是否達到。
7. 記得用烤箱專用手套來取食物,食物和烤箱都是很熱的。
有三個放置烤架的夾層。
5
烤盤不可放在夾層上使用,只能放與烤架上使用。
烘
者
美的客戶服務中心
。
軟
軟
放置提示:
廢棄的電器請不要等同於生活垃圾隨意處理,避免有害有
毒物質等滲入地下水進入食物鏈中影響健康。為保障您和
他人健康,維護良好生活環境,請聯繫專業回收公司處理!
觸電布類防止衣物被燃燒。

MODEL:MG25BNM
POWER SUPPLY: 220V~50Hz
POWER CONSUME: 1500W
BEFORE OPERATING THIS PRODUCT, READ, UNDERSTAND, AND FOLLOW THESE INSTRUCTIONS.
TOASTER OVEN INSTRUCTION MANUAL
ENSURE TO SAVE THIS BOOKLET FOR FUTURE REFERENCE.

IMPORTANT SAFEGUARDS
When using electrical appliance, basic safety precautions should always be followed,
including the followings:
1. Read all instructions before using.
2. To protect against any electrical hazards, DO NOT place unit or cord in water or
any other liquids.
3. Do not touch any hot surfaces. Use oven mitts for removing or touching any hot
parts. Always placing Toast Oven on heat protected surface.
4. Unplug the unit from outlet when not use and before cleaning. Always allowing to
cool down before attaching or removing any parts.
5. The use of accessory attachments are not recommended by the appliance manufacturer
may cause injuries.
6. Always pulling the plug out from the wall and never pull the cord. Remove the plug from
the wall before moving the appliance. Using both hands to move the appliance.
7. Do not let cord hang over edge of table, or touch hot surface.
8. Do not place the Toaster Oven near the heated oven, a hot flame or electric
burner.
9. Do not use outdoors.
10. If the electric circuit is overloaded with other appliances, this appliance may not
operate properly. The Toaster Oven should be operated on a separate electrical
circuit from other operating appliances.
11.The temperature of accessible surfaces may be high when the appliance is operating.
12. If the supply cord is damaged, it must be replaced by midea customer service
center in order to avoiding a hazard.
13. Store only the accessories provided with this unit inside the oven when not in use.
Do not store other materials.
14. A fire may occur if the appliance covered or touched the flammable materials, including
curtains, draperies, walls, and so on, when in operation. Do not put any items
on the top of the appliance when in operation.
15.Do not place any cardboards, papers or plastic items inside the oven.
16.All containers placed inside the oven must not be airtighted. Also, they need to have
enough room to allow for expansion of fluids.
17. Clean this appliance regularly because the grease may cause a fire. Make
sure that this appliance is not placed near curtains, any drapery, or other flammable
materials.
18.Do not clean with metal scouring pads. Pieces can break off the pad and touch
electrical parts involving a risk of electric shock.
19. In order to preventing accidental burns, must use the handle and knobs to operate
this appliance.
20.The temperature of the door or outside surface may be high when the appliance
operating.
2

Caution :hot surface
21. Oversize foods or metal utensils must not be inserted in a toast oven as they
may create a fire or risk of electric shock.
22. Do not cover crumb tray or any part of the oven with metal foil. This will cause
overheating of the oven.
23. Extreme caution should be exercised when using containers constructed of
other than metal or glass.
24. This appliance is not intended for use by persons including children with
reduced physical, sensory or mental capabilities, or lack of experience and
knowledge unless they have been given supervision or instruction concerning
use of the appliance by a person responsible for their safety.
25. Children should be supervised to ensure that they do not play with the appliance.
26. The appliance is not intended to be operated by means of an external timer or
separate remote-control system.
27. The surface of appliance shall be placed against a wall.
SAVE THESE INSTURCTIONS
HOUSEHOLD USE ONLY
BEFORE FIRST USE
1. Remove all accessories and shipping materials packed inside the oven.
2. Wash the rack and pan in warm soapy water. Wipe the inside of the oven with a
damp cloth or sponge. Blot dry with paper towels to be sure the unit is dry before
using.
3. Place oven on a flat counter or other stable surface DO NOT OPERATE ON THE
SAME CIRCUIT WITH ANOTHER APPLIANCE.
4. Make sure the crumb tray is properly installed before using.
For the first time, et the temperature knob to MAX, the timer setting to1
minutes. This will burn off any oils still on the oven.
NOTE: The oven may smoke during this process. This is normal for a new oven and
will not last more than 10-15 minutes.
3
0s

NAME OF PARTS
1. Door handle
2. Housing
3. Temperature knob
4. Function knob
5. Timer knob
6. Crumb tray
678
CONTROL SETTINGS
TIME SETTING
0-60 MINUTES: The timer can be set up to 60 minutes.
The oven will not turn on without the timer being set.
When the time knob is in the "0" position, the
oven will not operate.To set the time, turn the timer
knob to the desired time.
Indicator light is lit only when time has been set.
When the timer has reached the "0" position,
a bell sound will be heard. Power supply will be
cut off automatically.
Timer can be changed during cooking cycle. Just
turn the timer knob to the desired time and continue
cooking.
NOTE: When setting the timer knob for less than
5 minutes, rotate timer to over 10 minutes
and then rotate back to your chosen time.
TEMPERATURE SETTING
Turn the temperature knob clockwise to the desired
temperature setting. The temperature can be seted
from 100 to 230 .
o
c
o
c
4
7. Baking tray
8. Baking rack
MG25BNM
FUNCTION
12
3
4
5
TIME ADJUSTING
Ensure a safe and accurate timer setting.

STAY ONFor useing the toaster without time control, turn the timer konb to position" STAY ON " Inthis case,the toaster will
5
FUNCTION SETTING
This Oven offer three different functions for versatile cooking all in one appliance.
Bake: The lower heating element is working during this function.
Broil: The upper and lower heating elements are working during this cycle.
Toast: The upper and lower heating elements are working during this function.
It is perfect for baking pizza, bread and cookies and toasting pork, steaks
and toasts.
HOW TO USE
CAUTION: THE OVEN SURFACES ARE HOT DURING AND AFTER USE
GENERAL INSTRUCTIONS
1. Place the baking rack in position that will accommodate the height of the food to be
cooked.
2. Set the food on the rack. Make sure that you use an ovenproof container in
the oven, never use plastic or cardboard containers in the oven.
3. Never use glass or ceramic pans or lids.
4. Do not let juices run to the bottom of the oven. Use the drip tray and crumb tray
when cooking.
5. Set the temperature as suggested by the recipe or as desired.
6. Securely shut the door and set the cooking time to begin operating the oven.
STAY ON
For using the toaster without time control, turn the timer konb to position" STAY ON " In
this case,the toaster will work until the timer konb is set to " 0 " position.
Note: The bread may catch fire if the toasting time is setting too long. Close supervision
is necessary during toasting.

TOAST FUNCTION:
Use the toast function for foods such as corn, bread, cookies and heating food
1. Place the baking rack to the desired height.
2. Set the function knob to " ".
3. The most length of time you want to Toast for 7 minutes.
4. Rotate the temperature knob clockwise to desired temperature.
5. Continuing toasting for desired length of time.
6. Check food temperatures before moving to ensure that proper internal temperatures.
have been reached.
7. Always removing food with oven mitts. Food and oven are very hot.
BROIL FUNCTION:
The broil function is ideal for fish, beef, steak, vegetables, etc.
1. Place the baking rack to the desired height.
2. Set the function knob to" ".
3. Select the length of time you want to broil the food.
4. Rotate the temperature knob clockwise to desired temperature.
5. Continuing broiling for desired length of time.
6. Check food temperatures before moving to ensure that proper internal temperatures
have been reached.
7. Always removing food with oven mitts. Food and oven are very hot.
6
BAKE FUNCTION:
Use the bake function for foods such as meats which easy to stew, soups and vegetables.
1. Place the baking rack to the desired height.
2. Set the function knob to " ".
3. Select the length of time you want to “Bake” the food.
4. Rotate the temperature knob clockwise to desired temperature.
5. Continuing baking for desired length of time.
6. Check food temperatures before moving to ensure that proper internal temperatures
have been reached.
7. Always removing food with oven mitts. Food and oven are very hot.
.

ABOUT RACK LEVELS
There are 3 rack levels. Used on a baking tray is not placed in the mezzanine, can only be
placed on the grill.
CARE AND CLEANING
1. Before cleaning unplug the toaster oven and allow it to cool completely.
2. Wash all the attachments with mild, soaped water including the rack and the baking
Tray.
3. Do not use abrasive cleansers, scrubbing brushes and chemical cleaner as this will
cause damage to the non-stick coating of baking tray.
4. Using a wet cloth to wipe the inner of the oven.
5. Clean the door by using a wet cloth saturated with detergent or soap.
6. Never immerse the unit in water or other liquid.
7. Any other servicing should be performed by mide customer service center.
7
a
DISPOSAL:
Do not dispose of electrical appliances as unsorted municipal waste,
use separate collection facilities. Contact your local government for
information regarding the collection systems available. If electrical
appliances are disposed of in landfills or dumps, hazardous
substances can leak into the groundwater and get into the food chain,
damaging your health and well-being.
Table of contents
Other Midea Oven manuals

Midea
Midea MO5BL User manual

Midea
Midea MO 659 TD BK User manual

Midea
Midea TJE17GS7-S00N0A User manual

Midea
Midea MG25CHB User manual

Midea
Midea MAF-CN20A User manual

Midea
Midea MBI-8085SB User manual

Midea
Midea MO 655 BK User manual

Midea
Midea 315545 User manual

Midea
Midea 310717 Wiring diagram

Midea
Midea 93M90D0 User manual

Midea
Midea 315544 User manual

Midea
Midea PS2022Z User manual

Midea
Midea 310715 User manual

Midea
Midea VS96048D User manual

Midea
Midea 315545 User manual

Midea
Midea MEO-32Z25 User manual

Midea
Midea MC32AHB User manual

Midea
Midea 310716 Wiring diagram

Midea
Midea MOP9BL User manual

Midea
Midea 7NM20M1 User manual