Midland BIZTALK MB400 Installation manual

1|| midlandusa.com
1. Operating System: Windows XP or higher.
Note: The software will not run on Apple iOS.
2. Processor Speed: Pentium 4 or higher.
3. Available RAM: 256MB or higher.
4. Internal Storage Memory: 2MB.
5. USB Type A 2.0 port or higher.
®
INTRODUCTION
QUICK LINKS
MINIMUM OPERATING SYSTEM REQUIREMENTS
MIDLAND ON-SITE BUSINESS RADIO PROGRAMMING INSTRUCTIONS
MB400
PROGRAMMING
INSTRUCTIONS
The MB400 comes with 16 of the most common frequencies and privacy codes pre-programmed in the radio.
You can use the FREE programming software to select from a list of 99 other Business Band frequencies
and 142 Privacy codes as well as other settings to customize your radio. The available frequencies and
codes are listed in your owner’s manual.
You will need the MPC400 programming cable and programming software. The MPC400 programming cable is
available at https://midlandusa.com/product/biztalk-mpc400-usb-programming-cable/ and a FREE programing
software is available at https://midlandusa.com/biztalk-mb400-business-radio-software-download/.
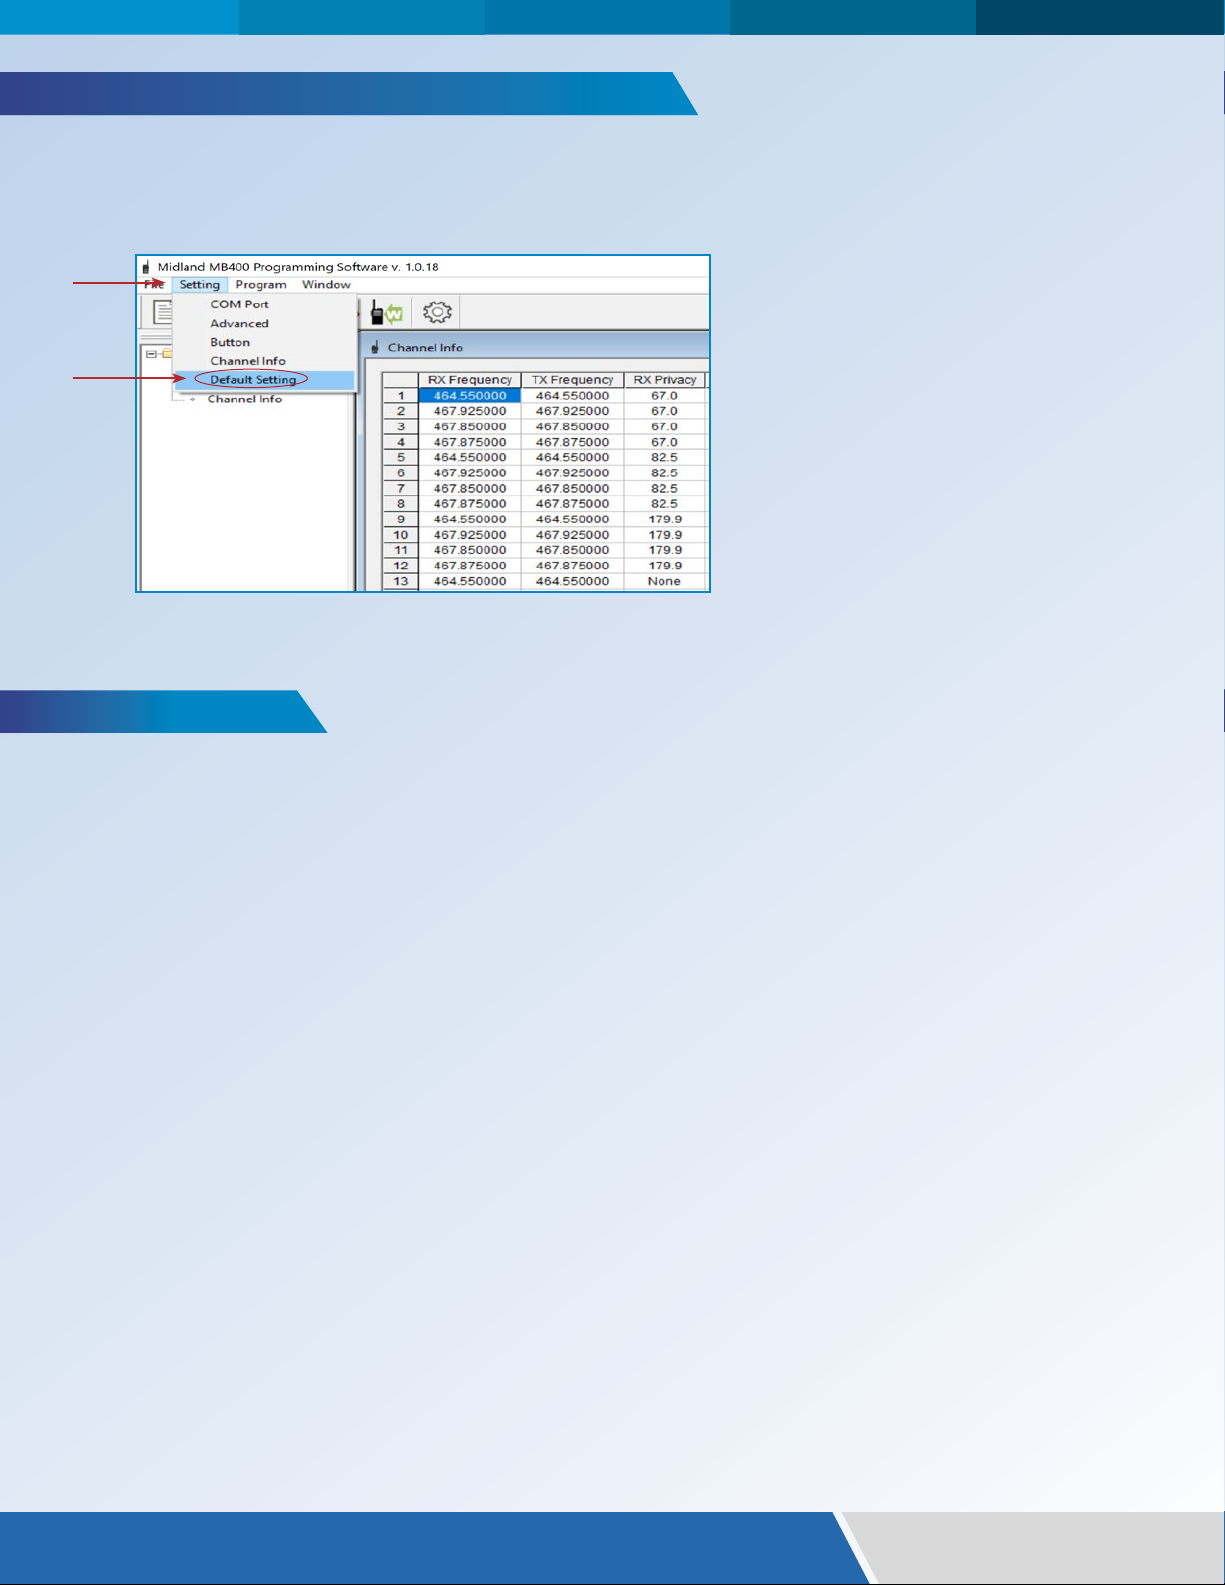
If at any time during programming you are unsure of what value to use for a setting, use the
default value. You can return the radio to all of its default values by using the “Default Setting”
command under Settings.
Minimum Operating System Requirements............................................................................................................1
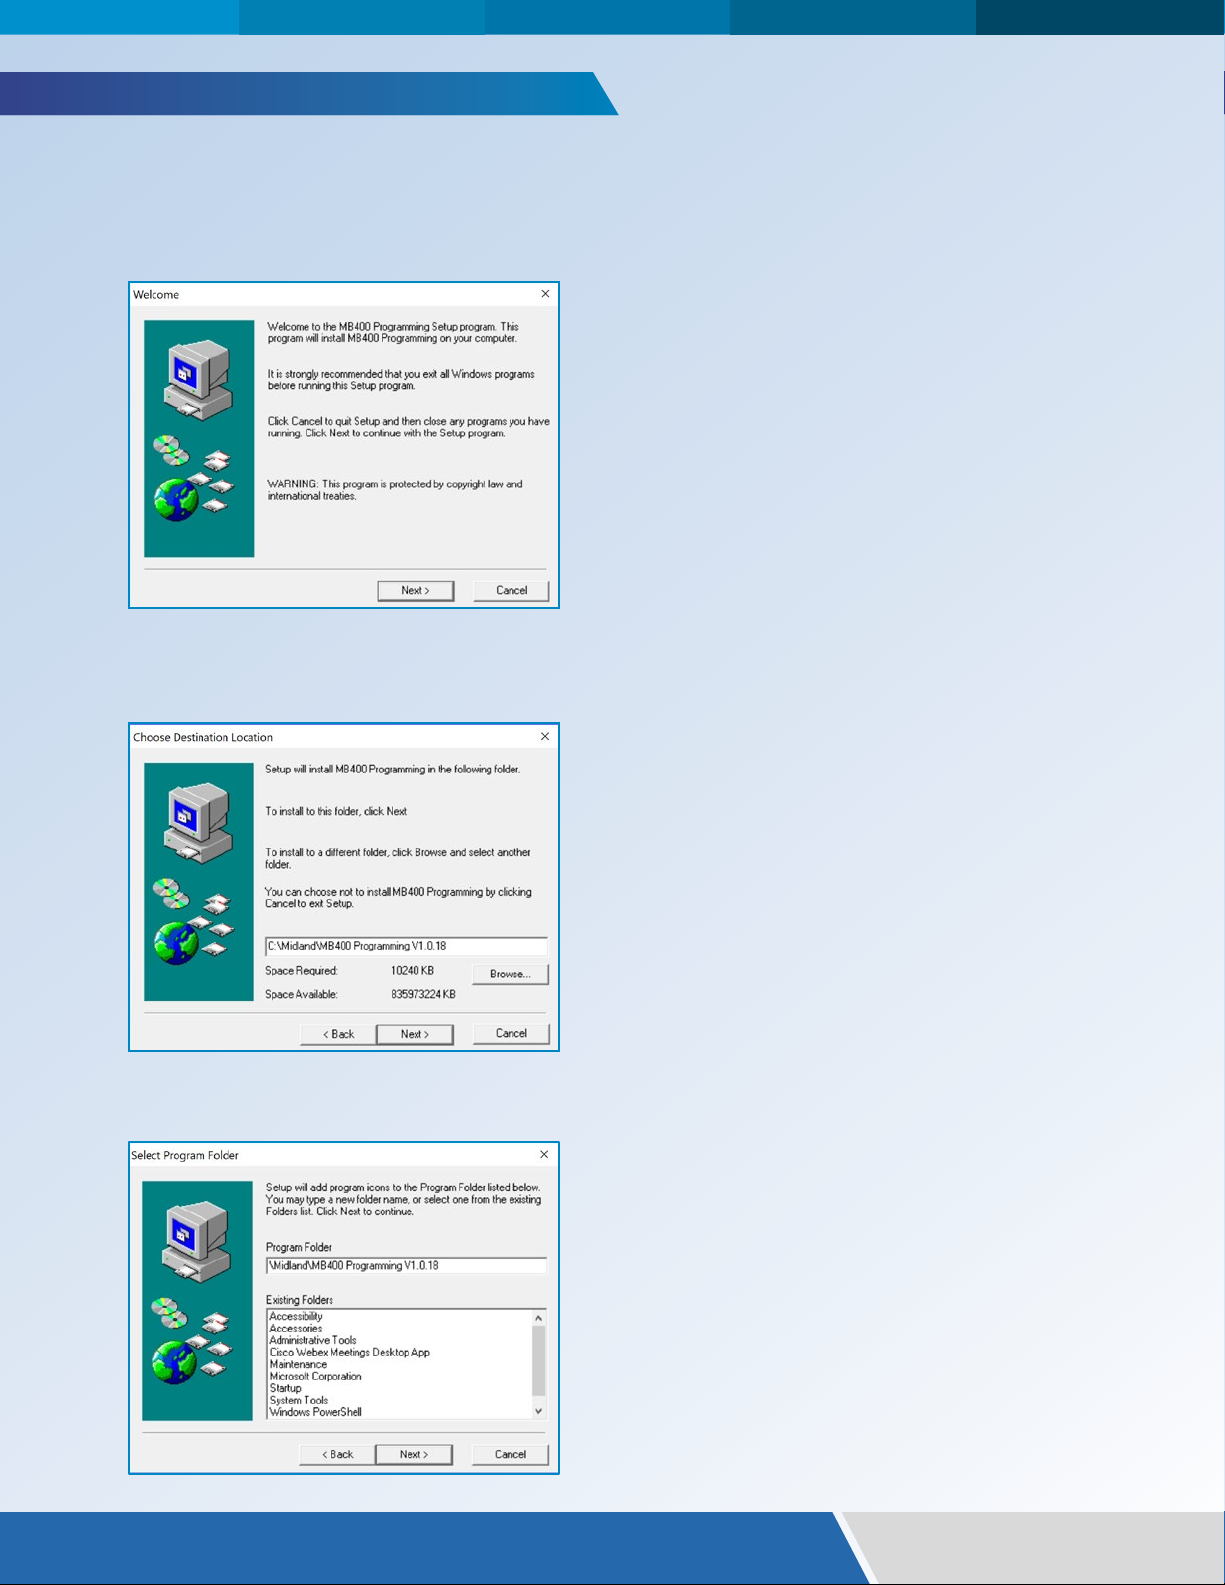
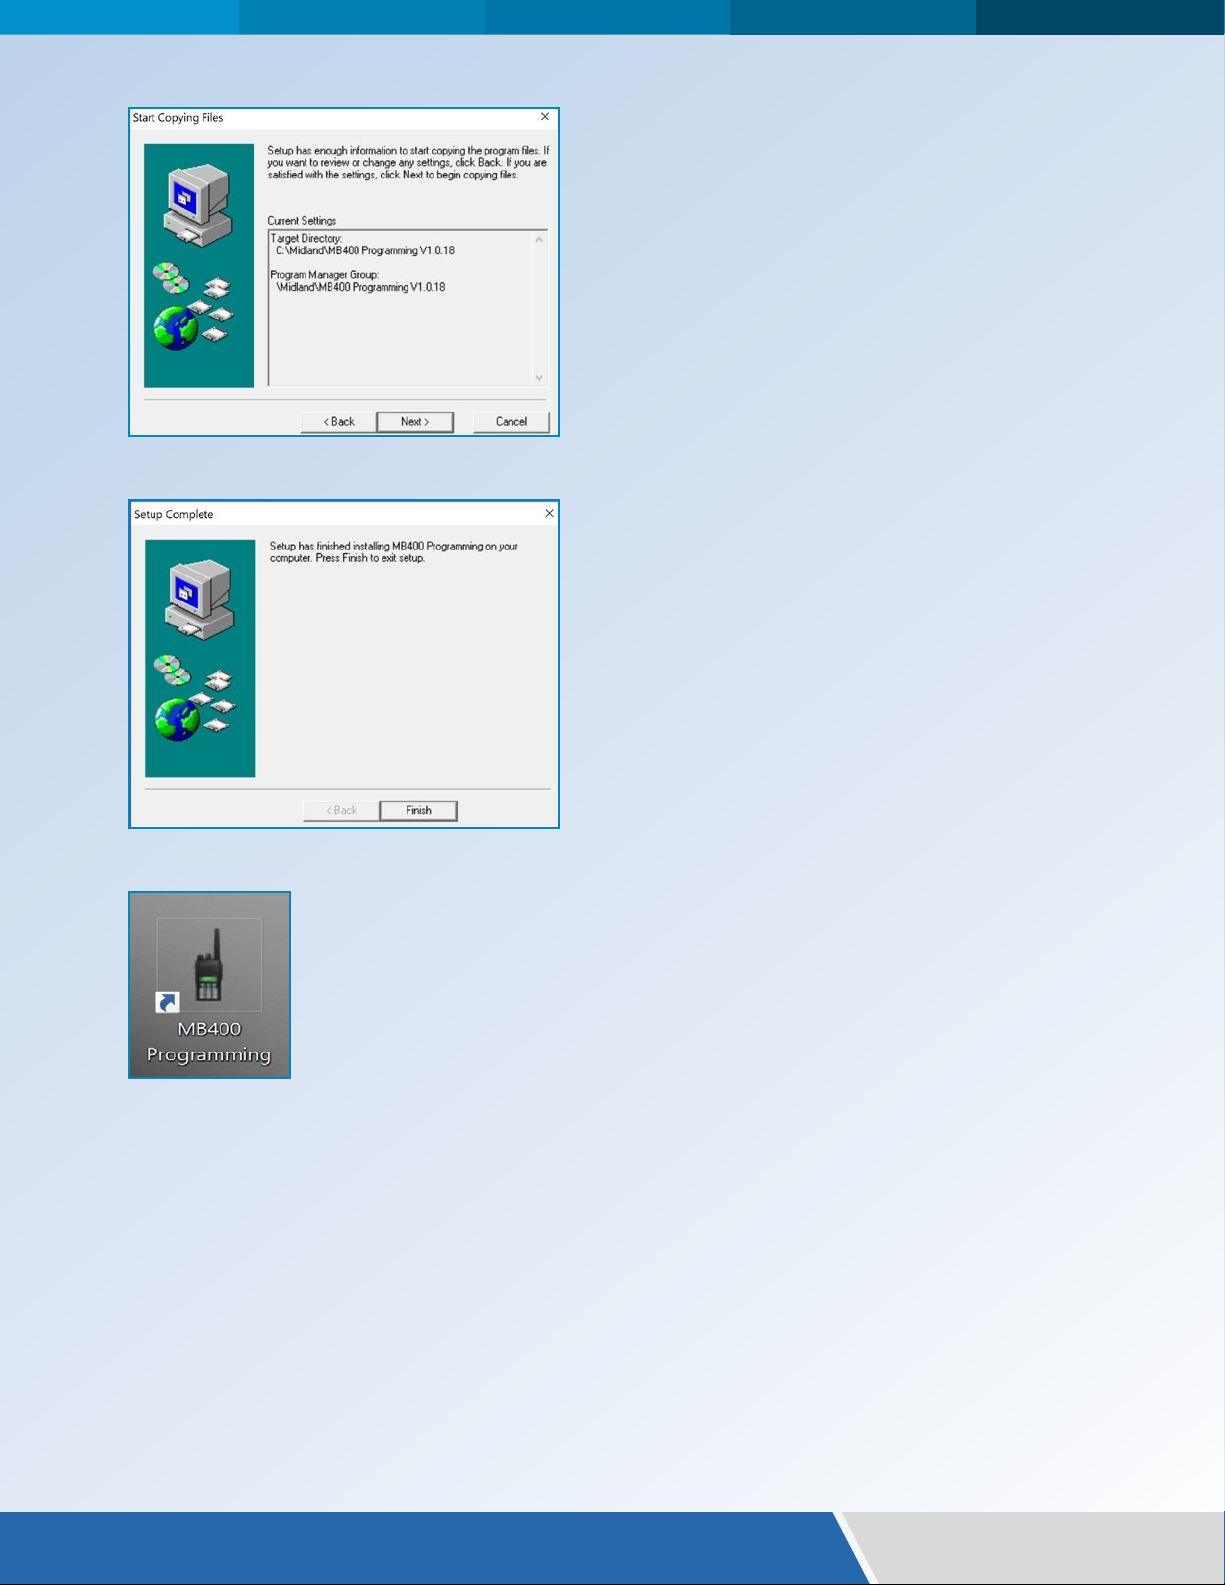
Installing the Programming Software ............................................................................................................... 2-3
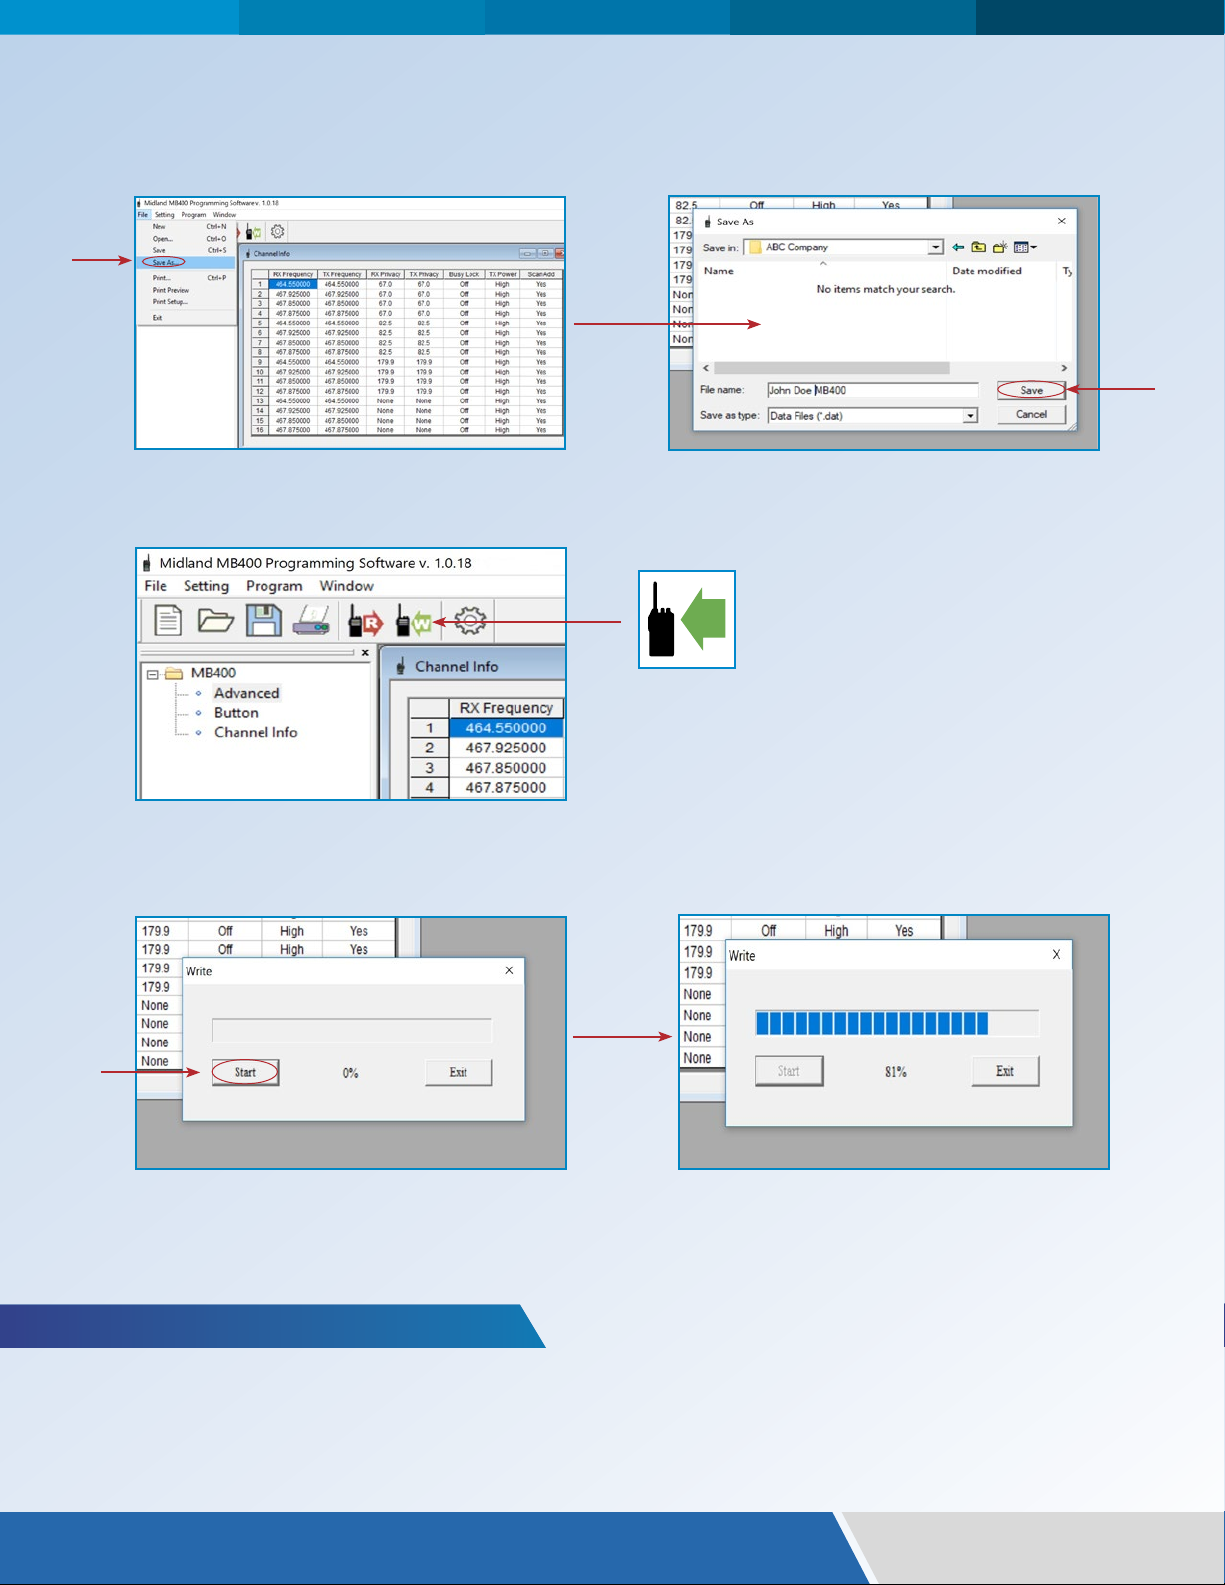
Program a MB400 Radio ................................................................................................................................. 4-8
Read a Programmed MB400 Radio ...................................................................................................................... 8
Program Using a Saved File ................................................................................................................................ 9
Reset a MB400 Radio to its Factory Default Settings..........................................................................................................10
Cloning Radios.................................................................................................................................................10
Troubleshooting, Tips and Tricks......................................................................................................................... 11

2|| midlandusa.com
INSTALLING THE PROGRAMMING SOFTWARE
1. Go to https://midlandusa.com/biztalk-software-download/ and download the FREE MB400
programming software to a designated folder or your desktop.
2. Follow the on screen instructions to install the program.
a. Welcome screen. Recommends you close other programs and then click “Next” to continue.
b. The program will be installed on your computer’s hard drive and automatically create
a data file for storage. Accept the location by clicking on “Next” (recommended) or
select another location that is memorable.
c. The program will ask if it is ok to install the programs icon on your desktop.
Click “NEXT” to accept and move to the next step.

3|| midlandusa.com
d. The program will confirm it is ready to install. Click “Next” to proceed.
e. The program will install. Click “Finish” to complete the installation.
3. Once installation is complete, a shortcut icon will appear on your desktop.

4|| midlandusa.com
3. Turn the radio on.
4. Double click on the icon to open the MB400 programming software.
1. Turn the MB400 radio off.
2. Connect the MB400 radio to your computer using the MPC400 programming cable.
a. You will hear “Midland Ready” with the channel number announcement.
a. Remove the accessory jack cover from the radio.
b. Connect the small jack on the programming cable to the small socket (microphone) on the radio.
c. Connect the USB plug of the programming cable to a USB port on your computer.
Speaker / Microphone
Jack Cover
Connect to
microphone
jack on the radio
Connect to a
USB port on
your computer
PROGRAM A MB400 RADIO

5|| midlandusa.com
5. Check the COM (Communication) Port setting.
6. The Channel Screen should be opened when you started up the program.
If not, open it by clicking on “Channel Info.”
7. Using the drop down menus on the Channel Screen, select your desired data for:
a. Click on “Settings”
b. Click on “COM Port”
c. Make sure “COM Port 3” has been automatically selected, and close the window
a. RX Frequency
i. The TX Frequency will automatically change to match your RX selection.
ii. If programming for a repeater, select a separate TX frequency that matches your TX
repeater frequency.
b. RX Privacy Code
i. The TX Privacy code will automatically change to match your RX selection.
ii. If programming for a repeater, select a separate TX Privacy code that matches
your RX repeater code.
Your computer should have automatically recognized the radio on COM3
and will use it to transfer the programming data to the radio. If the data
does not successfully transfer using COM3, try a different COM port.
!
Repeater frequencies are a “matched pair” as assigned and regulated by the
FCC. You must be properly licensed by the FCC to operate on a repeater.
!
Dropdown
Menu

6|| midlandusa.com
8. Open the “Button” screen to program the Soft Keys.
c. Set Busy Channel Lock
i. The recommended (default) setting is “Off” so you do not block any
transmissions from being received or transmitted on the programmed frequency.
ii. Use “Carrier” to block all transmissions (send or receive) on the same
frequency as the channel setting.
iii. Use “QT/DQT” to allow transmissions (send or receive) on the same frequency
and privacy tone (CTCSS or CDCSS), and block all other transmissions on that frequency.
d. TX Power
i. The recommended (default) setting is “High” for all channels to ensure you get maximum range.
ii. Choosing “Low” will help you conserve battery life, but significantly reduce
the effective range of your radio. Use this setting only for close range communications.
f. Scan Add
i. The default value is “Yes” so that you will scan all programmed channels.
ii. Selecting “NO” will drop that channel from your scan list and will not be
scanned for activity when the radio is in Scan or Priority Scan mode.
g. Repeat steps a – f for each channel you want programmed. You do not need to
program all 16 channels. Select “None” in the RX column for unused channels.
SK1
Emergency N/A
Scan On / Off Priority Scan On/Off
Monitor VOX On/Off
SK2
KEY FUNCTION 1
LONG PRESS
SHORT PRESS
a. Use the drop down menu for each Soft Key and select the feature you want quick
access to. The default values are:

7|| midlandusa.com
a. Use the drop down menu for each setting and select the value that will give you the
desired performance. If you are not sure what value to use, use the default value.
9. Open the “Advanced” screen to program the advanced settings of the radio.
Edit
Advanced
Settings
SQ
Squelch Level 5
5
1
120
Off
Off
VT
On
English
0-9
1-9
1-16
Off-300
On/Off
On/Off
On/Off
On/Off
English or
Spanish
Power Save
Priority
Channel
VOX
Voice
Annunciation
TOT
(Time Out Timer)
VOX
Sensitivity
Roger Beep
Key Beep
Default Value
(Recommended)
Settings
Range Comments
ON will increase battery life, but may cause a small delay in voice
response when transmitting as the radio "wakes up".
Lower values help prevent the radio from overheating and
reduces channel congestion. "Off" is not recommended.
Turn off the "End of Transmission" tone when you
release the PTT.
Lower values will allow the VOX feature to respond to your voice at
a lower volume, but may also respond to background noise more
often by accident.
Turn ON if not using one of the soft keys for this feature.
A VOX headset is required for this feature.
Lower values increases sensitivity to background noise.
Select the channel you want the radio to scan more often.
Select the language you desire.
Turns off the button tones for quite operation.

8|| midlandusa.com
10. Proofread and save your program.
11. Write the program to the radio.
12. Turn the radio off and disconnect the programming cable.
13. Turn the radio on, and test it with other radios to make sure it is working correctly.
14. Write the program to other MB400 radios, or save and close the program.
a. Use the “Save As” command under “File”.
b. Give your program a name and save it in a memorable location.
c. Click “Save.”
a. Click on the green “W” icon.
READ A PROGRAMMED MB400 RADIO
Read a programmed MB400 so you can:
• Use the same programming values for other MB400 radios.
• Save the programming file for later use.
• Check the settings to make sure they are correct and match other radios.
b. Click on “Start” to send the programming data to the radio.
c. The radio will return to its normal state after programming is complete. You will hear
“Midland Ready” with the channel number.
W

9|| midlandusa.com
1. Follow steps 1 through 5 above to connect the radio to the computer and open the software.
2. Use the “Open Folder” icon to locate and open your file.
PROGRAM USING A SAVED FILE
1. Follow steps 1 through 5 above to connect the radio to the computer and open the software.
2. Click on the red “R” icon.
3. Click on “Start” to read the programming data from the radio.
4. The radio will return to its normal state when complete. You will hear “Midland Ready”
with the channel number.
5. The programming data will be displayed on their respective program window.
6. Turn off the radio and disconnect the programming cable.
7. With the programming software still open, connect another MB400 radio follow step 11 above
to write the same data to additional radios.
8. Or, save your file for later use and close the program.
3. The file will automatically populate all settings with the data saved in your file
4. Click on the green “W” icon as described in step 11 above to program the radio.
5. Disconnect the radio and test it with other radios to make sure it is operating correctly.
R

10 || midlandusa.com
1. Follow steps 1 through 5 above to connect the radio to the computer and open the software.
2. Set all programming settings to their default values.
a. Click on “Settings”.
b. Click on “Default Settings”. This will automatically populate all settings with the default value.
RESET A RADIO TO ITS FACTORY DEFAULT SETTINGS
3. Click on the green “W” icon as described in step 11 above to program the radio.
4. Disconnect the radio and test it with other radios to make sure it is operating correctly.
CLONING RADIOS
The programed settings from a MB400 radio can be directly transferred to another MB400
radio bypassing the need to individually program radios. The MCC400 cloning cable is
required and is listed in the back of this manual and available on our website at midlandusa.com
1. Connect the programmed (Host) radio to the radio to be programmed (Clone) using the
MCC400 Cloning cable.
2. Turn ON the radio to be cloned.
3. Press and hold Side Key 1 while turning ON the Host radio.
4. The LED will flash orange twice to confirm the Host radio is in clone mode and ready to
transfer the data.
5. Press the PTT of the Host radio to send the data to the radio to Clone.
6. The LED on the Host radio will blink red, and the LED on the radio to be cloned will blink
green during the data transfer.
7. When the data transfer is complete, the cloned radio will automatically restart.
8. You may clone another radio by disconnecting the cloned radio and connecting another
radio to the Host and following the steps above.
9. Or you may disconnect both radios and turn them off, and back on to return to the normal operation.

11 || midlandusa.com
TROUBLESHOOTING, TIPS AND TRICKS
Most problems can be resolved by following these simple steps. However, if you need
additional help, call our Customer Service team at 816-241-8500, ext. 259.
SYMPTOM SOLUTION
- Make sure the programming cable is correctly installed between the radio
and computer. Unplug and re-install the cable, or replace it if necessary.
- Make sure the radio has charged battery and is turned on.
(Do not program a radio while in the charger)
- Install a USB to Serial Port conversion driver. The programming cable in
cludes this driver and should be automatically install on your computer the
first time you use it. You can install a standard driver if necessary from:
http://www.prolific.com.tw/US/Showproduct.aspx?p_id=225&pcid=41
- Make sure your computer meets the minimum requirements.
- Software will not work on an Apple (Mac) computer.
Use a Windows PC.
- Uninstall and re-install the program.
- Check with your IT administrator.
- Use the default value. (See above)
- TIP: Reset the radio to its default values as described above
and change ONLY the settings necessary, leave all others as is.
- Use the “Read” function of the software to make sure the data
you sent to the radio is correct.
- Check the settings on both radios making sure they are the
same, especially the TX/RX frequency and Privacy Codes by
channel. These must match for the radios to work together.
The programming data will not transfer to the
radio from the computer, I keep getting an error
code when I click “start”.
The programming software will not install or
run on my computer.
I am not sure what to use for a certain setting.
I programmed the radio but it still doesn’t
work with my other radios.

5900 Parretta Drive
Kansas City, MO 64120
Call 816.241.8500
We’d love to hear from you! Let us know what you
think of your new Midland product at
or by visiting us at
midlandusa.com
Note: Features & Specifications are subject to change without notice.
MIDLAND is not responsible for unintentional errors or omissions on its
packaging.
Other manuals for BIZTALK MB400
2
Table of contents
Other Midland Radio manuals

Midland
Midland 9001Z User manual

Midland
Midland 210 DS User manual

Midland
Midland HH50 User manual

Midland
Midland PRO902 User manual

Midland
Midland M-222P User manual

Midland
Midland XT511 Manual

Midland
Midland 1001LWXA User manual

Midland
Midland T18 Series User manual

Midland
Midland GXT444 User manual

Midland
Midland 278 User manual

Midland
Midland 75-822 User manual

Midland
Midland 220 User manual

Midland
Midland ALAN 121 User manual

Midland
Midland CT 510 Manual

Midland
Midland SYN-TECH III P25 - REV 6.0 User manual

Midland
Midland WR120B Manual

Midland
Midland ALAN 48 EXCEL User manual

Midland
Midland 75-822 User manual

Midland
Midland G7XT Manual

Midland
Midland G9 User manual