manuals.online logo
Brands
  1. Home
  2. •
  3. Brands
  4. •
  5. Millipore
  6. •
  7. Laboratory Equipment
  8. •
  9. Millipore Viresolve Pro VPMCPDKNB9 User manual

Millipore Viresolve Pro VPMCPDKNB9 User manual

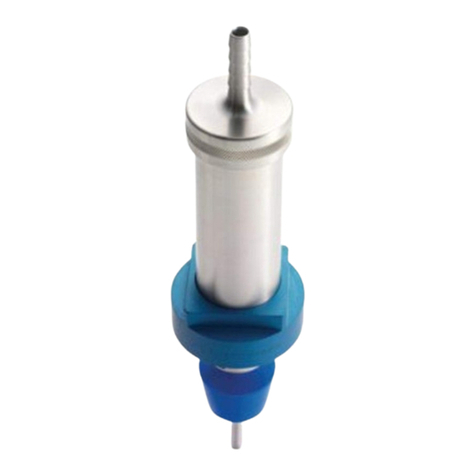
Viresolve®Pro
Micro Device
User Guide
Millipore, Viresolve and Milli-Q are registered trademarks of Millipore Corporation. The M
logo is a trademark of Millipore Corporation.
Copyright © 2008 Millipore Corporation. All rights reserved.
00104257PU Rev A, 02/2008
Standard Warranty
Millipore Corporation (“Millipore”) warrants its products will meet their applicable published
specifications when used in accordance with their applicable instructions for a period of one year
from shipment of the products. MILLIPORE MAKES NO OTHER WARRANTY, EXPRESSED
OR IMPLIED. THERE IS NO WARRANTY OF MERCHANTABILITY OR FITNESS FOR A
PARTICULAR PURPOSE. The warranty provided herein and the data, specifications and descriptions
of Millipore products appearing in Millipore’s published catalogues and product literature may not be
altered except by express written agreement signed by an officer of Millipore. Representations, oral or
written, which are inconsistent with this warranty or such publications are not authorized and if given,
should not be relied upon. In the event of a breach of the foregoing warranty, Millipore’s sole obligation
shall be to repair or replace, at its option, the applicable product or part thereof, provided the customer
notifies Millipore promptly of any such breach. If after exercising reasonable efforts, Millipore is unable
to repair or replace the product or part, then Millipore shall refund to the customer all monies paid for
such applicable product or part. MILLIPORE SHALL NOT BE LIABLE FOR CONSEQUENTIAL,
INCIDENTAL, SPECIAL OR ANY OTHER INDIRECT DAMAGES RESULTING FROM
ECONOMIC LOSS OR PROPERTY DAMAGE SUSTAINED BY ANY CUSTOMER FROM THE
USE OF ITS PRODUCTS.
Technical Assistance
For more information, contact the Millipore office nearest you. In the U.S.,
call 1-800-MILLIPORE (1-800-645-5476). Outside the U.S., see your
Millipore catalogue for the phone number of the office nearest you or go
to our web site at www.millipore.com/offices for up-to-date worldwide
contact information. You can also visit the tech service page on our web
site at http://www.millipore.com/techservice.
Notice
The information in this document is subject to change without notice
and should not be construed as a commitment by Millipore Corporation.
Millipore Corporation assumes no responsibility for any errors that may
appear in this document. This manual is believed to be complete and
accurate at the time of publication. In no event shall Millipore Corporation
be liable for incidental or consequential damages in connection with or
arising from the use of this manual.
Introduction
Viresolve Pro Micro Devices are typically used for process optimization,
viral clearance validation and filtration of small batch volumes of proteins.
This manual applies to the following devices:
Process Development
Kit Validation Kit
Catalogue No. VPMCPDKNB9 VPMCVALNB9
Color
Solid Teal Teal and White
Integrity
Testing Not Binary Gas Tested Binary Gas Tested
Primary
Intended Use
Process Development
Optimization, scale-up,
etc. Virus Validation
Installing the Device
Testing should be conducted with a user supplied pump at a constant
flow rate or a constant pressure. A low volume constant pressure holder
(Millipore Catalog number VIRUSVMAX or equivalent) is recommended
for constant pressure testing of Viresolve Pro devices. This user guide
provides instructions for conducting testing at a constant pressure. Contact
Millipore for instructions on testing at a constant flow rate.
Remove caps from all devices. Attach a two-way luer valve to both the1.
feed port (V1) and vent port (V2) of the device. Connect the feed vessel
to the luer valve on the feed port. Close both luer valves.
Position a filtrate2.
collection vessel and
a weighing balance
(to record filtrate
mass) beneath the
device. Fill the feed
vessel with at least
125 mL of
Milli-Q®water,
water for injection
(WFI) or equivalent.
Record the3.
temperature of the
fluid.
Purge the system by4.
following the device
purging sequence.
Purging the Device
Purging is recommended to remove air from the device before use.
Open V2. Open V1 until fluid begins to drain from V2 (approximately1.
five seconds).
Close V2. Close V1.2.
Figure 1. Typical setup
Feed Port
Balance/Weigh
Scale
Collection
Vessel
Feed
Reservoir
Outlet Port
Vent Port
V2 V1
Prefilter
(optional)
Filtering Product
Add the desired volume of protein to the feed vessel. Record the protein1.
temperature. Follow the purge procedure. Attach the air supply and
pressurize the feed vessel to 2.07 bar (30 psi).
Place a clean, empty collection vessel beneath the device outlet port on2.
the weigh scale. Tare the scale.
Open V1 and start recording the mass of the filtrate collected at desired3.
time intervals. Stop the process (close V1) when the target conditions
(e.g. volume, flux) have been reached.
Depressurize the feed vessel and remove the air supply.4.
Post-Use Buffer Flush
(Optional for Product Recovery)
Empty the protein from the feed vessel and replace it with approximately1.
10 mL of buffer. Attach the air supply and pressurize to 2.07 bar (30 psi).
Place a clean, empty collection vessel beneath the device outlet port on
the weigh scale. Tare the scale.
Open V1 and monitor the mass of filtrate collected. Stop the process2.
(close V1) when 3 mL of buffer is collected.
Depressurize the feed reservoir and remove from the air supply.3.
Empty the feed reservoir and the collection vessel. Purge the device
(see Purging the Device) and perform an integrity test.
Integrity Testing (Optional)
Note The device must be fully wetted with water or buffer before
performing this test.
The device filtration area is approximately 3.1 cm².
The diffusional flow rate is too low to measure
accurately, therefore a gross pass/fail integrity test is
recommended.
Place a beaker of water beneath the outlet port of1.
the device. Attach one end of the filtrate tubing to
the outlet port and immerse the other end in the
beaker of water.
Attach the air supply to the feed vessel. Open the2.
inlet air valve and pressurize the system to 0.3 bar
(5 psi). Open V1 and V2 to drain any liquid. Close V2. Increase pressure
to 3.5 bar (50 psi).
After five minutes have elapsed, watch for bubbles exiting the immersed3.
filtrate tubing. After observing for one minute, no bubbles should be
visible exiting an integral device.
Slowly release the pressure in the feed vessel and close V1.4.
Note Rapid depressurization after integrity testing may damage
the device.
Disconnect the device. If the device is integral, discard it. If the device5.
is not integral, store it in a beaker of 2 to 8° C water and notify your
Millipore representative.
Flushing and Wetting
Milli-Q water, WFI or equivalent is required to wet and flush the filters.
After purging the device, attach an air supply to the feed reservoir.1.
Pressurize the system to 2.07 bar (30 psi).2.
Tare the weigh scale.3.
Open V1 and start recording the elapsed time and the weight of the4.
filtrate collected. Record the weight every minute, for at least ten minutes,
until a stable flow rate is observed for three consecutive minutes. Close
V1 to stop the flow. Record fluid temperature. Calculate the temperature
corrected flow rate (Q25° C )for water (see Flow Rate Calculation).
Depressurize the system and remove the air supply. Empty the feed5.
vessel. Open V1 to ensure all liquid is drained from the device.
Close V1.
Measuring Buffer Flux
Fill the feed vessel with buffer. Record the temperature of the buffer.1.
Purge the device (see Purging the Device). Attach the air supply and
pressurize the feed reservoir to 2.07 bar (30 psi).
Place a clean, empty collection vessel beneath the device outlet port on2.
the weigh scale. Tare the scale.
Open V1 and start recording elapsed time and the mass of the filtrate3.
collected. Record the mass every minute for at least ten minutes. Close
V1 to stop flow. Record the fluid temperature. Depressurize the feed
reservoir.
Calculate the4. Q25° C for the buffer (see Flow Rate Calculation).
Empty the remaining buffer from the feed reservoir.5.
Flow Rate Calculation
Flow Rate at 25 °C and 2.07 bar (30 psi): 1.1 to 3.9 mL/min.
Calculate the temperature-corrected flow rate (Q25° C ) using the following
equation:
Q
25° C = Qp*F
Where:
Qpis the filtrate flow rate in mL/ min. (may assume a density of
1 g/cc for water to convert weight to volume)
F is the Temperature Correction Factor from Table 1.
Table 1. Temperature Correction Factor (F)*
T (°F) T (°C) F T (°F) T (°C) F T (°F) T (°C) F
104.0 40 0.734 82.4 28 0.935 60.8 16 1.243
102.2 39 0.748 80.6 27 0.956 59.0 15 1.276
100.4 38 0.762 78.8 26 0.978 57.2 14 1.310
98.6 37 0.777 77.0 25 1.000 55.4 13 1.346
96.8 36 0.793 75.2 24 1.023 53.6 12 1.383
95.0 35 0.808 73.4 23 1.047 51.8 11 1.422
93.2 34 0.825 71.6 22 1.072 50.0 10 1.463
91.4 33 0.842 69.8 21 1.098 48.2 9 1.506
89.6 32 0.859 68.0 20 1.125 46.4 8 1.551
87.8 31 0.877 66.2 19 1.152 44.6 7 1.598
86.0 30 0.896 64.4 18 1.181 42.8 6 1.648
84.2 29 0.915 62.6 17 1.212 41.0 5 1.699
*Based on Water Fluidity Relative to 25 ºC (77 ºF)
Fluidity Value F=
(μT ºC/μ25 ºC)
or
(μT ºF/μ77 ºF)
If the device does not meet the specification listed above, check the water
temperature and pressure and repeat the Q25° C measurement. If the value
falls outside the recommended range stated above, replace the device and
start over.
Note If the device does not meet specification, store in a beaker of
2 to 8 °C water and notify your Millipore representative.
Figure 2. Integrity Test
This manual suits for next models

1

Other Millipore Laboratory Equipment manuals

Millipore Milliflex Oasis User manual

Millipore

Millipore Milliflex Oasis User manual

Millipore Helicon S10 User manual

Millipore

Millipore Helicon S10 User manual

Millipore Amicon 6028 User manual

Millipore

Millipore Amicon 6028 User manual

Millipore Samplicity User manual

Millipore

Millipore Samplicity User manual

Millipore Labscale User manual

Millipore

Millipore Labscale User manual

Millipore Millicell ERS-2 User manual

Millipore

Millipore Millicell ERS-2 User manual

Millipore PR00SIA1 Use and care manual

Millipore

Millipore PR00SIA1 Use and care manual

Millipore Amicon Ultra-2 User manual

Millipore

Millipore Amicon Ultra-2 User manual

Millipore Spectroquant Multy User manual

Millipore

Millipore Spectroquant Multy User manual

Millipore 8003 User manual

Millipore

Millipore 8003 User manual

Millipore Amicon Ultra-4 Series User manual

Millipore

Millipore Amicon Ultra-4 Series User manual

Millipore MERCK EZ-Pak User manual

Millipore

Millipore MERCK EZ-Pak User manual

Millipore ReadyStream User manual

Millipore

Millipore ReadyStream User manual

Millipore Millicell MDCI10000 User manual

Millipore

Millipore Millicell MDCI10000 User manual

Millipore SNAP i.d User manual

Millipore

Millipore SNAP i.d User manual

Millipore XX11 000 00 User manual

Millipore

Millipore XX11 000 00 User manual

Millipore Direct Detect User manual

Millipore

Millipore Direct Detect User manual

Millipore Elix 35 User manual

Millipore

Millipore Elix 35 User manual

Millipore Milli-Q Advantage A10 User manual

Millipore

Millipore Milli-Q Advantage A10 User manual

Millipore Steritest Symbio User manual

Millipore

Millipore Steritest Symbio User manual
Millipore APC ErgoTouch Pro 2 User manual

Millipore

Millipore APC ErgoTouch Pro 2 User manual

Millipore XX4004700 User manual

Millipore

Millipore XX4004700 User manual

Millipore M Air T User manual

Millipore

Millipore M Air T User manual

Millipore milli-q User manual

Millipore

Millipore milli-q User manual

Popular Laboratory Equipment manuals by other brands

Mocom Exacta operating manual

Mocom

Mocom Exacta operating manual

Roche cobas h232 Quick reference guide

Roche

Roche cobas h232 Quick reference guide

Bio-Optica BCP230 user manual

Bio-Optica

Bio-Optica BCP230 user manual

Zeiss ELYRA quick guide

Zeiss

Zeiss ELYRA quick guide

Topcon TRC-NW300 instruction manual

Topcon

Topcon TRC-NW300 instruction manual

Prior PureFocus850 user manual

Prior

Prior PureFocus850 user manual

Waters TA Instruments Sample/Temperature Stage Operator's guide

Waters

Waters TA Instruments Sample/Temperature Stage Operator's guide

Life technologies EVOS XL Core quick reference

Life technologies

Life technologies EVOS XL Core quick reference

Esco AERIS-BG096 Service manual

Esco

Esco AERIS-BG096 Service manual

Thermo Scientific Neslab Merlin M 25 Installation, Operation, Basic Maintenance

Thermo Scientific

Thermo Scientific Neslab Merlin M 25 Installation, Operation, Basic Maintenance

Molecular Devices MultiWash+ user guide

Molecular Devices

Molecular Devices MultiWash+ user guide

Cognionics Quick Series manual

Cognionics

Cognionics Quick Series manual

Hach TenSette 19700-01 manual

Hach

Hach TenSette 19700-01 manual

NUVE NC 300 user manual

NUVE

NUVE NC 300 user manual

Egger eLED.LP3 operating instructions

Egger

Egger eLED.LP3 operating instructions

Analytik Jena novAA 800 operating manual

Analytik Jena

Analytik Jena novAA 800 operating manual

Cleaver Scientific CSL-CELLAS instruction manual

Cleaver Scientific

Cleaver Scientific CSL-CELLAS instruction manual

CTC Union INJ-IG02-PH Quick installation guide

CTC Union

CTC Union INJ-IG02-PH Quick installation guide

manuals.online logo
manuals.online logoBrands
  • About & Mission
  • Contact us
  • Privacy Policy
  • Terms and Conditions

Copyright 2025 Manuals.Online. All Rights Reserved.