1
3
4
5
6
7
8
2
1. Automatic Temperature Compensation
indicator
2. Instability indicator
3. Percent indicator
4. Calibration indicator
5. Low battery indicator
6. Measuring unit on main LCD
7. Main LCD
8. Temperature reading
9. Secondary LCD
OPERATIONAL GUIDE
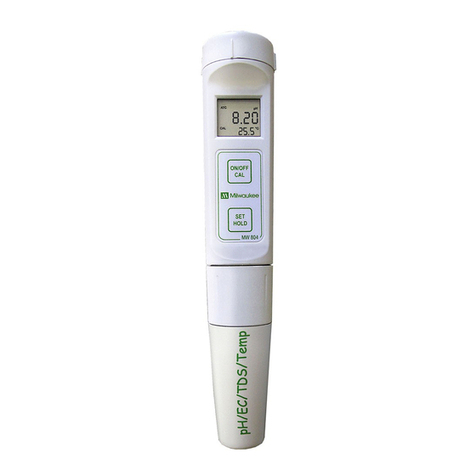
yRemove the probe cap and turn the meter
on by pressing the ON/OFF/CAL button.
All the used segmentson the LCD will be
visible for 1 secondor as long as the button
is pressed.
yImmerse the probe in the solution to be
tested and select either EC or TDS mode
with SET/HOLD.
yStir gently and wait for the reading to
stabilize, i.e. the hourglass symbol on the
LCD turns o.
yThe EC (or TDS) value is automatically
compensated for temperature and
will be displayed on the main LCD,
while the temperature is shown on the
secondaryLCD.
yTo freeze the display, while in measurement
mode, press and hold the SET/HOLD
button. The “HOLD” message appears on
the secondary display and the reading will
be frozen on the LCD. Press any button to
return to normal mode.
yTo turn the meter o, press the ON/OFF/CAL
button. The “OFF” message will appear on
the secondary display. Release the button.
Notes:
Before taking any measurement, make sure
the meter is calibrated (the CAL tag is on).
After use always turn the meter OFF, rinse
the probe with water and store it with the
protective cap.
SETUP
Setup mode allows the selection of
temperature (°C or °F), TDS conversion factor
(CONV) and temperature coeicient (BETA).
To enter the Setup mode, press the ON/OFF/
CAL button until “CAL” on the secondary
LCD is replaced by “TEMP” and the current
temperature unit (e.g. TEMP °C). Then:
yfor °C / °F selection: use the SET/HOLD
button; then press the ON/OFF/CAL
button three times to return to the normal
measurement mode.
yto change the TDS factor value: after setting
the temperature unit, press ON/OFF/CAL
once to show the current value of the TDS
conversion factor (e.g. 0.50 CONV). Select
the desired value by using the SET/HOLD
button, then press ON/OFF/CAL twice to
return to the normal measurement mode.
yto change the temperature coeicient: after
setting the TDS factor, press ON/OFF/CAL to
show the current value of the temperature
coeicient ß (e.g. 2.1 BETA). Use the SET/
HOLD button to set the desired value, then
press ON/OFF/CAL to return to the normal
measurement mode.
CALIBRATION PROCEDURE
For better accuracy, frequent calibration of
the tester is recommended. Calibration is
also necessary after probe replacement,
after testing aggressive chemicals and where
extreme accuracy is required.
yFrom normal EC operation mode, press
and hold the ON/OFF/CAL button until the
“OFF” message on the secondary LCD is
substituted by “CAL”. Release the button.
yImmerse the probe in the proper calibration
solution: M10030 (12.88 mS/cm) for EC60
and M10031 (1413 µS/cm) for EC59.
yOncethecalibrationhasbeen automatically
performed, the LCD will show “OK” for
1second and the meter will return to the
normal measurement mode.
ySince there is a known relationship
between EC and TDS readings, it is not
necessary to calibrate the meter in TDS.
Note: When the calibration procedure is
completed, the CAL tag is turned on.
yTo exit calibration and return to the last
calibration data press the SET/HOLD
button. The secondary LCD isplays “ESC”
for 1 second and the meter returns to the
normal measurement mode.
yTo reset to the default values and clear a
previous calibration, press the ON/OFF/
CAL button after entering the calibration
mode and before the calibration point is
accepted. The secondary LCD displays
“CLR” for 1 second, the meter resets to the
default calibration and the CAL tag on the
LCD turns o.
PROBE REPLACEMENT
yRemove the protective cap and unscrew
the plastic ring on the top of the probe.
yPull out the MI59P probe and replace it
with a new one.
yMake sure the gaskets are in place before
screwing back the ring.
BATTERY REPLACEMENT
When the batteries become weak, the battery
symbol on the LCD will light up to advise that
only a few hours of working time is remaining.
The meter is also provided with BEPS (Battery
Error Prevention System), which avoids any
erroneous readings due to low battery level
by automatically switching the meter o.


