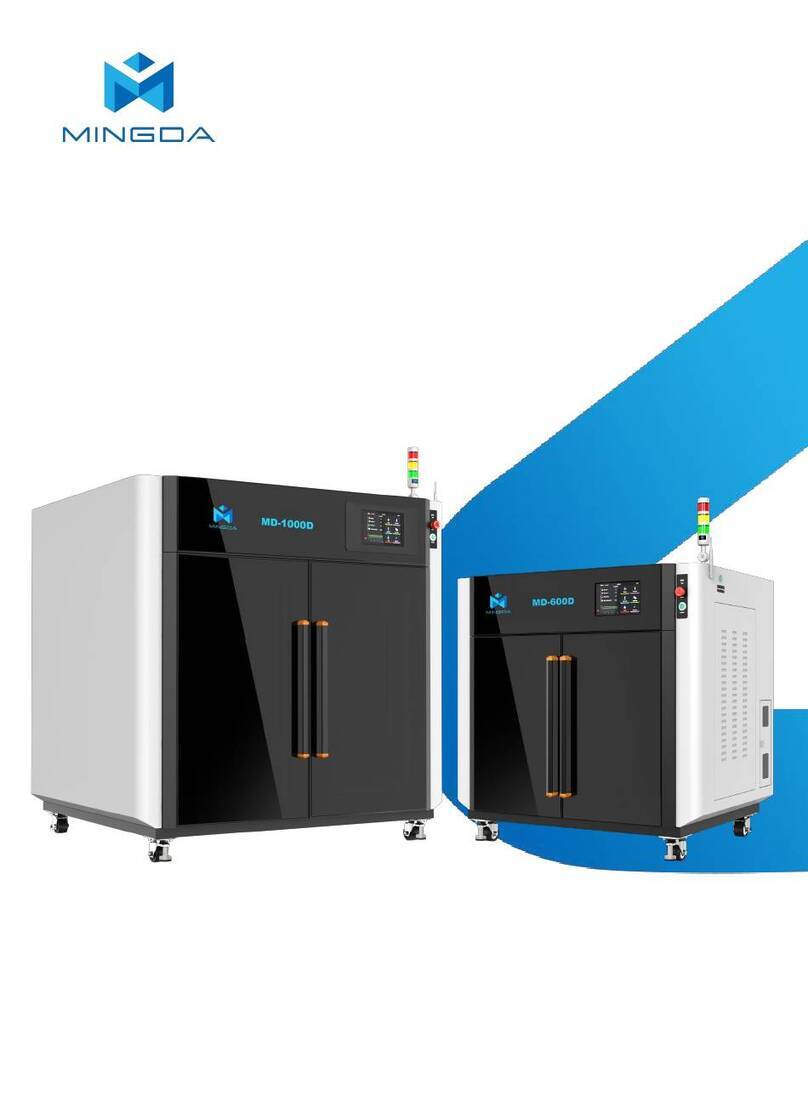
Mingda MD-400D User manual

User Manual
【MD-400D 3D Printer】
Shenzhen MINGDA TECHNOLOGY CO.,LTD
V1.1
*Please read this guide carefully before using this printer

Contents
Notice ……………………………………………………………………………………………...................................
1 Brief Introduction …………………………………………………………………………………………………............
User-Guide Instructions ……………………………………………………………………………………………………………….................….
Learn More Information …………………………………………………………………………………………………………………………..…….
Safety Precautions ……………………………………………………………………………………………………………………………...............
2 Overview ……………………………………………………………………………………………….............................
View of 3D Printer ………………………………………………………………………………………………..............................................
Tool box accessories ………………………………………………………………………………………………...........................................
3 Installation ………………………………………………………………………………………………...........................
Insert a power socket …………………………………………………………………………………………….....….....................................
Introduction to machine operation page ……………………………………………………………................................................
Duplicatio Mode / Mirrored Mode / Autopark Mode ……………………………………………….........................................
4 Machine calibration …………………………………………….....….........................................................
Install the filament (Take PLA filament as an example ) ………………….........…………………………………….…………......…
XY-axis offset calibration for the left and right print heads.…….........…………………………………….…………......….........
Verify the XY-axis offset for the left and right print heads .…….........…………………………………….…………......….........
Printing the Test Files….........…………………………………….…………......….......................................................................
Printing Process ........….........…………………………………….…………......….......................................................................
Pause and Continue to Print ………………………………….…………......….......................................................................
5 Software .....….......….....….......….....….......….....….......….....….......….....….......…......…........…....
Install CURA ….....….......….....….......….....….......….....….......….............................….......….....….......…......…..............
Add Printer ….....….......….....….......….....….......….....….......….............................….......….....….......…......…...............
Import Model ….....….......….....….......….....................................................…..............….....…........….....................….
Start slicing ….....….......….....….......….....….......….....….......….....….......….....….......….....…...........…......…..................
Printing support ….....….......….....….......….....…..….....….......…....….....….......….....…….....….......….....….........…..….....
Print two colors ….....….......….....….......….....….......…........................….......…...….......…...….......…...….........….........
Tips for printing support and dual color models………………………….....…...................................................................
6 General Maintenance ...….......…...….......…...….......…...….......…...….......…...….......…...…........…
Daily Preventive Maintenance ...…...…...…...…...…...…...…...…...…...…...…...…...…...…...…...…...…...…...…....….......…..
500 Hours Maintenance …...…...…...…...…...…...……...…...…...…...…...…...……...…...…...…...…...…...……...….....…....…..
Replace the hot end ..…......…...…...…...…...…...…...............................................................…............…........…...…...
7 Trouble Removal …...…...…...…...…...…...……...…...…...…...…...…...……...…...…....…...…...............
8 Support …...…...…...…...…...…...……...…...…...…...…...…...……...…...…...…...…...…....……...…...…...
Customer Support …...…...…...…...…...…...……...…...…...…...…...…...……...…...…...…...…...…...……...…...…...….....…......
Working Computer Specifications …...…...…...…...…...…...……...…...…...…...…...…...……...…...…....…...…...…...….......
MINGDA Limited Warranty Statement …...…...…...…...…...…...……...…...…...…...…...…...……...…....…...…...…...….......
9 Quality Assurance ..…..........……...............……...............……............……..............................…...
1
2
2
2
2
3
4
5
6
6
7
8
10
12
14
16
17
18
18
19
19
19
21
23
25
28
31
34
34
34
35
35
36
36
36
36
37

Notice
This machine is suitable for printing filaments within 320 degrees.
Filament
Print Temperature
Print Platform Temperature
1
PET-CF
280-320°C
60-80°C
2
PET-GF
3
PA12-CF
4
HtPA-GF
300-320°C
70-90°C
5
HtPA-CF
6
HtPA
280-320°C
70-80°C
7
ABS-GF25
250-270°C
90-110°C
8
ASA
250-270°C
90-110°C
9
S-Mulit
260-280°C
60-80°C
10
S-HtPA
270-280°C
60-80°C
11
ABS
240-260°C
80-100°C
12
PETG
230-250°C
80°C
13
TPU 95A
210-230°C
50°C
14
PVA
210-220°C
60-70°C
15
PLA
190°C
60°C
1
1-10 Recommend High Temperature 11-14 Recommend Normal
Note: Please put the high-temperature filaments in a dry box for printing, otherwise humidity
will affect the print quality.
Precautions for the Use of High Temperature Filament
If the high-temperature filament is not used up, put it in an aluminum foil bag in time. If
the filament is wet or the surface of the print has obvious drawing, it means that the
filament is damp, and it needs to be dried in an industrial oven before use.
Reference video:
Operation video and after-sales video, please refer to the video in the SD card.

1. Brief Introduction
MD Series Industrial 3D Printers adhere to the design concept of the simple to the extreme. It can print
product quickly and easily, even if you've never used a 3D Printer.
The printer prints the model with PLA, so the products will be strong and durable. You can make drilling,
tapping, grinding and painting on the PLA models. MD Series 3D Printers combine proprietary hardware,
software and filament technologies creatively.
Welcome to a new world of 3D printing!
User-Guide Instructions
This User Guide has been carefully organized into "Installation", "Operation", "Maintenance" and
"Troubleshooting" sections for client to read and understand. Be sure to read the sections carefully to get the
best use of your 3D printer.
Learn More Information
SD card provides the electronic user guide. This guide provides information as following topics:
1. Troubleshooting information
2. Important safety statements and regulatory information
3. Printing supplies related information
4. Detailed instructions for use
You can also find more information on the official website.
http://www.3dmingda.com
Safety Precautions
The following precautions ensure that the customer uses the printer correctly and protects the printer
from damage. Please always follow these precautions.
1. Use the specified power supply voltage. Do not connect multiple devices to the printer's power outlet
to avoid overload.
2. Make sure the printer is properly grounded, Or it may cause electric shock, fire or electromagnetic
interference.
3. Contact your after-sales or local service before disassembling or repairing the printer by yourself.
Check the "Support" section in the User Guide.
4. It is recommended to use the power cord that came with the printer. Do not damage, cut or repair
the power cord. Damaged power cords present a risk of fire or electric shock. Please replace the damaged
power cord with a quality-certified power cord. Do not allow metal or liquid to come into the printer and
contact with the internal parts of the printer. It may cause fire, electric shock or other serious accident.
5. Turn off the printer and unplug the power cord from the electrical outlet under the following
conditions:
1) The printer emits smoke or emits an abnormal smell.
2) The printer emits abnormal noise that has never occurred during normal operation.
3) Metal or liquid (not required for cleaning or routine maintenance) come into the printer.
4) Thunderstorm weather.
5) Power off
This guide contains the following categories.
Note: potentially dangerous situation, if not avoided, may result in minor or moderate injury.
Warning: potentially dangerous situation, if not avoided, may result in serious injury.
High temperature surface: The high temperature surface symbol indicates the presence of high
temperature equipment. When working near hot parts, be careful and wear safety gloves.
Gloves: When performing some maintenance procedures, the machine may be hot, so need to use
gloves to avoid burns.
Safety glasses: Please wear safety glasses to avoid eye injury.
Lifting hazard: Two or more people should cooperate when lifting, so as not to cause serious injury.
Recovery: Use the correct method for recovering materials and packaging materials.
ESD: Use standard electrostatic discharge (ESD) precautions when working with or near electronic
components.
2
2. Overview
The printing process of the MD series 3D printer is as follows: the slicing software CURA convert the .stl
document into a .gcode document, and 3D printer read the .gcode document and print the raw material into a 3D
product.
MINGDA-CURA is a slicing software that runs on Windows XP, Windows Vista, Windows 7, Windows 8, or
Windows 10.
The product size and print size of MD series 3D printer are as follows. Each filament holder can hold at least
1kg of printed filament, 1 kg filament can continue to print for about 120 hours, you can also add a second roll of
filament for continuous printing.
Model
Product Size (W*D*H)mm
Printing Size(W*D*H)mm
MD-400D
758*660*890
400*400*400
MD Series Industrial 3D Printers have Resume Printing Function and Filament sensor, which can greatly
save the client's losses.
Resume Printing Function: During the printing process, if the power is off, the machine will save the data.
After powering on, follow the on-screen prompts to continue unfinished print jobs.
Filament sensor: If the filament is used out during printing, the machine will automatically pause printing,
install new filament, and click the Continue button on the screen to continue printing.
(Note: This machine does not support the detection of transparent materials.)
Below we will take MD-400D as an example to introduce the function and use of the printer:
3

View of 3D Printer
Filament holder
Socket
In this 3D printer, the print head moves in the X-axis (left and right) and Y-axis (forward and backward) directions on the panel,
and the entire panel moves in the Z-axis (up and down) direction. The printing platform is fixed when the printer is working.
Touching screen
Printing head
Type-C
SD card port
Platform
USB disk port
Screen button
4

Tool Box Accessories
Diagonal pliers Power cable Sleeve
SD card Card Reader Allen wrench
Note: The picture is for reference only. When the real thing is inconsistent with the
picture, the actual object shall prevail.
5

3. Installation
In a good ventilation and dry environment
Insert a power socket
Click the shutdown button of the screen “MENU” interface to shut down
Please press and hold for 3 seconds to turn on the printer
6

7
Primary interface
Explain
Preheat
Pre-set nozzle & hotbed’s temperature
Nozzle
Pre-set nozzle’s temperature
Bed
Pre-set hotbed’s temperature
Leveling
Autoleveling (No other operations shall be done during auto leveling)
Menu
Printer’s printing value adjustment
Print
Start print
Ready
Introduction to machine operation page

Duplicatio Mode / Mirrored Mode / Autopark Mode
Reminder: When starting the Duplicatio / Mirrored printing mode, the two extruders are printed at the same
time at the left and right ends of the hot bed. Therefore, when slice, we need to put the model at the left end
of the hot bed. When the two extruders are printed at the same time, they will not interfere with each other
to produce collisions, so as to achieve the effect of Duplicatio / Mirrored printing.
Open the duplicatio mode: select "Menu" , "Set nozzle" , "Duplicatio" , at this time the
opportunity to squeeze out of the way, then return to the previous step, click "Move" , "X-" , The
extruder 2 will move to the middle of the hot bed. The extruder 1 will move to the left to the lower left corner of
the hot bed. At this time, the distance between the extruder is fixed, and the duplicatio mode is successfully
opened.
8

Open the mirrored mode: select "Menu" , "Set nozzle" , "Mirrored " , at this time the extruder will
have a return movement, and then return to the previous step, click "Move" , "X-" , The extruder 2 will move
to the right to the lower right corner of the hot bed. The extruder 1 will move to the left to the lower left corner of the
hot bed. At this time, the distance between the extruder is fixed, and the mirrored mode is successfully opened.
Open the Autopark mode: select "Menu" , "Set nozzle" , "Autopark" , at this time extruder
will have a return action, and then return to the previous step, click "Move" , "X-" , Left print
head will move to the right. If you want to move another print head, return to the mode selection interface,
click T0 to switch to T1, and return to the mobile interface to move the right print head.
Note: The machine will be reset to free mode after each restart
9

4.Machine calibration
1. Prepare an A4 paper and place it between the left print head and the platform. Click the reset button
to initiate the reset process. Once the reset is complete, click on the Z-axis movement option to raise the platform to
its highest position. Click on the unlock motor button and manually move the print head to make the nozzle
sequentially move to the four corners and the center of the platform. Simultaneously adjust the corresponding four
knobs to ensure that the print head is just pressing against the A4 paper. Gently pull the A4 paper, and if the nozzle
leaves a slight mark on the paper, it means the leveling is satisfactory.
[Note: In general, the device is already pre-adjusted at the factory, so you can skip this step and proceed
directly to automatic leveling.]
2.After adjusting the left print head, you can manually move the right print head to check if the distance
between the right print head and the hotbed is consistent with the left print head. If they are not aligned, you can
manually adjust the distance between the right print head and the platform to match the distance between the left
print head and the hotbed. There is a screw at the back of the right print head that can be loosened to roughly adjust
the height of the right print head. Once adjusted, tighten the screw to secure it in place.
[Note: In general, the device is already pre-
adjusted at the factory, so you can skip this step and
proceed directly to automatic leveling. However, if
there is a significant deviation or if you require precise
calibration for duplication or mirror modes, you can
refer to the instructional video on the SD card or the
official website for adjustment instructions.]
10

4.Click the leveling button , then click the start button to initiate the automatic leveling process. The left
print head will begin to move and perform the automatic leveling procedure.
[Note: Please do not insert your hand into the printer enclosure during the leveling process to avoid any potential
injuries or accidents.]
11
3. Adjust the Z-offset by ZAlign.
First click Menu-Home-Home and wait for the machine to reset.
Click the T0 button on the screen to switch the T1 extruder (the right extruder), and the right extruder will
move to the middle position. Adjust the Z-offset to an appropriate distance in the same way.
Click the Save button to save the settings.
Then take a piece of A4 paper and put it between the nozzle and the hot bed, and click Menu-Set Nozzle-Z Align
on the screen. The default calibration is T0 extruder (left extruder) extruder heat bed starts to move until it stops.
Move the A4 paper by hand, and adjust the Down and Up keys on the screen until the nozzle can scrape the A4 paper.
Calibration of the left extruder is complete.
T1
T0
11
2
11
2

Install the filament (Take PLA filament as an example )
1. Hang two volumes of PLA Filament on the scraping pole in the left and right Filament box, and
insert the Filament from the inlet port until the Filament are exposed to the printed head along the
guide pipe.
2. Press the gas joint, pull out the guide tube, pull the handle of the inlet port, insert the Filament
into the squeeze machine into the material mouth.
12
5.Calibrate the Z-axis offset for the left and right print heads. Click the Z-axis calibration button, and the left and
right print heads will automatically move to the right front switch to touch the calibration limit switch one by one.
Once completed, the machine will automatically save the data.
[Note: If during the calibration process the print head does not align with the switch and causes a collision,
please immediately click the emergency stop button to shut down the machine. For specific instructions, please refer
to the instructional video on the SD card or the official website.]

3. Long press the screen button to turn on, first click the reset button , click the heating
button, set the temperature of the left and right head to 200 ℃, and automatically heating the nozzle
to 200 ℃.
4. When the temperature of the nozzle rises to 200 ℃, insert the filaments into the extruder, click
"Menu" , "Extrude" , click the Load button to enter the feed, click the extruder
button, and switch to another head for the crowding operation.
5. After the filament feeding is completed, insert the guide pipe.
13

XY-axis offset calibration for the left and right print heads.
First, insert the SD card, click calibration gcode folder and chose “calibration accuracy 0.1.gcode”
to print.
Rendering
14

Enter the machine parameter settings interface and input the corresponding offset value. Save
the settings.
After printing, compare the calibration lines again and note the value of the line that aligns with the baseline.
Enter the machine parameter settings interface and input the corresponding offset value. Save the settings.
15

Print the verification file named "Calibration two-color square testing.gcode" from the SD card.
When the printing is complete, please compare the printed two-color square with the sample graphic,
and check whether there is an obvious gap between the color squares.
Verify the XY-axis offset for the left and right print heads:
1. If there is no gap between the color blocks, it means that the XYZ direction offset value of the right nozzle is
within a reasonable range. Offset calibration is complete.
2. If there is a gap between the color blocks, re-calibrate the XY direction offset value of the right nozzle.
Repeat the printing process until the testing square is successfully.
16

Printing the Test Files
Click on the Print icon , choose a gcode file which you want to print.
Tip: You can adjust the babystep according to the adhesion of the first layer of filament. After the
adjustment is completed, click Save, then you can print directly next time without any adjustments.
If the distance between the nozzle and the platform is too high, the
filament will not easy to stick to the platform. Should click "Decrease"
until the distance is proper.
Keep a proper distance between the nozzle and the hot bed, so that
the filament stick to the hot bed evenly.
If the distance between the nozzle and the platform is too low, the
filament will be not easy to feed out smoothly . Should click
"Increase" until the distance is proper.
17

1. Insert the SD card.
2. If not leveled, run the auto-leveling procedure first.
3. Preheat the head and bed, check whether it feed smoothly.
4. Click "Print" icon on the display panel.
5. Choose the Gcode file to print.
6. After the printing is completed, Wait for the platform to cool down, then take out the model gently.
Printing Process
While printing files, you can pause it at any time.
1. When printing, you can click Percentage rate icon to adjust printing speed .And click icon to
change the printing speed by percent.
2. Press the pause icon on the display panel, the mprinter will be suspended to print, press again to
continue.
3. When printer pause, you can feed the filament and change another filament.
4. If press stop icon , the printer will stop printing.
5. The printer will automatically shut down after printing finished.
Pause and Continue to Print
18
Table of contents
Other Mingda 3D Printer manuals

Mingda
Mingda Magician X2 User manual

Mingda
Mingda Magician Pro User manual

Mingda
Mingda Magician X2 User manual

Mingda
Mingda MD Series User manual

Mingda
Mingda MD-D01 User manual

Mingda
Mingda Glitar 4 User manual

Mingda
Mingda MD-600D User manual

Mingda
Mingda MD-16 User manual

Mingda
Mingda Magician Pro User manual

Mingda
Mingda Rock 3 Pro User manual