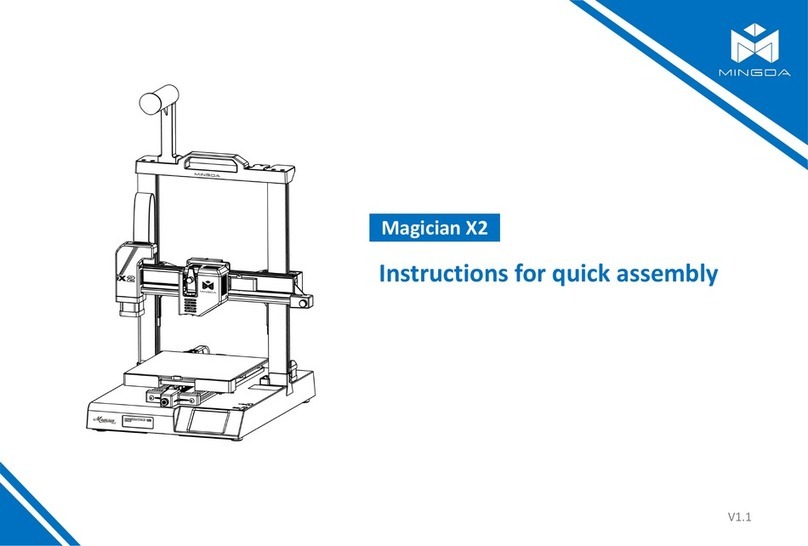
Mingda Magician X2 User manual

3D PRINTING
USER MANUAL
V2.0
FOR MINGDA MAGICIAN X2 3D PRINTER

Mingda Magician X2: Official instructions
Version 2.0 - Sept. 6th, 2023
The latest version of the Magician X2 handbook can always be found at
https://3dmingdaofficial.com/pages/magician-firmware-driver-and-video
Quick Guide to the First Print
1. Read the Safety Instructions carefully.
2. Place the printer on a flat and stable surface.
3. Download the latest firmware from our website and install it.
4. Calibrate the printer with auto-leveling.
5. Insert the SD card that came with your printer and print your first object.
How to contact Mingda technical support:
First, check the last sections of this manual that deal with common problems. Then send an email to
[email protected] and/or use our chat at 3dmingdaofficial.com. Try to describe your problem as accurately
as possible - ideally include pictures or videos.

------------------------------------------------------------------------------------------- 09
---------------------------------------------------------------- 09
----------------------------------------------------------------------- 09
--------------------------------------------------- 10
------------------------------------------------------------- 11
---------------------------------------------------------------------------------- 11
----------------------------------------- 12
---------------------------------------------------------------------------------------- 12
----------------------------------------------------------------------------- 13
--------------------------------------------------------------------------------------- 22
------------------------------------------------------------------ 23
------------------------------------------------------------- 24
-------------------------------------------------------------------------- 25
---------------------------------------- 26
-------------------------------------------------------------------- 26
------------------------------------------------ 26
--- 27
-------- 28
-------- 28
------------------------------------------------------------------------- 29
---------------------------------------------------------------------------------- 30
-------------------------------------------------------------------------- 31
Table Of Contents
1. Introduction
2. Unpacking and Package Contents
2.1. How to Move the Printer
2.2. Contents of the Package and Accessories
3. Magician X2 Overview and Glossary
3.1. Product Display
3.2. Connecting and Disconnecting the Power Cable
4. Your First Print
4.1. Machine Operation
4.2. Print Sheets
4.3. Inserting (Loading) filament
4.4. Unloading (Removing) Filament
4.5. Starting the First Print
4.6. Removing a Printed Object from the Print Sheet
4.7. First Print Troubleshooting
4.7.1. First layer peeling off from the bed
4.7.2. Nozzle moves too high/low, or extrudes plastic outside the print area
4.7.3. The nozzle does not start extruding, even after multiple attempts
4.7.4. After a few hours of printing, the nozzle stops extruding filament
4.8. Updating the Firmware
4.9. Sample Models
5. Printing Your Own Models

----------------------------------------------------------------------- 32
------------------------------------------------------------------------ 33
-------------------------------------------------------------------------- 33
----------------------------------------------------- 34
------------------------------------------------ 34
-------------------------------------------------------------------------- 35
----------------------------------------------------------------- 36
---------------------------------------------------------------------------------------- 37
---------------------------------------------------------------------------------------- 37
---------------------------------- 38
------------------------------------------------------------------ 38
-------------------------------------------------------------------------------- 39
--------------------------------------------------------------------- 39
------------------------------------------------------------------------------------------- 39
------------------------------------------------------------------------------------------------ 39
------------------------------------------------------------------------- 39
---------------------------------------------------------------------------------------- 39
------------------------------------------------------------ 40
---------------------------------------------------------------------------- 40
--------------------------------- 40
------------------------------------------------------------------------------------------------- 40
---------------------- 41
----------------------------------- 41
6. Obtaining Printable Models
6.1. Create Your Own Model
6.2. What is a G-code File?
6.3. Mingda Cura slicer Interface Explained
6.3.1. Initial Setup and General Workflow
6.3.2. Using Supports
6.3.3. Speed vs Print Quality
6.3.4. Infill
6.3.5. Brim
6.3.6. Printing Objects Larger than the Print Volume
6.3.7. Slicing and Exporting
7. Regular Maintenance
7.1. Keeping the Printer Clean
7.2. Bearings
7.3. Fans
7.4. Extruder Feeding Gear
7.5. Electronics
7.6. Extruder is Clogged or Jammed
7.7. Cleaning the Nozzle
7.7.1. The filament does not come out of the nozzle.
7.7.2. The filament does not come out of the nozzle or only a small amount
comes out.
7.8. Troubleshooting Faulty Sensor Readings and Removing Errors
7.9. Printer Does Not Recognize the Inserted USB Drive

Product Information
Name:
Magician X2
Manufacturer:
Mingda Technology limited company 3/F, No.20, Dahe Industrial
Zone, Longhua District, 518110; Shenzhen, Guangdong, China.
Contacts:
E-mail: [email protected]
Power supply:
100-240 VAC, 50-60 Hz, 350W
Operating temperaturerange:
18 °C - 38 °C
Maximum air humidity:
85%, non-condensing
Printer dimensions:
Width: 460 mm
Depth (with bed centered): 430 mm
Height (without filamentholder): 546mm
Build volume (width ×depth × height):
230×230×260 mm
Installed nozzle diameter:
0.4mm
Supported filamentdiameter:
1.75mm
Weight (withoutpackaging):
7.5kg
The product serial number can be found on the type label located on the right side of the printer's gantry.
This device is intended for use in indoor environments only where it is protected against external influences.
Warranty
The Mingda Magician X2 3D printer is covered by a 12-month warranty for end customers and business customers.
Consumables and parts subject to wear and tear are excluded from this warranty. The warranty period starts on the
day the customer receives the goods. The seller is not liable for any damage caused by improper handling of the
purchased product, or damage caused by handling in violation of the information and recommendations given in the
official manuals and instructions. The warranty also expires in the event of unskilled interventions and the use of
unofficial hardware and software modifications.
5

Safety Instructions and Disclaimer
Placement and Basic Use
lMake sure that the printer is located and operated in a safe place to avoid potential risks.
lThis device is intended for indoor use only. Do not expose the device to water or snow. Contact with water and
other liquids may lead to damage to the electronics, short circuits, and other types of damage. Always operate
the printer in a dry environment.
lPlace the printer in a safe dry place on a horizontal and stable surface - e.g., a work table. Around the printer
should be at least 30 cm of space. If there are obstacles close to the printer, it may affect its operation or cause
excessive wear of the textile cable sleeves or even the cables themselves. Worn cables can pose a risk
(electric shock, fire).
lMake sure that none of the vents/fans is blocked. The printer has a built-in fan speed monitoring, but in some
cases (incorrect assembly, damage to components, unofficial firmware) the monitoring may not work correctly.
Insufficient cooling can lead to overheating and serious damage to the printer (risk of damage to electronics,
fire).
lMake sure that the printer is placed so that it cannot be toppled over or dropped to the ground. If the printer
has suffered physical damage, do not use it - damaged parts of the printer may pose a safety risk.
lThe power cable must be placed so that it cannot be tripped over, stepped on, or otherwise damaged. Place
the printer on a stable, solid surface (e.g., a work desk). If the printer is damaged, stop using the device, turn it
off immediately and contact us for assistance. Damaged cables pose a safety risk - there is a risk of electric
shock or fire.
lDo not leave the printer switched on without supervision! The printer has temperature monitoring and a number
of smart features for increased safety, but in the case of use contrary to the instructions in this manual or
failure of components, there is a risk of fire.
lNever place anything into the printer under the heatbed - the heatbed is a moving part and could crash into
objects underneath it!
Acting in contravention of the information provided in the manual may lead to injury, poor print results, or damage to
the 3D printer. Make sure that everyone working with the printer is familiarized with the content of this handbook and
understands it correctly.
As we cannot control the conditions under which the Mingda Magician X2 printer is used, we do not assume any
responsibility and expressly disclaim any liability for losses, injuries, damages or expenses arising out of or in
connection with the assembly, handling, storage, use or disposal of the product.
The information in this manual is provided without any warranties, expressed or implied. Be very careful when
handling the 3D printer. It is an electrical device with moving and heated parts.
6

Electrical Safety
lThe printer should only be powered through a standard 230 VAC, 50 Hz or 110 VAC, 60 Hz outlet. Never use
alternative power sources as they can cause problems or damage the printer.
lDo not use the printer if the power cord is damaged in any way – damaged cords can lead to electric shock.
lWhen disconnecting the power cord from the outlet, pull the plug, not the cord, to reduce the risk of damaging the
plug or outlet.
lNever disassemble the power supply of the printer as it contains no parts that can be repaired by an untrained
worker. Always take the printer to a qualified service technician for repairs. Improper interventions in the power
supply may lead to damage to the printer and an increased risk of electric shock.
lThe device is disconnected from the power supply by pulling out the plug. The electrical outlet must be easily
accessible.
Mechanical Risk
Moving mechanical parts of the printer can cause injury.
lNever interfere with the inner components of the printer when it is connected to the power supply or running –
there is a risk of injury from mechanical parts or electric shock.
lPrevent children from manipulating the printer without the supervision of an adult – even when the printer is not
printing.
Burn Risk
lDo not touch heated parts of the printer – heatbed, print plate, and parts of the printhead. There is a risk of burns.
lWarning! During printing, parts of the printhead and the print plate can heat up to very high temperatures! Do not
touch them until the printing ends and the printer cools down – otherwise, you may get burned.
7

Proper Use of Glass Printing Sheets
Each type of print sheet requires slightly different maintenance. Improper handling and use can lead to damage to
the print sheet, heatbed or other parts of the printer. Print sheets are consumable and subject to wear.
lTo degrease the sheet’s surface, use highly concentrated isopropyl alcohol (90% or higher).
lDo not use products that contain IPA as one of the components (e.g. hand sanitizers) - these products usually
contain other additives that may negatively affect the properties of the printing plate.
lIf the sheet is dirty, clean its surface with an isopropyl alcohol-dampened wipe before you start printing.
Working with Filaments
When handled correctly, working with filaments is straightforward and safe.
Please read the following recommendations.
lAlways use the recommended temperatures for the selected material.
lBeware of molten plastic - it can cause burns! If there is molten plastic stuck in the nozzle, do not remove it by
hand - use pliers or other tools.
lSome materials may emit a strong odor when printing - regularly ventilate the room.
lHandle the filament according to the instructions on the following pages of the manual.
lAlways make sure that the end of the filament is properly secured (either in the extruder or in the spool). If you
accidentally release the end of the filament, it may easily tangle up and create knots.
8

Thank you for purchasing the Mingda Magician X2 3D printer from MINGDA! Your support allows us to invest in
further development of 3D printers and any other projects of 3d printing.
Magician X2: simple operation, easy maintenance, heatbed with Glass printing sheets, filament sensor, high-quality
PSU, long-term support and many more. Still, roughly 80% of all parts have been changed.
1. Introduction
2. Unpacking and Package Contents
The printer is 90% fully assembled model, simply remove the top foam inlay from the box. Find a good place for
the Magician X2. You need at least 570x450mm of space for the printer to operate. Keep in mind that the
heatbed moves back and forth during printing and the cables must not hit a wall when the heatbed is in the
rearmost position. Grab the top part of the metal frame and lift the printer from the box - see the chapter below:
How to Move the Printer.
2.1. How to Move the Printer
If you want to move the Mingda Magician X2 printer, use the recommended method - grab the top of the printer
frame and lift the printer. Never lift the printer by the cables, filament holders or X-axis.
9

2.2. Contents of the Package and Accessories
The latest version of this handbook can be found at
https://3dmingdaofficial.com/pages/magician-firmware-driver-and-video in PDF format.
If you encounter any problems while using the printer, do not hesitate to contact us at support@3dmingda.com.
We will be happy to answer your questions or hear your ideas for improvement.
What’s in the box
Filament
User manual
Filament holder
M4*10 (2pcs)
M5*25 (2pcs) M4*20 (4pcs)
SD card
Teflon tube
Nozzle
Power cable
Wrench Allen wrench
M3*8 (2pcs)
The Main Chassis
Gantry Extruder
10

3. Magician X2 Overview and Glossary
Front View
Back View
Filament Holder
Aluminum Beam
Belt Tensioner
Extruder
Power Socket
Multi Connection Touch Screen
Photoelectric Switch
PEI Plate
Printing Head
Synchronous Belt
Lead Screw
Z motor
Y motor
X motor
Heated Bed Cable
Filament Detector
(Via SD Card, U-disk,PC/Laptop)
3.1 Product Display
11

3.2. Connecting and Disconnecting the Power Cable
Always pull the connector, do not pull on the cable itself! Incorrect handling can lead to damage to the
connector or cable.
The power supply port is located on the left side of the printer. Before you plug or unplug the cable, turn the printer
off using the physical switch on the power supply unit next to the power supply port. See the picture below to learn
how to correctly disconnect the power plug from the power supply.
4. Your First Print
To get your printer up and running, please pay attention to the information in the following chapters. We will go
through the basics together - you’ll be printing in no time!
In this chapter you will learn how to:
lControl the printer
lPerform level calibration
lInsert filament
lStart the first print
lRemove the print
lTroubleshoot basic issues
lUpdate the firmware
12

In printing process main interface
Primary interface Secondary interface and Explain
Pause Pause the printing process
Heat Decrease ”-” : Decease the temperature
Increase ”+” : Increase the temperature
Nozzle/Hotbed: Option to change the nozzle and bed
℃ :1 ℃, 5℃, 10℃ for option
Stop : Stop heating the nozzle/bed
Back:Back to last step
Percentage1Decrease ”-” : Decease the Speed/Flow
Increase ”+” : Increase the Speed/Flow
Speed/Flow : Option to change the speed/Flow
% : 1%, 5%, 10% for option
Normal: None
Back: Back to last step
Stop Cancel the printing process
More Fan3: option to stop or decrease/increase the fans speed
Extruder: While printing is paused, Option to see the materials
loading speed and flow.
(Materials run out and reload the new materials choose this option in printing process)
Baby Step2Decrease↓: Decrease nozzle distance to the hotbed
Increase ↑: Increase the nozzle distance to the hotbed
Save: Save the Z-off set setting
mm: 0.01mm, 0.1mm,1mm for option
Zero: Reset the BabyStep set to 0
Back: Back to last step
Process bar Show the printing process time/percentage
13
4.1. Machine Operation
All configuration steps and overall control of the printer are done with touching screen. We will show you the
operation interface of the printer and Glossary.

Pre-printing Main Interface
Primary interface
Explain
Preheat
Pre-set nozzle & hotbed’s temperature, turn to page [15]
Nozzle
Pre-set nozzle’s temperature, turn to page [15]
Bed
Pre-set hotbed’s temperature, turn to page [16]
Leveling
Autoleveling (No other operations shall be done during auto leveling)
Menu
Printer’s printing value adjustment,turn to page [17]
Print
Start print, turn to page [16]
Ready
14

Secondary interface
Explain
PLA
Pre-set temperature for PLA
PETG
Pre-set temperature for PETG
TPU
Pre-set temperature for TPU
Both
Option Nozzle/hotbed only or Both
Stop
Stop the heating process
Setting
For customize Pre-set temperature for Nozzle and hotbed
Back
Back to last step
Pre-heat
Secondary interface
Explain
Decrease ”-”
Decease the temperature
Increase ”+”
Increase the temperature
Nozzle/Hotbed
Option to change the nozzle and bed
℃
1 ℃, 5℃, 10℃ for option
Stop
Stop heating the nozzle/bed
Nozzle
15

Secondary interface
Explain
Decrease ”-”
Decease the temperature
Increase ”+”
Increase the temperature
Nozzle/Hotbed
Option to change the nozzle and bed
℃
1 ℃/5℃/10℃ for option
Stop
Stop heating the nozzle/bed
Bed
Secondary interface
Explain
SD card
Select SD card’s Gcode
U Disk
Select USB’s Gcode
Print
16

Menu
Primary interface
Explain
Move
Adjust X, Y, Z Axis’ Value, turn to page[18]
Home
Reset X, Y, Z Axis’ Value, unlock motor, turn to page[18]
Extrude
To unload or load filament, turn to page[19]
Percentage
Adjust Printing speed & flow Value, turn to page[19]
Settings
More printer setting, turn to page[20]
Fan
Adjust cooling system’s Value, turn to page[21]
Babystep
Adjust Z offset’s Value, turn to page[21]
17

Secondary interface
Explain
X+,X-
Adjust X axis (Right & Left)
Y+,Y-
Adjust Y axis (Forward & Backward)
Z+,Z-
Adjust Z axis (Up & Down)
mm
0.1/1/10 Movement distance
Move
Secondary interface
Explain
Home
Reset to 0
X
Set X to 0
Y
Set Y to 0
Z
Set Z to 0
Em.stop
Motor Unlock
Home
18

Extrude
Secondary interface
Explain
Decrease ”-”
Decease the printing speed
Increase ”+”
Increase the printing speed
Speed
Switch to Flow
5%
Adjust rate
Reset
Reset to initial speed
Percentage/ Speed
Secondary interface
Explain
Stop
Stop feeding out filament
E0
Display the distance of feeding out
Load
Start feed out filament
Nozzle
Display nozzle temperature
Normal
Flow speed slow, normal, fast
mm
Distance of feeding out
19

Secondary interface
Explain
Decrease ”-”
Decease the flow rate
Increase ”+”
Increase the flow rate
Flow
Switch to Speed
5%
Adjust rate
Reset
Reset to initial speed
Percentage/ Flow
Secondary interface
Explain
English
Switch to other language
Silent ON
Switch On/off buzz of printer
Runout On
Switch On/off filament detector
Info
Printer’s information
Z-Offset
Manually adjust the Z offset value
Settings
20
Other manuals for Magician X2
1
Table of contents
Other Mingda 3D Printer manuals

Mingda
Mingda Magician X2 User manual

Mingda
Mingda MD-400D User manual

Mingda
Mingda MD Series User manual

Mingda
Mingda MD-600 Pro User manual

Mingda
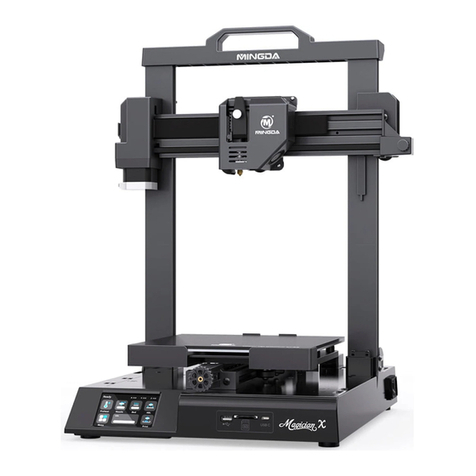
Mingda Magician X User manual

Mingda
Mingda Goldfish X User manual

Mingda
Mingda Magician Pro User manual

Mingda
Mingda Magician Pro User manual

Mingda
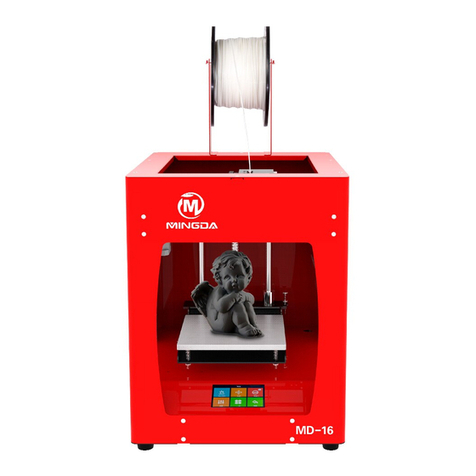
Mingda MD-16 User manual

Mingda
Mingda Rock 3 Pro User manual
Popular 3D Printer manuals by other brands

Flashforge
Flashforge Creator Pro Start up and instruction guide

3DGence
3DGence INDUSTRY F420 user manual

Bondtech
Bondtech Raise3D DualDirect Assembly and installation manual

Bondtech
Bondtech Prusa i3 Assembly and installation manual

Bresser
Bresser 2010100 instruction manual

Geeetech
Geeetech Acrylic I3 Pro user manual