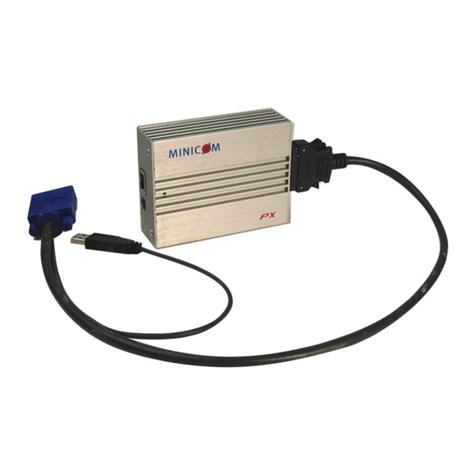
Screwthe bracket sections
togetherwith the3 longer
round headed screws
Figure4Connectingthebracketsections
together
figurebelowillustratesapossibleapplication ofthe bracket.
AssigningstaticIP addresses
WherethereisnoDHCPserveron thenetwork,assign IPaddressesas follows:
1. ConnectthePXsasdescribedabove,oneatatimeandopenInternet Explorer.
2. Type https://192.168.0.155selectconfiguration andloginwithusername admin
and password access thePXConfigurationpageappearsseeFigure 6.
Connectto
rackhere
Connecttoanyholes
along thissection
Thissectioncan
be rotated toa
convenientangle Screwthe 2shorter
flatheaded screws
intotherearofthe
PX
Figure5Bracket
application
AssigninganIPaddress foreach PX
assignanIPaddressforeachPXthereshouldbeaDHCPserveronthe network.
aPXispoweredonandconnectedto thenetworkit automatically receives an
ssignedIP addressfromtheDHCP server.
aDHCPserveriscurrentlyunavailable,thePXbootswiththestatic IP
of192.168.0.155.ThePXsearchesforaDHCPserverevery5 minutes.
ceaDHCPserverbecomesavailablethePXreceivesanIP addressfrom it.
see theassignedIPaddresswhenyouaccesstheCentralized Management
tem.TheCentralizedManagementsystemautomaticallydiscoversall PXs
to thesamenetworksegment.ThePXMACaddressappearson the
of each PX.
Figure6PXConfiguration page
3. In theLANsection,uncheckEnableDHCPand configureastaticIP address
forthePX, includingSubnetMaskand Default Gateway.
4. ClickSave& Restart.
TheCentralizedManagementsectionin Figure6isonlyrelevantwhenthePXis part
ofaCentralizedManagementsystem.WhenpartofaCentralized Management
systemselecttheEnableCentralizedManagementcheckbox,thisenables the
CentralizedManagementsystemtodetectthePX.Onceenabled,the Centralized
ManagementsystemcanautomaticallydiscoverPXsconnectedto thesame network
segment,werecommendun-checkingManagerAuto Discoveryandtypingin the
Manager IP.
Operating the system
Tocompletetheinitialsetupandoperatethesystem,see thesoftcopyPX User
Guide at:
http://www.minicom.com/supportuserguides.htm
4 5
QUICKGUIDE
Restoringfactory defaults
restoreaPXto thefactorydefaultsettings,thePXmustbeconnectedto the PoE
witchandapoweredon computer.
thePX’sResetbutton(seeFigure2) for afewseconds.ThePowerLED blinks
andthePXrebootswith thefactorydefault settings.
Booting PXinsafe mode,ifadministrator’spasswordis forgotten
Disconnectthenetworkcablefromthe PX.
PressandholdtheResetbuttonand re-connectthePXto thePoE switch.
ContinuepressingtheResetbuttonfor3-5sec after re-connecting.
PX
PX - Technical specifications
OperatingsystemsTarget
Server
DOS,Windows,Novell,Linux,SUN Solarisfor
PC
Client
Computer
Windows2000orlaterwithInternet Explorer7.0/Firefox
3.0
and
later
Linuxx86 withFirefox3.0and
later
ResolutionTarget
Server
Upto 1600x1200
@85Hz
Client
Computer
Recommended
resolutionshouldbe higherthanresolution
on
local
computer
ReleasetheResetbutton.If aDHCPserverisavailable,PXpicksupan IP
addressfromit.IfthereisnoDHCPserver, PXbootswithstatic IP
192.168.2.155.
Videoand
Mouse
Synchronization
Both autoandmanual
modes
Type http://192.168.2.155/config (HTTPandnotHTTPS), ortypetheIP address
receivedfromtheDHCP server.
Connections
Ethernet -RJ45 -10/100Mbit/sec
autosensing
26pinconnectorforVideo andUSB (keyboard,mouse
and
virtualmedia)
cable
Loginwith username admin and password SAFEmode (case sensitive). Product
dimensions
HxDxW
33 x80 x105mm /1.2 x3.15x4.13
in
RestorePXdefaultsettingsfromthesafemodeorperformafirmwareupgrade if
PXfailstoboot withitsnormal firmware. Productweight 0.3kg/0.66
lbs
MinicomTechnicalSupportforspecialfirmwareforupgradingPXfrom the
Shipping
dimensions
HxDxW
105 x150x230mm/4.1x5.9x9.0
in
afe mode. Shipping weight 0.7kg/1.54
lbs
Powersupply PoE4.5Worexternalpowersupply12V,
1000mA
Operatingtemp.0°Cto 40°C/32°Fto
104°F
