Tip
How to use a product
3) How to stop
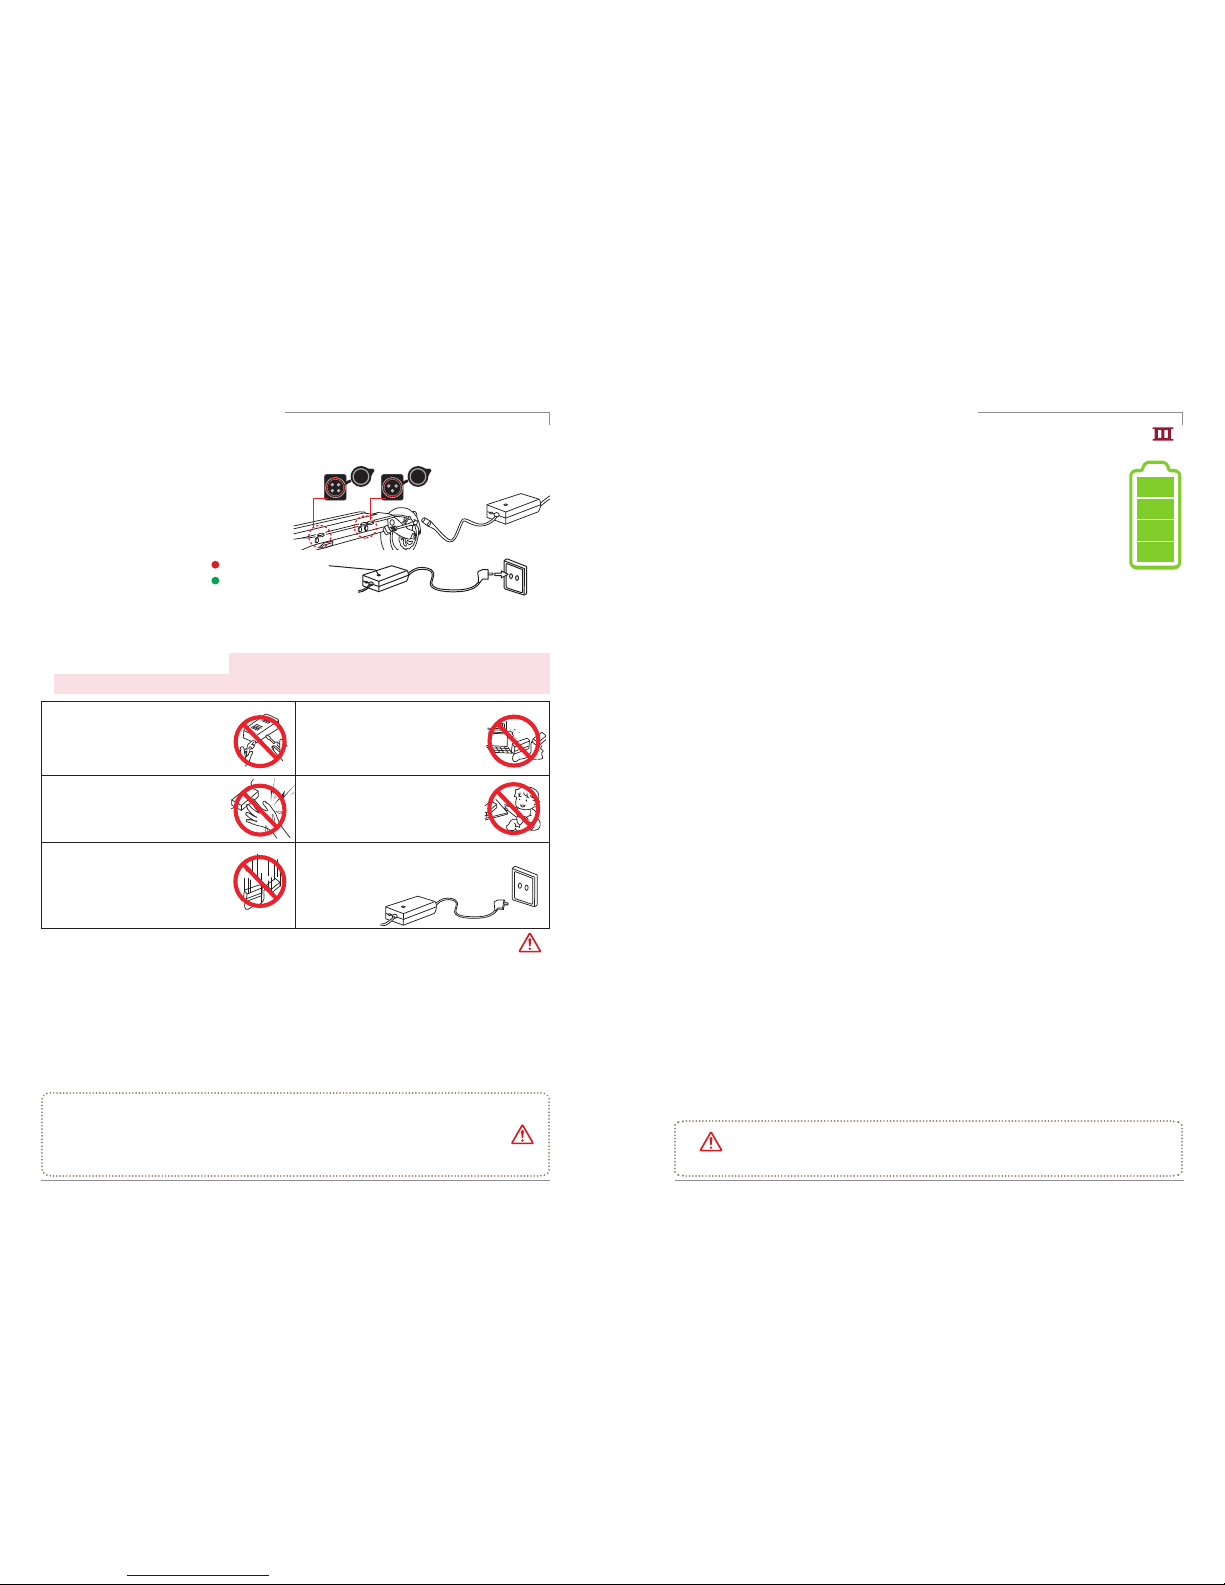
Step1 Step2
Be sure to use the rear brake first for
decelerating when stopping while driving.
For safe stop, it is necessary to practice slow
down after deceleration with rear brake.
Always use the front and rear brake
levers together to stop smoothly and
safely after decelerating with the rear
brake.
Rear brake use Front brake use
Step4
Set the use and strength of the electronic
brake among the detailed functions of the
instrument panel before driving. When the
brake lever works, the electronic brake works
together to increase the braking force.
Deceleration and braking using
electric brake
Step3
•For safe braking, check whether the brake lever and disc caliper connection (wire damage, external breakage, etc.) are
damaged before and after driving, and check brake wear and looseness of brake inner core(Inner wire). In the case of
hydraulic brakes, it is also necessary to check the oil leakage or deficiency and always check that the braking force is sufficient.
•Due to various factors such as road surface condition and speed, it may not be possible to stop when brake is operated as
expected. The electronic brake and ABS functions are auxiliary functions to further increase the braking force and used. The
user should understand the function and expect the operation timing when use this function.
Check for safe braking
Tip
4) Product folding
1. Fold handlebar and steering tube
Folding lock
After folding the handle bar, unscrew
the QR lever outward and lay the
steering tube down while raising the
fixed slide.
When the steering tube is folded, it is fixed
by using the locking slide and QR lever,
then it is easy to move by attaching the
handle with the folding lock device (not
available when mounting the seat mount).
2.Fixing the folding part
Finishing
screw
QR lever Locking slide
Steering tube
2) How to start
After tilting the kickstand, find a stable
position on the footrest and then hold the
handle grip comfortably. Be careful not to
raise your foot on the rear fender.
Step3. Stance for driving
Acceleration can be performed by using
the throttle of the instrument panel while
driving, and the deceleration or stop can
be performed by holding the brakes on the
handle.
Step4. Acceleration and deceleration
Rear fender
Side stand
Brake
When turning on the product, you can start
driving by turning on the main power switch
first (when using the built-in battery) and
turning on the power of the LCD panel. When
driving is finished, turn off the LCD panel and
turn off the main power.
* The power of the instrument panel will turn off
automatically after a few minutes of inactivity.
At this time, the LED lamp is also turned off, so
turn it off with the LED lamp button when you
turn it on again, and turn off the main power
switch after use.
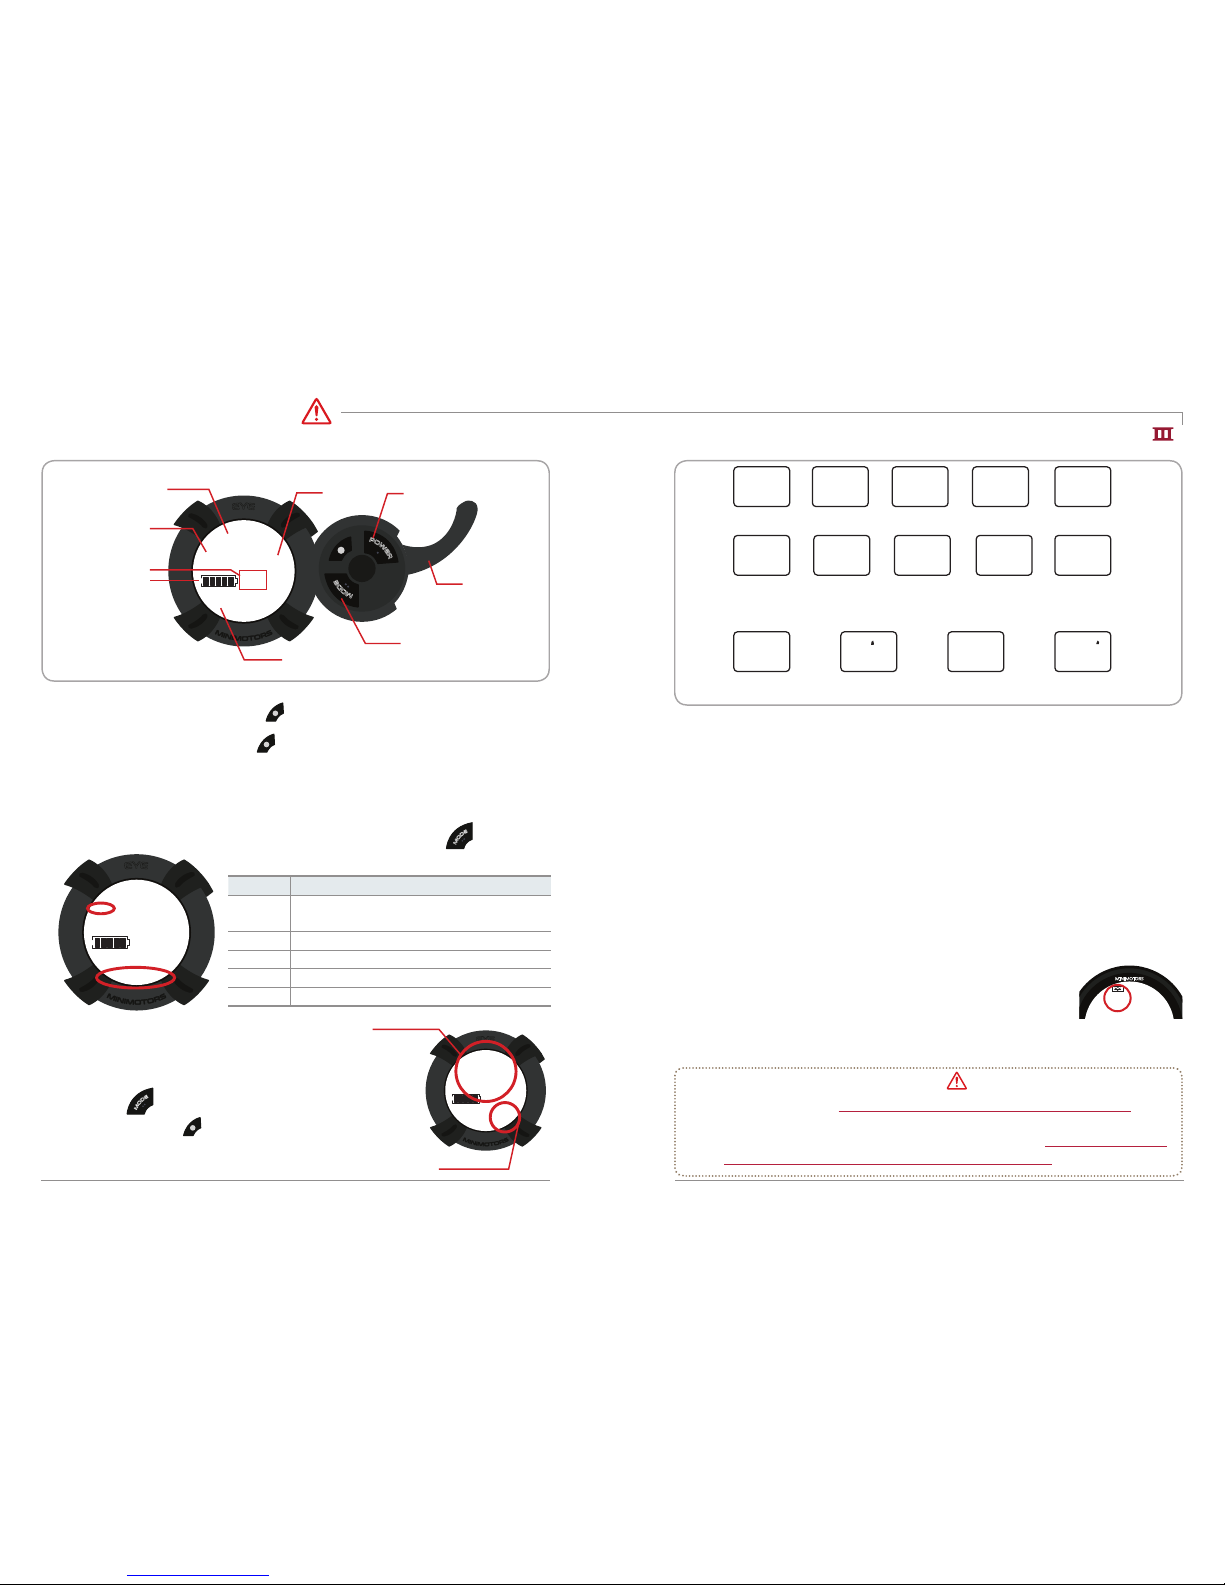
Step1. Turning on the main switch
Press the POWER button on the instrument
panel for 2 seconds to turn on the instrument
panel. You can set the start mode, cruise
mode, electronic brake, and ABS function.
Step2. Turning on the instrument panel
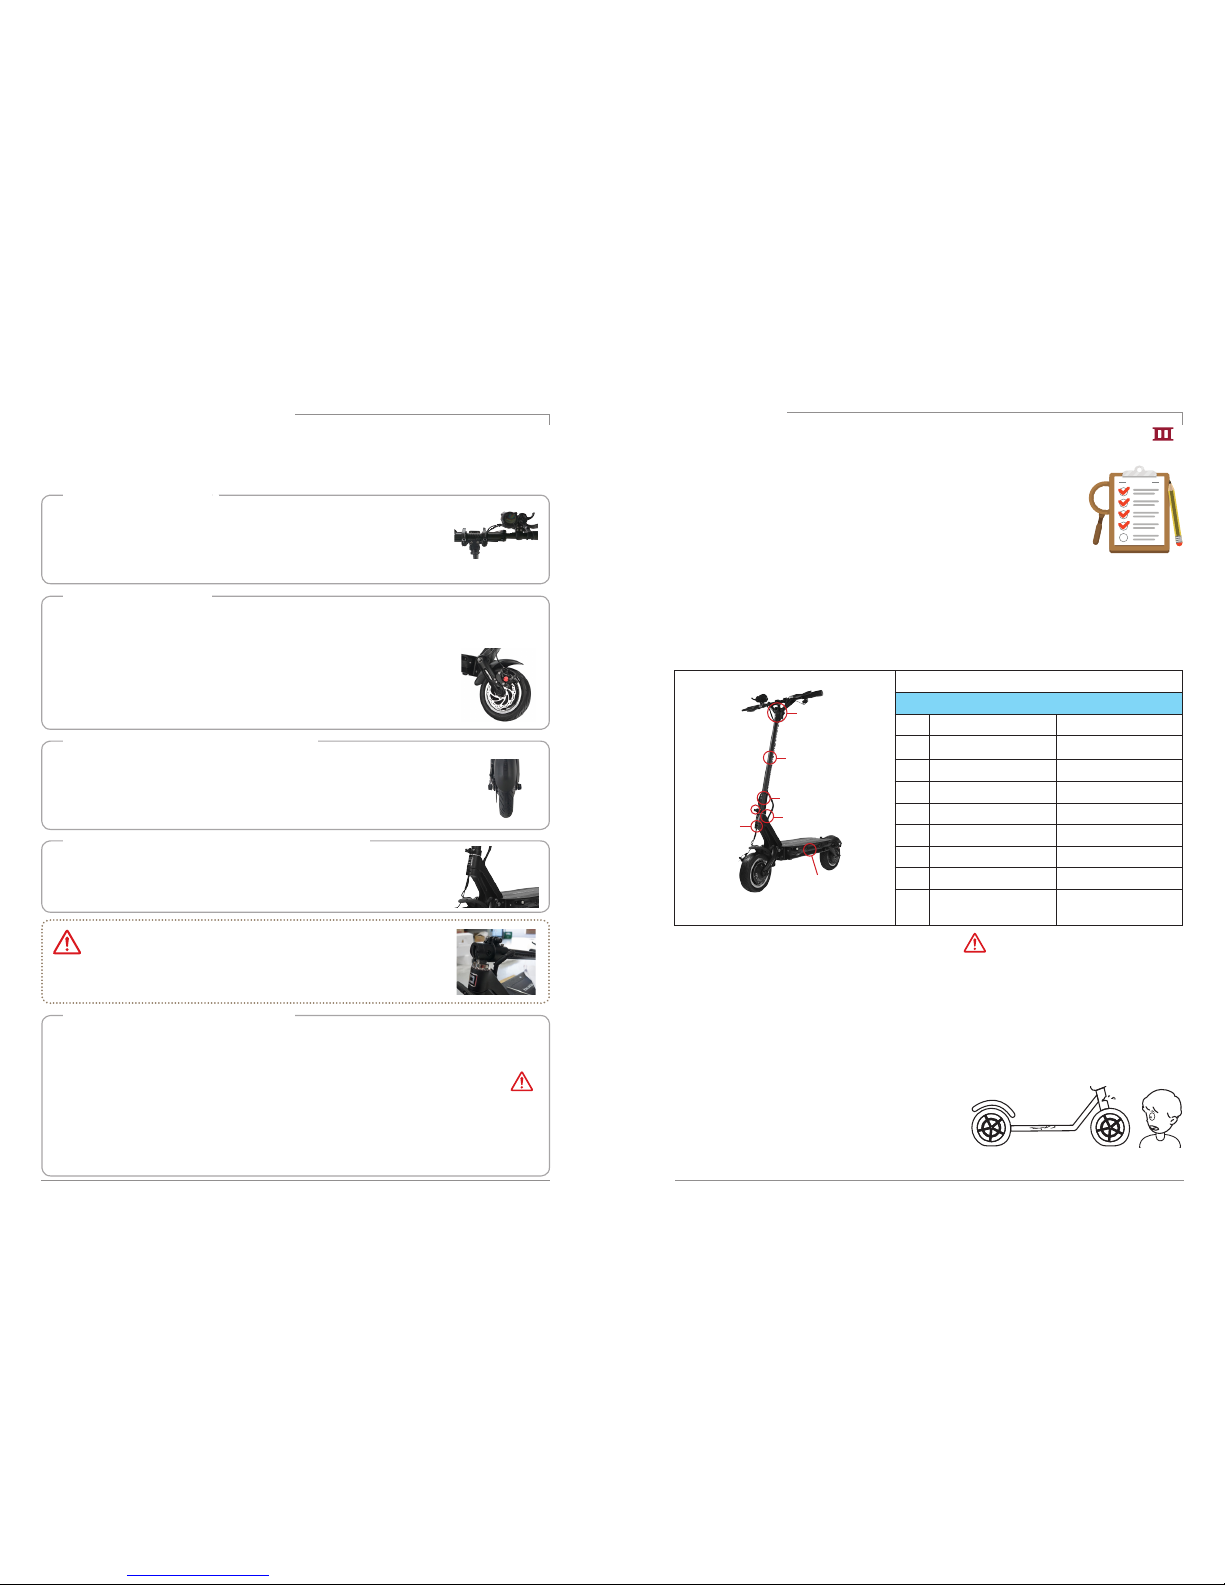
Before driving, be sure to check the folding part, the handle part, the part where the
main fixing part of the product
is fastened well. And check the position of the fixing slide,
the QR lever locking status and the folding part fixing status.
Throttle malfunction caution
Regardless of whether the throttle is operated or not, the motor sensor may continue to
operate, causing malfunctions such as sudden acceleration. In this case, holding the brake
lever to cancel the operation. This phenomenon may be caused by corrosion of the throttling,
immersion of the throttle, disconnection of the magnet, broken off levers, and breakage of
the spring. Do not bounce the throttle lever strongly.
Caution
Driving mode and motor system selection
Driving
mode
Motor
system
Pressed
(Low speed)
Not pressed
(High speed)
ECO TURBO
Not pressed
(Rear wheel
driving)
Pressed
(Front&rear two-
wheel driving)
SINGLE DUAL
Checklist before turning on
the product
Before turning on the product, turn on
the power with the LED lamp turned off.
Index throttle
LED Lamp button
Index finger
throttle