manuals.online logo
Brands
  1. Home
  2. •
  3. Brands
  4. •
  5. Mitsubishi Electric
  6. •
  7. Air Conditioner Accessories
  8. •
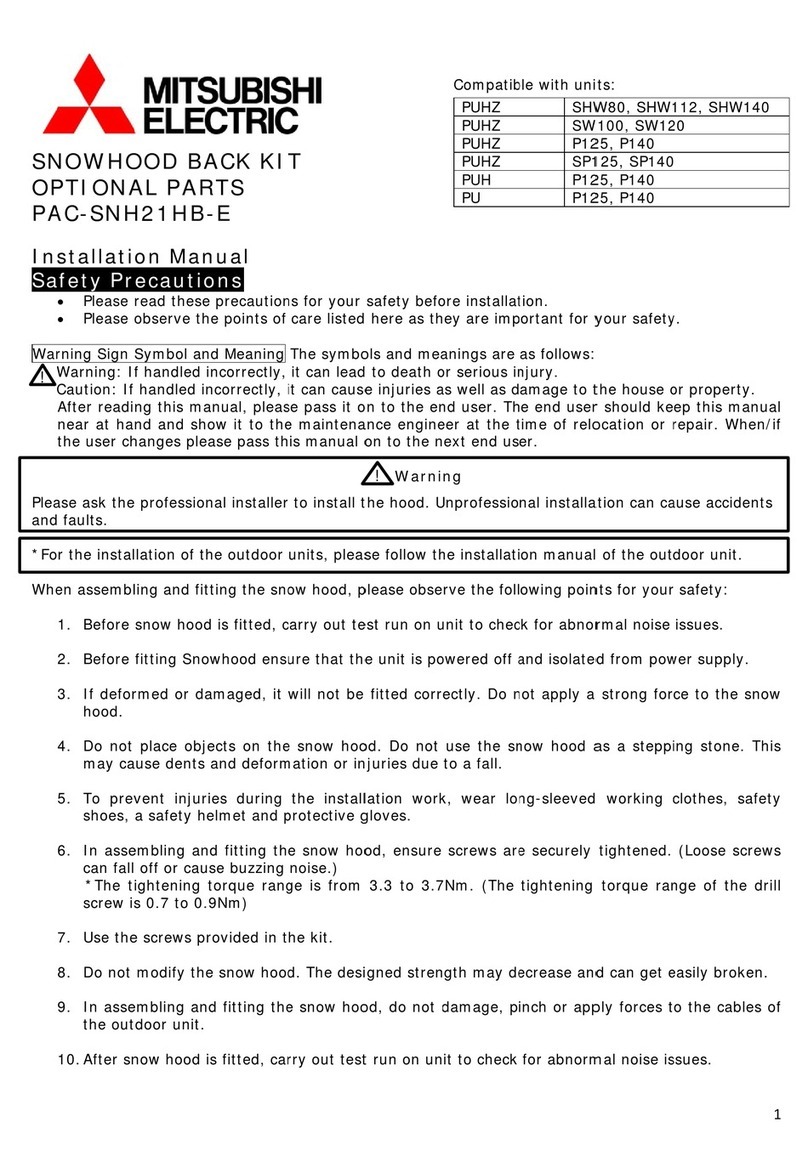
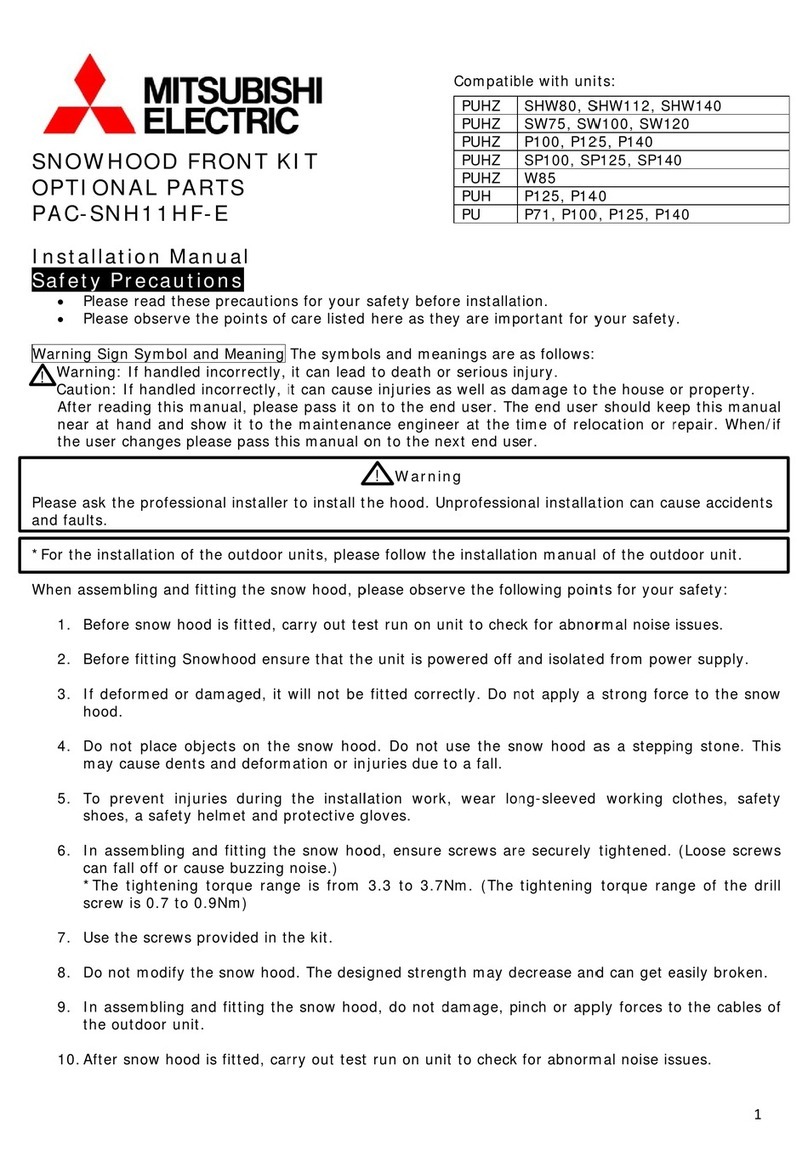
  9. Mitsubishi Electric PAC-SNH11HB-E User manual

Mitsubishi Electric PAC-SNH11HB-E User manual

Other Mitsubishi Electric Air Conditioner Accessories manuals

Mitsubishi Electric MSZ-RW25VG User manual

Mitsubishi Electric

Mitsubishi Electric MSZ-RW25VG User manual

Mitsubishi Electric PLP-6EAJ User manual

Mitsubishi Electric

Mitsubishi Electric PLP-6EAJ User manual

Mitsubishi Electric PAC-SNH21HB-E User manual

Mitsubishi Electric

Mitsubishi Electric PAC-SNH21HB-E User manual

Mitsubishi Electric PFR-12-18 Instruction sheet

Mitsubishi Electric

Mitsubishi Electric PFR-12-18 Instruction sheet

Mitsubishi Electric PAC-SNH11HS-E User manual

Mitsubishi Electric

Mitsubishi Electric PAC-SNH11HS-E User manual

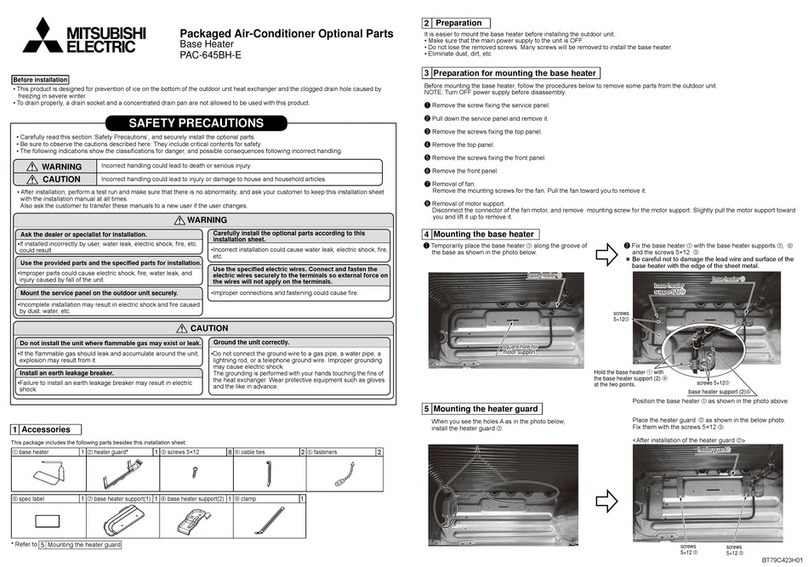
Mitsubishi Electric PAC-645BH-E User manual

Mitsubishi Electric

Mitsubishi Electric PAC-645BH-E User manual

Mitsubishi Electric PAC-645BH-E User manual

Mitsubishi Electric

Mitsubishi Electric PAC-645BH-E User manual

Mitsubishi Electric RCN-K-E User manual

Mitsubishi Electric

Mitsubishi Electric RCN-K-E User manual

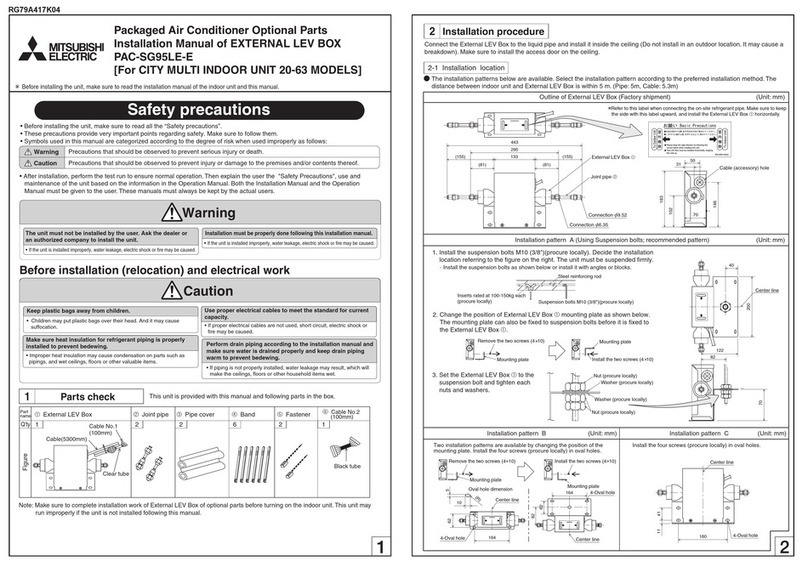
Mitsubishi Electric PAC-SG95LE-E User manual

Mitsubishi Electric

Mitsubishi Electric PAC-SG95LE-E User manual

Mitsubishi Electric PRE-12 Instruction sheet

Mitsubishi Electric

Mitsubishi Electric PRE-12 Instruction sheet

Mitsubishi Electric CMY-Q100CBK User manual
Mitsubishi Electric

Mitsubishi Electric CMY-Q100CBK User manual

Mitsubishi Electric PAC-TZ02-E User manual

Mitsubishi Electric

Mitsubishi Electric PAC-TZ02-E User manual

Mitsubishi Electric PAC-SK38HR-R User manual

Mitsubishi Electric

Mitsubishi Electric PAC-SK38HR-R User manual

Mitsubishi Electric EHGT17D-YM9ED User manual

Mitsubishi Electric

Mitsubishi Electric EHGT17D-YM9ED User manual

Mitsubishi Electric PAC-SG85DR-E User manual

Mitsubishi Electric

Mitsubishi Electric PAC-SG85DR-E User manual

Mitsubishi Electric SPTB1 User manual

Mitsubishi Electric

Mitsubishi Electric SPTB1 User manual

Mitsubishi Electric RG79F146H03 User manual

Mitsubishi Electric

Mitsubishi Electric RG79F146H03 User manual

Mitsubishi Electric PAC-RB01BC User manual

Mitsubishi Electric

Mitsubishi Electric PAC-RB01BC User manual

Mitsubishi Electric FR-A800 User manual
Mitsubishi Electric

Mitsubishi Electric FR-A800 User manual

Mitsubishi Electric PAC-SNH11HF-E User manual

Mitsubishi Electric

Mitsubishi Electric PAC-SNH11HF-E User manual

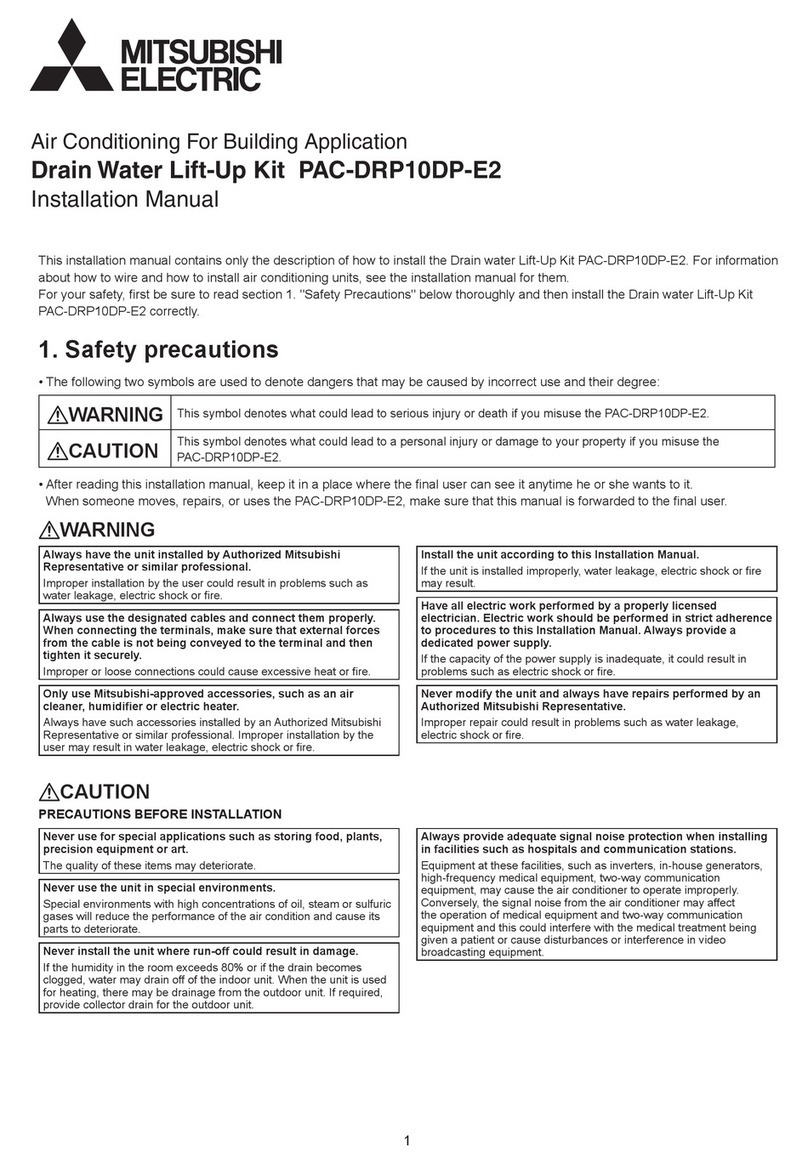
Mitsubishi Electric PAC-DRP10DP-E2 User manual

Mitsubishi Electric

Mitsubishi Electric PAC-DRP10DP-E2 User manual

Mitsubishi Electric AE-200A-50A User manual

Mitsubishi Electric

Mitsubishi Electric AE-200A-50A User manual

Mitsubishi Electric PAC-SNH21HS-E User manual
Mitsubishi Electric

Mitsubishi Electric PAC-SNH21HS-E User manual

Popular Air Conditioner Accessories manuals by other brands
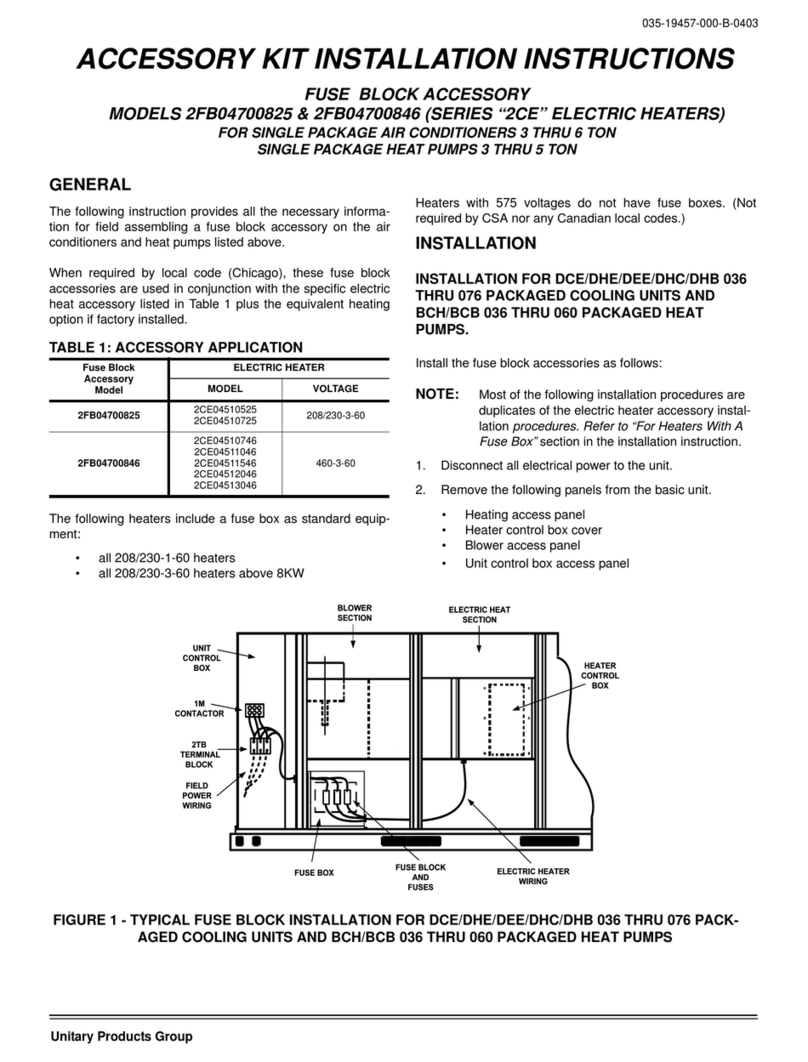
Unitary products group 2CE Series installation instructions
Unitary products group

Unitary products group 2CE Series installation instructions

Qlima EU-ODZ104 user manual

Qlima

Qlima EU-ODZ104 user manual

Tecnosystemi smart clima SCD500163 user manual

Tecnosystemi

Tecnosystemi smart clima SCD500163 user manual

Waeco AirCon Service Center ASC 5300 G operating manual

Waeco

Waeco AirCon Service Center ASC 5300 G operating manual

American Standard BAYSQRD001AA Installer's guide

American Standard

American Standard BAYSQRD001AA Installer's guide

Bimar AP11 Instruction booklet

Bimar

Bimar AP11 Instruction booklet

Mitsubishi PAC-SJ41TM-E installation manual

Mitsubishi

Mitsubishi PAC-SJ41TM-E installation manual

Tecnosystemi Smart Clima SCD500084 user manual

Tecnosystemi

Tecnosystemi Smart Clima SCD500084 user manual

Samsung MIM-H04U User & installation manual

Samsung

Samsung MIM-H04U User & installation manual

Waeco AirConServiceCenter ASC 3500 G LE operating manual

Waeco

Waeco AirConServiceCenter ASC 3500 G LE operating manual

Fujitsu UTZ-KXGC installation manual

Fujitsu

Fujitsu UTZ-KXGC installation manual

Hitachi E-52XN installation manual

Hitachi

Hitachi E-52XN installation manual

ActronAir LR7-1W Operation manual

ActronAir

ActronAir LR7-1W Operation manual

EMI 550000565 installation instructions
EMI

EMI 550000565 installation instructions

Tecnosystemi ARIA 2 ELEGANCE CR user manual

Tecnosystemi

Tecnosystemi ARIA 2 ELEGANCE CR user manual

GE RAB71B Standard installation instructions

GE

GE RAB71B Standard installation instructions

RRS Jade XRD-01RDHAM3 Series Installation instruction

RRS

RRS Jade XRD-01RDHAM3 Series Installation instruction

Galletti estro UTN PWN quick start guide

Galletti

Galletti estro UTN PWN quick start guide

manuals.online logo
manuals.online logoBrands
  • About & Mission
  • Contact us
  • Privacy Policy
  • Terms and Conditions

Copyright 2025 Manuals.Online. All Rights Reserved.


S
N
O
P
P
A
In
S
a
Wa
r
Ple
a
and
*Fo

Wh
e
!
N
OWH
O
P
TION
A
A
C-SN
H
stallati
a
fety P
r
•Please
•Please
r
ning Sign
W
arning: I
Caution: I
f
After readi
near at ha
the user c
h
a
se ask th
e
faults.
r the insta
l
e
n assemb
l
1. Before
2. Before
3. If defo
r
hood.
4. Do not
may ca
5. To pre
v
shoes,
6. In ass
e
can fall
*The t
i
screw i
7. Use th
e
8. Do not
9. In ass
e
the ou
t
10.After s
n
O
OD B
A
A
L PA
R
H
11HB
-
on Ma
n
r
ecauti
o
read these
observe th
Symbol an
f
handled i
f
handled i
n
ng this ma
nd and sh
o
h
anges ple
a
e
professio
n
l
lation of t
h
l
ing and fit
t
snow hoo
d
fitting Sno
w
r
med or d
a
place obj
e
a
use dents
a
v
ent injuri
a safety h
e
e
mbling an
d
off or cau
s
i
ghtening
t
s 0.7 to 0.
9
e
screws p
r
modify th
e
e
mbling an
d
t
door unit.
n
ow hood i
s
A
CK KI
R
TS
-
E
n
ual
o
ns
precautio
n
e points of
d Meaning
ncorrectly,
n
correctly,
nual, plea
s
o
w it to th
e
a
se pass t
h
n
al installe
r
h
e outdoor
t
ing the sn
o
d
is fitted,
c
w
hood ens
a
maged, it
e
cts on th
e
a
nd defor
m
es during
e
lmet and
p
d
fitting th
s
e buzzing
t
orque ran
g
9
Nm)
r
ovided in t
e
snow hoo
d
d
fitting th
e
s
fitted, ca
r
T
n
s for your
care listed
The symb
o
it can lead
i
t can caus
e
s
e pass it
o
e
maintena
is manual
o
r
to install
t
units, plea
s
o
w hood,
p
c
arry out t
e
u
re that th
e
will not be
e
snow ho
o
m
ation or i
n
the instal
l
p
rotective
g
e snow ho
o
noise.)
g
e is from
he kit.
d
. The desi
e
snow ho
o
r
ry out tes
t
safety bef
o
here as t
h
o
ls and me
a
d
to death
o
e injuries
a
o
n to the e
n
a
nce engin
e
o
n to the
n
Warni
t
he hood.
U
s
e follow t
h
p
lease obs
e
e
st run on
u
e unit is p
o
fitted cor
r
o
d. Do not
n
juries due
l
ation wor
k
g
loves.
o
d, ensure
3.3 to 3.
7
i
gned stre
n
o
d, do not
t
run on u
n
!
o
re installa
t
h
ey are im
p
a
nings are
o
r serious i
n
a
s well as d
n
d user. T
h
e
er at the
t
n
ext end us
ng
U
nprofessio
h
e installat
i
rve the fol
l
u
nit to che
c
o
wered off
a
r
ectly. Do
n
use the s
n
to a fall.
k
, wear lo
screws ar
e
7
Nm. (The
n
gth may d
e
d
amage, p
it to check
PUHZ
PUHZ
PUHZ
PUHZ
PUH
PU
Compati
b
t
ion.
p
ortant for
y
as follows:
n
jury.
amage to
t
h
e end use
r
t
ime of rel
o
er.
nal installa
i
on manual
owing poi
n
c
k for abno
r
a
nd isolate
d
n
ot apply a
n
ow hood
a
n
g-sleeved
e
securely
tightening
e
crease an
d
inch or ap
p
for abnor
m
SW
P1
0
SP
1
W8
P7
1
P7
1
b
le with uni
y
our safet
y
t
he house
o
r
should k
e
o
cation or
a
tion can c
a
l
of the out
n
ts for you
r
rmal noise
d from po
w
strong fo
r
a
s a stepp
working
tightened.
torque ra
n
d can get
e
p
ly forces
t
m
al noise i
s
W
75
0
0
1
00
5
1
, P100
1
, P100
i
ts:
y
.
o
r propert
y
ep this ma
r
epair. Wh
e
a
use accide
door unit.
r
safety:
issues.
w
er supply.
r
ce to the
s
i
ng stone.
c
lothes, s
a
(Loose sc
r
n
ge of the
e
asily brok
e
t
o the cabl
e
s
sues.
1
y
.
nual
e
n/if
nts
s
now
This
a
fety
r
ews
drill
e
n.
e
s of
2

As
s
Ass
co
m
1.
In
a

Part
Na
m
Ite
m
Qua
Fig
*U
s
*U
s
*D
r
In
s
s
embly
e
mble the
m
ponents a
r
Componen
a
ddition to
m
e:
m
No:
L
P
ntity:
ure:

s
e an elect
r
s
e 300mm
e
r
ill screw
s
s
tallation
S
•When
walls/b
locatio
n
•Ensure
•Ensure
replac
e
snow hoo
d
re availabl
e
ts
this install
a
P
anel
1
R
1

r
ic driver t
o
e
xtension
f
s
are to b
e
S
pace:
installing
uildings/w
a
n
.
the locati
o
there is
e
ment of p
a
d
by follo
w
e
.
a
tion manu
R
Panel
2
1

o
tighten th
f
or driver t
o
e
used on
e
snow
h
a
lkways –
o
n can bea
r
adequate
a
rts on the
w
ing the st
al, please
c
Centre To
p
Panel
3
1

e mountin
g
o
allow acc
e
e
time onl
y
h
ood con
s
refer to
u
r
the weigh
t
access
s
unit.
eps in the
c
heck the
f
p
(CT)
M
o


g
/drill scre
w
e
ss to mo
u
y
. Discard
s
ider the
u
nit I.M. f
o
t of both t
h
s
pace to
a
assembly
f
ollowing c
o
o
unting Scr
e
4
14

w
s.
u
nting poin
t
after eac
h
proximit
y
o
r more i
n
h
e unit and
a
llow for
manual p
r
o
mponents
e
w-5x12


t
s.
h
use.
y
of the
n
formation
the snow
h
the main
t
r
ovided aft
are includ
e
Drill Screw
5
1

e
unit t
o
on choos
hood.
t
enance, i
er checkin
g
e
d in the ki
T
ie B
a
6
1
o
surroun
i
ng install
a
nspection
g
all
t:
a
nd
ding
a
tion
and




Remov
e
e
screw holdi
n
(25-30mm)
g wire guard
To
p
wire
duri
n
Pan
e
the
Tie
B
diag
r
secu
exc
e
in position.
Screw m
o
Rear Panel
temporary
Panel.


p
revent the
t
from being
n
g installati
o
e
l, attach th
e
wire guard
B
and as sho
w
r
am. Ensure
re then
e
ss.
o
unting scre
w
half way to
mounting poi
n
3
t
hermistor
damaged
o
n o
f
L
e
wire to
using the
w
n in the
band is
remove
w
into
create
n
t for L
4


L
A
1
L
Panel is mo
u
A
fter bottom
t
u
nted betwee
t
wo screws h
a
n rear panel
a
a
ve been mo
u
S
c
a
nd wire guar
u
nted, tighten
S
crew mounti
c
reate tempo
r
d, take care
n
the top tem
p
ng screw into
r
ary mounting
n
ot to twist g
u
p
orary mounti
n
side panel h
a
point for R P
a
u
ard wire wh
e
ng screw to s
a
lf way to
anel.

Mount L Pa
n
temporary
m
point.
e
n tightening
s
e
cure L Panel
n
el using
m
ounting
s
crews.
.

Use mounti
n
been mount
e
n
g screws to
m
e
d, tighten th
e


m
ount R Pane
l
e top tempor
a
Insert mo
u
Panels to
c
2
l
to unit. Afte
r
a
ry mounting
u
nting screw
s
c
reate tempo
r
M
t
e
r
bottom two
s
screw to sec
u
s
halfway into
r
ary mountin
g
M
ount R Panel
e
mporary mo
screws have
u
re R Panel.
positions hig
h
g
points for C
T
using
u
nting point.
h
lighted on L
T
Panel.
5
and R
6




Remove existing screws from Top Panel.
Align slots on CT Panel with temporary mounting points on L and R Panels.
With CT Panel in position, align the holes on the CT
panel with the holes on L and R panels and mark the
location of the hole to be drilled using pencil/marker.
Once the hole has been marked
remove the CT Panel.
3


Using
d
d
rill screw cr
e
Remo
u
e
ate mounting
u
nt CT Panel
u
hole in positi
u
sing existing


i
on that has
b
mounting sc
r
b
een marked.
r
ews and scr
e
Discard drill
w provided.
l
screw afte
r
r
one use.
7


8

Re
g
Ple
a
1.
2.
3.
4.



g
ular Che
c
a
se check t
Check if th
outdoor u
n
Check if t
h
fitted.
In order t
o
repairs wh
e
When oil o
look like r
u
c
ks/Maint
e
he followin
ere is no l
o
n
it.
h
ere is no
r
o
prevent
t
e
n rust or
c
o
r dust is p
r
u
st at time
s
e
nance
g items re
g
o
ose screw
r
ust or cor
r
t
he snow
h
c
orrosion i
s
r
esent insi
d
s
.) Clean t
h
Ti
g
g
ularly for
s
on the sn
o
r
osion on
t
h
ood from
d
s
present.
d
e the sno
w
h
e snow ho
o
g
hten screws



s
afety:
o
w hood a
n
t
he snow h
d
ropping,
t
w
hood, ru
od regularl
in temporary
n
d in the jo
ood and i
n
t
ighten scr
e
st and cor
r
y.
mounting po
s
i
nts betwe
e
the area
w
e
ws when
r
osion can
o
s
ition.
e
n the sno
w
w
here the
they are l
o
occur. (Mu
w
hood an
d
outdoor u
n
o
ose and
m
d and dus
t
GK79D00

d
the
n
it is
m
ake
t
can
1H03